BIQU BX Review: Ultimate 3D Printer for Enthusiasts?
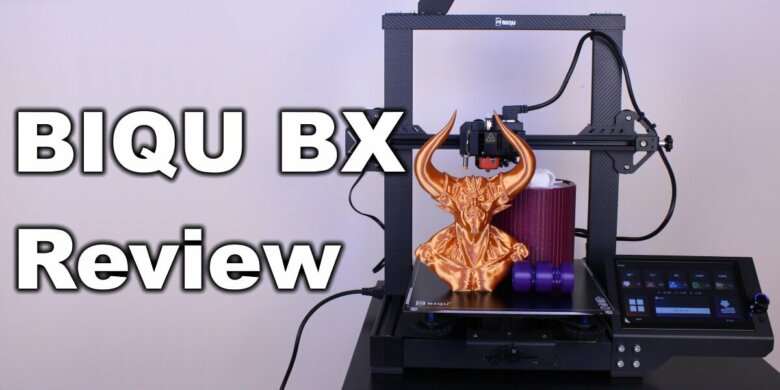
The BIQU BX is one of the most complete 3D printers available right now, with a huge list of features and hardware upgrades making it the ultimate 3D printer for enthusiasts.
I previously reviewed the entry-level BIQU B1 3D printer which is a nice budget 3D printer, but this time BIQU made a “full-option” 3D printer which uses performance parts while keeping the price tag low.
The printer was launched on Kickstarter and it was a success considering the 665 backers that supported the machine. Currently the backer deliveries are underway and hopefully everybody will get it soon.
My machine was provided by BIGTREETECH for the purpose of this review, and I got it a bit faster to have some extra time to complete this review.
BIQU BX Shipping and Packaging
As with any other 3D printers, the BIQU BX comes in a cardboard box and it’s well-packaged with thick foam on all sides. There shouldn’t be any issue with shipping.
(please ignore the blurry pictures. the camera had some issues apparently)
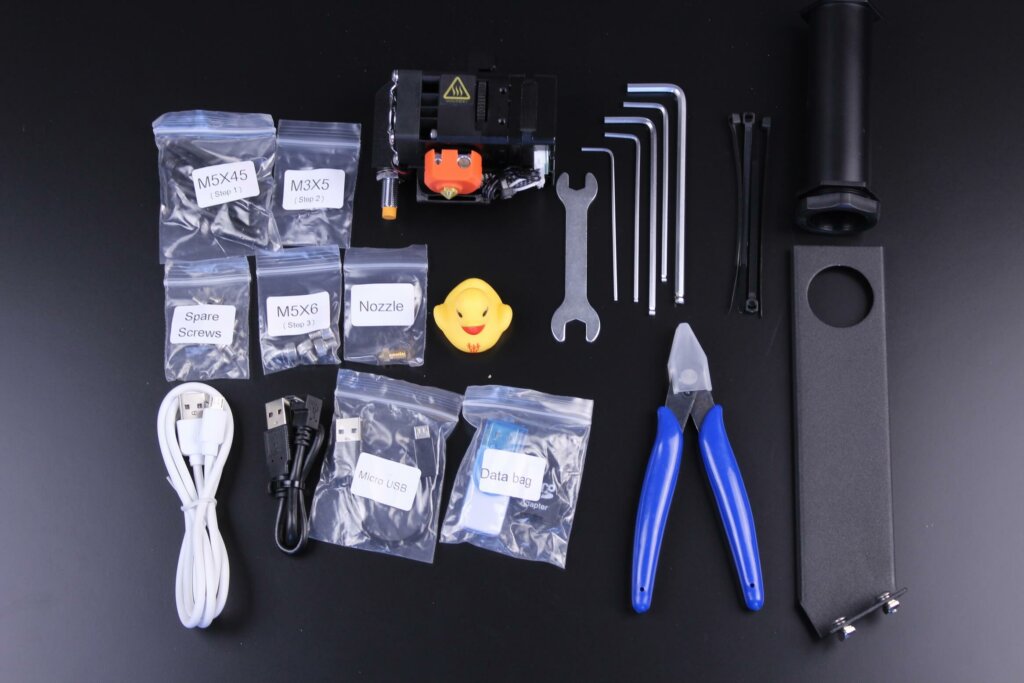
With the BIQU BX, you also get the following accessories:
- 3x Micro USB Cable
- Card reader with 2GB Micro SD
- Yellow duck (extremely important for BTT products)
- Wrench
- Spare 0.4mm nozzle
- Hex wrenches
- Zip ties
- Cutting pliers
- Spool holder
- Screws
Assembly of the BIQU BX
Assembling the BIQU BX is done in less than 30 minutes because it comes mostly assembled and you only need to attach the gantry to the base with four screws.
After installing the gantry, you need to install the extruder and finally connect all the wires. It was a painless experience. All the v-slot wheels were properly tightened but I recommend you double check them to make sure they are properly set.
BIQU BX Design
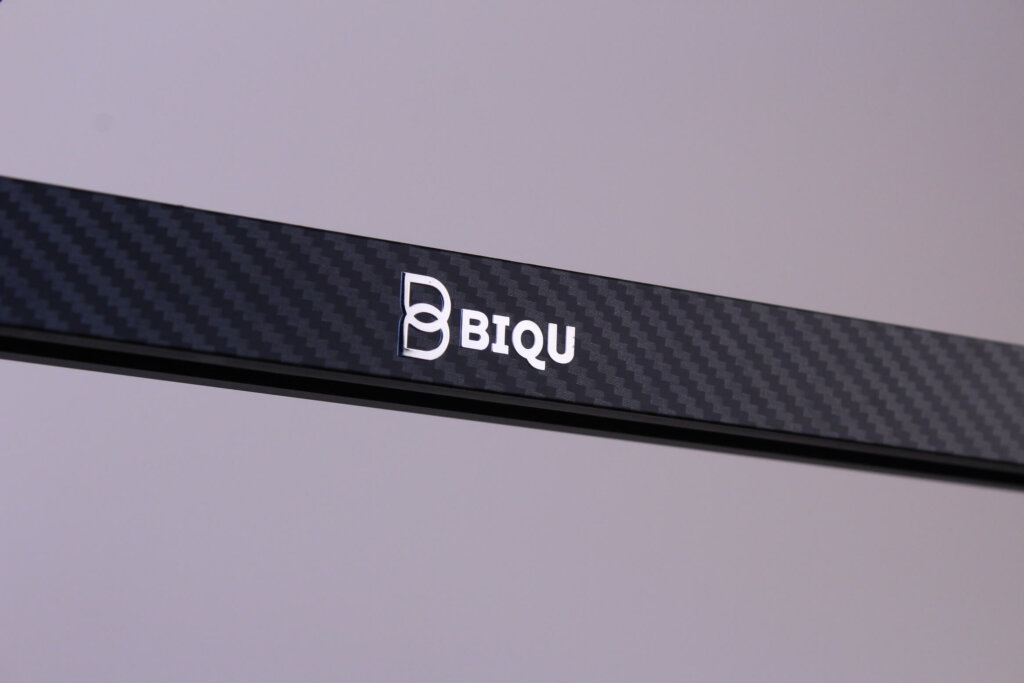
I love the design of the BIQU BX. The whole printer is black, and the front extrusions have a carbon-fiber look. On the top of the printer, there’s the BIQU logo.
When assembled, the BIQU BX looks quite nice and clean.
BIQU BX Specs
| Printer Name | BIQU BX |
| Size | 440mm x 553mm x 615mm |
| Net Weight | 8.6kg |
| Printing Size | 250x250x250mm |
| Molding Tech | FDM |
| Nozzle Quantity | 1 PCS |
| Layer Thickness | 0.1 mm – 0.3 mm |
| Nozzle Diameter | 0.4mm |
| Printing Accuracy | ±0.1mm |
| Filament | PLA, PETG, TPU, TPE, ABS, Nylon |
| Slicing Format | STL, OBJ, AMF |
| Connecting Method | Via data cable , TF card , USB |
| Slicing Compatible | With Cura/ Repetier-Host/ Simplify 3D |
| Rated Voltage | 100-120V/200-240V 60/50 HZ |
| Output Voltage | 24V |
| Rated Power | 350W |
| Max Temp of Hot Bed | 100℃ |
| Max Temp of Nozzle | 260℃ |
| OS compatible | Win 7/Win 10 |
| Max Printing Speed | 100mm/s |
| Normal Printing Speed | 60mm/s |
| Language Transform | Supported |
| Auto-bed leveling | Supported |
| Resume Printing | Supported |
| Filament Run Out Detection | Interface available for DIY |
| Automatic Shutdown After Printing | Interface available for DIY |
Direct Drive BIQU H2 Extruder
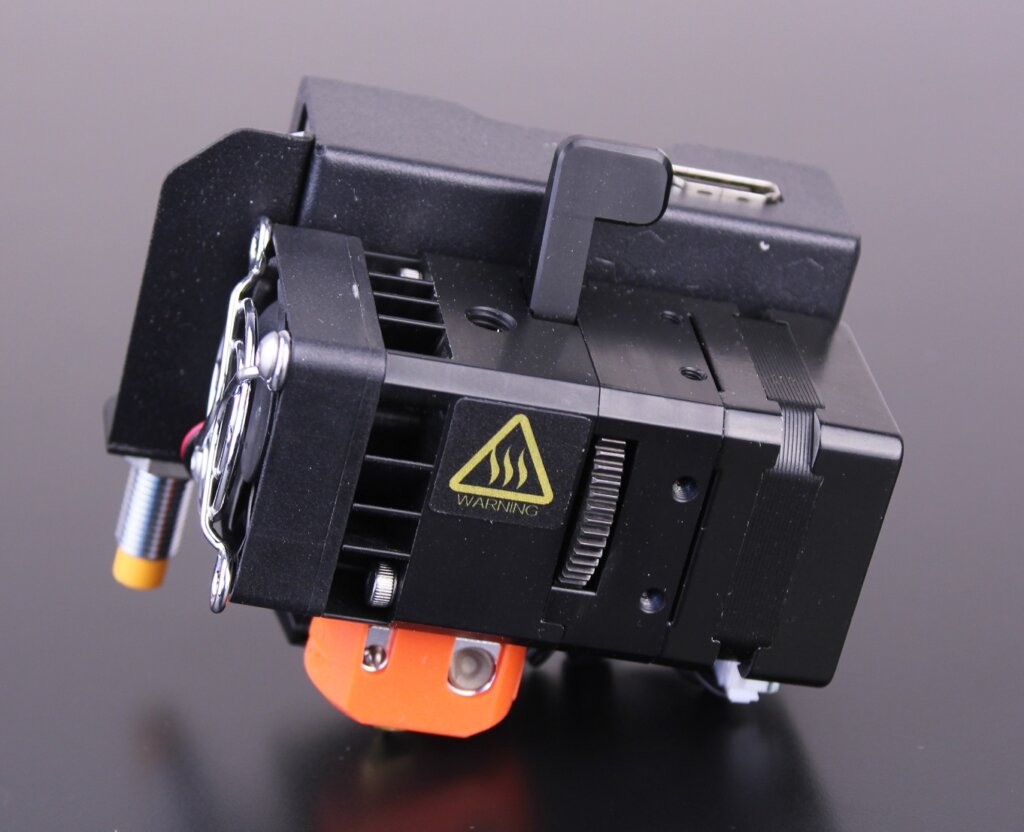
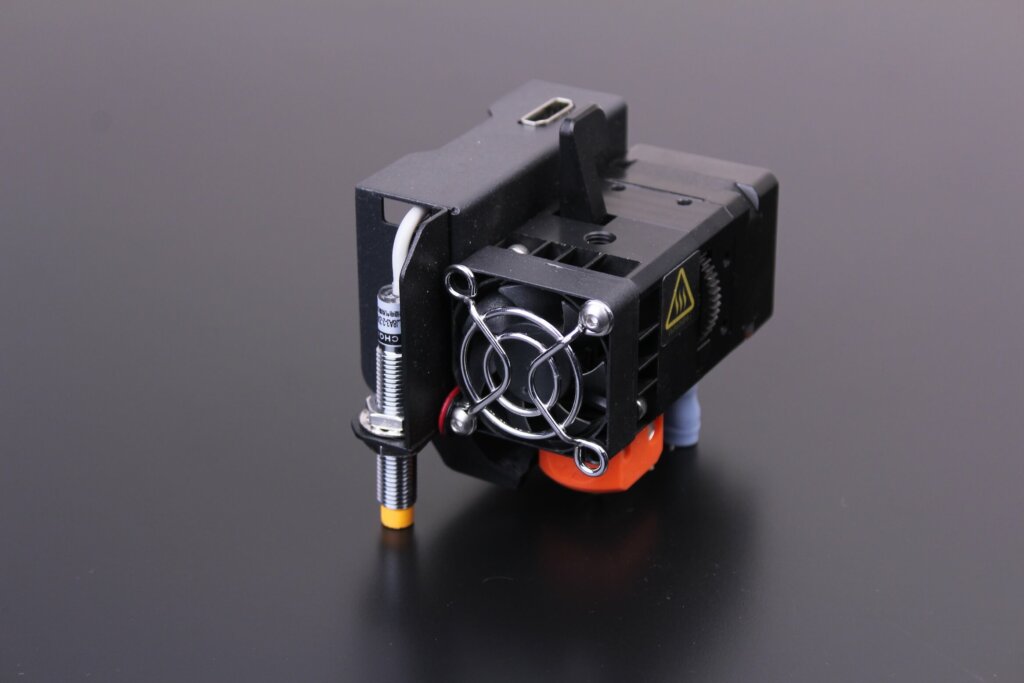
One of the most notable features of the BIQU BX is the addition of a light and compact direct drive extruder. The BIQU H2 extruder is marketed as being the “World’s Lightest Direct Extruder” and while this statement could be false (there are other lighter direct drive extruders out there) the H2 is still one of the lightest extruders available to date.
The whole BIQU H2 extruder is BIQU’s own custom design which uses a 7:1 ratio for accurate extrusion. Unfortunately, it’s not yet compatible with Linear Advance and I’m not sure if it will be in the future because of the quick movements done during printing.
The part cooling fan is integrated in the extruder design and it uses a 3010 radial fan installed in the back of the H2. It’s not the most efficient part cooling fan but it does its job pretty well for regular prints.
Another benefit of the BIQU H2 extruder is the short filament path which makes it an excellent solution for printing flexible filaments offering good control and a constrained filament path.
The heatblock is made from aluminum and it’s well machined. Judging by the silicone cover with Phaetus marking, I think that it was made in collaboration with them.
While the heat break is still PTFE lined, the material used is titanium alloy to lower the thermal transfer between the heatblock and the radiator.
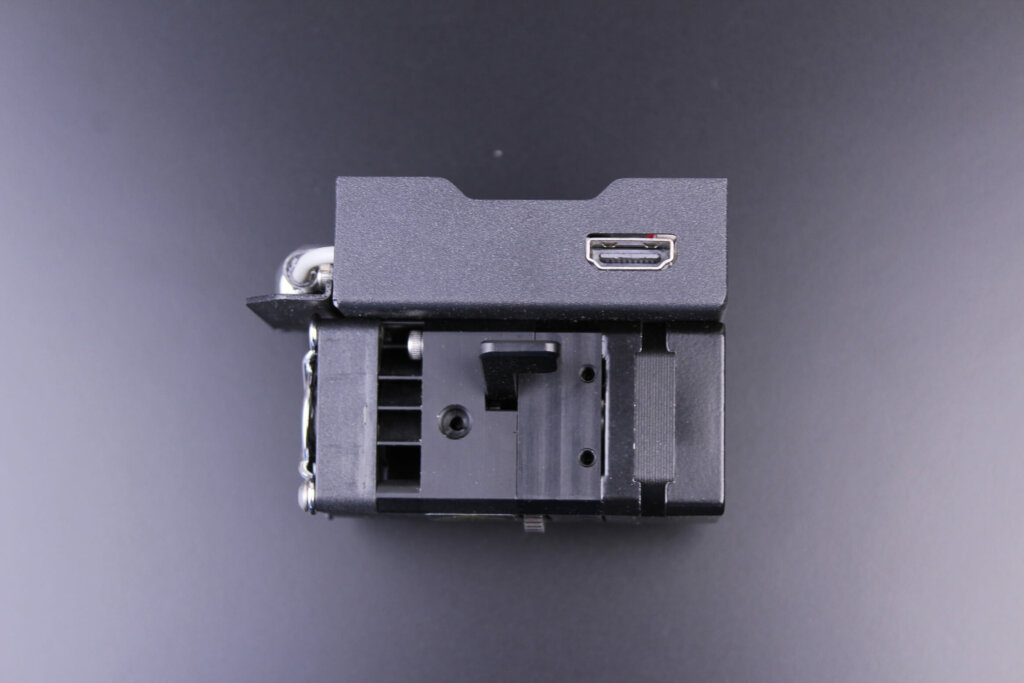
To power everything, BIQU used a HDMI cable for data and power. This keeps things nice and tidy, while also allowing quick removal of the BIQU H2 extruder. I think this will pave the way for other tool heads in the future made specifically for the BX.
The HDMI cable has a 90-degree connector to minimize wire strain, but I would have liked to see some sort of strain relief added to make sure that the connector sits well and there’s no movement. This will probably be solved in the future with a custom 3D printed upgrade.
The 3510-fan used for cooling the extruder’s radiator does a respectable job in pushing a lot of air trough while being relatively quiet. You can feel a lot of air going through the heatsink fins, so the airflow design works well.
More information about the BIQU H2 extruder is shared in my BIQU H2 Review, so if you want to learn more about it, make sure you check out the article.
BTT TFT70-BX Touchscreen (with Raspberry Pi compatibility)
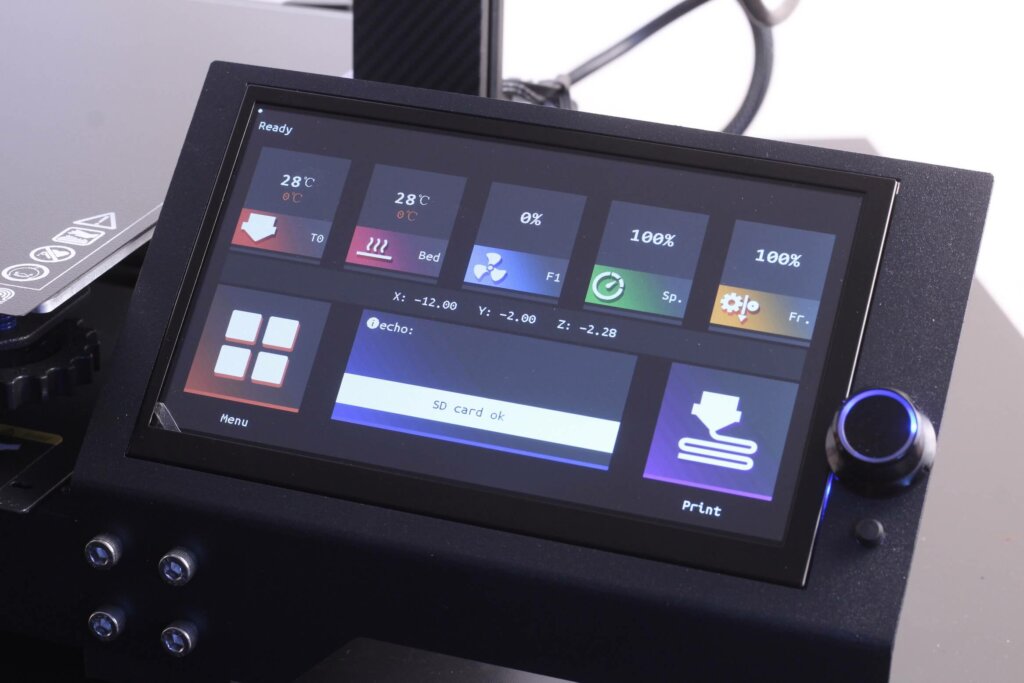
Another excellent feature of the BIQU BX is the inclusion of a 7-inch BTT TFT70-BX touchscreen made specifically for the this printer. It’s one of the biggest touchscreens you can get right now for your 3D printer and I love it.
Keep in mind that this is not the same screen as the regular BTT TFT70 screen you can currently purchase.
You can switch between three modes. The regular touchscreen interface, the LCD12864 Marlin interface with click wheel control and finally, the Raspberry Pi Mode.
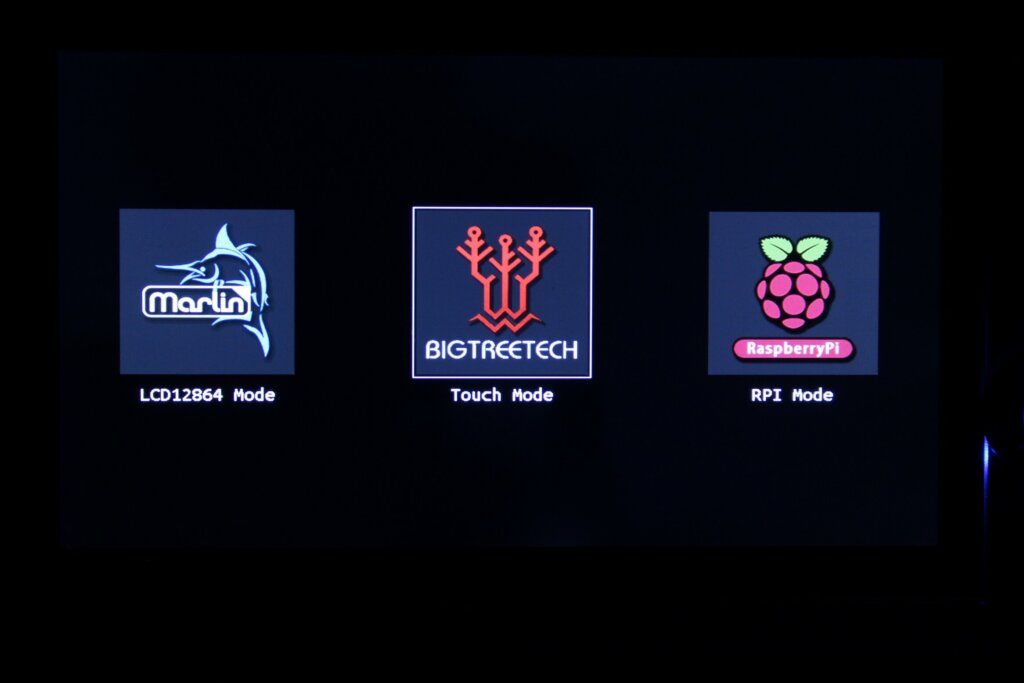
The touchscreen is nice and responsive, the colors are vibrant, and the backlight is good allowing for ample viewing angles. The menus are consistent and if you’ve played with a BTT touchscreen in the past, you know what to expect.
The LCD12864 Marlin interface works just as well, but I would have preferred to have the old interface instead of this one.
But the best feature of this TFT70-BX touchscreen is the possibility of installing a Raspberry Pi right behind the touchscreen. That way, you can use OctoPrint and install OctoDash or BIQU’s flavor of OctoPrint.
I won’t go over the steps for installing a Raspberry Pi with OctoPrint on the BIQU BX because this will be a separate article.
BTT SKR SE-BX Board with TMC2226 Stepper Drivers
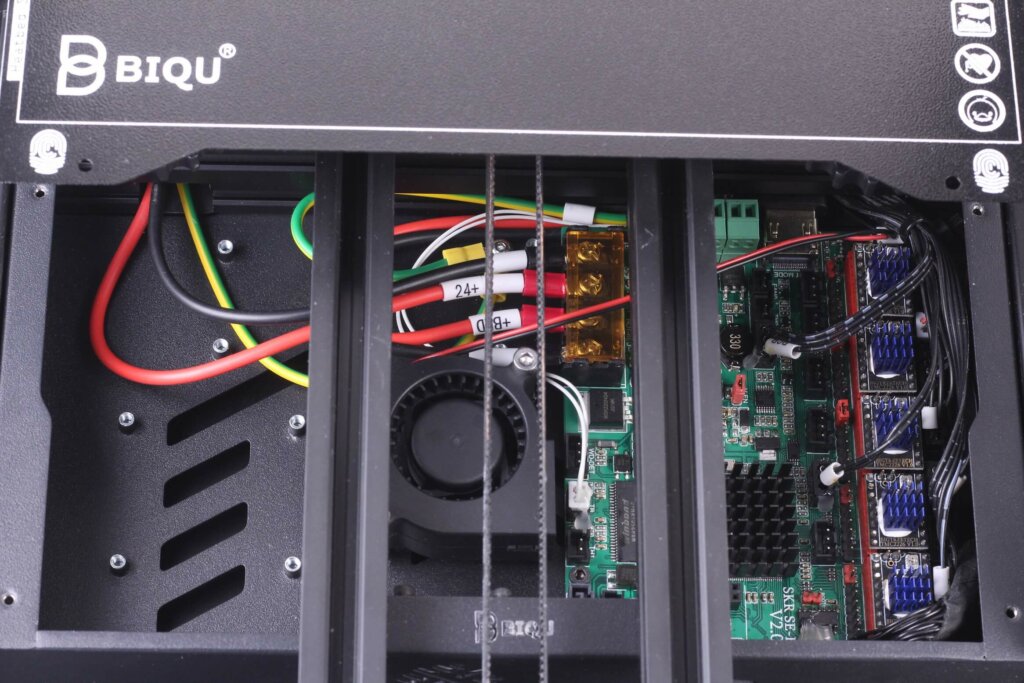
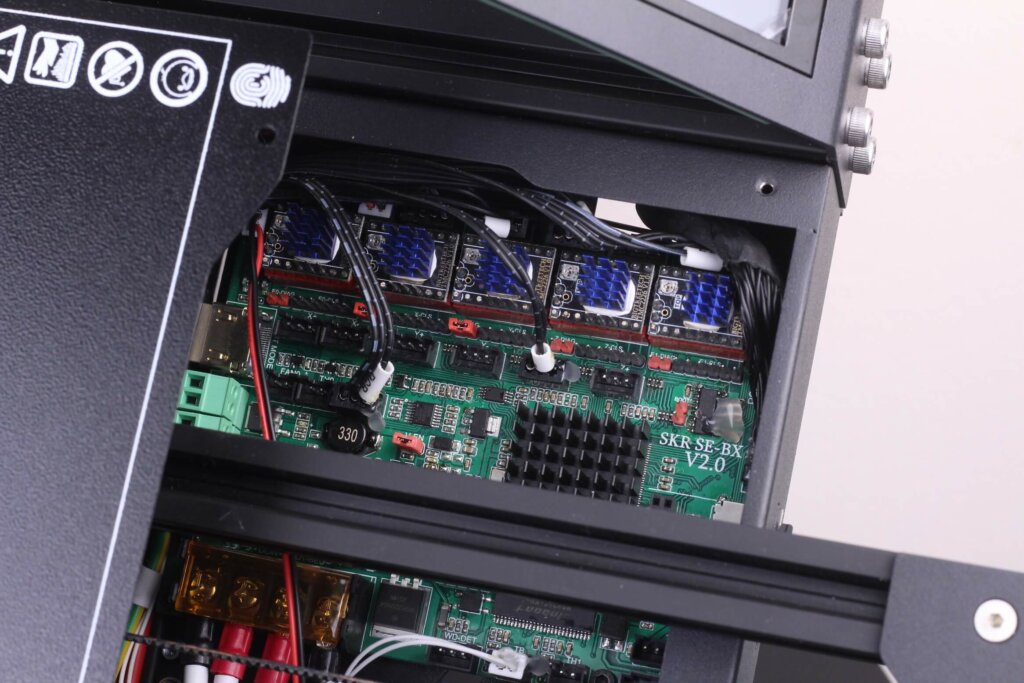
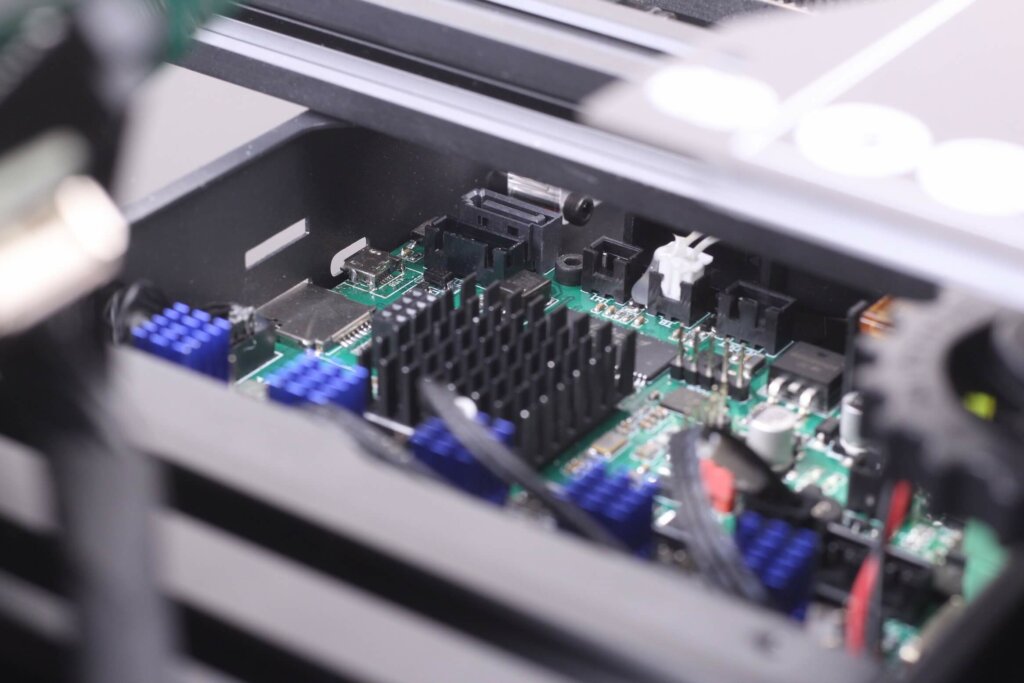
Most of the hardware installed on the BIQU BX is sort of high-end, so it would be only fair to have a high-end board for this printer. BIQU made a custom 3D printer board specifically for the BX and it’s called BTT SKR SE-BX. And let me tell you, this thing is a monster when it comes to specs.
It’s running a powerful 400 Mhz STM32H743IIT6 Cortex M7 CPU which is more than capable to take anything you can throw at it.
The SKR SE-BX has 5 stepper motor driver slots populated by TMC2226 stepper drivers which are a newer revision of the popular TMC2209 stepper drivers. Basically, they are the same stepper drivers but in a different package to improve thermal performance which allows them to run a bit cooler. You can read more about them in the datasheet.
The SKR SE BX makes use of the TMC2226 Sensorless Homing capabilities and implements it in the BIQU BX, so there’s no need for any kind of endstops for the X and Y axis.
There’s also a connector that looks like a SATA connector and I think it’s a CAN bus which allows communication without a host computer. The LPC developers have a board on their way so it will be interesting to see how the development of RRF will be in the future.
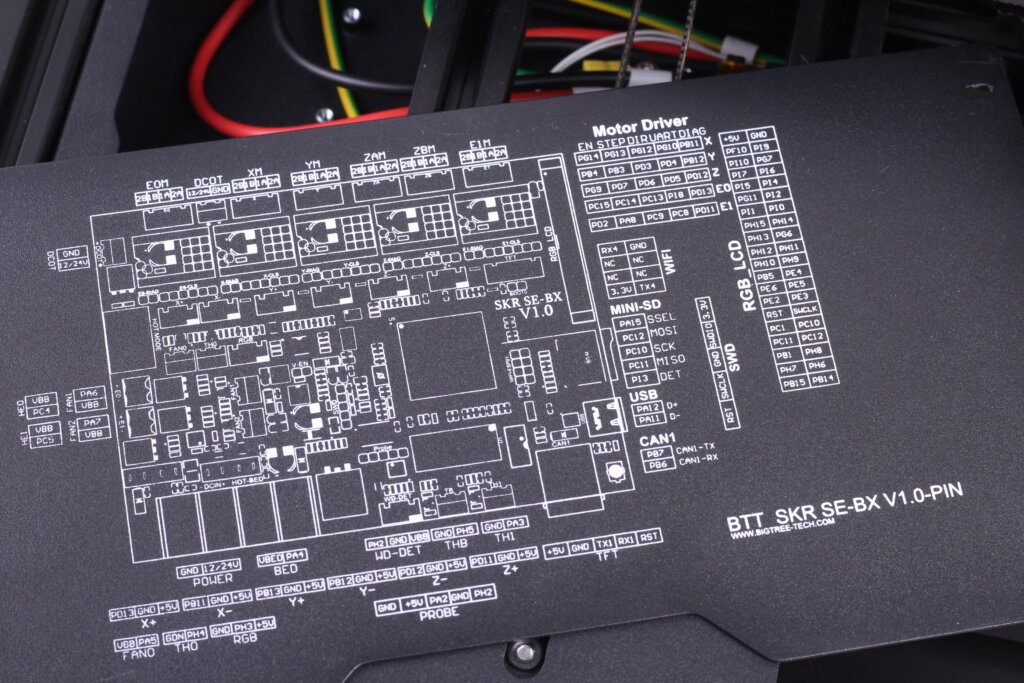
The electronics cover has the printed pinout information for the old SKR SE-BX V1.0 which is not the same as for the V2.0 I have but it will probably be fixed on the retail unit.
RGB Lighting
This is 2021, and because the BIQU BX is an over-the-top 3D printer, it also has an RGB LED strip inside the extrusion profiles.
These LEDs can be controlled using the screen, but they are also controlled by the printer’s firmware.
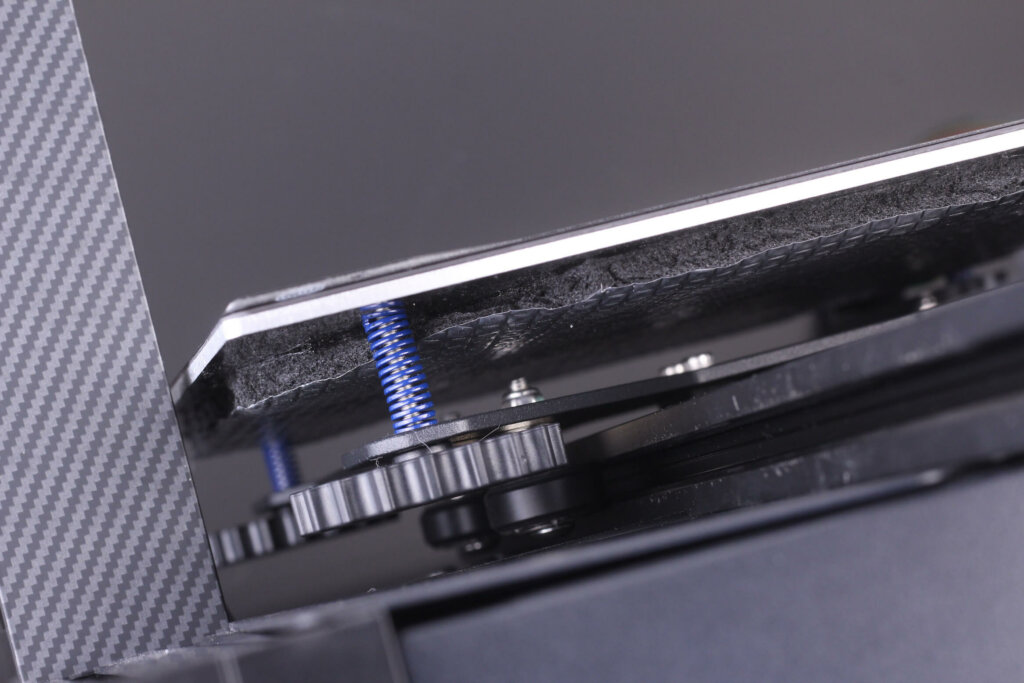
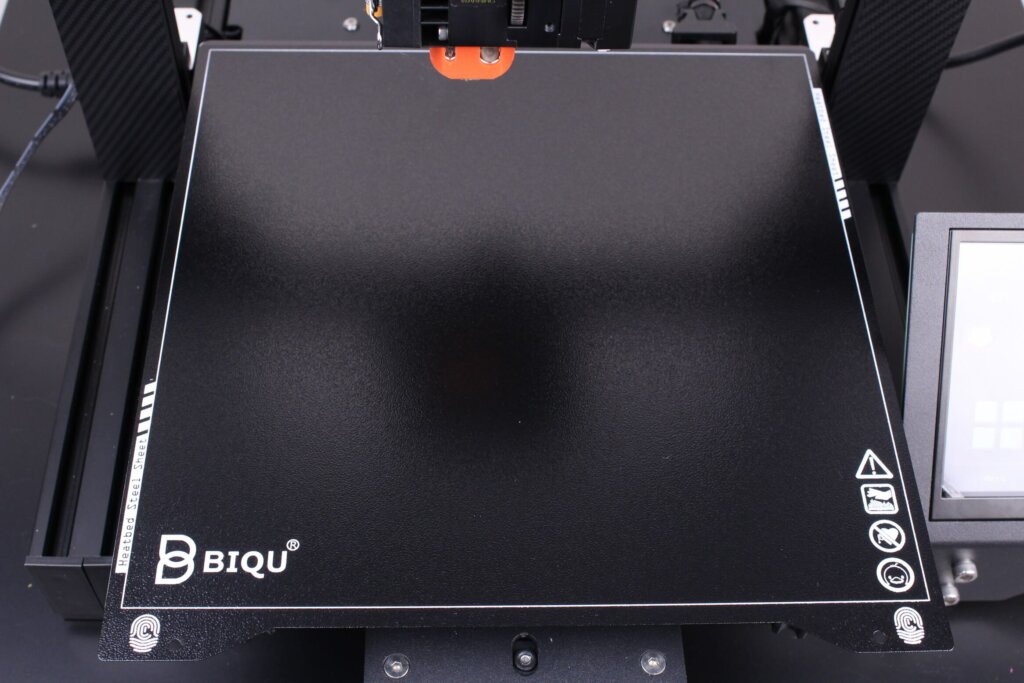
250×250 Heated Bed with Magnetic Spring Steel Sheet
The heatbed is a bit bigger than the common 230×230 offerings for most small-format printer manufacturers. I think that the size is good enough for most users and I think it’s the best compromise between size and usability. I rarely have the need to print something bigger than 250mm2.
It’s still a 24V aluminum heatbed but it does its job well. The temperature is consistent across the whole surface of the bed and having insulating material underneath helps with power efficiency.
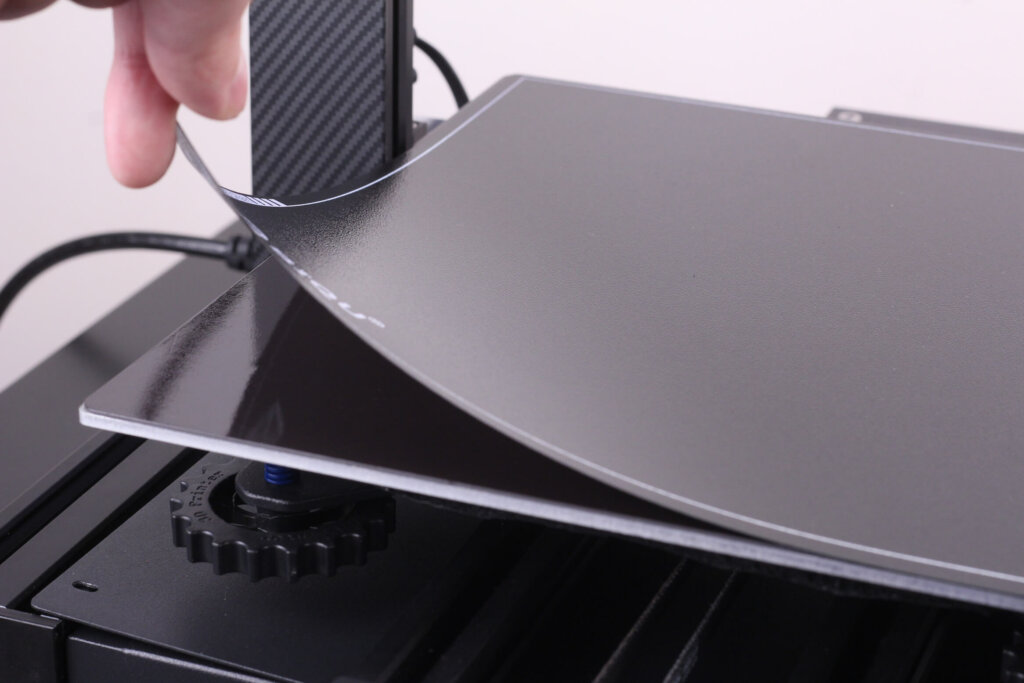
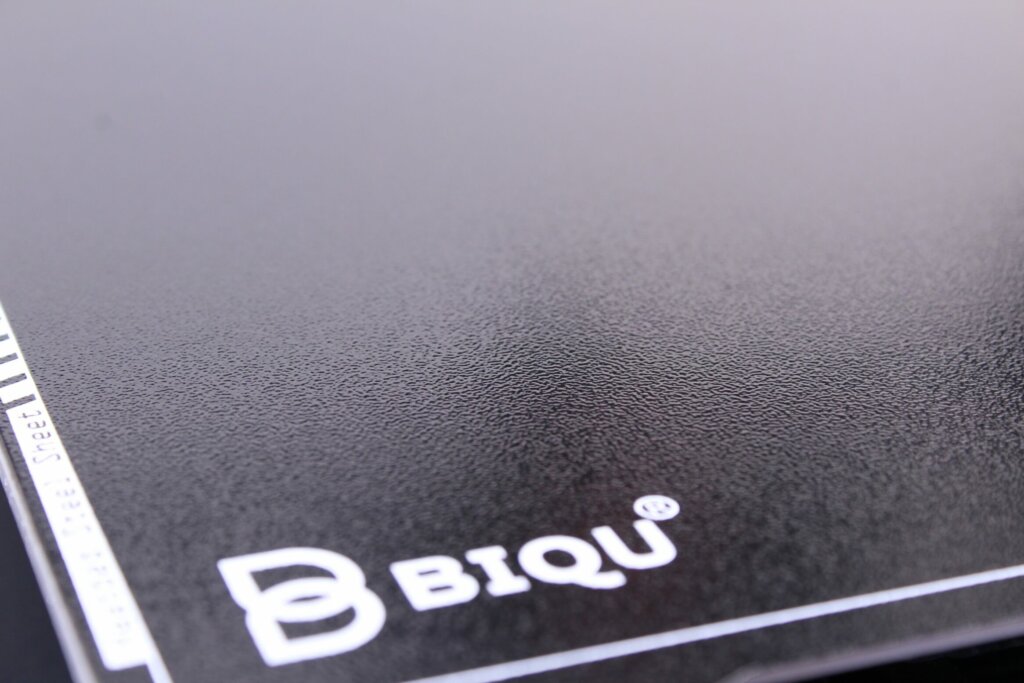
The magnetic SSS (Spring Steel Sheet) performs well and it’s one of my favorite print surfaces on any 3D printer. The printed models have good adhesion while the bed is hot, and removing the finished prints is easy with a simple and satisfying “pop”.
This print surface is also double-sided, so if one of the sides gets damaged over time, you can just flip it and have a “brand-new” print surface at your disposal.
You still need to manually level the bed once, using the included knobs under the bed. I would have liked to see a fixed bed mounting solution like on the CR-6 SE. It would have made the printer even more user friendly because that would be another thing to scratch off the checklist when using the printer.
350W Mean Well Power Supply
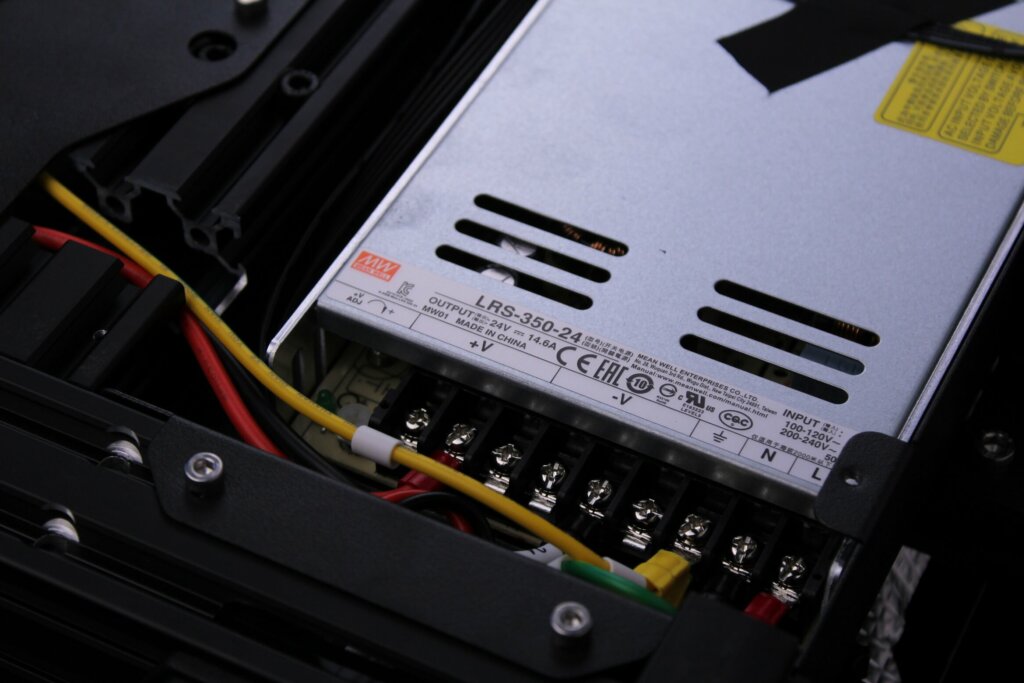
Of course, the BIQU BX wouldn’t be complete if it would not use a name-brand power supply. The 350W Mean Well power supply is an excellent addition to this printer, offering reliable power.
As with any Mean Well power supply, the fan is thermally controlled and turns on when load is detected. Unfortunately, the fan turns on more often which is probably because the printer doesn’t have a lot of breathing space in its enclosure. Either way, this is an issue only for the sound profile of the printer, not for its functionality.
Auto Bed Leveling Sensor
Having an Auto Bed Leveling sensor on a 3D printer is great, because by probing the bed, the printer will be able to compensate for the small irregularities of the print surface.
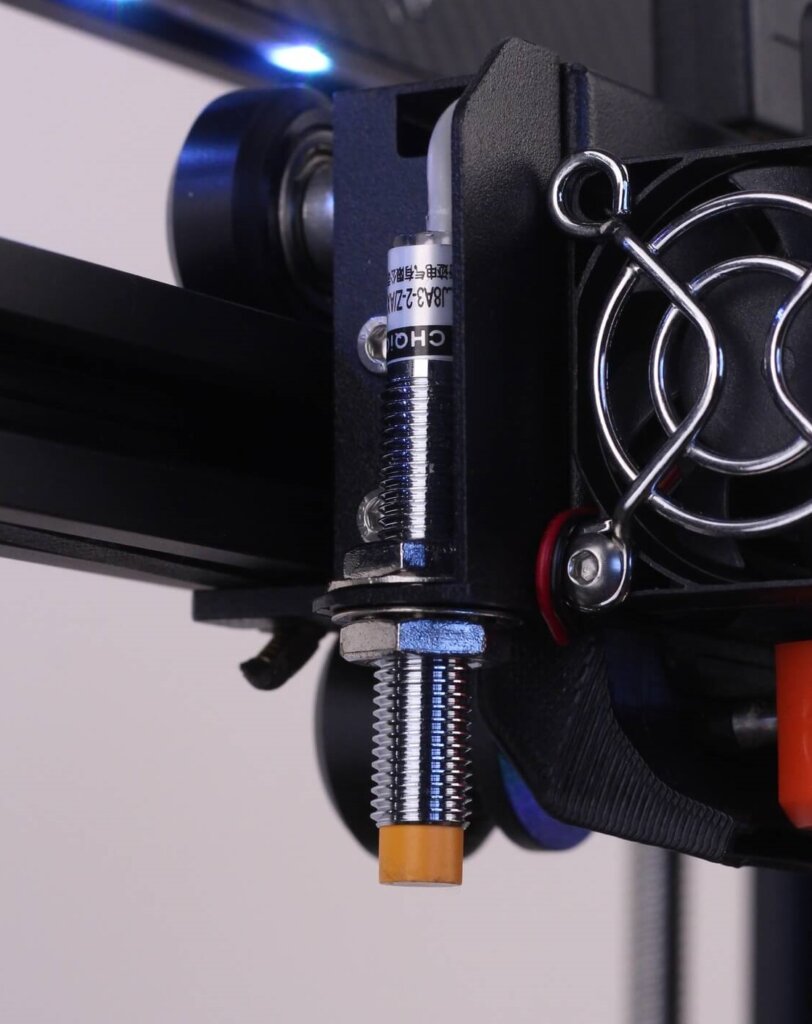
Of course, the BIQU BX has an inductive auto bed leveling sensor which detects the metallic SSS. It probes the print surface in 25 points and then stores the mesh in the printer’s firmware.
I’ve had a bit of trouble when setting up the Z offset. Setting the offset value was not consistent and I always needed to use babystepping to get a perfect first layer. After a chat with one of BIQU’s engineers I was told that it will be fixed in a future firmware update, so hopefully this will be fixed soon.
Other than that, the ABL sensor does its job well and I don’t have any other complaints.
Dual Z Axis
Having dual Z axis on 3D printers is starting to get more popular and the BIQU BX keeps the trend alive.
There is no sync belt installed to keep the motors aligned, and there’s also no anti-backlash nuts. You need to be careful when you install new filament because if you push too hard on the X axis, you might get the stepper motors out of sync and the gantry will not be level.
There’s also no auto leveling for the X gantry like other printers have but this should be easy to enable in the firmware. I would have liked to see a sync belt installed, but it is what it is.
Gates belts
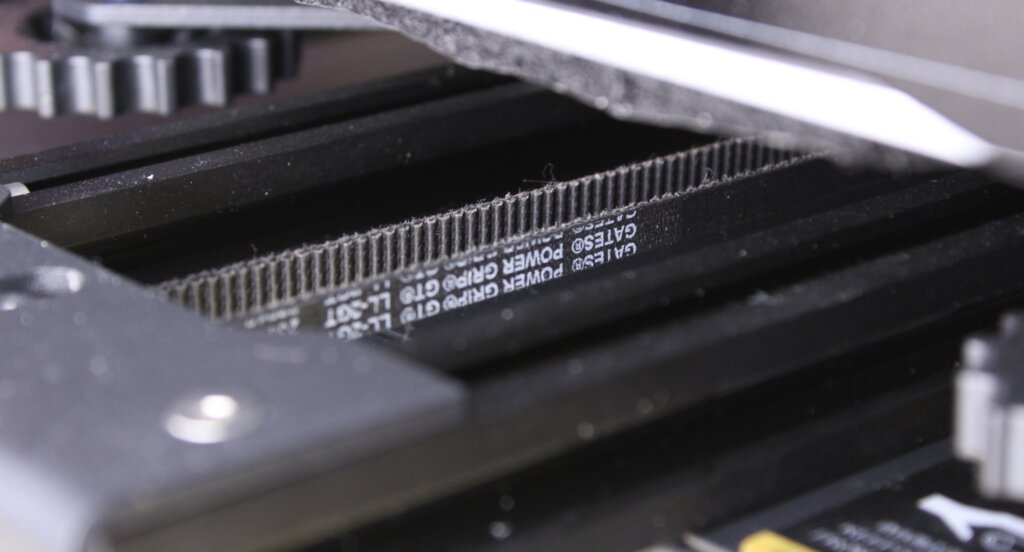
Having all this awesome hardware without quality belts would be crazy, but this isn’t the case for the BIQU BX. On the X and Y axis we have Gates belts which are quality name-brand belts.
They are not present on cheap budget printers because they are a bit more expensive, but the quality is also better. I’ve seen them on the Raise3D E2 which is a much expensive printer than the BX.
Gates belts match better with well-machined pulleys and they are also less “springy”, offering should offer a bit more accuracy.
I can’t really say if they’re worth it or not, because I also bought cheap belts which worked well, but they are definitely a step up over the entry-level belts.
0.9 stepper motors
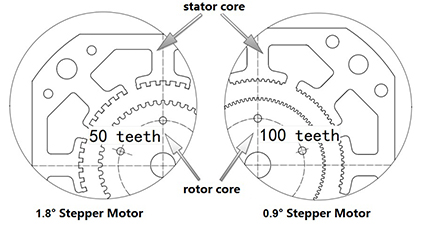
Continuing the list of top-end hardware, I need to mention the use of 0.9-degree stepper motors. BIQU upgraded the regular 1.8-degree stepper motors to improve the print quality and I’m happy to report that they work well.
Basically, having twice the resolution the stepper movements are finer and should produce the best results. Currently, upgrading to 0.9 stepper motors is common on well-tuned machines to get a bit more print quality.
Honestly, I can’t really confirm if they do a better job than regular stepper motors because I can get similar print quality on other machines from regular 1.8-degree stepper motors. But having them out of the box can’t hurt, right?
Belt Tensioners for X and Y
To tighten that Gates belts, you get two belt tensioner knobs for the X and Y axis. Nothing to mention here because these tensioners started to become the norm even for cheap printer.
Heating time and power consumption
I tested the heating time for both hotend and heat bed and here are the results:
Hotend
- 200C in 50 seconds
- 250C in 70 seconds
Heatbed
- 60C in 120 seconds
- 100C in 6 minutes
Power Draw
Idle power draw is around 12W. When the hotend and heatbed are heating up, the BIQU BX draws around 290W. After it starts printing, the power draw stabilizes to around 100W.
All these measurements were taken with a Blitzwolf smart power socket which indicates the power draw, and it can also be used for remotely powering on and off the printer.
BIQU BX Noise Levels
To better evaluate the noise levels of the BIQU BX, I took this video which should help you understand how noisy it is, but it is not an accurate way of measuring noise levels.
The BIQU BX is a quiet machine when it’s idle because all the fans turn off. When the printer starts heating up and the fans start to spin, there’s a bit more noise than what I expected. Not bad, but the BX doesn’t win any awards in the silent category. The Artillery Hornet is still the quietest 3D printer I tested until now.
To make things a bit worse, the front fan started to generate some noise after around 50 hours of printing, and it will need to be replaced soon.
IdeaMaker profiles for BIQU BX
During my time with the printer, I also tuned three IdeaMaker profiles for the BIQU BX using the tools available in the 3D Printer Calibration Guide using IdeaMaker article. These profiles are tuned for the stock printer and worked well for me. Feel free to give them a go.
BIQU BX IdeaMaker Profile – PLA – 3DPrintBeginner
BIQU BX IdeaMaker Profile – PETG – 3DPrintBeginner
BIQU BX IdeaMaker Profile – TPU – 3DPrintBeginner
Test prints on BIQU BX
3DBenchy
I always start my testing with printing a 3D Benchy to see how well the machine is put together and what can be achieved with a generic profile without too much tuning. As you can see, the quality out of the box is great with no major flaws in the print quality department.


- Material: Sunlu Gray PLA
- Layer Height: 0.2mm
- Nozzle Temperature: 215C
- Bed Temperature: 60C
- Print Speed: 50 mm/s
Z Wobble Test
To test the layer consistency for the full Z volume, I print a Z wobble test which is a 30x30x250 print. If a machine is not properly assembled, then Z banding will be detected on the external walls.
In this case, there was a small sign of banding after the first two hours of printing but being the single location where I could see this, I blame it on an inconsistent portion of the filament.
- Material: Sunlu Gray PLA
- Layer Height: 0.2mm
- Nozzle Temperature: 215C
- Bed Temperature: 60C
- Print Speed: 30 mm/s
Flourish Gift Box
With the printing profile tuned according to the filament, I started printing the Flourish Gift Box from Clockspring. It’s a really nice model which is printed in four parts and the BIQU BX managed to deliver remarkable results.
Extrusion is consistent, first layer is excellent, and the print looks amazing. It’s even better in real life.
- Material: FilamentOne PLA Glint Purple
- Layer Height: 0.2mm
- Nozzle Temperature: 215C
- Bed Temperature: 60C
- Print Speed: 50 mm/s
Creature
Another interesting print is the Creature from Thingiverse. It was scaled up to take the full print volume. On this model, the layers have a tiny bit more inconsistency, but this is caused by the cheap filament I used (~15$/roll).
Either way, the finished model is awesome, and the marble finish hides the small inconsistencies well.
- Material: Gembird Marble PLA
- Layer Height: 0.2mm
- Nozzle Temperature: 215C
- Bed Temperature: 60C
- Print Speed: 50 mm/s
Lord of Darkness
I love printing with silk filament, so I used some Silk Copper filament to print this Lord of Darkness bust. The model was scaled close to the printer’s full build volume, and it’s a good test for overhang performance and retraction.
The BIQU BX managed to complete the job with ease and as you can see, if the model is big enough, the part cooling fan does its job well.
- Material: SUNLU Silk Copper PLA
- Layer Height: 0.15mm
- Nozzle Temperature: 215C
- Bed Temperature: 60C
- Print Speed: 50 mm/s
Two Way Screw
I also printed this two way screw in PETG and the finish is just as good as with PLA. The nuts spin easily and there were no adhesion issues during printing.
- Material: Devil Design Galaxy Purple PETG
- Layer Height: 0.15mm
- Nozzle Temperature: 235C
- Bed Temperature: 70C
- Print Speed: 50 mm/s
Bathtub Boat
The Bathtub Boat was printed in PETG and it’s a good benchmark because it has a lot of small features which need an accurately calibrated machine to be printed properly.
- Material: Devil Design Pink PETG
- Layer Height: 0.2mm
- Nozzle Temperature: 235C
- Bed Temperature: 70C
- Print Speed: 50 mm/s
Kuiil Bust
The Kuiil bust came out well, with a small defect on the right side of the jaw which probably needed a bit of support. The other overhangs printed well with no visible defects but having better cooling could definitely help.
- Material: FilamentOne PLA Glint Gold
- Layer Height: 0.15mm
- Nozzle Temperature: 215C
- Bed Temperature: 60C
- Print Speed: 50 mm/s
3D Benchy in 30D TPU
I had a sample of Fiberlogy FiberFlex 30D filament which is a rubber-like filament that’s really flexible. It’s much more flexible than regular TPU, but the BIQU BX managed to print it.
The speed was lowered to 20mm/s and I think the printer did an admirable job considering that this filament is like printing with boiled spaghetti. The benchy was not finished because I ran out of filament, but I am sure that with a bit of tuning, I can get it to print even better.
- Material: Fiberlogy Fiberflex 30D
- Layer Height: 0.2mm
- Nozzle Temperature: 215C
- Bed Temperature: 60C
- Print Speed: 20 mm/s
3D Benchy in 40D TPU
Another flexible filament, which is a bit stiffer compared to the 30D. As you can see, print quality is better and I was even able to push the speed a bit higher (25mm/s).
- Material: Fiberlogy Fiberflex 40D
- Layer Height: 0.2mm
- Nozzle Temperature: 215C
- Bed Temperature: 60C
- Print Speed: 25 mm/s
BIQU BX vs Creality CR-6 SE
I’ve received a few questions about this topic where some readers asked me how the BX compares with the Creality CR-6 SE. It’s an excellent question because the price for these machines is quite similar.
In my opinion, the BIQU BX is a better purchase because you get much better hardware with it in the form of an excellent direct drive extruder, a huge touchscreen with Raspberry Pi integration, removable print surface, RGB lights and of course, a powerful board.
Print quality is not much different, but the printing experience is a bit better because you don’t need to deal with the bowden setup and all the small annoyances you get with a bowden setup. With the BIQU BX, really flexible filaments can be printed while the CR-6 SE can do it but only with regular TPU.
And if you consider the potential firmware upgrades which will probably be available in the future, then there’s no doubt the BX is better.
Conclusions: Is the BIQU BX worth it?
What’s not to like about the BIQU BX? I think it’s one of the most well-built machines of 2020, with a slew of hardware upgrades and features.
The BIQU BX was a reliable machine during my time with it and I can’t really complain about its performance. BIQU managed to deliver a well-made printer for an affordable price (kickstarter price) and that’s great! The retail price of ~550$ is a bit steep for my liking.
In my opinion, the BIQU BX is one of the best 3D printers to get if you’re a 3D printing enthusiast who likes to tinker with his printer. You get all the BIGTREETECH hardware to play with out of the box, and with firmware upgrades you might get new features over time. The hardware is capable.
It’s also a good machine for beginners, because it’s easy to assemble and use out of the box. It’s a better purchase if you compare it with the Creality CR-6 SE which is also targeted for first-time users.
The BIQU BX is worthy of your hard-earned money, (if you can get it for around 350-400$) and I don’t think you will regret your purchase. I’m sure this will be a popular printer in the future. Can’t wait to see other people get their hands on the BX.
The BIQU BX was a reliable machine during my time with it and I can't really complain about its performance. BIQU managed to deliver a well-made printer for an affordable price (kickstarter price) and that's great! The retail price of ~550$ is a bit steep for my liking. You get all the BIGTREETECH hardware to play with out of the box, and with firmware upgrades you might get new features over time. Design
Specs
Noise Levels
Ease of use
Print Quality
Price
Where to buy the BIQU BX?
The BIQU BX can be purchased from the following websites:
I recommend checking out the Discount Codes page before purchasing. I regularly update the article with discount codes for various online shops, and you might find one for this particular model.
The BIQU BX was provided free of charge by BIGTREETECH for the purpose of this review. While the article includes affiliate links, all opinions are my own. Nobody reviewed the article before it was posted, following the Review Guidelines.
Liked it?
|
|
















After some tunin, som hardware mod (longer X profile, 420mm, and the new superpinda sensor from prusa) and raspi with klipper, it’s almost perfect. Had to clean the extruder gear, but nothing strange! For 370€ it’s a well made printer!
It got cheaper now and it’s much more attractive than before.
Either way, happy to know it works well for you
I have the Ender 3 pro with silence Board and the Anycubic Vyper. The Vyper noise of the vyper is to loud for me. The mechanic from the Vyper is well constructed and in nearly every aspect superior to the ender 3. Also the part cooling is well implemented and effective. I also like the PEI printbed. My only complain is the noise of the printer, because the printer is in my bedroom. I thougt probably the the Biqu BX could be a better option for me. I’d like to achieve the same print quality like with the Vyper. Is the Biqu in aspect worse than the Vyper?
Is the noise from the Biqu comparable to the noise from the ender 3 or louder?
Why not just change the fans with some which are more silent?
On my Vyper the sound of the stepper motors are much louder than on the ender 3 pro with silent board. Since the tcm 2209 drivers are installed, I didn’t expect such noise from the drivers. Are the driver on your Vyper not also much louder than on other printers like the ender 3 oder probably the biqu bx?
I think after exchanging the fans with noctua fans the sound of the stepper motors would bi more noticeable and mor annoying. The new fans with step-down controller would cost arrount 100 $ and would probably not reach to a satisfied approach.
Therefore, my idea was to exchange the printer with another comparable printer.
I need a reliable printer for my studies and due the fact I work in the same room as my printer, he should be silent.
I thought probably the biqu bx could be the right printer for me. I also keep an eye on the artillery sidewinder x2 but this printer is in a higher price range and I don’t like the fact, that the glass print bed is installed permanently.
The Sidewinder X2 is more silent than the Biqu BX and Vyper. That’s the printer to get if you want silence (or the Genius)
Is the print quality better than the BX and Vyper?
What is your long-term experience with the Sidewinder X2?
The component cooling on the X2 doesn’t look very good.
From what I’ve read, many are replacing the extruder with, for example, the Hamera and the print bed with a PEI. I would also prefer a PEI to the fixed glued glass.
However, by replacing the hotend or optimizing the fans, you would lose the advantage of the factory quiet printer.
So I wonder which printer needs more customization. I think I can live with the print bed initially. Whether the extruder of the Sidewinder is satisfactory, I do not know. The extruder of the BX is often praised and seems to be comparable with the Hamera.
Hi, Your reviews and guides are always the best, thank you.
I am interest to buy this machine after reading this article. Could klipper firmware (if config file available soon?) further improve the print quality with faster speed on this machine? And will the stock screen remain useful with Klipper installed? Love to see more mods and calibrate guides on this machine, there are in deed not much information elsewhere. Thanks
Klipper is not compatible with the BX right now. I know that it’s being worked on, but can’t confirm when it will be available.
Great review, you’ve had it for a while now, what would you recommend upgrading on it? Just curious and i have a problem always want to upgrade stuff.
I haven’t added any upgrades yet 🙂
I appreciate your guide and info on the BX. I just got mine from kickstarter but having a hard time getting anything to print. If I use the model on the card, it will work just fine after i have set my z offset and got the layer to stick. Maybe a guide on setting the ABL properly to get up and going?
Great review! Have you tried printing at higher speeds?
I usually don’t go over 60mm/s but I will try something faster. Considering the weight of the extruder and the bed, it should be fine.
First design of dual z-axis was with sync belt but they changed it in final version because they add 2 stepper drivers for each Z motor. So you can sync them in Marlin, with gcode G34. 🙂
Still not my favorite setup 🙂
But it’s quite stable, so no worries about it.