Creality Ender 3 Max Review: Bigger equals Better?
You already know about the Ender 3. It’s one of the most popular machines Creality ever produced. With the Ender 3 Max, we mostly get the same printer but with some upgraded parts and lager volume.
Is the Ender 3 Max a good purchase? Does it live to the expectations? Let’s see.
Ender 3 Max Shipping and Packaging
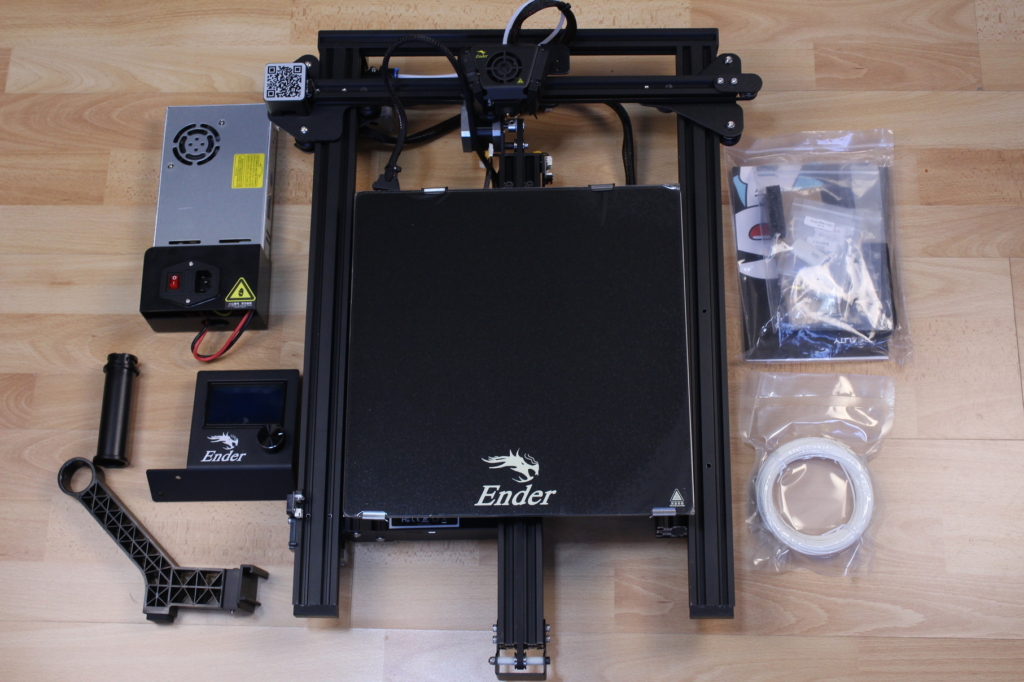
The Ender 3 Max comes in a big cardboard box with ample protection on all sides. It’s well packaged and everything arrived in perfect condition. Be careful when taking the printer out of the package because the bottom section of the printer and the gantry are connected with the hotend wires, so I recommend you take both out at the same time.
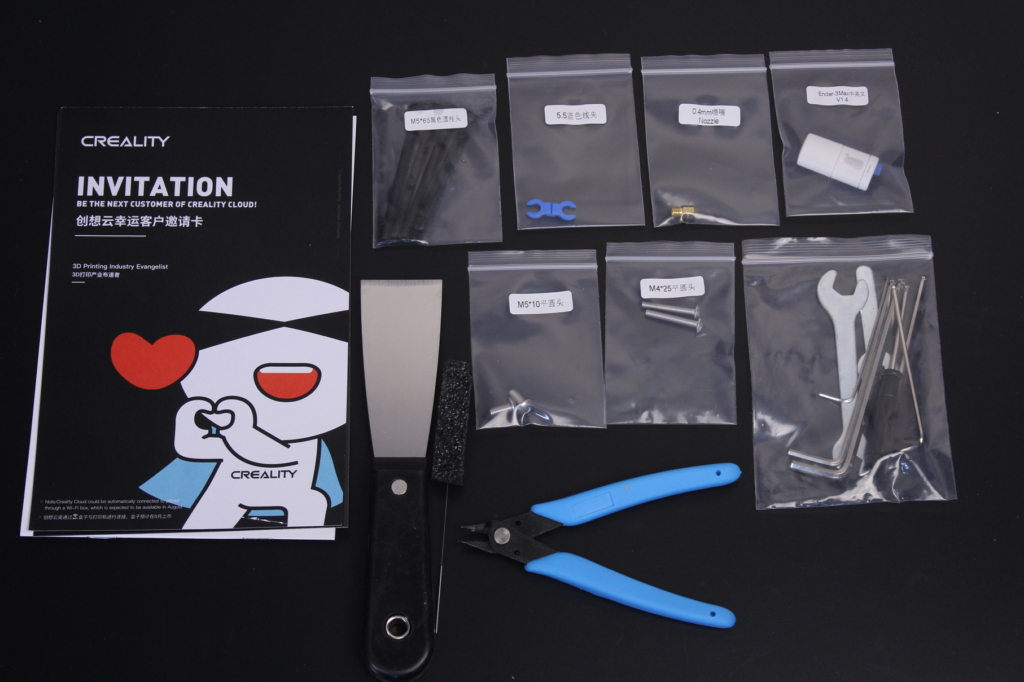
With the Ender 3 Max, you get the following accessories:
- Manual
- Spool holder
- Clippers
- PTFE tube spacers
- Spare nozzle
- Needle for nozzle clogs
- USB Card Reader
- 8GB MicroSD Card
- Screws
Assembly of the Ender 3 Max
The base of the printer and the gantry are pre-assembled so all you have to do put them together with four screws, wire everything then install the remaining items (power supply, screen and spool holder).
Ender 3 Max Design
As previously mentioned, the Ender 3 Max is just a scaled-up version of the popular Ender 3.
Ender 3 Max Specs
| Manufacturer | Creality |
| Printer type | Cartesian-XZ-Head |
| Nozzle size, mm | 0.4 |
| Operating system(s) | Windows, Mac OSX, Linux |
| Outer dimensions millimeters (xyz) | 513 x 563 x 590 mm (20 x 22 x 23 in) |
| Print speed | 30-60mm/s (recommended), ≤180mm/s |
| Printable material(s) | PLA/TPU/PETG/ABS/Wood |
| Printer type | Filament |
| Weight kg | 9.5kg (21 lb) |
| Build volume | 300 x 300 x 340 mm |
| Layer height | 100 – 400 Microns |
| Technology | FFF FDM |
| Connectivity | USB, SD card |
| Display | 12865 LCD |
| Extruder type | Single |
| Frame | Aluminum |
300x300x340 build volume
The increased build volume is probably the most attractive feature of the Ender 3 Max. Compared to the regular Ender 3, the Ender 3 Max has a build volume of 300x300x340. An increased build volume will allow you to print larger models in one piece, without the need of splitting the model.
Carborundum glass print surface
Creality chose to install the same carborundum glass print surface which is used on other machines from their lineup. It’s nothing fancy. Just a regular glass plate with a textured surface to increase adhesion.
This glass plate adds quite a bit of weight to the Y axis (compared to a magnetic print surface) but it does it’s job well. It’s flat, adhesion is great while heated and when the print is finished, you can easily remove the model without too much trouble.
Dual-fan setup for part cooling
An upgrade over the Ender 3 is the addition of an extra radial fan to the print head. This fan improves cooling quite a lot and makes it more consistent which translates to better bridging and overhang performance.
On the right side of the Ender 3 Max there’s space to install a BLTouch sensor to add auto bed leveling capabilities to the printer. While I don’t really see a need for a BLTouch on smaller printers, the increased bed size of the Ender 3 Max would benefit from something like that.
Single-gear metallic extruder
The extruder is also upgraded from the plastic one we get on the smaller Ender 3, and this time we got a metallic version. It’s not much better when it comes to performance (it’s the same thing but made from metal) but at least it will last longer.
While I would have liked to see a dual-gear extruder instead of this one, to have better control of the filament, Creality seems to add that kind of extruders only on more expensive printers.
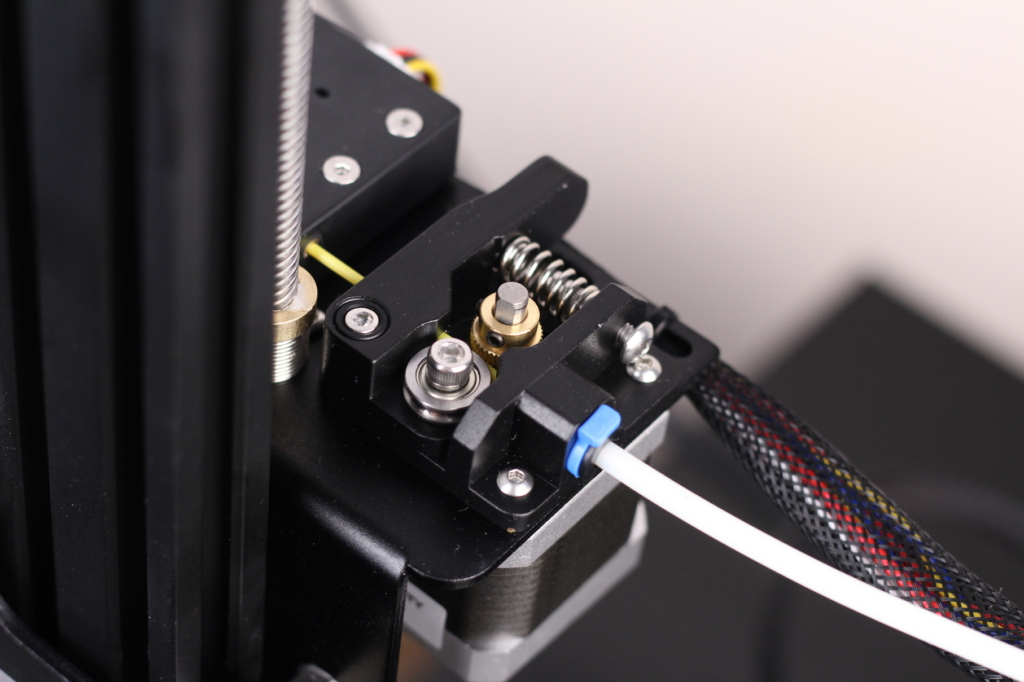
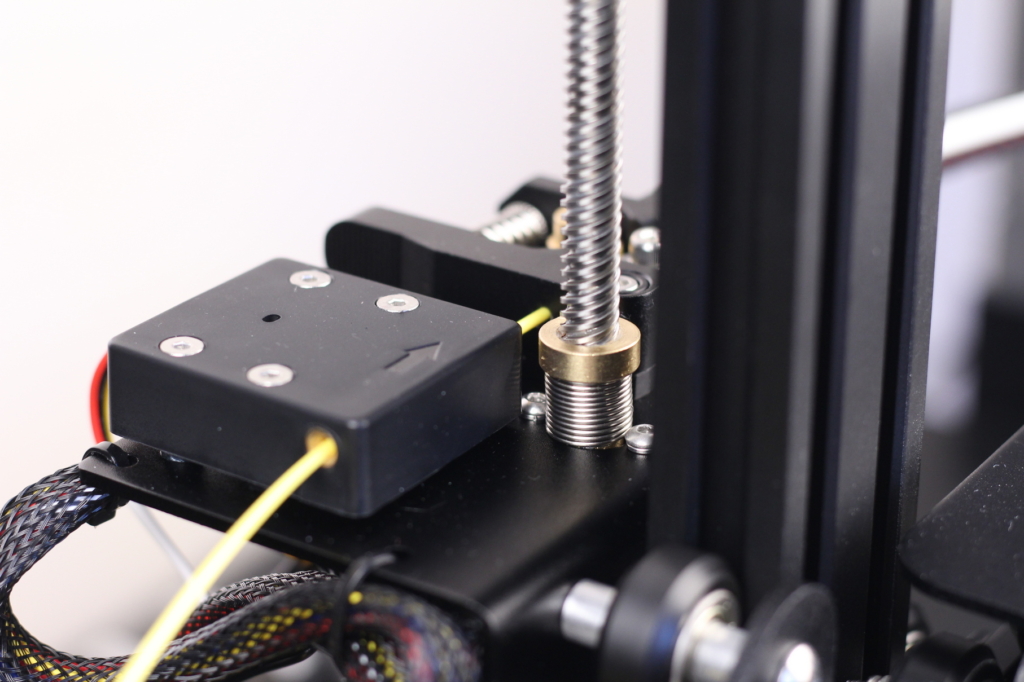
In the back of the metallic extruder, there’s also a filament runout sensor which will stop the print if filament runs out. It’s worth noting that you need to be close to the printer when this happens because the Ender 3 Max will stop the heaters while it waits for filament to be changed and your print might get detached from the bed when cool.
Single Z screw with anti-backlash nut
While I was hoping to see a dual Z screw setup, with the Ender 3 Max you get a single Z screw which is not that great especially for a printer this big.
While you have an anti-backlash nut already installed, this won’t be able to compensate for the droop you will get on the right side of the X gantry. This can lead to some leveling inaccuracies and your first layer will be troublesome.
For a larger format 3D printer (300×300) I am always looking for those which use dual Z lead screws because they are more reliable. A single lead screw usually works on smaller printers, but at this size, it’s a must-have.
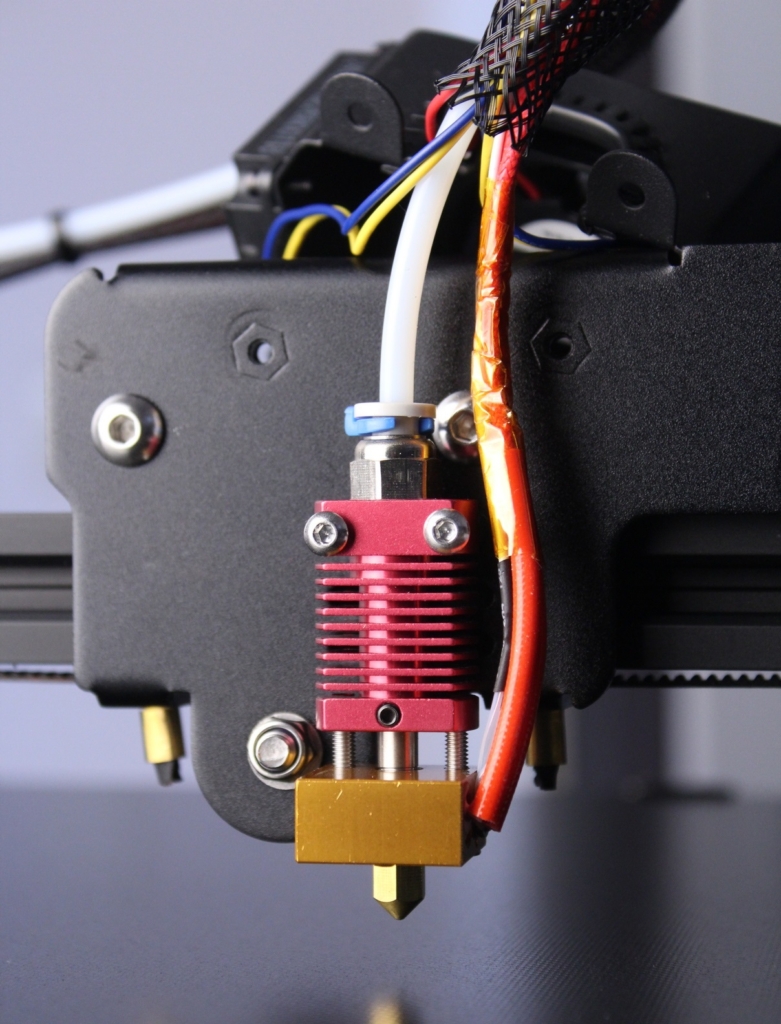
Same-old Creality hotend with PTFE lining
With the Ender 3 Max you get the same Creality style hotend you get on most cheap printers.
Its performance is not that bad, but from time to time you will need to replace the PTFE tube. This is because the PTFE tube is guided right up to the nozzle and the elevated temperature will start to degrade it over time. If you mostly print PLA, and don’t go over 240C most of the times, then your PTFE tube will last longer.
On this style of hotends it’s also recommended you perform the “hotend fix” which will allow you to replace just a single piece of PTFE tube when it’s needed, and you will also ensure that the PTFE tube is tight against the nozzle which eliminates clogs.
Mean Well 350W power supply
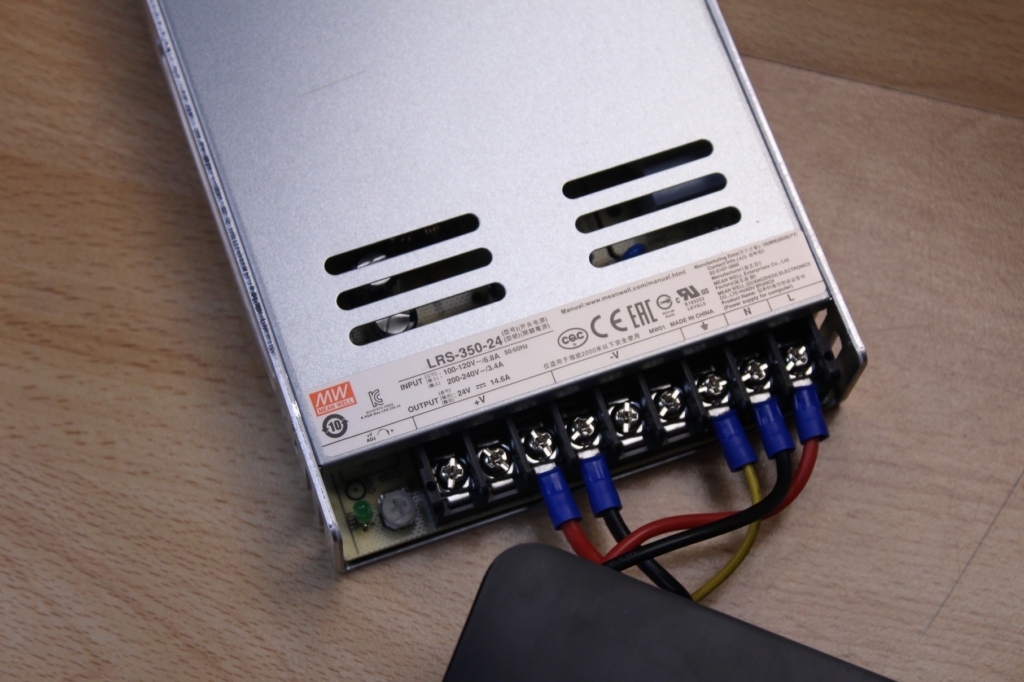
Creality is usually up to the task of letting you know if they included a Mean Well power supply with their printers. But for the Ender 3 Max they just mention a “name brand” power supply.
I am happy to report that on the Ender 3 Max you get a 350W Mean Well power supply which is great. I’m not a huge fan of the plastic cover on the bottom, because it feels flimsy, but that’s not a huge issue. Enthusiasts will probably print a mount for the power supply to install it on the bottom of the printer like others did on the regular Ender 3.
Creality V4.2.2 32-bit board with TMC2208 stepper drivers (on X and Y)
On the Ender 3 Max I got the Creality V2.4.4 which only has silent stepper drivers for the X and Y motors. The Z motor and the extruder use noisier stepper drivers that you will definitely hear when the printer is moving. But during printing, there’s little noise produced by the stepper motors.
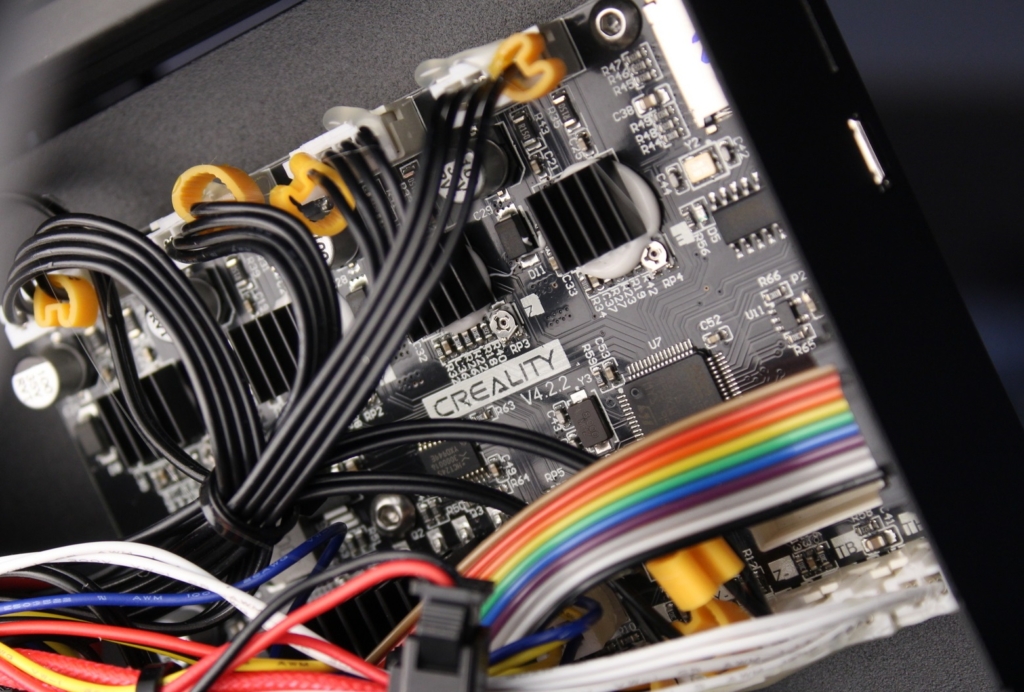
At this price point, Creality could have included a board which runs TMC drivers on all axis. I don’t think this would have increased the price significantly.
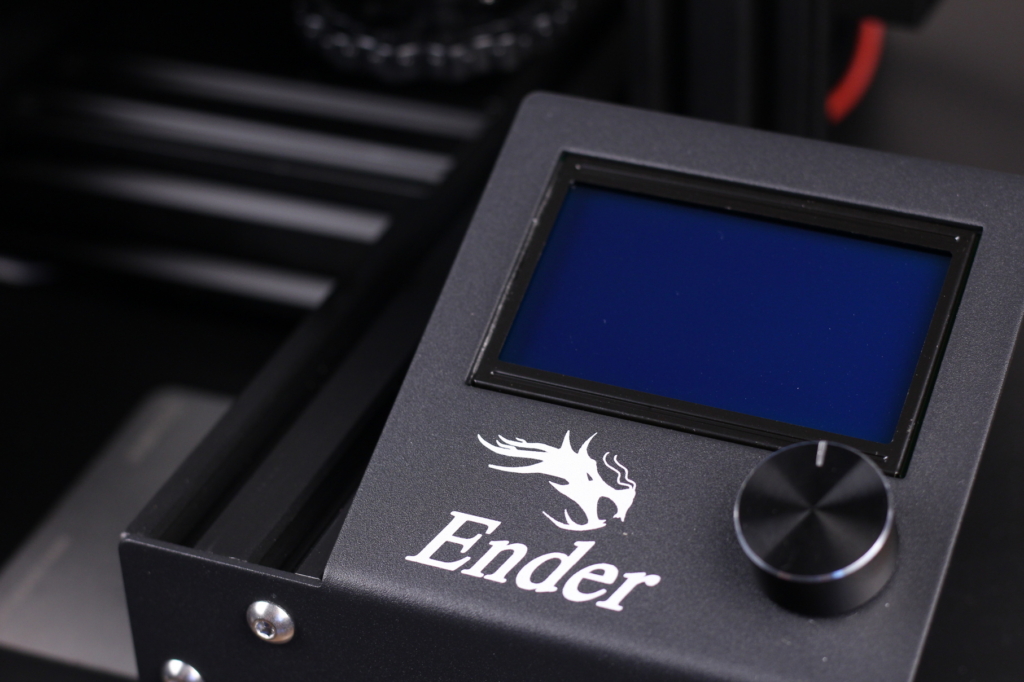
Old-school 12864 Screen
The Ender 3 Max runs the same screen you get on the regular Ender 3. This might be a good thing or a bad thing, depending on your expectations. From a tinkerer’s standpoint, having the 12864 screen will allow you to use it with most firmwares available even tough it doesn’t have all the bells and whistles like a touchscreen.
What I don’t like about this is the lack of useful menu entries. For example, the Ender 3 Max doesn’t offer assisted bed leveling to help level the bed. This would have been an easy option to enable in the firmware, but we don’t have this with this model.
Another annoying thing is the lag you get during printing. Moving trough the menu options is really slow when a print is running.
Modular spool holder
The spool holder that comes with the Ender 3 Max is the same one used with their CR-6 SE printer. It clips on the left side of the printer, on the aluminum extrusion and feeds the filament directly into the extruder. One of the benefits of this spool holder is that it can be collapsed so you save a bit of space when the printer is not in use.
Printer issues
Wheels for Z axis are not running on the extrusion
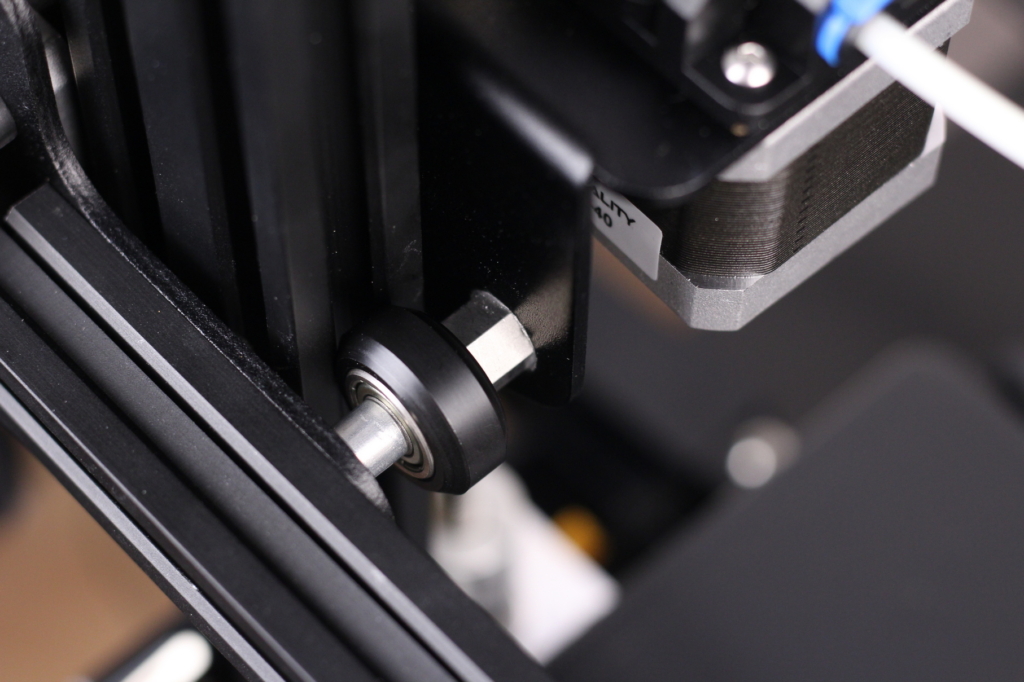
I think this is the biggest issue I encountered with the Ender 3 Max. After assembling the printer, I checked if the wheels are properly tightened against the aluminum extrusion.
I noticed that the wheels from the left side were tightened too much, and because of how Creality installed the eccentric nut, you cannot adjust it. You’re stuck with three wheels which are pressing too hard on the extrusion and can cause some print issues.
To explain this further: if the eccentric nut is fixed on one side, when you adjust it you also add a small angle to the wheel and instead of running the wheel parallel to the extrusion, only part of the wheel will touch it properly.
On the right side, the wheels were not tightened at all and only one of the wheels was touching the aluminum extrusion. Just like on the right side, you cannot tighten the eccentric nut correctly. So, you now have an X gantry that is not properly guided on the aluminum extrusion and the right side of the gantry has a big droop. While this seems to somehow work, I think this is a big issue of the Ender 5 Max.
A fix would be to either change the mounting solution for the eccentric nuts, but that requires quite a bit of work.
Fixed Z end stop
The Ender 3 Max has a fixed end stop position, and it cannot be adjusted if needed. For example, with the stock position of the Z end stop I was not able to use the printer because the bed springs need to be loosened up too much.
With the bed corners loose, the bed can easily move, and your Z offset will be constantly changing.
To fix this, I used a pair of bolts and T nuts to make it adjustable. This fix allowed me to properly tighten the bed screws while also being able to set a correct Z offset.
Bad bed springs
As mentioned, the included bed springs are bad. Even though they are long, their spring tension is too soft, and this doesn’t allow the bed to be leveled properly. You can either shim the springs with some screw washers, but I think it’s better to just replace them with better alternatives.
Heating time and power consumption
I tested the heating time for both hotend and heat bed and here are the results:
Hotend
- 200C in 1 minutes and 45 seconds
- 250C in 2 minutes and 30 seconds
Heatbed
- 60C in 3 minutes and 10 seconds
- 100C in 10 minutes
Power Draw
Idle power draw is around 9W. When the hotend and heatbed are heating up, the Creality Ender 3 Max draws around 335W. After it starts printing, the power draw stabilizes to around 125W.
All these measurements were taken with a Blitzwolf smart power socket which indicates the power draw, and it can also be used for remotely powering on and off the printer.
Bed Temperature Uniformity
I tested the temperature uniformity for the Ender 3 Max bed with the Flir Camera installed on the CAT S62 Pro. The bed has been set to 60C and I waited 2 minutes after reaching that temperature for the temperature to stabilize.
The bed has a good heating uniformity, and the temperature is mostly the same across the bed.
Ender 3 Max Noise Levels
While the printer is running silent stepper drivers for X and Y, the Z axis is the noisiest during movement. When printing, you won’t hear it that much. But rest assured, the Creality fans used on the Ender 3 Max will let you know that they’re present.
Besides that, the power supply fan also starts ramping up from time to time, making the printer a bit noisier than I would like.
IdeaMaker profiles for Ender 3 Max
During my time with the printer, I also tuned three IdeaMaker profiles for the Ender 3 Max using the tools available in the 3D Printer Calibration Guide using IdeaMaker article. These profiles are tuned for the stock printer and worked well for me. Feel free to give them a go.
Creality Ender 3 Max IdeaMaker Profile – PLA – 3DPrintBeginner
Creality Ender 3 Max IdeaMaker Profile – PETG – 3DPrintBeginner
Creality Ender 3 Max IdeaMaker Profile – TPU – 3DPrintBeginner
Please note that the TPU profile might need some adjustments according to your filament.
Test prints on Ender 3 Max
3D Benchy
The first 3D Benchy looks fine, but it’s not something to write home about. There are a few sections where you can see the misaligned layers and inconsistent extrusion which I think it’s caused by the way the X gantry is attached to the printer and the lack of proper adjustment.
- Material: Devil Design Dark Grey PLA
- Layer Height: 0.2 mm
- Nozzle Temperature: 215C
- Bed Temperature: 60C
- Print Speed: 50 mm/s
Voron Cube
I also printed the Voron Cube because it’s a nice way to test the print accuracy of any printer. This time, the extrusion quality is better and the bearing was easily fitted in the top of the cube. There’s a tiny amount of under-extrusion on the top layers, but that’s easily fixed by increasing the flow rate slightly.
- Material: Devil Design Dark Grey PLA
- Layer Height: 0.2 mm
- Nozzle Temperature: 215C
- Bed Temperature: 60C
- Print Speed: 50 mm/s
Phil-A-Ment
Next print is a full-size Phil-A-Ment that came out better than expected. The layers are consistent and there’s only a small portion in the print where the extrusion had some issues. Other than that, the overhangs look great and it’s a nice overall print.
- Material: SUNLU Rainbow PLA
- Layer Height: 0.15mm
- Nozzle Temperature: 215C
- Bed Temperature: 60C
- Print Speed: 50 mm/s
Pinky and the Brain Cheese
As you might remember from the Anycubic Photon Mono X Review, I printed Pinky and the Brain, but I also needed the support for the two figures. This model was printed in two pieces which were later glued together. The extrusion is not as consistent as I would like, but it still looks decent.
- Material: Gembird Yellow PLA Plus
- Layer Height: 0.15mm
- Nozzle Temperature: 215C
- Bed Temperature: 60C
- Print Speed: 60 mm/s
The Punisher
I wanted to print The Punisher bust from Fotis Mint for a while now, so I thought I give it a go using the Ender 3 Max. This print came out great with slight issues on the major overhangs where I should have added a bit of support.
- Material: Sakata Black PLA
- Layer Height: 0.15mm
- Nozzle Temperature: 215C
- Bed Temperature: 60C
- Print Speed: 50 mm/s
TPU 3D Benchy
To test the TPU performance of the Ender 3 Max, I printed a benchy. The print quality seems fine, but at a closer look, you can see a lot of under-extrusion especially on the top layers. Even if flow rate is adjusted, I still get under-extrusion so I will blame this on the plastic extruder. To be honest, I wasn’t even expecting for TPU to be printed on the Ender 3 Max, but I was contradicted by this test.


- Material: Devil Design Pink TPU
- Layer Height: 0.2mm
- Nozzle Temperature: 220C
- Bed Temperature: 60C
- Print Speed: 30 mm/s
Epicyclic Tester
Finally, I also printed the Epicyclic Tester from Clockspring3D in PETG. I scaled the model up to 200% because the original model felt too small. The printer managed to print the model successfully, the gears are spinning but when I increased the size, the tolerances also increased and because of that the wheels are a bit loose.
Either way, I’m happy with how well this PETG print came out.
- Material: Fiberlogy Easy PETG Blue
- Layer Height: 0.15mm
- Nozzle Temperature: 235C
- Bed Temperature: 70C
- Print Speed: 50 mm/s
Conclusions: Is the Ender 3 Max worth it?
The Ender 3 Max is not the printer I was expecting it to be. Instead of adding a few upgrades to improve upon the popular Ender 3, Creality just installed a bigger glass bed and longer extrusions without considering all the implications.
With the Ender 3 Max we get a badly engineered V-slot movement on the Z axis that cannot be adjusted properly, which can cause some printing artifacts. I might be a bit harsh with Creality this time, but the Ender 3 Max leaves a bit too much to be desired, and it’s not the Ender 3 upgrade I was looking for.
If I were to look for a larger format printer, I would easily choose to go with the Artillery Sidewinder X1 instead of the Ender 3 Max even though I need to spend a bit more money. For those extra ~70$, you get dual Z axis, a direct drive extruder with a better hotend, faster heating bed and quieter operation.
I can’t find a good reason to buy the Ender 3 Max at a price point of around 330$ because there are other larger format printers out there. But in the future, if the price of the printer gets lower, then it might be decent alternative to larger format 3D printers, as long as you know all the issues it comes with.
The Ender 3 Max is not the printer I was expecting it to be. It has more drawbacks that it should. The main attraction is only the increased build volume compared to an Ender 3. And the build quality issue don't help too much.Creality Ender 3 Max Rating
Design
Specs
Noise Levels
Ease of use
Print Quality
Price
Where to buy the Creality Ender 3 Max?
The Creality Ender 3 Max can be purchased from the following websites:
TomTop
Banggood
AliExpress
Amazon
Geekbuying
I recommend checking out the Discount Codes page before purchasing. I regularly update the article with discount codes for various online shops, and you might find one for this particular model.
The Ender 3 Max was provided free of charge by TomTop for the purpose of this review. While the article includes affiliate links, all opinions are my own. Nobody reviewed the article before it was posted, following the Review Guidelines.
Liked it?
|
|









I got lucky and picked up a Max woth a 4.2.7 board in it for just over $200 shipped .Added dual z-axis upgrade from a cr10 and I’m debating linear rails. Love the machine so far but glad I didn’t pay over $300 for what it is.
Glad I didn’t see this when I first started looking into the 3 Max. I’d have never got it. Z rollers are easily adjust to stop the droop. Do it the same way as any other ender 3 and pull the top extrusion and pull the X gantry off and align everything.
The big problem with this printer is the crappy creality extruder. Even the all metal unit is garbage. Bed springs and non adjustable Z are bad as you state as well. Toss on some silicone mounts for the bed and a BLtouch and you get a smooth as glass 1st layer on the entire bed. A proper dual gear extruder and a flash of non creality marlin and it prints awesome and has the typical large amount of 3rd part upgrades to print or buy.
There are better alternatives out there 🙂
well i got a promotion going on right now for 209€ i can get it, is there anyother option out right now for this price tag? keep in mind this will be my first 3d printer
209E could be an acceptable price for it. But you can look for the BIQU B1 SE Plus which is sold for ~300$. Just a bit more expensive, but with better features.