Creality CR-6 SE Review: Ender 3 Evolution
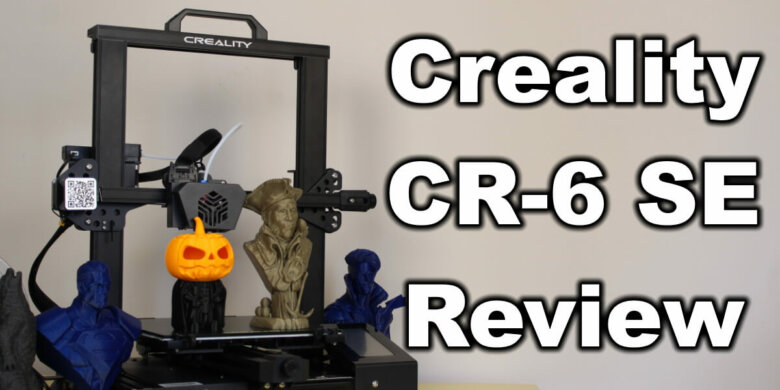
The Creality CR-6 SE printer has been launched on Kickstarter and in my opinion, this is the Ender 3 evolution everybody was expecting from Creality (instead of the Ender 3 V2).
I’m not really a fan of the way they launched this printer trough Kickstarter (even though it was a smashing success) but that’s just how things are right now. Anyway, let’s get right to it and see if the Creality CR-6 SE lives up to our expectations.
The Kickstarter fiasco
I need to confess that I tried to be one of the early backers to get a CR-6 SE at a great early bird price but I wasn’t successful. Now, I’m not that sad about this because printers are still shipped and some of the backers haven’t received their printer.
This is unfortunate and I think Creality should have delivered the printers first to their backers before selling the printer trough other channels. On the other hand, I am also happy because I was able to get one from Banggood relatively quick.
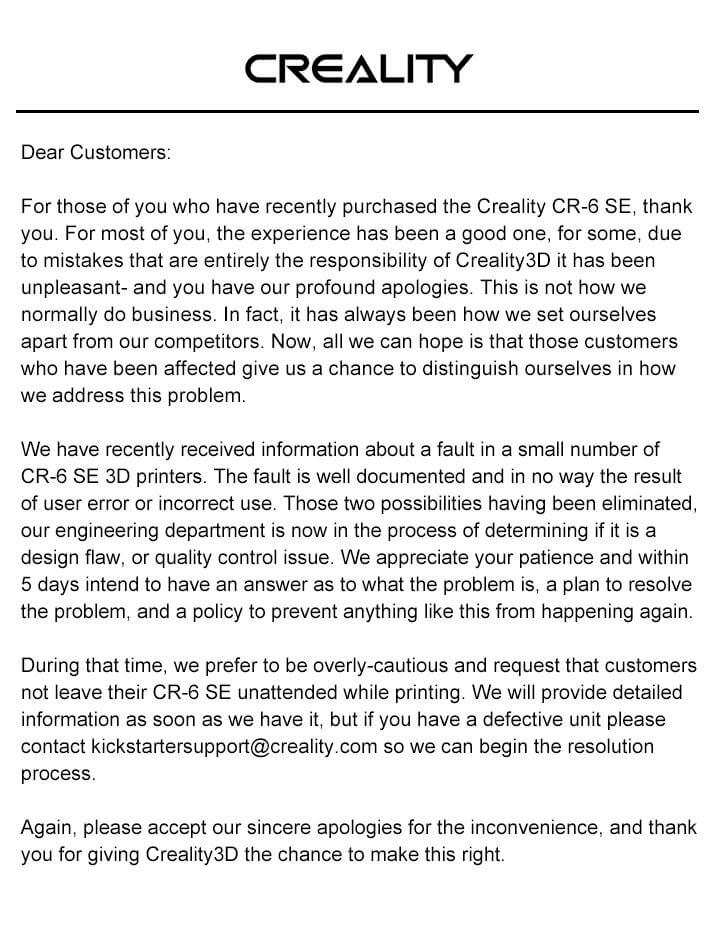
There are also a lot of reports online with backers who received their printers and they encountered issues right off the box. Some people had burnt boards after a few hours of printing. Others risked a fire because the power switches were not properly assembled and/or they are low quality.
Creality already released a statement where they apologized for the inconveniences, and advised people not to use their printers without proper supervision. They are currently doing a check and will probably offer another statement soon.
Packaging and shipping
My CR-6 SE was ordered from Banggood with EU Priority Line. It was shipped from China and it took 2 weeks to arrive in Europe.
Any product I ordered from Banggood using EU Priority Line arrived relatively fast and with no added cost for customs. Currently, the printer is also available on local warehouses which will offer even faster shipping.
Included in the box, you get the following accessories:
- Nozzle wrench
- Two spare nozzles with PTFE retainers
- Wrench for tightening the wheels
- 250 gram white PLA spool (I thought it shipped with a 1Kg spool!?)
- Card reader
- 8GB SD Card
- Needle for cleaning the nozzle
- Tool for removing the prints
- Filament pliers
- Hex wrenches
Assembly
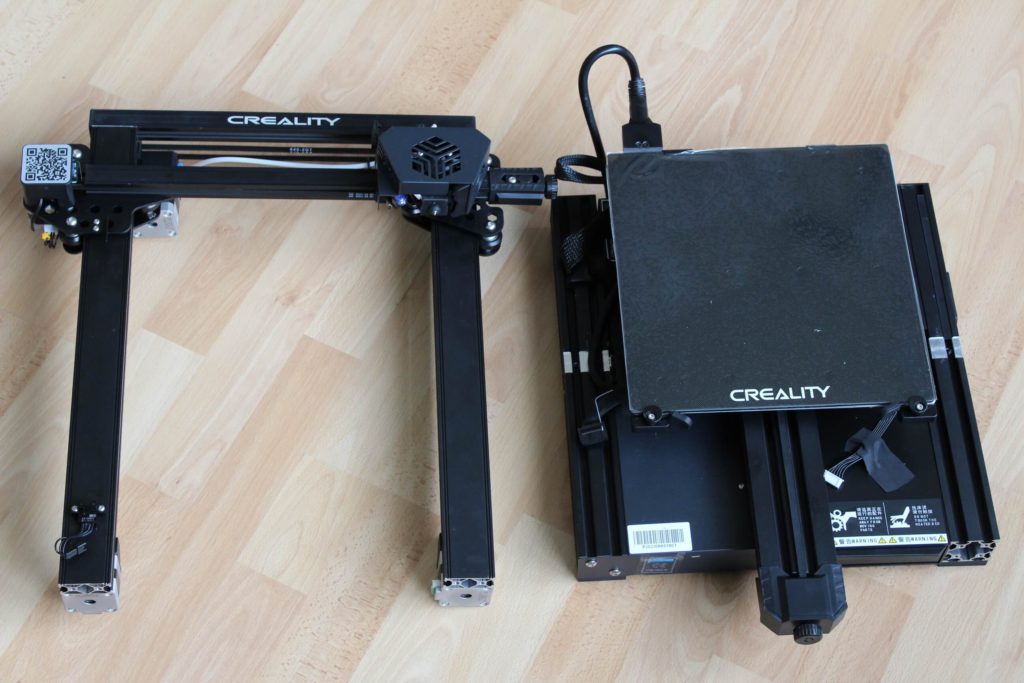
The assembly process for the CR-6 SE is easy even for a beginner. It comes mostly pre-asembled and you only need to attach the gantry to the base with the help of four screws. The final step is to install the touchscreen then connect the wires and that’s about it.
Machined slots on the base help with the installation, ensuring that the gantry is assembled right and it’s square.
After the quick assembly process, this is how the Creality CR-6 SE will look like.
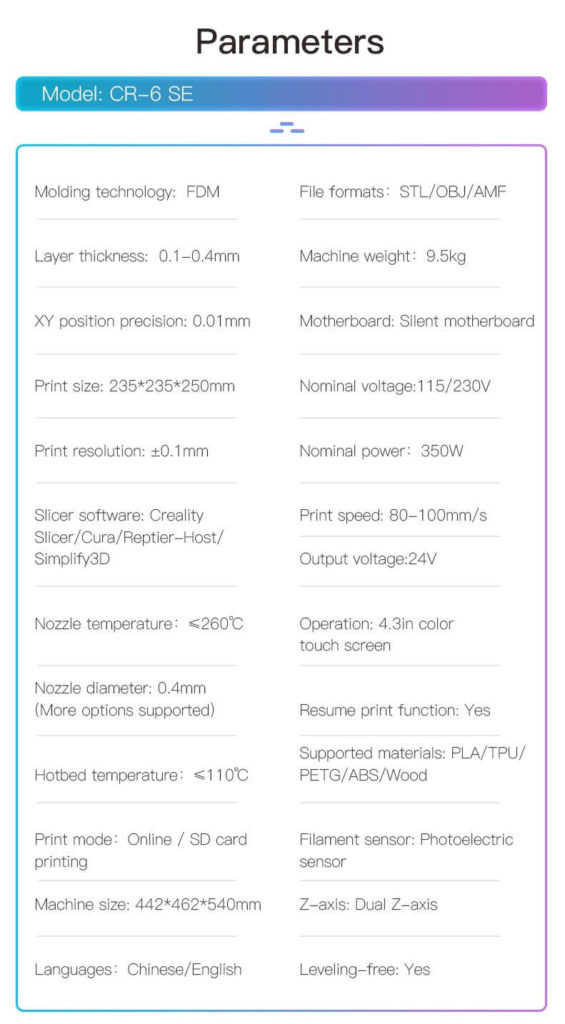
Creality CR-6 SE Specs
Dual Z axis
A great addition to the Creality CR-6 SE is the dual Z axis. With this feature, both sides of the gantry will stay level and the “gantry sag” we got with other printers like the Ender 3 is not present anymore. A sync belt is also present which makes sure the Z stepper drivers are always in sync.
I’d say this is how any printer should be built because it eliminates a lot of frustration and it helps keep printing results consistent and repeatable
32-bit board with TMC2209 drivers
The new Creality V4.5.2 board included with the CR-6 SE made the jump to 32-bit and also included silent stepper drivers in the form of TMC2209. The board is similar to the BTT SKR Mini E3 V2 which is a popular upgrade among Creality users.
Unfortunately, a few people reported issues with the board. I did not encounter any issues during my time with the printer (about 80 hours of constant printing) but some users had short circuits and the board started releasing the “magic smoke”. I am not sure if this issue is widespread, and Creality told us that the issue has been resolved, but it’s worth considering this.
If anything happens with the printer in the future, I will make sure to update this article.
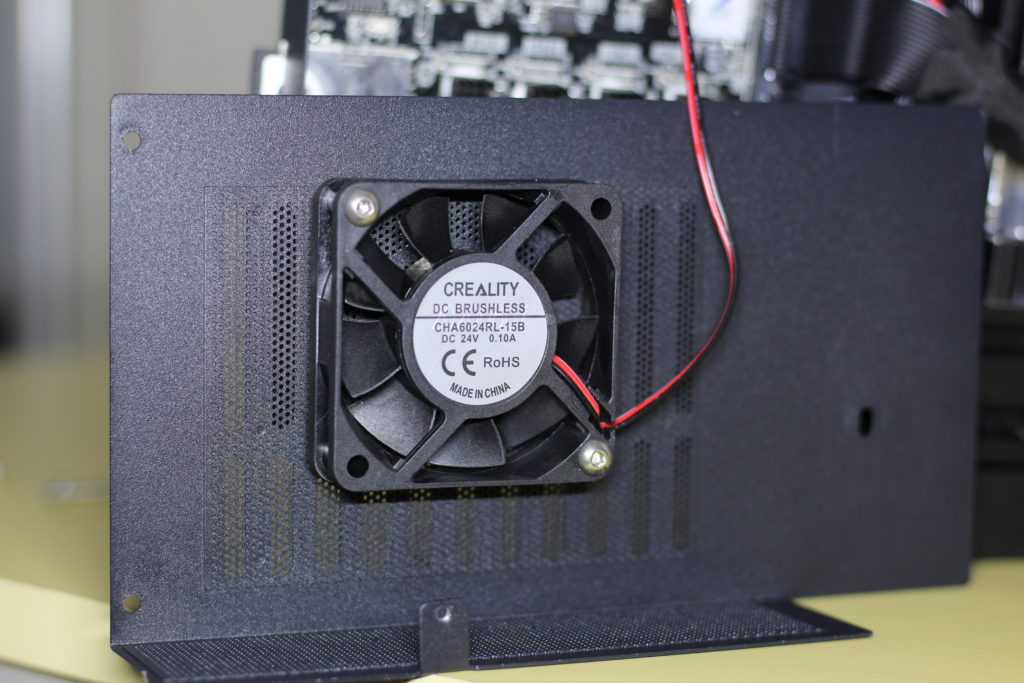
I don’t even know if that white adhesive is meant to be there, on the mosfets. It should probably hold a pair of heatsinks but my sample did not have them. Considering there’s a 6020 fan blowing air over the board it might be fine, but still…
Anoter thing to consider is the lack of EEPROM memory on the board. The settings are stored on the SD card, so for example, if you level the bed and then use a different card to load up a model, you will need to re-level the bed to store the new values on the SD card.
Color touchscreen
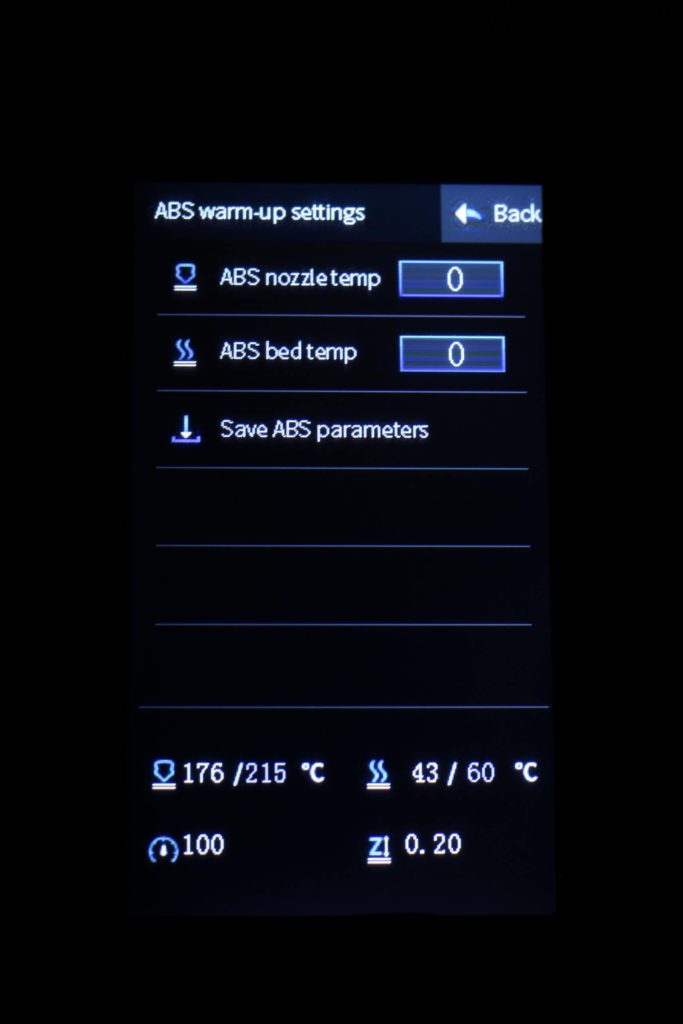
The new color touchscreen is nice and responsive but it’s still missing some features to make it a true upgrade. Right now, its functions are limited.
Please ignore the quality of the pictures. It’s hard to take good pictures of the CR-6 SE touchscreen and the low brightness doesn’t help too much.
There is no flow rate adjustment during printing, or other fancy features like other touchscreens offer, but I hope Creality will upgrade the screen firmware soon.
The PLA and ABS heating presets can be edited to better suit your needs. I adjusted my values to 215/60 for PLA and 240/70 for ABS because I mostly print PETG on my machines.
Improved extruder
Another important upgrade installed on the CR-6 SE is the new Creality extruder. They finally got rid of the plastic extruder (which is still being used on their other machines). It’s not a geared extruder, and uses just a single gear but at least it now it’s able to maintain a good pressure between the idler and the filament gear.
Inside the extruder there’s a metal guide tube which will improve the performance of the printer when printing flexible filaments. The plastic lever which opens the extruder makes loading filament really easy.
Previously, I would have changed the stock extruder for any Creality printer but this one does not make me want to do that. It just works and I could not find any reasons to upgrade.
Meanwell power supply
The CR-6 SE comes with a Meanwell 350W power supply and I’m really happy to see that Creality finally stopped using no-name power supplies. Unfortunately, the fan is noisy and it generates most of the noise that comes out from the printer. This makes all the silence you get from the silent stepper motors go away.


When you are heating the bed to 100C, the PSU fan noise is even more noticeable. This could have been mitigated by properly setting up the airflow in the printer. Right now, the PSU is pulling air inside the case, but that hot air doesn’t have an exhaust port to get it out.
Fixed Bed
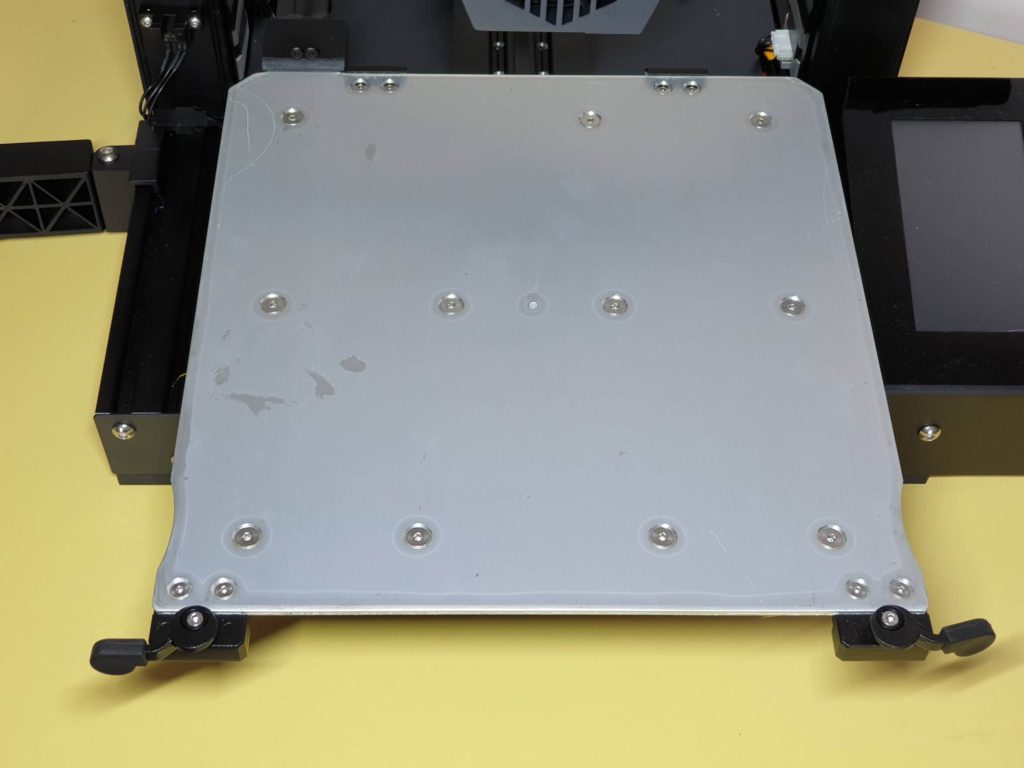
With the Creality CR-6 SE you get a fixed bed. This means that you won’t need to fiddle around with bed knobs trying to get every corner level with a piece of paper like on other machines. I would love to see this on other printers in the future.
The bed is bolted onto the carriage and there’s no flex or movement. Excellent addition to the printer, especially given the fact that the CR-6 SE also comes with an automated bed leveling system.
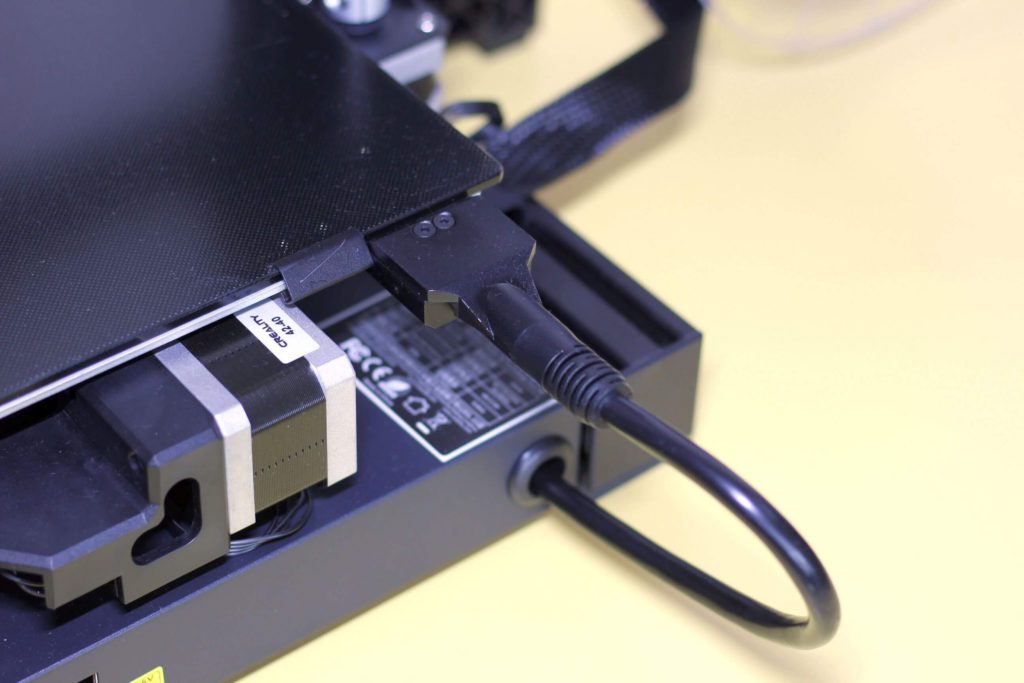
A cable strain relief is also included with the stock bed, which will make the printer more reliable and able to withstand a lot of printing without worrying about the wires getting bent by the repeated movement of the bed.
There is no insulation material under the bed but this is not a big issue for the CR-6 SE. The thermal mass of the glass bed can hold the temperature steady during printing.
Heating the bed to 60C takes 2m30s and for 100C you need about 8 minutes which is relatively fast for an DC powered bed.
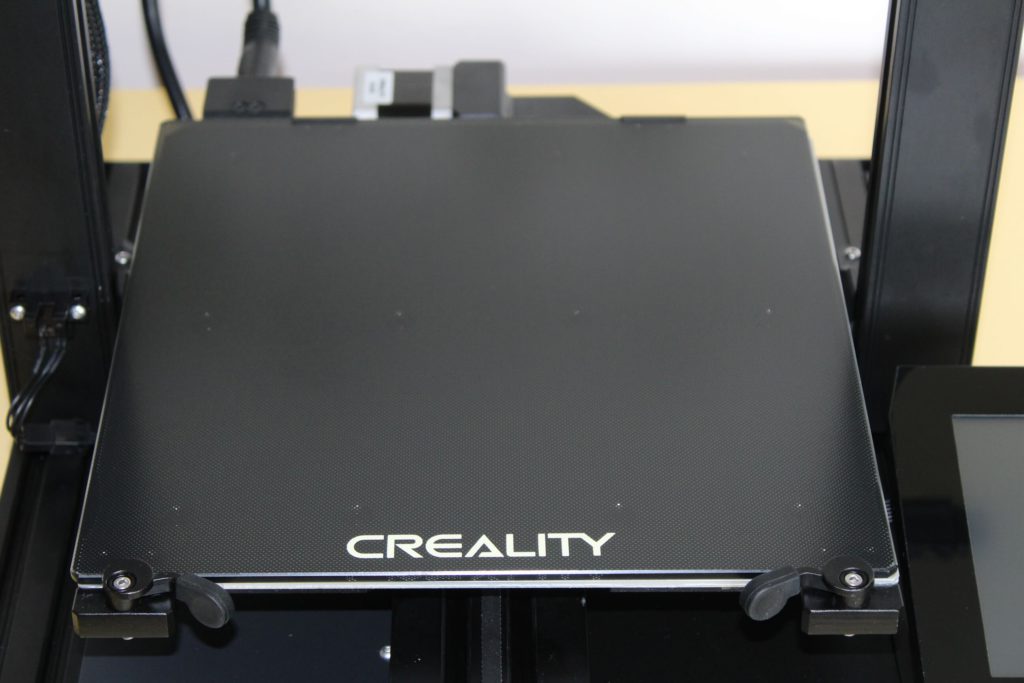
True 235×235 mm build volume with Carborundum glass
The old Ender 3 was boasting a 235×235 mm print bed but the effective build area was 220×220 mm. This time, the CR-6 SE has a “true” 235×235 mm with a heated bed with bigger dimensions.
On top of the heated bed there’s a “Carborundum” glass plate (basically a fancy word for tempered glass) which is held in place by two plastic levers which are easily accessible in the front. A nice addition compared to the old way of holding the glass plate down with paper clips which could get in the way of the nozzle.
When a print is done, if you want to cool down the plate faster, you can easily remove it thanks to the two front levers.
The adhesion on the glass bed is good. If the bed is cleaned well, the prints adhere really well while the bed is hot. The prints release without any problems after the print is finished, so no need for a metal scraper anymore. PLA and PETG have no problem adhering to the print surface.
If you plan to upgrade to a flexible PEI spring steel sheet, you need to get one in 245×255 mm size to fully cover the bed. You can already buy a PEI sheet made specifically for the CR-6 SE.
Auto Bed Leveling
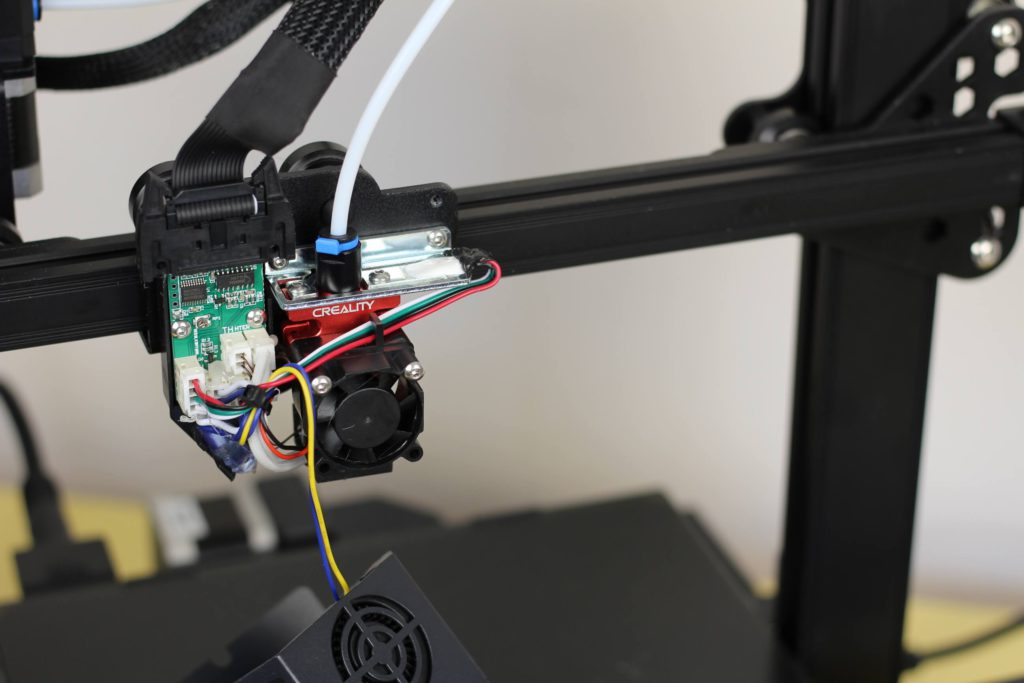
Another innovation from Creality for the CR-6 SE is the Auto Bed Leveling system they included with the printer. This time, Creality did not use a sensor (like the poplar BLTouch). They included a strain sensor with the hotend (similar to what you get on a regular kitchen scale) which detects the small movements of the assembly when the nozzle touches the bed.
So, instead of needing to rely on a different sensor and calibrate offsets, the tip of the nozzle is now the probe. when the nozzle touches the bed, the sensor detects the small change and stops the nozzle from crashing into the bed.
It’s important to note that the nozzle needs to be kept clean at all times because even a small amount of plastic on the tip of the nozzle can have an impact to the leveling and can cause issues during the first layer.
With this kind of leveling method, and the fixed bed you are almost guaranteed to get a good first layer, consistently. I only needed to level the bed once and it was consistent on all of my prints.
New hotend design
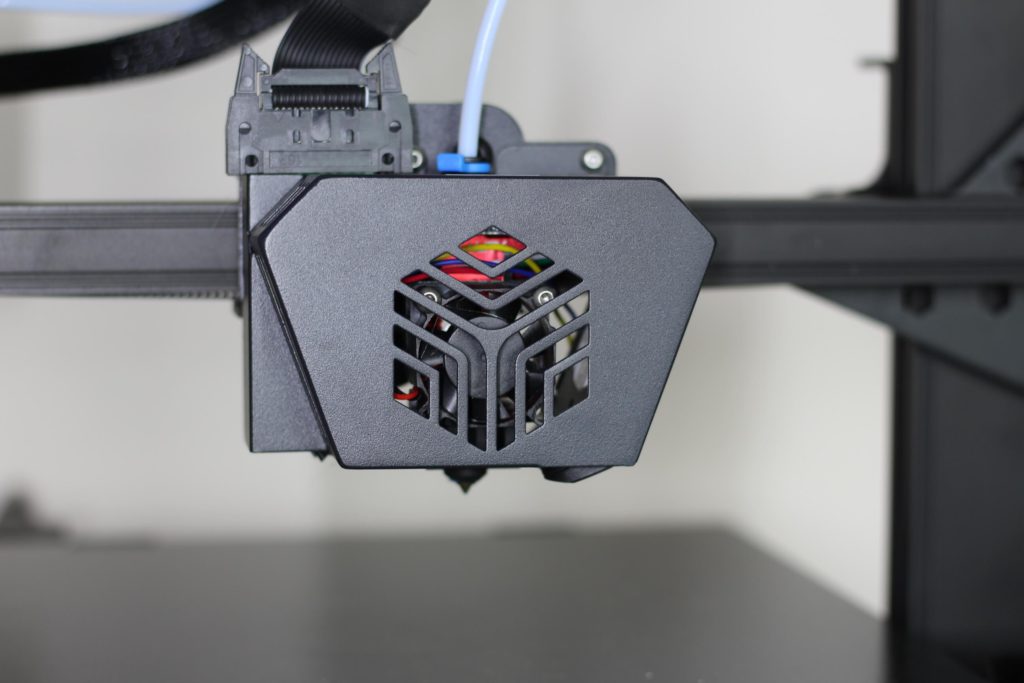
Because of the new bed leveling system, the hotend is also upgraded. It has a different design now, but it still relies on a PTFE tube which goes right up to the nozzle. This limits the maximum printing temperature to 265C but I would not recommend going over 240C. From 250C, the PTFE starts to degrade and release harmful fumes in the air.
Please note that this is the same even for Capricorn PTFE tubes. PTFE is the same, and the degradation occurs at the same temperatures, noted even by Capricorn on their website. You can safely print PLA, PETG, TPU and even ABS as long as you don’t push the temperature too high.
For some reason, the heat-break has a large portion with no heatsink on it which is stupid because that’s the main purpose of the heat break. To keep the filament cool until it reaches the nozzle. Relying only on the PTFE tube is not the best idea, but for now I haven’t had any issues with filament clogs so I guess it works.
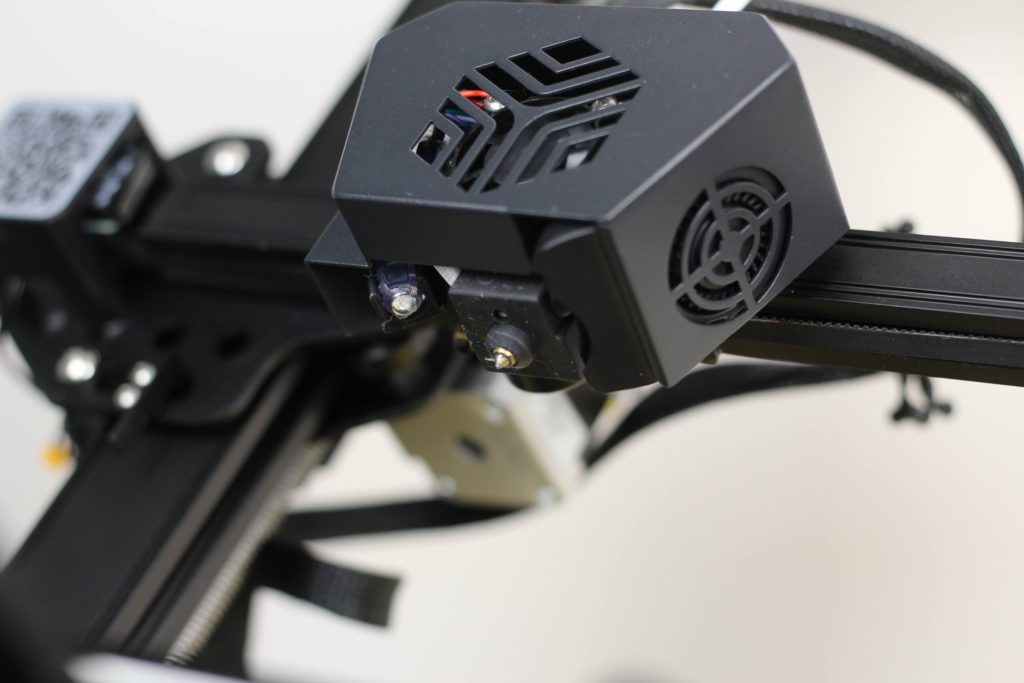
Cooling is provided by a single 3010 fan which is mounted directly on the hotend, and a single radial 4010 part cooling fan.
The fan has a lot of airflow and it’s a bit noisy, but it manages to keep the hotend cool with ease. There is a bit of air leaking from the hotend so ABS could be a bit challenging to print because of that, but it only helps cooling in the case of PLA, PETG and TPU.
The new hotend also gives you the possibility of changing nozzles one-handed with the included wrench. The heatblock comes with a silicone cover to keep it clean and maintain a constant temperature inside the heatblock and next to it there’s an LED light.
Because the new hotend uses two screws to mount it from the top, you cannot easily upgrade it to an all-metal hotend like the Micro Swiss or NF Smart hotend, but I’m sure hotend upgrades will soon show up.
The wiring which powers the hotend assembly terminates into a single connector which plugs into the small breakout board next to the hotend. This will make replacing the whole hotend assembly easier (in case there’s a need to do this for some reason).
Belt tensioners on X and Y axis
Belt tensioners are a popular 3D printed upgrade most of the Ender 3 users added to their printers. It’s nice to see that Creality decided to add these from the factory.
The belt tensioners give users the possibility of easily adjusting the belt tension on their printer, without having to go through complicated methods of doing it. With the belts tightened properly, layer shifts shouldn’t be a problem anymore.
With these belt tensioners, it’s easy to overtighten the belts and this is not recommended. If the belts are overtightened, they can stretch, or cause bad print quality. You should tighten the belts just enough so they grip the motor pulleys well without too much pressure.
Small quality-of-life upgrades
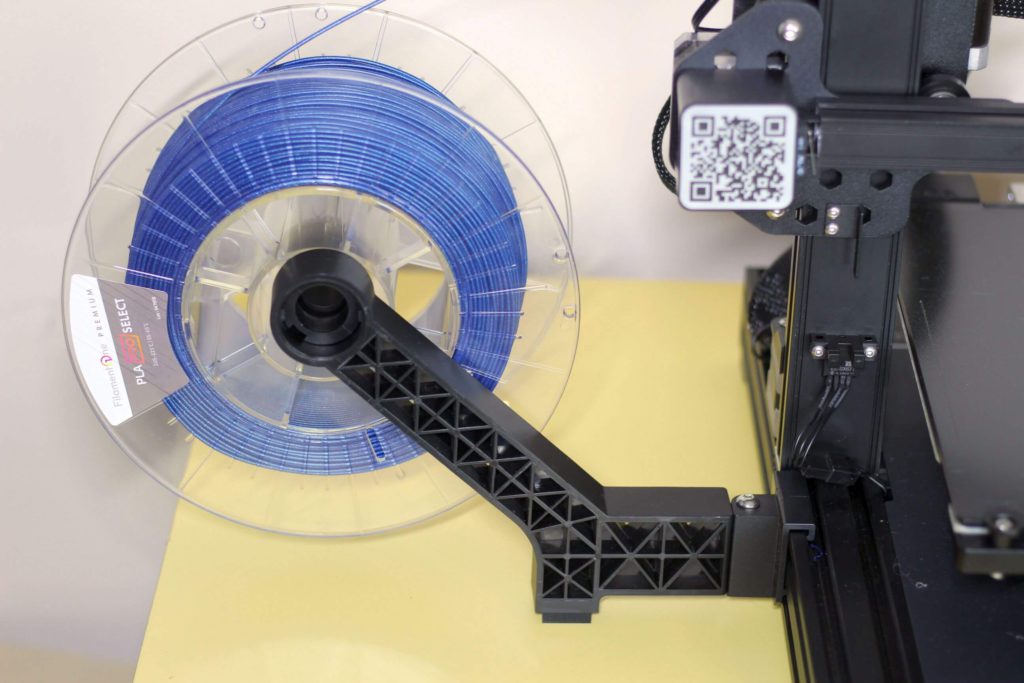
You also get a few nice quality-of life upgrades included with the CR-6 SE. One of them is the foldable spool holder which can be folded making the printer more compact and easier to store when not in use.
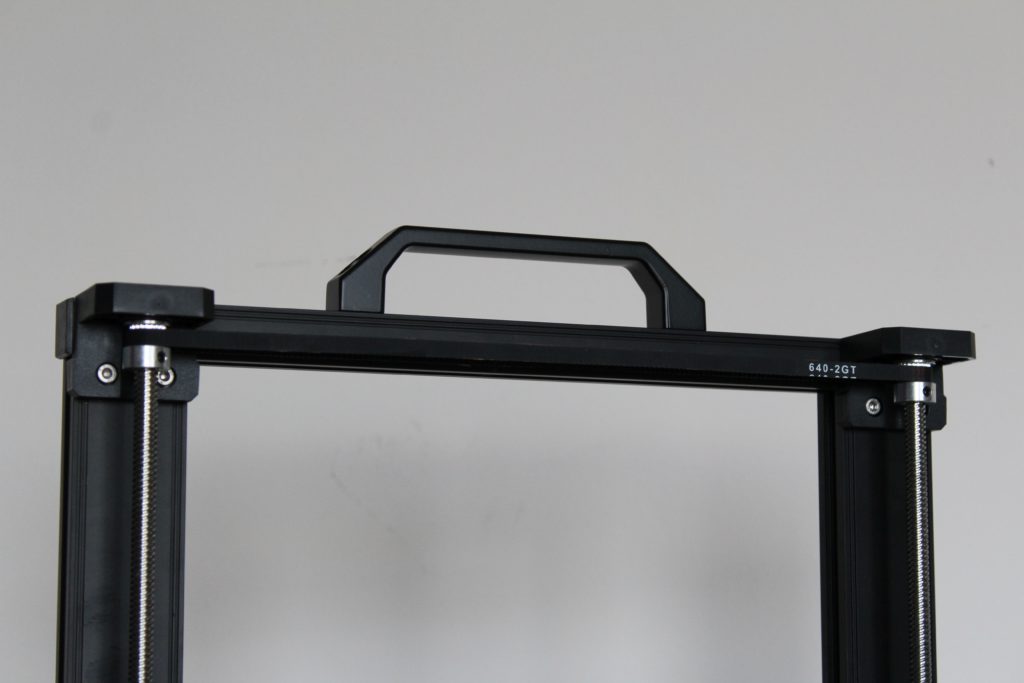
A handle is also included for those moments when you need to move your printer, and you also get a nice magnetic drawer which can be used for storing the tools.
Creality CR-6 SE nozzle quality
Even tough the stock nozzle looks a bit different, it’s still the same as the regular Creality nozzles and you can purchase different nozzles with ease.
As you can see, the tip of the nozzle looks fine, with a a few small marks around the hole from the machining.
IdeaMaker profiles for Creality CR-6 SE
During my time with the printer, I also tuned two IdeaMaker profiles for the Creality CR-6 SE. These profiles are tuned for the stock printer and worked well for me. If you are looking to give them a go, then feel free to download them from the links below:
Creality CR-6 SE IdeaMaker Profile – PLA – 3DPrintBeginner
Creality CR-6 SE IdeaMaker Profile – PETG – 3DPrintBeginner
Test prints on the Creality CR-6 SE
3D Benchy
As usual, the first print is a 3D Benchy where I set the baseline of my slicing profile and then adjust the settings to improve the print quality. It’s not the best benchy, but the quality is fine for an untuned profile, right out of the box.
- Material: Devil Design Dark Gray PLA
- Layer Height: 0.2mm
- Nozzle Temperature: 210C
- Bed Temperature: 60C
- Print Speed: 50 mm/s
A pirate with his rat
After a few tweaks to the profile, I printed a pirate with his rat bust from Eastman. This is a great model to test the print quality of a printer, and the Creality CR-6 SE did an amazing job. I am really happy with how the print turned out with small alterations to my base profile. Perfect layer lines with no stringing and good performance with small features.
- Material: FilamentOne PLA Glint Gold
- Layer Height: 0.15mm
- Nozzle Temperature: 210C
- Bed Temperature: 60C
- Print Speed: 50 mm/s
Superman Injustice
Next, it’s the Superman bust from Eastman. Just like my previous print, the quality produced by the CR-6 SE is outstanding. Other than some small under-extrusion on the top layers for the stand, everything looks great. I increased the flow rate to the top layers with 2% and continued testing.
- Material: FilamentOne PLA Glint Blue
- Layer Height: 0.15mm
- Nozzle Temperature: 210C
- Bed Temperature: 60C
- Print Speed: 50 mm/s
Godzilla
- Material: FilamentOne PLA Glint Gray
- Layer Height: 0.15mm
- Nozzle Temperature: 210C
- Bed Temperature: 50C
- Print Speed: 50 mm/s
Darth Pumpkin
Because the Halloween season is here, I tought it would be nice to print Darth Pumpkin. Again, the quality is excellent and even the large overhangs under the head are great considering the large overhangs.
- Material: Devil Design Black and Orange PLA
- Layer Height: 0.15mm
- Nozzle Temperature: 210C
- Bed Temperature: 60C
- Print Speed: 50 mm/s
Evil Grinning Pumpkin
To test the PETG performance, I printed the Evil Grinning Pumpkin from Eastman’s Halloween Pack. For a 0.2 layer height, the print looks great and there’s nothing to complain about. Just constant quality prints one after another.
- Material: Devil Design Dark Orange PETG
- Layer Height: 0.2mm
- Nozzle Temperature: 240C
- Bed Temperature: 70C
- Print Speed: 50 mm/s
Gambit
Finally, I ended my testing with the Gambit bust from Eastman. I expected to have some issues with the cigarette and the cards because I sized the model to 80% but the CR-6 SE managed to print those small features with no issues.
- Material: FilamentOne PLA Glint Blue
- Layer Height: 0.15mm
- Nozzle Temperature: 210C
- Bed Temperature: 60C
- Print Speed: 50 mm/s
Zellae The Witch
- Material: SUNLU Silk Copper PLA
- Layer Height: 0.15mm
- Nozzle Temperature: 210C
- Bed Temperature: 60C
- Print Speed: 45 mm/s
Is the Creality CR-6 SE worth it?
I think the CR-6 SE is a good printer. It’s a bit overpriced in my opinion but not totally unreasonable considering the print quality you get. The whole experience with the printer was excellent and I didn’t encounter any failures with any of my prints.
Leveling was excellent and the CR-6 SE gained my trust where I can just start a print and leave, without having to watch the first layer to make sure it’s fine. Not a lot of printers can consistently do that.
Unfortunately, the performance of the printer is somewhat shadowed by the issues reported online by other owners and I recommend you always keep an eye on the CR-6 SE until you can make sure the printer works well and doesn’t catch on fire.
As with all 3D printers, it’s a good idea to grab a smoke detector and set it next to the printer for extra piece of mind and safety.
You should take all the information from this review and then decide for yourself if the printer is worthy of your hard-earned money. But my experience with the printer was excellent, and I have no reservations of recommending this printer to any kind of user, even to a total beginner.
Where to buy the Creality CR-6 SE?
The Creality CR-6 SE can be bought from the following stores:
AliExpress
Amazon
Banggood
Comgrow
I recommend checking out the Discount Codes page before purchasing. I regularly update the article with discount codes for various online shops, and you might find one for this particular model.
The Creality CR-6 SE was provided free of charge by Banggood for the purpose of this review. While the article includes affiliate links, all opinions are my own. Nobody reviewed the article before it was posted, following the Review Guidelines.
Liked it?
|
|

