How to Install Klipper on Anycubic Vyper: Config and Setup
In this guide I will show you how to Install Klipper on Anycubic Vyper using Mainsail OS. I am in the process of installing Klipper on most of my 3D printers, so I thought it would be nice to document the process for the Vyper too.
What is Klipper?
Klipper is an open-source firmware for your 3D printer that combines the power of a Raspberry Pi and your printer main board for better printer control. By doing this, you are able to run your printer at higher speeds with better precision and control.
Why Install Klipper on Anycubic Vyper?
By installing Klipper on the Anycubic Vyper, you will be able to print faster compared to a stock printer, and you will also be able to control your printer remotely, trough Wi-Fi. The main reason to install Klipper is to use Pressure Advance and Input Shaper, which will greatly improve your print quality and speed.
If you want to learn more about Klipper, check out Nero’s video
Prerequisites
To install Klipper on Anycubic Vyper, you need to have the following:
- Raspberry Pi (any Pi version will work)
- MainsailOS or FluiddPi – In this guide I will use MainsailOS and a Raspberry Pi 4.
- Anycubic Vyper 3D Printer
- Quality Power Supply for your Raspberry Pi
Before you begin

Please note that installing Klipper on the Anycubic Vyper requires some experience with 3D printers and hardware. This is not a trivial task for beginners, and you may break your printer during the process. If you don’t feel comfortable doing this, then keep the stock firmware.
Read the full guide carefully and install Klipper on Anycubic Vyper only after you properly understood all the steps involved. If you have questions before starting, leave a comment and wait for a reply.
I am not responsible for any damage you may cause to your printer by following this guide. You are doing this on your own responsibility.
The configuration file shared in this article, is made for the stock Anycubic Vyper. It’s also worth noting that the stock touchscreen will not work anymore, and you will need to use the WebUI for controlling the printer. If you still want a standalone touchscreen, then I recommend buying a BIQU PI TFT50 and install KlipperScreen.
Install Mainsail or Fluidd
Before we begin, we need to install the web interface for our Klipper setup. I recommend installing MainsailOS because it is actively developed and it’s easy to use, but you can also install Fluidd.
I have written complete instructions on how to install Mainsail OS and Fluidd, so check out one of those articles before moving to the next step. In this guide I will use Mainsail.
The articles also cover the installation of KIAUH which is a handy tool to have when running Klipper.
Prepare and install Klipper firmware for Anycubic Vyper
Configure Klipper for Anycubic Vyper
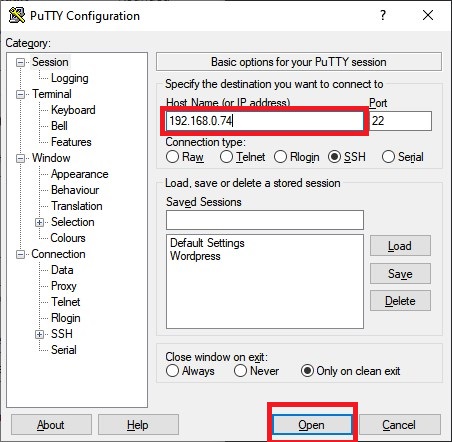
Open Putty, enter the IP of your Raspberry Pi then click Open.
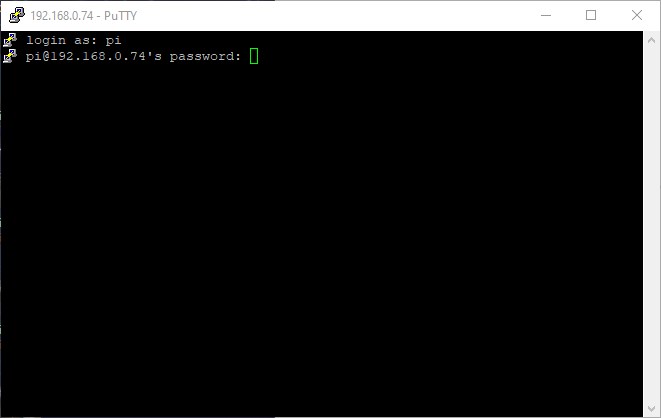
In the Login prompt, you need to enter the credentials for MainsailOS. The default user is pi and the password is raspberry. Please note that the password will not be shown when typing.
Now you are in the SSH console of your MainsailOS install. Enter the Klipper folder:
cd klipperOpen the Klipper Firmware Configuration screen using the following command:
make menuconfigThe Klipper Firmware Configuration screen will appear. Using your navigation keys, move through the menus and replicate the same settings I used.
When finished, press Q then Y to save your configuration. Now run the following command to start building the firmware:
makeThe build process will start and when finished, the firmware will be ready to install. For the Anycubic Vyper, we need to install it from the SD card.
How to flash Klipper firmware on Anycubic Vyper
First, connect via SFTP to your Raspberry Pi. I use WinSCP. Enter the IP, username and password just like you did for Putty, then click on Login.

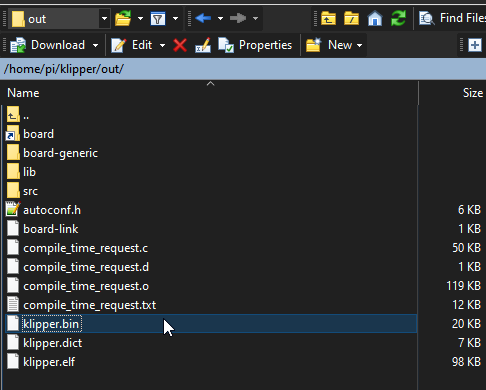
Navigate to /home/pi/klipper/out and copy the klipper.bin file on an SD card.
Rename the file from klipper.bin to main_board_20xxxxxx.bin
Next, plug the SD card in your printer and turn it on. The installation process takes about 10 seconds and you will hear a few beeps. I recommend you wait for a minute, then remove the SD card and restart your printer.
When you are flashing the board firmware, there won’t be any information displayed on the touchscreen. It will be stuck showing the Anycubic logo. Just continue to the next step.
Copy the Anycubic Vyper Klipper config file
To make things easier, I edited a printer.cfg with resources found online for the stock Anycubic Vyper which can be downloaded and copied in Mainsail. You can download the config from here: Anycubic Vyper Klipper Config
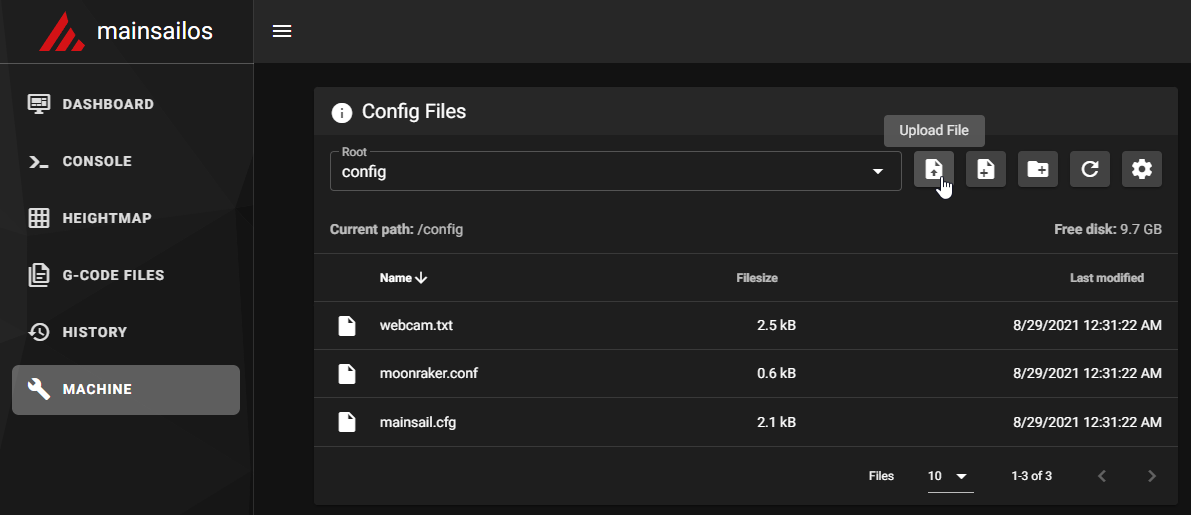
Navigate to Machine, then click on the Upload button.
Connect Klipper to your printer
Finally, you just need to connect Klipper to your printer. This is super easy. You just need to go back on your Mainsail Dashboard, click on the Power button in the top right corner then click on Firmware Restart.
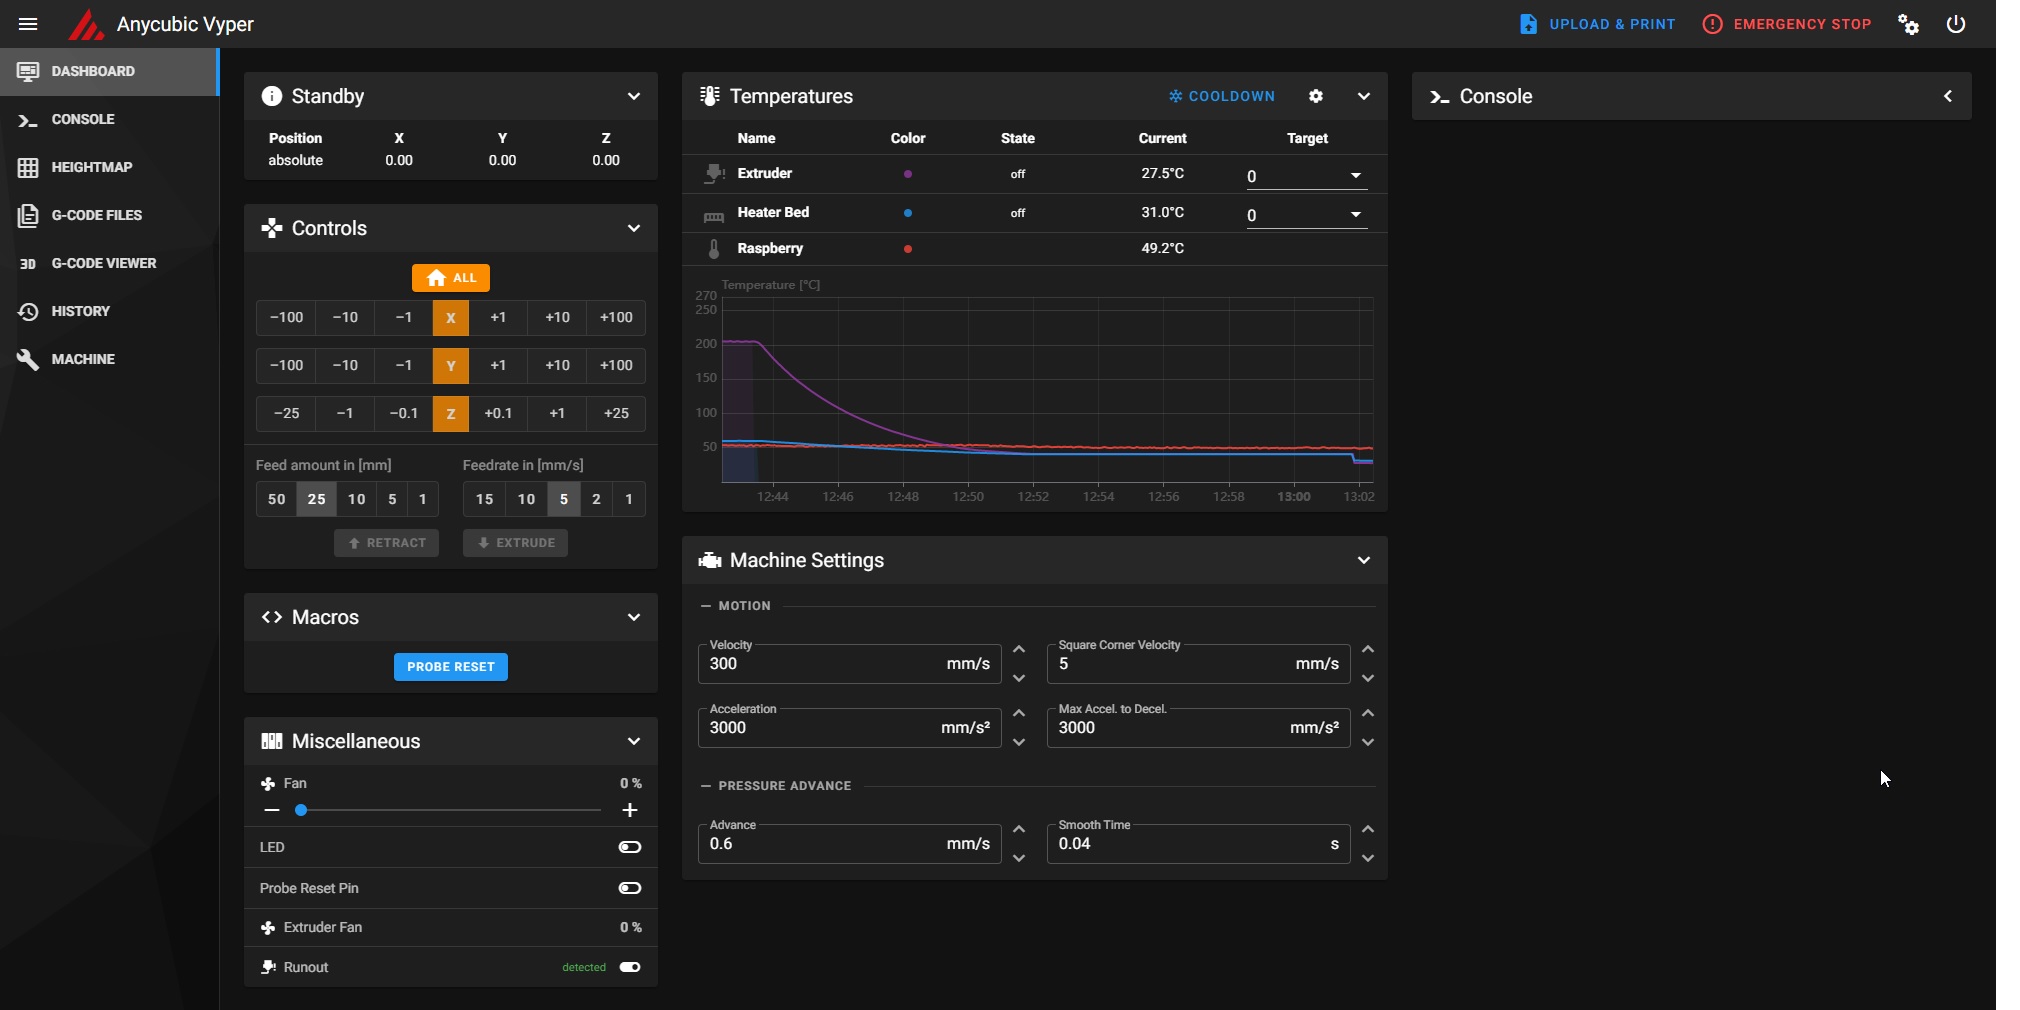
This action will trigger the connection between the Klipper service running on Mainsail and the Vyper firmware we just installed. If all the steps have been followed, then your printer will connect, and you will be greeted by this interface.
Feel free to home the printer first, to make sure everything is running correctly. Heat up the nozzle and heatbed and check if the temperature rises as expected. If everything looks good, I recommend starting the calibration process, for Pressure Advance and Input Shaper.
How to revert to Stock Anycubic Vyper Firmware?
If you decide Klipper is not for you, reverting to the stock firmware is easy. First, download the stock Anycubic Vyper board firmware.
Unzip the contents and copy the .bin file to the SD card.
Plug in the SD card and turn the printer on. This will trigger the board firmware update and the firmware will be flashed. It takes around 30 seconds.
Wrapping up
That’s it! Now you are running Klipper Firmware on your Anycubic Vyper. You should be able to print faster without any loss in print quality.
If you encounter issues during your installation, leave a comment below and I will do my best to help you. Besides that, you can also join the 3DPrintBeginner Forum where there’s a dedicated thread for Klipper Firmware, with Klipper enthusiasts ready to help.
This article was written with the help of various resources online made by other enthusiasts. My config is based on this one. I also recommend checking this GitHub repo for more config files and macros made for Klipper and Anycubic Vyper.
Liked it?
|
|










Hi
I followed your excellent guide to the last letter but I am completely stuck when it comes to printing. I slice in Cura using the Anycubic Vyper printer configuration and a slightly tweaked printing profile (basically just a slightly higher bed temperature to avoid prints coming loose). I just can’t get anything to print in Mainsail though. The file uploads and warms up everything but fails immediately when it supposed to start with error “Move exceeds maximum extrusion…See the ‘’max_extrude_cross_section’ config option for details”. I saw some post online citing issues with start commands but I cannot figure out which one is the issue. Any assistance or guidance would be welcomed. Thanks
Try adding this in the config section
max_extrude_cross_section: 50.0When I get to how to flash kliper to vyper I have no .bin file in the home/out file. Help