How to Install FluiddPi on Raspberry Pi

In this guide I will show you how to install FluiddPi on a Raspberry Pi. I will use a Raspberry Pi Zero because it’s a cheap option for running Klipper but you can follow the same guide for any Raspberry Pi variant.
What is FluiddPi?
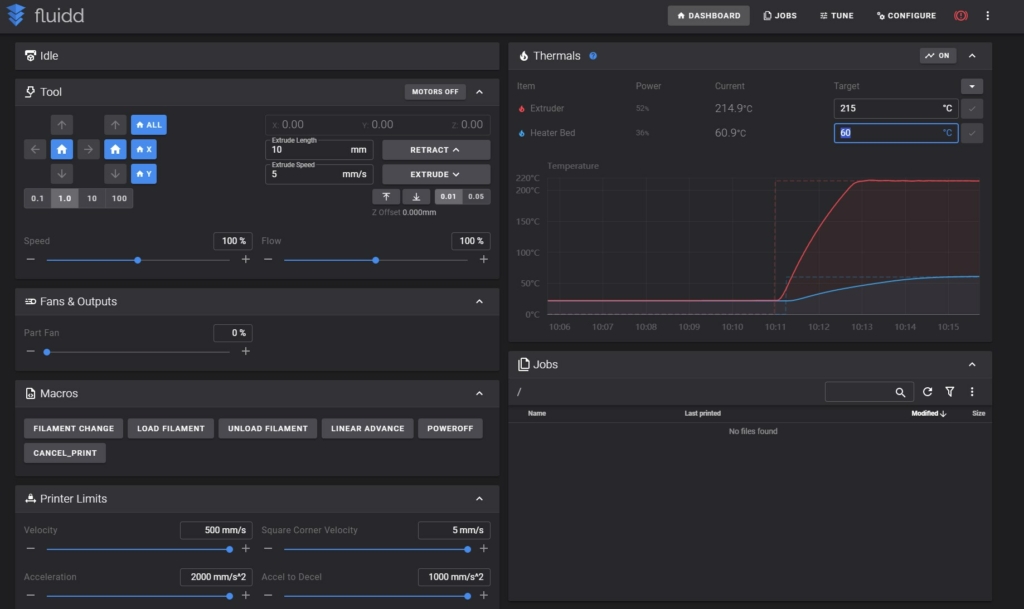
FluiddPi is a Raspbian image similar to MainsailOS which comes with the Fluidd web interface and Klipper already installed. The interface is lightweight and responsive, which means you will be able to use it on your smartphone with ease.
Fluidd allows you to connect and control multiple printers, it has thumbnail support for Prusa Slicer, has automated updates, a bed mesh viewer and camera support.
Prerequisites
- Raspberry Pi
- MicroSD Card – High Speed MicroSD Card is recommended
- Good power supply for the Pi – Any adapter works if it’s capable of delivering at least 2.5 A of power
Install FluiddPi on Raspberry Pi
Flash FluiddPi on the SD Card
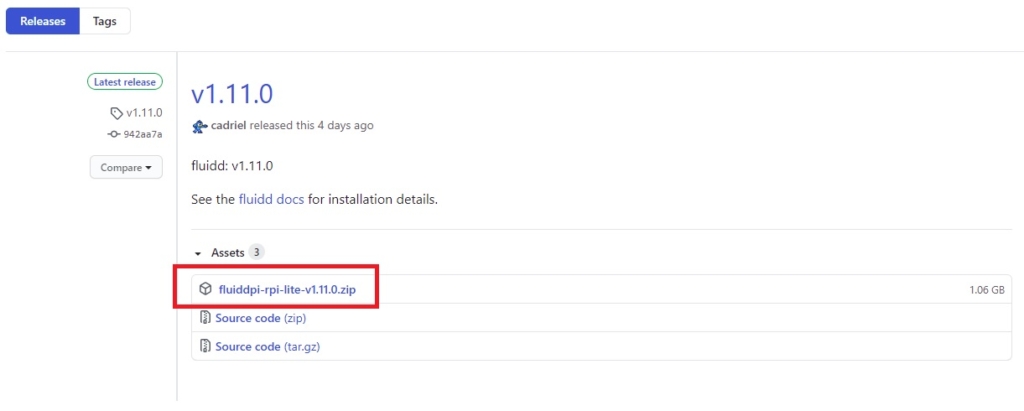
Before we install FluiddPi we need to first download the latest release from Github. At the time of writing this guide, FluiddPi reached V1.11.2.
Download the FluiddPi image then unzip the archive.
Download and install Win32 Disk Imager.
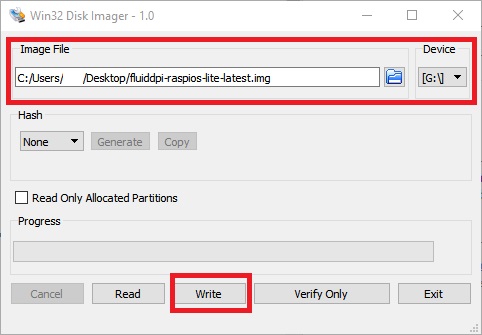
Open Win32 Disk Imager, load the .img file unzipped in previous step and select your SD card drive letter. Click on Write to install FluiddPi on the SD card. This process will take a few minutes, depending on the speed of your SD card.
After the Fluidd image has been flashed, we need to edit the Wi-Fi credentials to auto-connect. You can skip this step if you don’t use a wireless setup.
Set your Wi-Fi credentials
In order to auto-connect the Raspberry Pi to Wi-Fi, we need to edit a file on the SD Card and insert the Wi-Fi credentials.
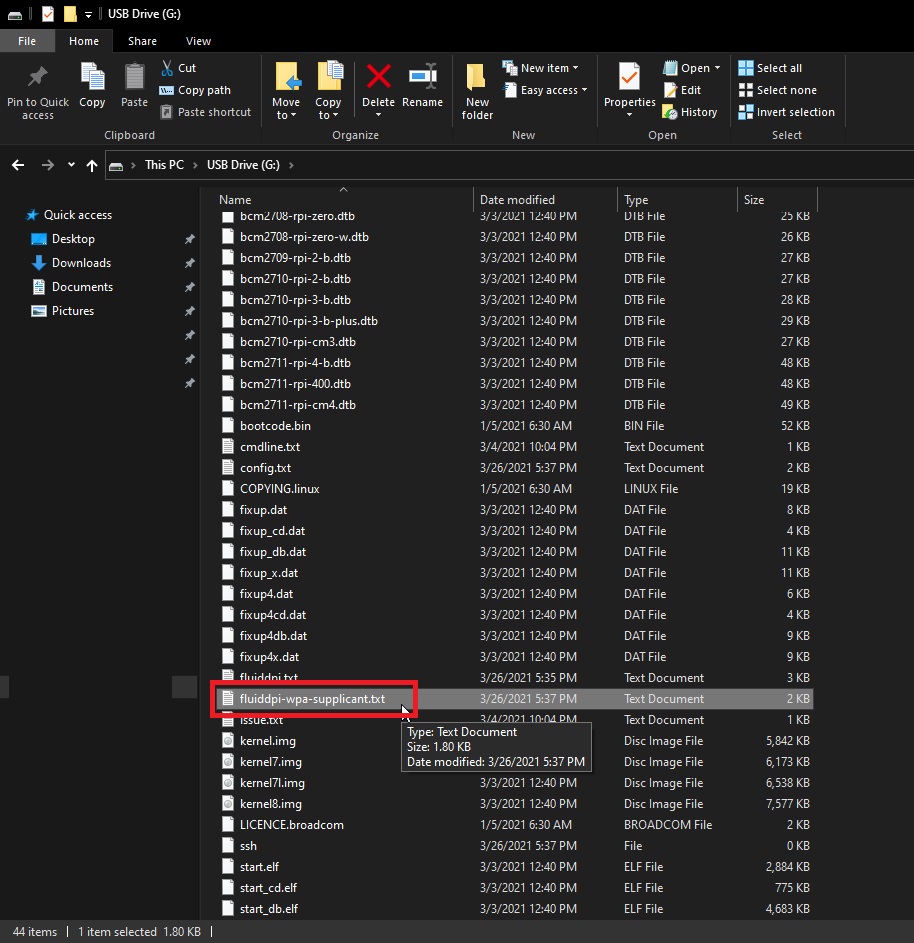
In your explorer window, navigate to the boot partition, and open the fluiddpi-wpa-supplicant.txt file in Notepad / Notepad++ (don’t use other file editors).
In this file, we need to uncomment line 27,28,29 and 30 then enter the Wi-Fi credentials. To do that, remove the “ # ” character in the front of the line.
Next, enter your Wi-Fi name and password.
In this example, my Wi-Fi is named “MyHomeNetwork” and the password is “SuperS3cretP@ssword“
This is how the file looks before entering the Wi-Fi credentials:
This is how the file should look after you entered your Wi-Fi credentials:
Now save the file, and remove the SD Card. Insert it into your Raspberry Pi then start it up. In a few minutes, FluiddPi will boot up and you will be able to access the web interface. If this hyperlink doesn’t open the Mainsail OS web interface for you, find the IP address of your Raspberry Pi.
Find the IP of your FluiddPi Web Interface
In order to connect to your FluiddPi web interface, you first need to find the IP address your Raspberry Pi received from the DHCP server.
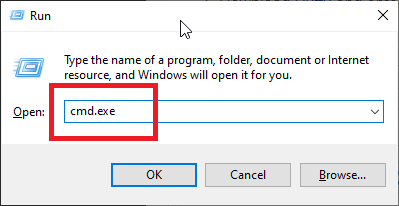
Press Windows Key + R at the same time to open Run. Type cmd.exe then press Enter to open Command Prompt.
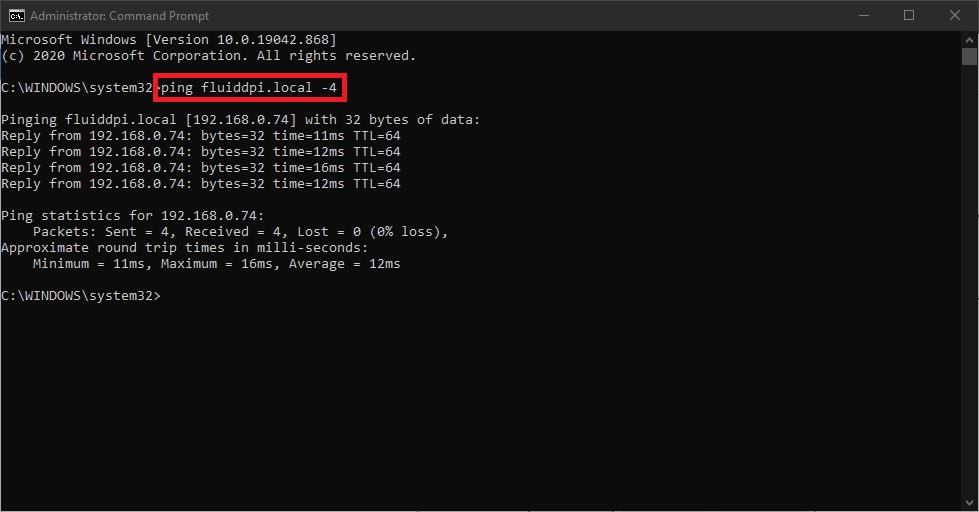
In the Command Prompt window, type ping fluidd.local -4 and press enter. This will return the IP of your Raspberry Pi.
Install KIAUH
Next step would be to install KIAUH which stands for Klipper Installation And Update Helper. It’s an excellent tool which will make the whole Klipper installation process much easier.
To install KIAUH, we fist need to connect via SSH to the Raspberry Pi.
Connect via SSH
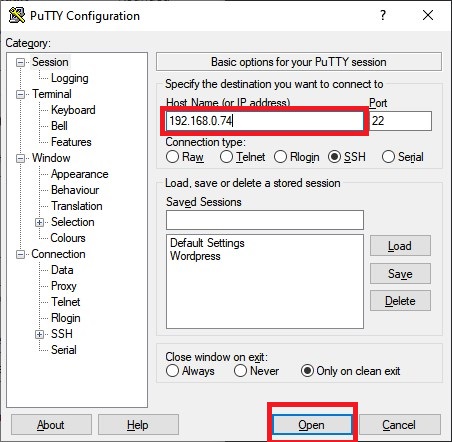
Download Putty, enter the IP of your Raspberry Pi then click Open
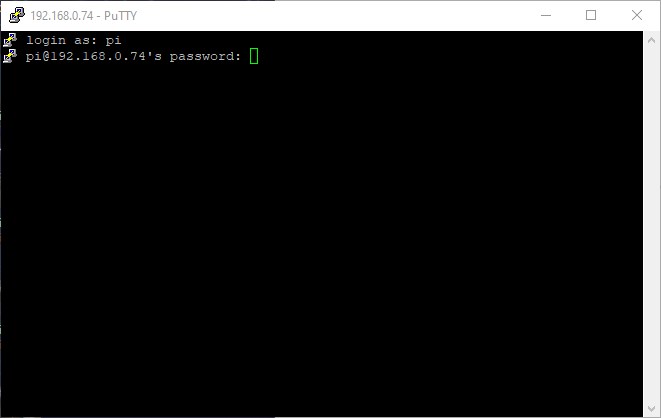
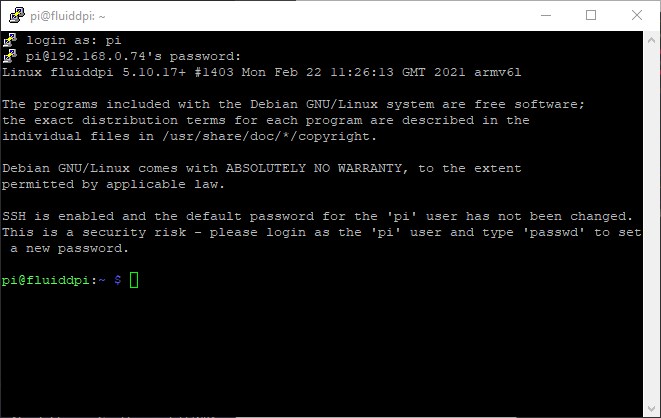
In the Login prompt, you need to enter the credentials for FluiddPi. The default user is pi and the password is raspberry. Please note that the password will not be shown when typing.
Now you are in the SSH console of your FluiddPi install.
Install KIAUH
Clone the git repository for KIAUH with the following command
git clone https://github.com/th33xitus/kiauh.gitAfter the cloning process is complete, navigate to the kiauh folder
cd kiauhSet the proper permissions for all the files in the kiauh scripts folder
chmod +x kiauh.sh scripts/*Finally, run the kiauh.sh installation script
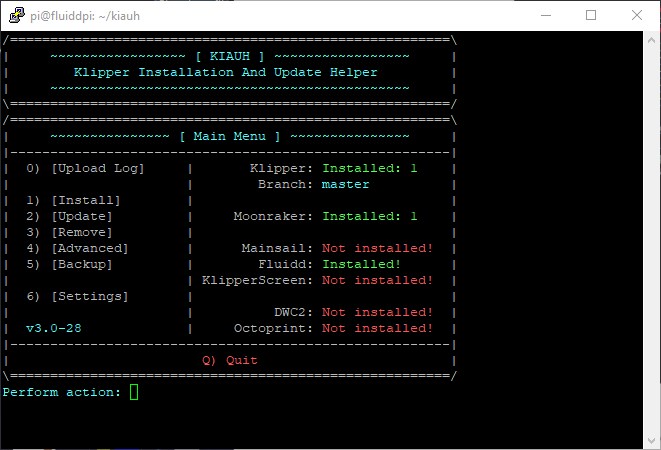
./kiauh.shThe KIAUH GUI will show up, where you can choose to install different packages and services and it’s also possible to update your services. You can use your keyboard to enter your selection.
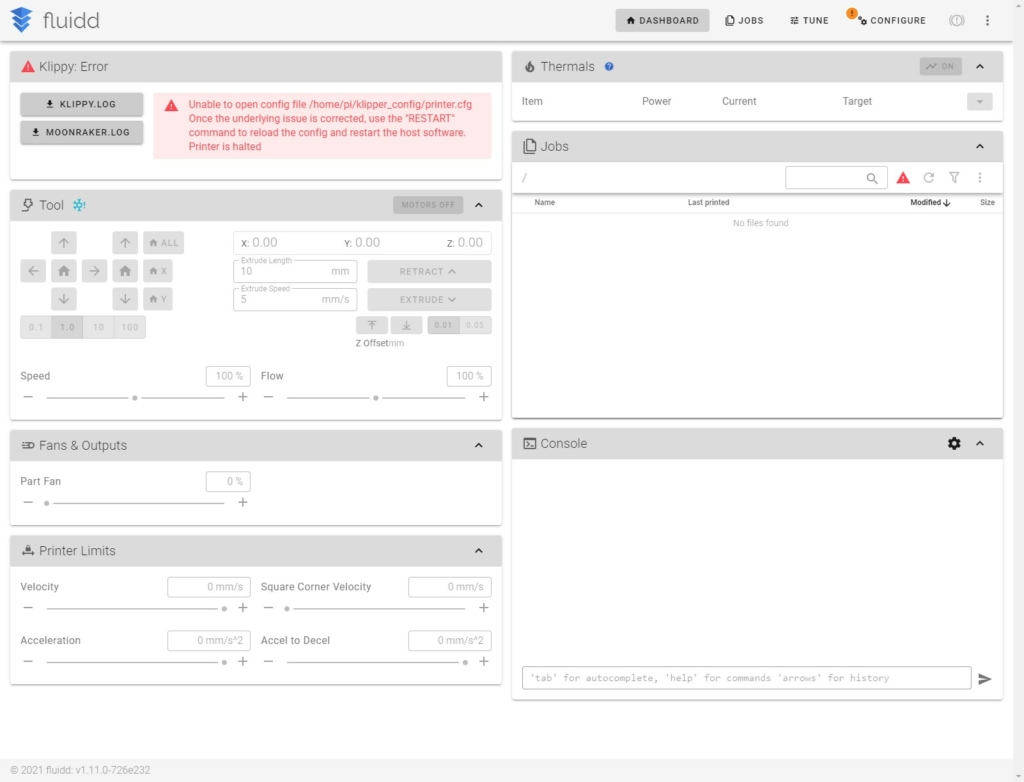
Fluidd interface is now available, and you can navigate to the Fluidd interface and start configuring it.
Wrapping up
With FluiddPi now installed and updated, you can go ahead and upload your configuration file then start the calibration process. You can find configuration files for a few of my printers in the Klipper section of the website.
If you encounter any issues, leave a comment or join the 3DPrintBeginner Forum where there’s a dedicated thread for Klipper Firmware
Liked it?
|
|






Spent the last week trying to install klipper on skr2 a bunch of different way and can not get it to connect to mcu do t know what to do at this point other than go back to marlin lol I would rather not I thought I had a bad board and got octopus board with same results so it has to be something I am doing wrong I can not find any info on this so hopefully you can help
for fluiddpi.local or the Ip address all i get is a 404 error. i can ssh in and the pi is connected to my wifi because i can ssh in and i can see it on my network scanner, just not sure what i need to do. any help would be appreciated.
Hi thank you so much for the tutorial, at the very end of the process I have an error message popping up that says”
Name of section ‘gcode_macro Linear Advance contains illegal whitespace
I’m stuck
Please help
Solved I was using your sample config file , just needed to cancel space between linear (and) advance
And it become LinearAdvance.
Maybe can help someone else
I’m walking through your install now. Thank you for this. I’ve started supporting you on Patreon!
Your link to the local server is wrong however. It should be http://fluiddpi.local/
You have http://mainsailos.local/
Thanks! I edited the guide
The git clone for the KIAUH isn’t working for me. Is there a new one I can use? Or do I even have to use KIAUH?
My understanding is that you don’t need KIAUH anymore with the current FluiddPi image, it can handle updating klipper, moonraker and fluidd as well as OS updates by itself. The exception may be if you want to mange multiple printers.
Hello, I am getting a “An error occured when attempting to lock the volume: Error 5: Access is denied” whenever I try to write the fluiddPi onto the SD card
Run the tool as administrator
Running it as Admin has not worked as well.
I think you need to add, add printer with the IP address through fluid settings menu as when I installed it the fluid screen overlay was not connecting to Moonracker it was just saying force restart.
I thought it was recommended not to use KIAUH anymore with update built into Fluidd and Mainsail.
I don’t think there’s any issue if you update with KIAUH or use the built in updater
Quick questions:
– Would you rather use Mainsail or FluidPi with Klipper ?
– Will you propose a Klipper installation tutorial for the Flsun Q5 ?
Thanks
Fluidd seems a bit more feature rich, so I’d go with this one.
The installation process for the Flsun Q5 should be similar with the KP3S
Thanks for creating these guides. They have been tremendously helpful since I got my Artillery Genius last year.
I just have one quick questions. What firmware and OS would you recommend using on the Pi with the Artillery Genius? I’m a bit lost with so many options out there.
Klipper is quite good, especially for an 8-bit board
Need to fix the directions… In the Command Prompt window, type ping fluidd.local -4 and press enter. This will return the IP of your Raspberry Pi. ping fluidd.local -4 it should say ping fluiddpi.local -4