Install Klipper on Sidewinder X1

The Sidewinder X1 is a capable printer but it’s held back by it’s 8-Bit board. If you Install Klipper on Sidewinder X1, you will be able to print a bit faster. Besides faster printing, it’s much easier to change firmware settings from a single config file.
Without further ado, let’s install Klipper on Sidewinder X1 and take our printer to the next level.
What is Klipper?

Klipper is an open-source firmware for your 3D printer that combines the power of a Raspberry Pi and your printer main board for better printer control. By doing this, You are able to run your printer at higher speeds with better precision and control.
Why Install Klipper on Sidewinder X1?
The main reason why you would want to install Klipper on Sidewinder X1 is to print faster. The Sidewinder X1 uses a MKS GEN L board which has an 8-bit CPU. This can be a limiting factor when printing fast, especially on round models.
Klipper tries to solve this by taking the load of processing the G-Code to the Raspberry Pi. That way, the Pi turns into the main processing unit, and the printer just receives the processed code then moves accordingly. The printer won’t be slowed down anymore because of slow G-core interpretation.
After you install Klipper on Sidewinder X1, there’s also the added benefit of being able to edit the firmware without the need of re-compiling and flashing the firmware. All configuration settings are located in a simple config file which can be edited.
If you want to see more features offered by Klipper, you can head over to the Klipper3D website.
Prerequisites
In order to install Klipper on Sidewinder X1, you need to have the following:
- Octoprint installed on a Raspberry Pi (Preferably a Pi 3B or higher but any Linux PC will also work)
- Stock Sidewinder X1 (running the MKS Gen L stock board)
Before you begin

Please note that in order to install Klipper on Sidewinder X1 you need some experience with 3D printers and hardware. This is not a trivial task for beginners and you may break your printer during the process.
Read the full guide carefully and install Klipper on Sidewinder X1 only after you properly understood all the steps involved. If you have questions before starting, leave a comment and wait for a reply.
I am not responsible for any damage you may cause to your printer by following this guide. You are doing this on your own responsibility.
Also, please keep in mind that the stock screen will not work with Klipper and you are limited to using the Octoprint interface exclusively.
Install Klipper on Raspberry Pi
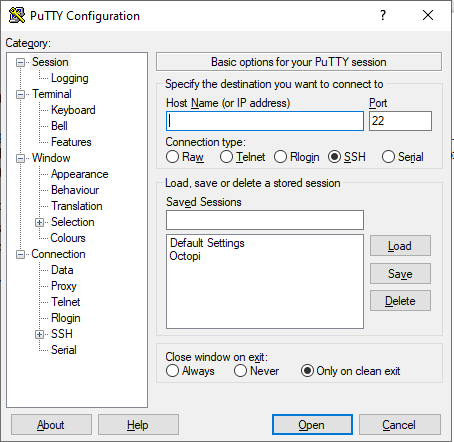
1. Login to your Octopi using your SSH client. I’m using Putty here:
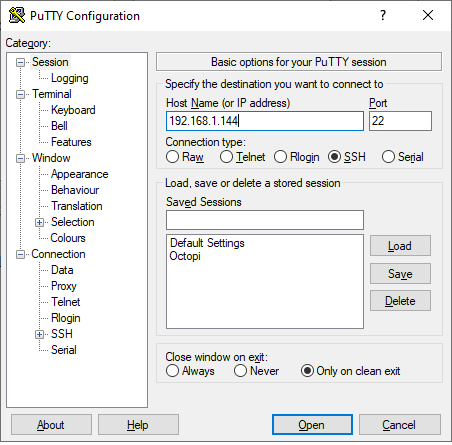
2. In the host name field, type the IP of your Octopi
3. Click the Open button. From here, you will be prompted for the user and password. The defaults for Octopi are:
- Username: pi
- Password: raspberry. Please note that nothing will show as you type the password into this field
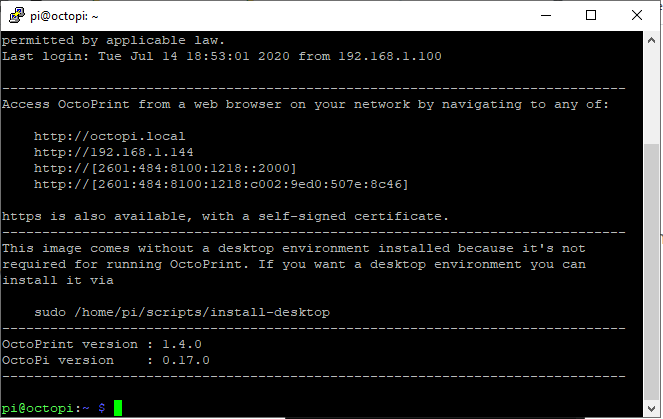
Once logged in, You will be greeted with this screen:
5. We will begin installing Klipper host software. First, We clone the Klipper github. Paste the following into the terminal by right clicking the terminal then press enter:
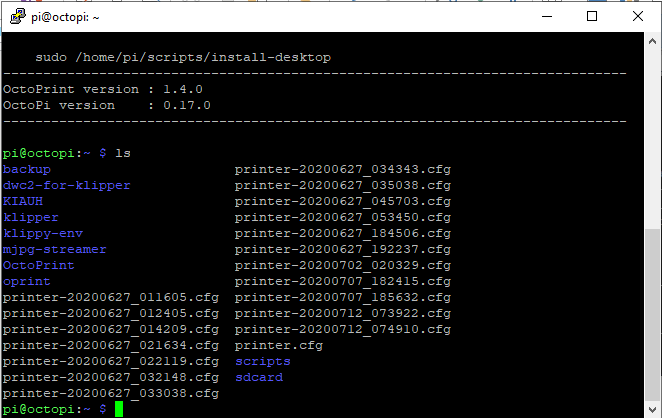
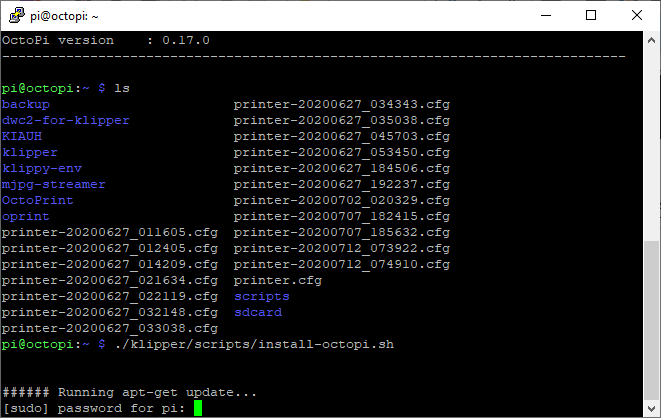
git clone https://github.com/KevinOConnor/klipperOnce Done, You will have a Klipper folder in the home folder. You can check this by typing “ls” in the terminal:
It’s fine if you don’t have every folder and file as I do. These are just backup configuration files. The next step is to install Klipper from the downloaded Klipper folder. To do this, run the following command by copying and right clicking into the terminal:
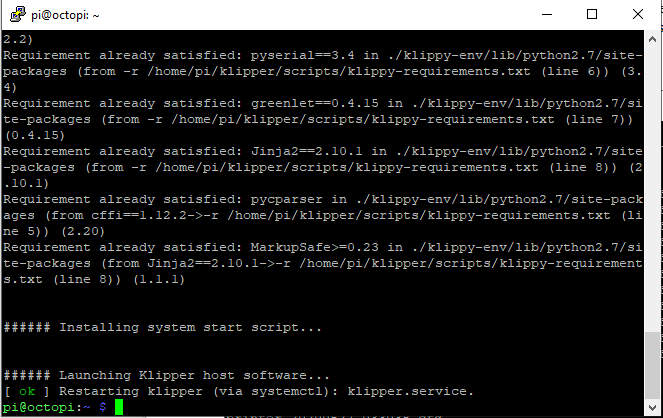
./klipper/scripts/install-octopi.shYou will be asked for a password as showing in the following picture. The password is the same password you used to login to the pi: raspberry. Type that in and press enter to continue. Allow the command to finish. This takes some time.
Once Finished, Your terminal should say starting Klipper:
Klipper is now installed on the pi host!
Build the Klipper Firmware
The next step is to install Klipper on the mainboard. To do this, enter the following into the terminal and press enter after each command:
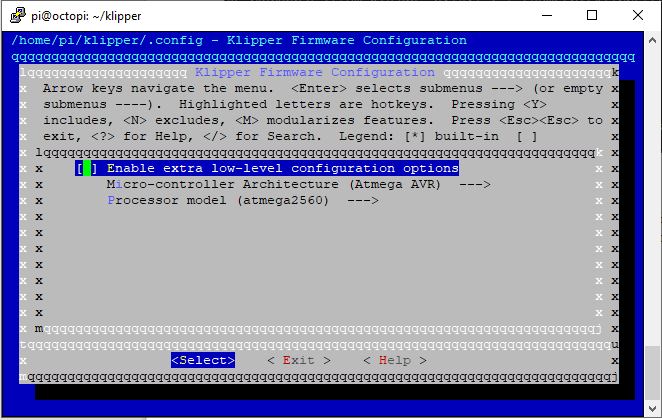
cd ~/klipper/ make menuconfigAfter these commands, You will be greeted with the following:
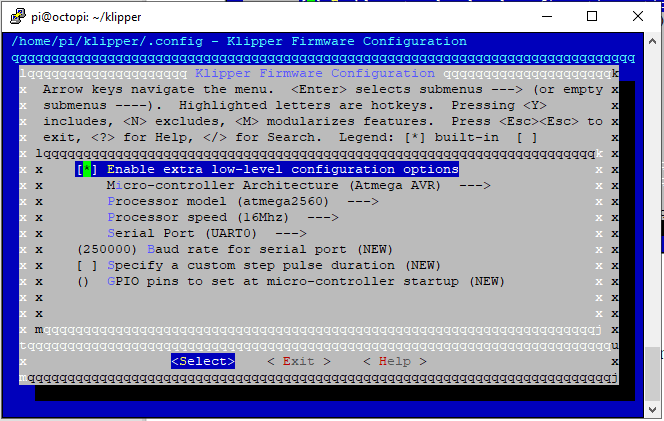
Make sure the “Enable extra low-level configuration options” is highlighted and press the space bar to enable it:
The Sidewinder X1 uses an MKS GEN L main board that uses an ATMEGA2560 @ 16Mhz. These options need to be selected in this menu. Select each line using the arrow keys and press enter to change them. Make sure they match the settings in the picture above. Leave the rest of the settings alone. After the settings are changed, select < Exit > to finish the configuration. It will ask you if you want to save the settings. Press enter on <Yes>.
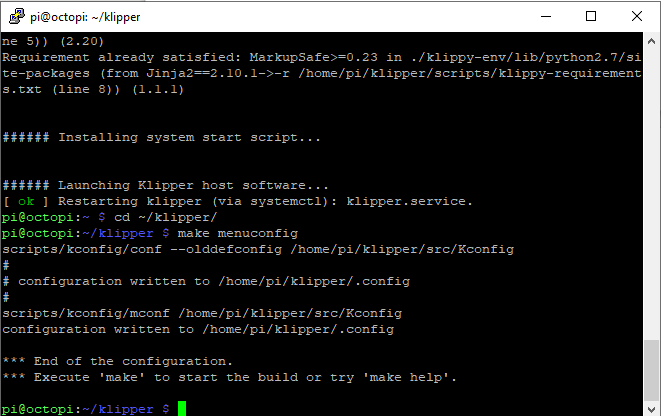
This will return you to the terminal as shown in the following:
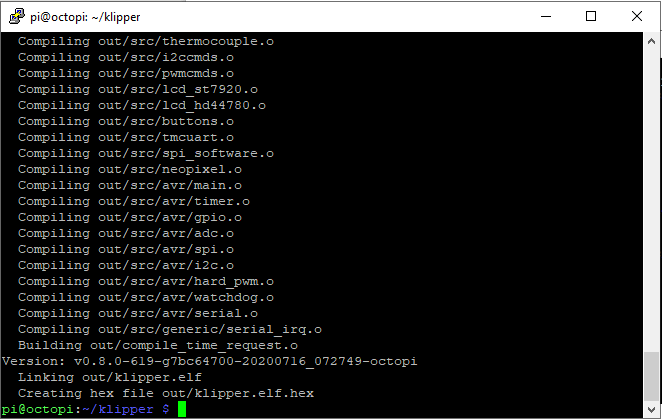
Now type “make” and press enter to compile the firmware file and generate the firmware image. Once finished, you will be left with the following:
Flash Klipper to the Mainboard
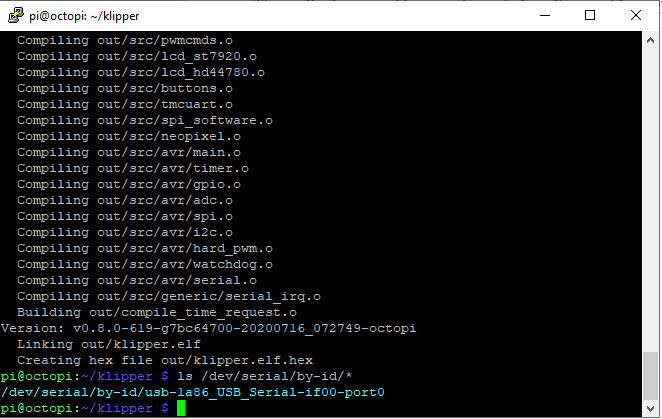
The first thing we need to do is get the serial port that the printer is connected to. To do this, make sure your printer is plugged in and paste the following command into terminal, then press enter:
ls /dev/serial/by-id/*This will return an address as shown below. You need to copy and save this address somewhere as it will be needed at a later point
To copy the ID, highlight the address, press CTRL+C and then in a text editor press CTRL-V. For example, here is my printers serial address:
dev/serial/by-id/usb-1a86_USB_Serial-if00-port0Next, stop the Klipper service by running the following command:
sudo service klipper stopFlash the firmware to the board:
make flash FLASH_DEVICE=”your_address”Make sure the change “your address” to the address you saved earlier. For example:
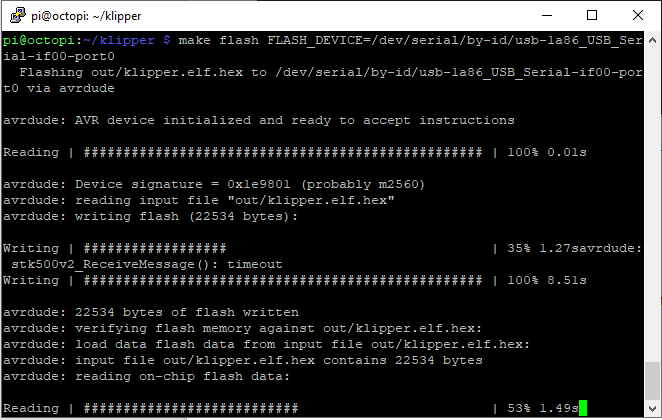
make flash FLASH_DEVICE=/dev/serial/by-id/usb-1a86_USB_Serial-if00-port0This is what you will see as it is flashing.
After the flash process is finished, we can start the Klipper service with the following command:
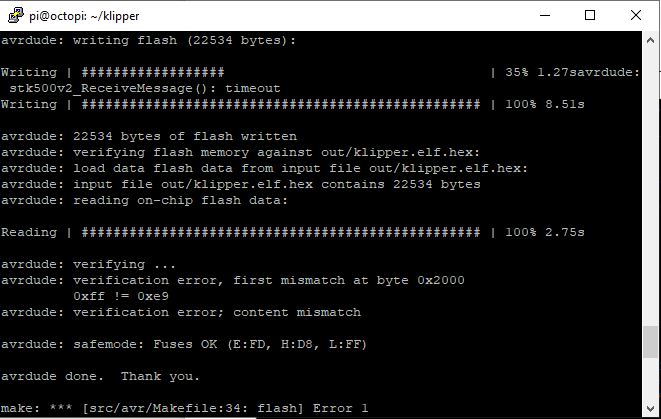
sudo service klipper startIf you get an error like this, make sure your TFT is unplugged then re-run the flash command to fix it:
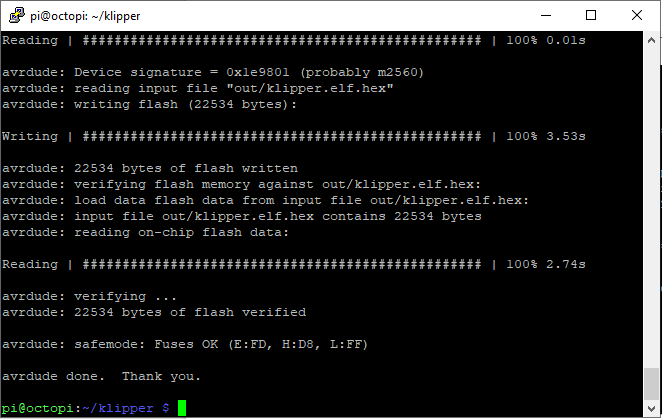
Once the flash is complete, you will see this in your terminal:
Congrats! You now have successfully managed to Install Klipper on Sidewinder X1 and the Pi!
Configuring Octoprint
The hard part is over! Next step is to configure Octoprint to use Klipper.
The OctoPrint web server needs to be configured to communicate with the Klipper host software. Using a web browser, login to the OctoPrint web page and then configure the following items:
Navigate to the Settings tab (the wrench icon at the top of the page). Under “Serial Connection” in “Additional serial ports” add “/tmp/printer”. Then click “Save”.
Enter the Settings tab again and under “Serial Connection” change the “Serial Port” setting to “/tmp/printer”.
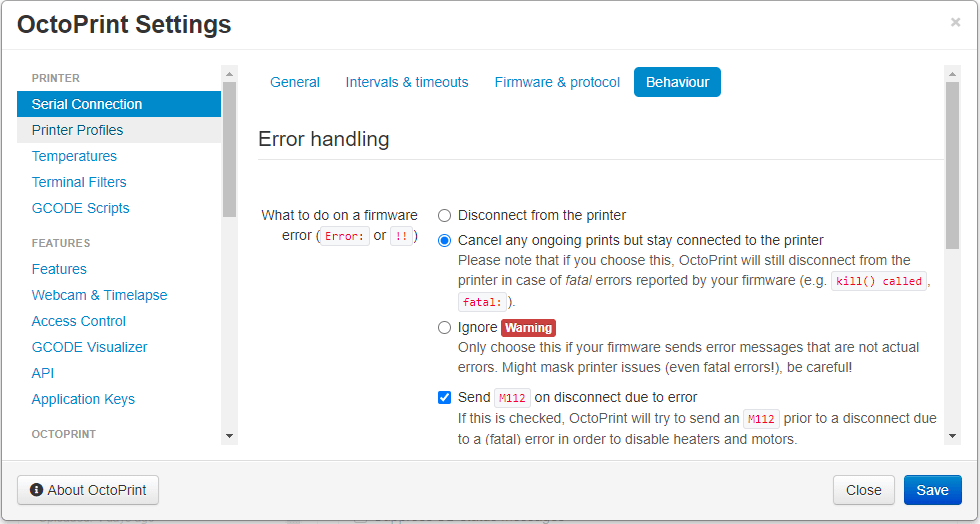
In the Settings tab, navigate to the “Behavior” sub-tab and select the “Cancel any ongoing prints but stay connected to the printer” option. Click “Save”.
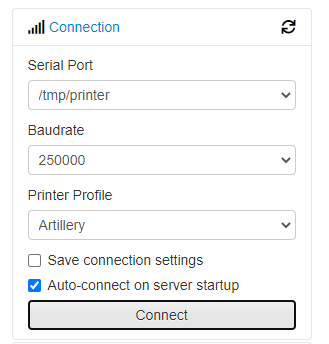
From the main page, under the “Connection” section (at the top left of the page) make sure the “Serial Port” is set to “/tmp/printer” and click “Connect”.
(If “/tmp/printer” is not an available selection then try reloading the page.)
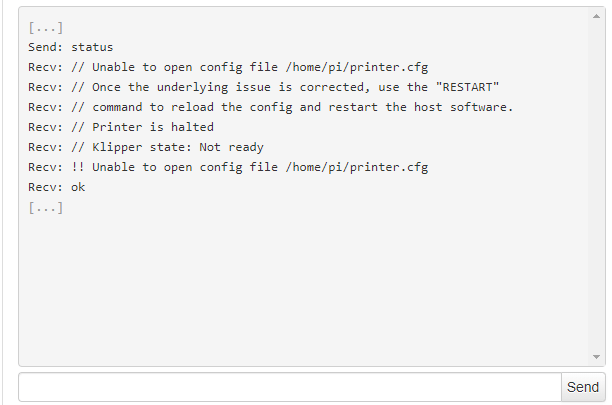
Once connected, navigate to the “Terminal” tab and type “status” (without the quotes) into the command entry box then click “Send”. The terminal window will likely report there is an error opening the config file – that means OctoPrint is successfully communicating with Klipper.
Installing OctoKlipper Plugin
Navigate to the Settings section and in the left menu, click Plugin Manager.
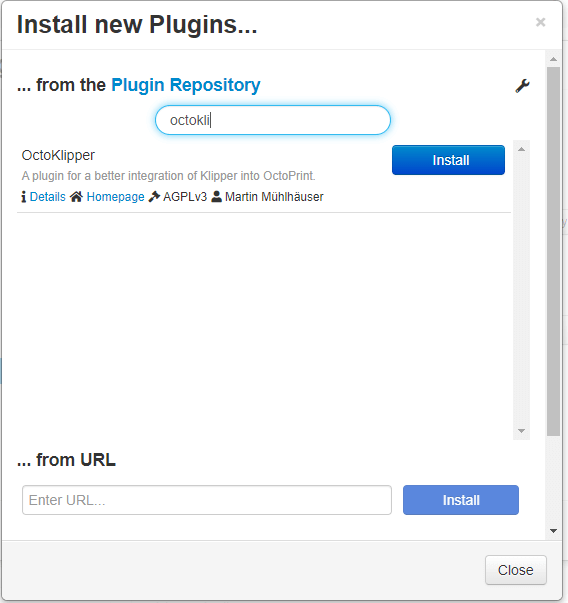
Click Get More and the search for OctoKlipper
Click Install and wait for the process to finish.
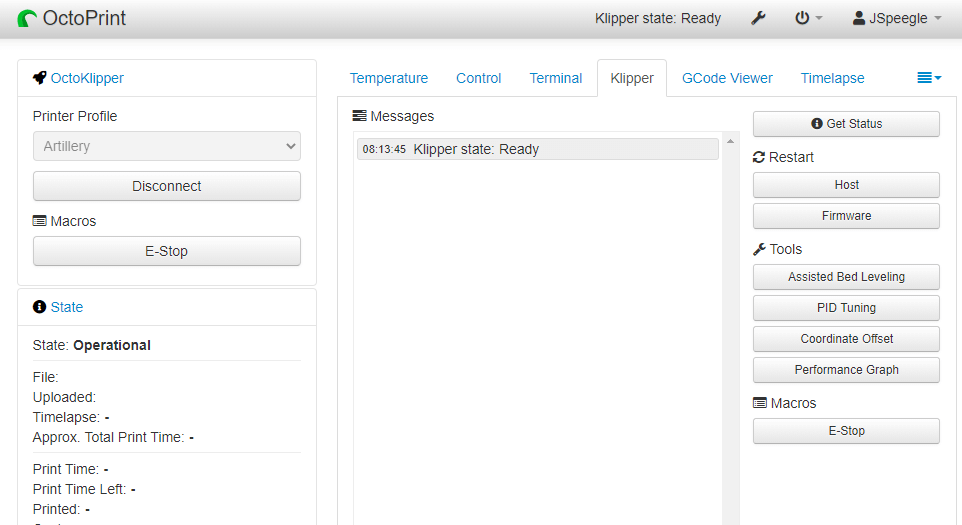
You will be required to restart Octoprint. Click the Restart Now button, then click Proceed. Octoprint will restart loading OctoKlipper which will automatically connect to your printer.
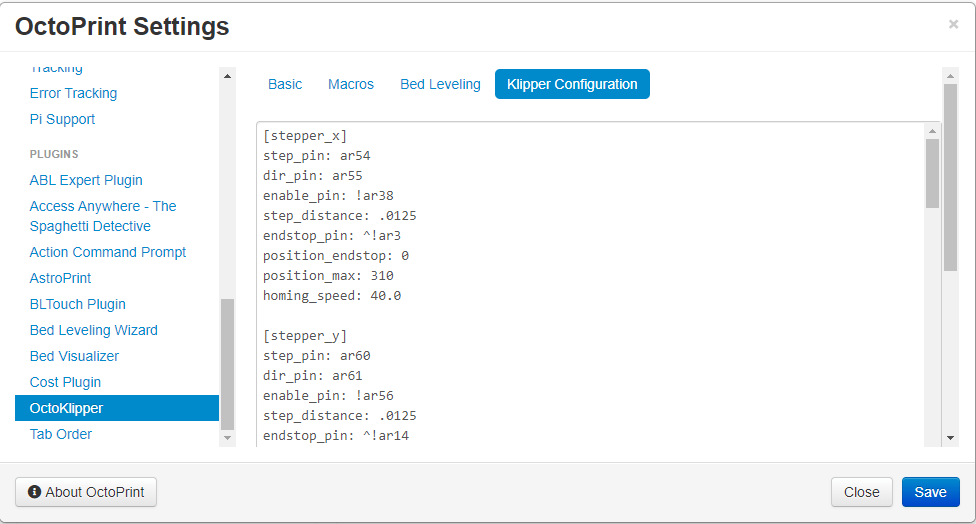
With OctoKlipper installed, you can open the settings tab, click Octoklipper and change the Klipper configuration
Here you will see I have my configuration already loaded into OctoKlipper. You will have a blank box here where you need to paste your printer config info. You can either make your own or you can head over to my Github and download the SideWinder X1 Stock.cfg for your stock printer. If your printer has a BLTouch, or the Z endstop ABL mod, then grab the configuration file accordingly.
Open that file with your favorite text editor (ex: Notepad++) , Copy the contents and then paste them into OctoKlipper where you have the empty white box.
Inside the Klipper Configuration, look for [mcu] and past your device ID. It’s the same we use when flashing the printer.
Example:
[mcu]
serial: /dev/serial/by-id/usb-1a86_USB_Serial-if00-port0
pin_map: arduino
After editing the device ID, click on Save.
Navigate back to the Octoprint terminal and run the FIRMWARE_RESTART command to restart the printer firmware and load the new config file.
Congrats!
You managed to Install Klipper on Sidewinder X1!
Now the next step is to… Well print! :D. There is much more to Klipper that you can do. If you’d like to talk more about Klipper, find me on the 3DPrintBeginner Discord Klipper thread and the Artillery Discord. My username is Clank.
Happy Printing!
This is a guest post made by Clank, an awesome member of the 3DPrintBeginner Discord Server. If you also want to contribute with information, send me an email.
Liked it?
|
|

