How to Install MainsailOS on Raspberry Pi
In this article, I will show you how to install MainsailOS on Raspberry Pi and upgrade it to the latest version. Mainsail V1.0.0 just launched and I think it’s a good opportunity to use it now as a main interface for Klipper.
What is MainsailOS?
MainsailOS is a Raspbian image customized to be as lightweight as possible, while also having most of the required services already installed. This means that you won’t have to install Klipper or other services manually because they come already installed and configured.
As the name implies, Mainsail is the default web interface used to control Klipper. It’s quite similar to the RepRapFirmware web interface, but with functionality added specifically for Klipper.
All you have to do after installing MainsailOS is to load the correct config file for your 3D printer, then start the calibrations.
Prerequisites
- Raspberry Pi – It works on any Pi, even on a Raspberry Pi Zero.
- MicroSD Card – High Speed MicroSD Card is recommended
- Good power supply for the Pi – Any adapter works if it’s capable of delivering at least 2.5 A of power
Install MainsailOS on Raspberry Pi
Flash Mainsail OS on the SD Card
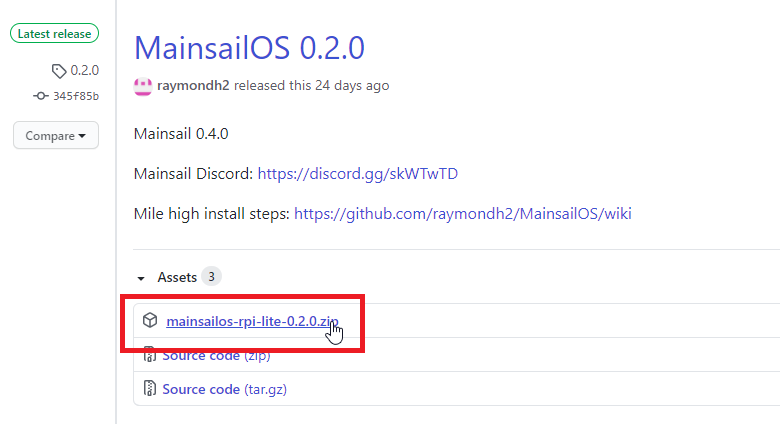
Before we install MainsailOS we need to first download the latest release from Github. At the time of writing this guide, MainsailOS reached V0.2.0.
Download the MainsailOS image then unzip the archive.
Download and install Win32 Disk Imager.
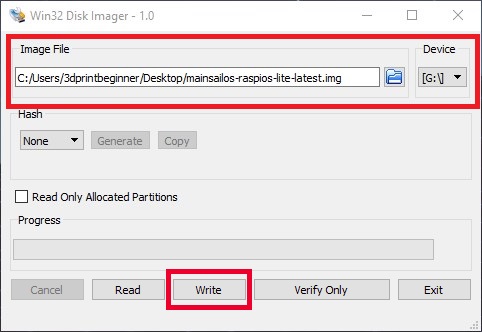
Open Win32 Disk Imager, load the .img file unzipped in previous step and select your SD card drive letter. Click on Write to begin installing MainsailOS on the SD card. This process will take a few minutes, depending on the speed of your SD card.
After the Mainsail OS image has been flashed, we need to edit the Wi-Fi credentials to auto-connect. You can skip this step if you don’t use a wireless setup.
Set your Wi-Fi credentials
In order to auto-connect the Raspberry Pi to Wi-Fi, we need to edit a file on the SD Card and insert the Wi-Fi credentials.
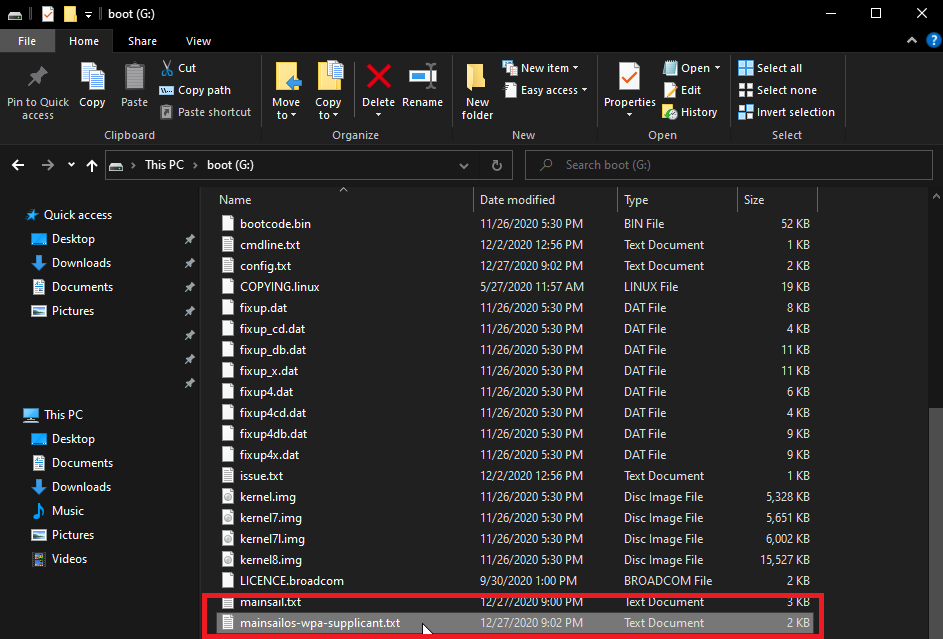
In your explorer window, navigate to the boot partition, and open the mainsailos-wpa-supplicant.txt file in Notepad / Notepad++ (don’t use other file editors).
In this file, we need to uncomment line 27,28,29 and 30 then enter the Wi-Fi credentials. To do that, remove the “ # ” character in the front of the line.
Next, enter your Wi-Fi name and password.
In this example, my Wi-Fi is named “MyHomeNetwork” and the password is “SuperS3cretP@ssword“
This is how the file looks before entering the Wi-Fi credentials:
This is how the file should look after you entered your Wi-Fi credentials:
Now save the file, and remove the SD Card. Insert it into your Raspberry Pi then start it up. In a few minutes, MainsailOS will boot up and you will be able to access the web interface. If this hyperlink doesn’t open the Mainsail OS web interface for you, find the IP address of your Raspberry Pi.
Find the IP of your MainsailOS Web Interface
In order to connect to your MainsailOS web interface, you first need to find the IP address your Raspberry Pi received from the DHCP server.
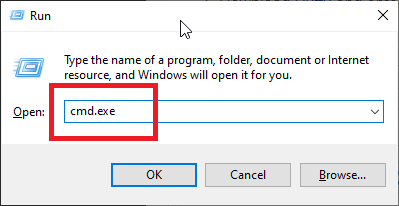
Press Windows Key + R at the same time to open Run. Type cmd.exe then press Enter to open Command Prompt.
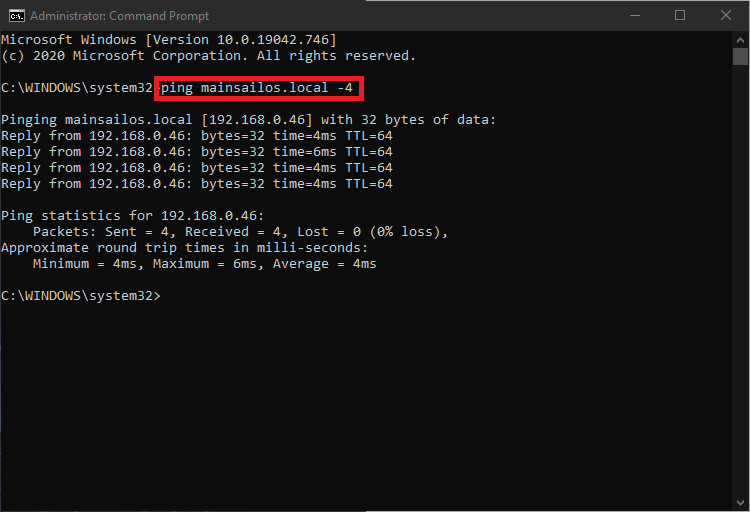
In the Command Prompt window, type ping mainsailos.local -4 and press enter. This will return the IP of your Raspberry Pi.
Install KIAUH
Next step would be to install KIAUH which stands for Klipper Installation And Update Helper. It’s an excellent tool which will make the whole Klipper installation process much easier.
To install KIAUH, we fist need to connect via SSH to the Raspberry Pi.
Connect via SSH
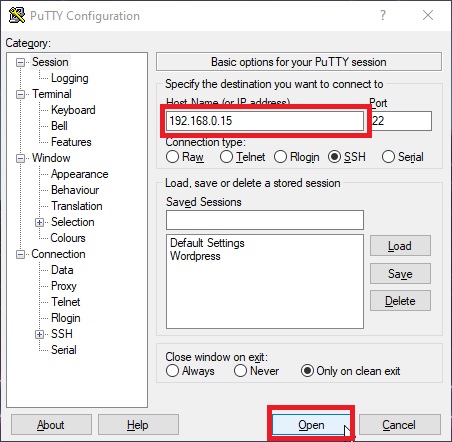
Download Putty , enter the IP of your Raspberry Pi then click Open
The servers’ SSH fingerprint prompt will show up. Click on Yes.
In the Login prompt, you need to enter the credentials for MainsailOS. The default user is pi and the password is raspberry. Please note that the password will not be shown when typing.
Now you are in the SSH console of your MainsailOS install.
Install KIAUH
Clone the git repository for KIAUH with the following command
git clone https://github.com/th33xitus/kiauh.gitAfter the cloning process is complete, navigate to the kiauh folder
cd kiauhSet the proper permissions for all the files in the kiauh scripts folder
chmod +x kiauh.sh scripts/*Finally, run the kiauh.sh installation script
./kiauh.shThe KIAUH GUI will show up, where you can choose to install different packages and services. You can use your keyboard to enter your selection.
Update MainsailOS Packages
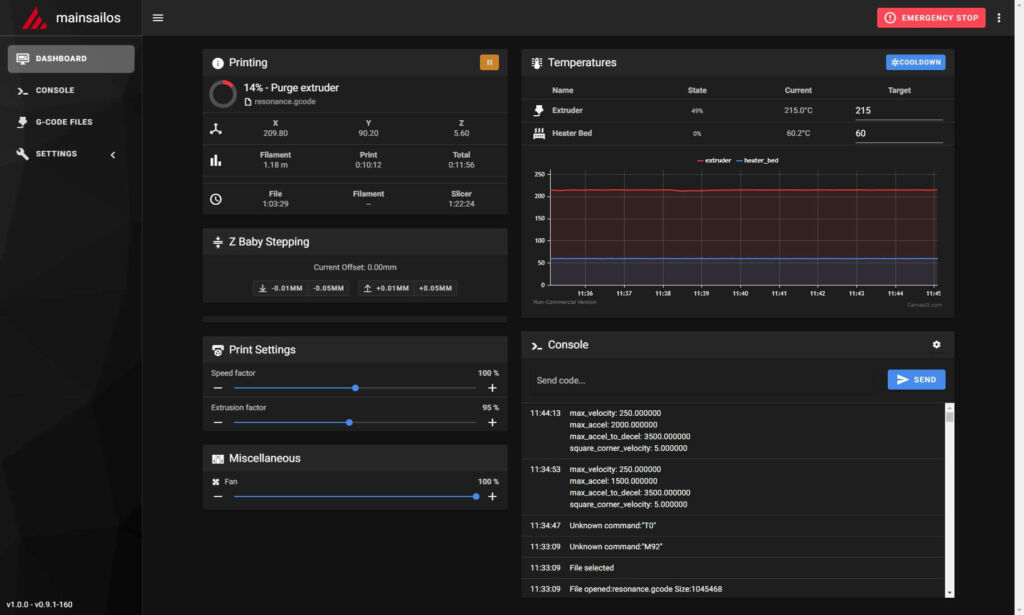
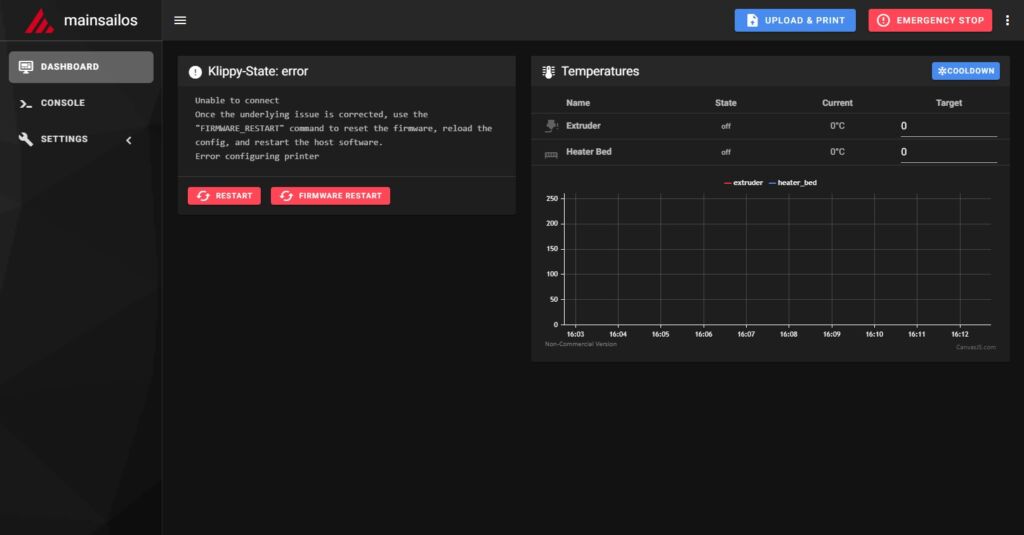
If you followed the steps correctly, then you can now open the MainsailOS web interface, and you will be greeted by this screen.
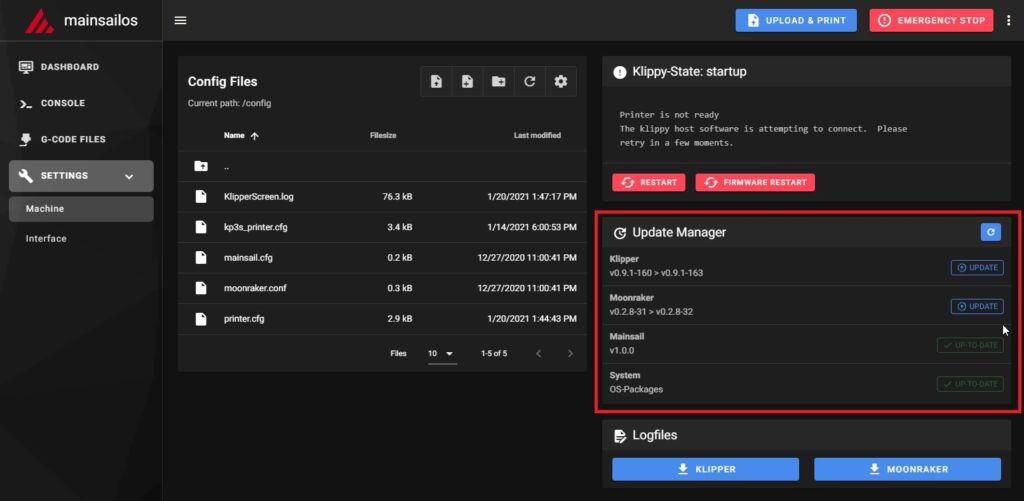
I recommend starting to update all the packages to make sure you are running the latest and greatest for Klipper. This can be performed from the Settings tab.
Upgrading the packages is as easy as clicking any of the update buttons when they are available, then waiting for the process to complete.
Wrapping up
With MainsailOS now installed and updated, you can go ahead and upload your configuration file then start the calibration process. You can find configuration files for a few of my printers in the Klipper section of the website.
If you encounter any issues, leave a comment, or join the 3DPrintBeginner Forum where there’s a dedicated thread for Klipper Firmware, with Klipper enthusiasts ready to help.
Liked it?
|
|









This guide needs an update in regards of “picking the right MainsailOS version”. A lot has changed in the way the Mainsail team presents their software since V0.2. We are at version 1.1.0 as I write this comment and there is not a single file ending on .img but instead we have
2023-03-18-MainsailOS-1.1.0-raspberry-rpi64.img.xz
2023-03-18-MainsailOS-1.1.0-raspberry-rpi64.img.xz.sha256
2023-03-18-MainsailOS-1.1.0-raspberry-rpi64.json
I found a solution on how to upload/compile MainsailOS V1.1.0
You need to get the “Raspberry Pi Imager” and an 8GB MicroSD card.
Once installed, start the imager and plug in the MicroSD card to your PC/Laptop.
Under Operationsystem select “Other specific-purpose OS” > 3D Printing > Mainsail OS > Matching bitrate version for your Pi’s CPU
Next step is to select the SD card as on your machine as installation destination.
Hit write and wait for the process to finish.
Now all you need is to do is to insert the SD card in to your Pi, connect it to it’s power source and wait for it to finish installing the files from the card. This is either indicated by flashing LEDs or a different colored LED than your Power LED, depending on the version of Pi your are using.
Hello!
I tried to flash MainsailOS 1.0.1 on my Raspberry 4B 8GB Ram (I used Raspberry PI Imager V1.7.3) and after insertinf the card in the Raspberry PI it starts to install the OS but after about 20-30 sec the cooler stops and the display and cooler of the raspberry PI turns off (no failure is shown untill it crashes)…
I tried both versions 64 bit and then 32 bit…
PS: The PI is runing perfectly with OCTOPI…
What do you think it coud be?
PSS: I get the same problem with the FLUIDDPI …
Is it possible that the disk imager is the problem? I am using a MacBook if this is of any help.
Thank You!
Which latest release variant of MainsailOS should be downloaded? I can see that they all contain the ‘img’ but they also have ‘sha256’, ‘xyz’ along with two types of files…..32 and 64.
I have an RPi 16g, a BTT PI TFT70 and an Ender-3 S1 Pro. How do I choose which file?
Also, according to the Mainsail site they recommend utilizing RPi Imager instead of your recommended Win32 Disk Imager.
Your help would be greatly appreciated!!
I’ve figured it out on my own….
How about you sahre your knowledge with others? I am sitting here, having the exact same problem and now I am thinking “What kind of a duck comes back, saying he figured it out, but doesn’t tell what he did to solve his problem?” xD
hallo, bekomme ein fehler:
C:\Users\***\kiauh>chmod +x kiauh.sh scripts/*
Der Befehl “chmod” ist entweder falsch geschrieben oder
konnte nicht gefunden werden.
What version of MainsailOS do you recommend installing now I see that there are more new versions it is for ender 3 s1
The latest, of course.
You must choose the right country for WIFI
Would you please update this tutorial? There are multiple cases so far that peopel have not been able to get klipper installed because they followed this and its outdated…
For on Kiuah is far from the easiest option right now. Just using mainsail OS or FluiddPi can be installed in 15 minutes and they have updates inside of them. You dont need KIUAH at all anymore.
This article clearly shows how to install Mainsail using MainsailOS. There’s nothing wrong with it.
no they changed how its done, this is no longer accurate
I had problems with Raspberry Pi 4 8 gig not reading the wifi. I did what was suggested in your article.
The only way I got it to work is to add this line to the end of the Wifi section:
scan_ssid=1
It now looks like this:
## WPA.WPA2 secured
network={
ssid=”yourWiFi”
psk=”12345″
scan_ssid=1
}
Just in case someone has the same problem.
Thanks for the information it made installing the OS easy, and it is very informative.
Good to know!
Hi !
could you create the configuration files for the flsun Q5 under Klipper ?
Thanks