How to Install Klipper on Sidewinder X2: Config and Setup
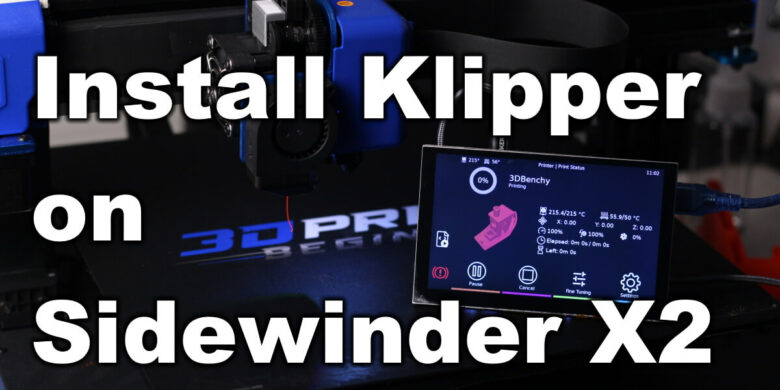
The Sidewinder X2 is quite a capable machine, but it can be even better with Klipper Firmware. In this guide I will show you how to install Klipper on Sidewinder X2 and take advantage of all the benefits it comes with.
What is Klipper?
Klipper is an open-source firmware for your 3D printer that combines the power of a Raspberry Pi and your printer main board for better printer control. By doing this, you are able to run your printer at higher speeds with better precision and control.
Why Install Klipper on Sidewinder X2?
By installing Klipper on the Sidewinder X2, you will be able to print a bit faster compared to a stock printer, and you will also be able to control your printer remotely, trough Wi-Fi. The main reason to install Klipper is to use Pressure Advance and Input Shaper, which will greatly improve your print quality and speed.
If you want to learn more about Klipper, check out Nero’s video
Prerequisites
To install Klipper on Sidewinder X2, you need to have the following:
- Raspberry Pi (any Pi version will work)
- MainsailOS or FluiddPi – In this guide I will use MainsailOS and a Raspberry Pi 4.
- Sidewinder X2 3D Printer
- Quality Power Supply for your Raspberry Pi
Before you begin

Please note that installing Klipper on the Sidewinder X2 requires some experience with 3D printers and hardware. This is not a trivial task for beginners, and you may break your printer during the process. If you don’t feel comfortable doing this, then keep the stock firmware.
Read the full guide carefully and install Klipper on Sidewinder X2 only after you properly understood all the steps involved. If you have questions before starting, leave a comment and wait for a reply.
I am not responsible for any damage you may cause to your printer by following this guide. You are doing this on your own responsibility.
The configuration file shared in this article, is made for the stock Sidewinder X2. It’s also worth noting that the stock touchscreen will not work anymore, and you will need to use the WebUI for controlling the printer. If you still want a standalone touchscreen, then I recommend buying a BIQU PI TFT50 and install KlipperScreen.
Install Mainsail or Fluidd
Before we begin, we need to install the web interface for our Klipper setup. I recommend installing Mainsail because it is actively developed and it’s easy to use, but you can also install Fluidd.
I have written complete instructions on how to install Mainsail OS and Fluidd, so check out one of those articles before moving to the next step. In this guide I will use Mainsail.
The articles also cover the installation of KIAUH which is a handy tool to have when running Klipper.
Prepare and install Klipper firmware for Sidewinder X2
Configure Klipper for Sidewinder X2 with Artillery Ruby 1.2
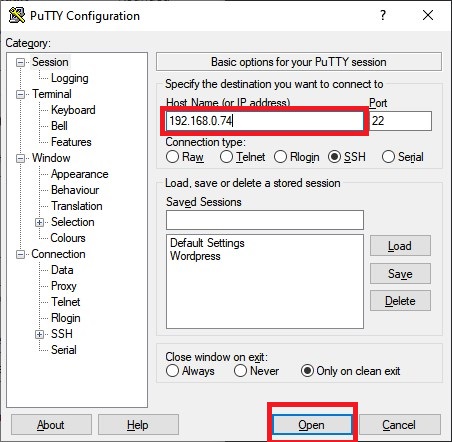
Open Putty, enter the IP of your Raspberry Pi then click Open
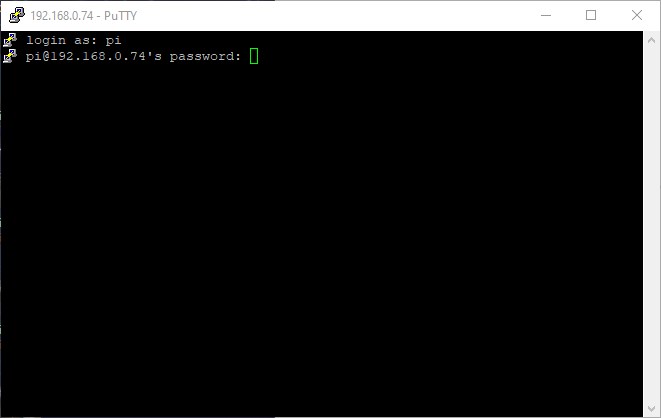
In the Login prompt, you need to enter the credentials for FluiddPi. The default user is pi and the password is raspberry. Please note that the password will not be shown when typing.
Now you are in the SSH console of your FluiddPi install. Enter the Klipper folder:
cd klipperOpen the Klipper Firmware Configuration screen using the following command:
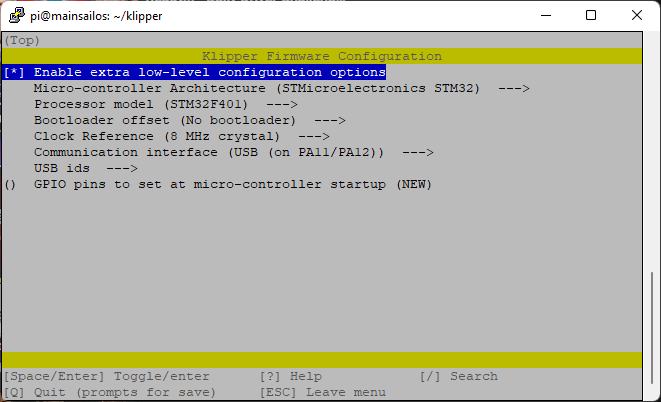
make menuconfigThe Klipper Firmware Configuration screen will appear. Using your navigation keys, move through the menus and replicate the same settings I used.
When finished, press Q then Y to save your configuration. Now run the following command to start building the firmware:
makeThe build process will start and when finished, the firmware will be ready to install.
Put the printer in DFU mode
The Ruby 1.2 board used by the newer Artillery printers need to be put into DFU mode in order to flash the firmware. This is done using the M997 command from a terminal window. I like to use Pronterface, but you can do it via OctoPrint or any other terminal of choice.
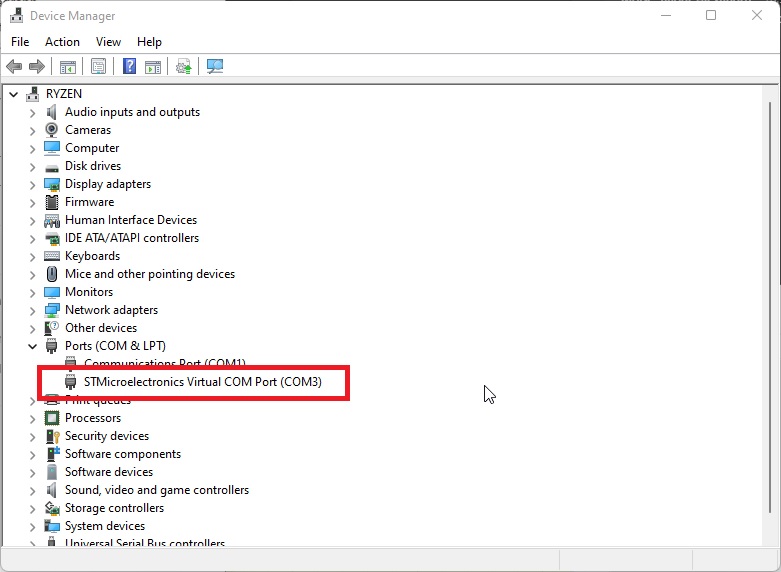
Connect your printer to to the computer via a USB Cable, and check the COM port in Device Manager. In my case, it’s COM3
Open Pronterface, and connect to the printer using the COM port and the 115200 Baud Rate, run the M997 command then proceed to the flashing step.
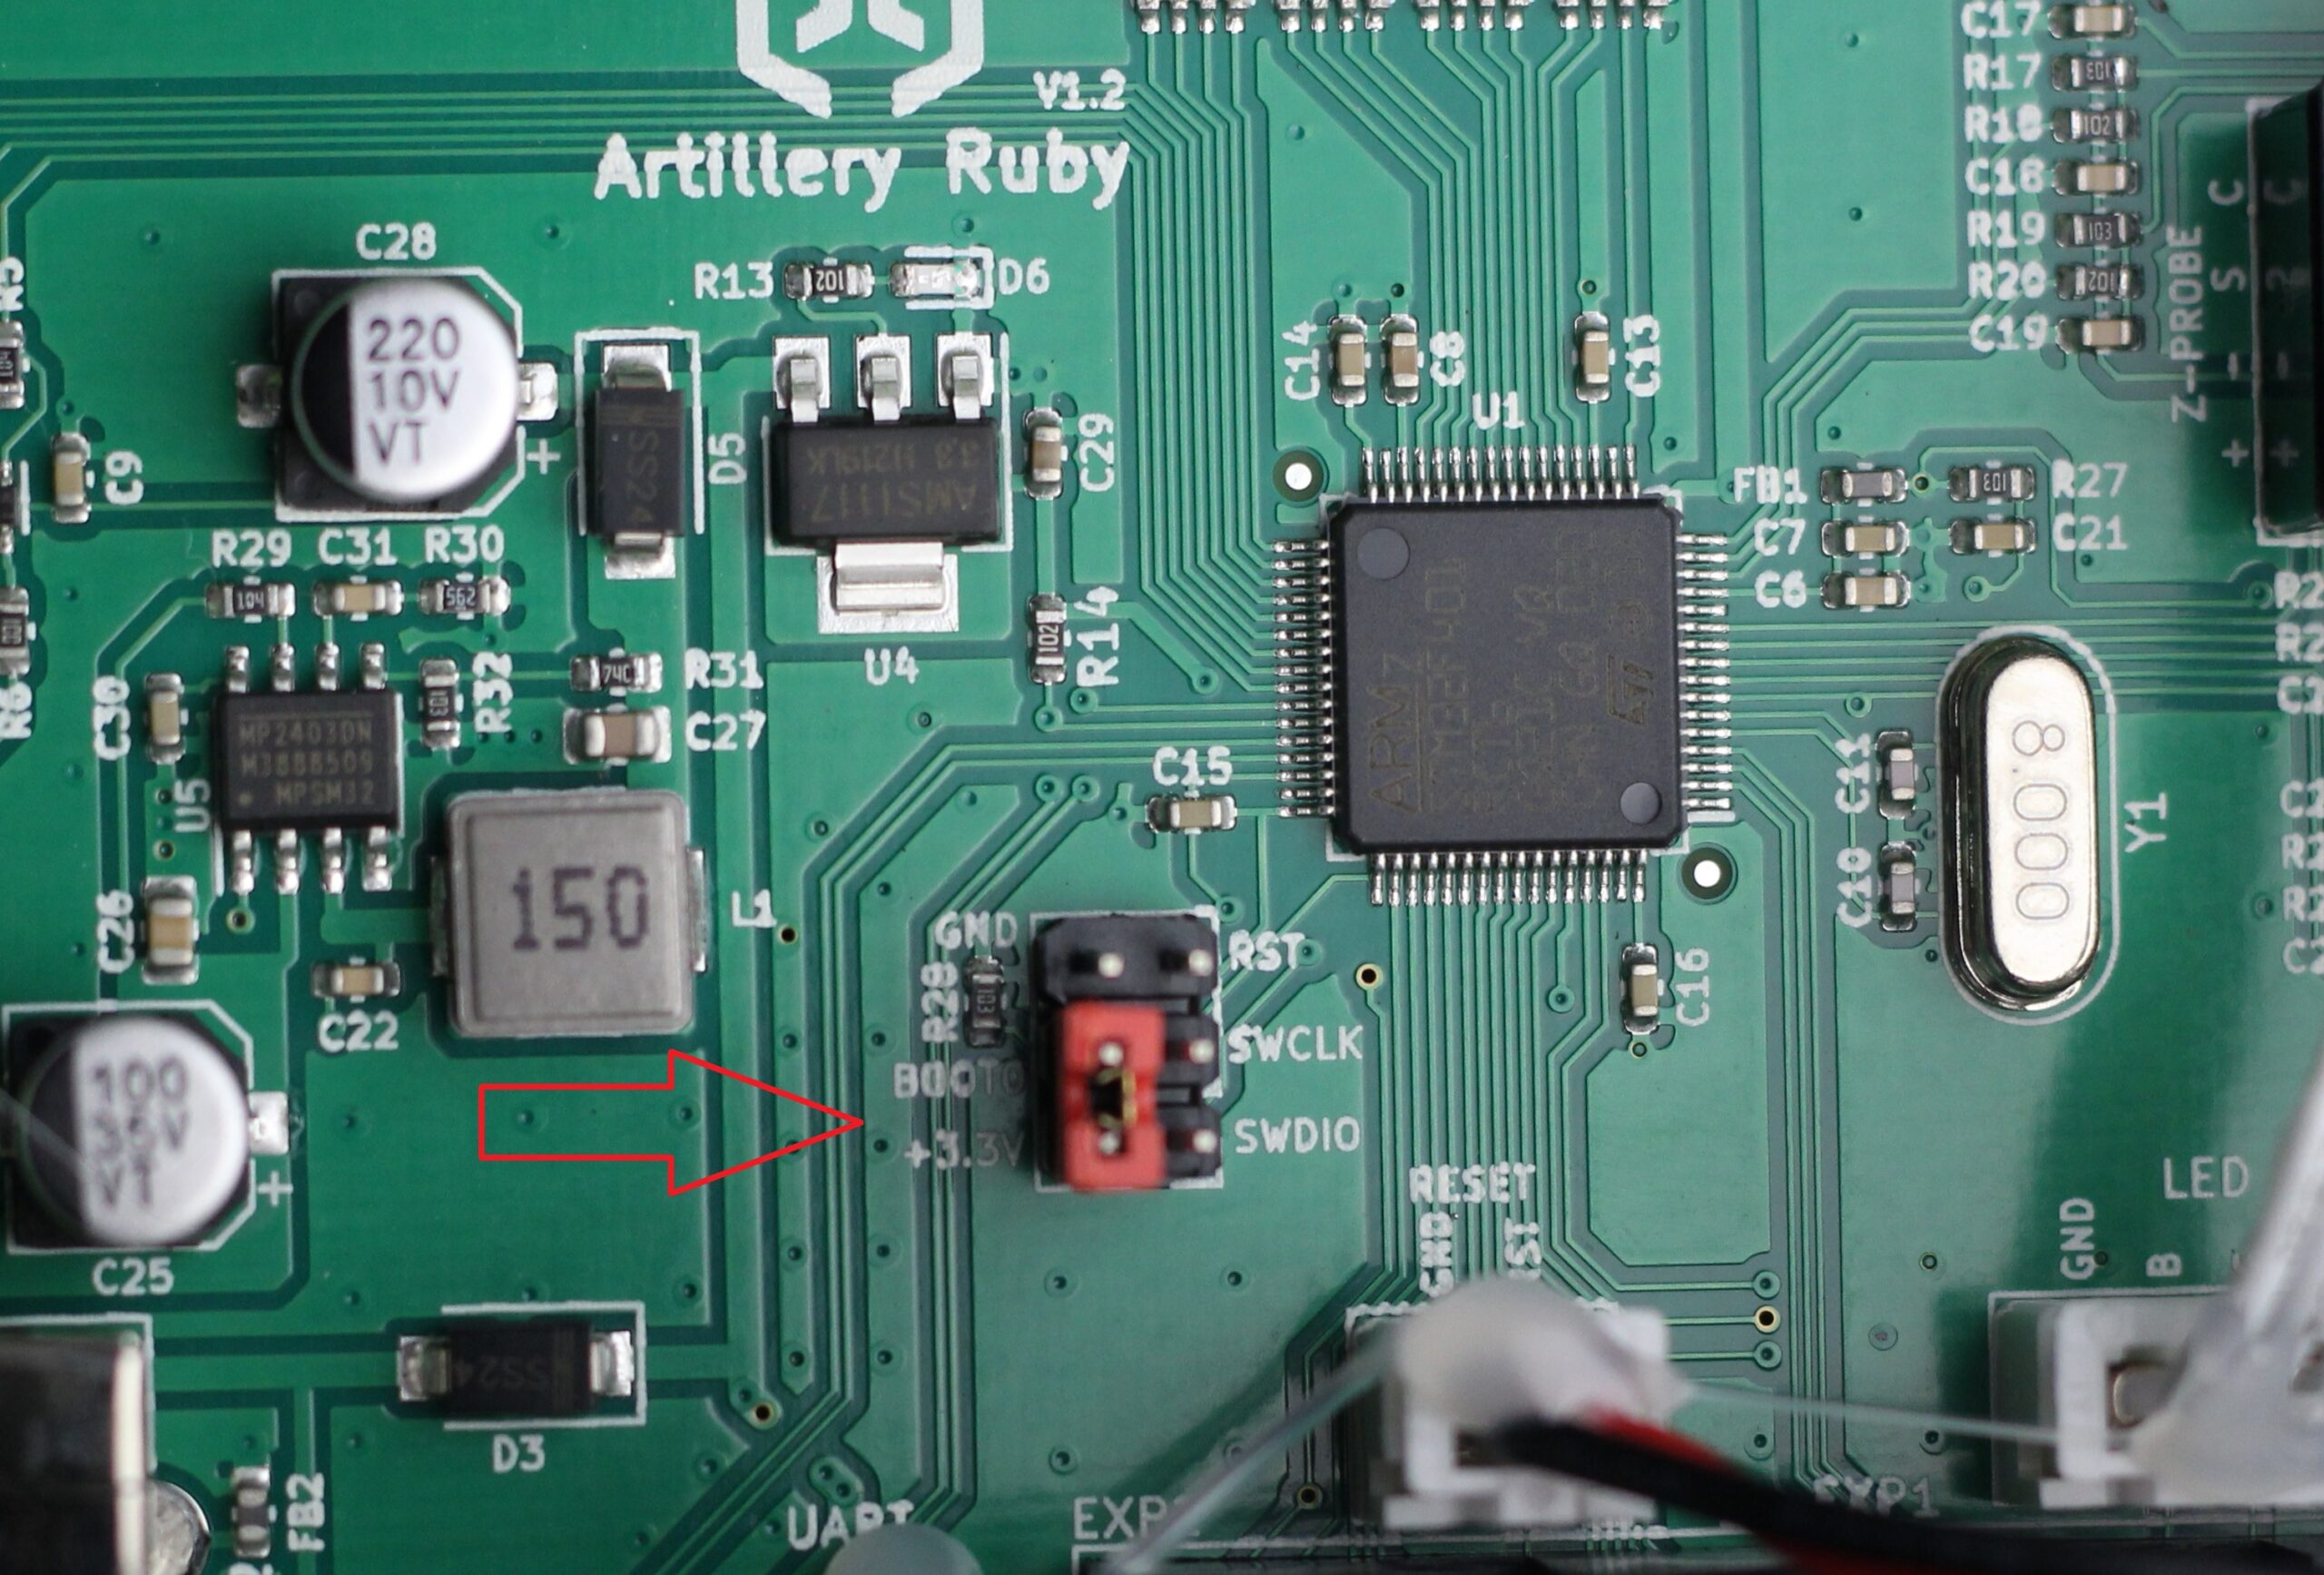
If this command fails, then you need to put the machine in DFU mode using the jumper pin on the board.
To do this, you need to remove the bottom cover of the printer in order to gain physical access to the Artillery Ruby board. Then, you need to install a jumper to connect the BOOT and the +3.3V pin. This connection will put the Ruby board in DFU mode and will allow you to flash the printer.
When the flashing process is complete, the jumper can be removed.
Flash Klipper firmware on Sidewinder X2
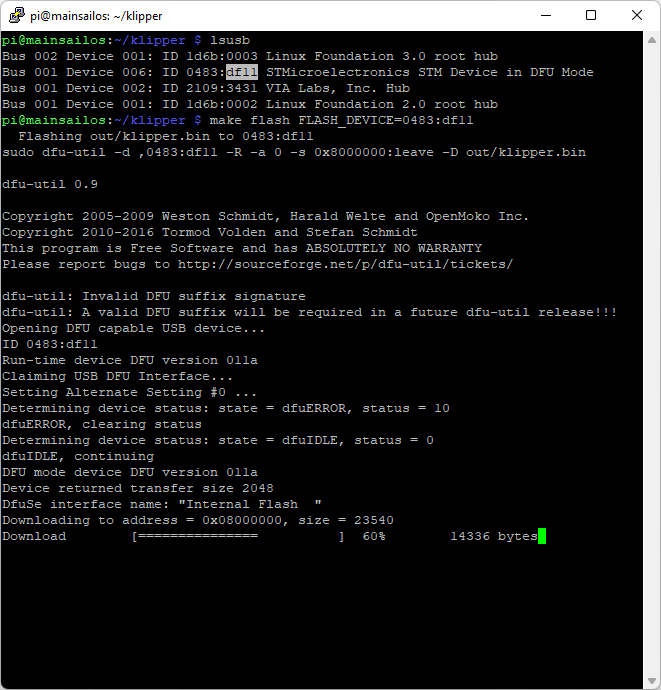
Back to the Pi terminal window, connect the USB cable from the X2 to the Pi and enter the following command to list all the USB devices:
lsusbA list of USB devices will be returned. Our printer will be listed under STMicroelectronics STM Device in DFU Mode. We need to know the ID of the USB device.
Start the flashing process with the following command:
make flash FLASH_DEVICE=0483:df11The flashing process will start and in a few seconds, it will be completed.
Copy the printer.cfg file to Mainsail
To make things easier, I pre-configured a printer.cfg for the stock Sidewinder X2 which can be downloaded and copied in Mainsail.
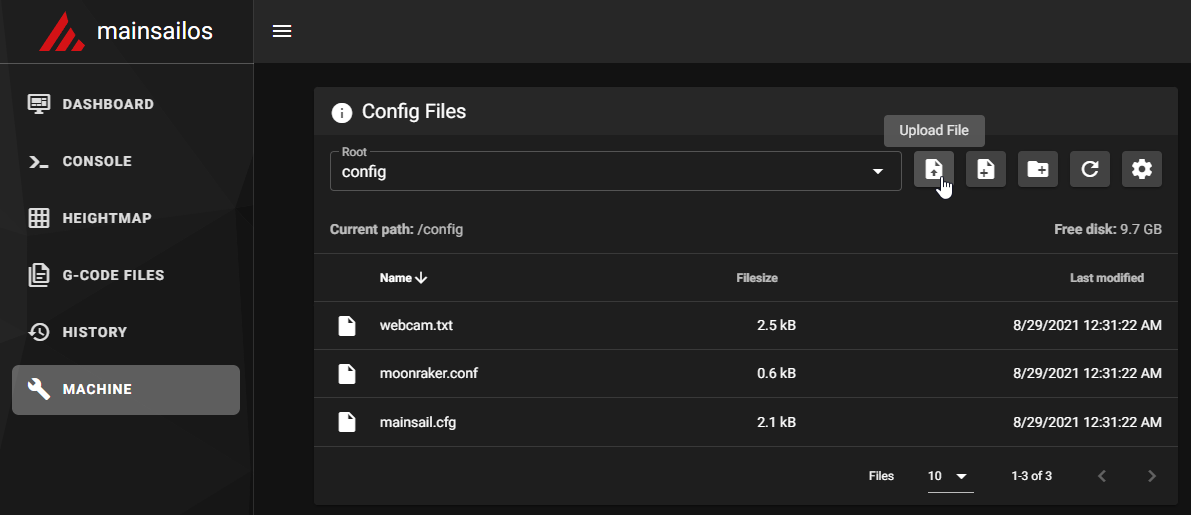
Navigate to Machine, then click on the Upload button.
Select the printer.cfg file to upload it, then use the power button in the top right corner to perform a restart. If everything is configured correctly, the printer will be connected. If this doesn’t happen, then you probably need to update the serial port in the config file. KIAUH can help with that.
Feel free to home the printer first, to make sure everything is running correctly. Heat up the nozzle and heatbed and check if the temperature rises as expected. If everything looks good, then you are ready to start the calibration of your Z offset.
Please note that my config includes the calibrated values for my stock Sidewinder X2. These settings should work pretty well, but I recommend taking the time and doing your own calibrations for best results.
I also recommend using a small piece of tape to cover the 5V pin coming from your Raspberry Pi. This will fix the always on display from the printer.
If you want to improve the probing speed of your Sidewinder X2, I also recommend checking out this macro. It speeds up probing quite a lot, and it’s easy to setup.
How to revert to stock firmware on Sidewinder X2?
The flashing process for the stock Marlin firmware on Sidewinder X2 was described by Artillery in this PDF file, so I won’t go trough the whole setup again.
First, you need to download the latest stock firmware source and compile it. Then, you put the Ruby Board in DFU mode like shown previously, using the jumper pin. Finally, you flash the firmware using the tools mentioned in Artillery’s PDF.
I might do a more detailed guide in the future, if this proves to be an issue for people trying to revert to stock.
Wrapping up
I hope this guide was helpful for you, and now you are running Klipper on your Sidewinder X2. The printer running Marlin is fine, but with Klipper the machine can be really good.
After you do some prints with the X2 running Klipper, you will probably see that one of the main limiting factors when printing fast is part cooling. I covered the most popular hardware upgrades for the X2 in the Artillery Sidewinder X2 Upgrades: Paid and Free article. Check it out, you might find something useful there.
If you encounter issues during your installation, feel free to leave a comment below and I will do my best to help you. Besides that, you can also join the 3DPrintBeginner Forum where there’s a dedicated thread for Klipper Firmware, with Klipper enthusiasts ready to help.
Liked it?
|
|







I have been transferring my Genius Pro to Klipper just now. Initially it didnt work, but I got a great hint from someone in Reddit, saying I should issue the ls /dev/serial/by-id/* command after having flashed the firmware and connected the printer with the PI, to find my own ID which had to be inserted in the MCU part of the printer.cfg file (this in case you are using a printer.cfg from soomeone else.)
MAy be some other read here might benefit from this as well.
Thanks for the general isntructions in any case
Hi. Is there a way to enable the runout sensor? I checked the documentation and there is a switch/config but I have no clue what pin I have to add.
If I remember correctly, the filament sensor on the X2 is wired to the TFT screen.
If you change its location, then you should be able to find the pin and enable it in the config.
Just as a heads-up for anyone that uses the printer.cfg file from this tutorial: The PID tuning for the bed heater was clearly done for 120v regions, as the values are wildly incorrect if you run the printer from a 230V plug. I definitely recommend doing PID tuning according to the Klipper documentation if you also have 230V mains
It was actually done on 230V. But as always, PID is different depending on various printers and temperatures.
Fantastic directions on getting Mainsail/Klipper setup on the SWX2. I’m running into an issue, however, trying to get the Ruby v1.2 board in DFU mode. I’ve tried sending the M997 command via Pronterface as well as physically jumping the 3.3v and BOOT jumpers. Nothing seems to be working. No STM device in DFU mode showing up. Any suggestions??? TIA
You copied your PID values from the extruder and just pasted it for the bed heater. Idk if it was an accident, but according to the cfg at least, there was nothing special done for either the bed/hotend. One of them is wrong, they aren’t supposed to be the same value
Trying to get my X2 working with Klipper running on a laptop per ModBot’s tutorial but am unable to get the laptop to connect post-flash. Using the steps below DFU reports successful flash download but upon reboot of the printer the blue light on the touch probe flashes ~once per second and otherwise is unresponsive. I can flash back to default firmware without issue. Any advice greatly appreciated!
Micro-controller Architecture: STMicroelectronics STM32
Processor model STM32F401
Bootloader Offset No bootloader (also tried 64kib with no joy)
Clock Reference 8 MHz Crystal (also tried 16 with no joy)
Communication interface (USB (on PA11/PA12))
USB ids USB Serial number from CHIPID
DFU reports a successful flash.
Upon reboot the blue light on the touch probe just flashes and otherwise the unit is unresponsive and unable to be connected to from the web interface of klipper on the laptop.
I figured this out. FYI the I just had to use the X2 config file provided by Artillery which has a different connection string in [mcu] vs. what ModBot used in his. X2 Config Source here:
My process was as follows;
build linuxmint install per ModBot’s excellent tutorial.
Put X2 config found in the Artillery link above in ‘printer.cfg’ and upload to klipper web GUI.
Run “make menuconfig” and select the STM32F401 with “No bootloader” and USB (on PA11/PA12) and not enable extra low-level configuration options.
run “make”
boot your X2 printer with jumper between 3.3V and Boot0 pins.
run “lsusb” and verify ‘us 002 Device 014: ID 0483:df11 STMicroelectronics STM Device in DFU Mode’ is present.
run “make flash FLASH_DEVICE=0483:df11”. Ignore the dfu-util: can’t detach error, it is a non-factor.
Go back to web gui, tell Klipper to Restart, see successful connection.
drink a beer.