Creality Ender 6 Upgrades: Paid and Free
In this article, I will share some of my favorite Ender 6 upgrades and what I think about them. The Creality Ender 6 is already a great machine in its stock configuration, but it can be further improved with a few upgrades.
As always, before jumping in the 3D printer upgrades train, I recommend reading the 3D Printer Upgrades for Beginners: When and Why? article to have a better understanding about how upgrades can improve the print quality of your 3D printer.
Creality Ender 6 Paid Upgrades
Magnetic PEI spring steel sheet
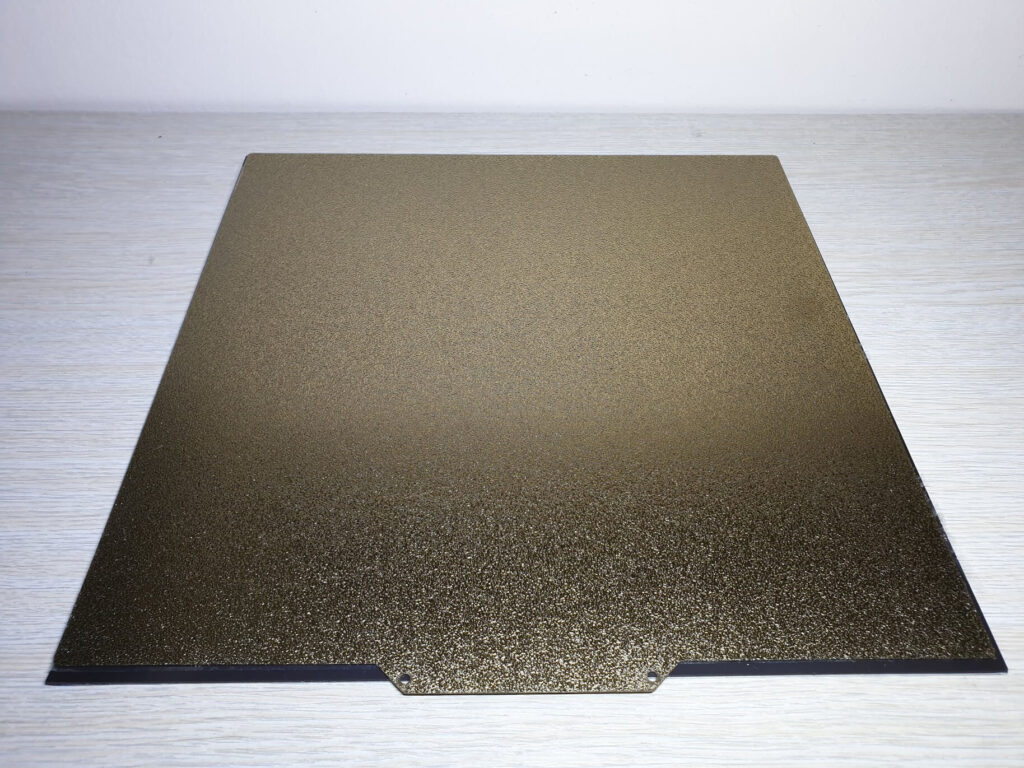
While the stock Ender 6 textured print surface does a great job, you might want to install a magnetic PEI spring steel sheet. This will allow you to remove your prints right after they are finished without needing to wait for the bed to cool. Besides that, it might help with adhesion when printing PETG and ABS. I think it’s one of the best Ender 6 upgrades you can do to your printer.
I previously reviewed the Energetic PEI sheet which worked well on all of my printers. The correct size for the Ender 6 is 290×290 mm but I plan to install a 300×300 mm plate I have as a spare. 5 mm on the side won’t really cause any issues.
The magnetic PEI spring steel sheet can be bought from the following websites:
Banggood
Amazon
Aliexpress
Better extruder
There are better extruders out there compared to the stock dual-gear extruder which comes stock on the Ender 6. The stock one is not bad, but you can improve your print quality if you choose to install an extruder with a gear ratio, like a BMG which can be used with the stock bowden setup.
If you want to push this a bit further, then make sure you check my Direct Drive Extruder Buyer’s Guide article where I covered my favorite direct drive extruders currently available.
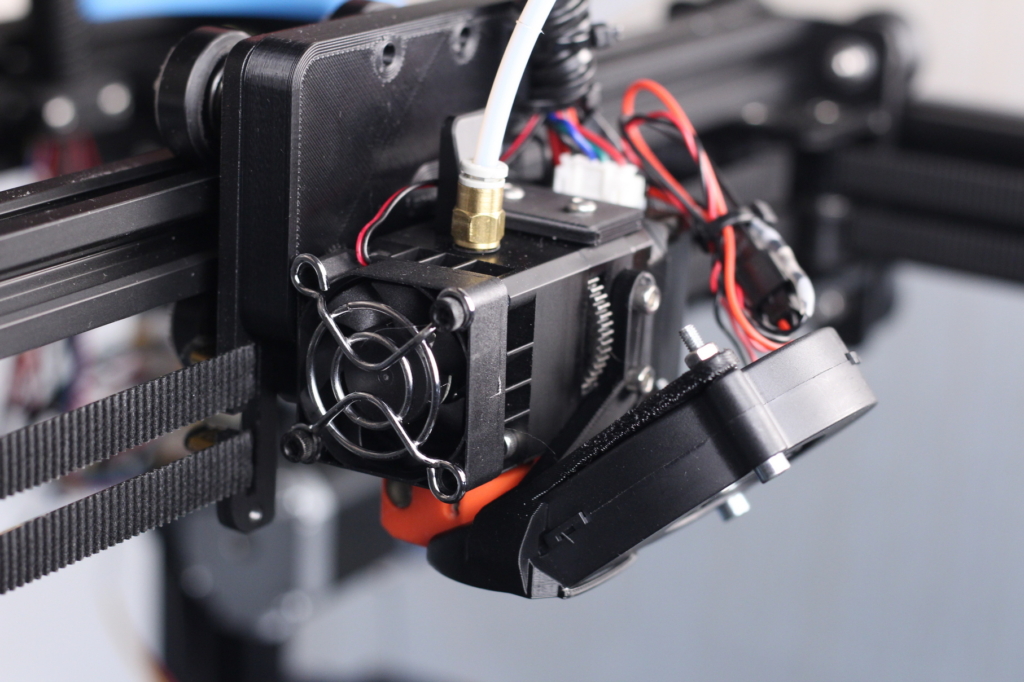
I chose to install the BIQU H2 extruder on my Ender 6 because it’s one of the lightest all-in-one extruders available right now, which provides excellent print quality even at high speeds and for me this was the best Ender 6 upgrade to date. I even wrote a BIQU H2 installation guide for Ender 6, which should make the entire process easier.
Another good option when it comes to direct drive solutions for the Ender 6 is the BMG Wind. It’s compact and doesn’t weigh a lot so make sure you also check that one before deciding.
The BIQU H2 Extruder can be purchased from the following websites:
Bi-Metal hotend
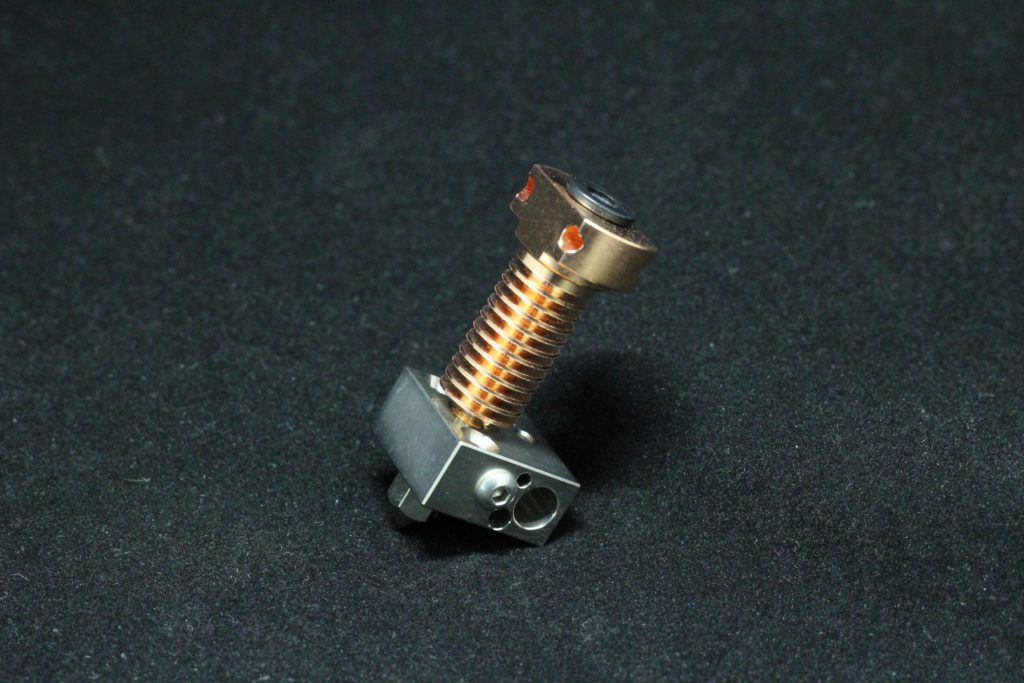
Print quality can also be improved by installing a bi-metal hotend. The stock hotend is not that great because it’s PTFE lined which means you won’t be able to print for long periods of time over 240C because the tube starts to degrade and release harmful fumes so having a better hotend is a great Ender 6 upgrade.
Over time, the PTFE tube degrades even when printing at lower temperatures, so by upgrading to a bi-metal hotend you minimize downtime and time spent.
The cheapest bi-metal hotend which is a drop-in replacement for the Ender 6 is the Mellow NF Smart. For the Ender 6, you need to get the NF Smart CR-10. There’s also the Trianglelab Spiral Tower Hotend, but it doesn’t offer significant improvements compared to the Smart.
You can also upgrade your stock hotend with a bi-metallic heat break, which will offer similar thermal performance improvements, and they are a bit cheaper. But make sure you grab the correct heat break for your hotend. I did this on the BIQU B1, and CNC Kitchen did something similar on his Ender and the results are interesting.
The NF Smart hotend can be purchased from the following websites:
AliExpress
Polycarbonate V-slot wheels
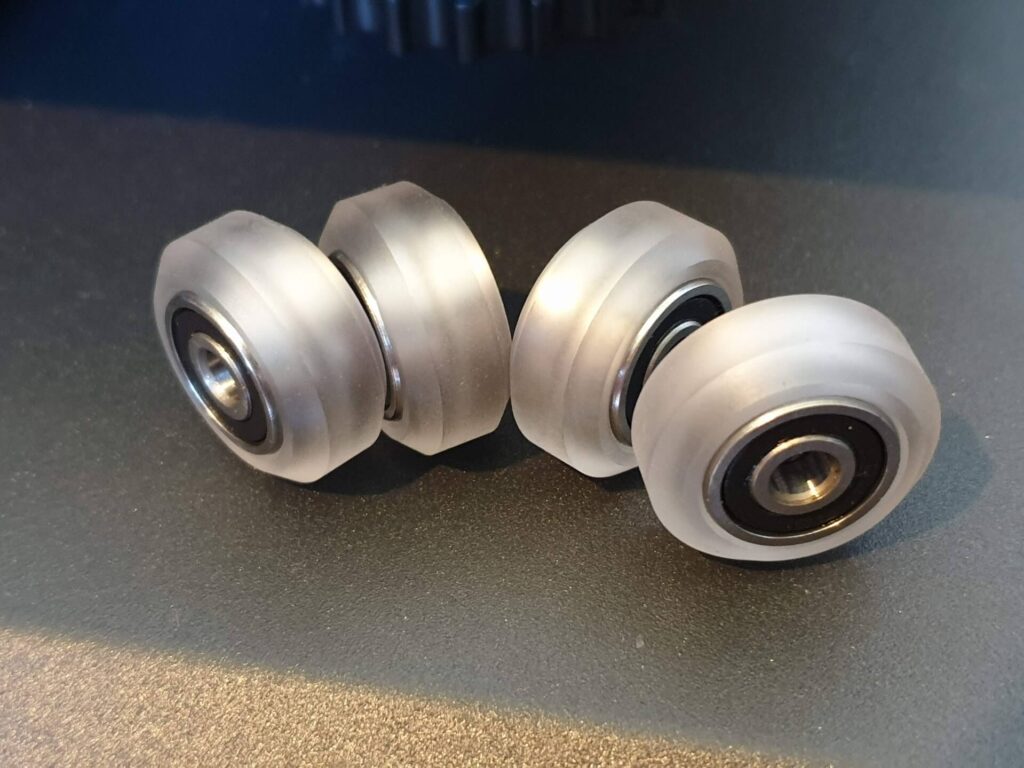
Another worthwhile upgrade is replacing the stock POM V-slot wheels with polycarbonate wheels. They are stiffer and they don’t develop flat spots if the printer is left unused for longer periods of time. By installing these wheels, you will eliminate the “dust” which starts to come off the stock wheels.
I installed PC v-slot wheels on some of my printers and they are worth the trouble especially for a fast printer, so definitely a good Ender 6 upgrade.
The Polycarbonate V-Slot Wheels can be bought from the following websites:
Amazon
AliExpress
Banggood
All-metal PTFE couplers
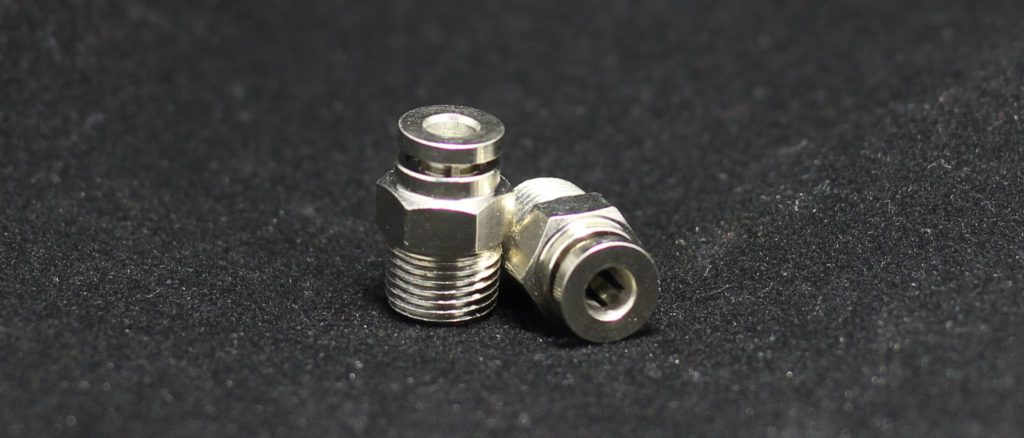
On bowden setups, the PTFE couplers are the most common parts that fail. They can break and the PTFE tube is not held in place as well as when they were new. Sure, you can purchase cheap PTFE tube couplers, but if you want to save yourself from constantly replacing them, or wait for a failure, then I strongly recommend getting all-metal variants.
These couplers have better grip on the PTFE tube and since I discovered them (about a year ago) I never needed to replace them. I got mine from Mellow but Trianglelab also sells them.
The all-Metal PTFE couplers can be purchased from the following websites:
AliExpress
Better PTFE tube
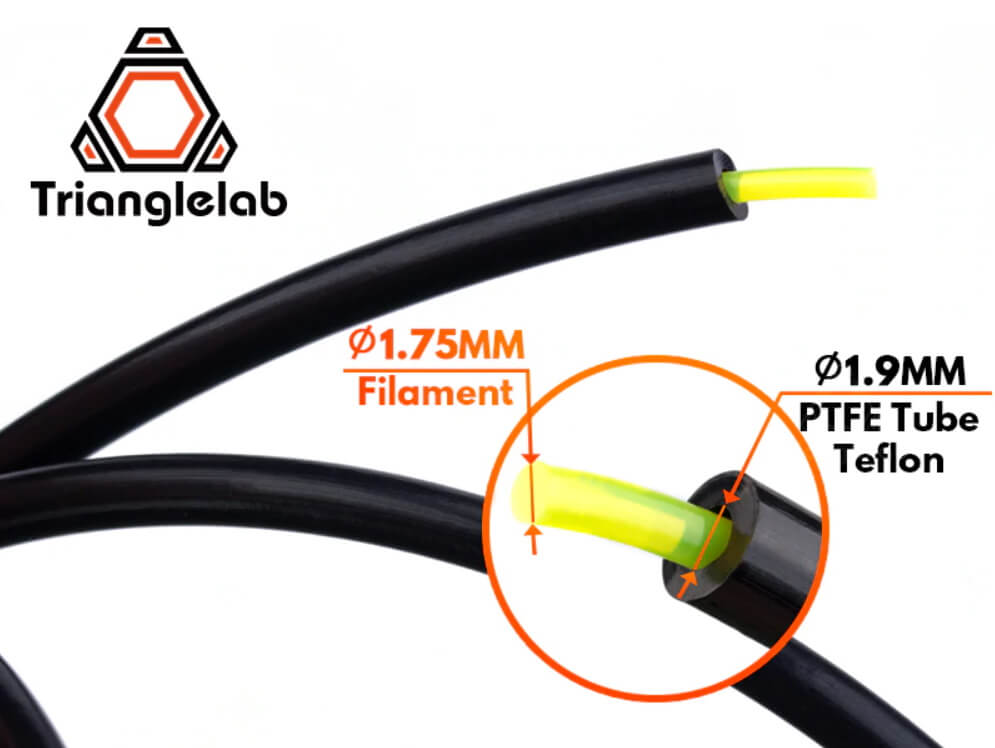
If you plan to keep the stock bowden setup on your Ender 6, then I recommend getting a PTFE tube with tighter tolerances. The main reason to upgrade to a tighter tolerance tube is to have better filament control and a bit less retraction.
This is a popular upgrade, and a lot of people decide to buy the Capricorn tube (which is more expensive) thinking that it has better heat resistance, but from my experience, PTFE is still PTFE, and it will degrade just as fast.
This is why I mostly buy Trianglelab PTFE tube on any bowden printers because it’s cost effective and offers tight tolerances, but nowadays there are other sellers who have similar tubes.
The Trianglelab PTFE tube can be purchased from the following websites:
Banggood
Amazon
AliExpress
RepRap firmware board
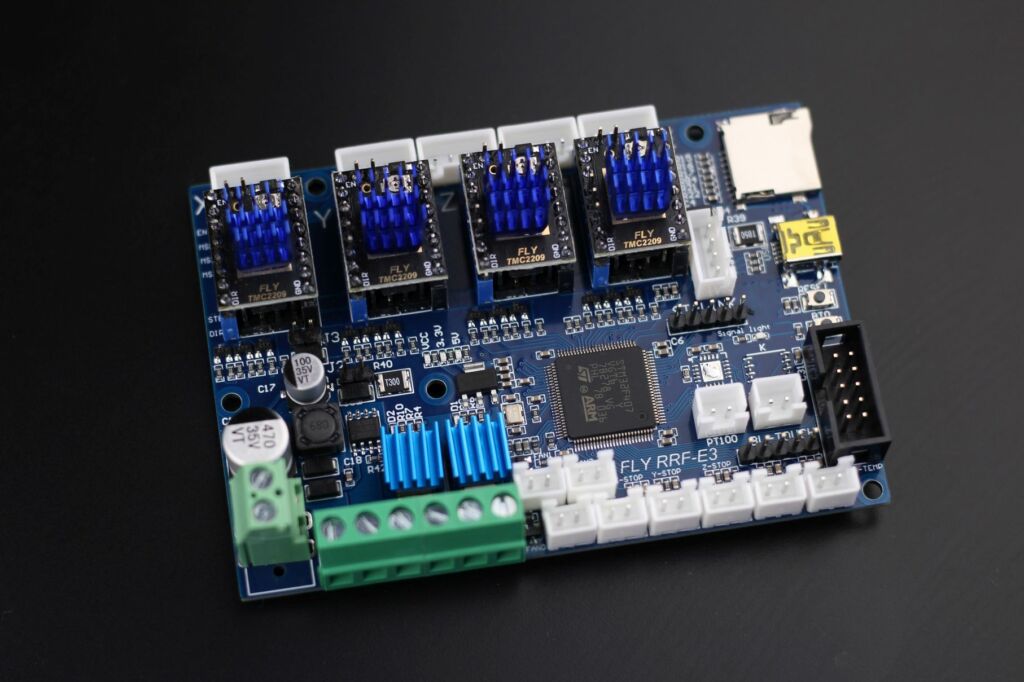
If you don’t like Klipper on your Ender 6, then you can add Wi-Fi functionality and run RepRap firmware after upgrading to a RRF board like the FLY RRF E3 or the BIQU E3 RRF. These boards are cheaper alternatives to the popular DUET boards while also being easier to install.
RepRap firmware brings a lot of features to your Ender 6, some of them covered in this Ender 5 RepRap firmware upgrade guide. It won’t really improve the print quality, but it will give you more functionality and an easy-to-use interface.
You can buy a RepRap board from the following stores:
Amazon
AliExpress
Banggood
Silicone bed mounts
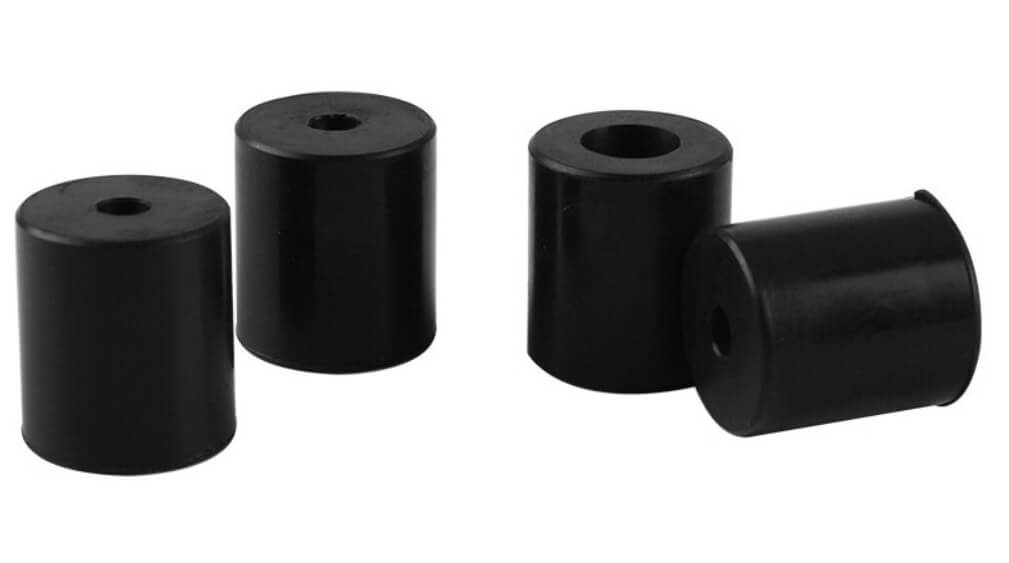
The included bed springs are long, and they are not as stiff as I would like. On my Ender 6, I plan to do the same bed leveling mod I did with the Artillery Genius, but if you are looking for an easier solution, the silicone bed mounts are great.
After you install these silicone mounts, you won’t have to adjust the bed for a long time.
You can buy silicone bed mounts from the following stores:
Amazon
AliExpress
Banggood
Ender 6 cover
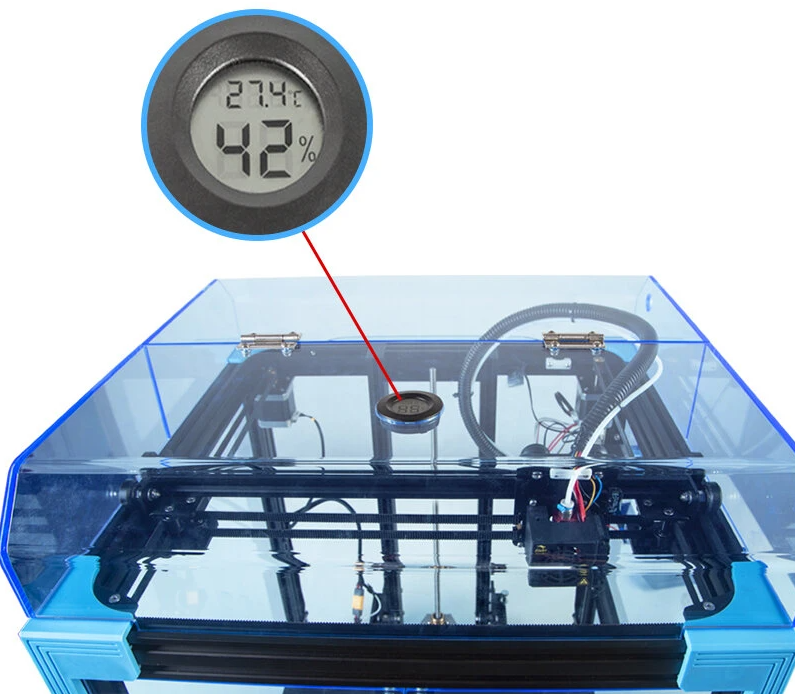
One of the most attractive features of the Ender 6 is that it comes partially enclosed. Unfortunately, the top cover is not included in the package, and it needs to be purchased separately. It’s a bit more expensive, but this upgrade will allow you to print higher temperature materials that require an enclosure. It also has a nice humidity and temperature sensor in the top to keep an eye on your enclosure temperature.
It’s not the cheapest Ender 6 upgrade out there, but it will help you print high-temp materials. For regular PLA and PETG prints, this is not needed.
You can buy the Ender 6 cover from the following stores:
Banggood
Amazon
AliExpress
LED Lights
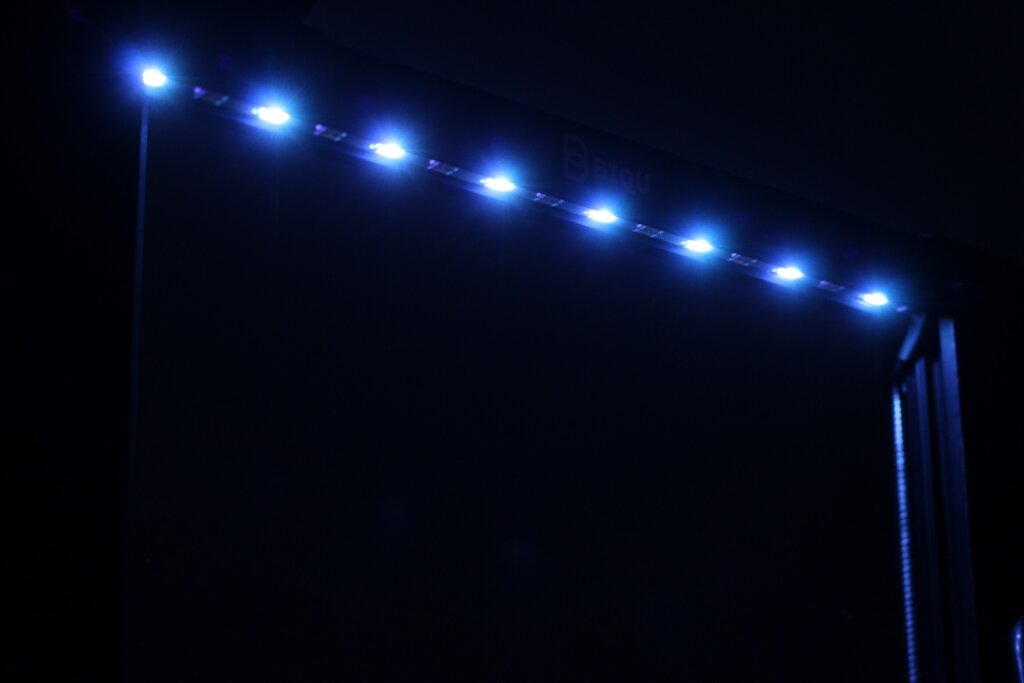
If you want to start doing time-lapse videos, then adding led lights to your Ender 6 might be a good idea. you can buy a roll of 24V LED light and wire it directly to the power supply, so when you start the printer, your model gets illuminated.
Adding these LEDs is an effortless process, because you can just use the double-sided tape included with the strip and attach it to the front aluminum extrusion.
You can buy LED strips from the following stores:
Amazon
AliExpress
Banggood
Linear rails
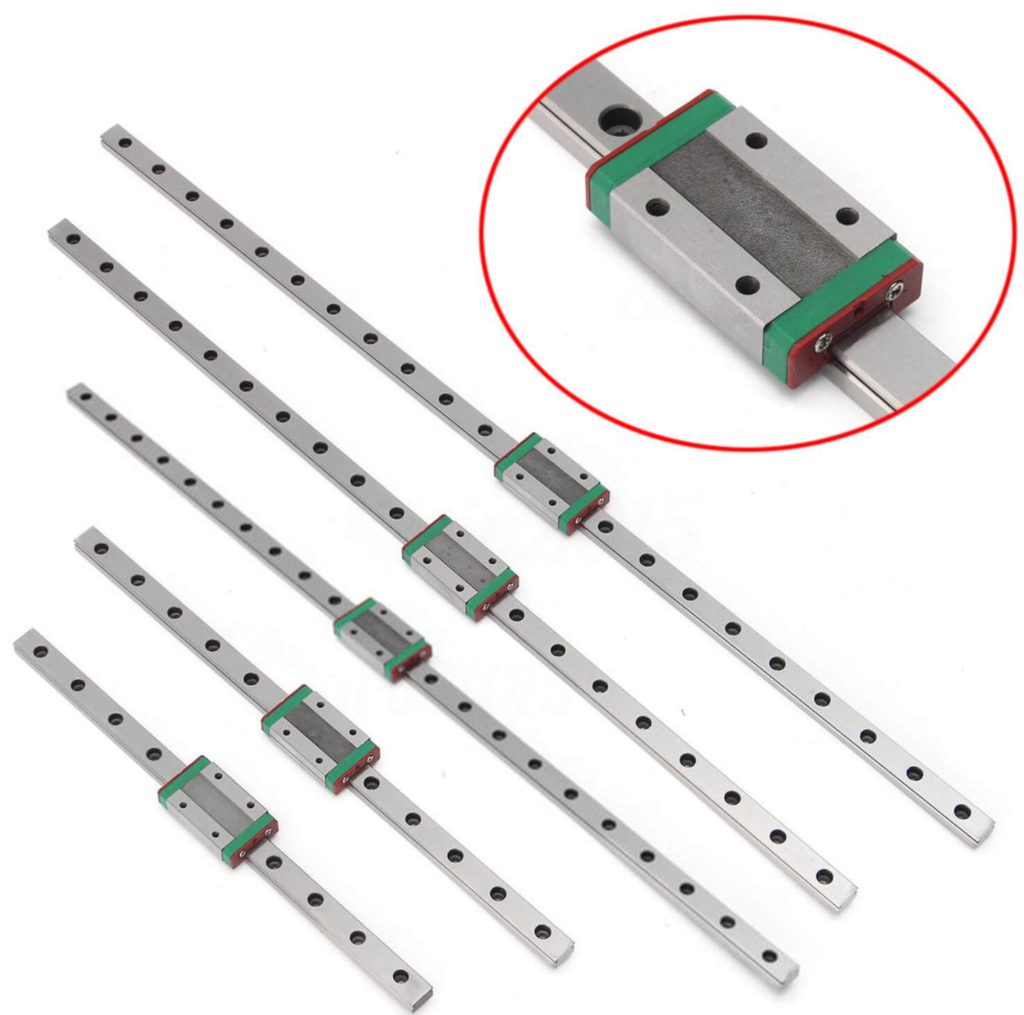
To be honest, I’m not really convinced that the Ender 6 will benefit from upgrading to linear rails because the main bottleneck when printing fast will be the printer stability. I used the Sapphire Plus which has linear rails and print speeds were similar to what I am able to push on the Ender 6.
If you still want to do this mod then you can check out this mount and order the required MGN12 rails to do it. But before you make the jump, give the PC v-slot wheels a go. They are a cheaper upgrade.
You can buy linear rails from the following stores:
Amazon
AliExpress
Banggood
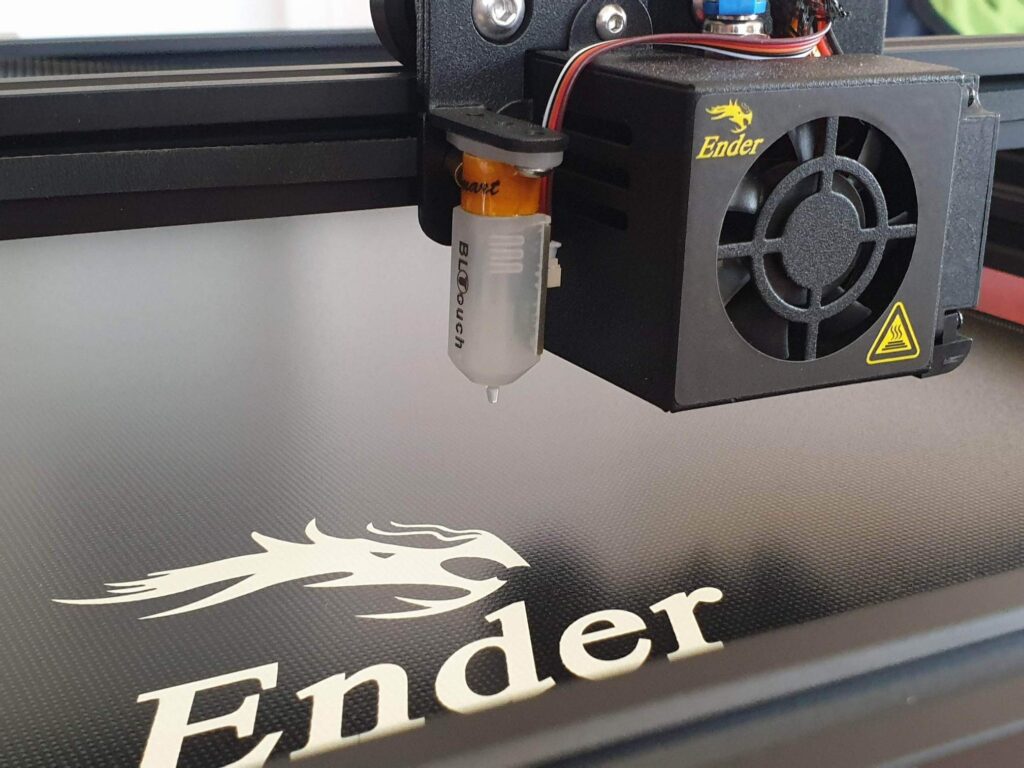
BLTouch for auto bed leveling
My Ender 6 has a flat print surface, and I can’t say a BLTouch is needed, considering the size of the build plate. But there are people who like having the BLTouch sensor installed because it can compensate for uneven spots on their print surface.
If you want to do it, I recommend purchasing an Original BLTouch because it’s guaranteed to work well. If you want to save some money, you can also get the 3D touch clones, but some people reported occasional issues with them.
The BLTouch sensor can be bought from the following websites:
Banggood
Amazon
Aliexpress
Creality Ender 6 Free Upgrades
Klipper firmware
Installing Klipper firmware on the Ender 6 can greatly improve the print speed and print quality. While this requires a Raspberry Pi (or any kind of computer really), I think it can be listed as a free upgrade.
If you’re interested in learning more about Klipper firmware, check out the Ender 6 Klipper Firmware installation guide.
Ender 6 dual fan mount
The Ender 6 is marketed as being one of the fastest 3D printers sold by Creality. Unfortunately, they did not think about the part cooling required for those speeds and we got a single 4010 radial fan. This works fine for larger prints but print quality and speed can be improved by adding an extra fan.
Part cooling is especially important for PLA where every bit of airflow will help solidify the material faster so this might be an easy to do Ender 6 upgrade without spending too much time. Other filaments don’t really need more cooling compared to what you get with the stock setup.
You can use this mount for this. It’s small, compact, and doesn’t increase the weight significantly.
Direct drive adapter
If you want to convert your Ender 6 to direct drive, but don’t want to spend more money for a different extruder, then you can use the stock one and this mount from Thingiverse. The designer used a BMG extruder for this, but the stock extruder can be used just as well.
Cable chain
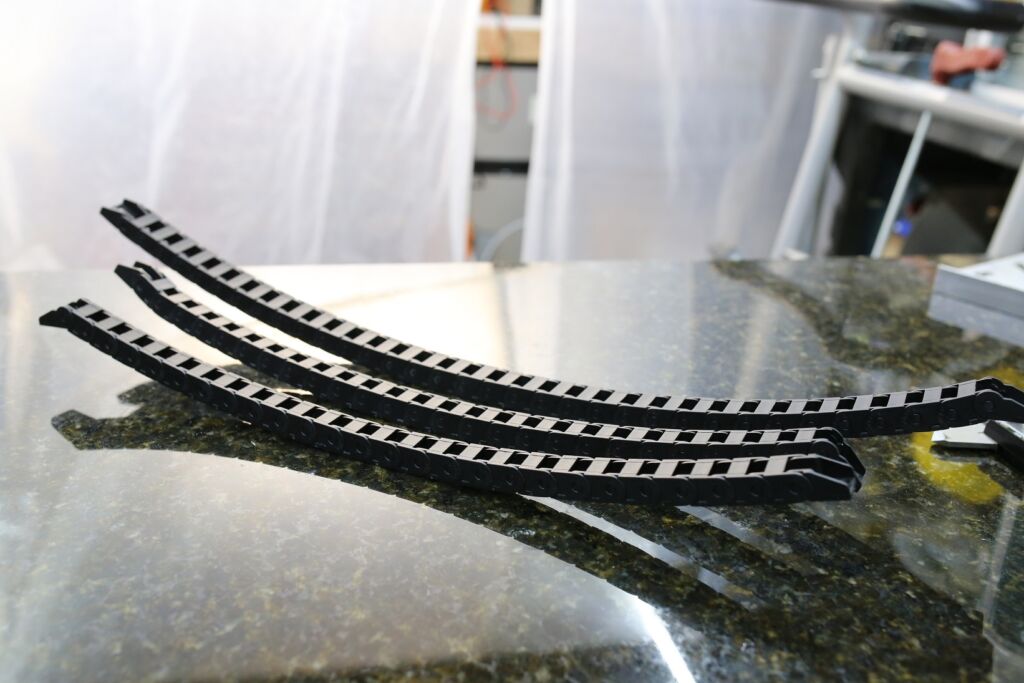
I’m not a fan of cable chains, but I’ve seen a lot of people installing them on their printers. This makes the Ender 6 spare requirements a bit better and might also help if you plan to install the acrylic cover. The cable chain will help you route the cables a bit nicer, but you might need to do some extra work and extend some of the wires.
This cable chain from Thingiverse should be easily printed and the only cost of installing it is a bit of used filament. Just don’t print it in PLA if you plan to enclose the printer.
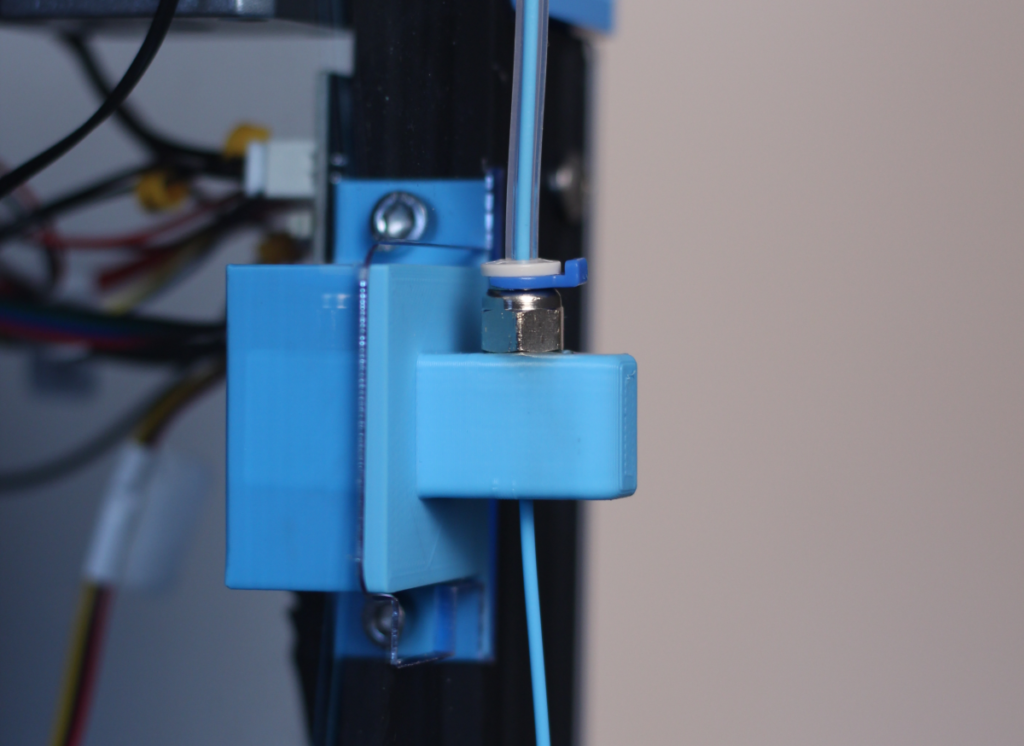
Reverse bowden mount
A reverse bowden mount is a must have if you converted your Ender 6 to direct drive because it will allow you to route your PTFE tube cleanly while still using the stock spool mount. It’s a must have Ender 6 upgrade if you convert your printer to direct drive. This is the model I chose to print for my Ender 6 and the BIQU H2 direct drive extruder. It works great!
Wrapping up
I hope this article helped you learn more about what Ender 6 upgrades you can do to your 3D printer. As always, decide for yourself if any of these changes actually help you fix an issue you have with your Ender 6. Don’t start spending money on stuff just because they look cool. Or do it! Who am I do judge? Just take the time to do some research in advance.
If you have other Ender 6 upgrades which worked well for you, feel free to leave a comment below, and share your experience.
I covered other 3D printer upgrades in my Ultimate 3D Printer Upgrade Purchase Guide article, so check that out.
While the article includes affiliate links, all opinions are my own.
Liked it?
|
|




How were you able to get pressure advance to work on the Ender 6 with the stock board. I’ve followed your guide to the letter but no matter how I slice the file I can’t get the test print to work. Everytime I print it the corners are exactly the same. I’m running the test exactly as instructed on https://www.klipper3d.org/Pressure_Advance.html for the bowden setup.
I have a direct drive setup
Hi I’ve just got 2 e3 rrf boards for my ender6’s are they plug and play and will they work with the spray boards also is there any issues with klipper firmware and mainsail will my printer config work
sorry for so many questions
For the bi-metal hotend do I need to get the 12v or 24v I’m wanting to install this on the ender 6
24V.
i made an upgrade to the extruder case, you can check it out on my thiguiverse https://www.thingiverse.com/thing:4935819
Hi, i bought an Ender 6 recently.
If buying the BIQU H2 extruder would you still recommend the NF Smart CR-10 hotend?
The NF Smart is the budget option if you want to use the bowden setup.
Thanks
I bought it finally, I need some advise for the installation. Do I need to use the cables that come with the hotend or can I use the ones of the ender 6… In case of the first, I have done anything with cables since I was in high-school 🤣
Added the top cover as well to my installation however broke the temp and humidity sensor. I applied pressure to press the sensor in from the top which causes it to break. There were no installation instructions included so wondering what the proper way is to install the sensor. Any insight how you installed it or had sny issues? Thanks for sharing
Maybe tolerances were not perfect. I would contact the supplier for help.
Same thing happened to me. It basically shattered into parts on install. They replaced it without much fuss.
hi im hopeing one of you could please help me out lol, i purchased and printed almost all these upgrades except plate and the chip-set. and afters all said and done when i go to level the ender 6 the z access goes up like normal but it doesnt touch the nozzle at all. so the problem im having is the z access touches the very top of the ender 6 and the nozzles not hitting the plate. any ideas or fixes?
Change the position of the Z endstop screw and adjust it until the nozzle touches the bed.
yeah i tried even with the endstop screw off it still touches the top of the bed i think it may be the shroud you have is a little different i want the one you have 😛 but yeah the 4 rubber things arent lifting the bed enough to touch the nozzle i had to go back to the springs ;(
You can add small spacers to compensate for the difference.
that fan mount you have with the fan that hangs down in the pictures do you know where i can get something like that for my ender 6 the one linked in here is really nice but it blocks the wheel
I can’t find it anymore. But now I am using this one: https://www.thingiverse.com/thing:4802487
It saves some Y space and works just as good.
Thanks, contacted them already but this confirms I was installing it in the correct way
Hi.
I ´m new to 3d-printing. So please be a little patient.
I purchased an Ender 6. And now I ´m buying all upgrades I can afford and I think are useful.
The NF Smart CR-10 you recommended should arrive soon. Now my question:
Does it make sense to also buy a bi-metallic heat break for the NF Smart CR-10?
If yes, which one would be best?
Thanks
The NF Smart is already a Bi-metal hotend. So no need for anything else.
Hi. I have a bl touch v3.1 with jst connectors, not compatible with the connector on the small board in the gantry. I want to install it directly on the mainboard but there are only two wires that are connected there, IN and PWM, at the five pin board connector.
I have a doubt if the creality firmware(1.0.4.9) recognizes the connection on the five pin connector ( G V IN G OUT ) or I have to use the z stop connection also. thank you.
Hi,
I haven’t looked into adding a BLTouch.
Sorry
I’ve upgraded the mainboard but using all 5 pins with the original board should work.
Even though Creality appears to be using only 2 pins, the breakout board combines several common lines, like ground and voltage so there are fewer wires to run to the mainboard.
Your BLTouch picture is of an Ender 3 not an Ender 6. The Ender 6 has built in support inside the factory fan housing.
Actually, it’s from the Ender 5 Plus.
Your articles are top-notch. I just ordered a new hotend (NF Zone CR-10), poly wheels, trianglelabs tube, and the metal ptfe couplers for my ender 6. Great write ups, very informative.
Hello, I upgraded from my endr 3 Pro to the ender 6 a few months back and after many times of stripping my hotend etc on the 3 I like to think I am more than capable of upgrading the firmware as I have done many times before… no nada Defford no.lol I tried to change the hotend and accidentally touched the two fan wires and it crackled and went off. I have spent weeks stuck on the screen with the loading bar not moving and used all the different firmware files except the bl touch ones as I don’t have it. On pronterface it just keeps going through the same things about sd card fine eprom fine and repeats that again and again but will not accept any of the firmware versions in any of the scenarios and fixes that may be helpful. The motherboard still seems to boot up but has no blue light,just a red and a green one? I also followed every second of the videos from th3 etc and marlin and compiled with success in the compiled but nothing. Any ideas at all please?
Maybe the board is shorted and might need to be replaced. When flashing the firmware, you also need to have a different file name each time you try to flash.