Fysetc Prusa Mini Clone Review
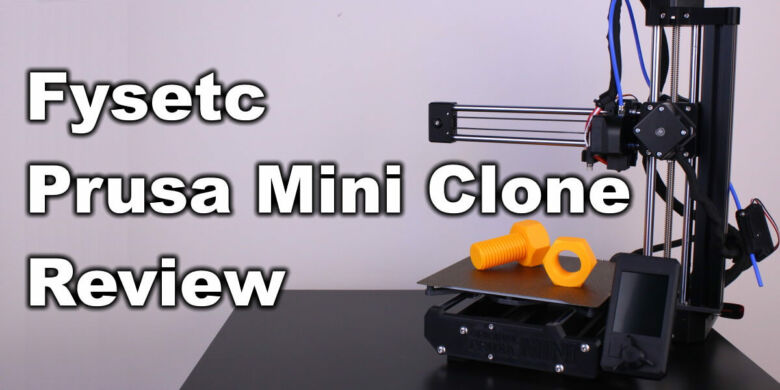
When the Prusa Mini was launched, it sparked my interest to get my first Prusa machine but for some reason I was not able to get one at the time.
Time passed and the Fysetc Prusa Mini clone came up, so I wanted to try it out to see how well it works compared to the original.
While I don’t have the original at hand to do a direct comparison, I think it’s worth looking at this Fysetc Prusa Mini clone and see if it’s worth building one. Other people reviewed the Prusa Mini and shared their impressions about it so I will share my experience with the clone.
Fysetc Prusa Mini Shipping and Packaging
The Fysetc Prusa Mini clone comes as a kit that needs to be assembled. All the components are packed well in a cardboard box. There’s not much protection in it but considering that most of the parts are packaged in smaller boxes, I don’t think there will be any kind of shipping damage.
Parts quality
Prusa Buddy Board Fysetc clone
The Buddy board clone looks fine. I don’t have the real board to compare it with, but it looks decent. You also get a set of heatsinks to install on the stepper drivers for better cooling.
It’s compatible with the Original Prusa Mini firmware so you can upgrade it like a regular Mini.
PEI Textured Spring Steel Sheet
The print surface included with the Fysetc Prusa Mini Clone is a double-sided textured spring steel sheet. The quality is as good as the Energetic plate I reviewed a while ago, so nothing to complain here.
Adhesion is great and I love the textured surface you get on your 3D printed models when finished.
Heatbed
The heatbed looks similar to the one included with the original Prusa Mini, and it has 16 strong magnets to keep the PEI sheet in place.
Wires are properly terminated with a connector for the thermistor and ferules for power.
Bed Carriage
The Bed carriage is made from aluminum and looks good. The main issue I had with it was when I installed the bearings with the metallic brackets. It was a bit hard to get them through the holes but with a bit of force everything fitted.
To install the heated bed on the carriage, you just need to use 9 screws from the kit. There is no manual leveling knobs like on other printers.
Fysetc Mini LCD28
The Fysetc Mini LCD28 V1.1 is used to interact with the printer. Mine is 2.8 inch in size, but you can also get the 3.2 version. if you want. It’s bright and has good view angles. Can’t really complain about it.
Prusa Mini Clone Hotend
The hotend asembly for the Fysetc Prusa Mini Clone is the most lacking when it comes to build quality. The heatblock, heat break and bowden tube couplers are lower quality.
An aluminum heatsink is providing cooling for the heat break, but tolerances are not that great and I feel like the heat break is not cooled properly.
The print head is one of the most important hardware in a printer, so having a low quality hotend is a bit disappointing.
Bits and pieces box
In this box you get all the required items to asemble your Fysetc Prusa Mini Clone and all the bags are labeled.
The included bearings, fans, and screws are of a decent quality and I can’t really complain too much. What I don’t really like is the belt quality. It feels cheap.
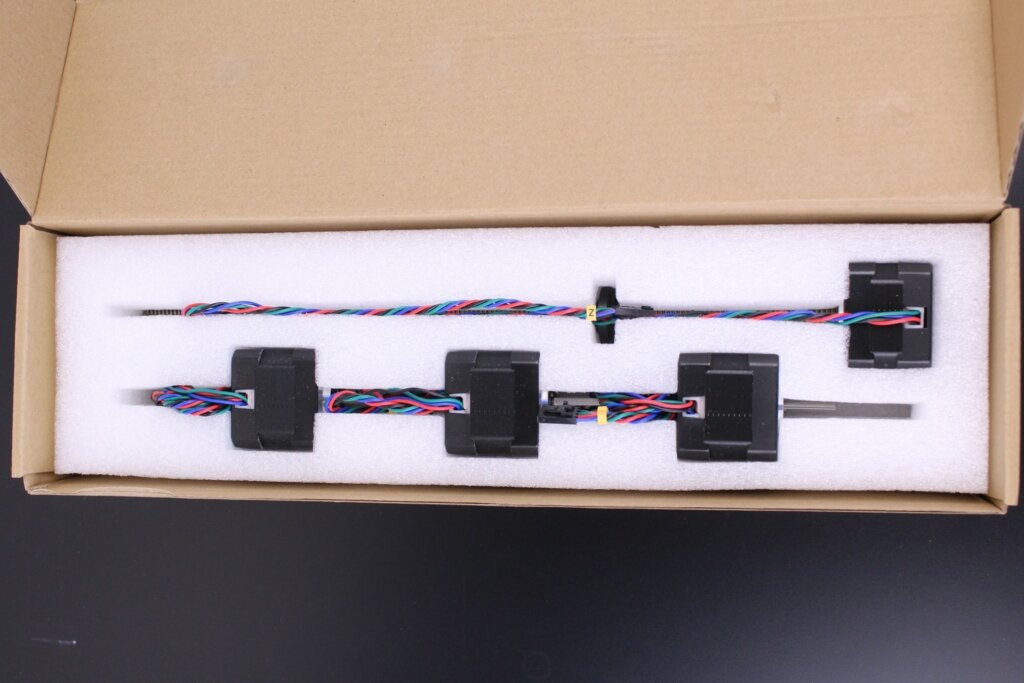
Stepper motors
Stepper motors are packaged separately with ample protection on all sides.
The Z axis motor has included the leadscrew and a POM nut is already installed, which eliminates the need of grease.
Mean Well Power Supply
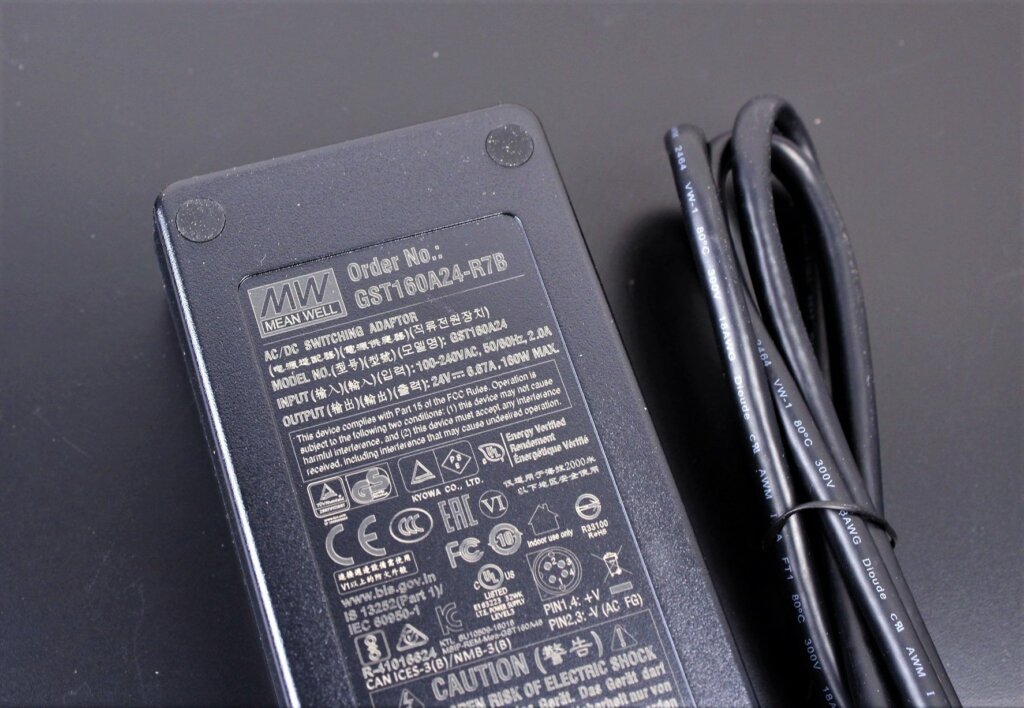
Included with the Fysetc Prusa Mini Clone, there’s a 160W Mean Well power supply which is a quality PSU.
You can choose to get a generic brand power supply if you order from AliExpress. This saves you a bit of cash, but issues might occur in the future.
Assembly of the Fysetc Prusa Mini
As I previously mentioned, the Fysetc Prusa Mini comes as a kit, with no printed parts. To assemble the printer, you need to already have a working printer which will be used for printing the files.
I printed all the Original Prusa Mini files in Black ABS using the Raise3D E2.
The parts took around 700 gr of filament and were printed with 5 perimeters and 50% infill at 0.2mm layer height. Printing all the required parts took a few days
If you don’t have a printer, there’s also the possibility of outsourcing the printing of parts to a friend, company, or even purchase the parts from Fysetc.
The assembly process took about 8 hours which is quite long, but I took all the precautions and carefully installed it. I also made sure to grease all the bearings in advance to avoid taking the printer apart in the future.
All the printed parts fitted well, and the only section where I needed to use a bit of “force” was when I installed the Y and Z axis smooth rods. They needed a bit of convincing to be fitted.
I followed the Fysetc Prusa Mini guide (available here) which was decently detailed but sometimes it was harder to understand all the steps. Other than that, everything went smoothly.
Heating time and power consumption
I tested the heating time for both hotend and heat bed and here are the results:
Hotend
- 200C in 70 seconds
- 250C in 110 seconds
Heatbed
- 60C in 2 minutes and 30 seconds
- 100C in just over 9 minutes
Power Draw
Idle power draw is around 4W. When the hotend and heatbed are heating up, the Fysetc Prusa Mini draws around 130W. After it starts printing, the power draw stabilizes to around 65W.


All these measurements were taken with a Blitzwolf smart power socket which indicates the power draw, and it can also be used for remotely powering on and off the printer.
Fysetc Prusa Mini Noise Levels
To better evaluate the noise levels of the Fysetc Prusa Mini Clone, I took this video which should help you understand how noisy it is, but it is not an accurate way of measuring noise levels.
The Prusa Mini Clone is a noticeably quiet machine, but vibrations are present. To silence the printer even more, I installed it on a mousepad. This way, vibrations don’t get transmitted to the table to amplify the sound.
Either way, I strongly recommend using something like I used to insulate it a bit.
Printing experience with the Fysetc Prusa Mini Clone
During my time with the printer, I used the default profiles available for the Original Prusa Mini in PrusaSlicer 2.3. There was no need for me to alter any settings to make the printer work, and no calibration was needed for good results.
Because the Prusa Mini comes with the pre-configured profiles, I thought it would be right to test the printer with those same profiles. I am considering of doing a few IdeaMaker profiles for it, but I’m happy with what I got from PrusaSlicer.
The calibration process went smoothly and there was no need for me to modify anything. When the printer was assembled, it was ready to go. I just needed to slice a file and start printing.
The only time when I needed to adjust the Z offset was when I printed PETG. I didn’t want the first layer to be too “squished” on the build plate and I increased it a bit. But other than that, I just plugged the USB then clicked “Start”.
A thing I don’t really like is the filament sensor. It’s a bit hard to load filament in it, and I also don’t like that it’s not attached in some way to the printer. It would be great if there would be a printable part to use and fix it in place. The good news is that it does its job without any issues.
Test prints on Fysetc Prusa Mini
Screw
I thought it would be a good idea to do the first print with a test file available on the Original Prusa Mini USB drive. So, I downloaded the screw and nut from PrusaPrinters and gave it a go.
The print quality is good, extrusion is consistent and the nut spins freely. Quite impressive for an out of the box print.
- Material: Devil Design Orange PLA
- Layer Height: 0.2mm (Quality Profile)
- Nozzle Temperature: 215C
- Bed Temperature: 60C
- Print Speed: 40 mm/s
Phil-A-Ment
I had some leftover white PLA from a Creality machine which is more than a year old, so I printed this Phil-A-Ment model, thinking I will give this Fysetc Prusa Mini Clone a run for its money.
I was not expecting this to come out this well considering that the filament is old, and it was kept exposed to air prone to add moisture to it. Extrusion is consistent, overhangs are great, and I can’t really complain.
- Material: Creality White PLA
- Layer Height: 0.15mm (Quality Profile)
- Nozzle Temperature: 215C
- Bed Temperature: 60C
- Print Speed: 40 mm/s
Owl
A good example of bad print with old filament is this one. The Silk PLA which I used for this model was opened more than a year ago and took some moisture. As you can see, because of the popping inside the nozzle there are some unextruded points on the external walls.
Stringing is also quite apparent in the top, but this might also be caused by the lower quality hotend / heatbreak cooling because it occured on PETG prints too.
- Material: Eryone Silver Silk PLA
- Layer Height: 0.15mm (Quality Profile)
- Nozzle Temperature: 215C
- Bed Temperature: 60C
- Print Speed: 40 mm/s
Door Handles
Why not do a functional print from time to time? I needed a pair of door handles, so I printed them in black PETG with the 0.2mm speed profile. The print quality is decent, with a small amount of stringing.
- Material: Devil Design Black PETG
- Layer Height: 0.2mm (Speed Profile)
- Nozzle Temperature: 230C
- Bed Temperature: 90C
- Print Speed: 50 mm/s
24 AA Battery Crate
I printed the 24 AA Battery Crate from Clockspring in Devil Design Translucent Orange PETG. Print quality is decent, but the inside of the print was quite full of small wisps and plastic remnants. This caused the battery holes to be too small and I can’t use the box.
The print profile for PETG doesn’t seem to work as well as the one for PLA, but with a bit of tweaking I think it’s possible to get better results.
- Material: Devil Design Translucent Orange PETG
- Layer Height: 0.2mm (Speed Profile)
- Nozzle Temperature: 230C
- Bed Temperature: 90C
- Print Speed: 50 mm/s
Commissioner Gordon
I remembered that I haven’t printed the Commissioner Gordon bust from Eastman, so I gave it a go on the Fysetc Prusa Mini Clone. The print quality is excellent, and I don’t have any complaints.
Even the supported areas for the glasses look untouched which is great!
- Material: Filamentone Glint Midnight Blu PLA
- Layer Height: 0.12mm (Quality Profile)
- Nozzle Temperature: 215C
- Bed Temperature: 60C
- Print Speed: 40 mm/s
Kong Bust
Finally, I printed the Kong bust from Wekster and I got to say, this is impeccable. Really nice finish on the model even though it’s printed with glint filament.
- Material: Filamentone Gold Glint PLA and Extrudr Greentec Pro
- Layer Height: 0.15mm (Quality Profile)
- Nozzle Temperature: 215C
- Bed Temperature: 60C
- Print Speed: 40 mm/s
Conclusions: Is the Fysetc Prusa Mini worth it?
As you can see, the Fysect Prusa Mini Clone is working really well and it’s capable of producing excellent looking prints without needing any kind of calibration or tuning. Do I recommend getting one? Let me explain.
The main reason you would get a Fysetc Prusa Mini clone instead of the real deal would be the shipping time. You might be able to get it faster if it’s available in a local warehouse, and you also don’t need to wait for it to be produced. Right now, the Prusa Mini+ has a lead time of 12 weeks from the purchase date which is quite high.
You might say the Fysetc Prusa Mini Clone is cheaper, and you might be right. But this is dependent on the location from where you are planning to order it. And you also need to consider other costs.
Right now, the Prusa Mini+ is just 349$ (for US) so I don’t think the price difference is worth the trouble of getting a clone if you live in US. Considering that you need to print your own parts (factor in the cost for time, energy, and filament) the price difference is less than 100$. For that price difference, you also get a warranty service with Prusa support.
In Europe, the original Mini is around 400E which is quite a big jump and getting a clone instead might be a good alternative because it’s available in local warehouse. The end cost will be around 250E including the filament used to print the parts.
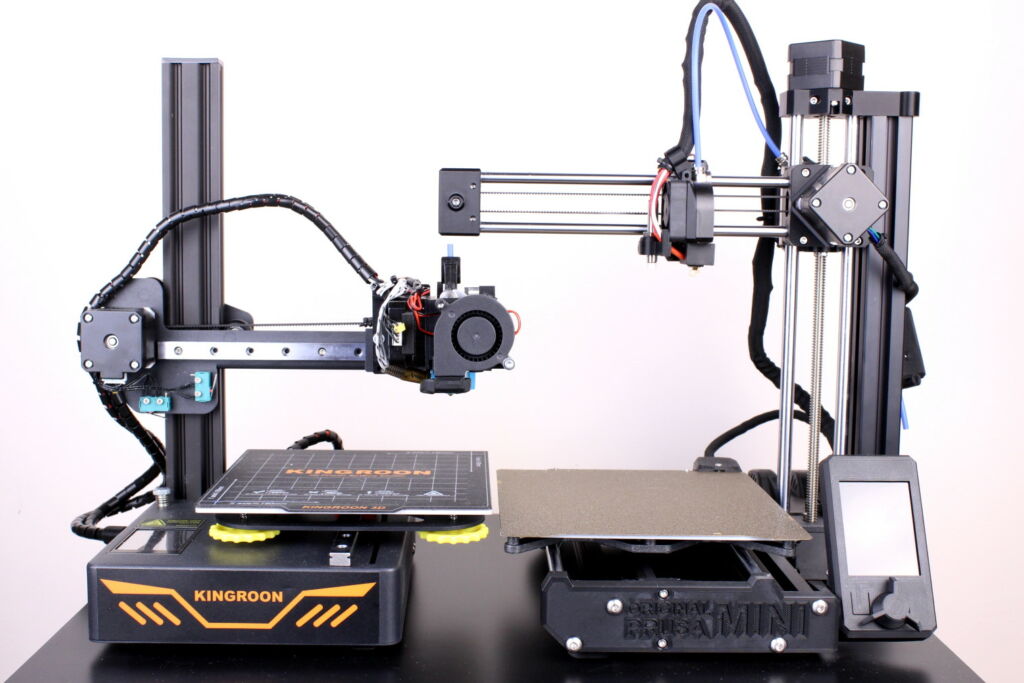
Before making any purchase, I strongly recommend checking out the Kingroon KP3S. It’s small, compact and the print quality is quite good. If you decide to invest a bit of time and money, you can make it even better.
The main reason you would get a Fysetc Prusa Mini clone instead of the real deal would be the shipping time. I don't think there's any other reason to go with the clone instead of the original Prusa Mini, because the price savings are not worth the trouble in my opinion.Fysetc Prusa Mini Rating
Design
Specs
Noise Levels
Ease of use
Print Quality
Price
Where to buy the Fysetc Prusa Mini?
The Fysetc Prusa Mini Clone can be purchased from the following websites:
Banggood – 289$ with discount code BGeb28d6
AliExpress
I recommend checking out the Discount Codes page before purchasing. I regularly update the article with discount codes for various online shops, and you might find one for this particular model.
The Prusa Mini Clone was provided free of charge by Banggood for the purpose of this review. While the article includes affiliate links, all opinions are my own. Nobody reviewed the article before it was posted, following the Review Guidelines.
Liked it?
|
|





That’s a very good article. Thank you!
Great article and review!