Bi-Metal Heat Break Review – No More Clogs!
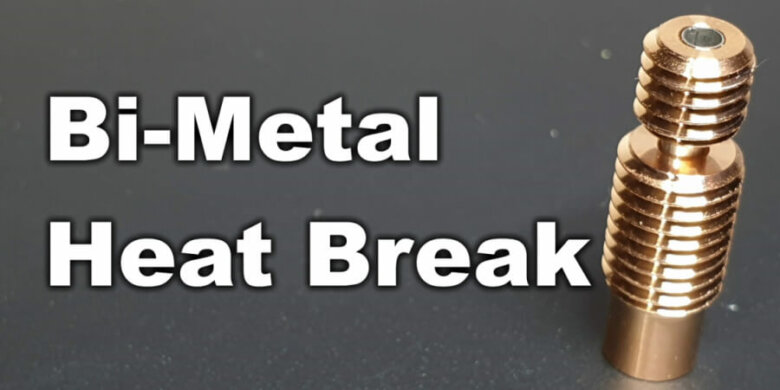
In the 3D printing world, heat break designs have gone trough a lot of changes. From the plain threaded tube in the past we reached the bi-metal heat break. This is a new design which improves thermal performance, and allows the use of lowered powered fans for less noise.
Why use a Bi-Metal heat break ?
Usually when you think about upgrading the heat break, it’s because you want to print higher temperature filaments. Most of the heat breaks used on regular printers are made from metal with a PTFE tube inside. This tube thermally insulates the filament before it reaches the nozzle.
Print higher temperature filaments
The PTFE lined heat break is fine for PLA prints because you don’t really need to go over 210C. But if you plan to print PETG or ABS it’s important to have a all-metal heat break to avoid any PTFE degradation and dangerous fumes.
An all-metal heat brake will allow you to reach up to 300C without any concerns, but there’s a downside. PLA is a bit harder to print with all-metal heat break.
Better heat transfer
Because the bi-metal heat break uses a better design, the temperature from the heatblock is not transferred to the cold end of the heat break. This means that you don’t need a lot of cooling surface if there’s not much heat to remove.
By upgrading to a bi-metal heat break, temperatures will be lower inside the cold zone and PLA prints with an all-metal heat break will be clog free.
The bi-metal heat break can be a great upgrade for the Artillery Sidewinder X1 and Genius. The stock heat break has PTFE lining, and the heatsink doesn’t have the best cooling available. By upgrading to a bi-metal heat break, you will be able to print hotter and have less heat going up the heat break.
Less noise
If you have less heat on the heat break cold zone, then you don’t need powerful fans for cooling that heatsink. I still recommend using a good quality fan with enough airflow. But if you are considering using quiet Noctua fans, now you can do it without the risk of clogs.
Noctua fans are still not recommended with a regular heat break.
Who came up with the Bi-Metal idea ?
Don’t quote me on this, but from what I know, Slice Engineering was the first company who came up with the idea of a bi-metallic heat break. The whole idea was introduced with the Slice Engineering Copperhead hotend. They took the great thermal design from the Mosquito Hotend, and adapted it to a heat break.
The whole concept is to use a thin metallic tube between the hot zone and cold zone of the heat break. The thermal transfer is bad trough that thin metallic tube, and this translates in much improved performance in cooling.
Currently, there are Copperhead Heat Breaks on their website for $24.99 (preorder). Considering the Trianglelab version is around 20$, I recommend you spend some extra money for the Slice variant to support their work, and also to get a guaranteed quality product. They also have more options, so you will probably find a heat break compatible with any kind of printer.
Trianglelab Bi-Metal heat break
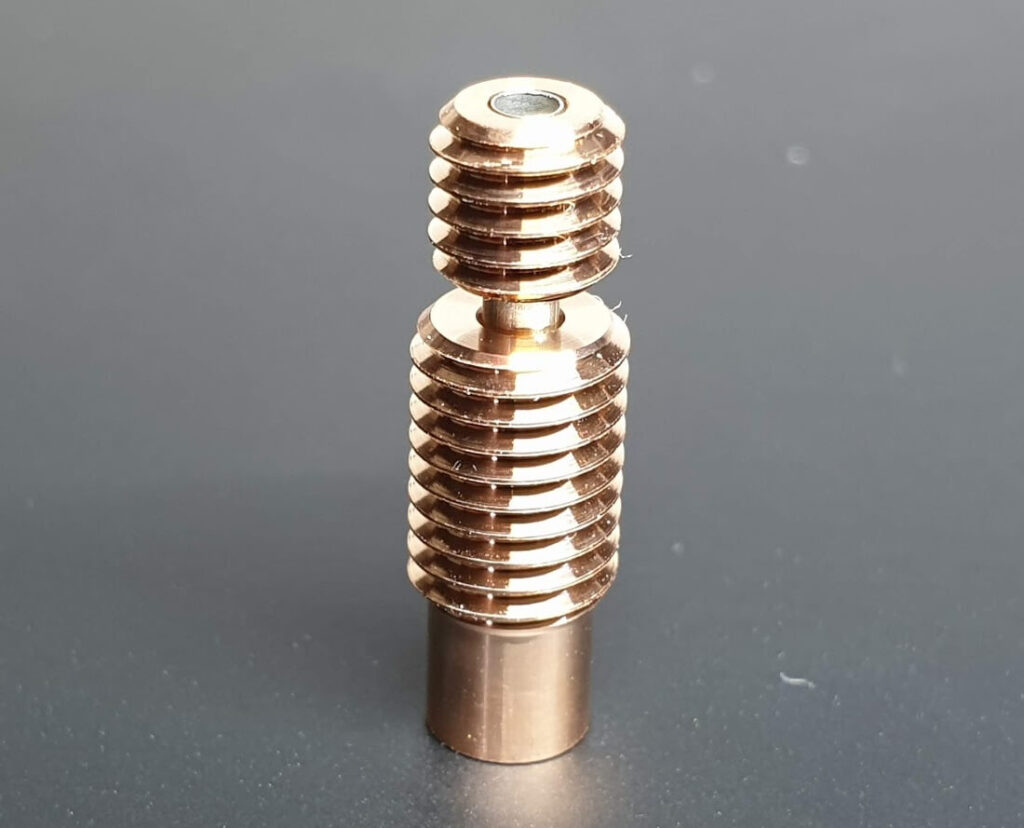
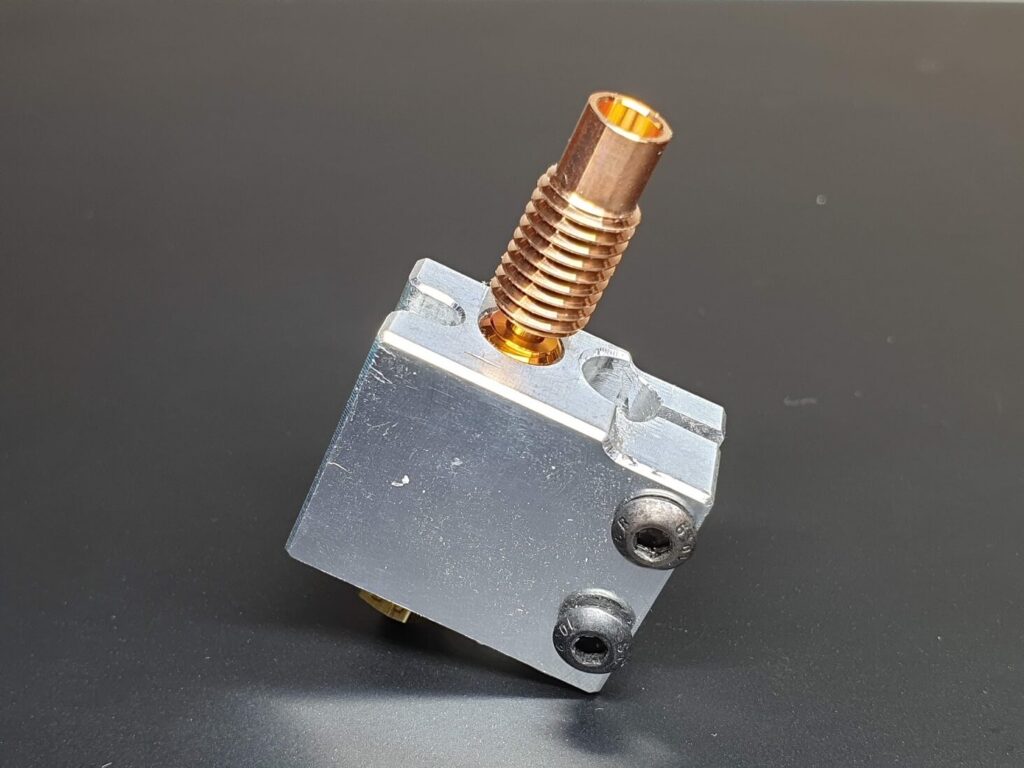
Trianglelab took the idea from Slice Engineering and manufactured this bi-metal heat break. It’s made from copper and it has a thin stainless steel tube running trough the heat break.
I got the Trianglelab Bi-Metal Heat Break from Aliexpress and had it delivered in less than 1 month.
When installing the new bi-metal heat break, make sure you don’t overtighten it. The stainless steel tube is thin. If too much pressure is added, the tube can be bent and your precious bi-metal heat break will need to be replaced.
Testing procedure for the Bi-Metal heat break
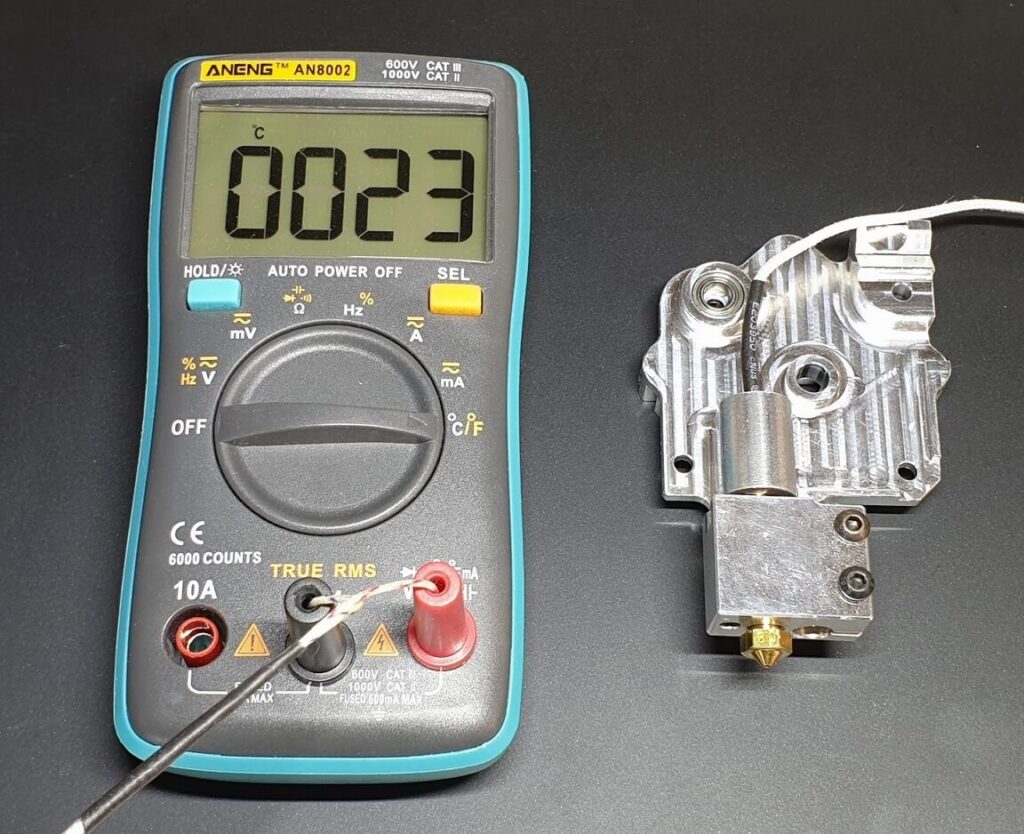
In order to properly test the bi-metal heat break, I made a test rig from old parts after the SKR 1.3 upgrade for Sidewinder X1. I used the MKS Gen L clone to power everything, a Volcano heatblock with 40W heater cartridge and a regular 100k thermistor.
The temperature inside the heat break was checked using a multimeter with a temperature probe. The probe was inserted in the heat break just above the transition zone and the end was touching the inside metal wall.
The ambient temperature was 22C. For each test, the hotend temperature was set then I waited 10 minutes for the temperature to stabilize. After 10 minutes, I checked the temperature from the multimeter probe.
Please note that I tried to keep all variables the same in order to have good results. These are ideal setups, with no airflow constrains or other parts which may influence the temperature (ex: heatbed temperature). Real life temperatures can be a few degrees higher.
Regular All-Metal heat break with Titan Aero heatsink
First test was done using a regular all-metal heat break with the Titan Aero heatsink. I installed a quality 40mm fan, and started the tests. The temperatures are too much for PLA prints, but still ok for printing PETG or ABS low risk of clogging.
| Hotend Temperature | Setup | Duration | Heatbreak Temperature |
| 180C | Regular Metal + Titan Aero | 10 minutes | 38C |
| 210C | Regular Metal + Titan Aero | 10 minutes | 42C |
| 250C | Regular Metal + Titan Aero | 10 minutes | 47C |
| 280C | Regular Metal + Titan Aero | 10 minutes | 50C |
Trianglelab Bi-Metal heat break with Titan Aero heatsink
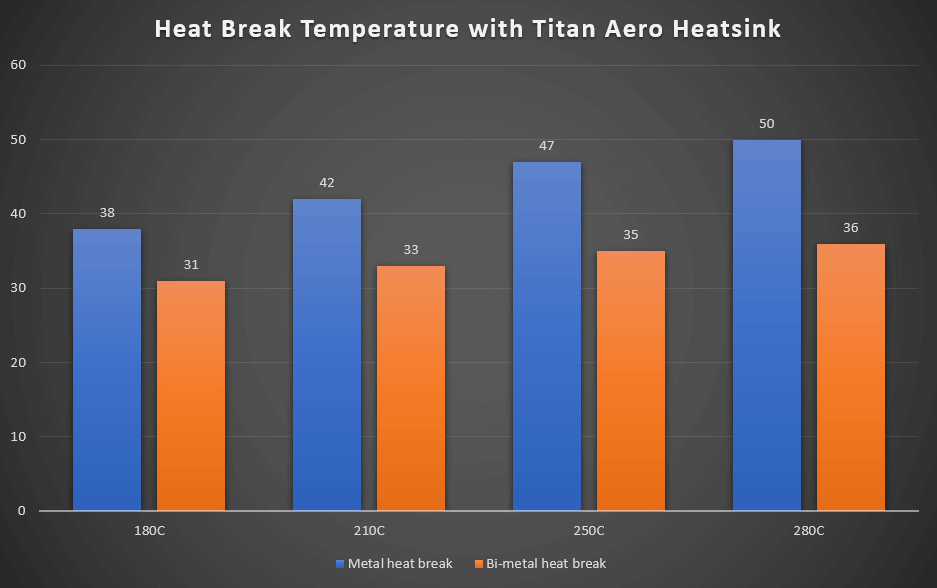
After replacing the regular all-metal heat break with the bi-metal, things have changed. As you can see, temperatures are much better and printing PLA is now possible without any concerns.
| Hotend Temperature | Setup | Duration | Heatbreak Temperature |
| 180C | Trianglelab Bi-Metal + Titan Aero | 10 minutes | 31C |
| 210C | Trianglelab Bi-Metal + Titan Aero | 10 minutes | 33C |
| 250C | Trianglelab Bi-Metal + Titan Aero | 10 minutes | 35C |
| 280C | Trianglelab Bi-Metal + Titan Aero | 10 minutes | 36C |
Chart for comparison
Regular All-Metal heat break with V6 heatsink
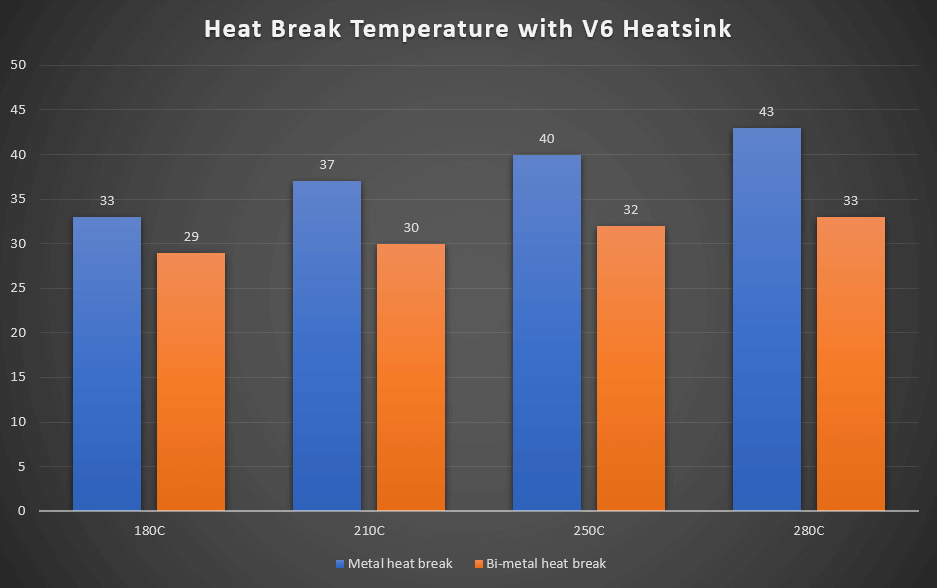
I was not expecting this, but it seems that the V6 heatsink is much better compared to the Titan Aero. With the regular all-metal heat break, any type of material should be printed without any concerns.
| Hotend Temperature | Setup | Duration | Heatbreak Temperature |
| 180C | Regular Metal + V6 Heatsink | 10 minutes | 33C |
| 210C | Regular Metal + V6 Heatsink | 10 minutes | 37C |
| 250C | Regular Metal + V6 Heatsink | 10 minutes | 40C |
| 280C | Regular Metal + V6 Heatsink | 10 minutes | 43C |
Trianglelab Bi-Metal heat break with V6 heatsink
While the temperature difference is not as big, there’s an obvious improvement with the bi-metal heat break.
| Hotend Temperature | Setup | Duration | Heatbreak Temperature |
| 180C | Trianglelab Bi-Metal + V6 Heatsink | 10 minutes | 29C |
| 210C | Trianglelab Bi-Metal + V6 Heatsink | 10 minutes | 30C |
| 250C | Trianglelab Bi-Metal + V6 Heatsink | 10 minutes | 32C |
| 280C | Trianglelab Bi-Metal + V6 Heatsink | 10 minutes | 33C |
Chart for comparison
Conclusions
After this quick test, I can safely say that bi-metal heat breaks are the future. They improve the thermal performance of any hotend and offer more flexibility in the fans we can choose for out printers. We may even see fanless hotends in the near future.
Even though I tried to measure everything as accurate as possible, there’s still the possibility I missed something. Please let me know if you find any issues with the information presented here.
I will also defer from debating if buying clones is right or wrong. I will continue to test and review 3D printers and components from various sources and share my honest opinions about them. The end user should decide where to spend the money.
More information about this, in Vector 3Ds video:
I will update this review with more heat breaks as soon as they get delivered. The NF-V6 Crazy Copper Heat Break should arrive in a few days. Also, I can’t wait to see the performance of Slice Engineering heat breaks. I am sure the machining quality will be exquisite, with excellent performance.
Liked it?
|
|

