Artillery Sidewinder X1 Review
Artillery 3D (recently renamed in EVNOVO) is a Shenzhen company founded in October 2018 and its main focus is producing quality 3D Printers. One of the most popular printers made by EVNOVO is the Sidewinder X1.
Today, we will review the Sidewinder X1 and test its functionality.
Packaging
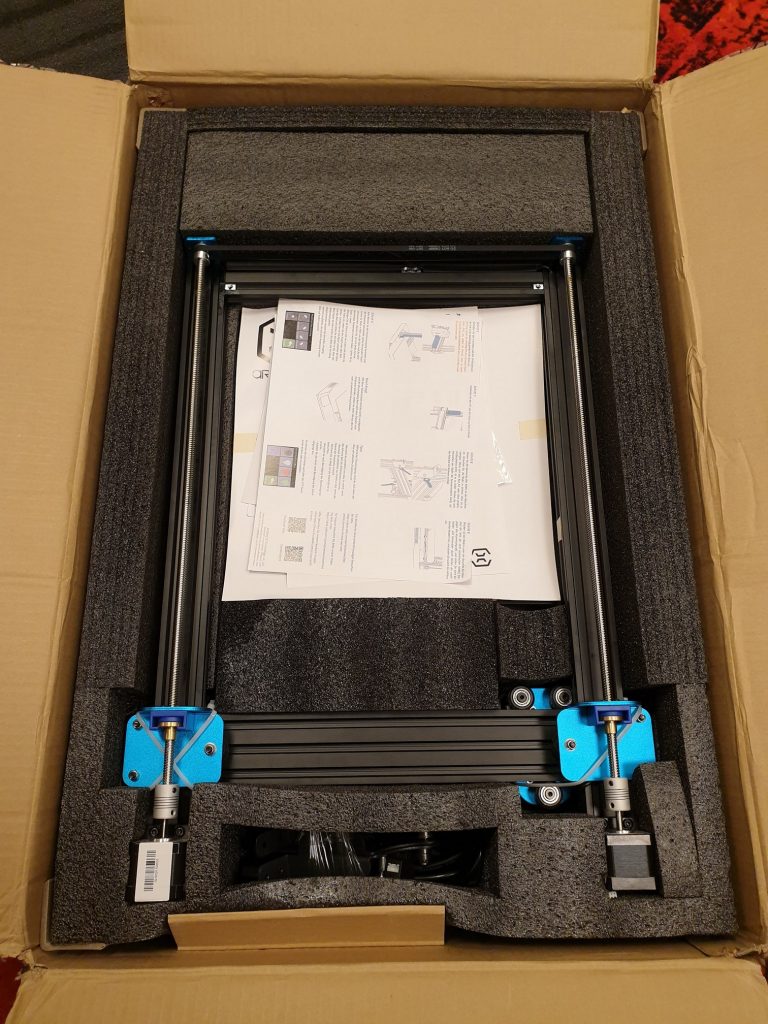
The Sidewinder X1 has one of the best packaging for a 3D printer. It comes in a big box with generous amounts of foam that protects the printer. The packaging material has been tested multiple times to ensure that the contents arrive safely to the buyer.
EVNOVO even has a video where they show the packages being dropped from 1.5 meters, to check if there is any damage.
I got my printer in great condition, and I did not encounter any issues with the items.
Assembly and contents
In the package we get the Sidewinder X1 split into two parts. The main printer base where all the electronics are housed and the X and Z gantry that holds the extruder. Besides this, you also get a nice pack containing spare parts.
Considering that a 3D printer has a lot of moving parts, it’s nice to see that you get spares that minimize downtime in case of a fault.
Assembling the printer is really easy, and it took less than 10 minutes. The gantry sits on top of the printer base and only 4 screws need to be installed. The ribbon two cables need to be connected, including the Z motor cables.
Checklist for the first print
- Make sure that the wheels from the heatbed are tightened and there is no play when trying to wiggle the bed. I needed to tighten the wheels.
- Make sure that the wheels from the extruder are tightened and there is no play when trying to wiggle the extruder assembly. In my case, the extruder wheels where properly tightened.
- Check the motor pulleys from the X axis and Y axis and make sure the screws are properly tightened. I had an issue with layer shifts on the X axis caused by a loose motor pulley
- Check the flexible motor couplers don’t touch the Z rods. I needed to raise the Z rods a bit and then tighten the screws from the couplers. The lead screws need to have a bit of space between the motor shafts, for the couplers to attenuate any movement caused by the lead screws being bent or uneven.
- Check the belt tension for the X and Y axis. If the belts are not tight, layer shift can appear.
- Start the printer and heat the nozzle and heatbed (200C for the hotend and 60c for the heatbed should be fine).
Artillery Sidewinder X1 specs
| Specifications | |
| Build Volume | 300 x 300 x 400mm (11.8 x 11.8 x 15.75in) |
| Layer resolution | 0.1mm |
| Maximum print speed | 150mm/s |
| Maximum travel speed | 250mm/s |
| Print bed | Glass-ceramic |
| Heat bed type | Rapid heating AC heat bed |
| Build plate heat up time | 80℃ in less than 2 minutes |
| Filament diameter | 1.75mm |
| Supported filament | PLA, ABS, Flexible PLA, TPU, Wood, PVA, HIPS |
| Bed leveling | Manual |
| Print technology | FFF (Fused Filament Fabrication) |
| Extruder type | Direct Drive Extruder (Titan type) |
| XYZ resolution | 0.05mm, 0.05mm, 0.1mm |
| Nozzle type | Volcano |
| Nozzle diameter | 0.4mm |
| Nozzle temperature | up to 240℃ |
| Nozzle heat up time | < 3 minutes |
| Noise level | < 60 dBA |
| Power consumption | 100V-240V 600W max (with heated bed turned on) |
| Power supply |
Plug EU Standard(220v) or US Standard(110v) – Optional
|
| Control board | MKS Gen L |
| Stepper driver | Exclusive ultra-quiet stepper driver (256 micro-stepping) |
| Advanced sensors | 3 inductive endstop sensors |
| Machine weight | 14kg |
| Shipping weight | 16.5kg |
| Machine dimensions | 550 x 405 x 640mm 550 x 405 x 870mm (w/ spool holder) |
| Shipping box dimensions | 780 x 540 x 250mm |
Build quality and features
1. Base assembly
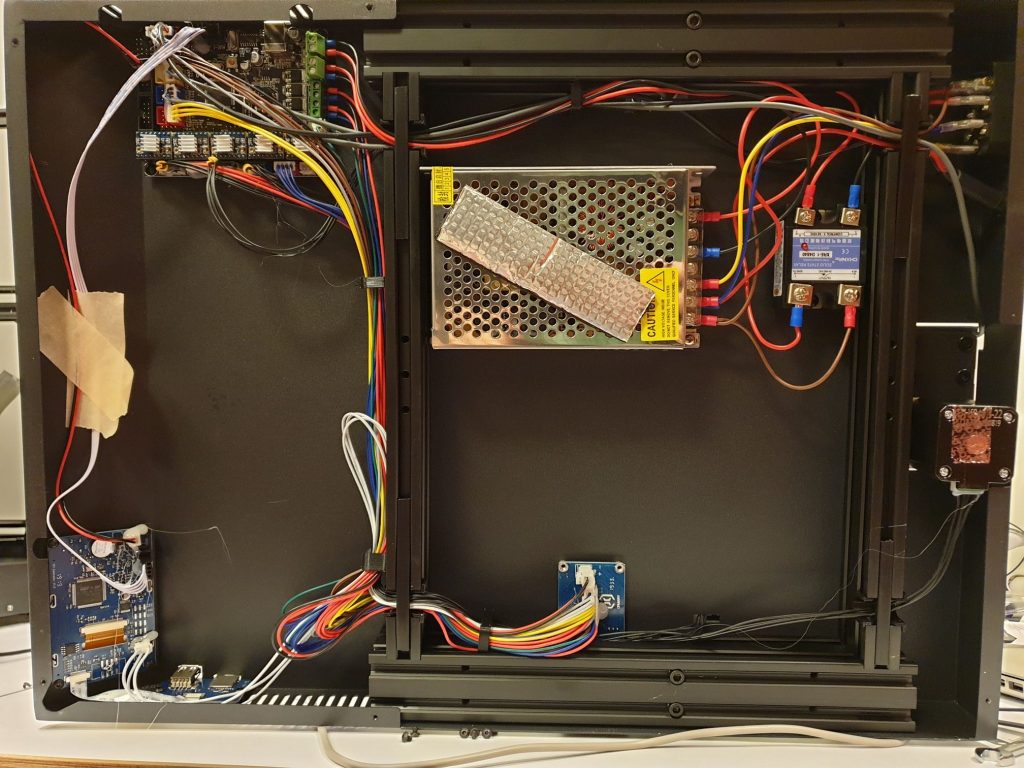
Sidewinder X1’s base is made from a metal sheet. On top of it, the heatbed (or Y axis) runs on a 60x20mm aluminum extrusion which is great for stability.
There are also vent holes in the left and right sides of the base, that allow cool air to be taken in. On the bottom, there’s a 24V 80mm fan that cools the entire assembly. Considering the amount of air it pulls out from the base, it can be considered silent and efficient.
The power supply is passive, but considering that it only powers the printer hardware and hotend, it’s more than enough. The heatbed runs on mains power (in my case 220V) and it’s powered by the integrated Solid State Relay.
In the front left of the base, the color touchscreen resides, and on top the SD card and USB outlet.
The mainboard is a MKS Gen L running TMC2100 motor drivers. I don’t think the drivers are genuine, but I can’t say I had any issues with them. No overheating and no lost steps.
2. Heatbed
On the Sidewinder X1 we get a large 310×310 mm heatbed made from glass that has a textured finish on it. This improves the layer adhesion and even allows PLA prints without heat.
I could not find any uneven spots in my bed, making the leveling a walk in the park with the large leveling knobs present under it.
As previously mentioned, the heatbed runs on mains power allowing quick heating and higher temperature. The silicon heater is insulated with a thick piece of insulation material improving efficiency. To be honest, i can’t understand why this insulator is not used by any 3D printer manufacturer, considering that it helps a lot and the cost to implement it is next to nothing.
Heating to 60c takes ~50 seconds and reaching 100c takes less than 2:30 minutes. Excellent results considering the size.
Unfortunately, there is no power cable strain relief installed, so this is one of the first prints i did. Mwww has a great design available on Thingiverse. Please make sure you print this upgrade because without proper strain relief on the heatbed cable, issues may occur and considering there’s mains voltage in those cables this can be a death hazard.
Another “issue” is that some prints stick a bit too well to the heatbed. This can be a pro or a con for some users. If you encounter issues with removing prints, try to heat up the hotbed to around 70-80C for a minute. Then, try to wedge a cutter or sharp knife under the print and wait for the heatbed to cool down. You should be able to easily remove it after the heatbed reaches environment temperature.
3. Z axis assembly
The Z axis assembly consists of 40×20 aluminium extrusions. It has dual motors with dual lead screws lifting the X axis.
Lead screws are kept in sync by the belt in the top, which is nice to see. On my Creality CR 10S PRO, the main issue i had was with bed leveling. Because of the weight of the X assembly, the lead screws would get out of sync causing fist layer issues.
By using this belt, no “drooping” of the X axis was encountered during my testing. Lead screw stabilization bearings are also installed. I had issues in the past with these, but on the Sidewinder X1 there’s no issue for me.
4. X axis assembly
The X axis assembly consist of a 60×20 aluminium extrusion, just like the heatbed. Considering that the extruder is a direct-drive, this is needed for quality prints. EVNOVO engineers did a great job choosing these big extrusions in order to minimize backlash.
A Titan Aero clone with a pancake motor powering it, and a Volcano style hotend melts plastic for the Artillery X1.
Unfortunately, the Titan used by EVNOVO is not the best. The cooling performance in the heatbreak area is not that great because they use a simple aluminium heatsink that is bolted to the mount. I did not have any issues when printing but i would like to see an upgraded cooling solution in the future.
The extruder assembly, including the LED’s, hotend, fans and motor is powered using a single flexible flat cable that plugs into the side. I really like this design because it makes the whole printer look a lot better eliminating the need for wire management.
But the implementation of this flexible cable is not good enough. The ends of the cable use a friction-lock system and unfortunately, the contacts are not always good. I know this because after around 50 hours of printing, the flexible cable from my printer started to smoke, and thermal runaway protection stopped my printer.
Fortunately, EVNOVO support works great. I opened a ticket and after a few messages, i confirmed my address for replacements to be sent. Replies arrived in less than 1 hour which is impressive.
I contacted Creality support in the past, and received a reply after a few days, but EVNOVO support was really fast.
Test Prints on the Sidewinder X1
My first print was the Moai from Thingiverse printed in Fiberlody Gray Easy PLA with 0.2 layer height, 205c and 60mm/s. As you can see, the extrusion was not exactly calibrated, and there is a bit of Z banding.
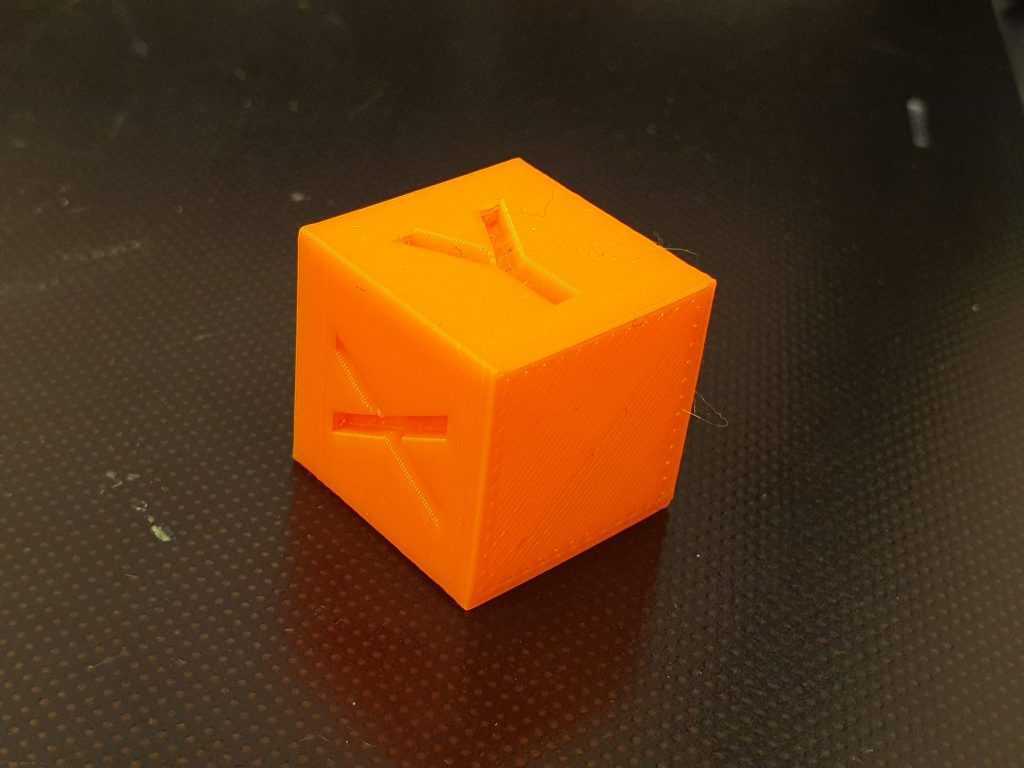
After i re-calibrated the extruder and re-attached the flexible couplers on the Z rods i did a second print, which is the classic calibration cube in PETG.
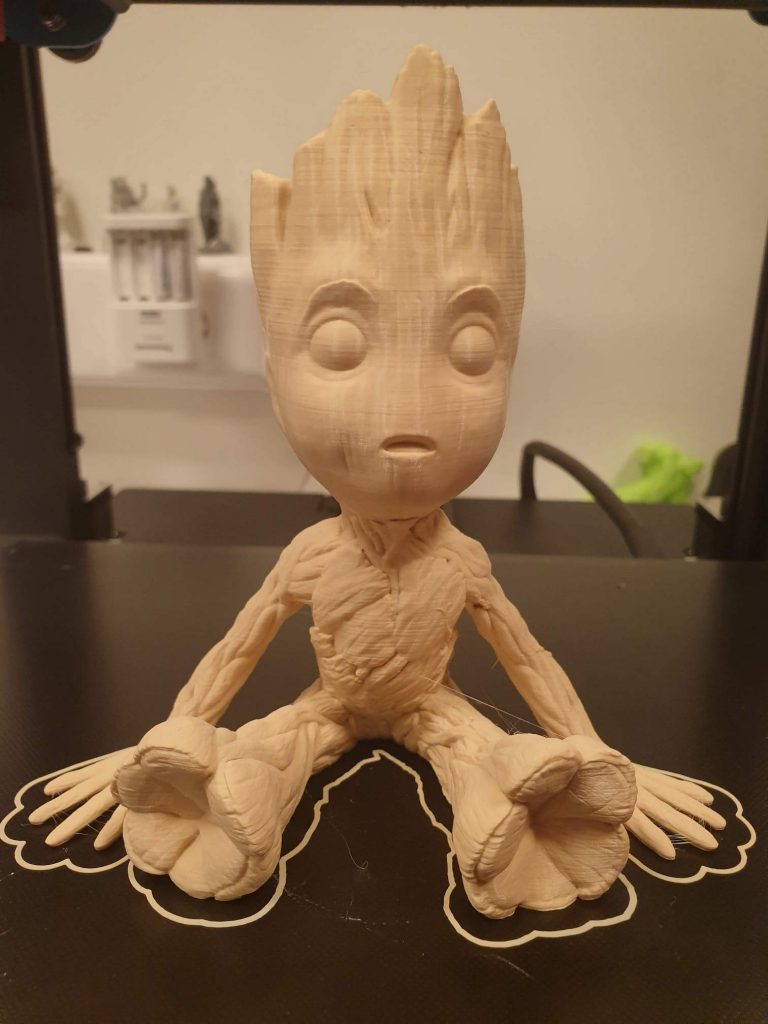
This is the Baby Groot from Thingiverse printed in Devil Design Beige PLA with 0.1 layer height, 205c and 60mm/s. The quality was better, but unfortunately I could still see some Z banding. I remembered that a PID Tuning needs to be done for each new printer, so i did just that, and started the next print.
This is the Spiral Vase from Thingiverse printed in Devil Design Galaxy Purple PETG, with 0.3 layer height, 0.6 line width, 240c and 40mm/s. Spiral mode was used, and the end result is great.
Printed in less than 6 hours.
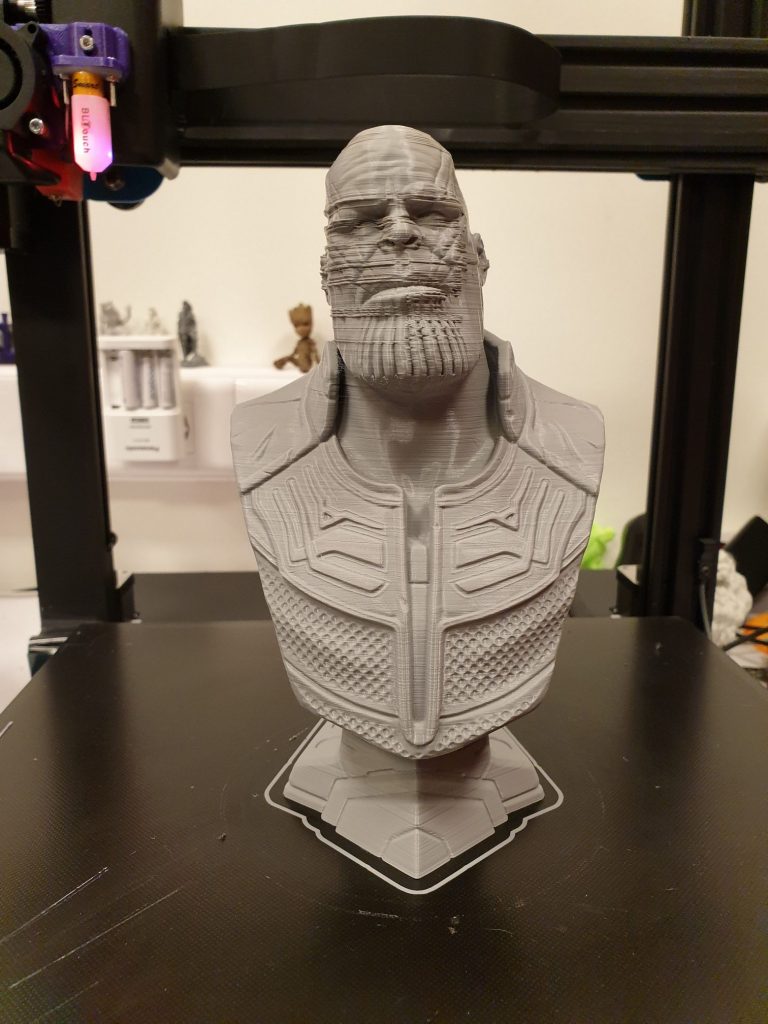
Happy that i managed to fix the issues, I wanted to do a big print, and started the Thanos Bust from MyMiniFactory in Devil Design Gray PLA with 0.1 layer height, 205c and 60mm/s. Unfortunately, when i got close to finish, layer shifting started to occur. After checking for issues, i noticed that the layer shift is caused by the X motor pulley which was not tightened good enough from the factory. I re-tightened the pulley and layer-shift was gone.
After making sure everything is properly tightened and calibrated, prints got a lot better. This is the Rocket Pig Games Support-Free Werewolf printed with Devil Design Gold PLA, 205C, 0.15 layer height, 60mm/s. The STL was sliced using a modified Filament Frenzy profile for Simplify 3D that can be downloaded from here.
With the same profile, i printed the MatterHackers’ Mascot Phil A Ment Devil Design Pink TPU, 205C, 0.15 layer height, 60mm/s. The speed is a bit too much for TPU because the cooling cannot keep up with the printer.
I think that after I upgrade the part cooling to a dual-head version TPU overhangs will improve. But still a good print, considering the settings.
Sidewinder X1 upgrades to improve the printing experience
The only upgrade i did to this printer is adding a BLTouch. Not because the bed is hard to level (quite the contrary, the bed is rock solid) but because i am used to auto leveling and it makes my life a lot easier.
To install the BLTouch sensor, i followed the Waggster Mod from Thingiverse. The mod is really easy to do and there’s even a complete video on how to do this, but please note that this will void your warranty.
In the future, i also plan to add some sort of brace to the frame, to make it more stiff and allow for higher speeds. Besides that, i already ordered a Textured Spring PEI Sheet with magnetic base to remove finished prints easier. I will update this article with results after I receive it.
Conclusions
Overall, the Artillery Sidewinder X1 3D printer is awesome.
In my opinion, this is a really good price for a solid printer that produces great results. Out of the box, the prints are decent, but with a bit of tweaks and fine tuning that takes less than 1 hour, the printer can show its capabilities.
I wrote a detailed guide on how to calibrate the Artillery Sidewinder X1 to get the best results possible.
Currently, the Artillery Sidewinder X1 can be ordered from:
AliExpress
Gearbest
Banggood
Amazon
Geekbuying
I recommend checking out the Discount Codes page before purchasing. I regularly update the article with discount codes for various online shops, and you might find one for this particular model.
The Good
- Solid construction with big aluminium extrusions for X and Y axis.
- Geared Titan extruder that offers precise movement and good flexible filament prints.
- Volcano hotend allowing for fast prints.
- Clean flat and flexible cables.
- Dual Z axis synchronized by belts.
- Insulated AC powered heatbed for fast heating.
- Color touch screen.
- Filament runout sensor.
- Quiet stepper drivers and fans.
- Inductive endstops.
- USB slot for printing, besides the regular SD card.
- Good quality print surface that eliminates the need for print adhesion solutions.
- Good support, with quick replies.
- Great packaging for ensuring the printer arrives safely.
- Easy assembly – the printer is 95% assembled when received.
- Package with spare parts in case issues occur.
The Bad
- The flexible cables don’t have a proper way of securing them, causing issues.
- Quality control is not the best, and some parts are not assembled correctly (Z rod couplers, motor pulleys).
- The stock firmware does not support EEPROM save.
- The Titan extruder lever is brittle and can break
- Sometimes, the prints adhere to the heatbed too well
The Ugly
- The filament run out sensor has an awkward mounting solution.
- The spool holder can be hard to adjust if you use different size filament spools.
- There is some wobble when printing tall objects.
- The Titan extruder is a clone, and the heating is not the best. It did not cause issues, but it can be improved with small tweaks.
Compared to my Creality CR 10S Pro, the Artillery Sidewinder X1 took a lot less fiddling and i could focus on printing instead of fixing issues that should not be present. If EVNOVO manage to further improve the quality control, and somehow improve the flexible cable mounts, this printer will be really popular and there won’t be any reason why not to recommend it to beginners and advanced users alike.
I can’t wait to test it’s little brother, the Artillery Genius and see if it performs just as well.
The Sidewinder X1 was provided free of charge by Artillery for the purpose of this review. While the article includes affiliate links, all opinions are my own. Nobody reviewed the article before it was posted, following the Review Guidelines.
Liked it?
|
|

