Ultimate 3D Printer Upgrade Purchase Guide
I thought it would be a good idea to do a list of my recommended 3D printer upgrade. I tested a lot of hardware for 3D printers, I’ve played around with more than a dozen different machines and I have a good understanding of how things work.
The following article includes my favorite 3D printer upgrades which were tested by me, or I know they offer a benefit when using them. It’s going to be a long article, so feel free to use the table of contents to navigate to the section you are interested in.
Before you start
Upgrading your printer can easily become and addiction. If you like to tinker with your 3D printer and you are always looking to improve your print quality, you know what I mean. I must confess that I like tinkering with my printers more than starting a print and wait for it to finish. I love to put some work into a machine and work my way up until it prints great. This whole journey is worthwhile for me, and I think it’s a really nice way to learn the ins and outs of 3D printing.
Most of the people who start upgrading their 3D printer do it because they want to turn a cheap machine into a workhorse which can work reliably and produce quality prints.
Nowadays, there are a lot of machines who work well out of the box, but you can still improve them with a small investment.
Before doing any upgrade to your 3D printer, make sure you know your printer well. Take the time and tune your machine to work well with the stock configuration. Calibrate your extruder, tune your flow then tweak your slicer profile well. After you manage to do that, and you are comfortable with your printer then you can delve in the 3D printer upgrades realm. Success will be more easily achieved and you will be able to fix small issues that can occur while doing this.
Don’t start upgrading your printer with no reason, just because you read a comment online which tells you to do this. Always do your own research before ordering and plan in advance. 3D printer upgrades can lead to frustration if you don’t know what you’re doing and you can even damage your machine.
Also, don’t fear to mess around with your printer. There are people who assume that 3D printer manufacturers do their due diligence in tweaking their machines to print well but this rarely happens when we are talking about cheap 3D printers. Some of the manufacturers always try to save a buck when building a printer and cheap out when installing hardware.
That’s the reason you see a lot of chinese printers which launch and after a few weeks, upgraded version are available. This happens mostly because they “make it work” and then list it for purchase again with upgrades added. They constantly launch newer products without spending the extra mile to further refine their machines.
Of course, if you are buying a more expensive printer from a “name brand” things work better. That’s because the companies who make them spend that extra time to make sure they offer a good experience to their buyers.
A good example is Prusa. You get a good printer out of the box, which was well thought out from the start to offer the best experience to the user. But this reflects into their price. Sure, you can get the same quality from a cheaper printer but you need to account for the amount of time you need to invest in it to tune it, then to add small upgrades for it to work reliably. Then, you start to understand why it’s priced higher than other machines with the same build size and capabilities
In my experience, any 3D printer can be improved in some way. Technology always advances and even a good printer can be upgraded to turn into a great printer.
Please take the information from this guide as an information piece and not as the ultimate truth. Everything you will read is based on my own experience so please do your own research. When installing the upgrades, you are doing it on your own risk and I am not responsible for anything that might happen.
3D Printer Board Upgrade
The main reason to upgrade your 3D printer board is to get 32-bit capabilities from a newer board. More Marlin features can be added trough firmware updates which can contribute to having a better print in the end.
The second reason would be to have better stepper drivers like the TMC2209 which can make a printer much more silent. Better drivers can also allow you to use features which are not available with others (like Linear Advance and Sensorless Homing)
For some of the 3D printer boards listed below you can also get a different operating system like RepRap Firmware, or WiFi capabilities which allow remote control of your machine.
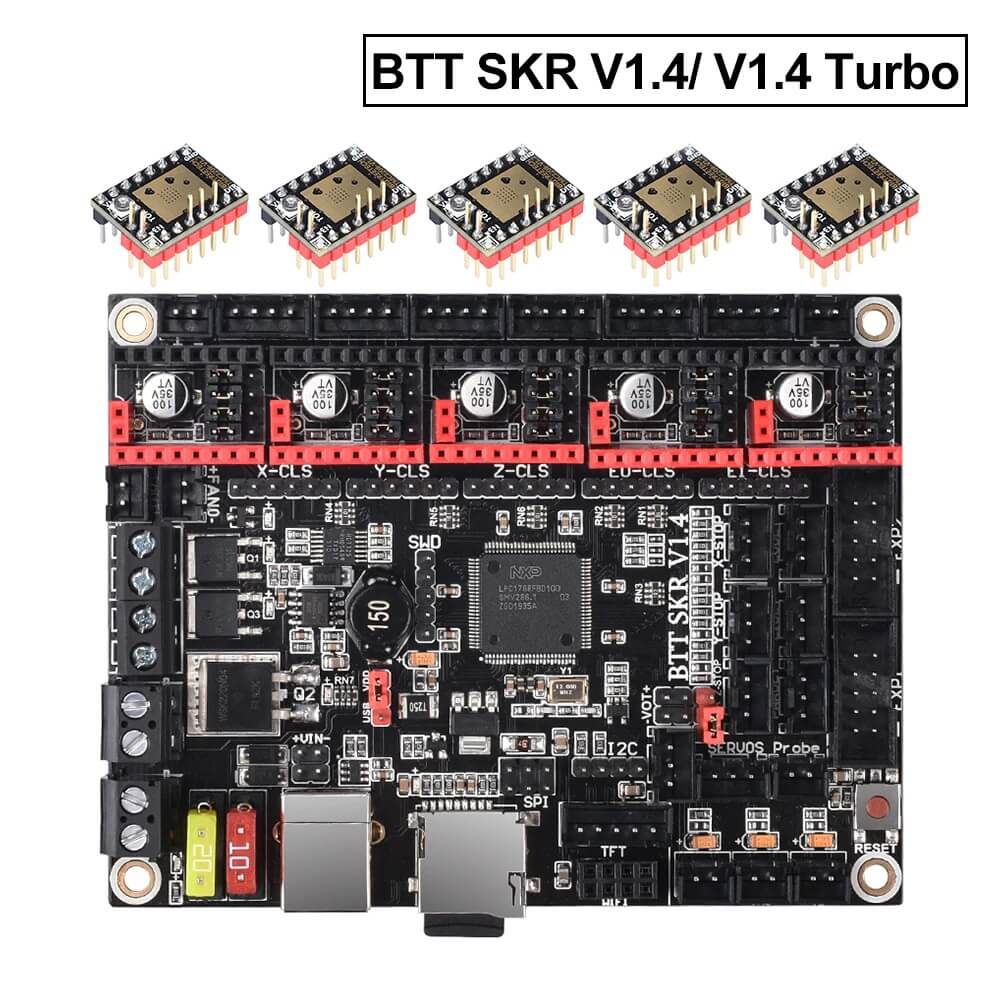
SKR 1.4 / 1.4 Turbo
Probably the most popular board from BIGTREETECH, the SKR 1.4 is a great upgrade for any 3D printer. It’s cheap, has good documentation and you can install up to 5 stepper drivers.
BIGTREETECH has good documentation for their hardware and overall good support which adds up when making your purchase. The components used in their boards are decent and they try to offer the best bang for your buck without doing a lot of compromises in quality.
With a simple module, you can easily add WiFi capabilities to your printer by using the ESP port. There’s also a power module which can be installed with the SKR 1.4 to use with addressable LED lights.
Another benefit for using the SKR 1.4 is the possibility of installing RepRap Firmware. I covered the installation process in this article: RepRap Firmware on Sidewinder X1: SKR 1.3/1.4.
Overall, the SKR 1.4 is a good board which has been available for a while and most of the reports I’ve read online are good. I mostly used the SKR 1.3 board (which is a bit older) but the SKR 1.4 should be an improved version.
The only issue I had with them is shipping. Sometimes I get an order in a few weeks, and in other cases I get my order on more than 3 months.
The SKR 1.4 board can be purchased from the following websites:
Banggood
Amazon
AliExpress
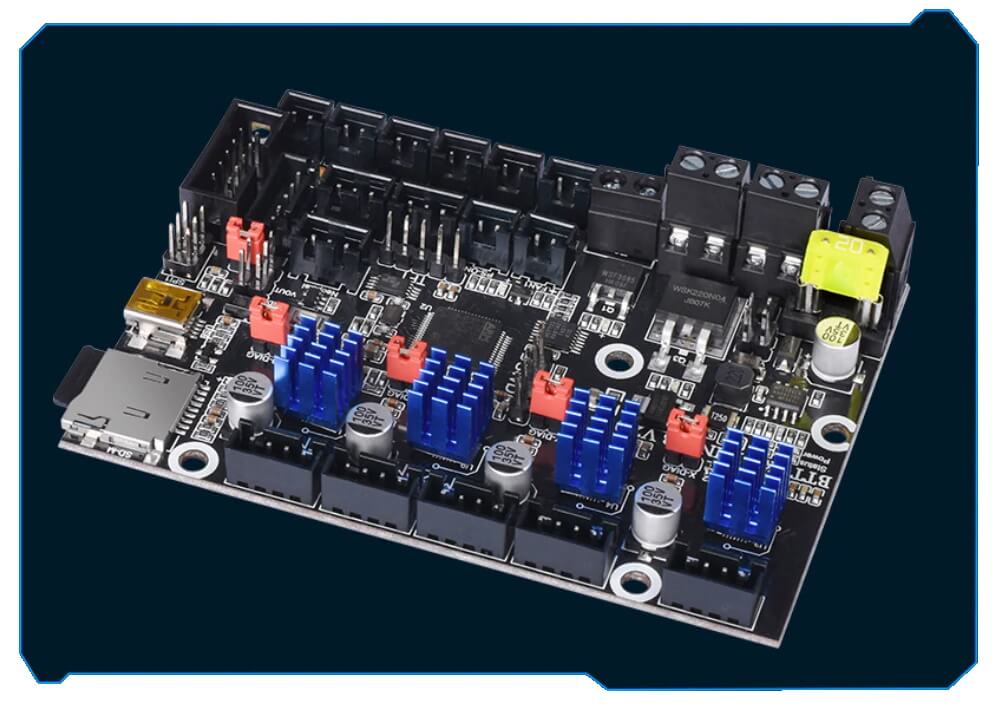
SKR Mini E3 V2.0
Another popular 3D printer board is the SKR Mini E3 V2. It’s really popular for Creality printers because it is built in the same format as the Creality 3D boards.
Usually, the SKR Mini E3 is purchased as an alternative to the Creality Silent Board because it has TMC2209 drivers (which supports Linear Advance) and a 32-bit CPU.
It’s an easy drop-in replacement for the Ender 3 but it can be adapted to other Creality printers by recompiling Marlin firmware. I am running one on my Ender 5 Plus and I am really happy with it.
The SKR Mini E3 V2.0 board can be purchased from the following websites:
Amazon
AliExpress
Banggood
MKS SGen_L V2.0
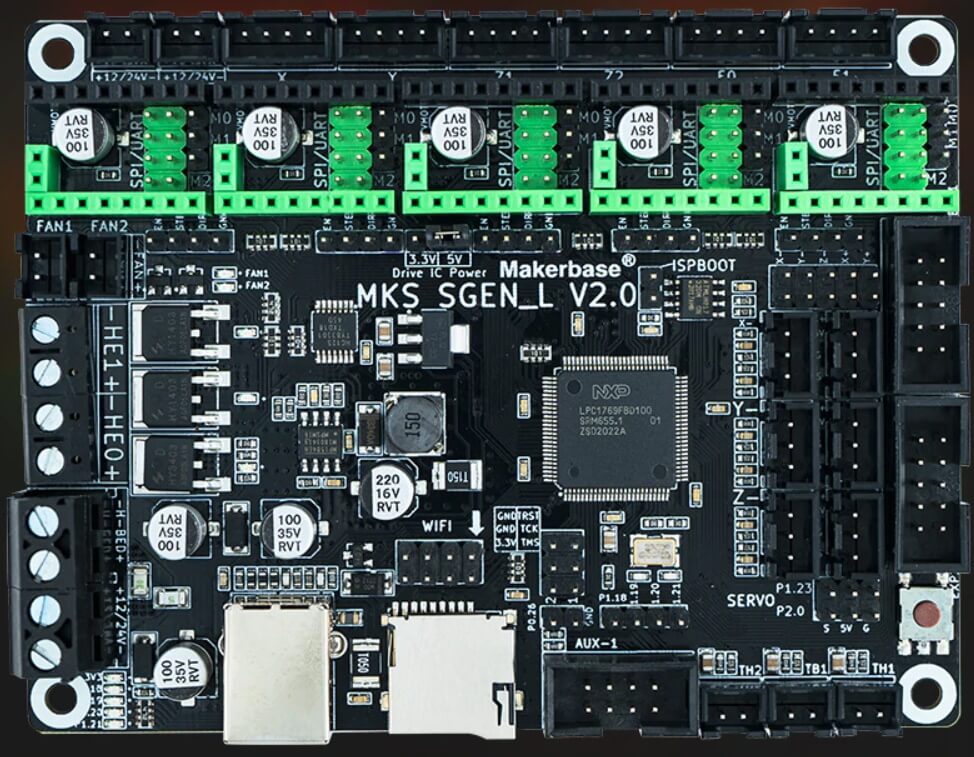
Makerbase has recently launched a new board called MKS SGen_L V2.0. It’s similar to the SKR 1.4 Turbo because it uses the same LPC1769 CPU which runs at 120MHz.
The SGen_L 2.0 has an extra stepper motor header which allows you to run dual Z from a single stepper driver. There’s also a 4KB EEPROM chip on the board.
But there’s more! RepRap Firmware can also be installed on the SGen_L V2.0 making it the cheapest board with RRF capabilities. You can get it for around 30$ including 5x TMC2209 drivers which is close to half the cost of the SKR 1.4 Turbo. So, in my opinion this is a no brainer.
It’s good to know that MKS has been opening up in the last few months and started to embrace the Open Source community and they’re also listening to the feedback from their customers to further improve their products. Because it’s so new, I haven’t had the chance to play around with it but I have one on order and expect some feedback on it soon.
The MKS SGen_L V2.0 board can be purchased from the following websites:
AliExpress
Duet 2 WiFi
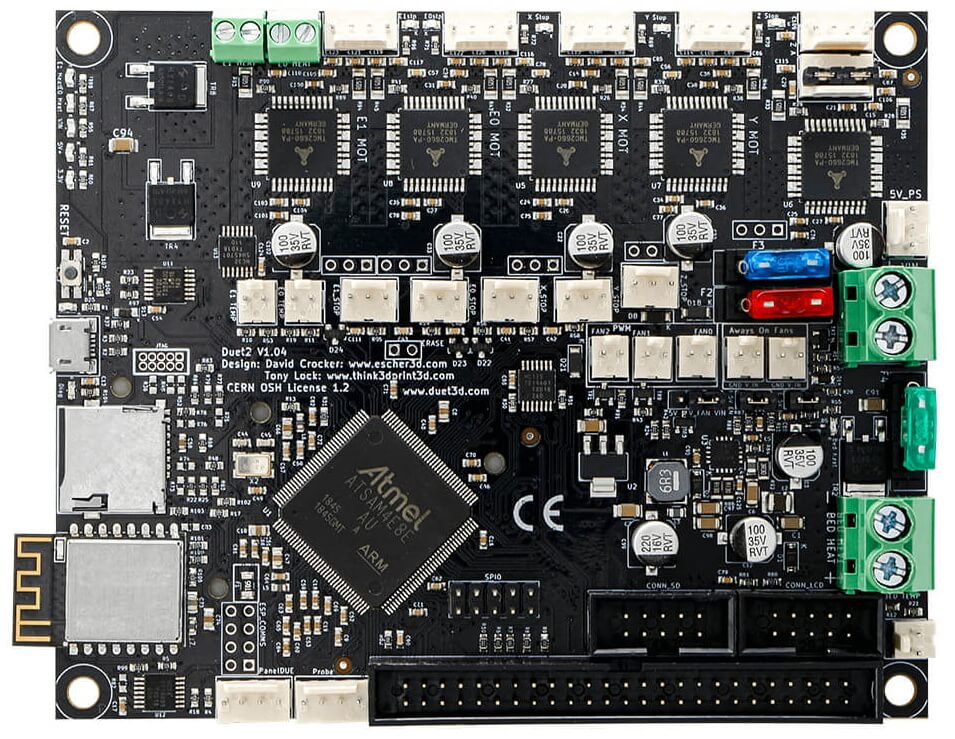
If you are looking to upgrade your printer with a board which runs RepRap Firmware from the start, you can get the Duet 2.
The Duet 2 board gained its popularity because of RepRap Firmware. Previously, this was the only way to run it but nowadays there are other boards which can do the same thing.
Prepare yourself with some patience because you will need to crimp your own connectors when installing the Duet 2. In my case, this is the most annoying thing I need to do and it could deter others from choosing a Duet.
Besides the powerful 32-bit CPU and stepper drivers, you also get other capabilities like adding a daughter board like for more stepper drivers. Unfortunately, the TMC2660 drivers which come with the Duet 2 WiFi are a bit noisier because they don’t support StealthChop but they’re still more silent compared to the A4988 drivers.
You can buy the Original Duet 2 board and start tinkering. That way you also support the original creators and get support for anything that might happen.
If you want to save some money, there are Duet 2 clones available. I have a Duet 2 board from FYSETC in my BLV cube and it works well. I also have an MKS Duet 2 but unfortunately, I haven’t had the chance to put it to work.
The Duet 2 WiFi board can be purchased from the following websites:
Amazon
AliExpress
Banggood
Hotend Upgrade
When you plan to upgrade your hotend, it’s mostly because you want to print higher temperature materials or want to fix some of the issues you have with the current one.
Most of the cheap bowden 3D printers use bad hotends which use the PTFE as a heat break and it’s usually pushed right up to the nozzle. This limits the maximum temperature you can print to about 240C. If you go higher, the PTFE tube will start degrading and release bad fumes.
By upgrading to an all-metal hotend, the PTFE tube is not reaching the nozzle temperatures can go as high as 500C (depending on the hotend).
I strongly recommend to purchase a hotend which fits your use case. It’s not worth getting a high-end hotend if you plan to print PLA all day. It’s nice to have the best, but you might also encounter issues along the way.
There are a lot of all-round hotends available which are cheap and good for any 3D printer. You can print most of the popular materials with a low investment.
Dragon Hotend
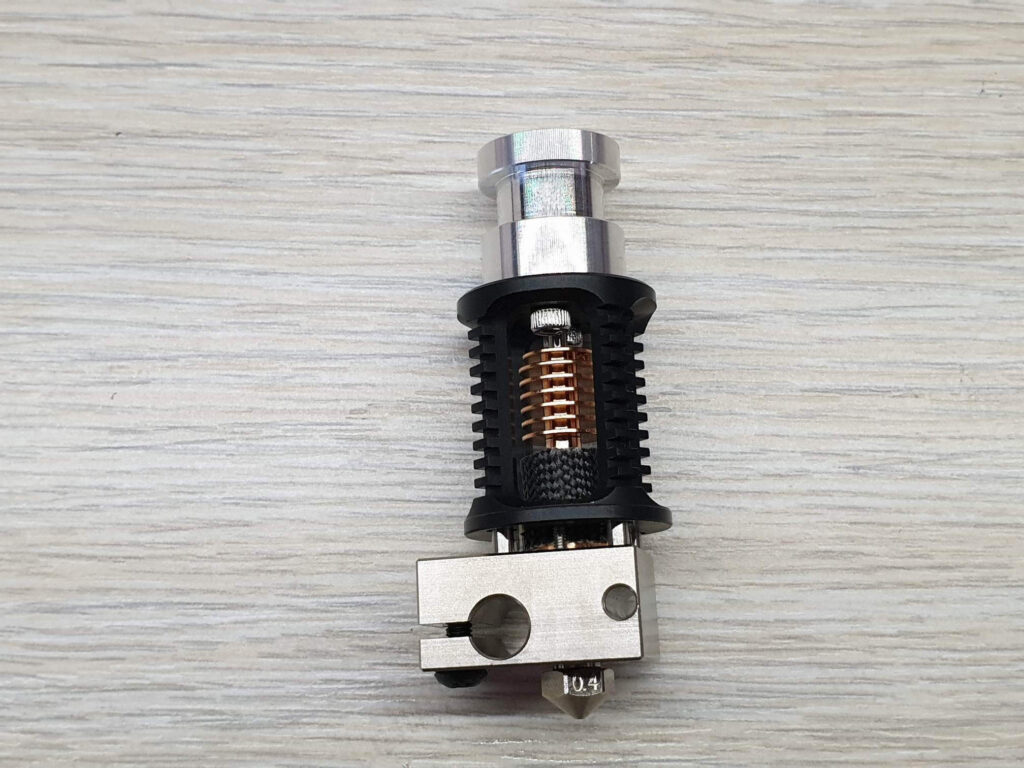
First time I learned about the Dragon was when Trianglelab listed it on their AliExpress store. It looked like a merge between the popular V6 body and the Mosquito Hotend thermal design and I thought it’s brilliant. Later, I found out that the first company to come up with the Dragon Hotend was Phaetus.
Anyway, I was one of the first people to order a Dragon Hotend and I was really happy with it when I got it. It uses an all-metal design and it’s capable of printing high-temperature materials while still maintaining the V6 compatibility.
The quality is good and it worked well for me. I had a few clogs but most of the times they were caused by me and improper use. Over time, the heat break performance has declined a bit (probably because it torched to unclog it) but it still works well on my CR 10s PRO. Since then, the heat break has been upgraded and in theory it should perform even better.
If you are interested, you can also read my Dragon Hotend review and also check out the article where I compared the Dragon Hotend heat break performance with a V6.
There are two variants available: The regular Dragon Hotend and a High-Flow version which melts filament faster for high speed printing.
At the time, the price of more than 70$ was ok for a well-built hotend but I think currently it’s a bit on the expensive side. Anyway, you like the looks and you are looking for a V6 compatible hotend which performs well then the Dragon Hotend is a good choice.
The Dragon Hotend can be purchased from the following websites:
AliExpress
Amazon
Banggood
NF Crazy Hotend
I think Mellow was the first AliExpress seller where I found a Mosquito Hotend clone which is named NF Crazy. I won’t go in an argument if it’s right or wrong to buy a cloned product. I just want to let you know about the experience I had with it.
The NF crazy is close to the original Mosquito Hotend but it is not recommended to get it if you are planning to go over 350C. Mainly because the heat break is not as good like on the “real deal” but for any other materials which need lower temperatures, it works well.
There’s also an added bonus of being able to change the nozzle one-handed, which is nice.
It uses a plated copper heat block design and overall, it’s compatible with any Mosquito mount available online. There’s also a cheaper NF-Crazy variant available with an aluminum heat block.
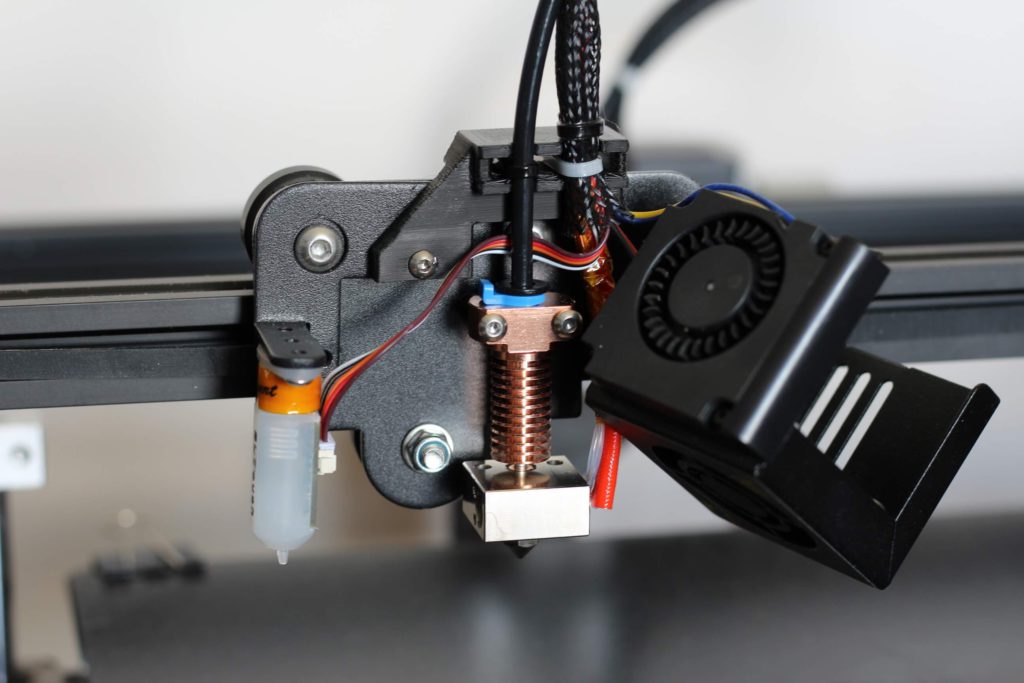
Of course, I also clogged the NF-Crazy a few times but this was caused by improper cooling on my side. If you get one, I recommend you set the fan in a pull configuration to pull air through the heat break fins instead of pushing air. That way cooling is better and since I did that clogs were not present anymore.
Unfortunately, I managed to break mine when I torqued the nozzle too much and managed to strip the copper thread on the heat break. Maybe I will fix it in the future.
So, pay attention to the torque you use and don’t overtighten the nozzle.
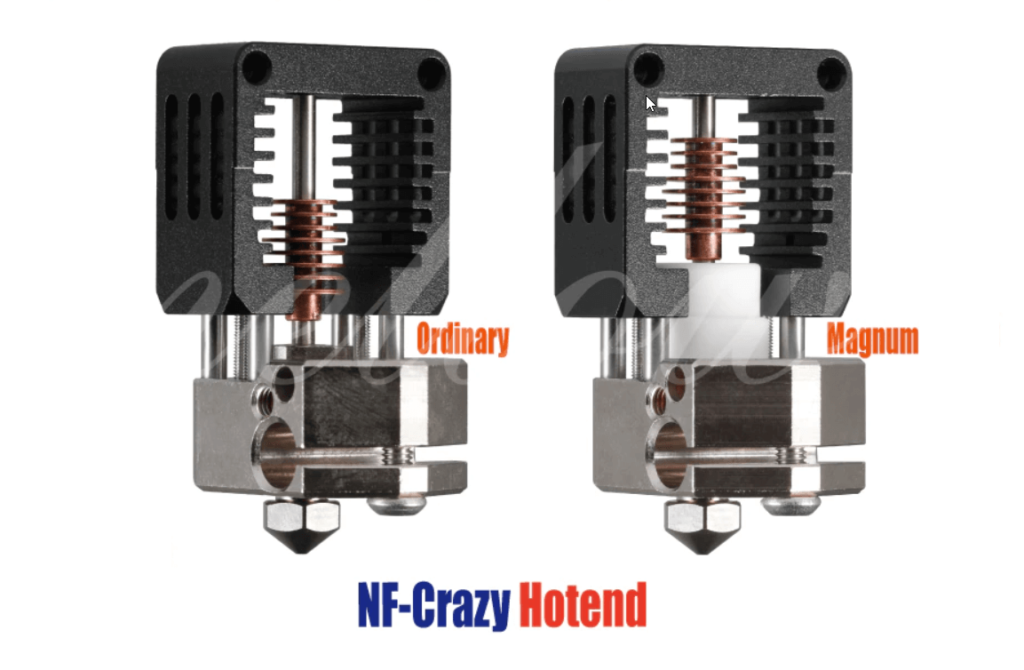
The NF Crazy is available in two versions: Ordinary and Magnum. The ladder is made for high speed printing with bigger nozzles to melt filament more efficiently. Consider it to have a Volcano-like performance.
There’s also a cheaper variant available with an aluminum heatblock, named NF-Crazy-A.
The NF Crazy Hotend can be purchased from the following websites:
AliExpress
Banggood
Mosquito Hotend
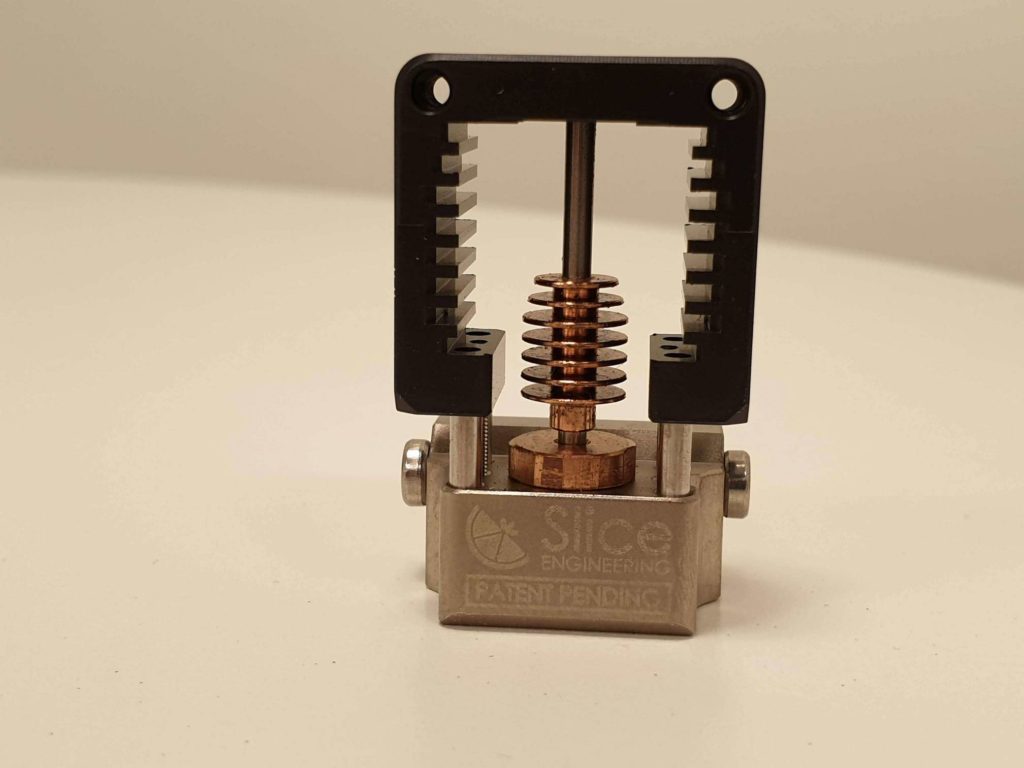
I previously reviewed the Mosquito hotend and you can read about it here: The Mosquito Hotend – Best Hotend Money Can Buy?. It’s probably the most expensive hotend I own currently and it’s installed on my BLV MGN Cube.
I used it for over 1000 hours of printing and it’s been great. If you can afford it you can’t go wrong with it. The machining is excellent, it’s well built and it performs well.
It was designed for high-temp printing and can be used up to 550C. The Mosquito Hotend also has various ways of mounting. If you are using the mounting holes available on the hotend you will benefit from one-handed nozzle changes which is a nice quality-of-life improvement.
I had the exact same issue like with the NF-Crazy when I didn’t cool the heat break well enough but flipping the fan fixed the issue for good. Since I got mine, the old heat break has been retired and all the new hotends are sold with an upgraded heat break which should deliver better cooling.
Please note that when you are buying it you also need to get the rest of the hardware needed (thermistor, heater cartridge).
The Mosquito Hotend can be purchased from the following websites:
Slice Engineering – Use 3DPRINTBEGINNER code for a small discount (affiliated code)
Amazon
V6 Hotend
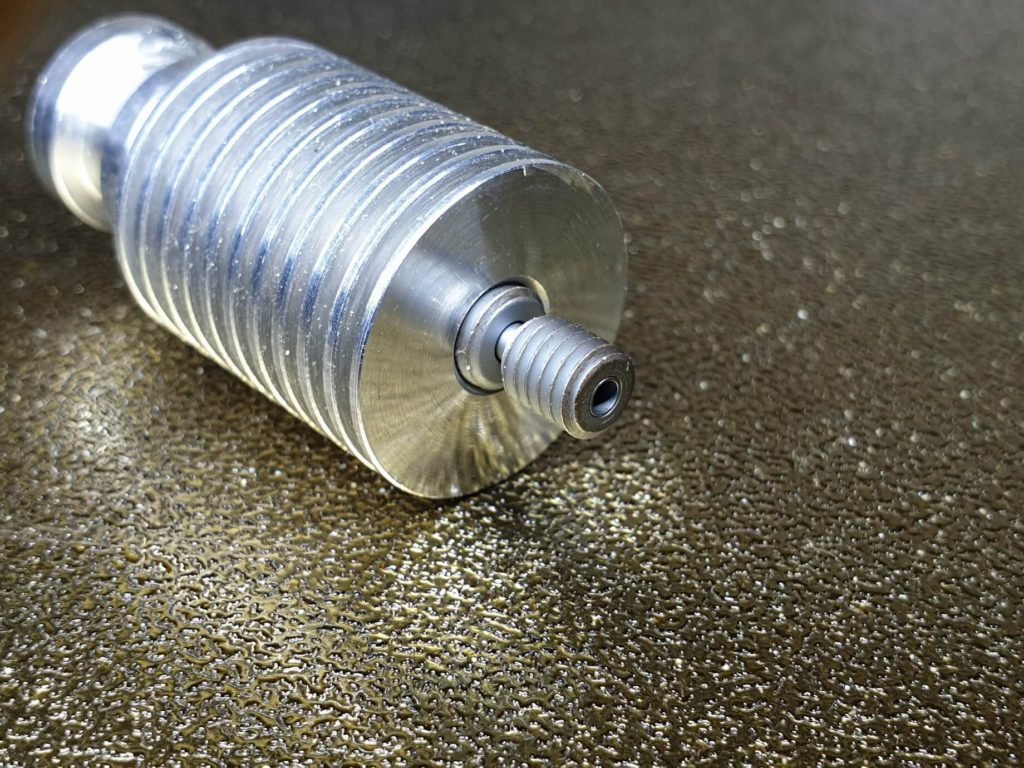
The good ol’ V6 hotend is a really popular option for most people who are looking to upgrade their hotend. It was first launched by E3D but since then it’s been copied and adapted by the Chinese sellers. I never touched a real E3D V6 hotend but I’ve had a lot of success with the Trianglelab and Mellow variants.
Since the “birth” of the bi-metal heat breaks, the V6 heatsink + bi-metal is an excellent combo for a good all-metal hotend. Add a Volcano heatblock and you can enjoy fast printing with no clogs on a budget.
The V6 Hotend can be purchased from the following websites:
Amazon
Aliexpress
Banggood
Copperhead Hotend
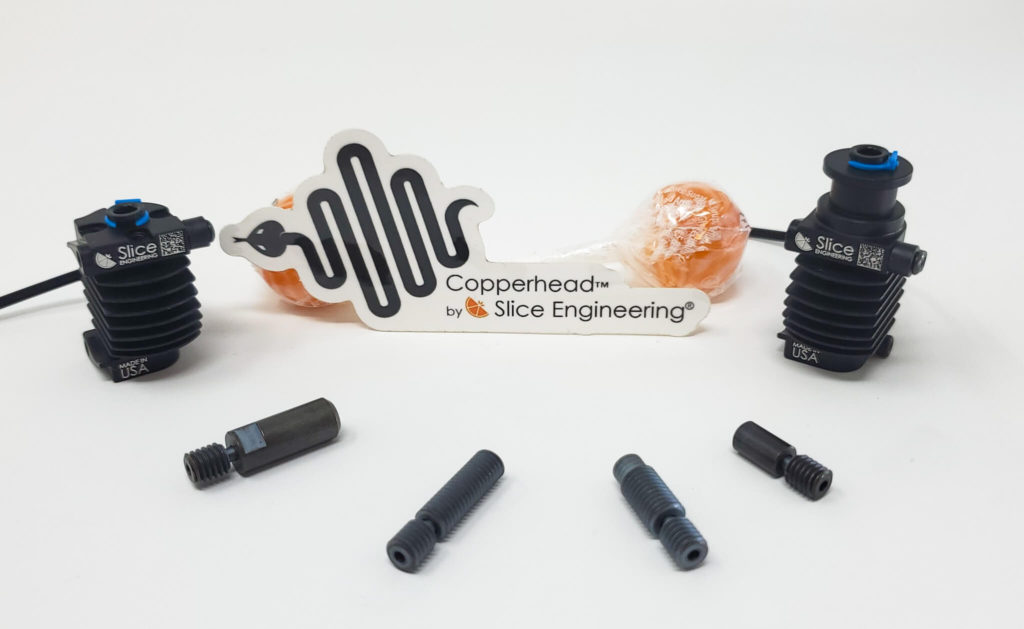
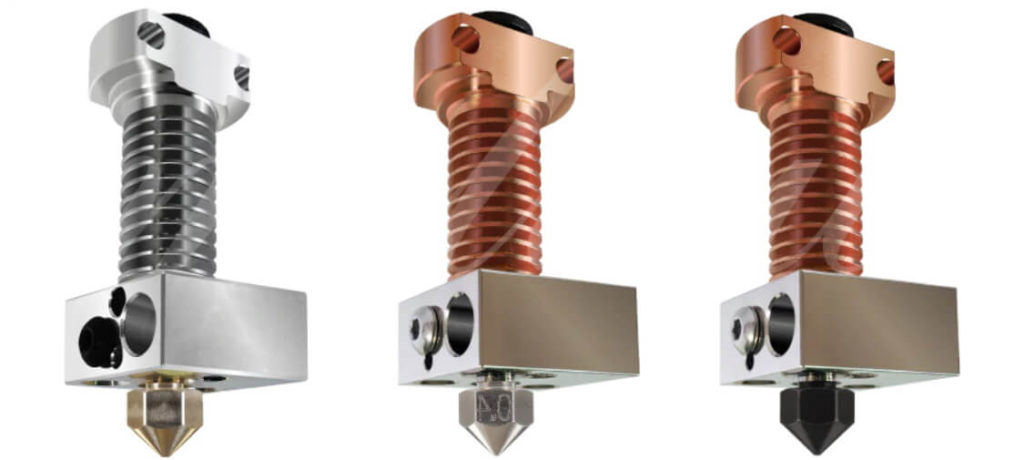
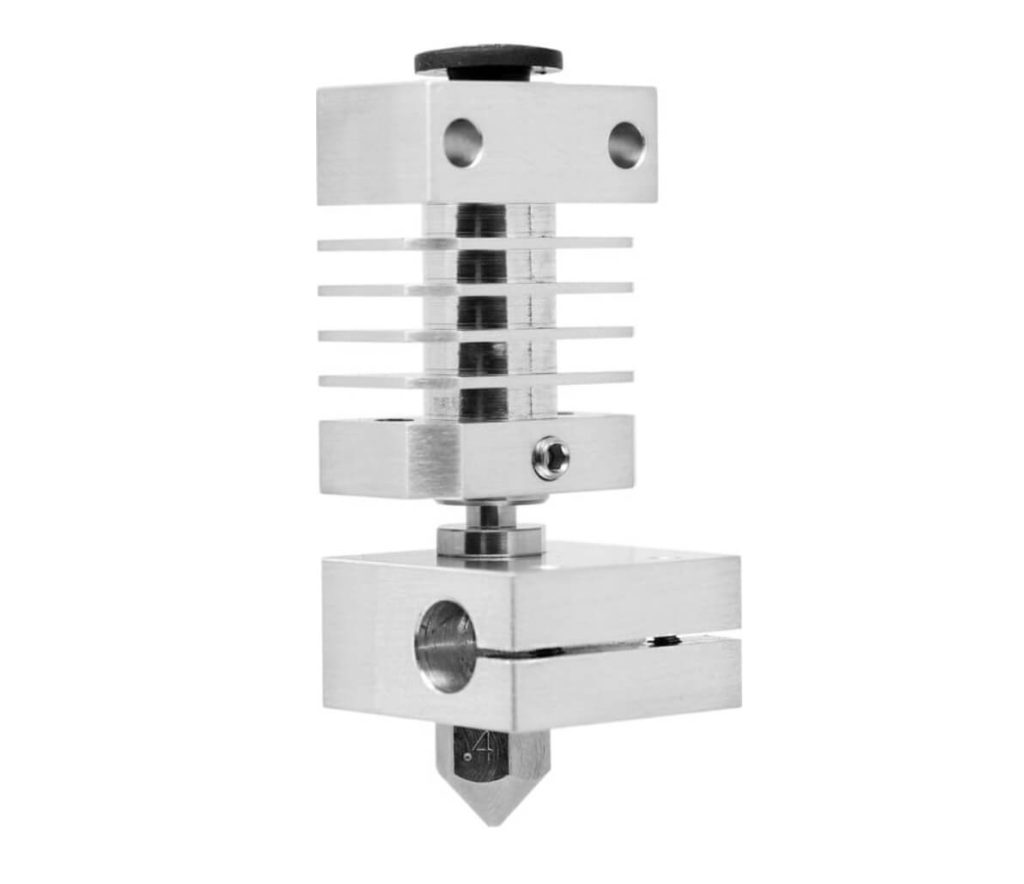
I like to think that Slice Engineering listened to the feedback from their users about the Mosquito Hotend and that’s how the Copperhead was born. With the new Copperhead Hotend, you can get close to the Mosquito performance for around 100$ for the complete package. The interesting part is that you can mix and match according to your needs.
It’s rated up to 450C and you can see a video of its performance on the product page. Unfortunately, because the heat break mounts in the heatsink with a grub screw, you lose the one-handed nozzle change. But this is also a benefit because it will be much easier to work on the hotend and remove the heatblock with ease.
The main star is the bi-metallic heat break which is covered later in the article. When ordering the Copperhead, you need to choose the type of heatsink mount you plan to use then the heatblock and a heat break. This makes it much more affordable because you might already have a V6 heatblock you like and you only need the heatsink and heat break, thus lowering the price. I love it when companies give you so much flexibility.
I haven’t had the chance to test it but I’m sure it performs well. The heat break is a beast and there’s no denying that the machining is just as like with the Mosquito.
The Copperhead hotend can be purchased from the following websites:
Slice Engineering – Use 3DPRINTBEGINNER code for a small discount (affiliated code)
Mellow NF Smart
The Mellow NF Smart is a hotend developed by Mellow which takes advantage of the idea made popular by the Bi-metal heat breaks. There’s a thin stainless tube which connects the heatsink to the heatblock thus improving the temperature performance.
Because this system doesn’t need a lot of cooling, the heatsink was shrunk to save on material and weight.
There are two version available: NF Smart and NF Smart CR-10. The NF-Smart has a groove mount just like the V6 and it maintains compatibility with any printer which uses a V6 hotend.
The NF Smart CR-10 is made as a direct replacement for any Creality printers, just as the MicroSwiss hotend. No need for doing any kind of modifications. Just take out the stock Creality hotend and install the NF Smart.
There are also three versions of NF Smart hotend when it comes to the “build”. One of them uses a regular aluminum heatsink and a brass heatblock for less weight and the other two use copper heatsinks and heatblocks which are a bit heavier and more expensive.
I have one installed on my Ender 5 Plus and I’m really happy with it. Print quality improved and I managed to reduce retraction with 0.5mm. I installed it in less than 10 minutes.
The NF Smart hotend can be purchased from the following websites:
AliExpress
Mellow NF Zone
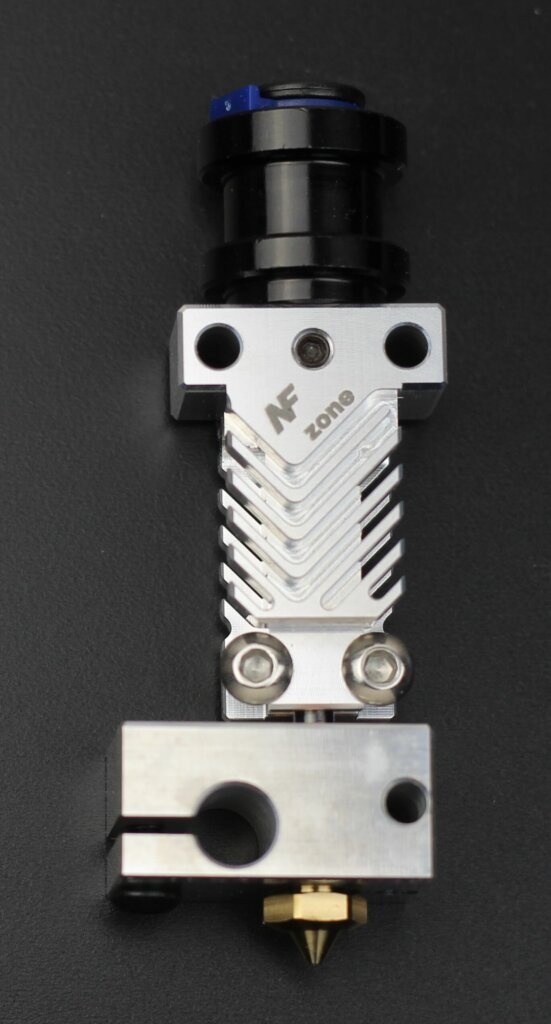
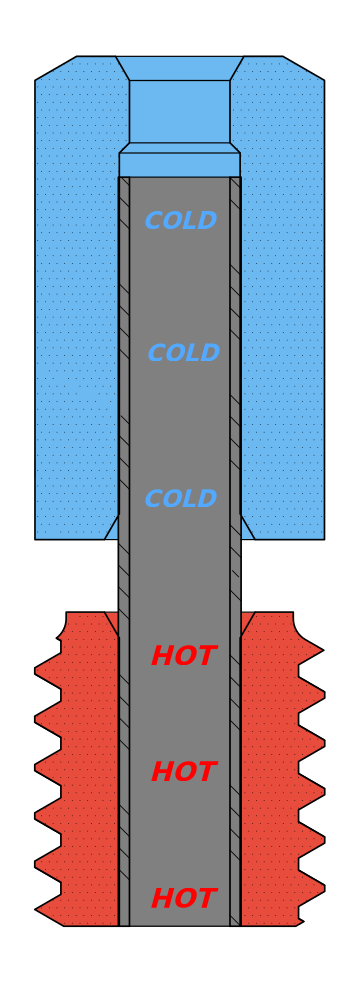
The main benefit for using a NF Zone instead of a different hotend with a bi-metal heat-break is the removal of another interface between it and the heatsink. The NF Zone heat break is cooled directly by the heatsink while in the case of other hotends, the heat needs to pass from the heat-break to the copper thread, then from the thread to the heatsink.
You can read more about it in the Mellow NF Zone Review where I also shared temperature measurements and print samples with no hotend cooling. It’s a really good hotend and I highly recommend you read more about it.
The NF Zone can be purchased from the following websites:
AliExpress
Micro Swiss Hotend
The Micros Swiss hotend has been a popular hotend upgrade for Creality machines. This is a drop-in replacement for the stock hotend and overall an easy upgrade to all-metal. It’s loved by a lot of people because it fixes PTFE issues which almost all stock Creality printers have, for a fair price.
It doesn’t have any “cool” features. It’s just a good hotend available for ~60$ that can make your Creality printer work reliably. Just keep in mind that retractions need to be tuned again.
Trianglelab and Mellow also have quality Micro Swiss clones in their offer so if you are interested in an easy upgrade then go for it. Avoid cheaper clones because they are bad, and you will get frustrated. I recommend take your pick from these three vendors.
If you can’t wait for an AliExpress to deliver the NF Smart, then the Micro Swiss hotend can be a good choise. But I would get a bi-metal hotend.
The Micro Swiss hotend can be purchased from the following websites:
AliExpress
Amazon
Heat Break Upgrade
In my opinion, this is one of the best 3D printer upgrades you can do for any type of printer. There are various heat break designs available now.
The lowest quality heat breaks use a PTFE tube which goes right up to the nozzle and this is the one you are probably upgrading from. This is the mail bottleneck for most of the hotends because if you go past 250C you can get clogs and the tube starts degrading releasing harmful fumes.
The next is an all-metal heat break which is usually made from stainless-steel. With this kind of heat break you push the temperatures a bit higher but in most of the cases the next bottleneck comes from the heatsink. Because the thermal performance of a stainless-steel heat break is not great, getting clogs with PLA is imminent and that’s why this is recommended only for higher temperature filaments.
The 3rd, and possibly a popular heat break upgrade is the titanium heat break. This is similar to the stainless-steel version but it’s made from titanium which has lower thermal conductivity thus improving the cooling performance. It will work well in most cases, but it will still cause issues with PLA from time to time if cooling is not adequate.
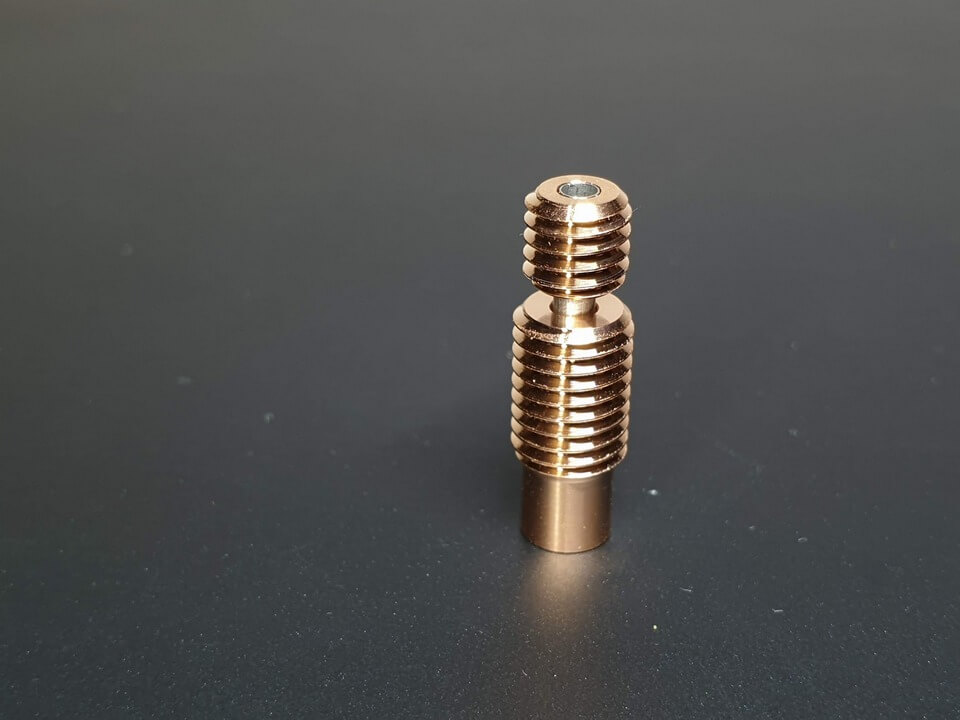
And the 4th offering, which is currently my favorite is the bi-metal heat break. It was carefully engineered by Slice Engineering but since then it was cloned and it’s now available from various AliExpress sellers.
Because the bimetallic heat break uses a better design, the temperature from the heatblock is not transferred to the cold end of the heat break. This means that you don’t need a lot of cooling surface if there’s not much heat to remove. Copper is used on the threaded sections and a thin stainless-steel tube connects them. This means that any kind of heat which gets passed from the tube is quickly transferred to the heatsink and dissipated.
On the hot size, the same copper will transfer the heat better from the heatblock and will help with melting the filament.
If you are planning to buy one, try to buy it from Slice Engineering. They are the real “heroes” for this awesome technology and that way you are supporting future development. Considering the Trianglelab version is a few dollars cheaper, I recommend you spend some extra money for the Slice variant to support their work, and also to get a guaranteed quality product
There are a lot of bi-metal heat break clones available now on Aliexpress but from reports I’ve read online not clones are made equal. I recommend you only stick to the version from Trianglelab because it is built well and it worked well for me. The Mellow version failed after about 20 hours of use.
The bi-metal heat break can be purchased from the following websites:
AliExpress
Amazon
Extruder Upgrade
A good upgrade to any 3D printer is changing the extruder. This is a really important part of the printer because the extruder controls the amount of filament which gets pushed trough the nozzle.
Cheap printers still use a single gear extruder, which can work well but most of the time they’re also made from plastic. This can crack or generate all kind of extrusion issues. There’s also not much lever tension control for these extruders and considering how cheaply you can purchase a better extruder there’s no need to fiddle with them.
Newer printers come with Titan or BMG clone extruders which are better and usually there’s no need to replace them. But this can depend on the quality.
BMG Extruder
In my opinion, the BMG extruder is one of the most versatile extruders available. It has a 3:1 gear ratio allowing you to use a pancake stepper motor without losing steps. This translates in a lighter extruder assembly in direct drive configurations.
The original Bondtech BMG extruder is around 90$ which is on the expensive side but if you can afford it buy it to support the original creators. There are a lot of clones available now which can be bought for as low as 15$. While these really cheap clones are not made with the same precision and use lower quality materials, I had good results with them.
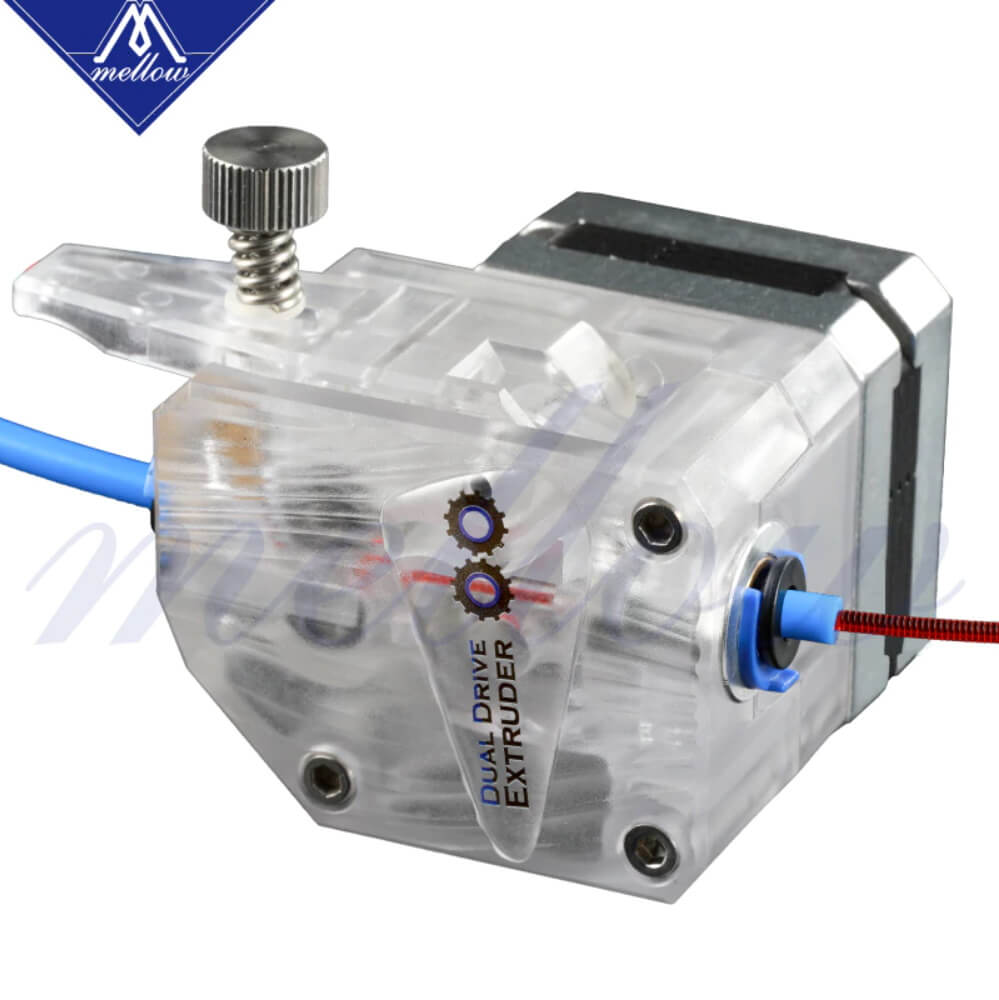
My favorite clone available is the translucent version from Mellow. It’s a bit more expensive compared to others but it is built well and the gears are machined well. I think currently it’s the best clone to buy if you can’t afford the original version.
The BMG Extruder can be purchased from the following websites:
AliExpress
Amazon
Banggood
BMG Wind Extruder
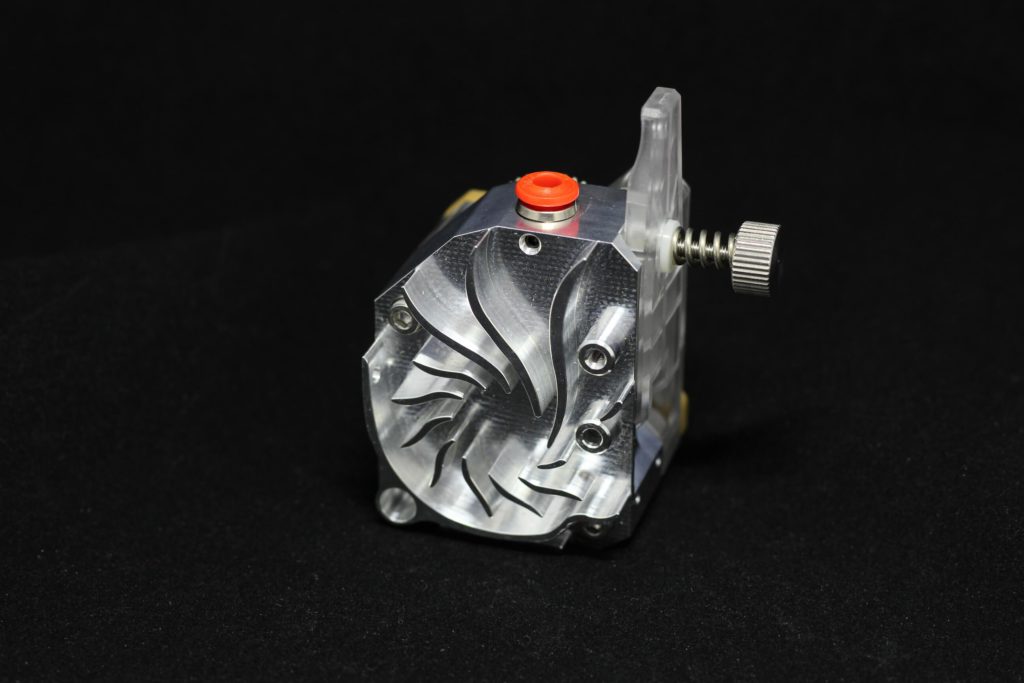
Mellow has the BMG Wind extruder which is a BMG and Hemera combo. It takes the great BMG gears and form factor and combines it with a Hemera style heatsink in a single block of machined aluminum. This makes the extruder more compact and moves the gears closer to the nozzle for more filament control. In theory, a smaller filament path allows faster printing with flexible filaments like TPU.
The whole BMG Wind extruder is really light for a Direct Drive. It’s not much heavier than a plastic extruder. The machining is good and I’d say it’s currently a really good buy if you can integrate it with your printer.
When paired with a bi-metal heat break and a Volcano heatblock, the BMG Wind turns into an excellent direct drive setup for a fair price.
If you are interested to learn more about it, I reviewed it here: BMG Wind Review: Sidewinder X1 Upgrade Guide.
The BMG Wind can be purchased from the following websites:
AliExpress
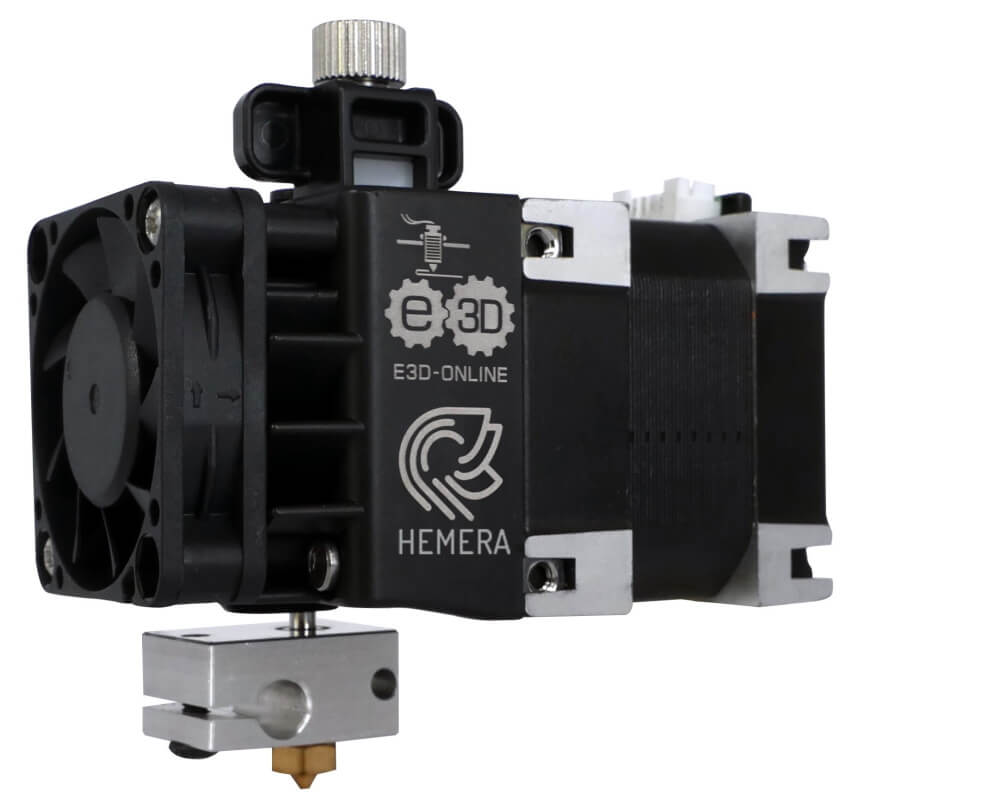
E3D Hemera
E3D knocked it out of the park with their new Hemera extruder. It very well designed and it quickly became one of the most popular 3D printer upgrades. They can’t make enough of them to keep up with the demand.
It includes a custom designed NEMA17 stepper motor with more torque and a smaller form factor. And because the well thought design, it’s maintains the compatibility with most of the printers.
There’s no need to re-design fan shrouds or ABL sensor mounts like the BLTouch for different printers. They are made specifically for the Hemera allowing you to mix and match according to your heart’s desire.
Unfortunately, I am a bit disappointed by the fact that it comes with a V6 heatblock and there’s no way to purchase it without it. I would have liked to be able to purchase it with a Volcano heatblock to be able to print faster with bigger nozzles. But this can be easily upgraded (with an added cost).
Either way, if you can get your hands on one, I’m sure you will love it. Considering you get a complete extrusion setup, The price is somehow good for a well-made product. I don’t own one but there are A LOT of people which grabbed it and they are really happy with it.
The E3D Hemera can be purchased from the following websites:
Amazon
E3D
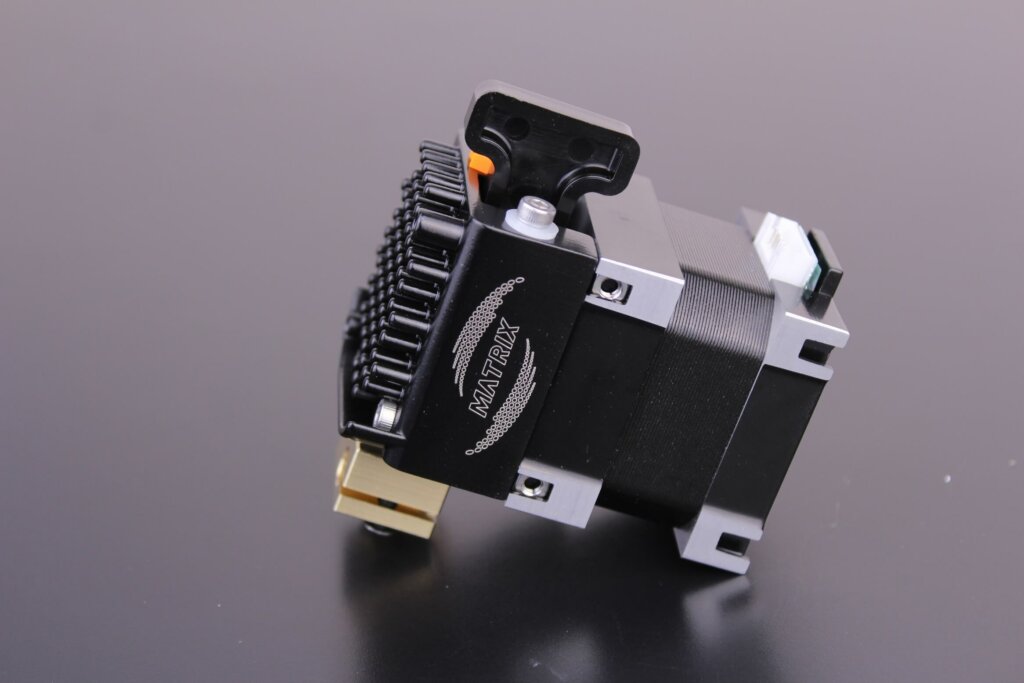
Trianglelab Matrix Extruder
The Trianglelab Matrix Extruder is a Hemera alternative with a Bi-Metal heat break and a lower price. You can read more about it in the Trianglelab Matrix Extruder Review.
It’s a good extruder, but it’s currently one of the pricier offerings from AliExpress. If you have some money to spend, wanted to get a Hemera but couldn’t because of the lack of stock, then the Trianglelab Matrix Extruder is an excellent upgrade for your 3D printer.
The Trianglelab Matrix Extruder can be purchased from the following websites:
AliExpress
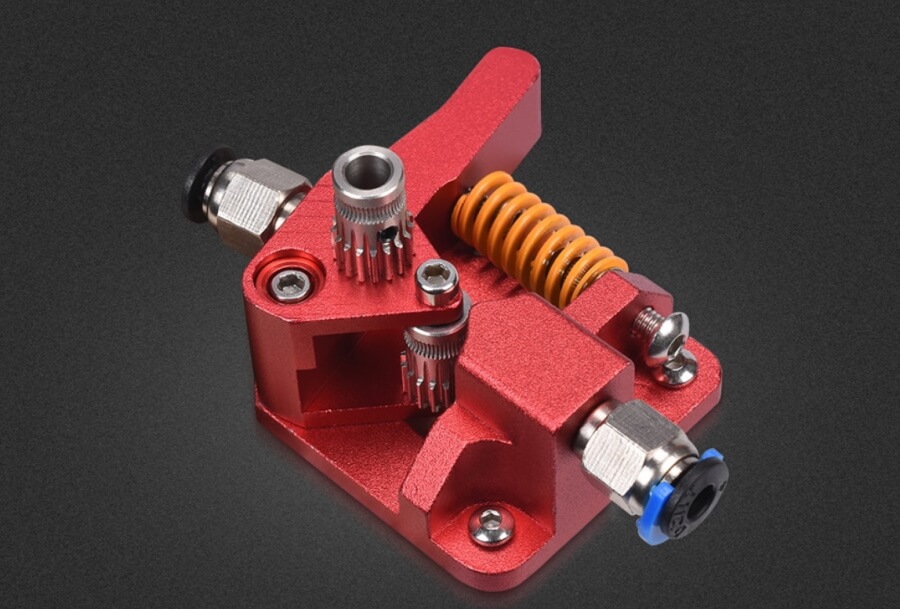
Dual-Gear Extruder
If you are on a budget but want to upgrade your Creality extruder without breaking the bank then this is for you. The Dual-Gear Extruder uses two BMG gears which grips the filament from both sides increasing the control and performance of the extruder
Compared to the BMG, the Dual-Gear Extruder doesn’t have an added gear to increase torque and resolution, but I used it on my Creality CR10s PRO and also installed one on an Ender 3 with good results. If you can’t get a BMG, then the Dual-Gear Extruder is the next best thing for a Creality printer.
The Dual-Gear Extruder can be purchased from the following websites:
Amazon
AliExpress
Banggood
Nozzle Upgrade
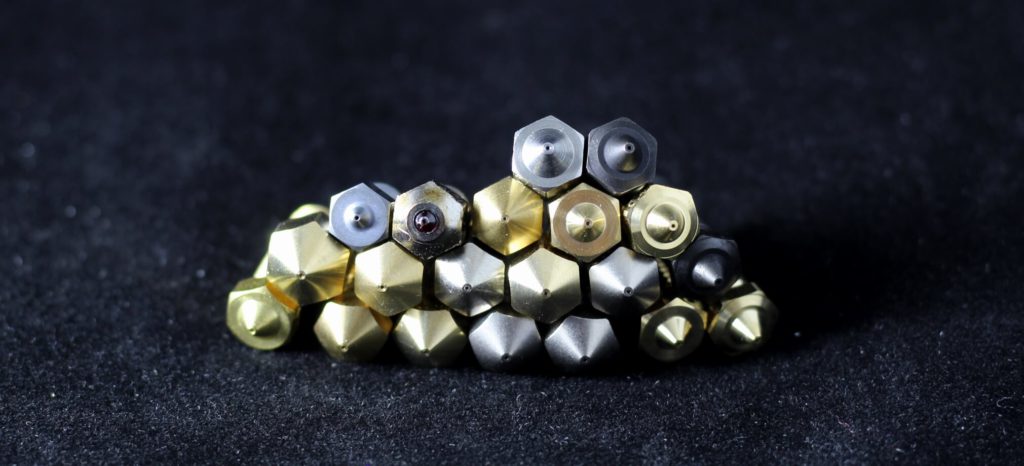
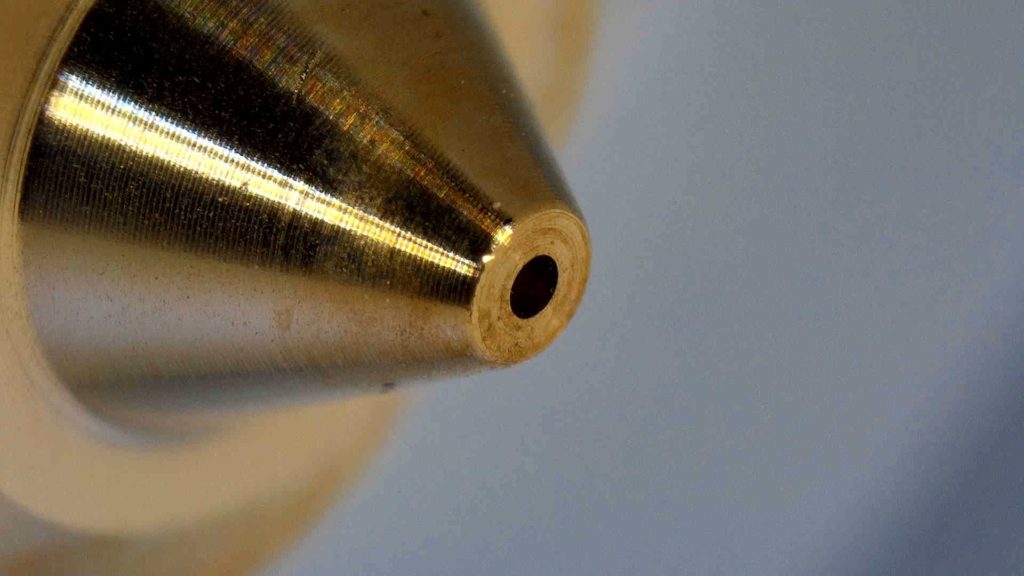
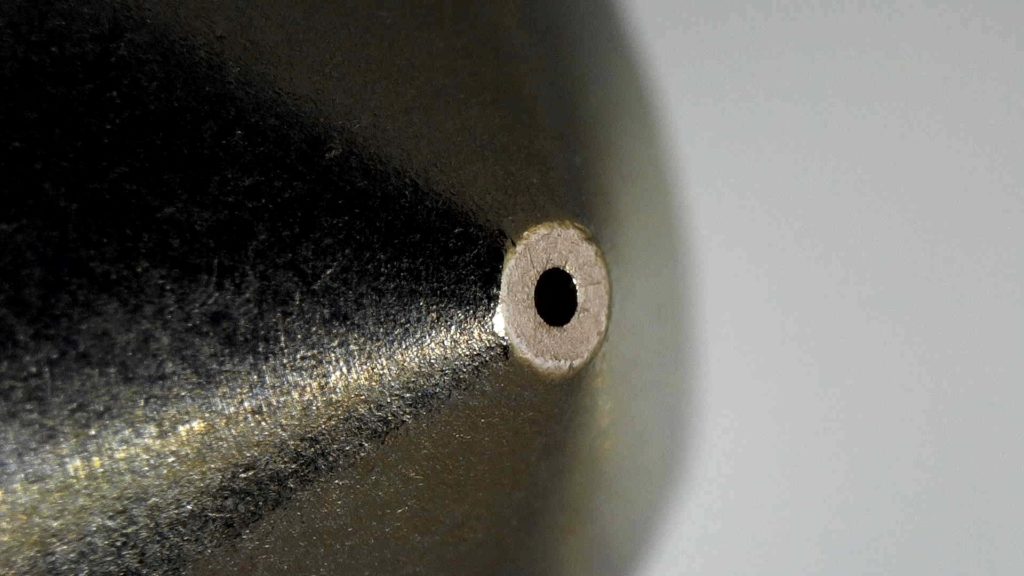
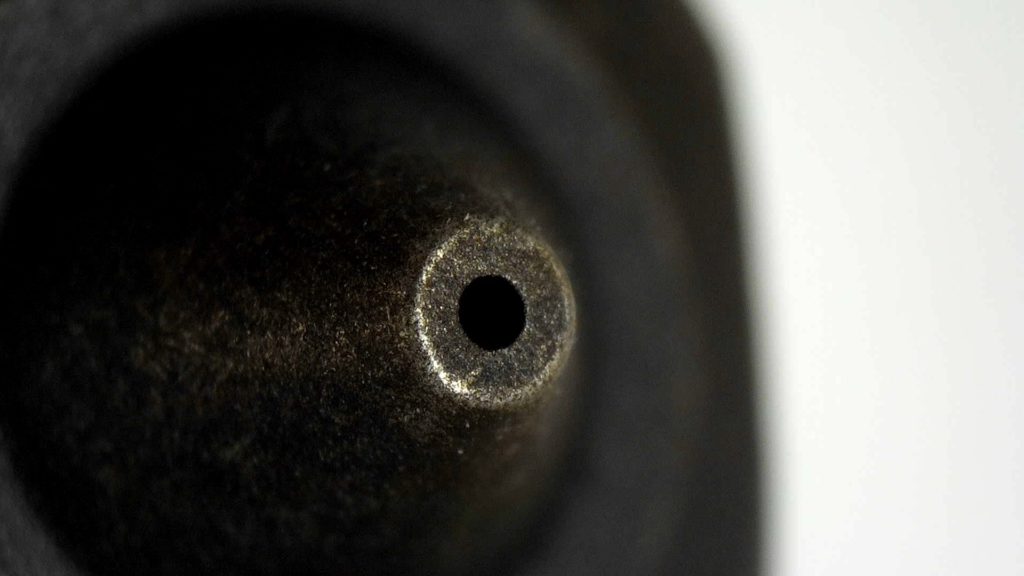
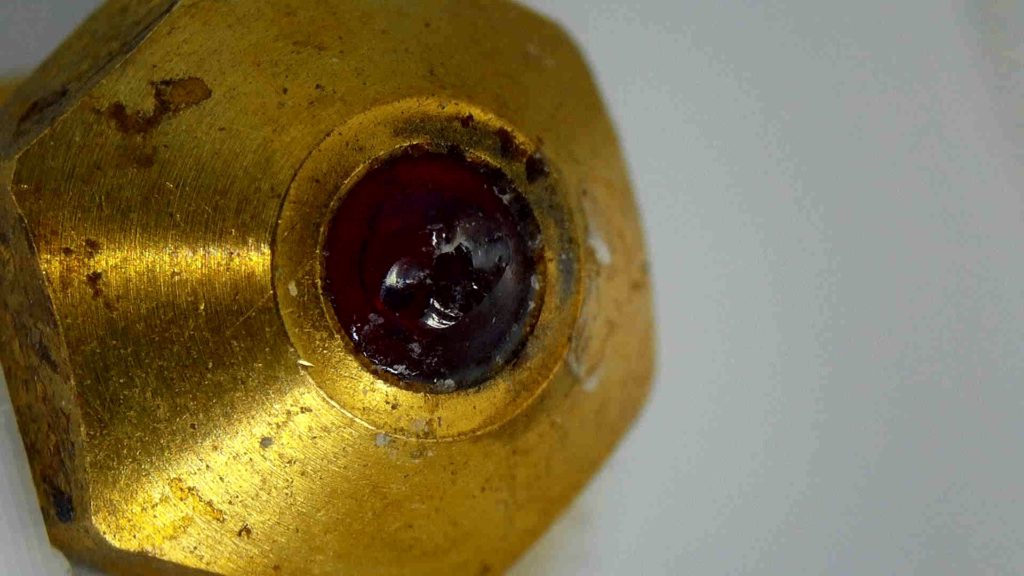
In my experience with a boatload of different nozzles, I found out that most of the cheap nozzles, or the ones included with some printers are bad. Like, really bad. This is the reason why I always recommend people to buy a good nozzle.
You don’t need to spend a huge amount of money to get better quality. Just pick up some nozzles machined well because this can make your prints look a lot better.
People often spend money on all kind of upgrades but they cheap out when it comes to nozzles. This is a bad idea because a nozzle is important to print quality.
For example, if the nozzle hole is not cut to a precise size your printed lines can be different. This can be somewhat compensated by performing a flow calibration but it’s an extra step you need to do.
Nozzles can also have different thermal proprieties. I bought some really cheap nozzles (4 nozzles for 1 dollar) made from some kind of metal then painted to look like brass. Worst purchase ever. I troubleshooted extrusion issues for a couple of hours until I thought about increasing the hotend temperature with about 15C to compensate for the bad thermal transfer.
It’s also important to use different nozzles for different materials and printing situations. It’s not a good idea to print abrasive filament (ex: carbon fiber filament) with a brass nozzle because the tip will get sanded and the extrusion hole will get larger over time. This can happen even during a long print.
If you’re thinking: “No problem, I will just get a hardened steel nozzle”. Well, it’s also not the best “all-round” nozzle. The hardened nozzle will be more resistant to wear but it will have lower thermal transfer and you will need to up your temperatures with around 10C to have the correct temperature inside the nozzle.
That’s why you should pick the correct nozzle for the job, and have a few spares just in case.
If you want to learn more about the quality differences between nozzles, make sure you check my Ultimate 3D Printer Nozzle Comparison.
Better Quality Brass Nozzle
My go to nozzles are made by Trianglelab and Mellow. For around 2$ a pop, you get well machined brass nozzle which can be easily discarded after a while without regret. That way, you can always change your nozzle and make sure they are in good shape.
Brass nozzles work great for PLA, PETG and ABS. If you mainly print with this kind of materials, then you’re good. No need to go with other type of nozzles just for that one time when you *might* print different materials.
You can buy Better quality brass nozzles from the following websites:
AliExpress
Amazon
Plated Copper Nozzle
My second favorite nozzles are made from plated copper. They offer better thermal performance and because they are plated, they should wear out over a longer period of time.
Besides the wear resistance, you also have the benefit of filament not sticking to the tip of the nozzle like with a brass or hardened steel nozzle.
There’s also a drawback to copper plated nozzles. Because copper is a much softer metal, you can easily damage the nozzle if you replace it a few times. If you torque it too much, you can also strip the threads so take extra care when you install one.
Mellow and Trianglelab also have different types of plated copper nozzles from where you can choose from.
You can buy better quality brass nozzles from the following websites:
AliExpress
Amazon
Hardened Steel Nozzle
The hardened steel nozzles are needed only if you print a lot of abrasive filament. I don’t think it’s worth messing with them if you print regular materials.
As the name implies, they are made from hardened steel and offer much better wear resistance, but at some point in time they can also get worn out.
Keep in mind that hardened steel nozzles will require a higher temperature compared to your regular brass nozzles because heat transfer is a bit worse. A rule of thumb is to increase the temperature by 10C, or even better, print a temperature tower. That way you can calibrate your nozzle according to the material you are using.
I have a couple of Slice Engineering Vanadium Nozzles, but I only needed to use one until now. It’s installed on the BLV cube where I rarely print abrasive filaments. It’s also coated with a plastic repellent substance which makes cleaning and printing PETG a joy. The nozzle still looks almost brand new after a few hours of printing.
You can also look into the E3D Nozzle X which is also rated for abrasive and high temperature printing. It can be used for up to 450C and it also boasts a “polyphobic” coating to optimize filament flow. I am almost sure this is mostly marketing talk but I’ve seen reports online with people who praised it. I haven’t had the chance to purchase one but I will get one soon.
Lastly, there’s the usual alternatives from AliExpress. Mellow and Trianglelab have hardened steel nozzles in their offer. They don’t seem to have any coating, just better wear resistance.
You can buy hardened steel nozzles from the following websites:
AliExpress
Amazon
Ruby Nozzle
In my opinion, ruby nozzles are a waste of money. I could stop here and call it a day, but let me share some arguments from my experience.
I got an Olsson Ruby Nozzle and after only ~20-30 hours of printing “died”. The ruby tip got cracked and now I have an expensive paperweight. I also have a Trianglelab Ruby nozzle which lasted a bit longer (it’s still intact) but because the tip is not made from the same material, it has lower heat transfer. Can’t say if this is good or bad, but I now keep it in my nozzle box waiting to be used at some point.
Considering the huge premium, you pay for a ruby nozzle and how easily they can be damaged, I don’t really recommend buying one.
Even though this is an article where I recommend you upgrades, I thought I should add it in the list just so you don’t get tempted into buying one. But I’m just some guy on the internet, so make your own decision.
You can buy ruby nozzles from the following websites:
AliExpress
Amazon
PTFE Tube Upgrade
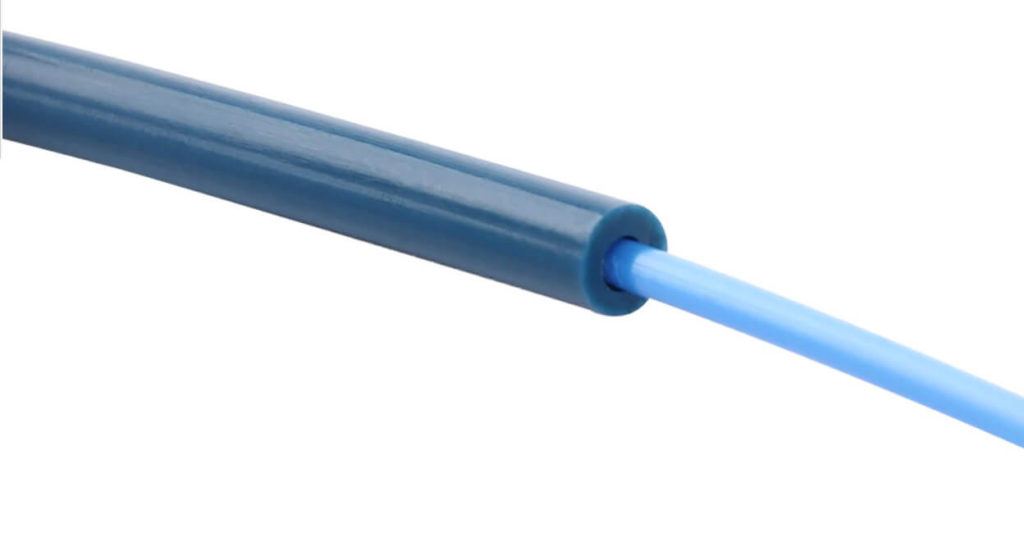
The only reason you would like to do a PTFE tube upgrade is for bowden printers. They usually have a 2mm to 4mm size and filament path is not that constrained. This causes high retraction values and stringing issues. It’s not unheard of using retraction values of 6-7mm.
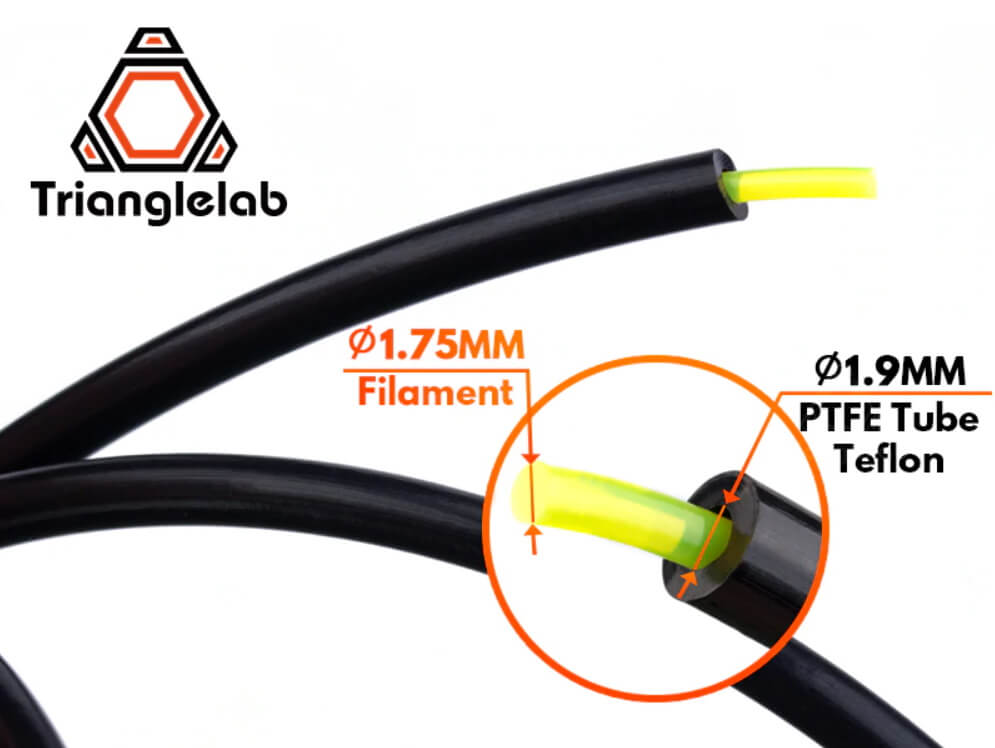
When you upgrade the PTFE tube, it’s mostly for better tolerances and a more constrained PTFE path. This will reduce retractions, and overall improve the filament control.
It’s important to note that it’s not a good idea to always use a more constrained PTFE tube. There are some situations where you would prefer a bit of slack inside the tube. For example, when you are using a PTFE tube in a reverse bowden setup, or with a multi-color tool like the MMU2s or Palette 2.
Capricorn PTFE Tube
For 3D printers which use a Bowden setup, the Capricorn PTFE tube is one of the best upgrades you can do.
Capricorn PTFE is made with much better tolerances compared to the regular “white” PTFE tube you get with most of the printers. This results in better filament control, less retraction and possibly better prints.
There’s some misconception online where people think the Capricorn PTFE tube can withstand higher temperatures compared to others. The truth is that PTFE is the same for any kind of tube. I don’t recommend going over 240C if you are using a hotend which passes the PTFE tube right to the nozzle. When you go over 250C, PTFE starts to degrade and release harmful odors which can kill you.
The Capricorn PTFE tube can be purchased from the following websites:
Banggood
Amazon
AliExpress
Trianglelab PTFE Tube
If you are looking for mostly the same performance as the Capricorn PTFE tube, then you can get the Trianglelab PTFE tube. It’s much cheaper but the tolerance is similar.
I use this Trianglelab PTFE tube for two of my bowden printers (Ender 5 Plus and BIQU B1) and it works great. Mellow also has the same kind of PTFE tube so pick the one you like best.
The Trianglelab PTFE tube can be purchased from the following websites:
Banggood
Amazon
AliExpress
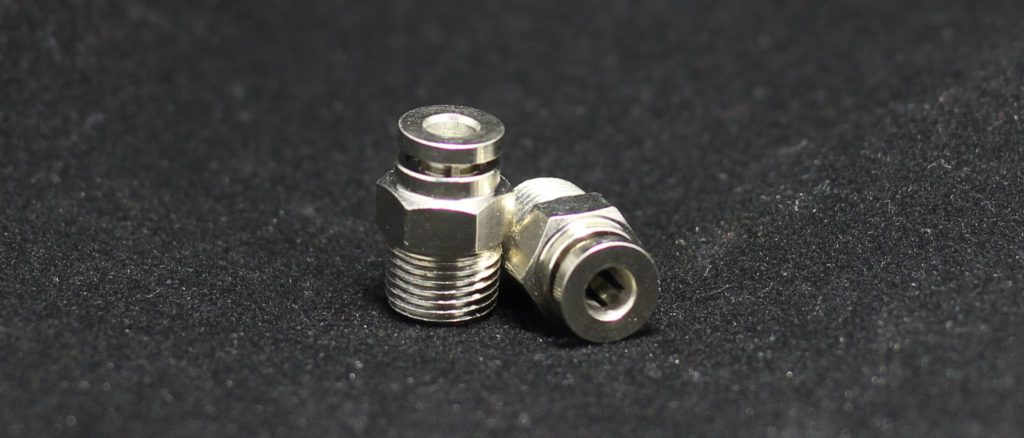
All-Metal PTFE Couplers
If you want to save yourself some frustration from failing PTFE tube couplers, I recommend you upgrade them as soon as possible. I had multiple coupler failures in the past and this is one of the reasons why I sort of hate bowden setups.
The new metal couplers have a much better grip compared to the regular cheap couplers and considering the price is not that high, there’s no reason why not to get them.
I got mine from Mellow but Trianglelab also sells them. I can’t say for sure they are much better because I’ve just installed them, but for now they seem great. All-metal couplers are also used on the Raise3D E2 I am testing right now so I guess they know what they’re doing.
The All-Metal PTFE Couplers can be purchased from the following websites:
AliExpress
Display Upgrades
Usually most of the printers come with a capable screen which runs well but you might want to upgrade it to add some features or just have a different screen with a bigger size.
The most popular screens are the 12864 LCD screens. They are excellent and there are a lot of people who still love them. I am one of those guys, but it’s 2020 so we can get both.
Newer screens can have both 12864 LCD screen baked in the firmware while also offering touchscreen capabilities more up to date with the days we are living in.
BTT TFT Touchscreens
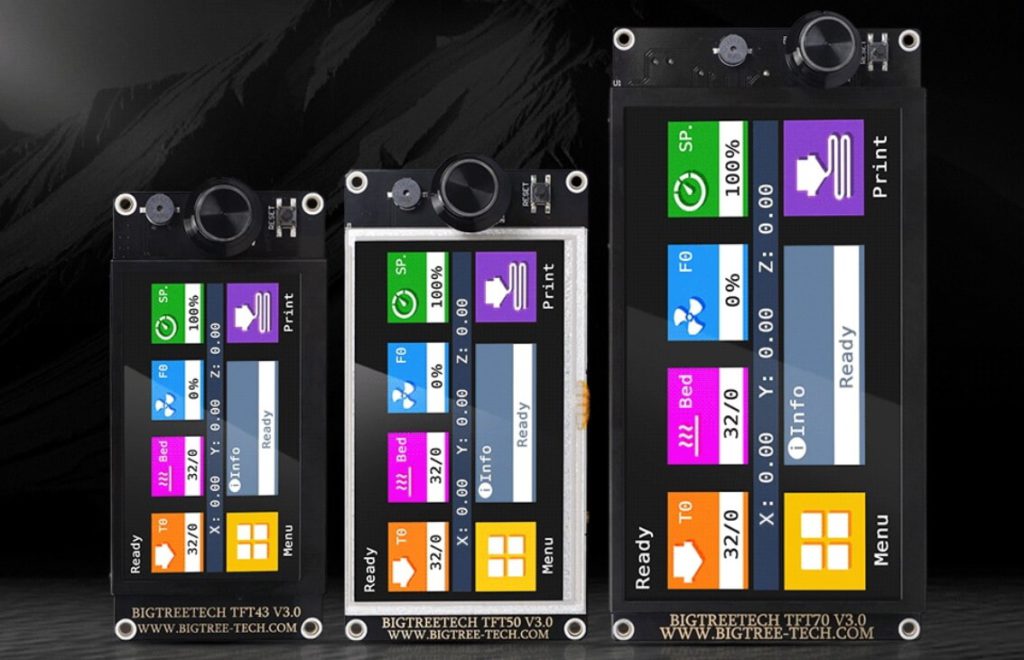
The TFT touchscreens from BIGTREETECH are one of the most popular screen upgrades available right now. The main attraction is the possibility of changing between the Marlin interface running in a 12864LCD emulator and the “new” touchscreen interface from BTT.
Just like other BTT hardware, the screen has the sources available and everybody can customize the firmware to their needs.
Previously, there was a single TFT35 screen available but recently a few extra variants were launched. TFT43, TFT50 and TFT70 cover most of the sizes one could need for their printer.
I use BTT screens for a couple of my printers and the same firmware was ported to the Artillery printer screens. I love them and you can’t go wrong with any of them. I still like the TFT35 V3.0 best because I think it offers a good “size to usefulness” ratio until there are more firmware updates available.
The BTT TFT Touchscreens can be purchased from the following websites:
Banggood
Amazon
AliExpress
MKS TFT Touchscreens
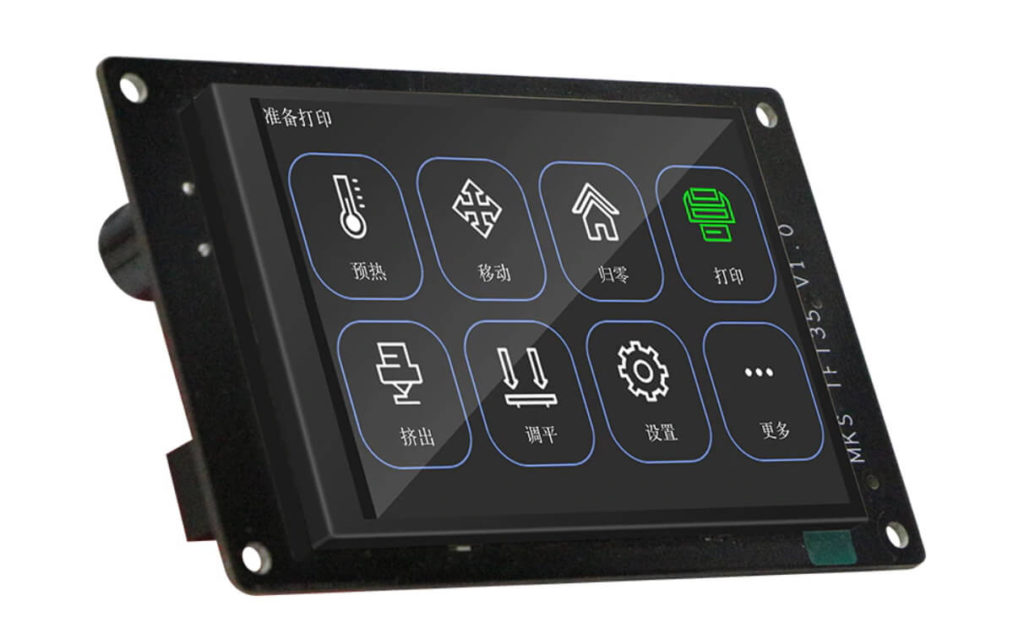
The Sapphire Plus uses a TFT35 screen made for the MKS xxxx board. It offers a lot of functionality which can be compared with the BTT TFT35.
It doesn’t have a knob to go through the default Marlin interface, but you can do it with the touchscreen buttons. It also has a nice print preview thumbnail and a skin over the Marlin interface which can be customized with their web tool.
It’s still not as capable as the TFT screens from BIGTREETECH but they are getting there. Development is active and MKS made it open source so everybody can contribute to the project.
The BTT TFT Touchscreens can be purchased from the following websites:
AliExpress
PanelDue
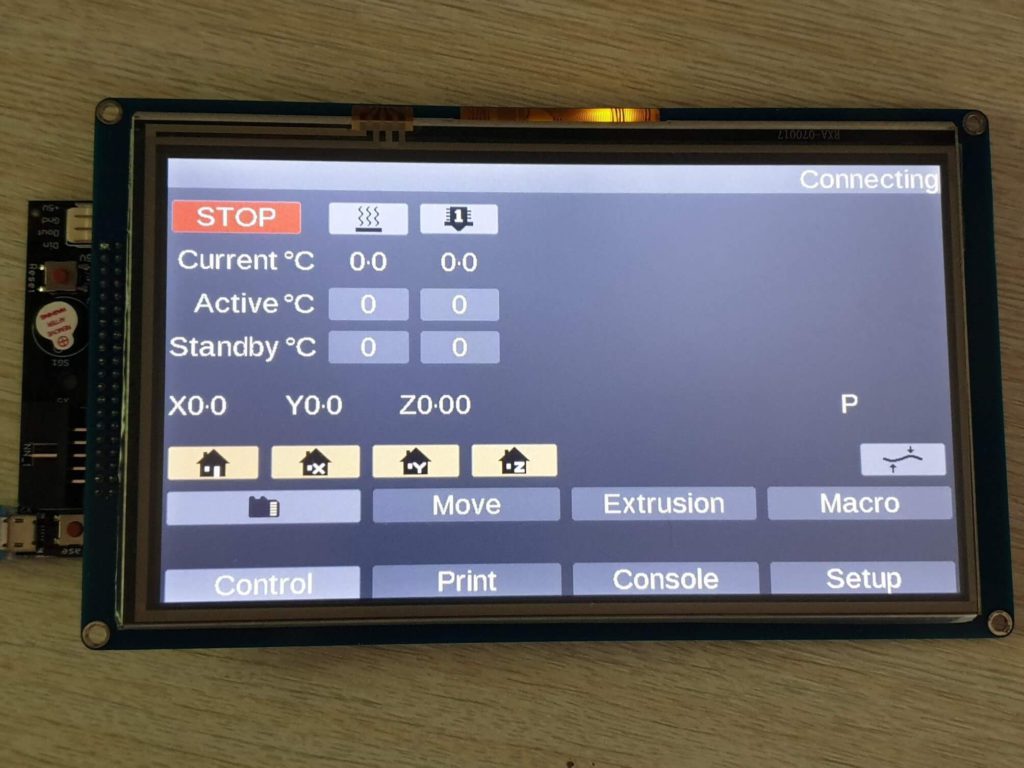
When using Reprap Firmware, there’s not much choice when it comes to screens. The PanelDue is the most recommended screen to pair with RRF, but only do it if you really think there’s a need for it.
The Duet Web Control offers a lot of functionality and considering you can just open a browser on your phone or tabled and have that functionality available without any wires, I think the PanelDue is not that useful.
It has even less features compared to a BTT TFT35 or an MKS TFT35. On those screens you can have a thumbnail with your print, or adjust different parameters of your printer with ease. The PanelDue doesn’t have all that functionality.
The BTT TFT Touchscreens can be purchased from the following websites:
AliExpress
Amazon
Banggood
Movement Upgrades
For good quality prints it’s imperative to have minimal to no backlash and accurate movements. All the three axis should move smoothly. No binding should be present and everything needs to be correctly tightened.
POM Anti-Backlash Nuts
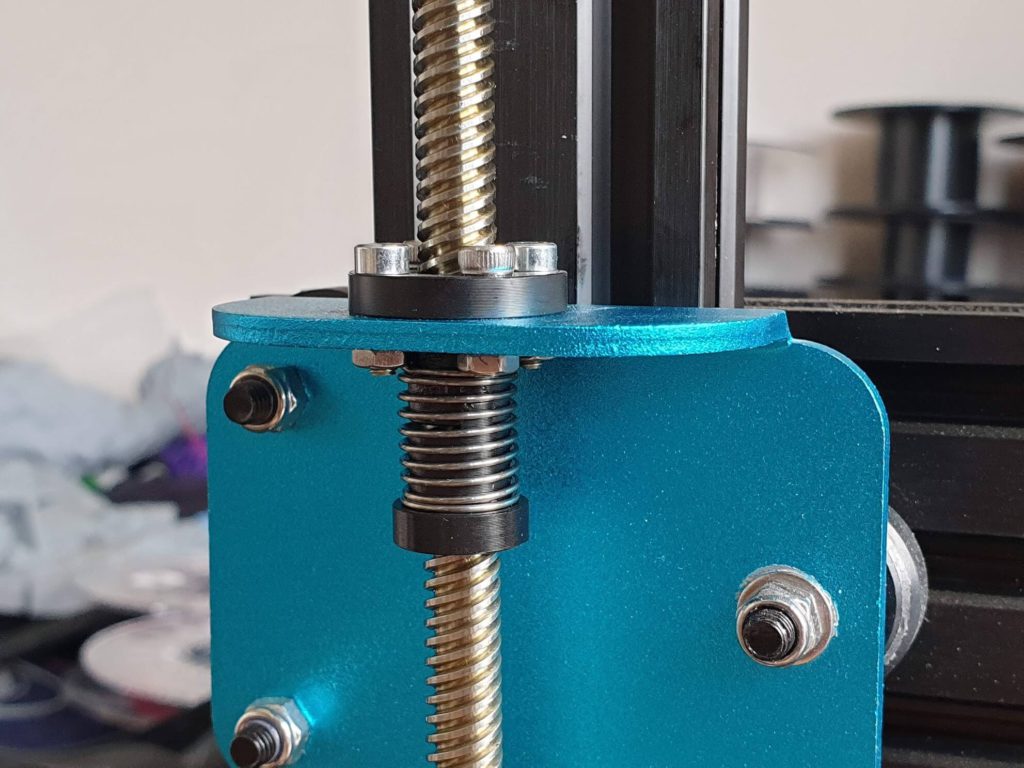
Since I used the first POM Anti-Backlash Nuts with the BLV Cube, I knew that these will be great for any kind of printer. So, I installed POM nuts on a couple of my printers.
I am using them because they offer zero backlash and smoother motion compared to the regular brass couplers. They are also great for dual Z axis printers because they will help with keeping the X gantry leveled.
Besides that, you can even use them without any kind of lubrication. And considering they are about 2$ / pair, it’s an excellent purchase for any 3D printer.
The POM Anti-Backlash Nuts can be purchased from the following websites:
Banggood
Amazon
Aliexpress
Spider Motor Couplers
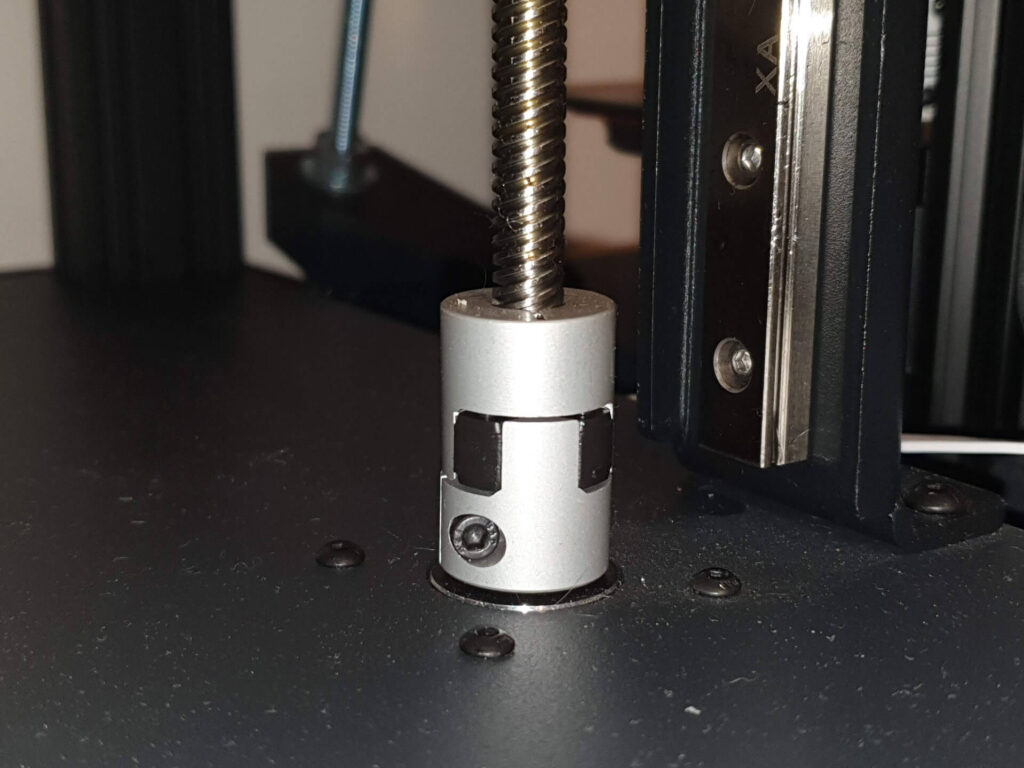
Also known as “jaw couplers” they are a great 3D printer upgrade if you have Z banding effects on your prints. Cheaper couplers like the spring couplers will allow the X axis to move a bit and cause inconsistent layers.
The spider couplers use a rubber interface between the coupler “jaws”. This interface removes any vibration from the stepper motors and they also allow for a bit of movement if the Z rods are not perfectly straight.
I installed a few on some of my printers and I noticed some improvements but they work best coupled with the POM nuts to eliminate any backlash and have accurate movements.
The Spider Couplers can be purchased from the following websites:
Amazon
Aliexpress
Banggood
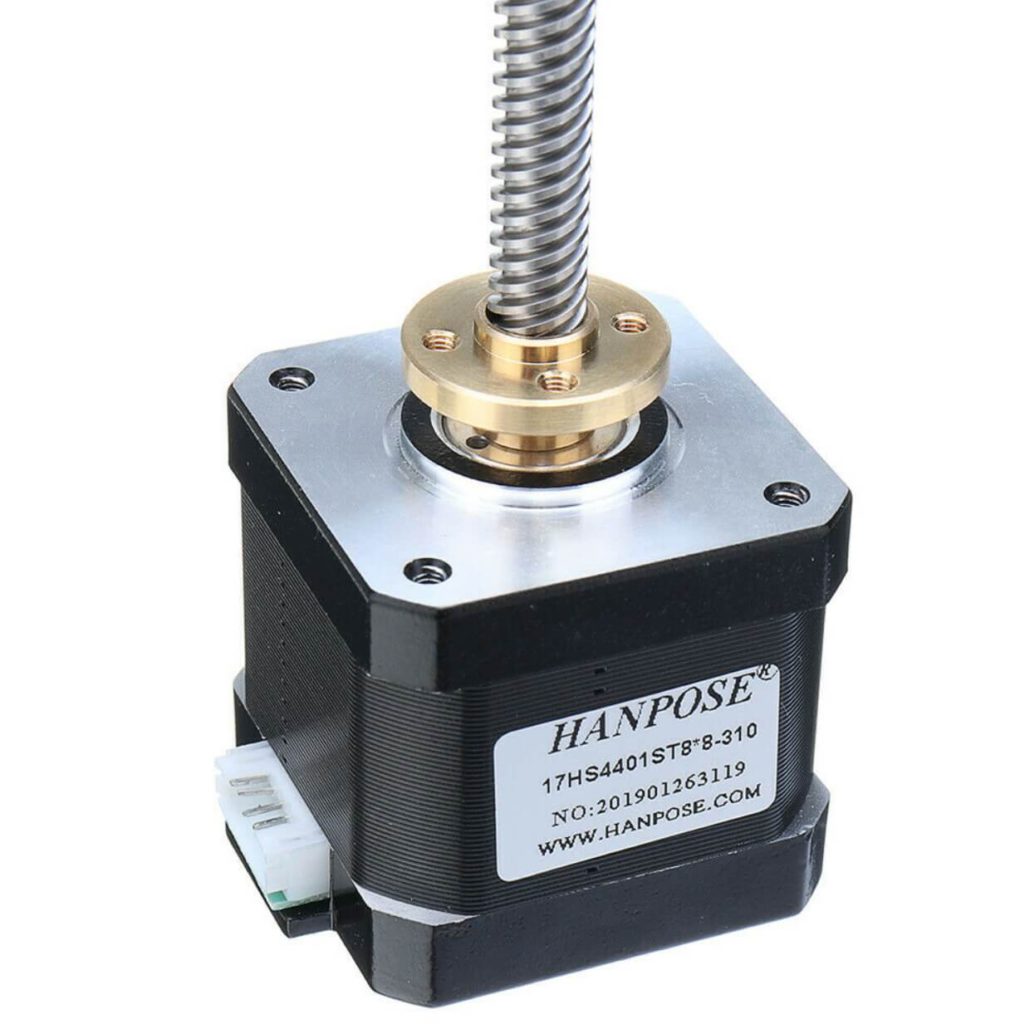
Stepper Drivers with Integrated Lead Screws
If you wan to get rid of those couplers, then you can upgrade your 3D printer with stepper motors which have the lead screw integrated. There’s no need for a coupler in this case and people report more accurate Z movements.
There’s also a benefit if you plan to align the Z motors with sensorless homing because there’s less risk of the couplers to add any inconsistency.
Printers like the Prusa MK3S use them with much success for this exact thing.
I haven’t upgraded to these motors yet, but I plan to do it in the future and I will report back.
Stepper drivers with integrated lead screws with motors can be bought from the following websites:
Amazon
AliExpress
Banggood
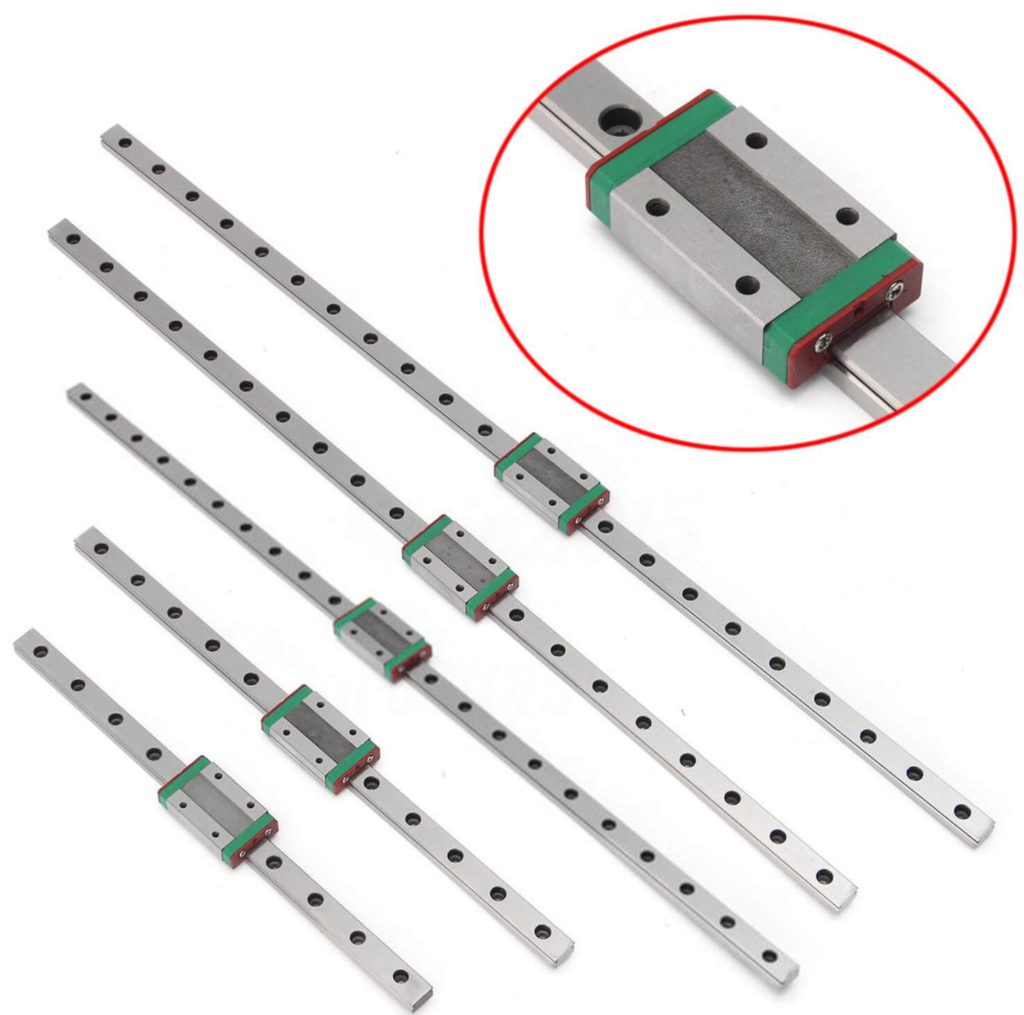
Linear Rails
A lot of people go for Linear Rails when upgrading their printer for smoother motion. These are a popular alternative to V-Slot wheels which promise smoother motion and more constrained movements. This is true but only if your printer is already calibrated well and you can see it’s limited by the movement setup you are using.
Core XY printers benefit the most from these linear rails. The Sapphire Plus I reviewed a few months ago use MGN12 linear rails and they work great.
There are some upgrade kits like the BLV Ender 3 Pro which includes a Hiwin linear rails. If you plan to install linear rails on other printers, then you would need to first look for some mounts which were done by others on sites like Thingiverse and make your purchases accordingly. If you are comfortable with 3D modeling, then you can probably handle it .
Linear Rails can be bought from the following websites:
Amazon
AliExpress
Banggood
Policarbonate V-Slot Wheels
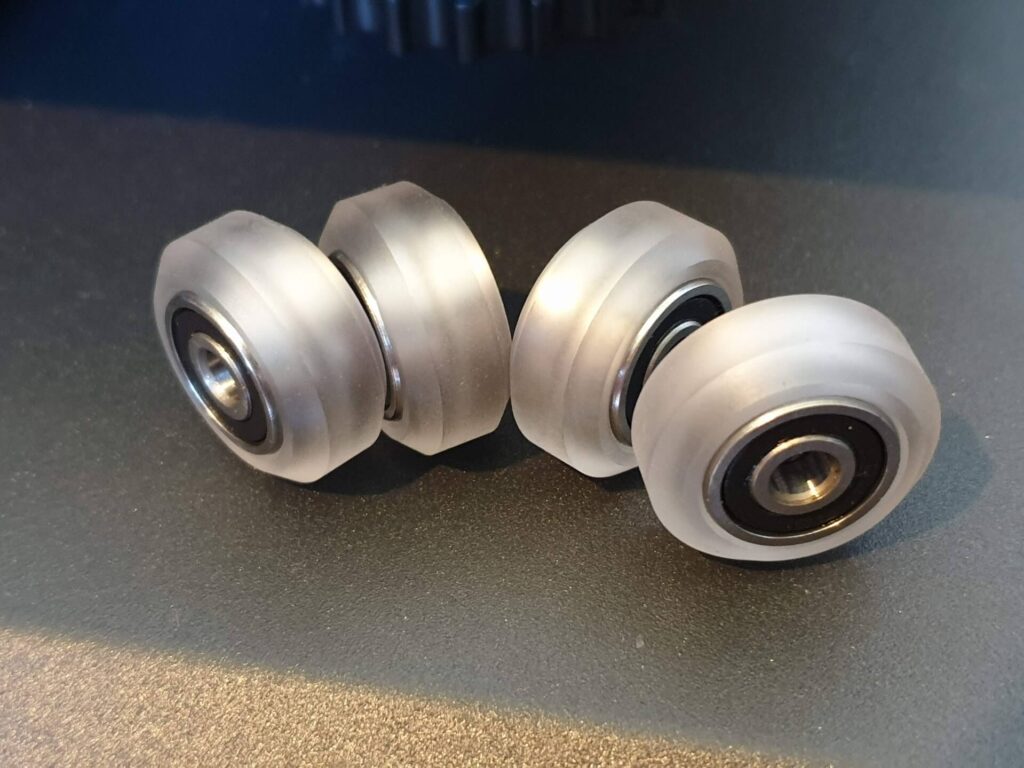
Most of the 3D printers which use V-Slot wheels ship with regular plastic wheels. If they are too tight and don’t move for a while, they can develop flat spots. This translates in uneven movement and you can see the results on your prints. Besides that, they get damaged more easily and start to release some “wheel dust” which you have probably seen.
A good alternative to regular v-slot wheels are made from Polycarbonate. This material is stiffer and has better wear resistance
I used some polycarbonate wheels on my Sidewinder X1 to fix some issues on the Y axis. The bed was not moving smooth enough. After replacing the wheels, print quality improved and there is no wear dust.
Considering they are cheap, I highly recommend them for any printer that uses a v-slot with wheels. Of course, besides good wheels it’s important to also keep the slots clean so there is no debris on them.
The Polycarbonate V-Slot Wheels can be bought from the following websites:
Amazon
AliExpress
Banggood
GATES Belts, High Matching Pulleys and Idlers
This upgrade is mostly ignored by a lot of people, but is you have small imperfections on your prints which look like ringing you might need to change the belts.
There are a lot of 2GT belts you can get, but I recommend getting Trianglelab GATES-LL-2GT belts or the same from Mellow. They are really good, they don’t stretch easily and match motor pulleys much better.
Of course, the pulleys will need to be upgraded with something like the Mellow motor pulleys and idlers and it’s guaranteed to see some kind of difference.
Consider that a lot of cheap printers run their belts on a flat bearing which takes the role of a geared idler. It’s easy to understand why this is not the best solution and can add a small amount of backlash and ringing. You will need to tighten your belts more, which will increase the ringing-like effect on the prints and it’s an infinite cycle.
Upgrading the belts, pulleys and idlers should be on the bottom of your list because there are other more important upgrades you can do before. But if you are really looking to get that 5% extra quality from your printer, then go for it.
Silicone Bed Mounts
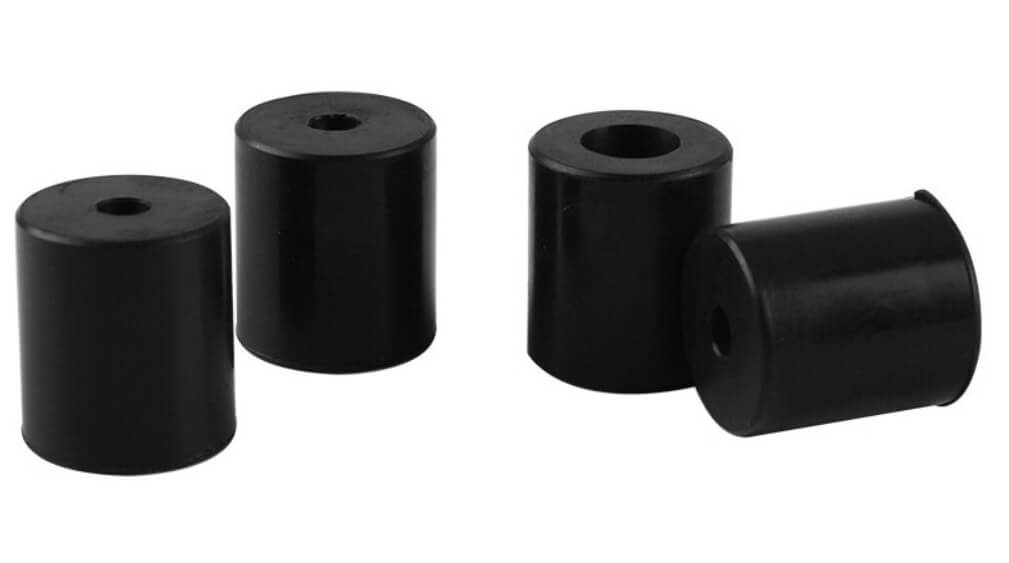
A nice solution for upgrading your bed and make it more stable are silicone bed mounts. Using these silicone mounts you can make the bed much stiffer and they are a good alternative to the popular “yellow springs” .
I previously covered the Artillery Bed Leveling Mod where you can use simple M5 nuts to achieve the same thing. But using silicone spacers will allow you to go trough this whole process faster.
If you take your time to manually level your bed using this kind of bed mount, the need of Auto Bed Leveling solutions disappears. Since I did the bed leveling mod on my Artillery Genius, I never had to re-level the bed in more than 2 months of use.
You can buy silicone bed mounts from the following stores:
Amazon
AliExpress
Banggood
Build Surface Upgrades
Different materials have different adhesion proprieties. 3D printing enthusiasts were always looking to get better adhesion because a good first layer can have an impact on the whole print.
They started using all kind of adhesion materials from painters tape, to a mix of water and sugar but nowadays all of this is not needed.
It’s much easier to buy a simple PEI Spring Steel Sheet which is a good all-round surface for a lot of materials and it makes removing prints easier. But there are other solutions which work just as well when it comes to adhesion with some caveats.
PEI Sheet
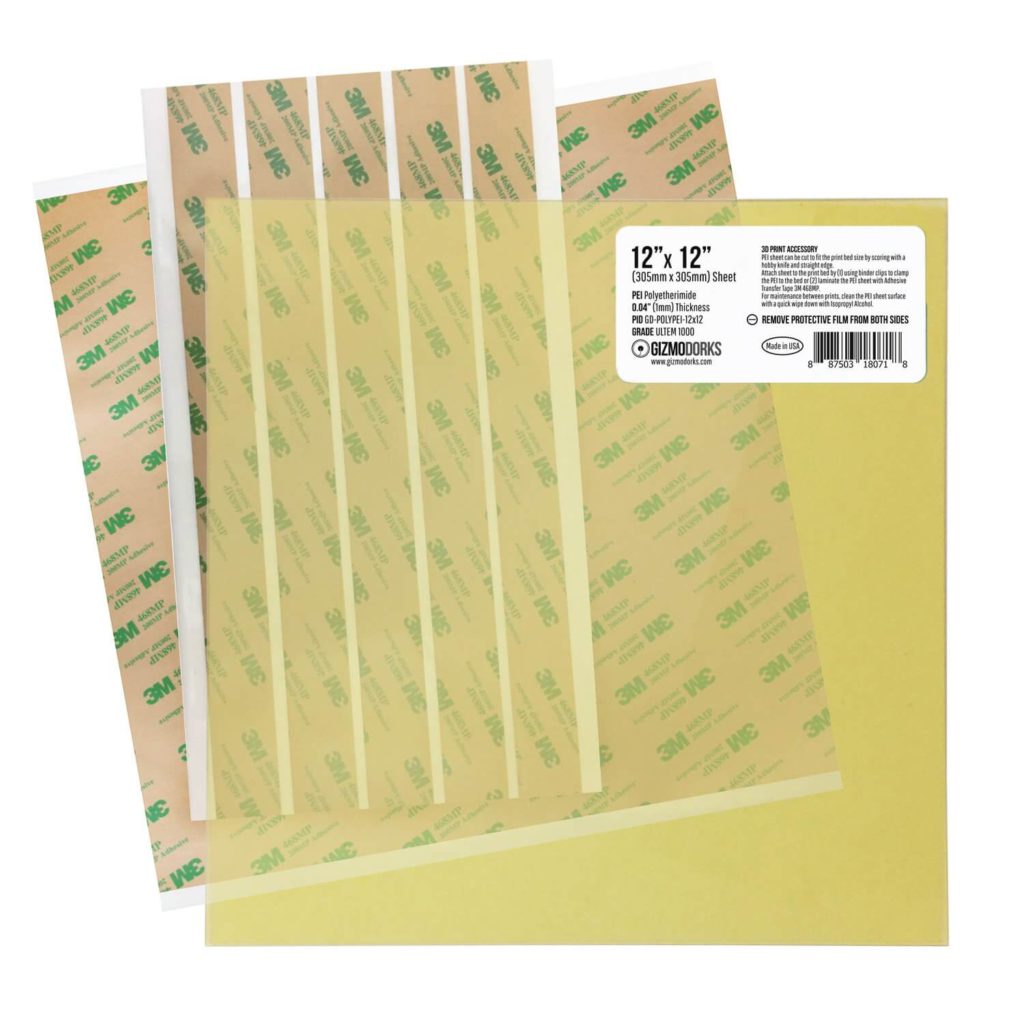
If you already have a flat but adhesion is not great, you might be interested in applying a PEI sheet on your bed.
The PEI sheet comes in a single piece cut to size which can be applied on the bed. It’s important to thoroughly clean the bed before with regular windows cleaner then with some alcohol before applying it.
While this solution can work well to improve the adhesion of your heatbed, please note that the application process is not that easy. You need to have a lot of patience when installing it.
Another drawback is removal when it gets damaged. I had one installed on a glass bed and when I needed to remove it. I spent more than 1 hour. It can be done but I prefer not to deal with this in the future. That’s why I like to pay a little bit more for a magnetic PEI spring steel sheet so I can just replace the sheet if it gets damaged.
The PEI sheet can be bought from the following websites:
Banggood
Amazon
AliExpress
Magnetic PEI Spring Steel Sheet
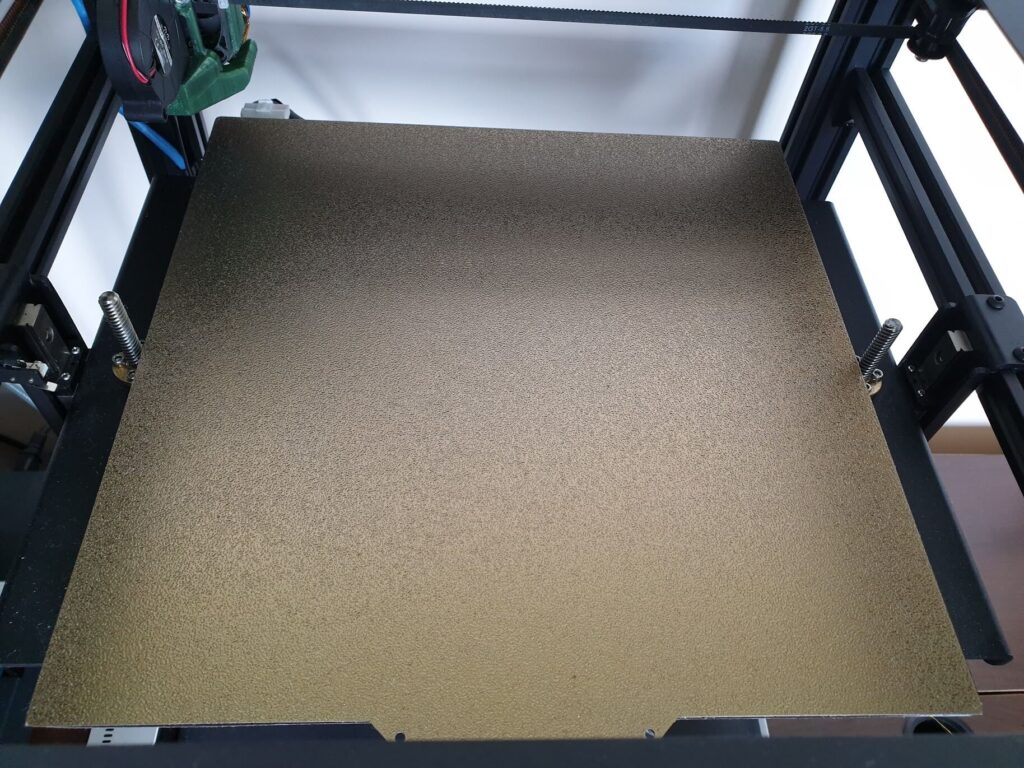
As you probably know by now, my favorite print surface is the magnetic PEI spring steel sheet.
I had a lot of success with the Energetic Textured PEI Spring Steel Sheet. It’s double sided with a textured surface on one side which gives an awesome finish to your prints.
The other side of the ENERGETIC plate is smooth. I don’t use it as often but there are some situations where you might like a smooth finish on your printed model.
If you are interested, you can read more about it in my review: ENERGETIC Double-Sided PEI Sheet Review.
The main benefit of using a PEI spring steel sheet is when removing your prints. You don’t need to wait for the printer to cool. Just remove the sheet, wait for 30 second then just flex it a bit. The 3D printed model will pop off and you can start your next print. It’s an excellent quality-of-life upgrade for your 3D printer.
After reviewing the BIQU B1 printer I discovered a new one. The SSS from BIGTREETECH has the same adhesion proprieties but it’s a bit cheaper.
It’s thinner and can flex easily without worrying about bending the sheet. The drawback for the SSS is the limited sizes which are available for purchase.
Both sides are powder coated and considering the price, it’s a good alternative to a simple PEI sticker.
It’s recommended to clean the PEI sheet with IPA but regular window cleaner works just as well. Do keep in mind that when printing PETG it’s recommended to use an interface layer like glue stick (or a similar adhesion product). This is required because the PETG can fuse with the PEI and you will damage the surface.
The Magnetic PEI Spring Steel Sheet can be bought from the following websites:
Banggood
Amazon
Aliexpress
BuildTak
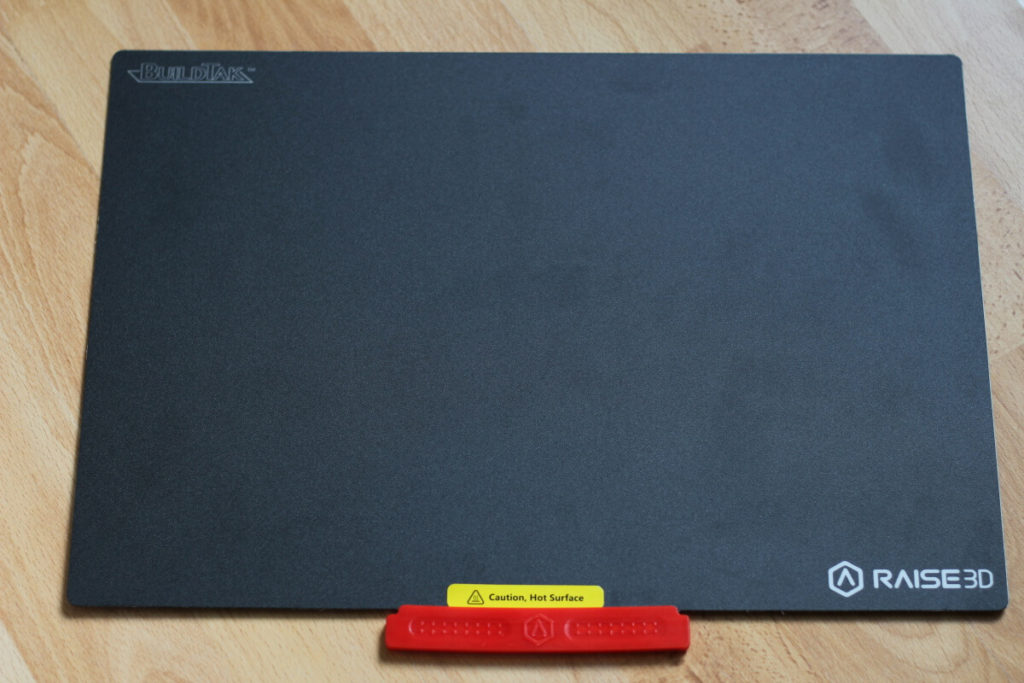
I only experienced the real BuildTak print surface when I laid my hands on the Raise E2 3D printer. The surface has a high-grit sandpaper finish and adhesion is really good.
On some printers which use a BuildTak-like surface (ex: the Ender 3) adhesion was good but in some cases the prints where adhering too much. Removal was harder and if the bed is not flexible then you’ll have some trouble with it.
Even tough the surface works well, I still prefer using a PEI Spring Steel Sheet with a textured surface.
The BuildTak Sheet can be bought from the following websites:
Banggood
Amazon
AliExpress
Creality Ultrabase Bed
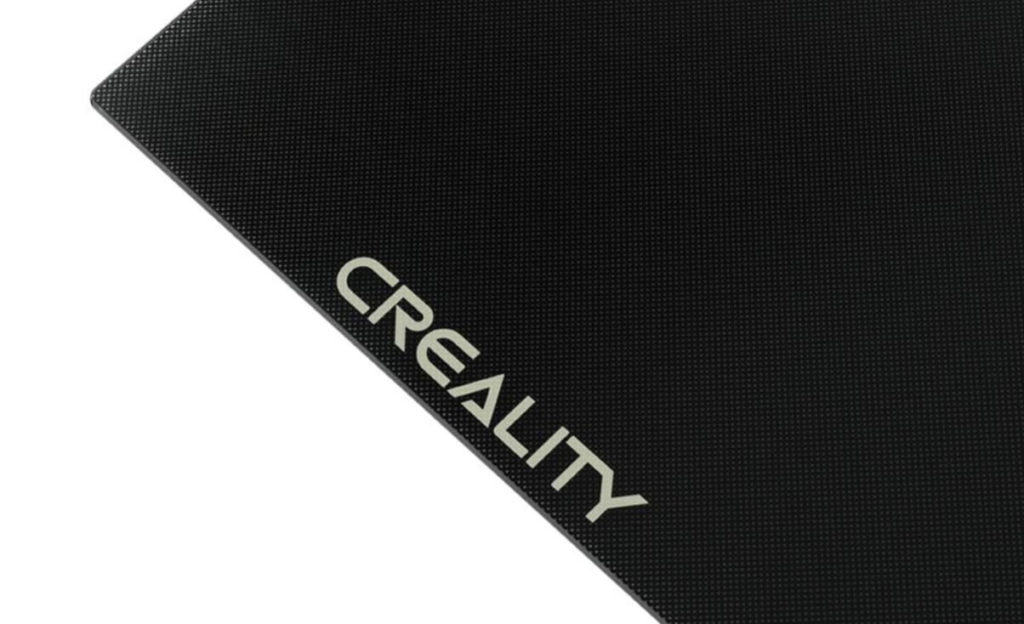
Creality is shipping some of their printers like the Ender 5 Plus with a tempered glass bed which has some kind of a textured surface on the top. It works well when the bed is heated and after the print is completed the print releases from the bed.
A similar bed is used by Artillery with their Sidewinder X1 and Genius. Unfortunately, because the heating element is glued directly to the glass bed, it can warp a bit and cause some inconsistency in the surface. I also noticed that the adhesion is not as good compared to Creality’s offering.
One drawback it is that you need to wait for the bed to cool after the print is done. On a big heated bed like the one on the Ender 5 Plus, it takes close to 30 minutes. Another drawback is the need of clips to hold the bed in place. Most of the people use regular paper clips but now you can get thinner clips which don’t get in the way of the nozzle.
If you are looking to upgrade your print surface and you already have a flat bed, I recommend getting a PEI spring steel sheet. But if you also need to fix a warped surface, a Creality Ultrabase Bed can be better.
The Creality Ultrabase Glass Bed can be purchased from the following websites:
Banggood
Amazon
AliExpress
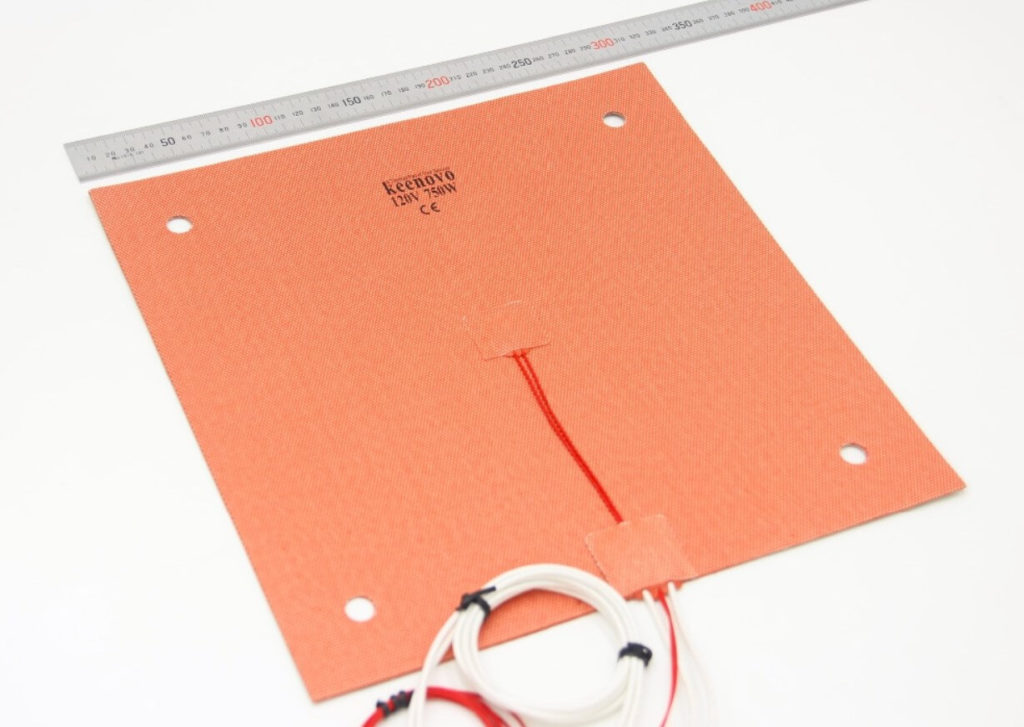
AC Silicone Heater
The AC Silicone Heater is an excellent upgrade if you want to heat up your bed faster. For example, this is a future upgrade plan I have for the Ender 5 Plus. The stock bed heats up slowly and it needs a lot of power to be delivered from the power supply.
Artillery has an AC silicone heater Sidewinder X1 and Genius which is awesome and the printer heats up really fast. Hopefully more printers will come with an AC silicone heater because it’s a great addition. This way, a lower power PSU can be used which will also lower the noise.
You also need to get a SSR and some electrical knowledge to install an AC silicone heater, so it’s not the easiest upgrade out there. But if you want better heatbed performance, then this is recommended.
The AC Silicone Heater can be purchased from the following websites:
Banggood
Amazon
AliExpress
Automated Bed Leveling Upgrades
Having a good Auto Bed Leveling system is a nice quality-of-life upgrade. This will make leveling your bed much easier and much less time consuming.
Auto Bed Leveling measures the bed in multiple poins to create a mesh which will be used during printing. This way, when the nozzle goes over a portion of the bed which is lower or higher, it compensates in real time to maintain the same distance helping you achieve a great first layer.
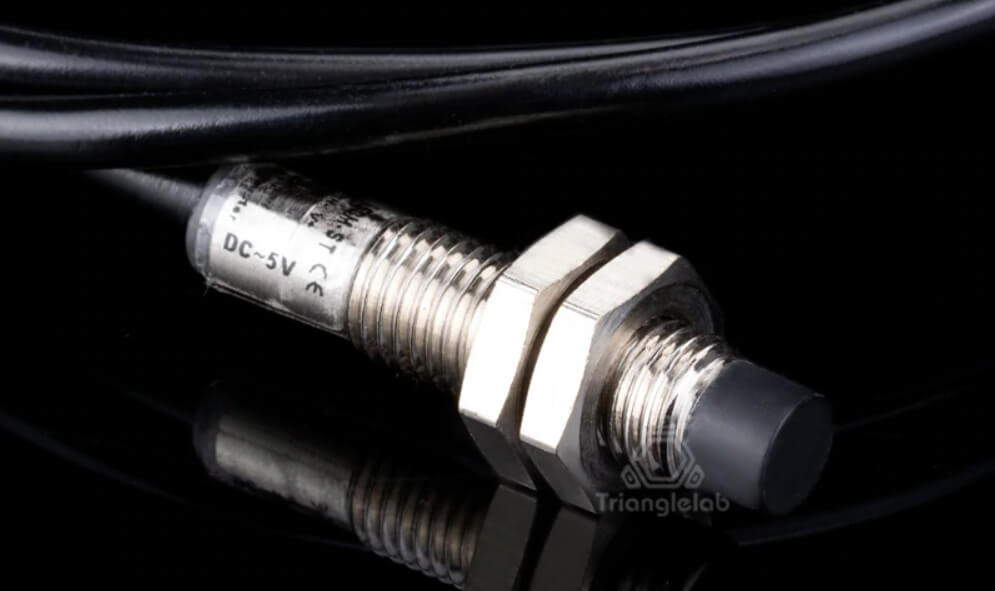
There are many ABL sensors available and you can even use a stock Z endstop like I did in the Artillery Auto Bed Leveling Mod which uses an inductive endstop as a sensor for measuring the bed.
It’s important to note that any ABL sensor will require the bed to be already leveled manually as much as possible. Don’t think that you will buy an ABL probe and you won’t need to ever level your bed. It’s not a magic solution.
For consistent results, you should have a manually leveled bed and then compensate for smaller differences with the ABL mesh.
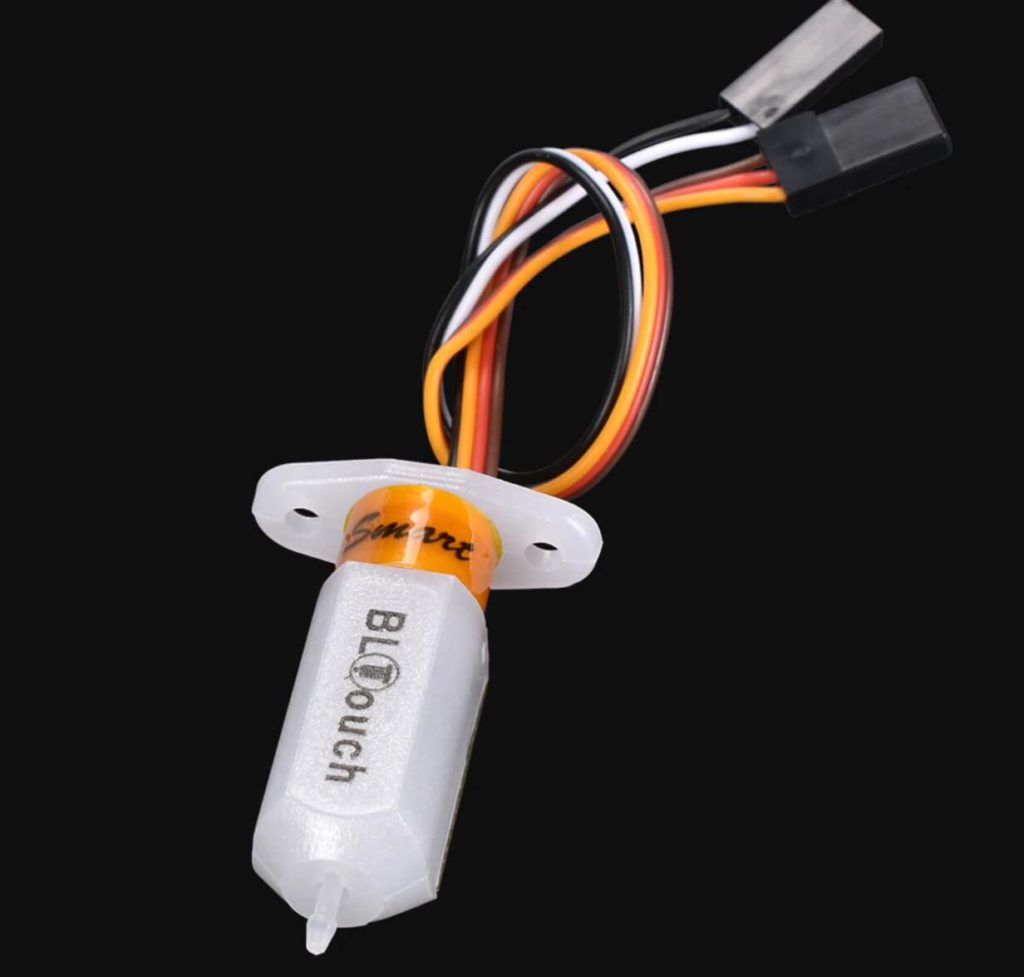
BLTouch
The Antclabs BLTouch is probably the most popular 3D printer upgrade when it comes to adding Auto Bed Leveling capabilities to your printer. It’s popularity comes from the versatility is provides.
The BLTouch allows probing the bed without complaining about the type of surface used because it uses a physical probing pin which touches the surface for measurement.
There’s no really downside from using a BLTouch. If I were to nitpick, the BLTouch is only held back by the probing speed which is a bit lower compared to other sensors.
You can also get BLTouch clones from AliExpress which are cheaper but sometimes they don’t work that well. If you plan to use a clone, I recommend getting the 3D Touch from Trianglelab or MKS (these are the sensors I tested and had decent results).
If you can afford it, buying the Original BLTouch will probably save you a bit of frustration along the way.
The BLTouch sensor can be bought from the following websites:
Banggood
Amazon
Aliexpress
P.I.N.D.A Sensor
The P.I.N.D.A sensor was made popular by the Prusa printers. It’s similar to an inductive sensor but it also has a temperature probe inside to compensate for the different Z offsets you get when heating up your bed.
This feature is also available in Marlin, so if you already have a metal bed or a PEI spring steel sheet then it should be a good 3D printer upgrade when it comes to bed leveling.
It’s important to note that an inductive sensor is able to detect only metal, so it won’t work with a glass bed.
The P.I.N.D.A sensor can be bought from the following websites:
Banggood
Amazon
Aliexpress
Noise Reduction Upgrades
I hate noisy 3D printers. That’s why I always try to remove some of the noise produced by the printers by any means necessary. Especially on printers I use often.
The easies way to make a printer more silent is to use silent stepper drivers and silent fans. But you can’t really use silent / low rpm fans if the hotend has bad thermal performance or the board is enclosed and doesn’t have space to “breathe”.
Silent Stepper Drivers
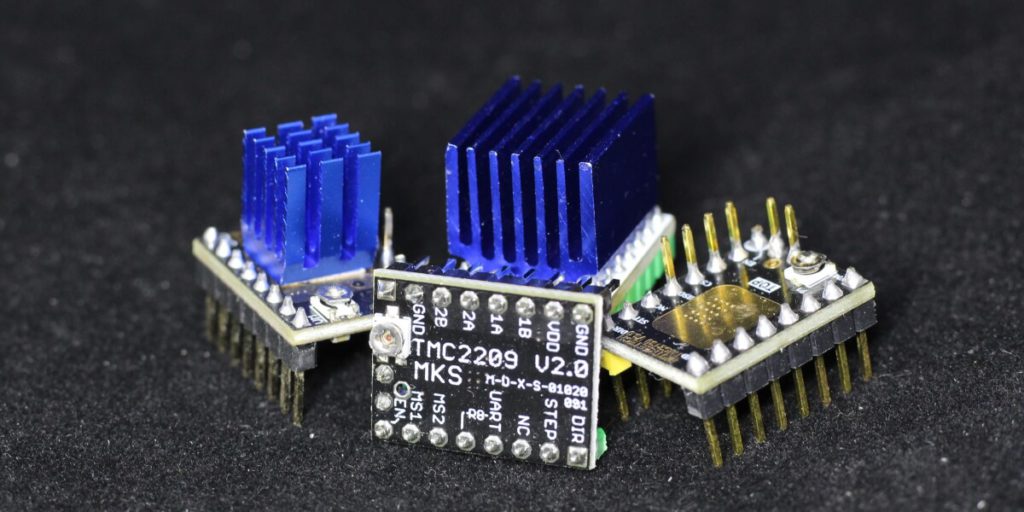
If you printer already has removable stepper drivers, then it should be relatively easy to upgrade your stepper drivers. For example, you could upgrade to TMC2209 drivers or the newer TMC2226 which are a bit cooler. These stepper drivers will run using StealtchChop which makes the printer much more silent. There’s also the possibility of enabling Sensorless Homing using the StallGuard technology from TMC.
I had a lot of success with the BIGTREETECH stepper drivers but I also used MKS drivers without any issues. I added MKS TMC2209 stepper drivers on my Sapphire Plus they run well. Besides that, they are also cheaper.
If you want to go further, then there’s the TMC5160 stepper drivers which have more power capable of driving bigger motors, but in my opinion, they are a bit overkill. They should be bought only if you plan yo use them with bigger stepper motors.
The TMC2209 stepper drivers can be bought from the following websites:
Banggood
Amazon
AliExpress
Better Fans
I hate a noisy printer. And currently the fans are the ones responsible for this. Most of the cheap chinese printers use loud fans to compensate for bad cooling choices.
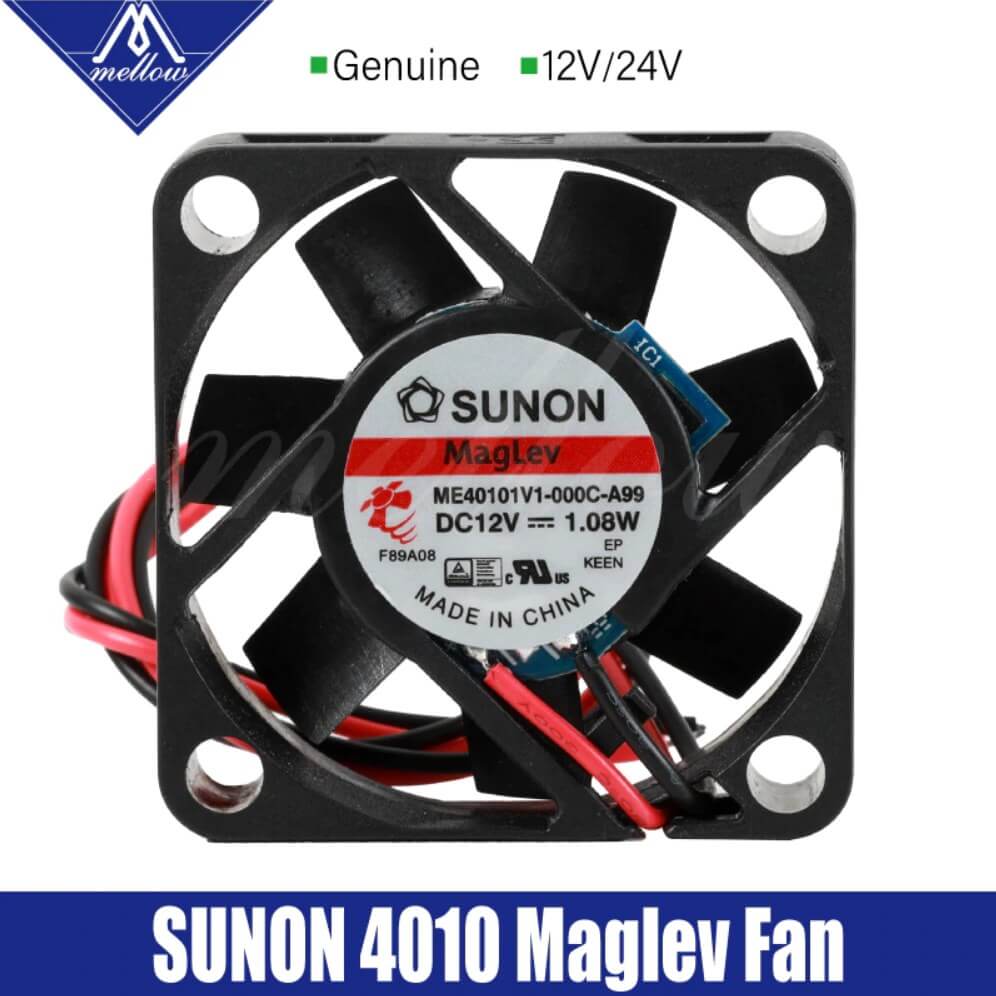
There are some fan alternatives to lower the noise produced by your 3D printer. The most popular alternative when it comes to fans are made by Sunon. To be honest, probably most of the Sunon branded fans available for purchase on AliExpress are fakes but they still have a good noise to performance ration and can silence your printer a bit.
I also recommend buying ball bearing fans because they have less vibration and last much longer compared to regular sleeve bearing fans. They are a bit more expensive but in the long run you will save more money and time because you don’t need to replace them as often.
Unfortunately, it’s hard to get silent fans which run on 24V. The Noctua 12V fans are popular but to use them you need a buck converter to lower the voltage. Besides that, if you use one on your hotend you need to make sure they blow a sufficient amount of air to keep the heat break cool. If not, clogs will occur and there’s not much use of a silent fan if your printer is out of commission.
When it comes to part cooling fans, I always recommend buying 5015 blower style fans because they can push more air and can cool your prints better. This is a popular upgrade for the smaller 4010 fans which come with a lot of printers.
The same thing applies for them. Always buy fans which use double bearing fans because they have less vibrations and will last longer.
My favorite fans are the Mellow 5015 dual bearing fans. They are not the best, but for the money, there’s not much to complain. There are some 5015 Sunon MagLev fans available but I haven’t tested them yet.
Silent fans can be bought from the following websites:
Banggood
Amazon
AliExpress
Buck Converters
Buck converters are great for adapting your 3D printer voltage to other electronical parts which need less current. I use them for installing 12V fans, 12V LED strips and even for powering a Raspberry Pi which needs 5V.
They are versatile pieces of hardware and it’s good to have a few at hand for your projects. There’s not much to say about them. Just don’t buy the cheapest you can find.
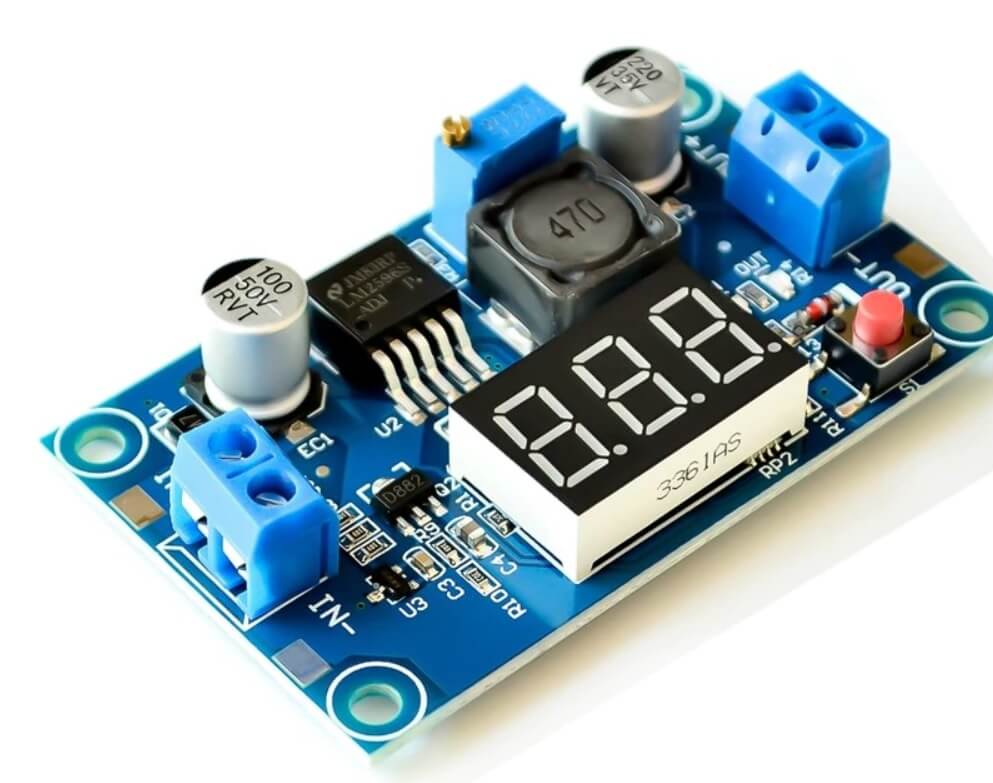
My favorite buck converter is this one. It has a display to easily set your target voltage and it has terminals for connections. That way you avoid having to solder the wires.
The Buck converters can be bought from the following websites:
Banggood
Amazon
AliExpress
Shrinkable Solder Connectors
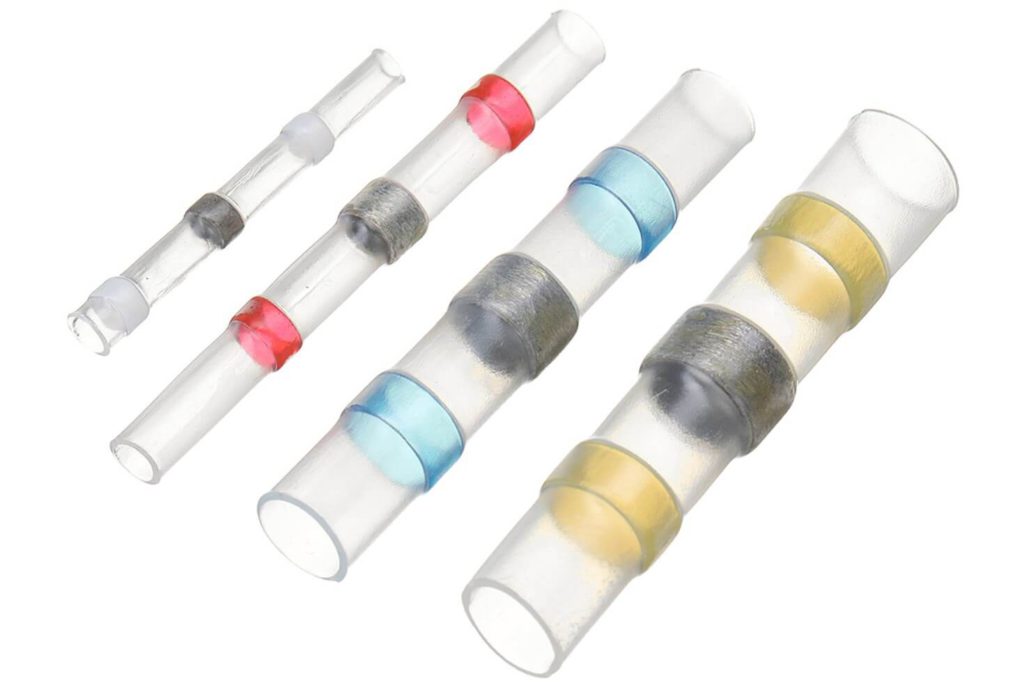
When you install a new 3D printer upgrade you will surely need to cut some wires then solder them again. If you are not that good with soldering and you are looking for something easier to use then the solder connectors are great.
They are shrinkable waterproof tubes which have a bead of solder in the middle which melts to a low temperature. You just need to join the wires, move the tube over the wire tips and then use a lighter to melt the solder and have a tight connection.
I often use them when I replace fans or if I need to extend some wires on my printer. They are cheap and I recommend you buy a few because they are extremely useful.
They come in all kind of sizes for different wire gauges but I mostly used the small ones so I prefer buying them separately. If you can use them for other project, then there are boxes which contain a large assortment of sizes.
The Shrinkable Solder Connectors can be bought from the following websites:
Banggood
Amazon
AliExpress
Functionality Expansion Upgrades
Upgrades in this category are not directly connected to the printer but can be purchased in addition to it.
If at some point you decide to repurpose them, you can do it easily.
Octoprint Raspberry Pi
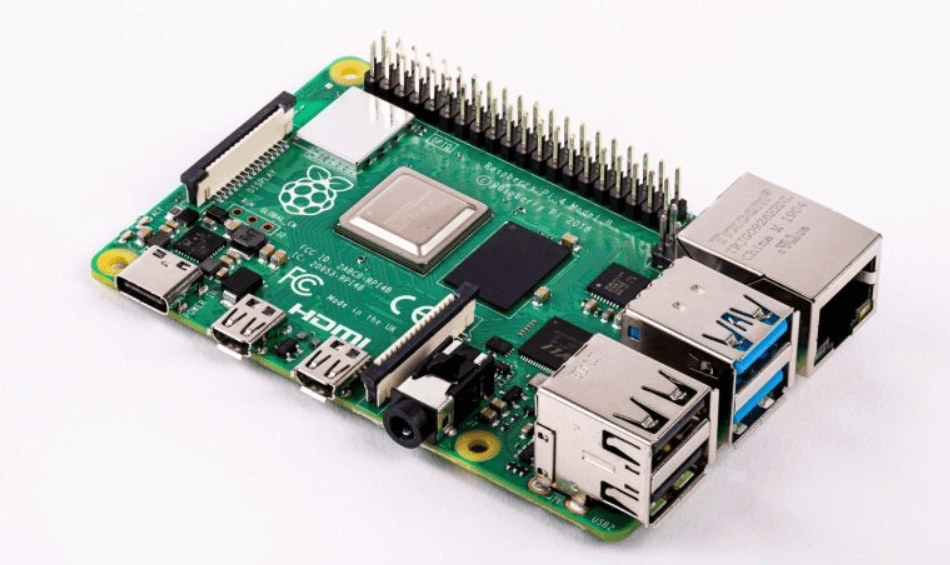
One of the most popular ways of adding more functionality to your printer is with a Raspberry Pi. You can install Octoprint easily and I also covered the entire process in this article: Install OctoPi on Raspberry Pi – OctoPrint Install Guide
With Octoprint, you give your printer WiFi capabilities allowing printer control from your browser. But this doesn’t stop here. You can easily add a USB webcam to remotely monitor your 3D printer and check on your prints.
Octoprint has a huge repository of plugins which can be installed. For example, Octolapse will allow you to do amazing time lapses during printing.
There’s also the possibility of installing the RaiseCloud plugin which connects your printer to the Cloud. This way, you can control and monitor your printer from anywhere in the world. I covered the process in this article:
So, I would wholeheartedly recommend Octoprint for any 3D printer user. It makes the whole experience much user friendly and it can be a nice weekend project.
The Raspberry Pi can be purchased from the following websites:
Banggood
Amazon
AliExpress
3D Printer Enclosure
Printing PLA and PETG is relatively safe, but it’s still recommended to use your 3D printer in a well-ventilated room. If you want to be extra safe, then it’s a good idea to enclose your printer.
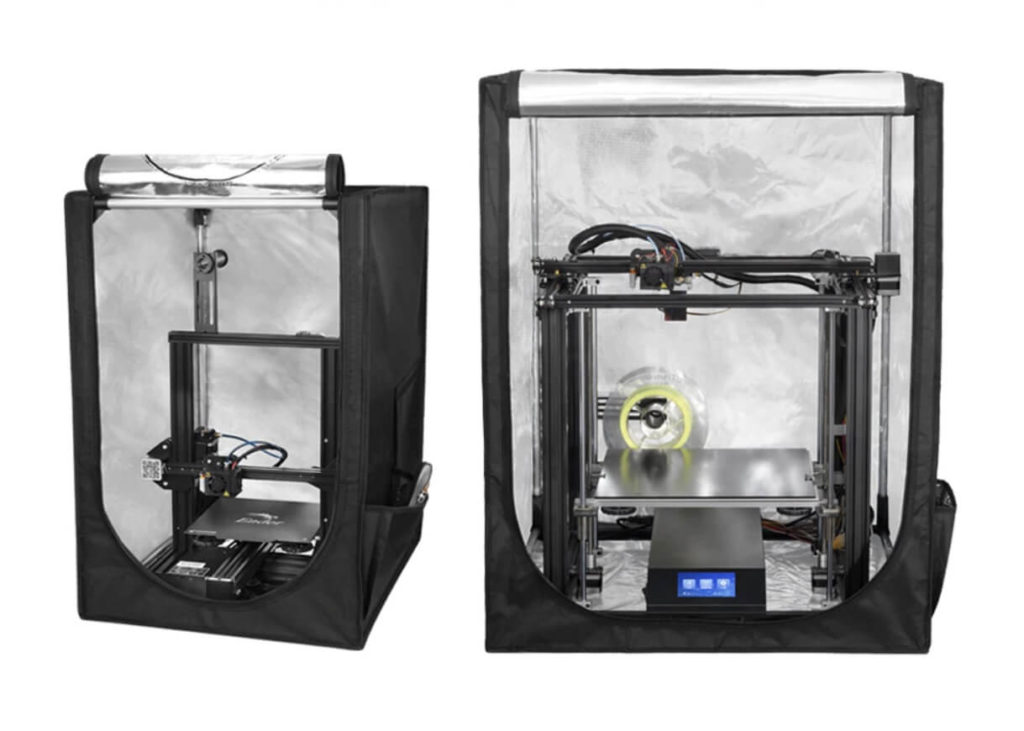
A popular way of enclosing your printer is with the IKEA lack coffee table which can be easily adapted to fit a small 3D printer. But in the last few months I’ve seen some “3D printer tents” which can do the same thing with less work.
Besides the added protection from harmful fumes, there’s also the added benefit of insulating the printer and keeping a higher temperature inside the enclosure.
This will help a lot with materials like PETG, ABS, Nylon and PC. These materials tend to warp, crack and even lose adhesion if there are any drafts around the printer or the temperature is too low. A 3D printer enclosure will help and will increase the chances a successful print.
Creality has an assortment of 3D printer enclosures which can fit most of their printers, but they can also be used with other machines. Just make sure you measure the printer beforehand so it fits inside the enclosure.
The Creality 3D Printer Enclosure can be purchased from the following websites:
Banggood
Amazon
AliExpress
WiFi Module
There are a couple of WiFi modules currently available on the market to add WiFi capabilities on your printer. They differ in features and installation complexity.
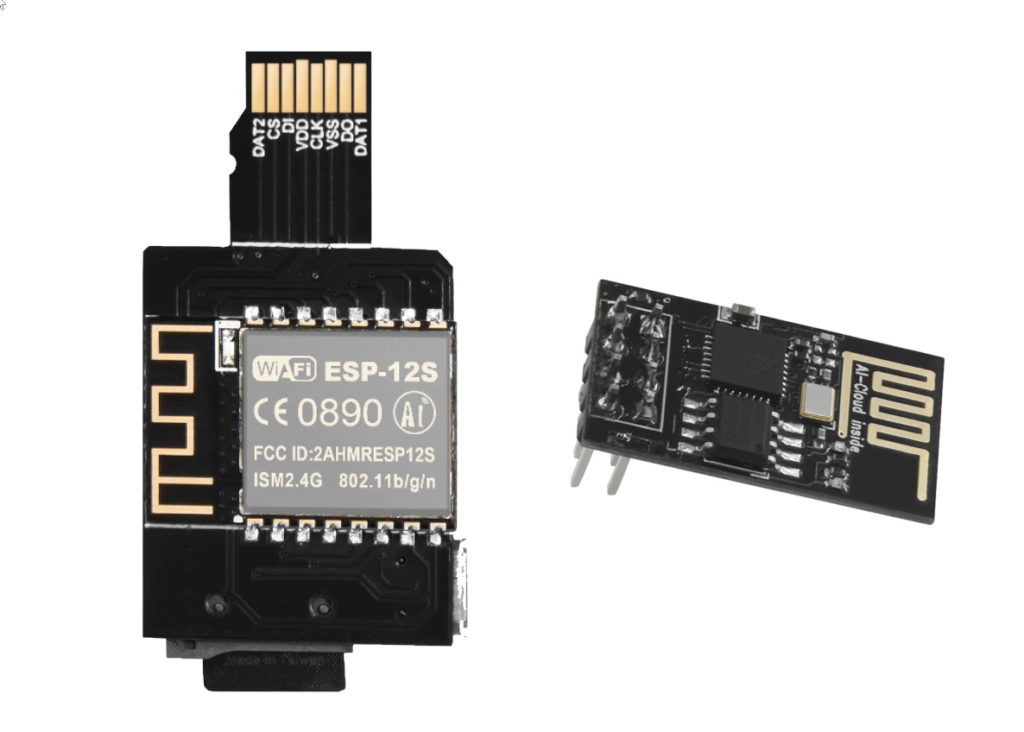
On the cheap side, there’s the ESP-01 WiFi module which costs a few dollars and can be installed on boards like the SKR 1.4, MKS SGEN_L V2.0 and even on a TFT Touchscreen from BIGTREETECH. They are ok for basic 3D printer control like movement and having a terminal where you can send GCode commands to the printer. But if you plan to send GCode files, prepare yourself for a slow transfer speed.
If you don’t need printer controls, you can buy a Wireless SD adapter. this plug into the SD card of your printer and allows you to send GCode files via WiFi to the printer. They offer better transfer speeds but for an added cost and less functionality.
If you already use a board which is capable of running RepRap Firmware, then you can also buy Peter’s WiFi adapter and do a conversion. Besides getting all the benefits from RepRap Firmware which come with WiFi controls, there’s also improved transfer speeds when sending your GCode file.
The WiFi adapter can be purchased from the following websites:
AliExpress
Amazon
Banggood
LED Lights
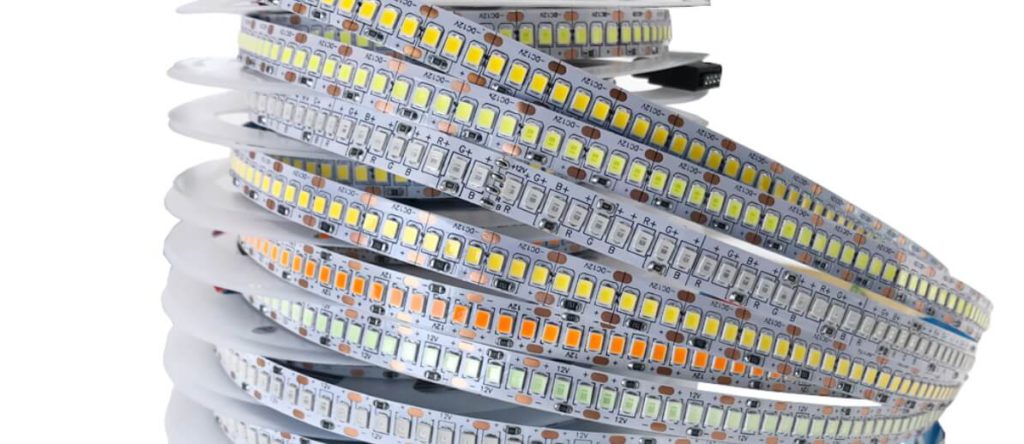
Adding LED light strips to your printer can help a lot. Think about how many times you were looking on your first layer and thought “I need more light!”. Well, you can solve this with a simple LED light strip.
If you get 24V LED light strips, you can connect it directly to the power supply of your 3D printer.
If you are looking to get fancy, try some NeoPixels. These are addressable RGB LED lights which can be controlled by your printer firmware. For example, you can have your printer gradually change the color from blue to red when it heats up which is a nice addition.
Sure, you need a bit of Marlin experience to be able to re-compile the firmware and make them work, but you can look at it as another weekend project with your 3D printer.
The LED Strips can be purchased from the following websites:
Banggood
Amazon
AliExpress
Remote Access Camera
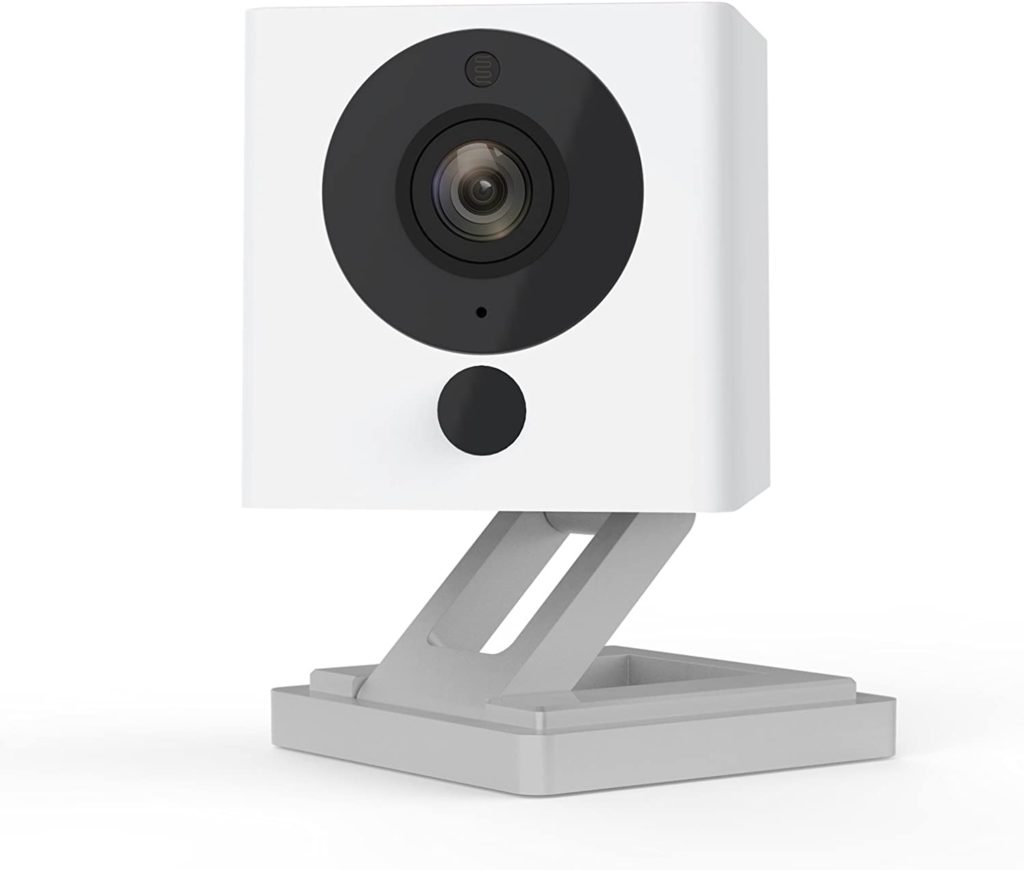
If you are not interested in getting into Octoprint, then you can use an IP camera for remotely monitoring your printer. I had a lot of success with the WyzeCam V2 IP camera. It has a great price and a lot of features.
With the WyzeCam V2 you can start monitoring your prints in less than 10 minutes. It has good video quality, wide field of view and even night vision. By adding a MicroSD card, you can also do timelapse videos during the print.
If you ever decide to use Octoprint in the future, you can easily install a different firmware on it and use it as a webcam.
Overall, the WyzeCam V2 camera is excellent. I have 4 of them and I will probably buy a few more. You can’t go wrong with them.
The Remote Access Camera can be purchased from the following websites:
Banggood
Amazon
Remote Controlled Power Socket
If you want to take your remote-control capabilities to the next level, then adding a remotely controlled power socket is the obvious thing to do.
They are multiple variants available for fair prices. I recommend you stay in the same ecosystem when purchasing smart power socket in order to have a single app to control all your devices.
Besides the remote control, you can monitor the power draw of your printer within the app which is an extra useful feature you get with a remotely controlled power socket.
If you are an Octoprint user, there are plugins that can be connected to your smart plugs and turn off the printer when it finished its job.
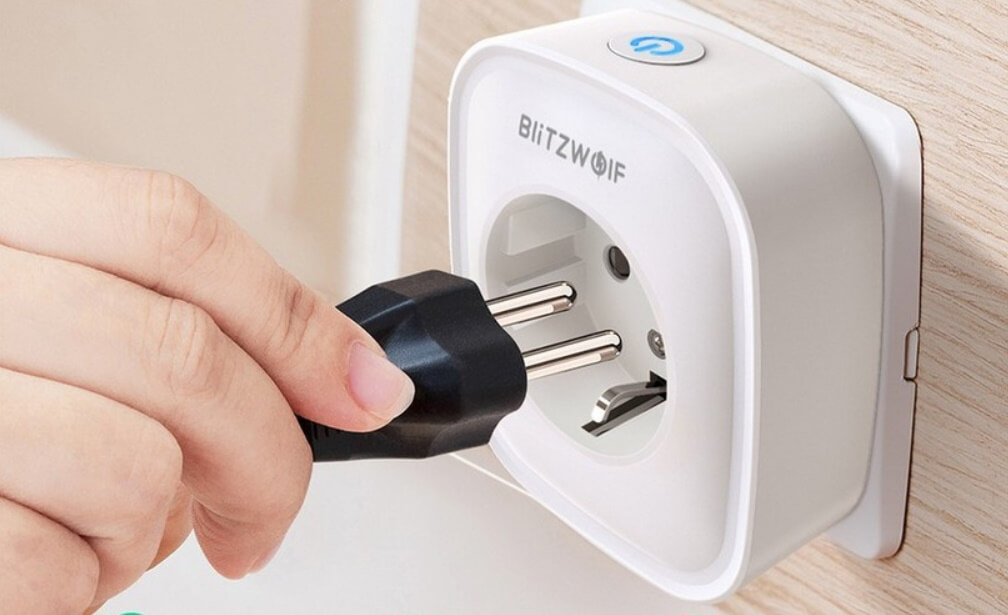
I use a couple of Blitzwolf SHP-6 smart sockets for my printers, and I also have the Blitzwolf SHP-H5 which includes dual USB controllable ports which I use to power the WyzeCams.
The Remote Controlled Power Socket can be purchased from the following websites:
Banggood
Amazon
AliExpress
Wrapping Up
Whew! This was a long one. Hopefully, this article helped you understand better the possible upgrades you can add to your 3D printer. If you have any questions, feel free to leave them in the comment section. Check back soon for more 3D printer related articles and reviews.
While this article contains affiliate links, all opinions are my own. Please make your own decision before purchasing anything.
Liked it?
|
|

