Trianglelab Matrix Extruder Review: Hemera Alternative?
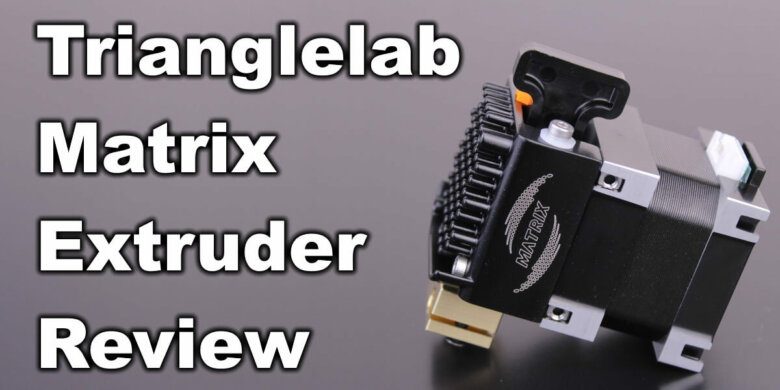
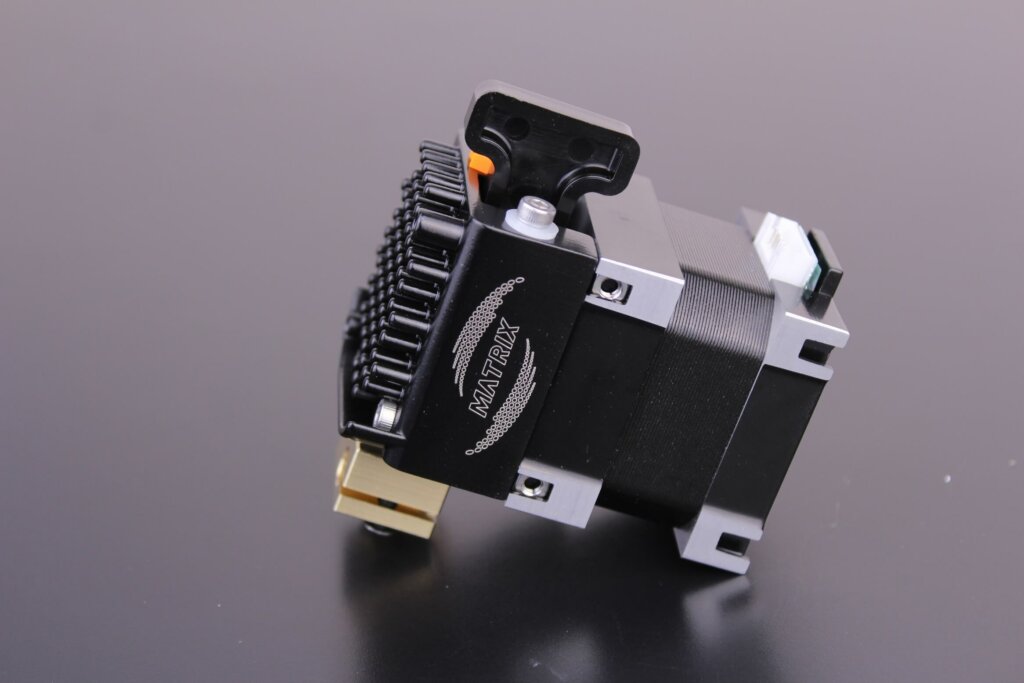
Since I found out that Trianglelab will make a new extruder, I was anxious to get my hand on it. The Trianglelab Matrix Extruder is somewhat of an E3D Hemera Clone but with some differences in design and materials.
I tried a couple of times to buy a Hemera from E3D even though it’s pricier, but I was unsuccessful. I tried a couple of times, but stock availability was an issue and I refused to place and order from other sellers and pay a premium for this opportunity.
In this article, I will share my experience with the Trianglelab Matrix Extruder after installing it on the Artillery Genius.
Packaging
The Trianglelab Matrix Extruder comes in a carboard box with foam protection on all sides. Not that much to say about it. It’s like a solid block of metal, so there’s not much it can happen to it during shipping.
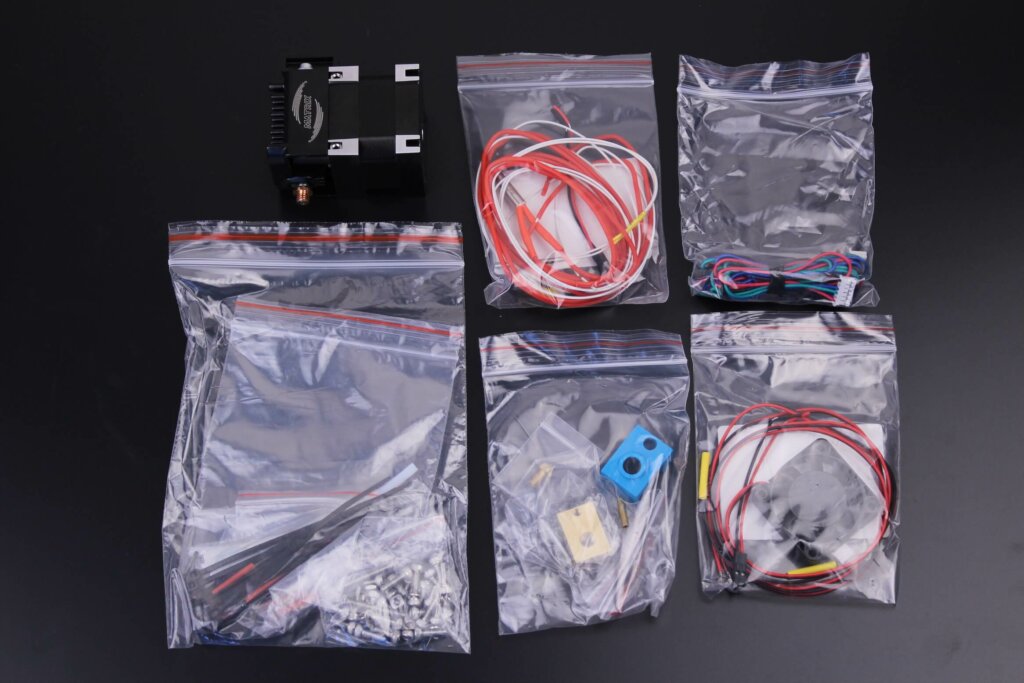
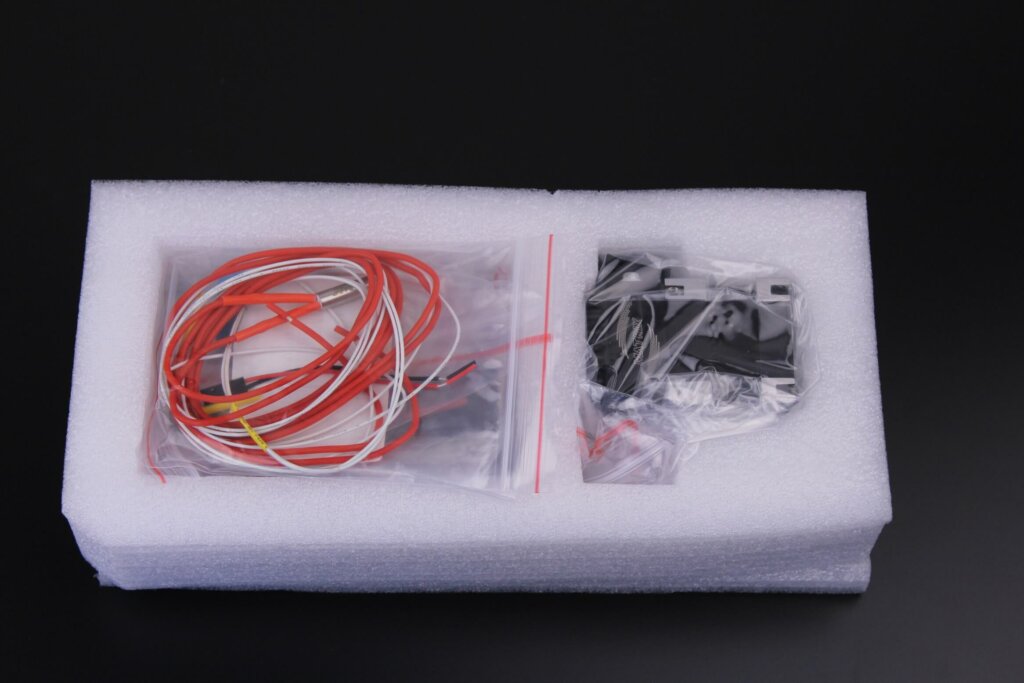
I got the 24V version and inside the package I got the following:
- Trianglelab Matrix Extruder
- 24V 40W Heater Cartridge
- Semitec 104NT-4-R025H42G thermistor
- 24V 4010 ball-bearing fan
- Brass V6 Heatblock with silicone sock
- Bag of screws and square nuts for the extruder
- Thermal paste
- Stepper motor wires
- Hex wrenches
- Zip ties
Trianglelab Matrix Extruder
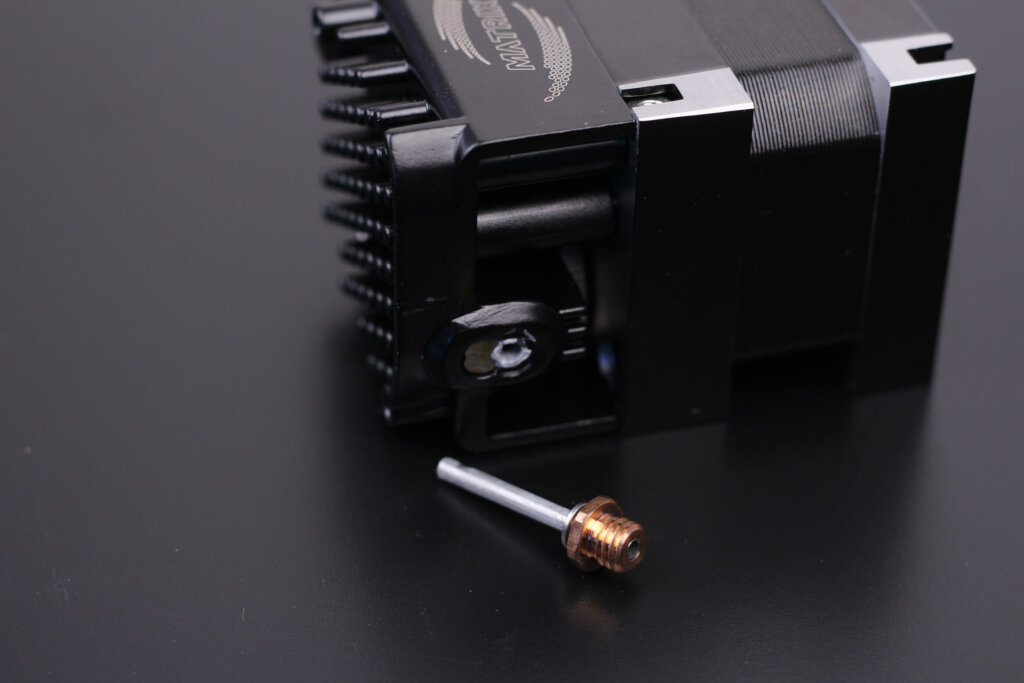
As I previously mentioned, the Trianglelab Matrix Extruder looks quite like the popular Hemera Extruder made by E3D. It uses a similar customized NEMA17 1.8 stepper motor, and the size is the same.
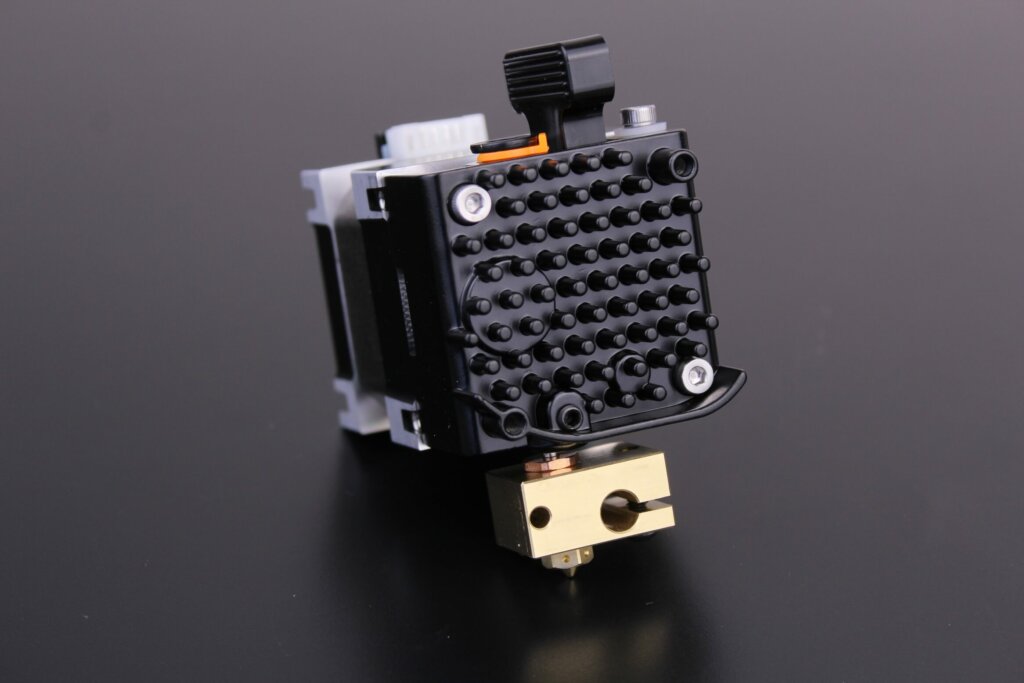
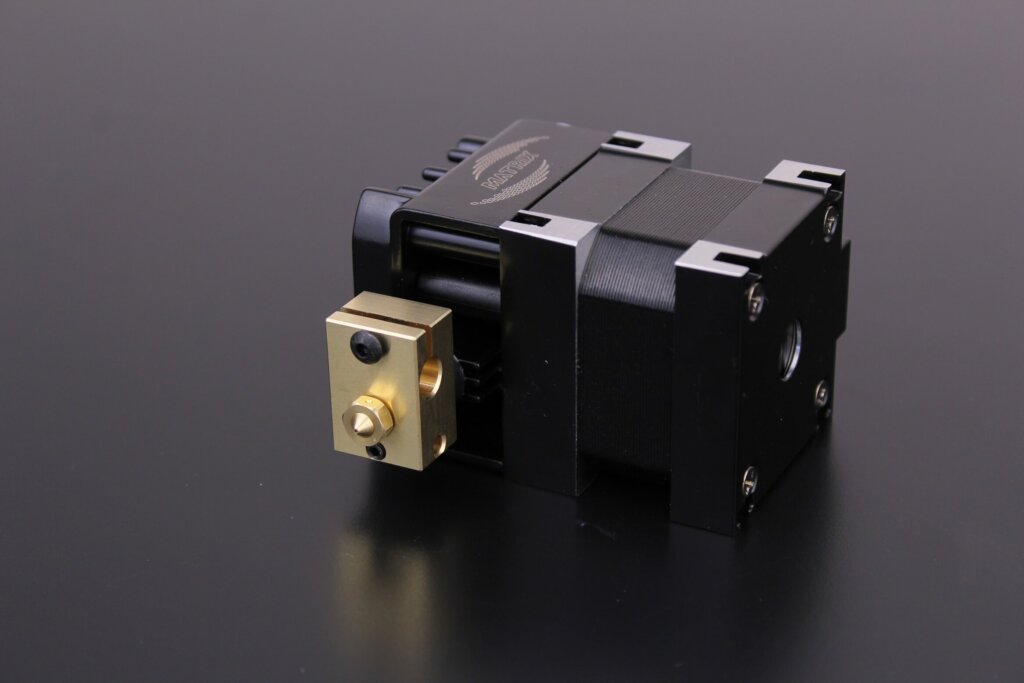
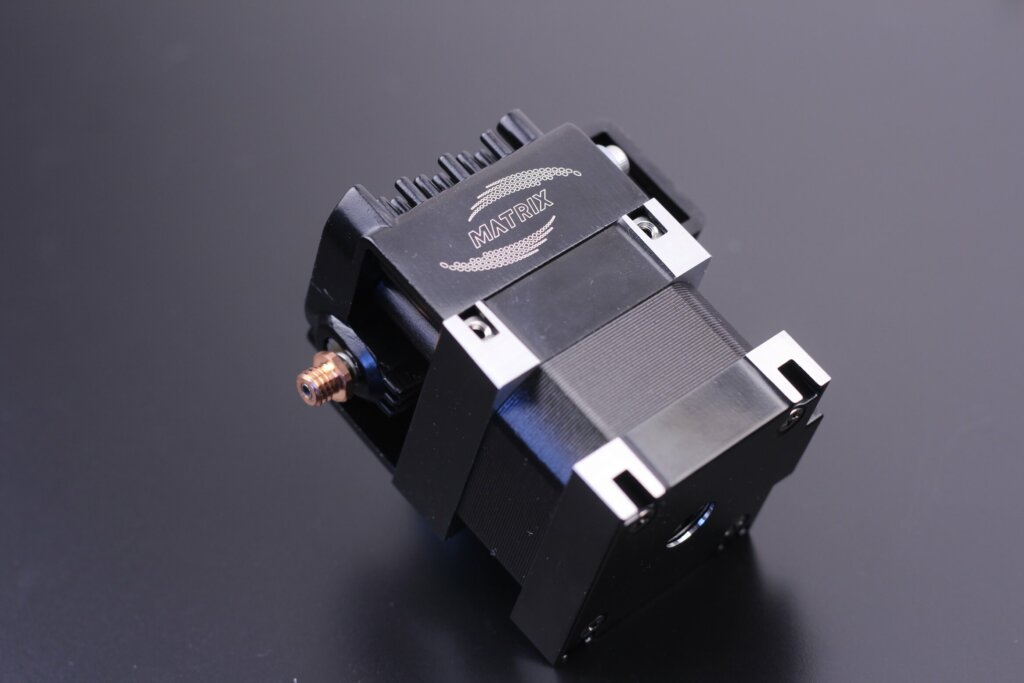
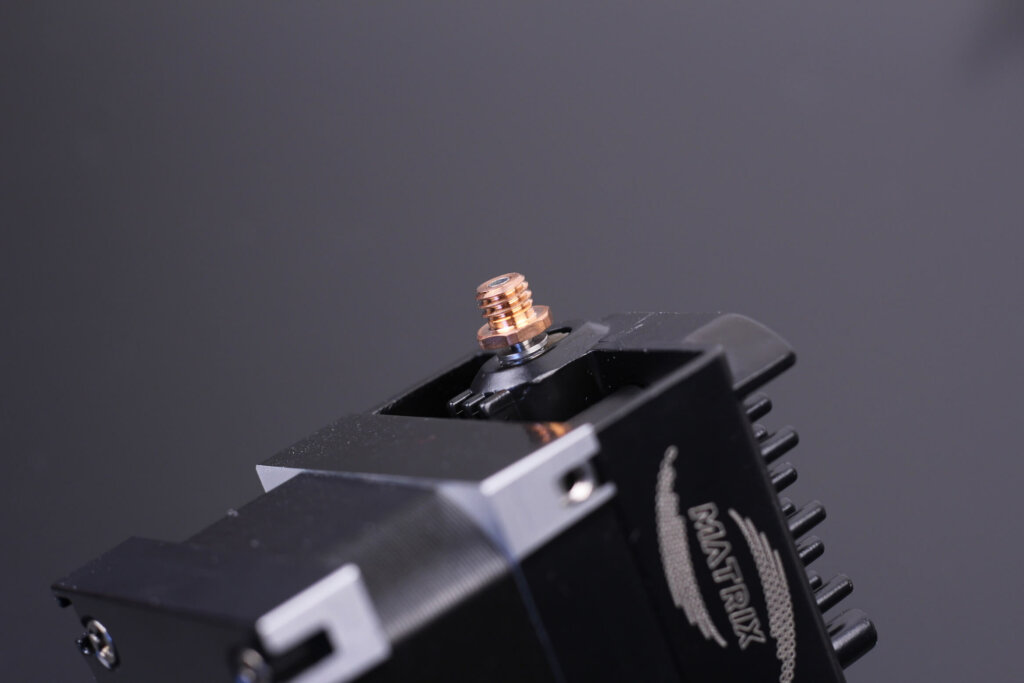
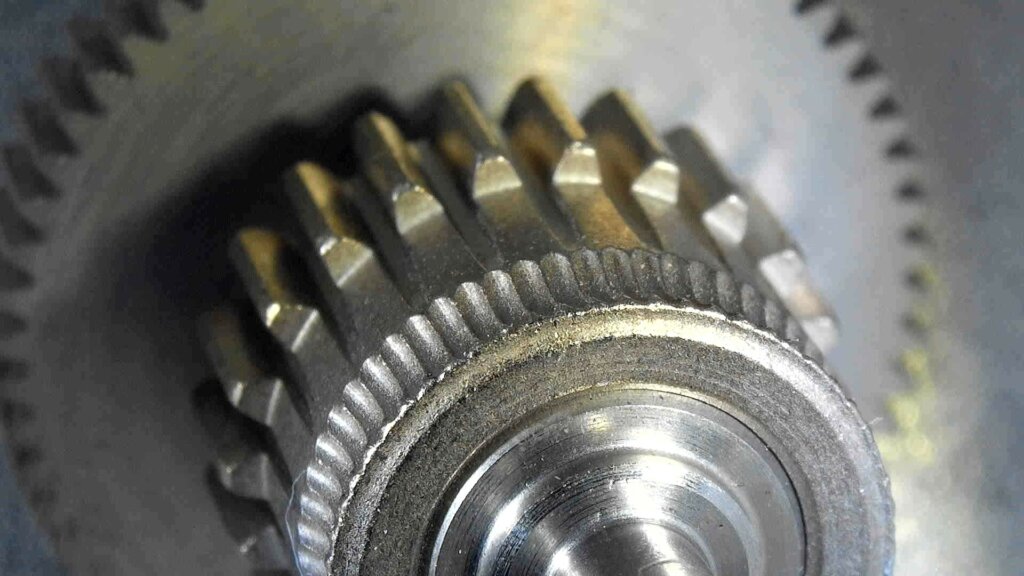
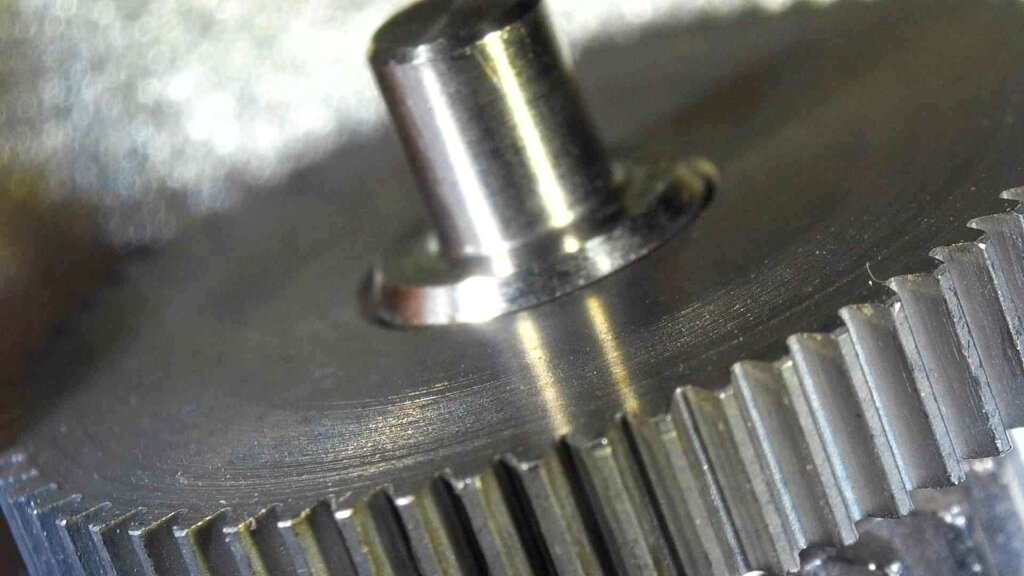
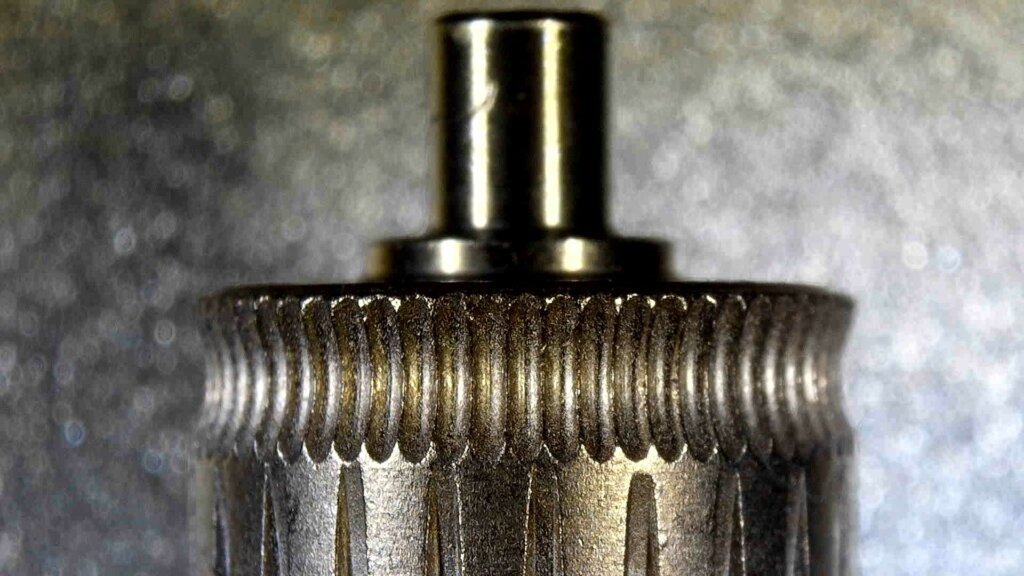
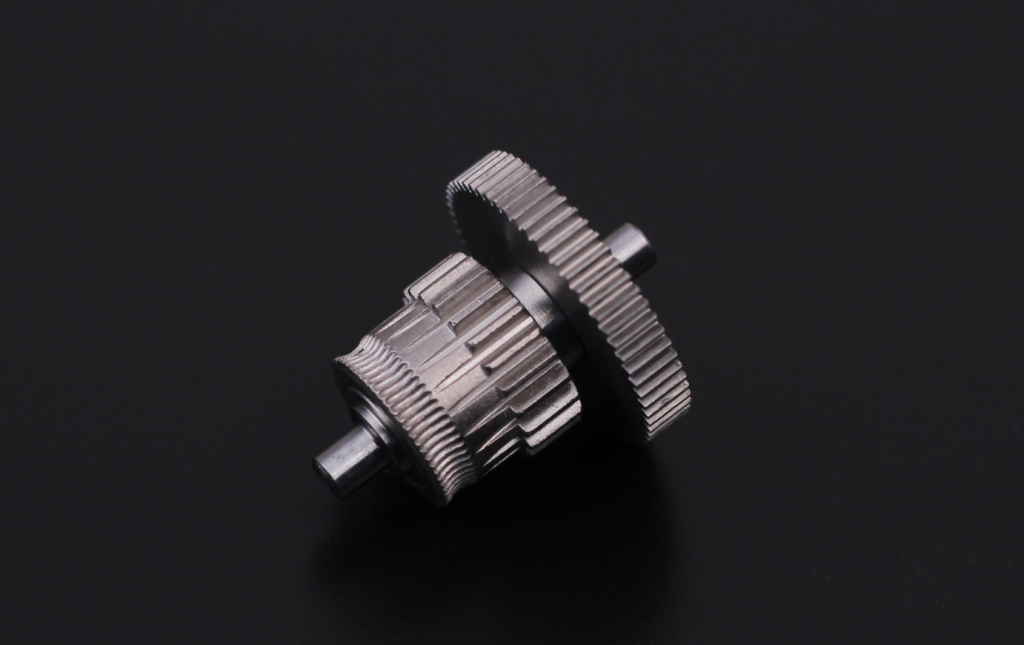
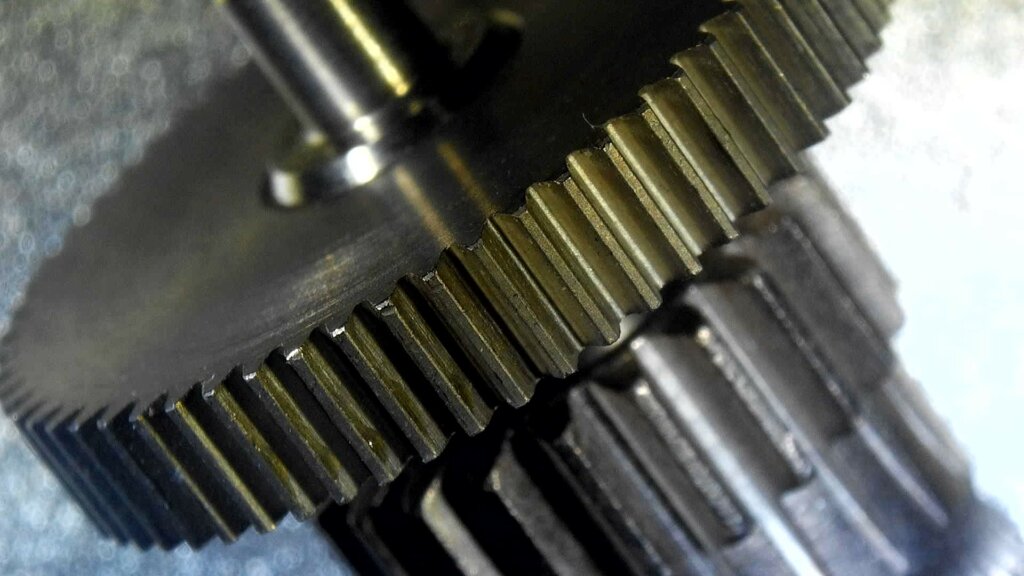
As you would expect from Trianglelab, the machining of the gears is really well made. I took some close-up shots of the gears where you can see this.
Because the Trianglelab Matrix uses a dual-gear setup, the hobbed gears will have excellent grip to the filament allowing for accurate control.
This is not something new. As you might know, the BMG Wind uses the same type of dual-gear setup which works just as good, but the Matrix has them closer to the nozzle.
Benefits of using the Trianglelab Matrix Extruder
All-in-One Design
The Trianglelab Matrix Extrude is contained in a single unit which has the extruder and also the stepper motor. This makes a bit more compact and also gives you access to a few mounting solutions.
Short filament path
Another attractive feature of the Trianglelab Matrix Extruder is the short filament path. It’s only about 28mm from when the filament is leaving the gears and reaches the nozzle.
This is especially important for flexible filaments because it allows for better control of the filament. What does this mean?
Better retractions, more accurate extrusions, and improved performance with linear advance (if you use this feature).
For example, I lowered my 0.13 linear advance value used with the stock Artillery extruder to 0.05 with the Trianglelab Matrix.
Compatibility with Hemera designs
The compatibility with the mounts and designs made for the Trianglelab Matrix is another attractive feature of the Trianglelab Matrix Extruder.
This means that you can print any mount made for the Hemera and fit your Matrix without any modifications. And if you also use the stock V6 heatblock, then it’s possible to use the same designs made for the Hemera.
Bi-metal heat break
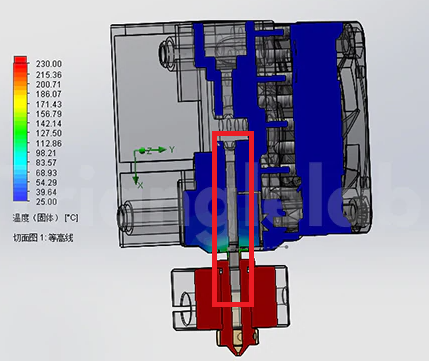
One of the attractive features of the Trianglelab Matrix Extruder is the use of a bi-metal heat break. It has a long metal tube which goes right up to the extruder gears. This will ensure maximum performance with flexible filaments ensuring a constrained path from the gears to the nozzle.
It’s important to note that the stainless tube is held in place by a machined bracket so the contact with the heatsink is better, and there won’t be any damage made to the tube.
Because of how the bi-metal heat break is designed, it has excellent thermal performance. I already reviewed the regular bi-metal heat break from Trianglelab. With the included heat break, the thermal performance of the Matrix is comparable to other bi-metal heat breaks.
The threaded part which screws into the heatblock is made from copper which will improve the melt zone. Heat will be conducted better from the heater cartridge to the filament so you should get a bit more flow rate from this compared to a titanium heat break.
Drawbacks of the Trianglelab Matrix Extruder
Heavier than most extruders currently available
All these features come at a cost which is weight. The Trianglelab Matrix Extruder is heavier than most extruders currently available on the market.
The weight of the fully equipped extruder (extruder including mouns, fans and duct) can reach close to 500 grams. Compared to the BMG Wind, which weighs around 320 grams fully equipped, the Matrix Extruder is heavy even for a direct-drive extruder.
This might be an issue if you plan to print faster than ~60 mm/s because the added weight will increase ringing and print quality will get worse as you increase speed.
In my testing, the extruder performed well on regular speeds, but you might get skipped steps if your jerk and acceleration values are too high.
Heatsink design could be better
Another small drawback for the Matrix Extruder is the heatsink design. While it does its job removing the little heat you get through the bi-metal heat break, the airflow could be a bit better.
But if you compare it with the terrible stock heatsink present on the Artillery extruder, this can be looked at as a big improvement.
For extreme users, there’s also a Trianglelab Matrix LC Extruder Water Cooling Heatblock which is made for enclosed printers and high-temp filament.
Trianglelab Matrix Extruder vs BIQU BX H2 Extruder
Because I also had the BIQU BX H2 extruder at hand, I thought it would be a good idea to take some comparison shots. As you can see, the BIQU BX H2 is much smaller than the Trianglelab Matrix Extruder.
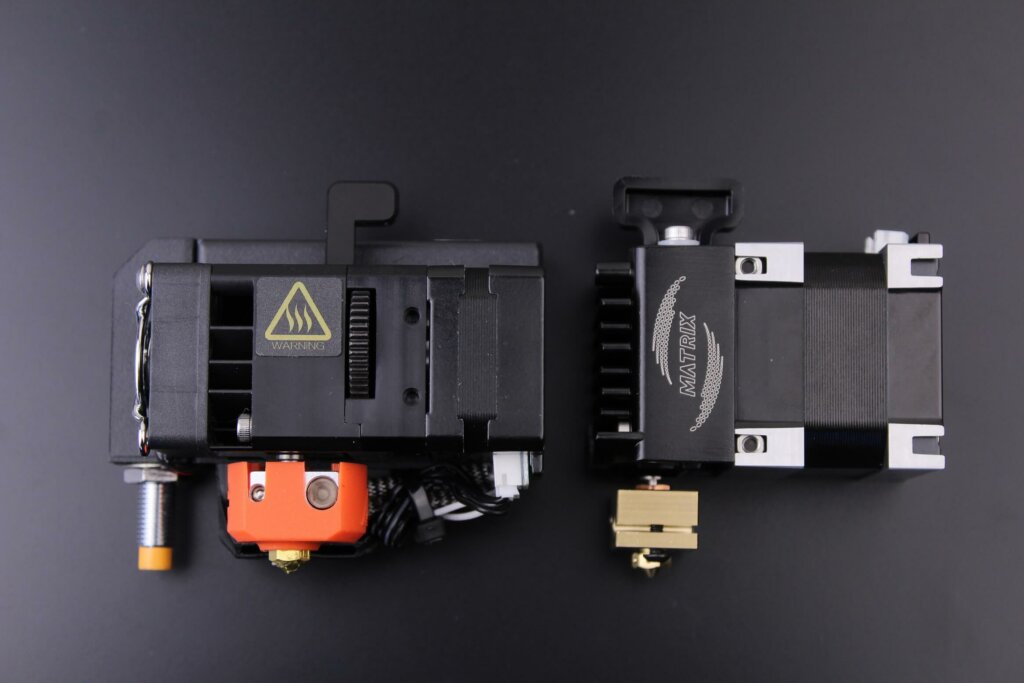
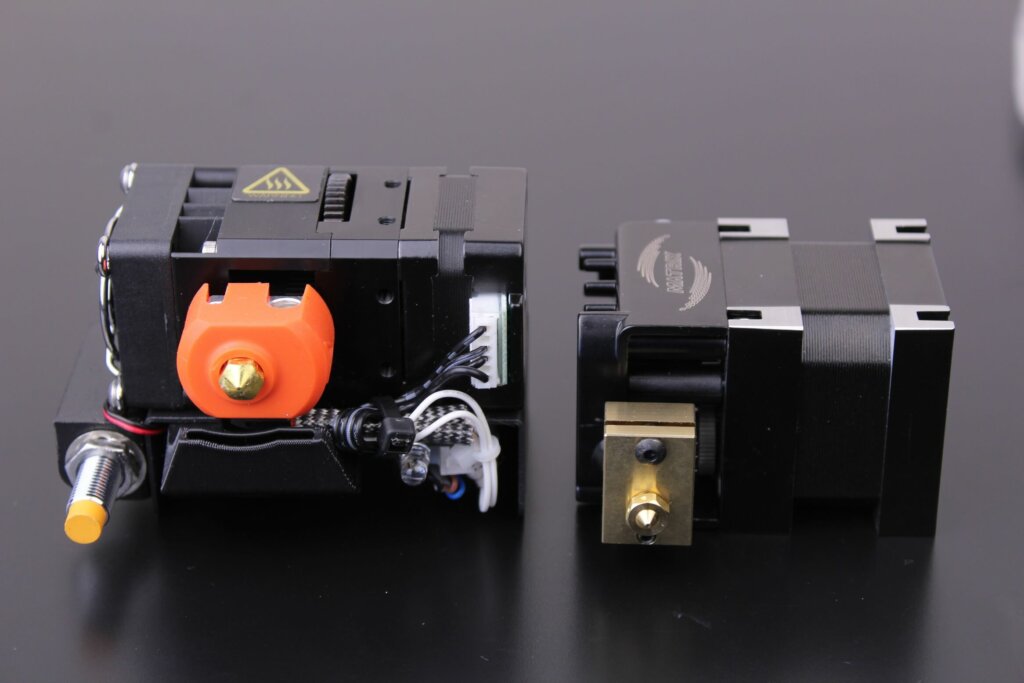
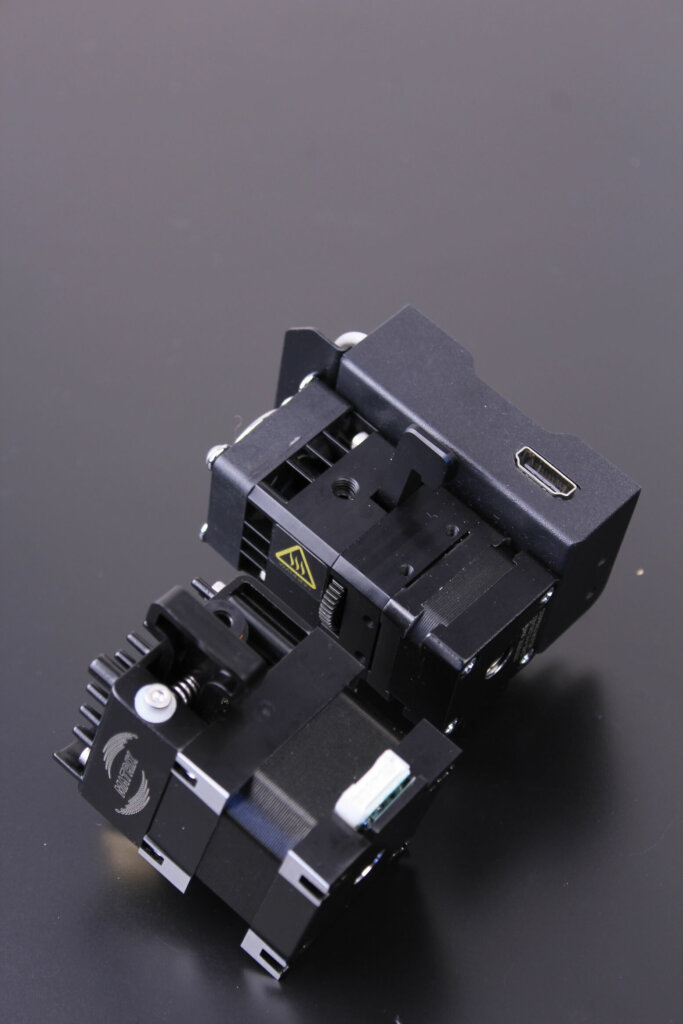
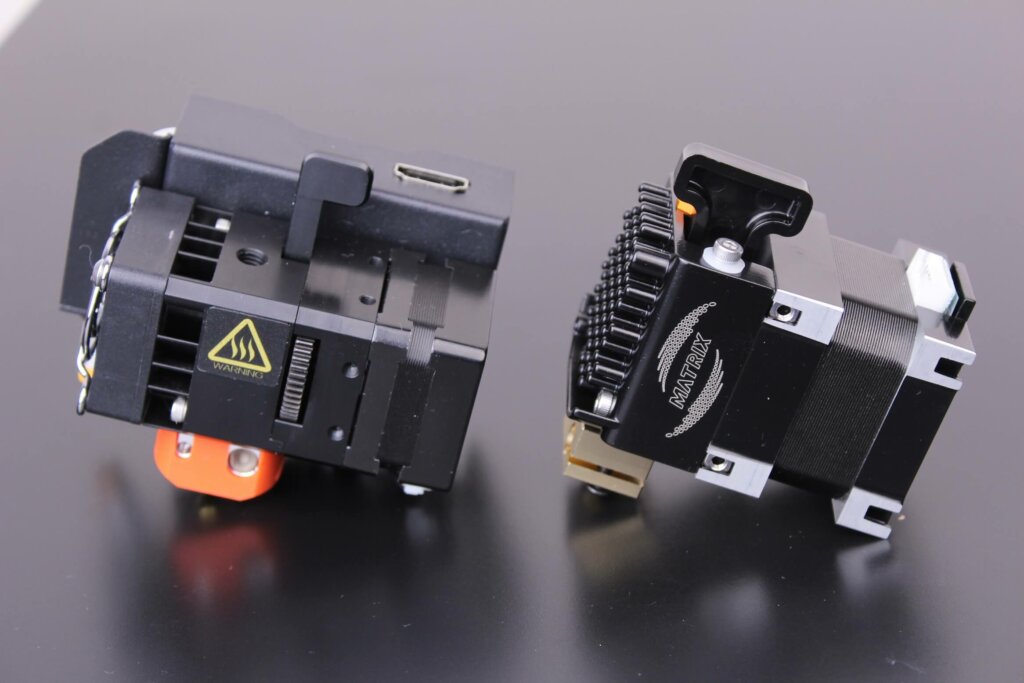
Besides the size difference, there’s also a hefty difference in weight. The BIQU BX H2 is only 220g compared to the ~400g of the Trianglelab Matrix.
This difference is made by the use of a smaller stepper motor in the for of a NEMA 14 stepper driver in a 7:1 ratio compared to the ~3:1 ratio we have on the Trianglelab Matrix.
But more will be revealed in the BIQU BX H2 Extruder review, so check back soon for that.
Printing experience with the Trianglelab Matrix Extruder
After installing the Trianglelab Matrix Extruder on my good old Artillery Genius, I first calibrated the extruder steps. I came up with a value of 320 which worked well for me.
I printed a few challenging prints, and I didn’t have any kind of issues. Extrusion was consistent, retraction worked well, and the stepper motor was just warm to the touch.
Feel free to judge the quality you can get with the Trianglelab Matrix extruder from the test prints below.
Test prints with the Trianglelab Matrix Extruder
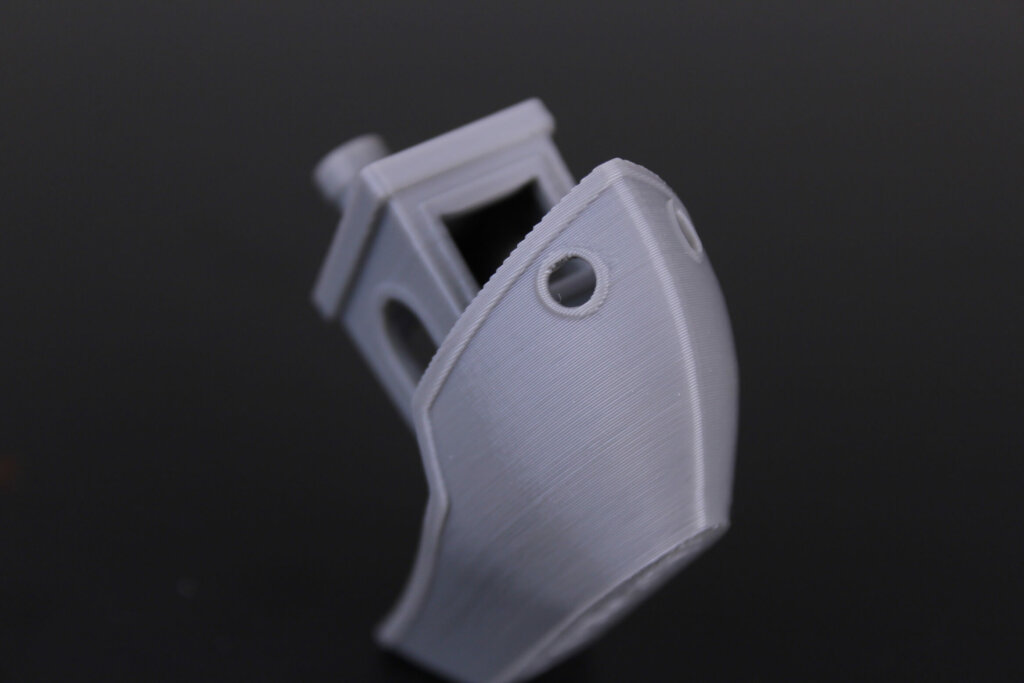
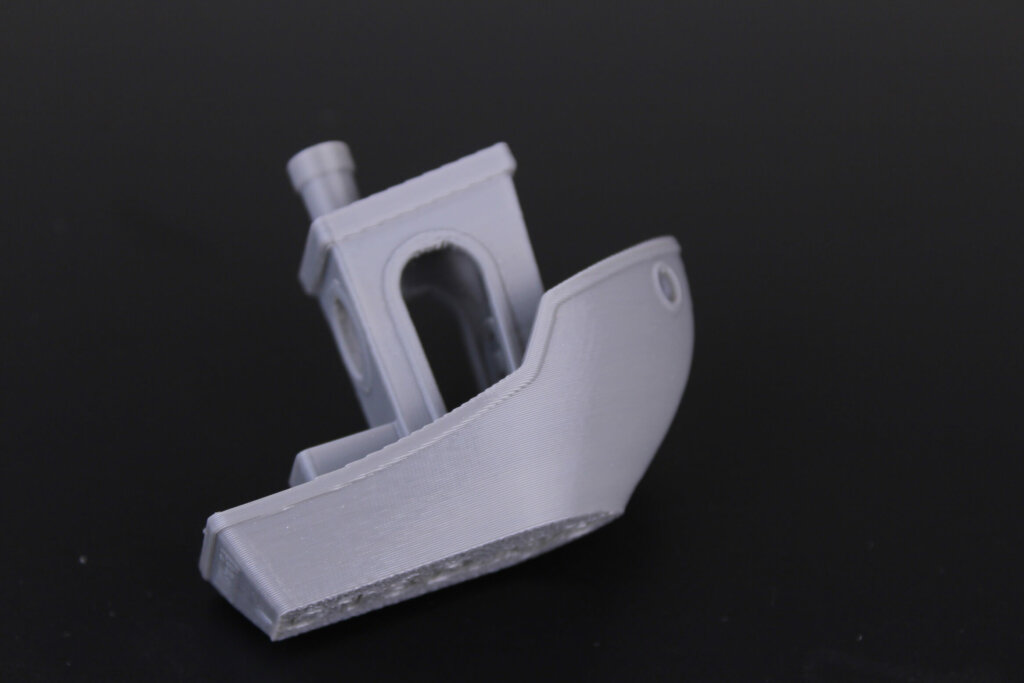
3D Benchy
First test print was the 3D Benchy. This took 80 minutes to print and the results are excellent. Consistent extrusion on the bow, small features are printed accurately and no signs of stringing.
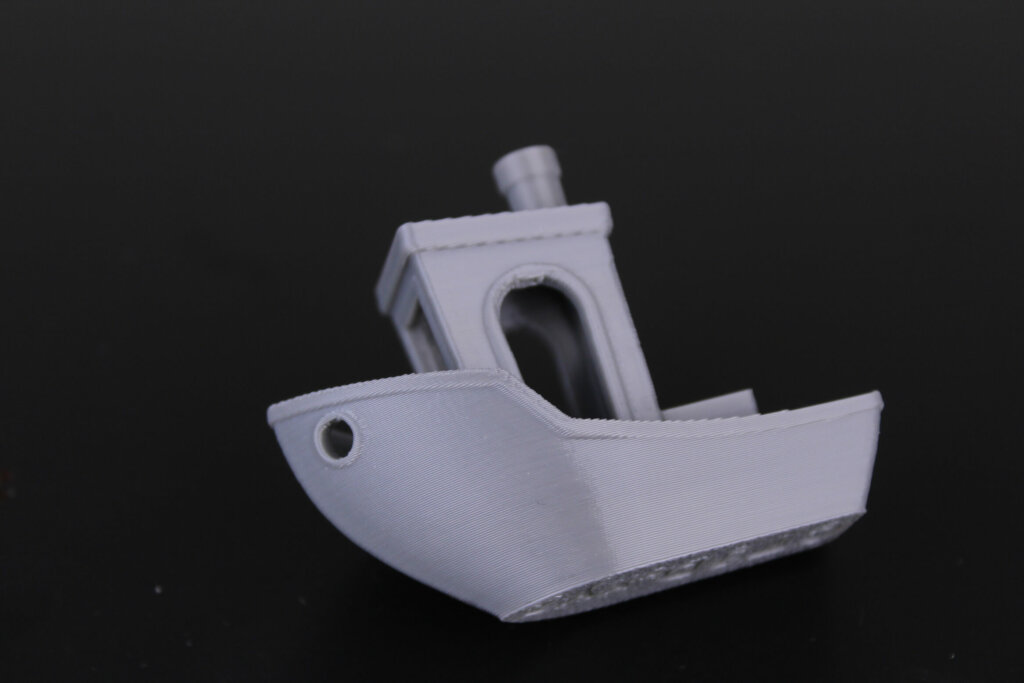
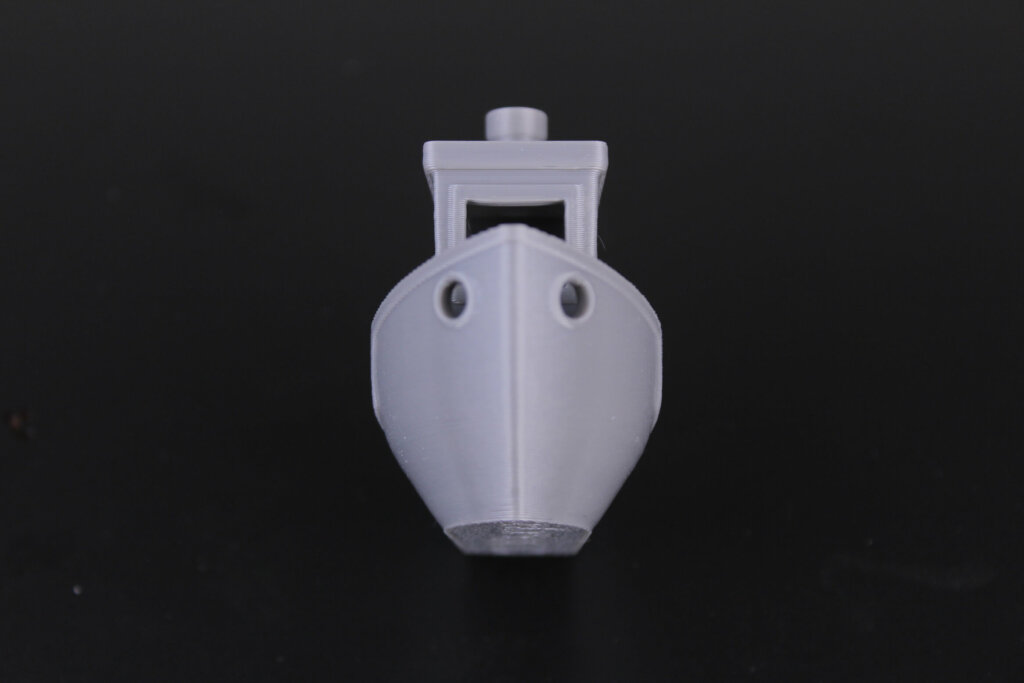

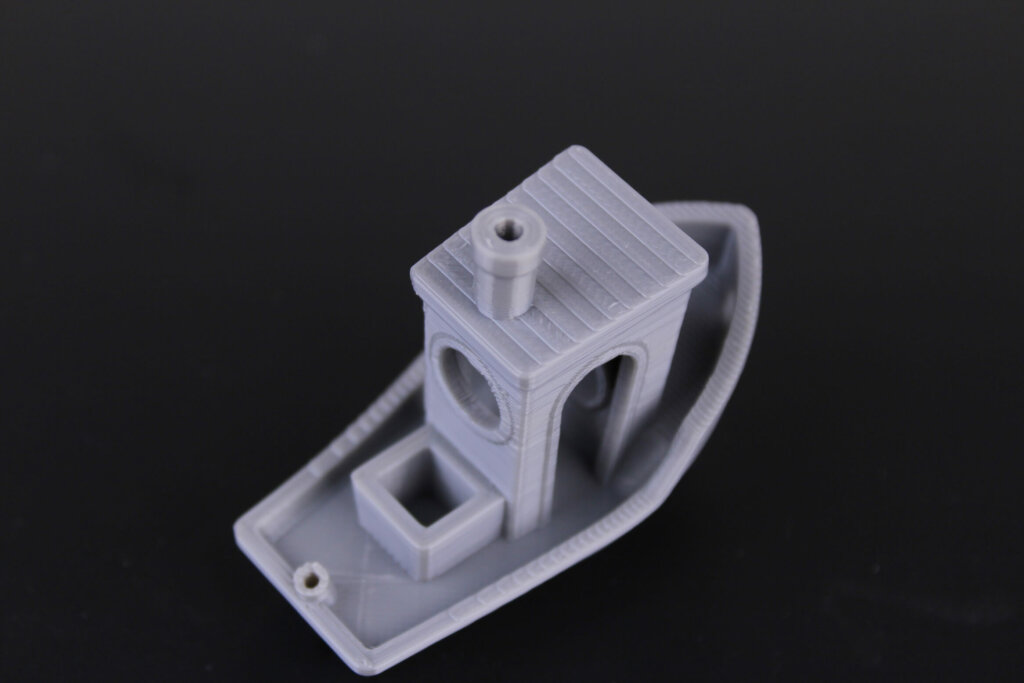
- Material: Sunlu Gray PLA
- Layer Height: 0.2mm
- Nozzle Temperature: 215C
- Bed Temperature: 60C
- Print Speed: 60 mm/s
Lattice cube
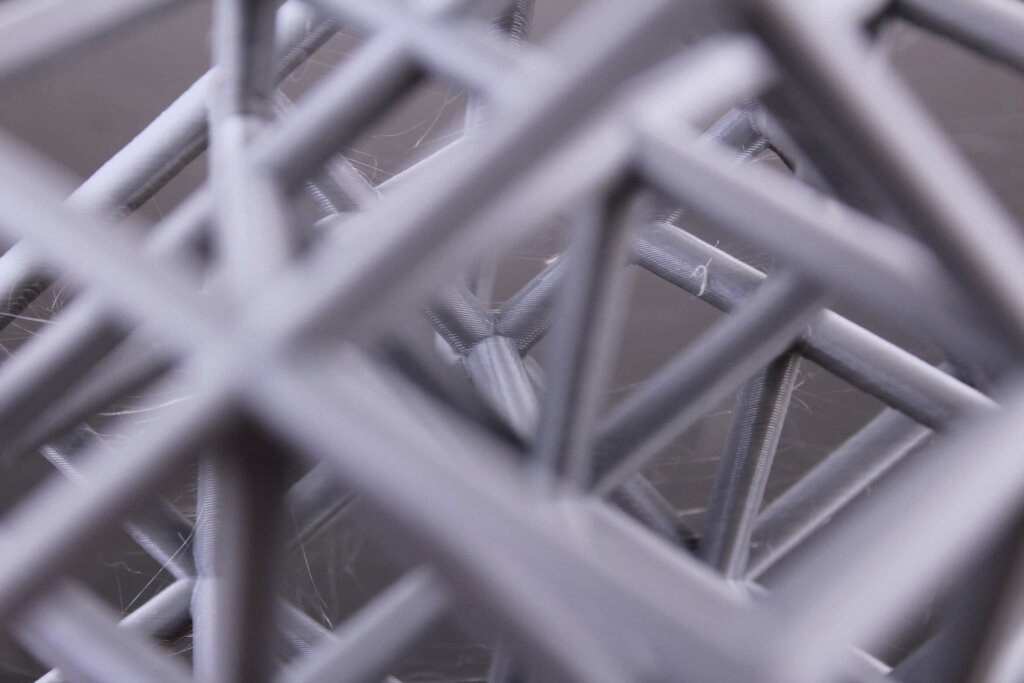
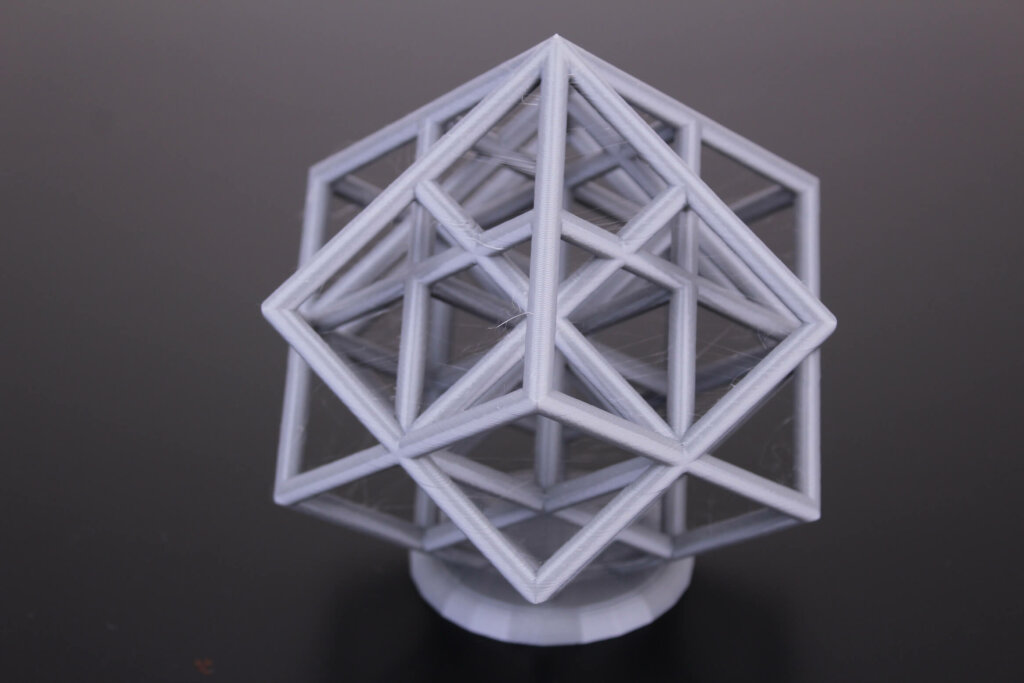
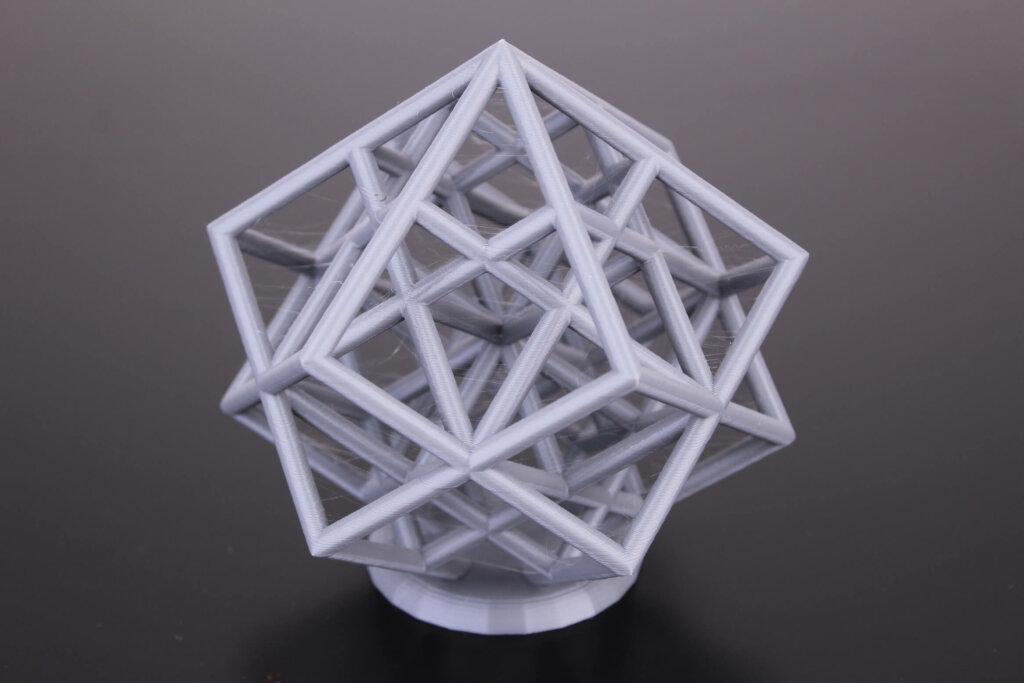
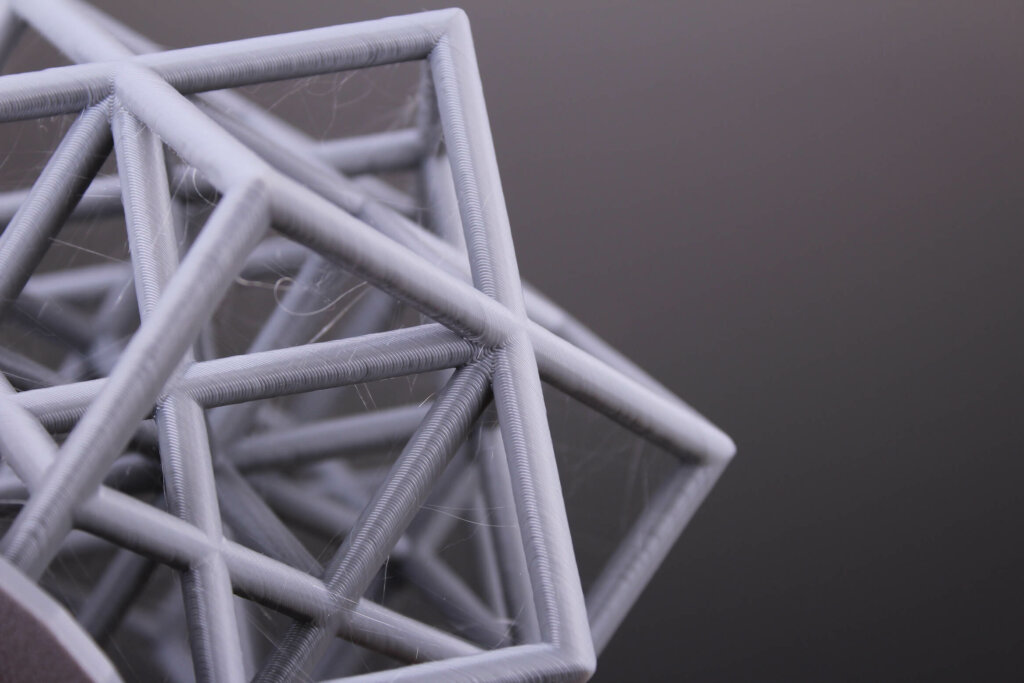
I wanted to give the retraction a run for its money, so I printed a torture test in the form of this lattice cube. It’s a demanding print because the extrusion needs to be accurate to avoid curling on the thin beams.
Other than a few small wisps (which I think were caused by Z-hop) the print looks well. All the steep overhangs were printed with no issues.
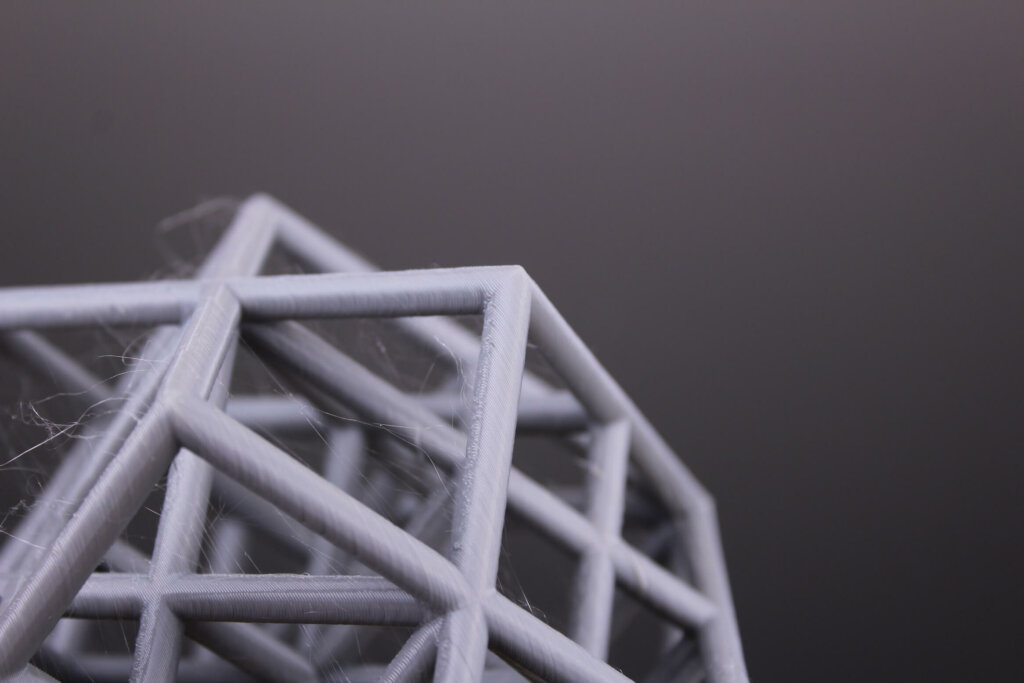
- Material: Sunlu Gray PLA
- Layer Height: 0.2mm
- Nozzle Temperature: 210C
- Bed Temperature: 60C
- Print Speed: 60 mm/s
Golden Frieza
Alsamen’s Golden Frieza model was printed a bit faster, and in silk filament. I did this to test the heatblock capacity to melt filament efficiently. If silk filament is not properly melted, the layers will not adhere properly but this wasn’t the case with the Matrix Extruder.


- Material: Devil Design Silk Gold PLA
- Layer Height: 0.15mm
- Nozzle Temperature: 220C
- Bed Temperature: 60C
- Print Speed: 60 mm/s
Old paddlewheel steamboat
This model has a lot of small features which will put any printer to work. And as you can see, the print quality is excellent, and the small features were easily reproduced by the Trianglelab Matrix Extruder.
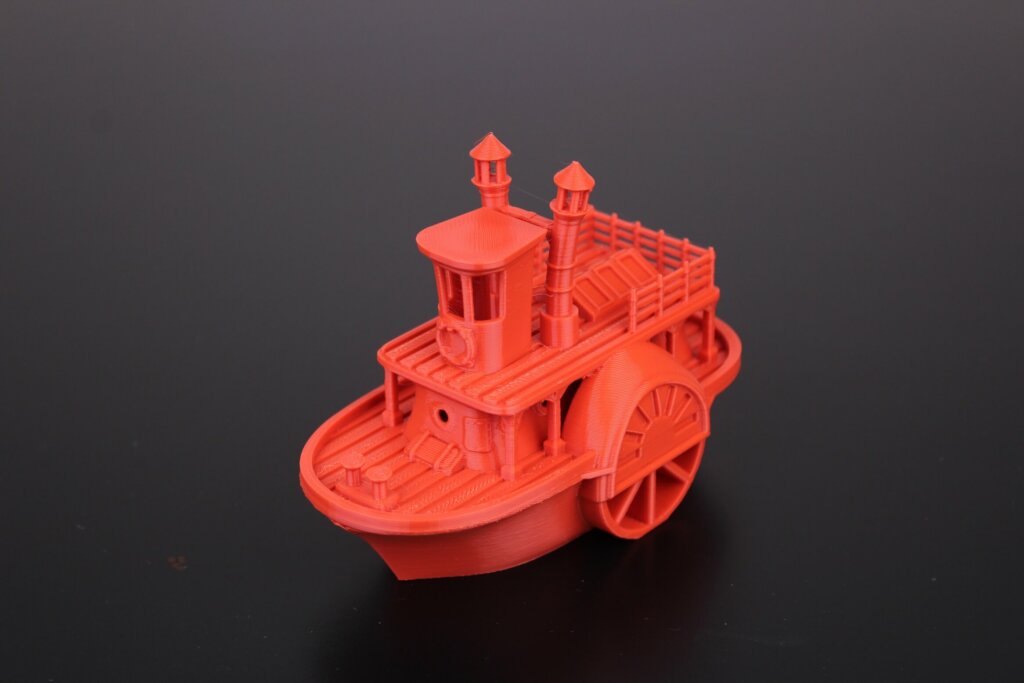
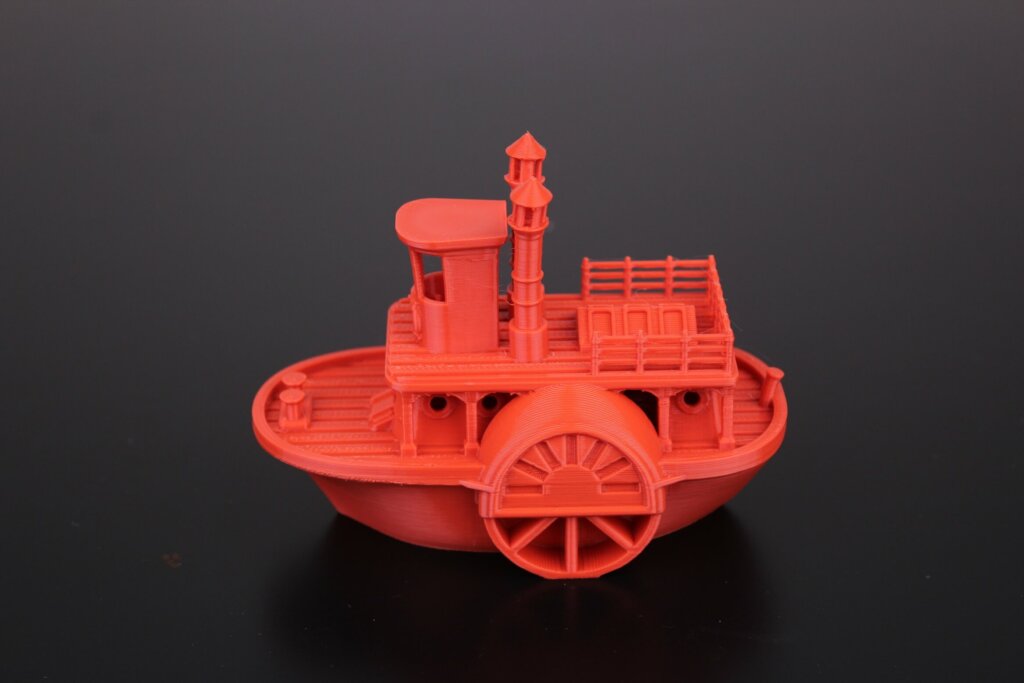
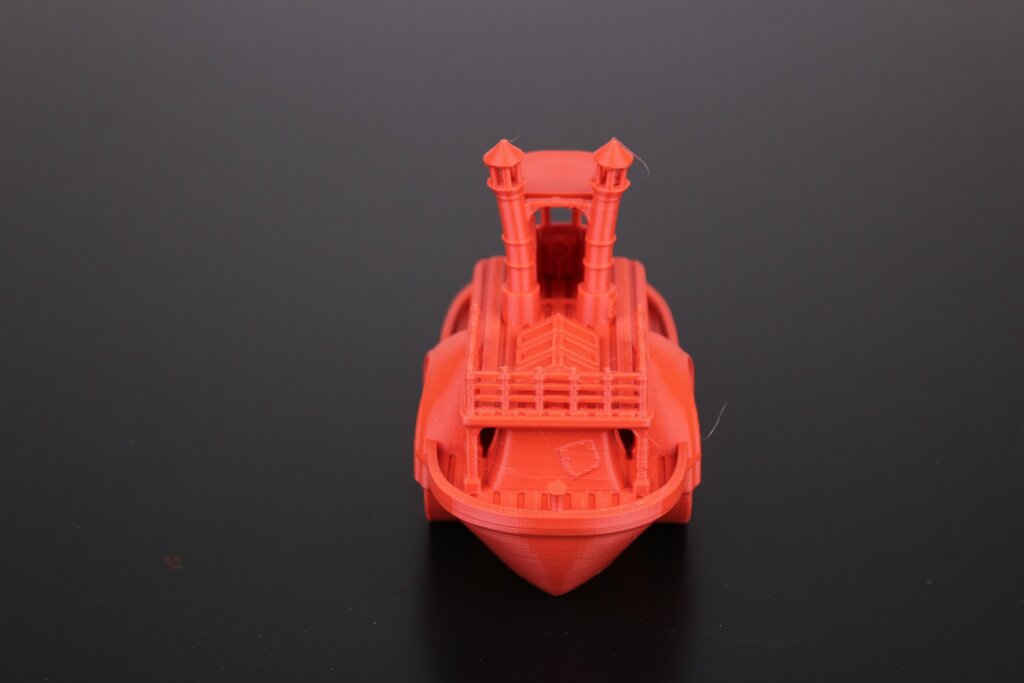
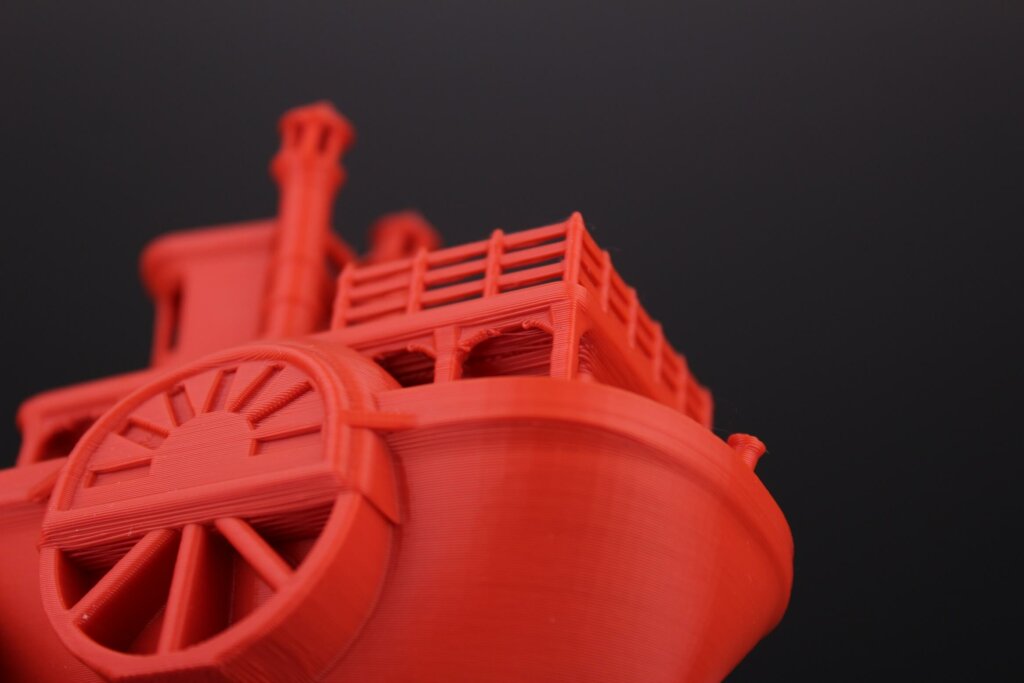
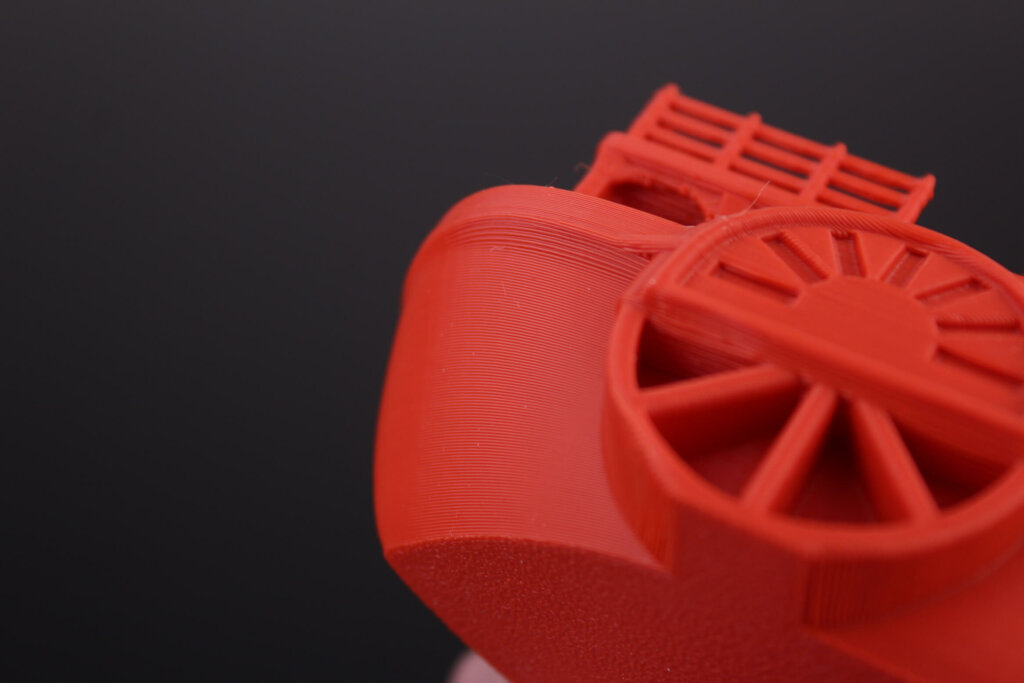
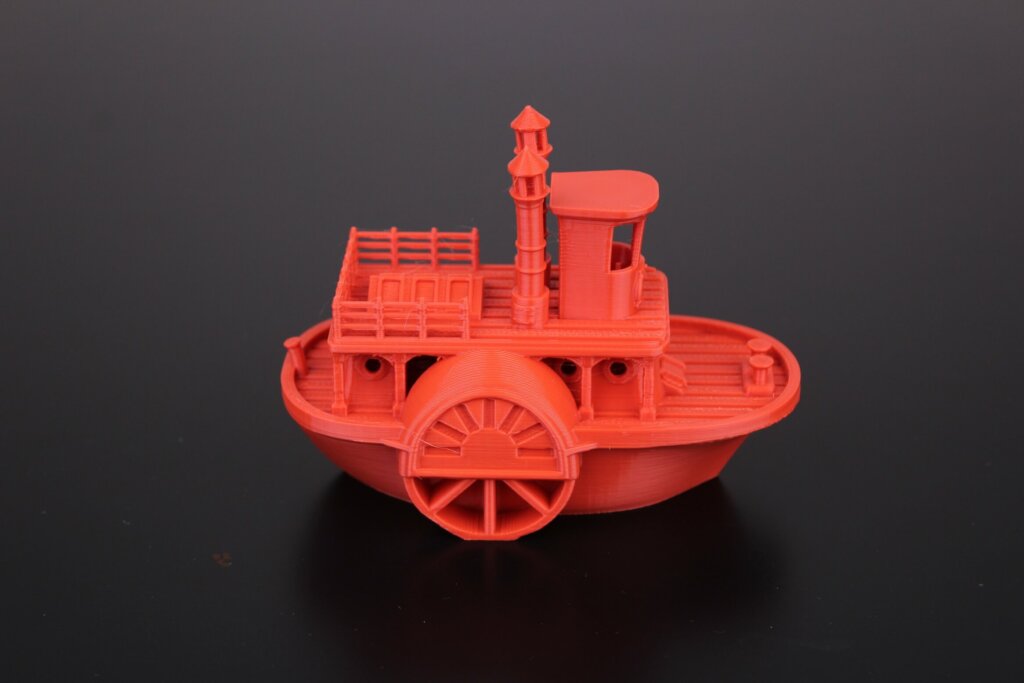
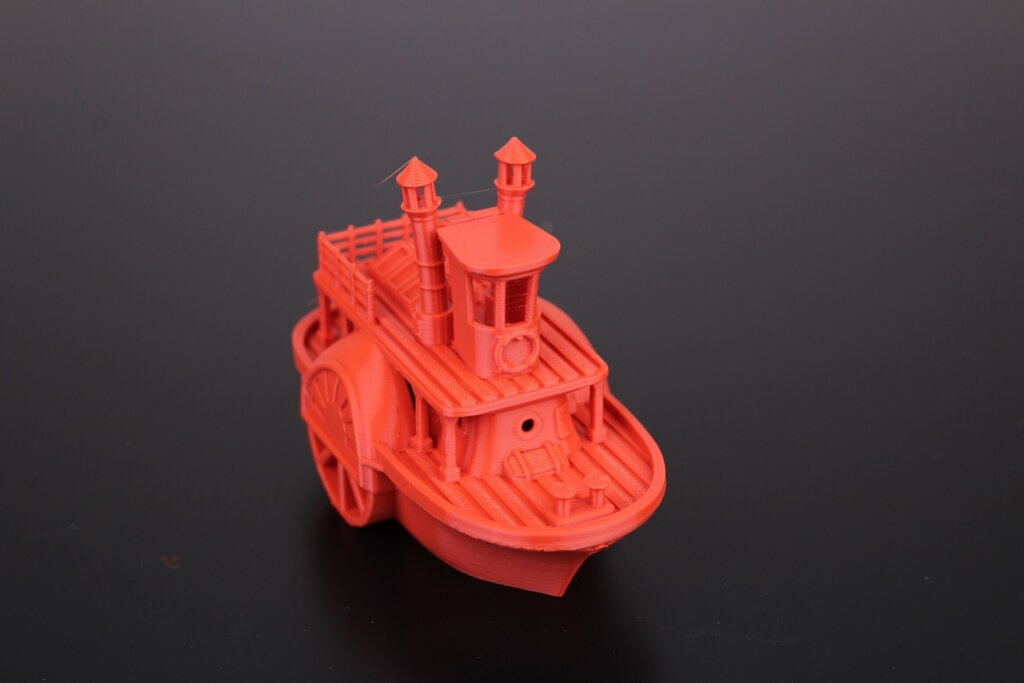
- Material: Devil Design Red PLA
- Layer Height: 0.2mm
- Nozzle Temperature: 210C
- Bed Temperature: 60C
- Print Speed: 60 mm/s
TPU 3D Benchy
Because the filament path short and constrained, the Matrix Extruder can print TPU with the same speeds as PLA.
To test this, I printed the same G-code but with TPU filament, and as you can see the extrusion quality is great.
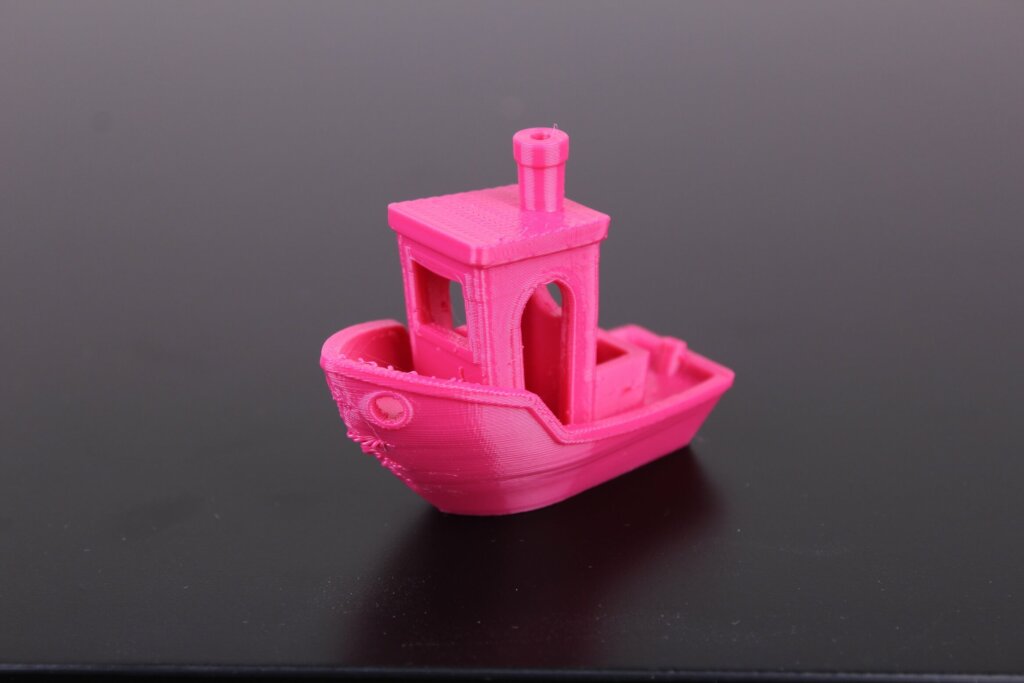
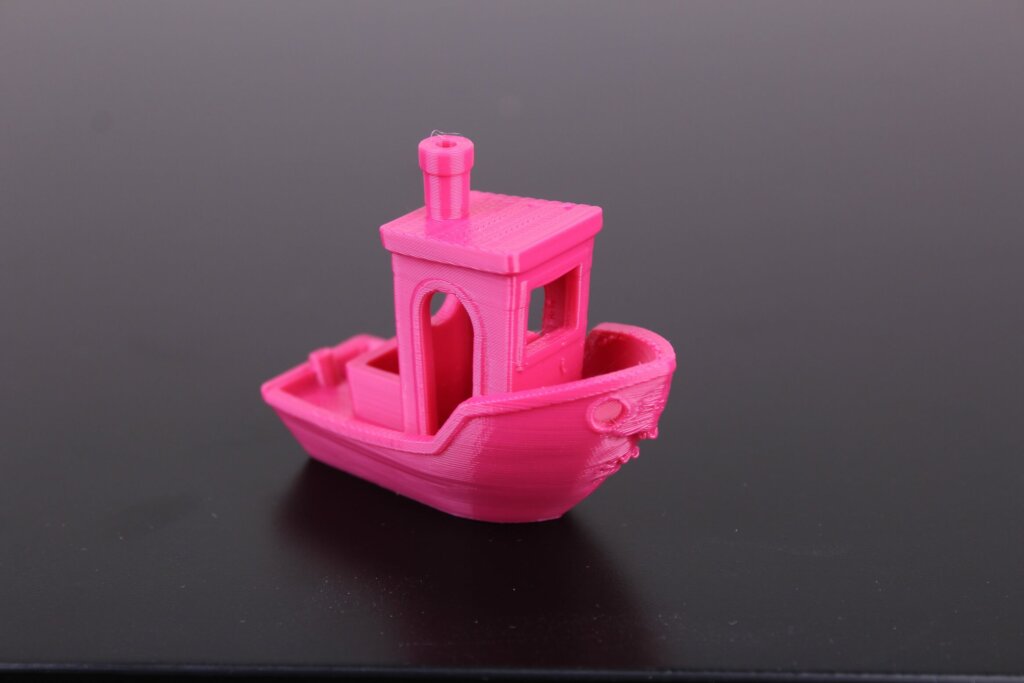
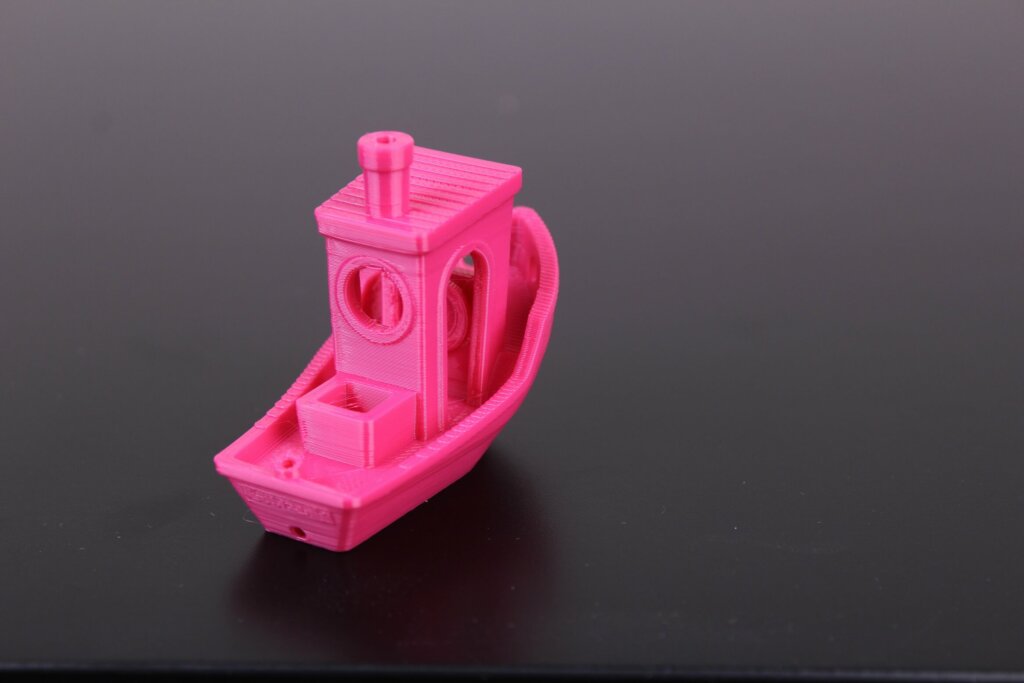
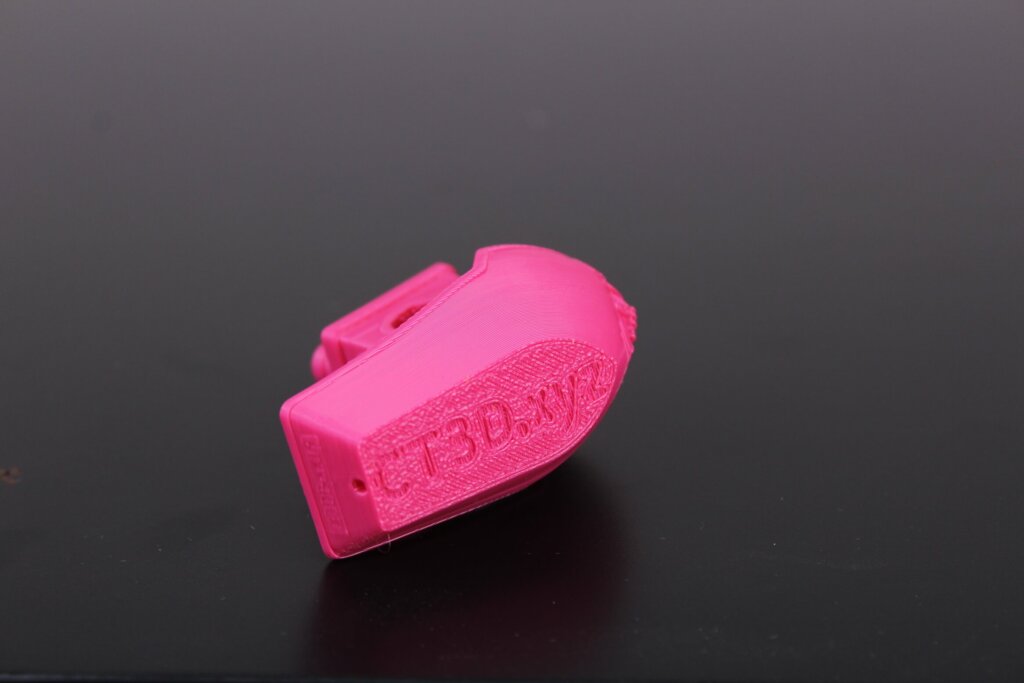
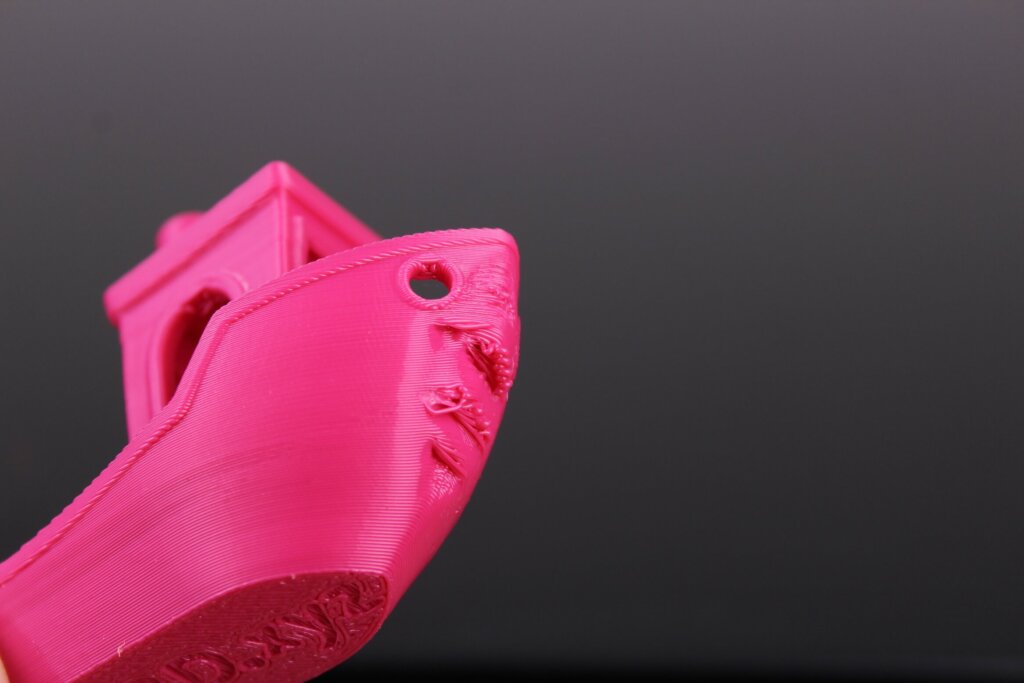
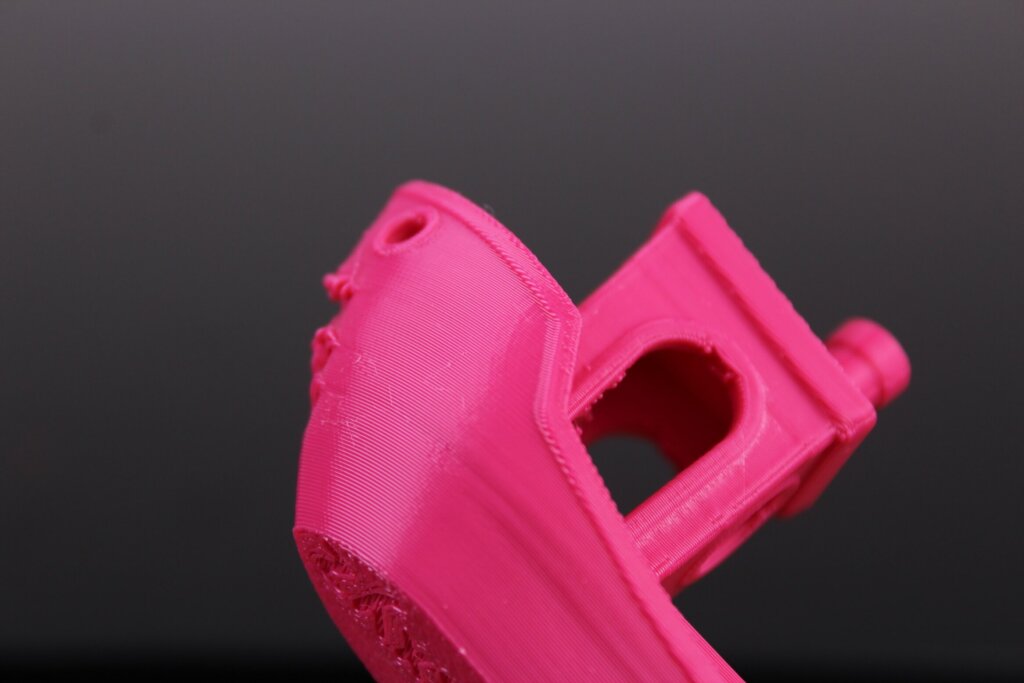
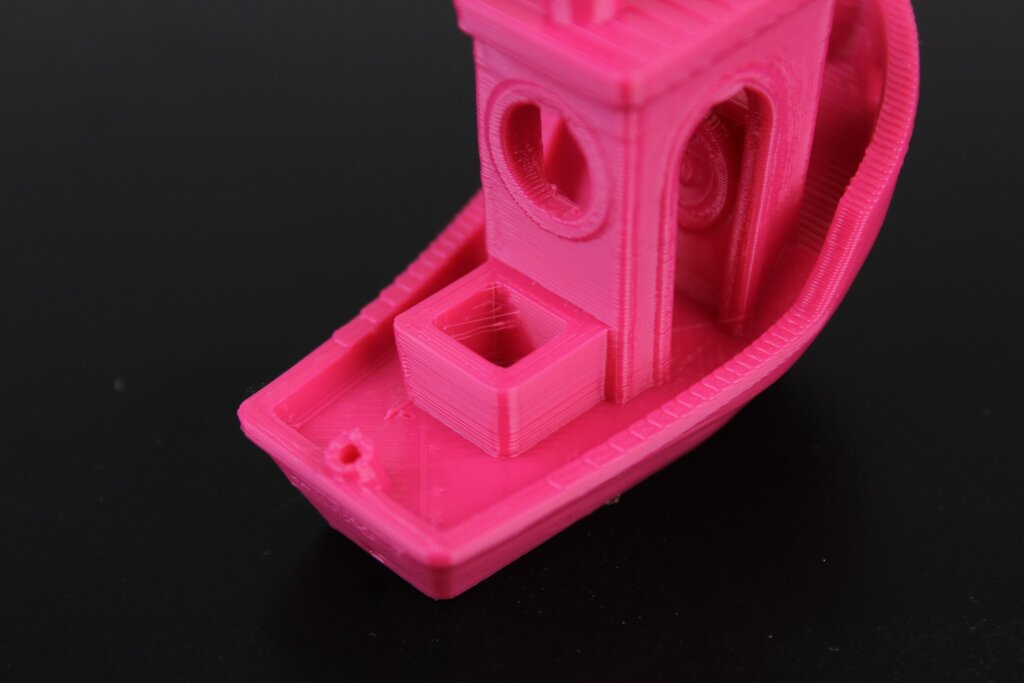
There are issues with the print, but they are caused by the lack of cooling. I will re-do the test after I upgrade to a 5015 fan. You can see the Matrix Extruder in action here:
- Material: Devil Design Pink TPU
- Layer Height: 0.2mm
- Nozzle Temperature: 215C
- Bed Temperature: 60C
- Print Speed: 60 mm/s
Conclusions: Is the Trianglelab Matrix Extruder worth it?
If this is the only question, then yes, the Matrix Extruder is worth getting. But this is more complicated. Let me explain.
The Trianglelab Matrix Extruder is currently available for around 85$ which is pretty steep in the world of AliExpress extruders. But you get what you pay for. A complete package which will provide you excellent extrusion and print quality for a fair price.
But when you think about the other variants currently available, like the BMG Wind, the situation changes a bit. For around 60$ you can get the BMG Wind I reviewed a while ago which can produce similar print quality for a lower price.
Filament is a bit harder to load (like with any BMG), compatible mounts are harder to find for less popular printers, the stepper motor has lower torque making it hotter and it’s a bit more work to install. But the BMG Wind compensates with a lower weight and cheaper price.
In the end, the question of “What’s the best extruder for me?” should be answered by the potential buyer. Think about how fast you want to print, how much money you want to spend and how much time you need to spend to install it on your machine.
Both extruders are good, and if you already have the Wind installed, then I don’t think too much will change in terms of print quality by upgrading to the Matrix.
But if you have some money to spend, wanted to get a Hemera but couldn’t because of the lack of stock, then the Trianglelab Matrix Extruder is an excellent upgrade for your 3D printer.
Where to buy the Trianglelab Matrix Extruder?
The Trianglelab Matrix Extruder can be purchased from the following websites:
Trianglelab Matrix Extruder Installation Guide
If you are looking to install the Matrix on the Artillery Sidewinder X1 or Artillery Genius, you’re in luck! Check out my Trianglelab Matrix Extruder Installation Guide.
The Trianglelab Matrix Extruder was provided by Trianglelab for the purpose of this review. While the article includes affiliate links, all opinions are my own.
Liked it?
|
|

