Bambu Lab X1 Heatbed Cable Replacement Guide: The Lazy Way
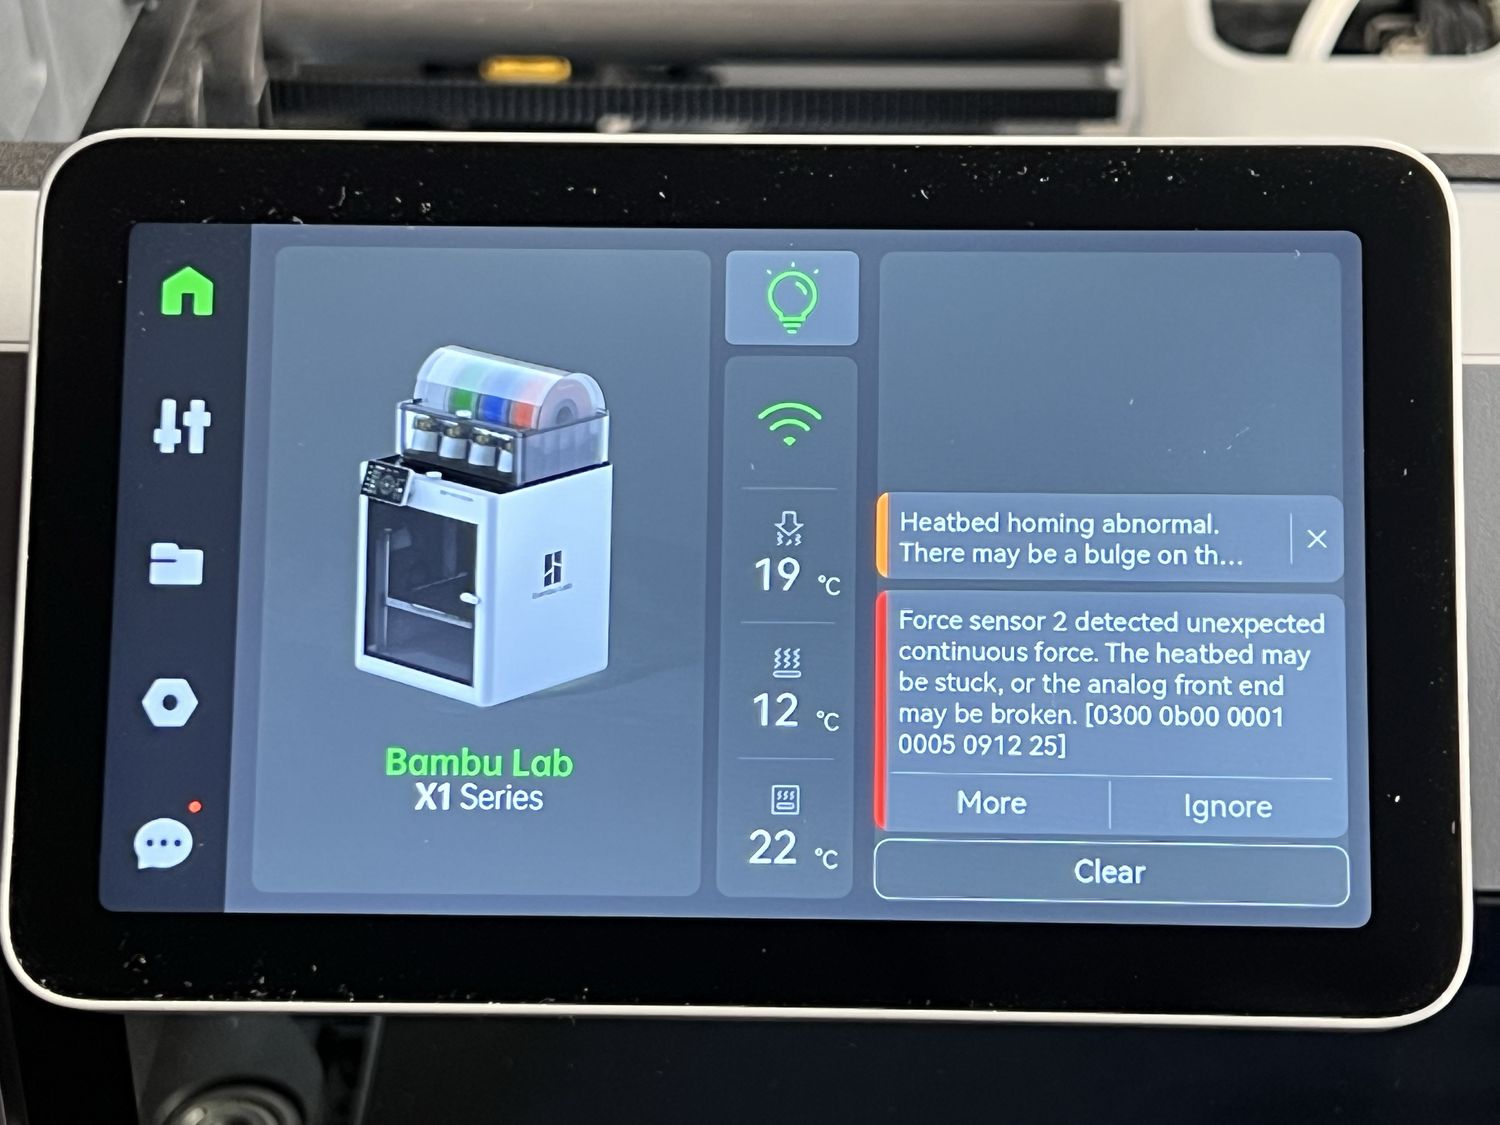
You know that I love the X1 line of printers from Bambu Lab, but my heatbed signal cable got broken after a few hundred hours of printing, and it displayed an error related to the force sensor. Besides that, there was also a heatbed homing abnormal message telling me that there was a bulge on the heatbed, but the problem is actually related to the 6-pin heatbed signal cable which connects the heatbed leveling sensors to the main board.
So I got a replacement heatbed cable, and I proceeded with the replacement of the cable following their detailed guide on how to do it. While the guide is very detailed, I believe that the process is a bit more complex than it should be, probably because they want to keep the stock printer parts untouched.
I am lazy and my spare time is limited. I wanted to see if there’s a simpler way to do it, that doesn’t require me to spend too much time fixing this, so I found an easier method of replacing the heatbed cable on the Bambu Lab X1 and I will share it with you.
Before you begin
Please note that this is an unofficial guide on how to replace the heatbed signal cable of the Bambu Lab X1. Even though this process is easier, I still recommend you follow the official documentation for this.
The process described in this article is only shared as an informative post and you should always follow the instructions received from the manufacturer. Following this can lead to losing the warranty of your printer.
Read the full guide carefully and perform the heatbed cable replacement only after you properly understood all the steps involved.
If you have questions before starting, leave a comment and wait for a reply. I am not responsible for any damage you may cause to your printer by following this guide.
You are doing this on your own responsibility.
The Problem
As mentioned before, this extra time required to replace this comer originates from the small slot trough where the cables need to be routed. The signal cable issue is probably generated by the repeated strain of the heatbed cable during the Z-axis movement of the heatbed. Due to the sharp bends in the cable, the internal wire can break and we’re left with a printer that requires a bit of love.
The Bambu Lab wiki article shows the process of replacing the signal cable on the X1 by removing all the heatbed cables, probably to allow the 6-pin cable connector to fit through the plastic routing which is very difficult or impossible to do without removing the other cables due to the very small space for it.
The Solution
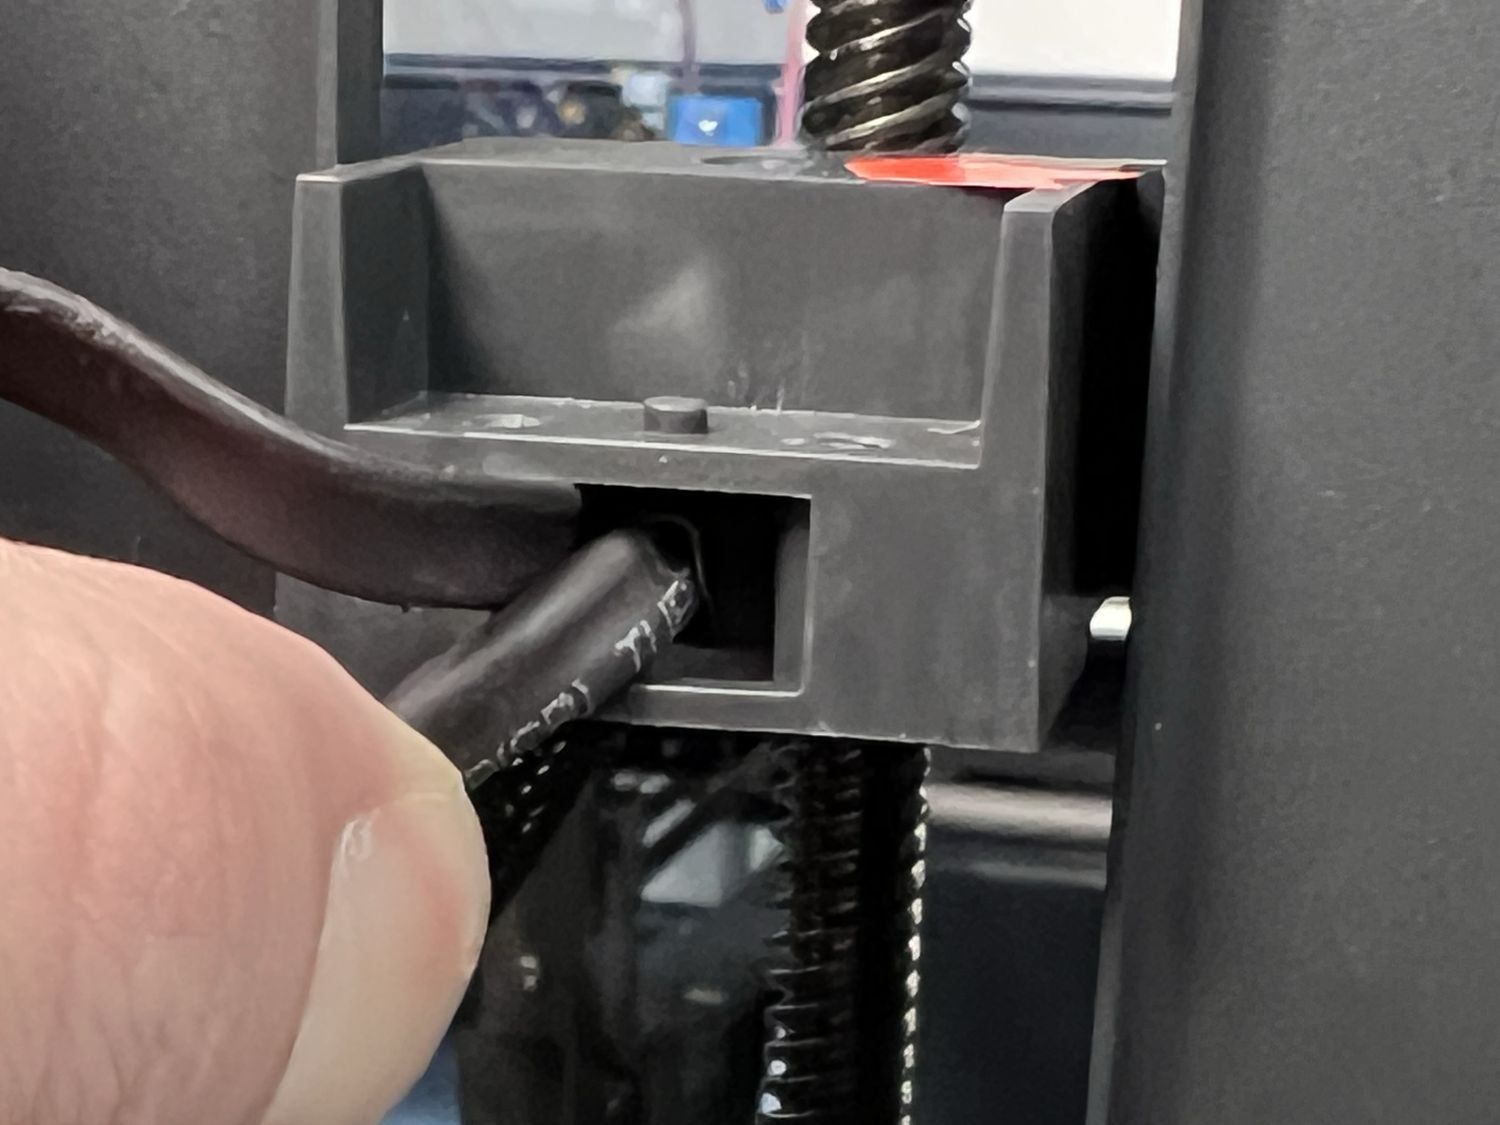
My solution to make the process easier and faster is to cut a small plastic tab on the plastic Z-axis bracket where the wires are routed through, to make the insertion of the cable less annoying. Cutting a small piece of the plastic bracket will allow you to easily remove the 6-pin heatbed cable of the Bambu Lab X1, and perform the repair faster.
How to replace the signal cable on Bambu Lab X1?
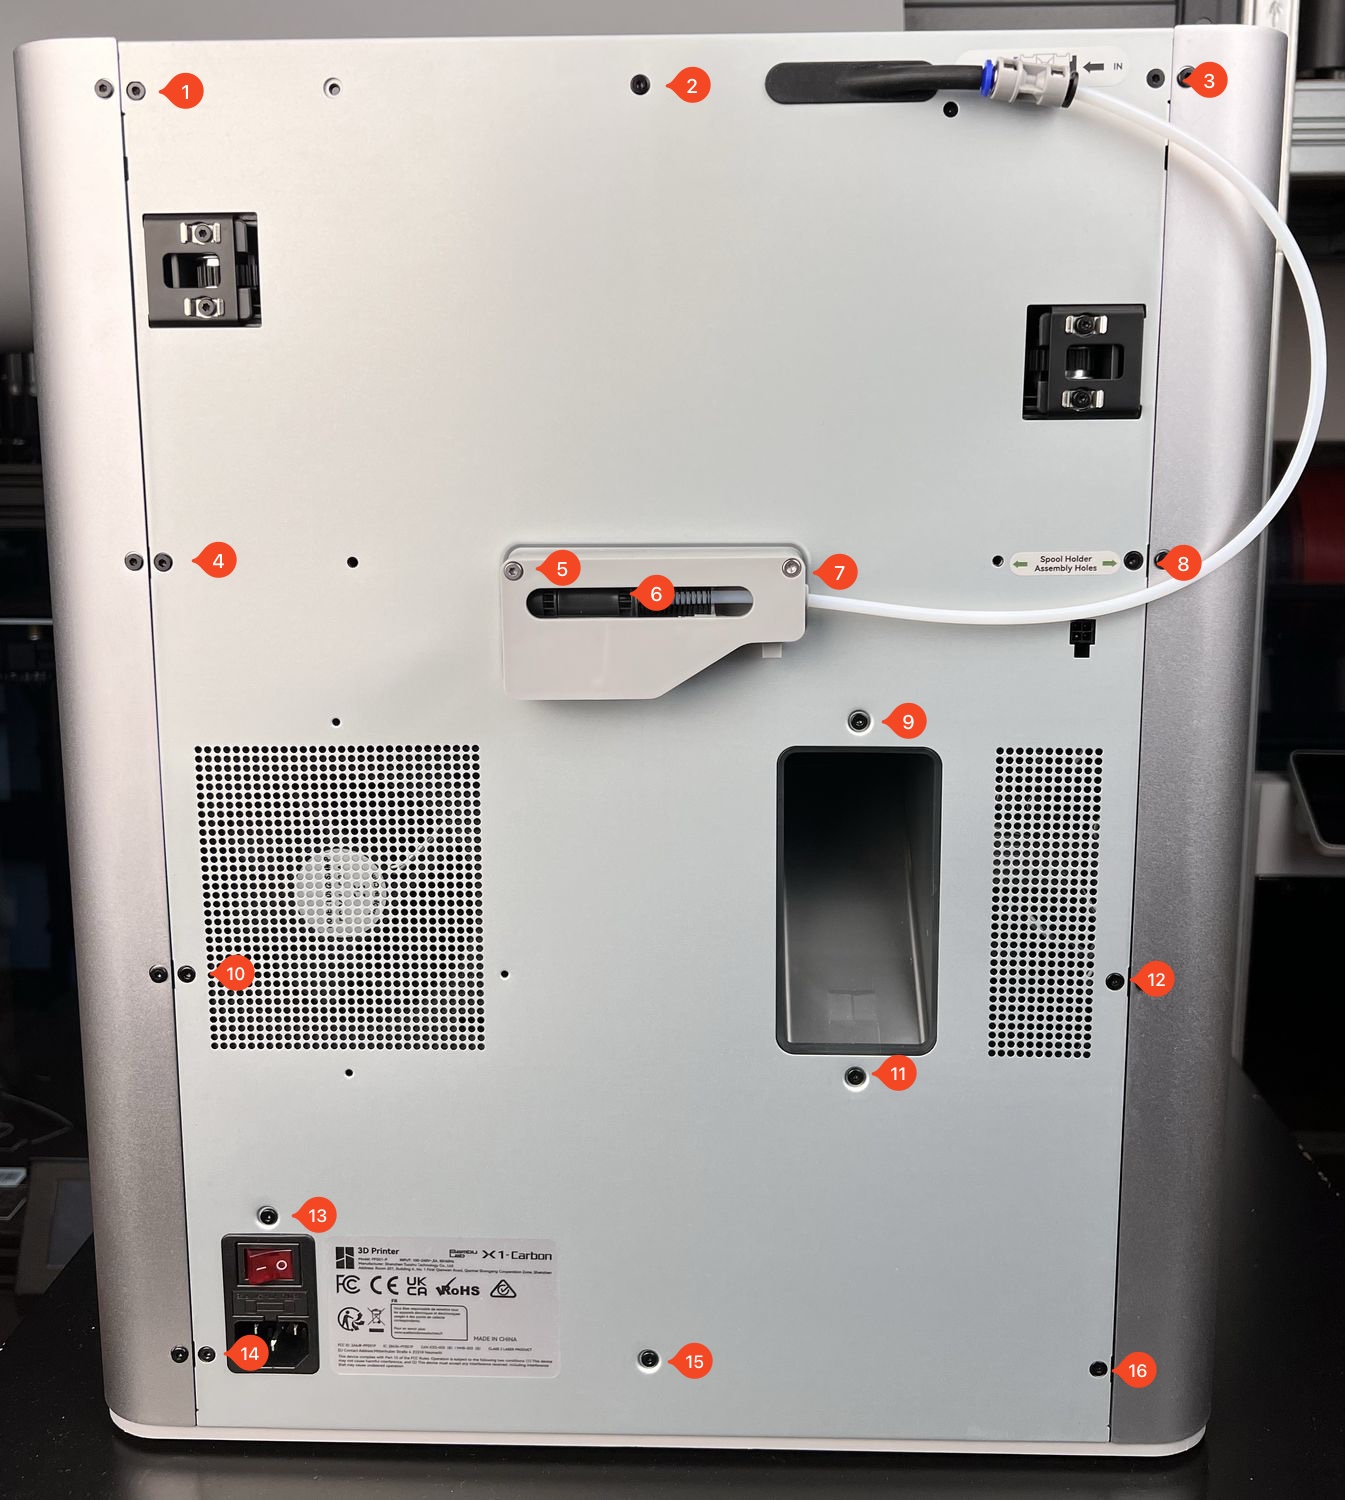
Remove the back panel
The first step in this process is to remove the back panel of the printer. This is a very easy process and can be done by removing all the screws from the back.
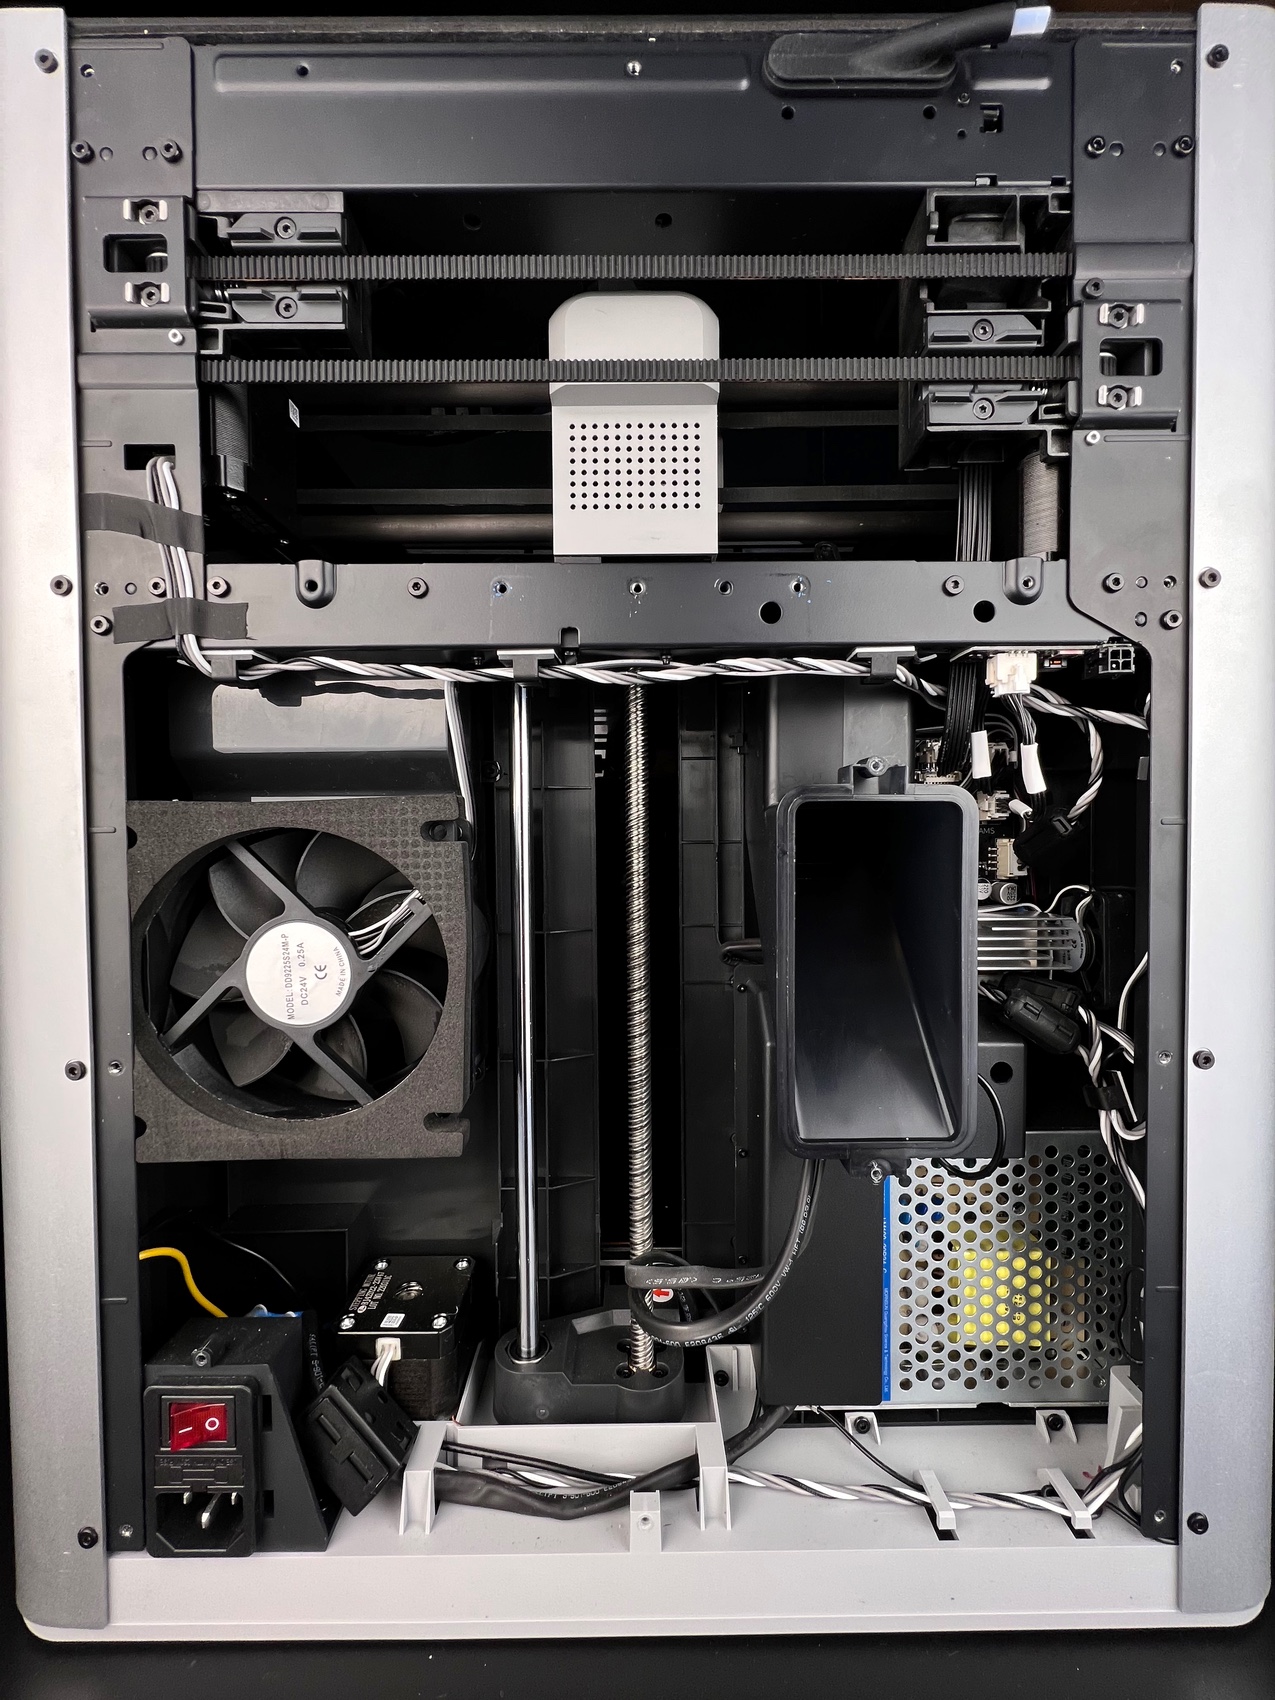
This is how the printer looks like after the back side is removed
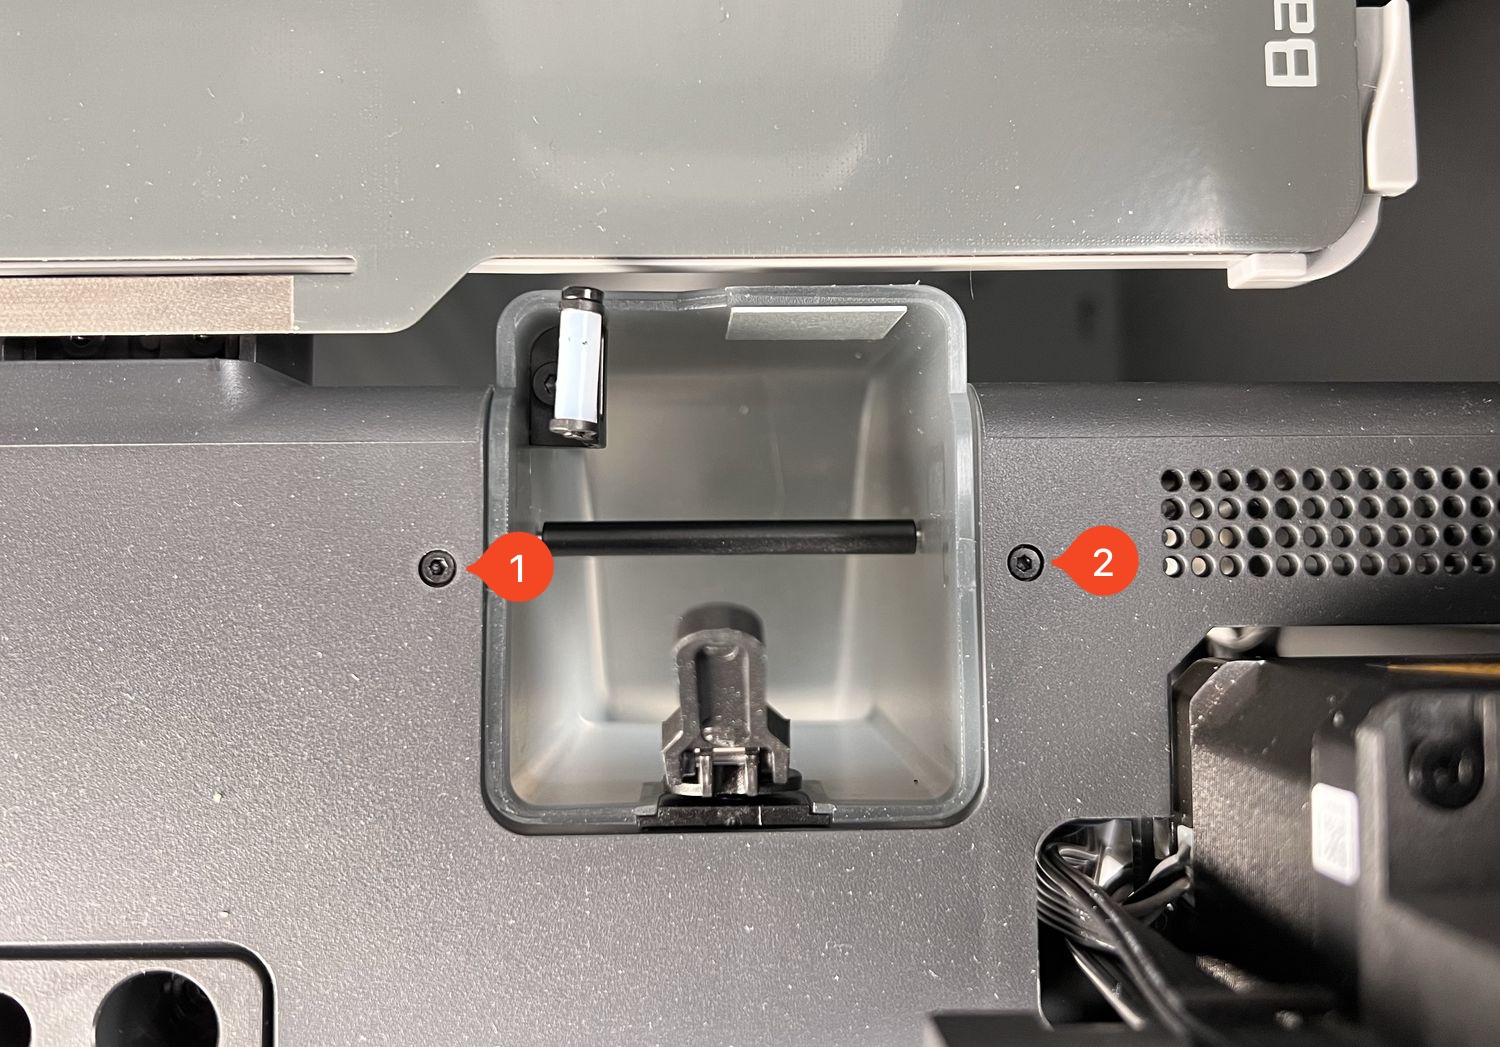
Remove the purge chute
The next step is to remove the purge chute. This is held in place by two small screws on the top, so remove the screws and you will be able to take out the purge chute easily.
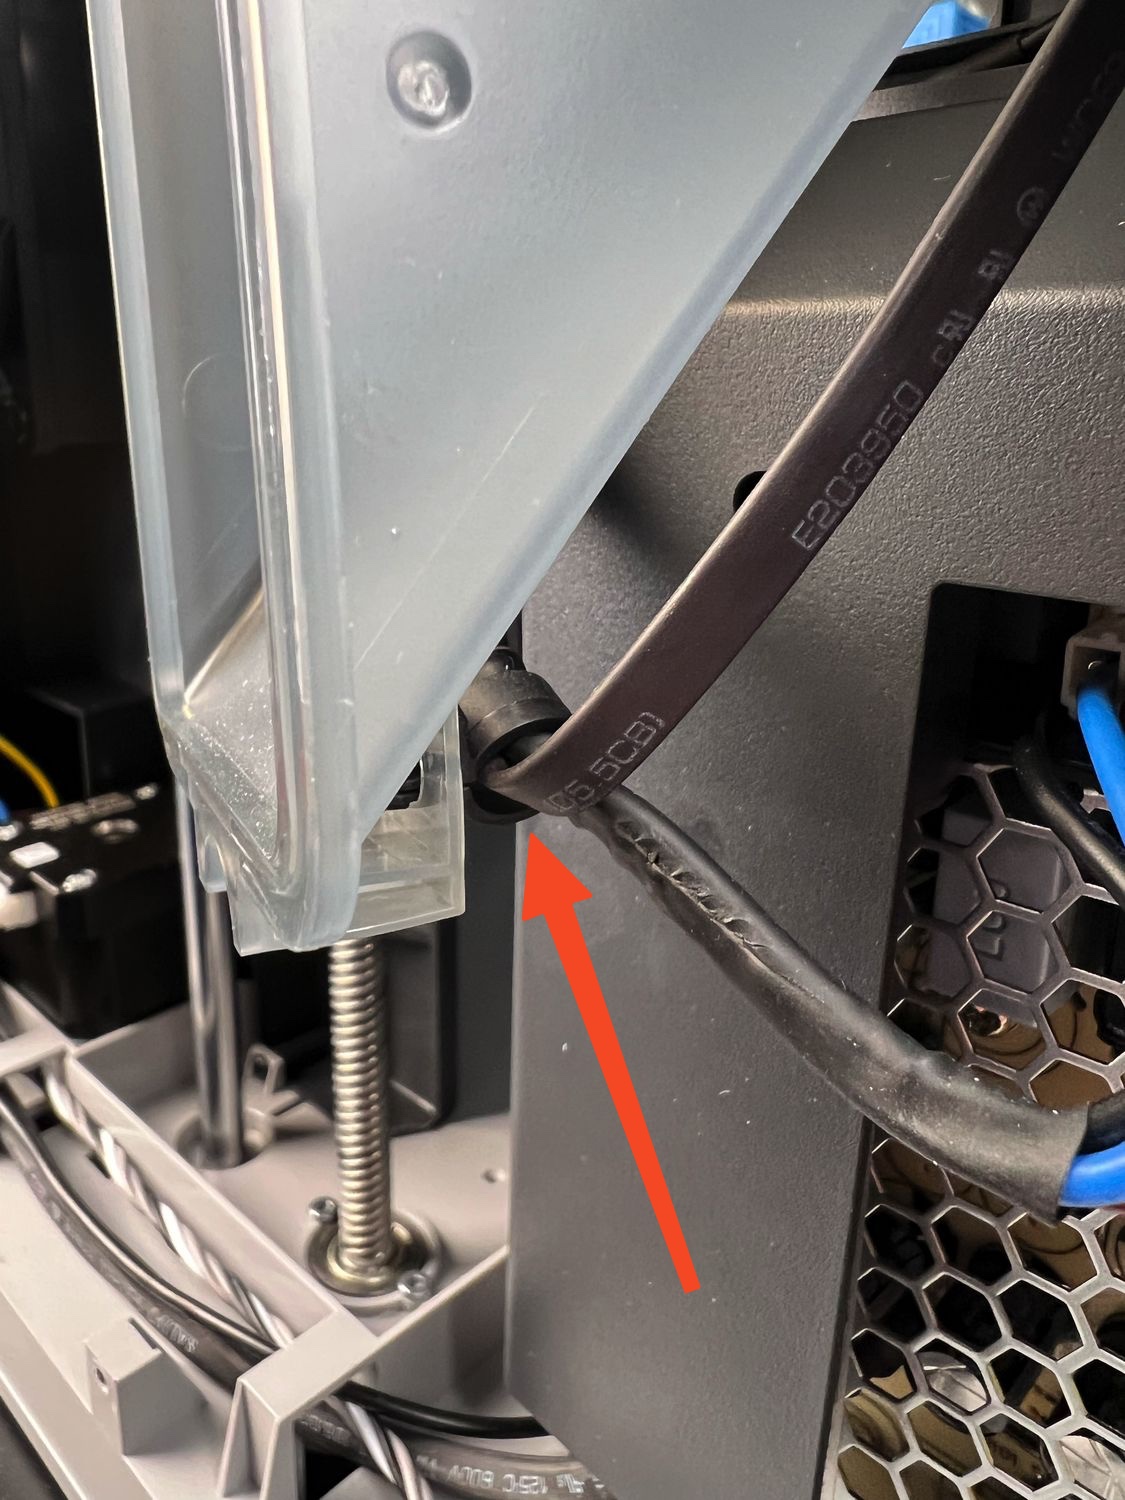
Make sure that you also disconnect the small plastic tab that’s holding in place the heatbed cables. You just need to squeeze it a bit then pull and it will release.
Remove the heat bed
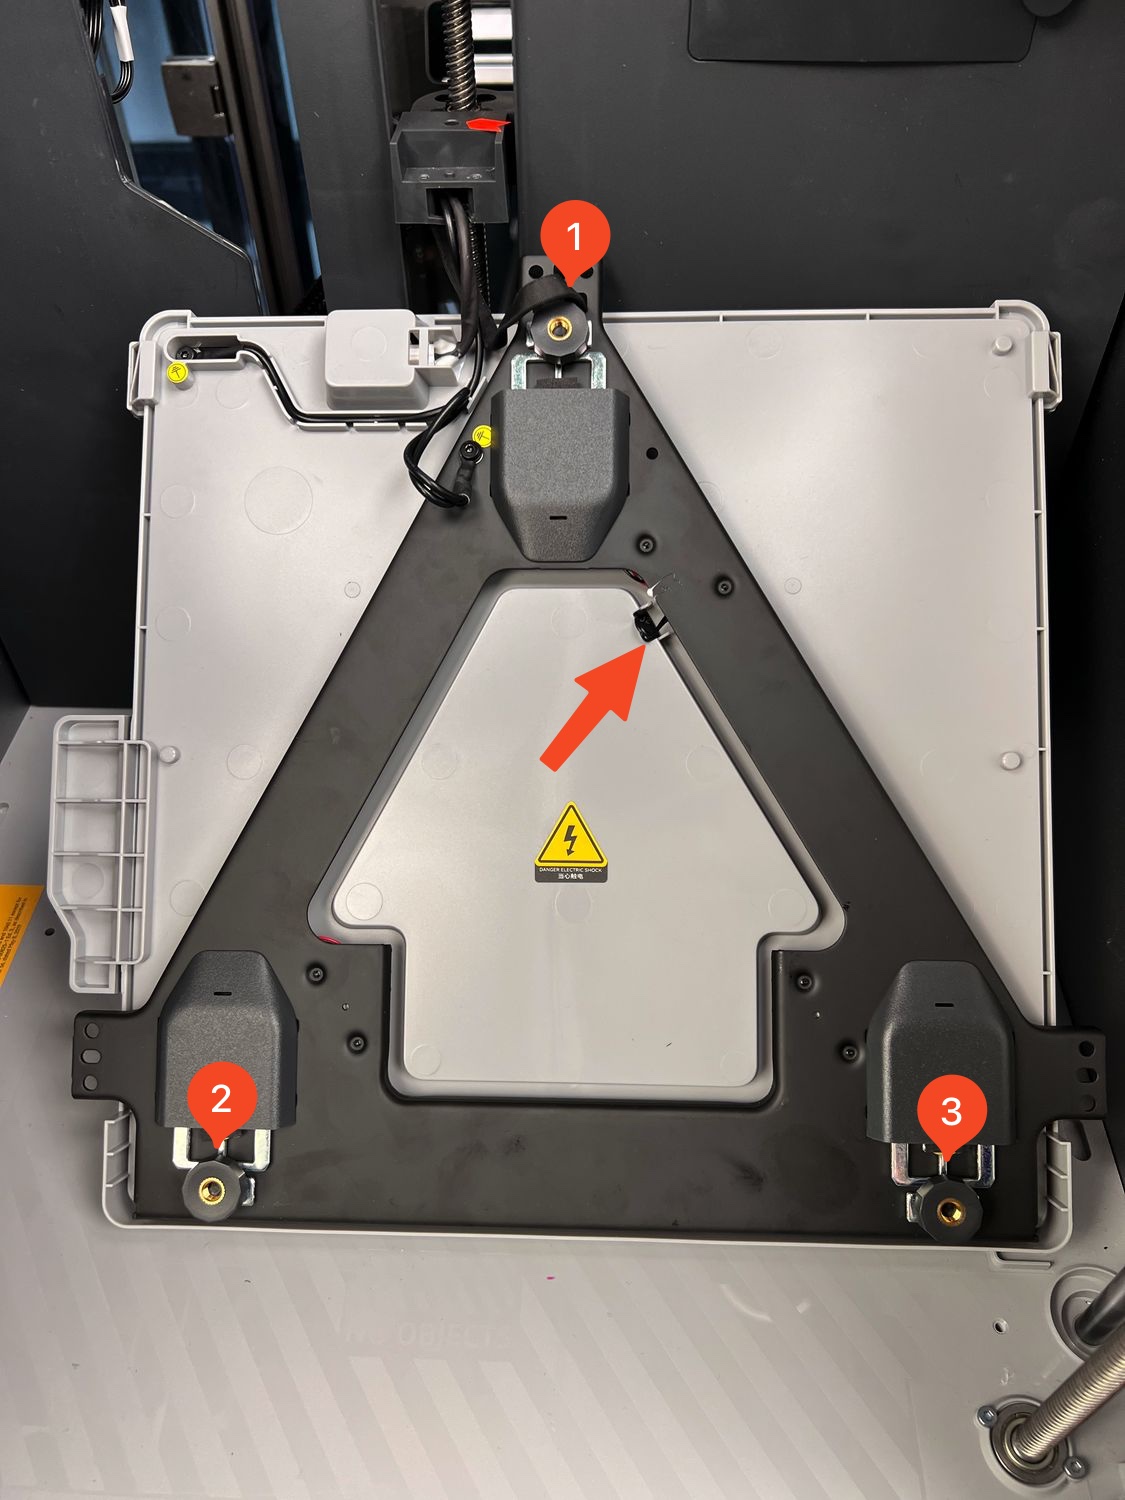
It’s time to remove the heatbed from the Z-axis mounts. First, remove the three pairs of screws holding the entire heatbed module onto the printer.
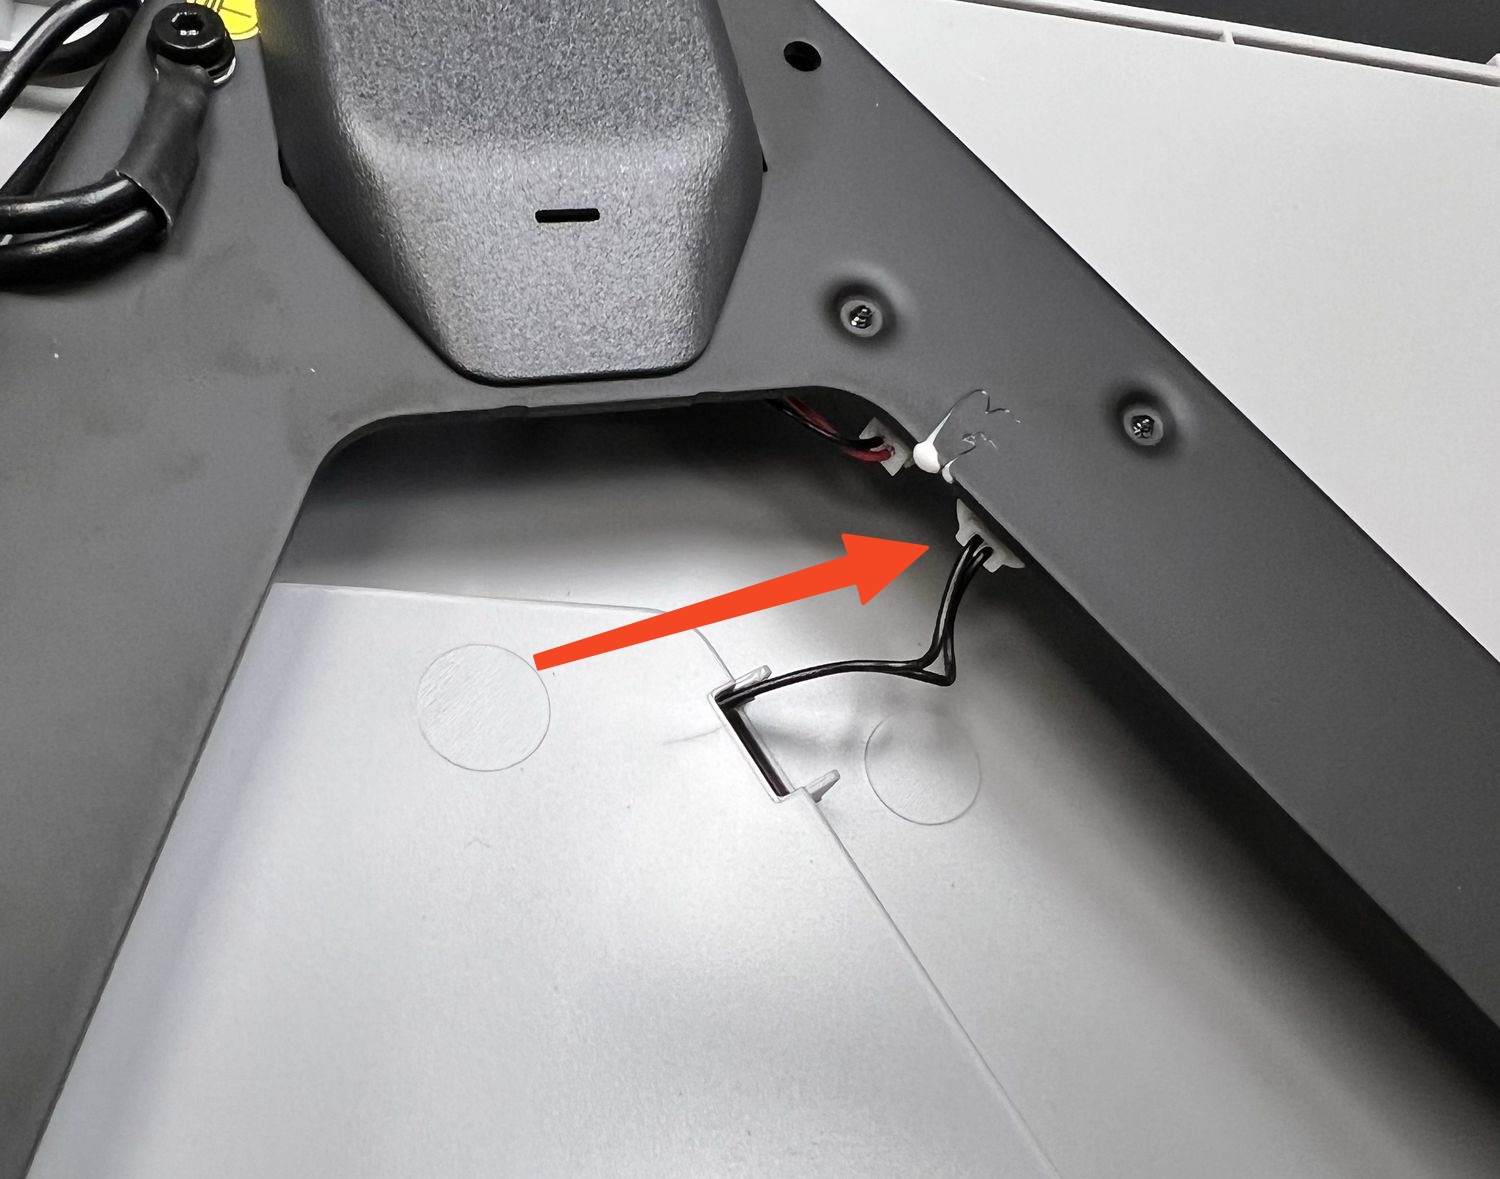
After doing this, flip the bed, and remove the three heatbed knobs holding the heatbed attached to the metallic bracket. Don’t forget to disconnect the small wire of the thermistor as shown in the image. It’s held in place by glue, so don’t pull on the wire as you might damage it. Gently pull it our by grabbing the connector.
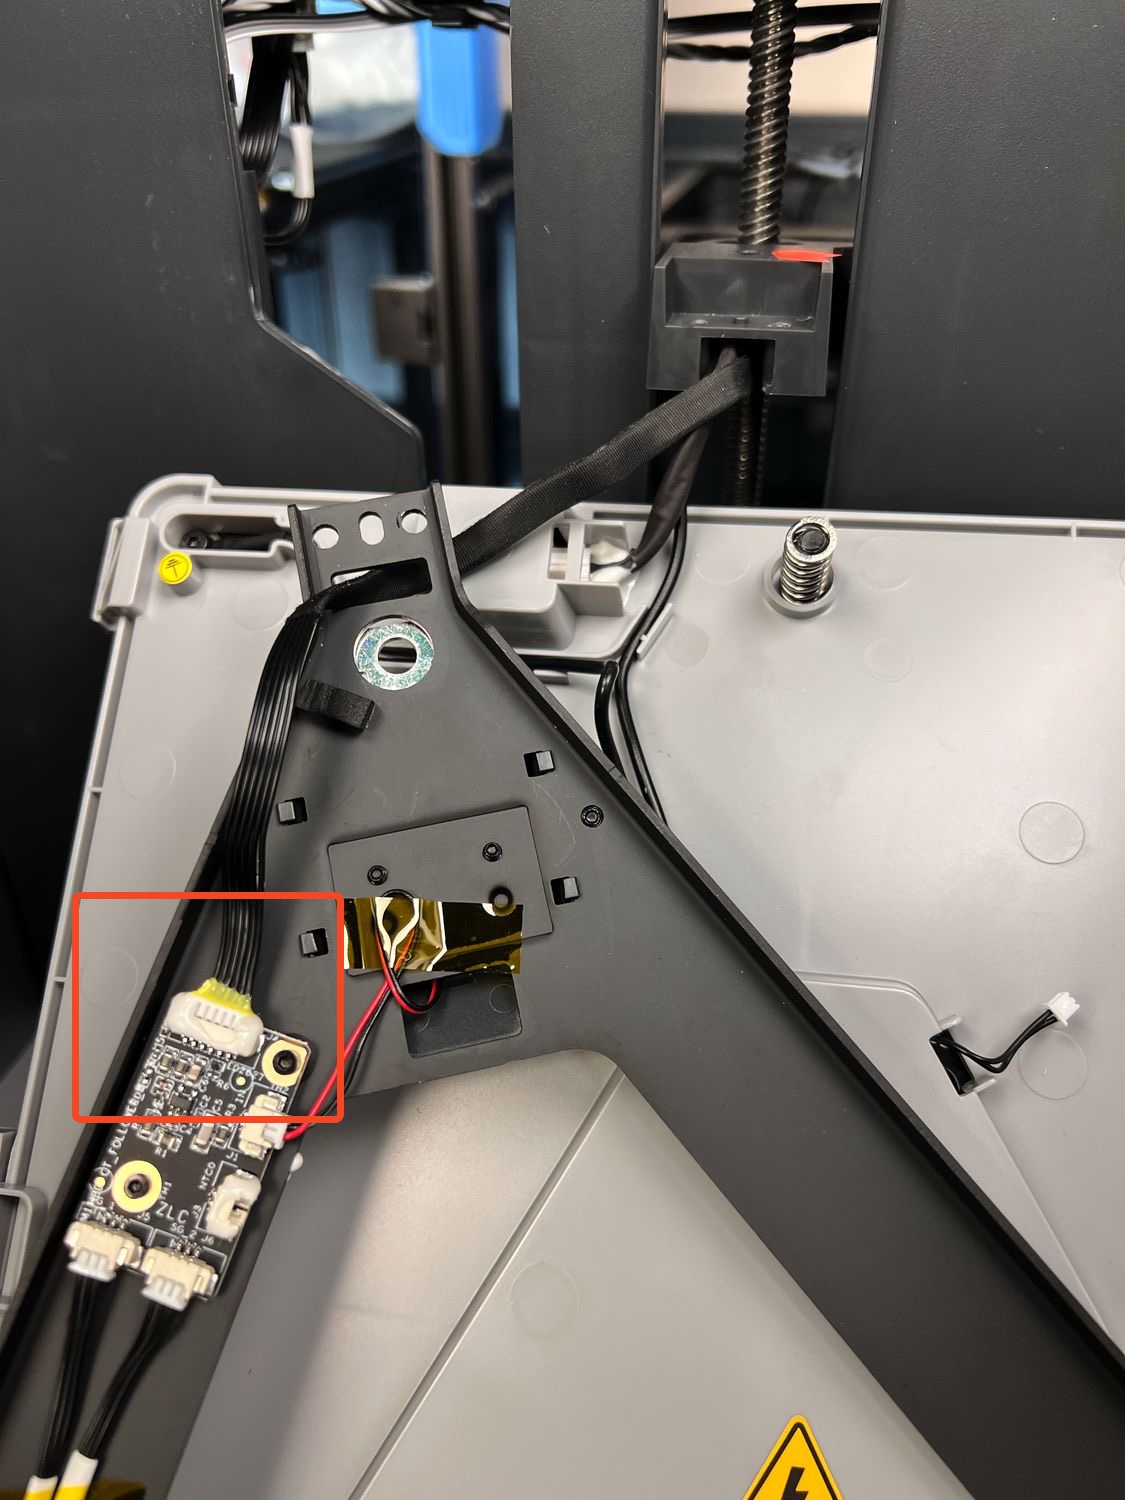
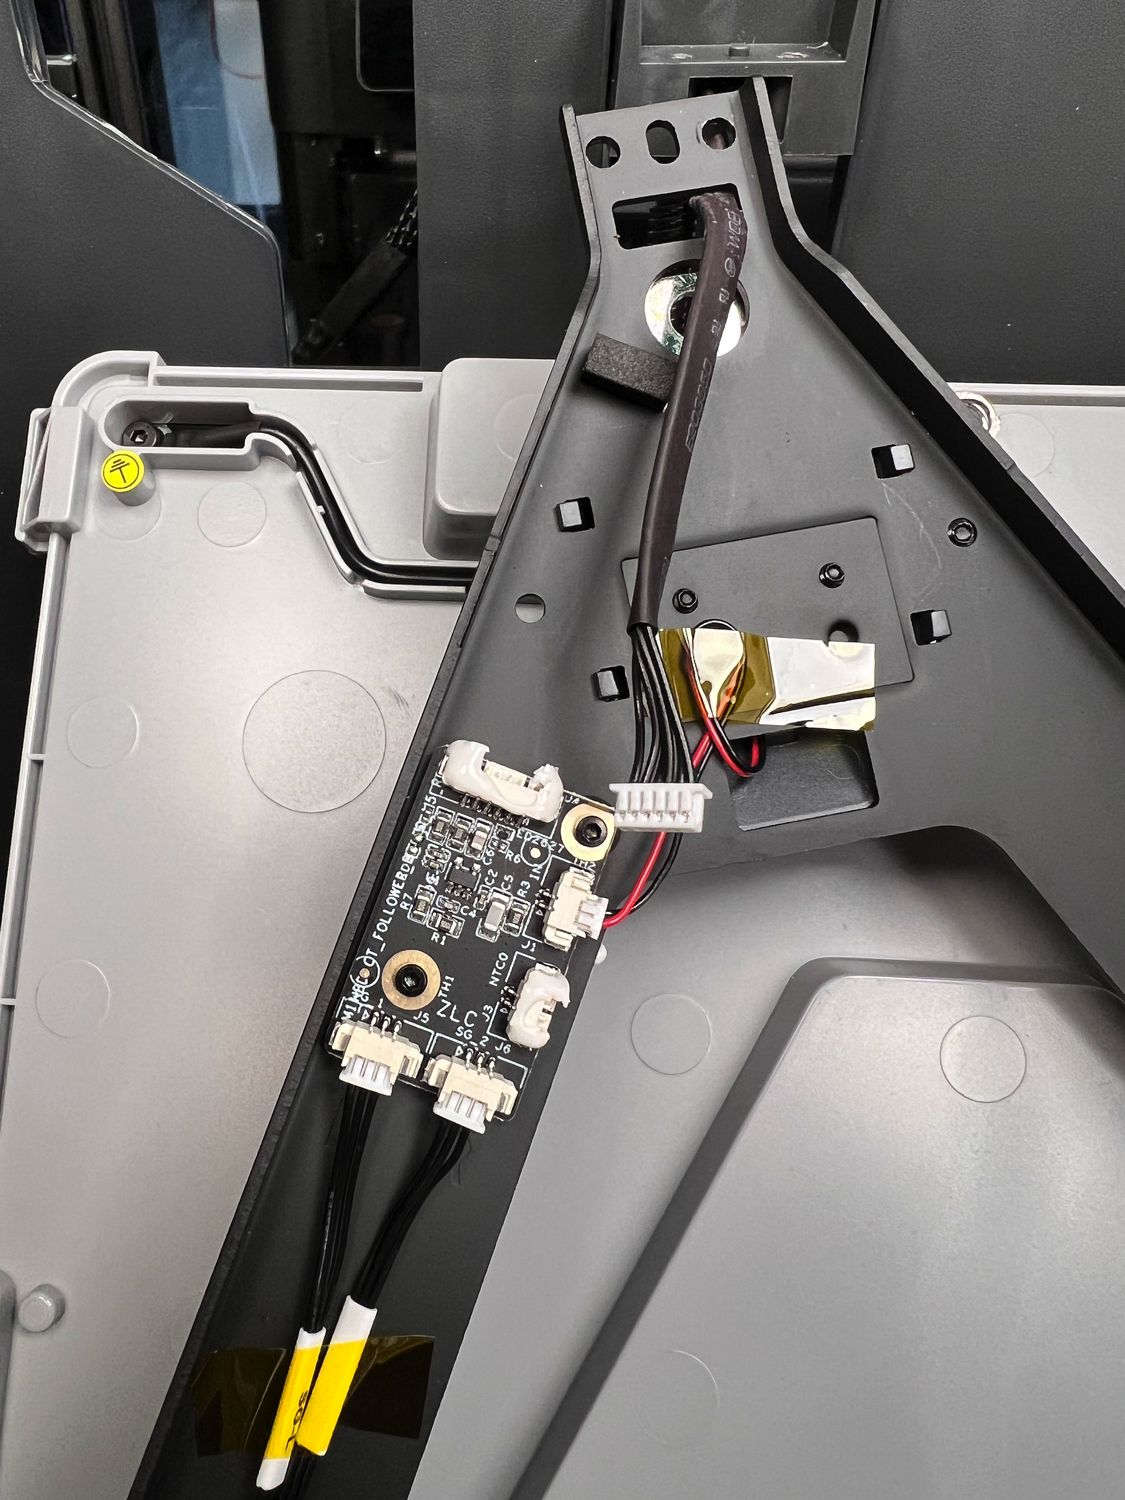
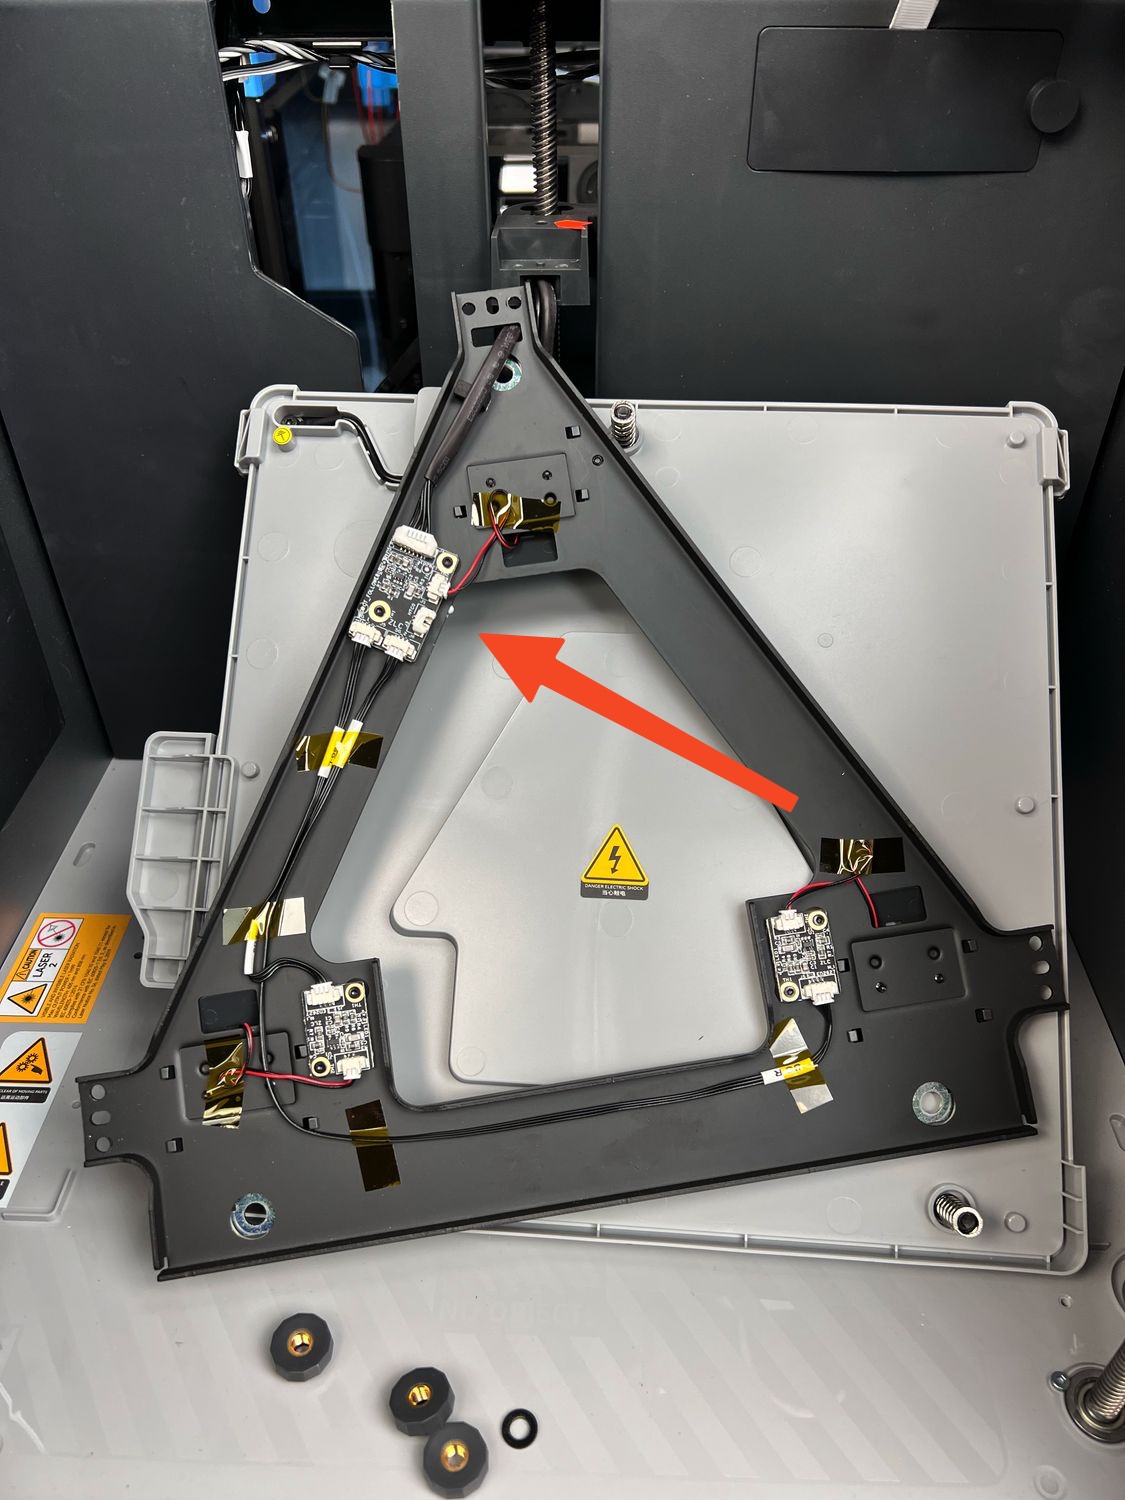
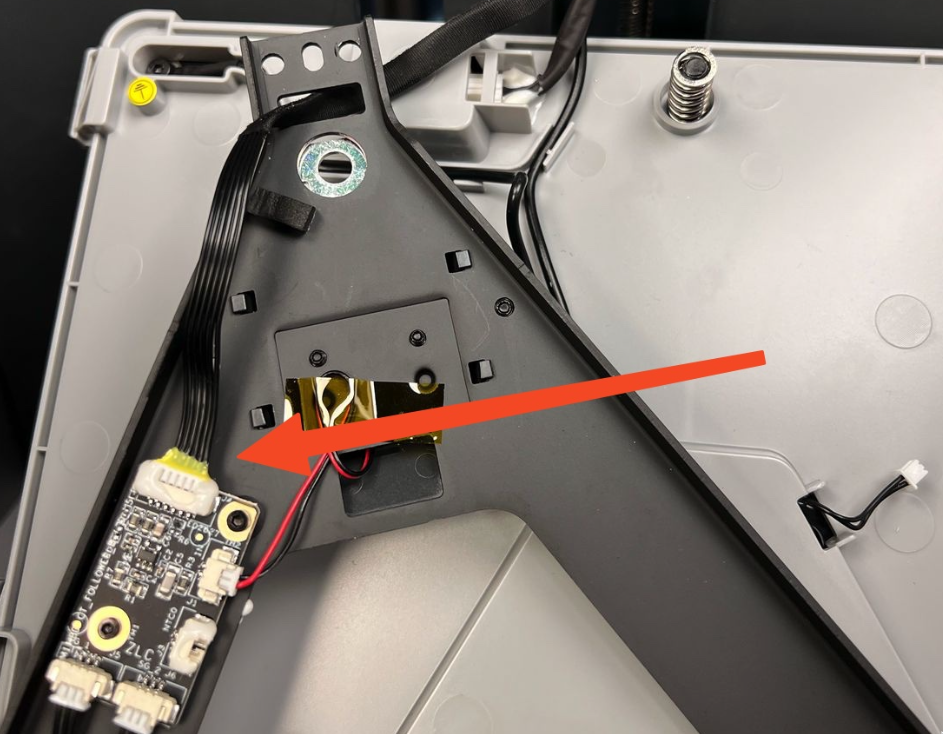
Next, flip the metallic bracket and it will reveal a few small boards that connect the heatbed sensors, and one of them is also the one holding one of the ends of the 6-pin cable, as shown in the image.
Disconnect the 6-pin heatbed signal cable
We need to remove the 6-pin heatbed cable from the top board. The connector is also held in place by glue, so gently remove some of the glue before pulling it out, to avoid damaging the connector.
The glue can be softened a bit with a hairdryer, so try that if needed.
Cut the plastic heatbed support bracket
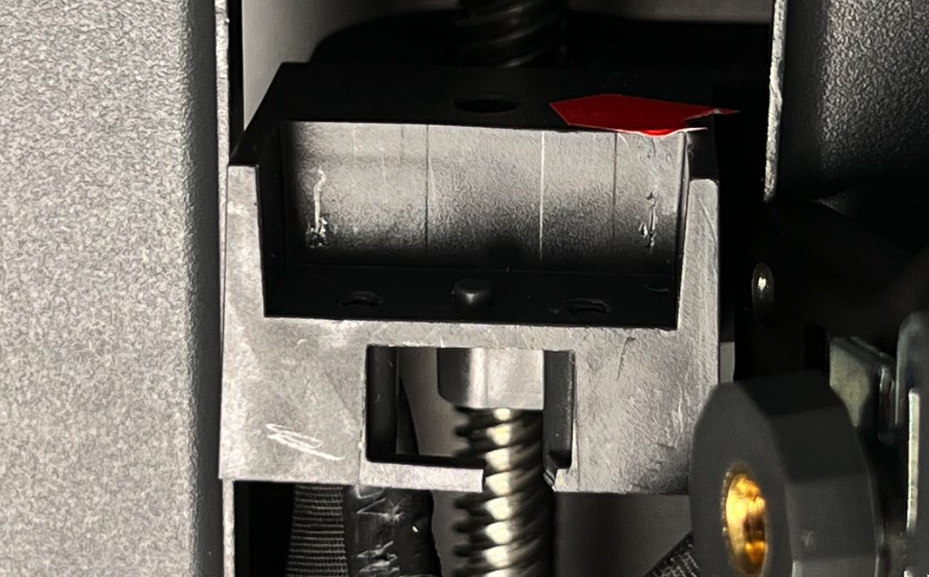
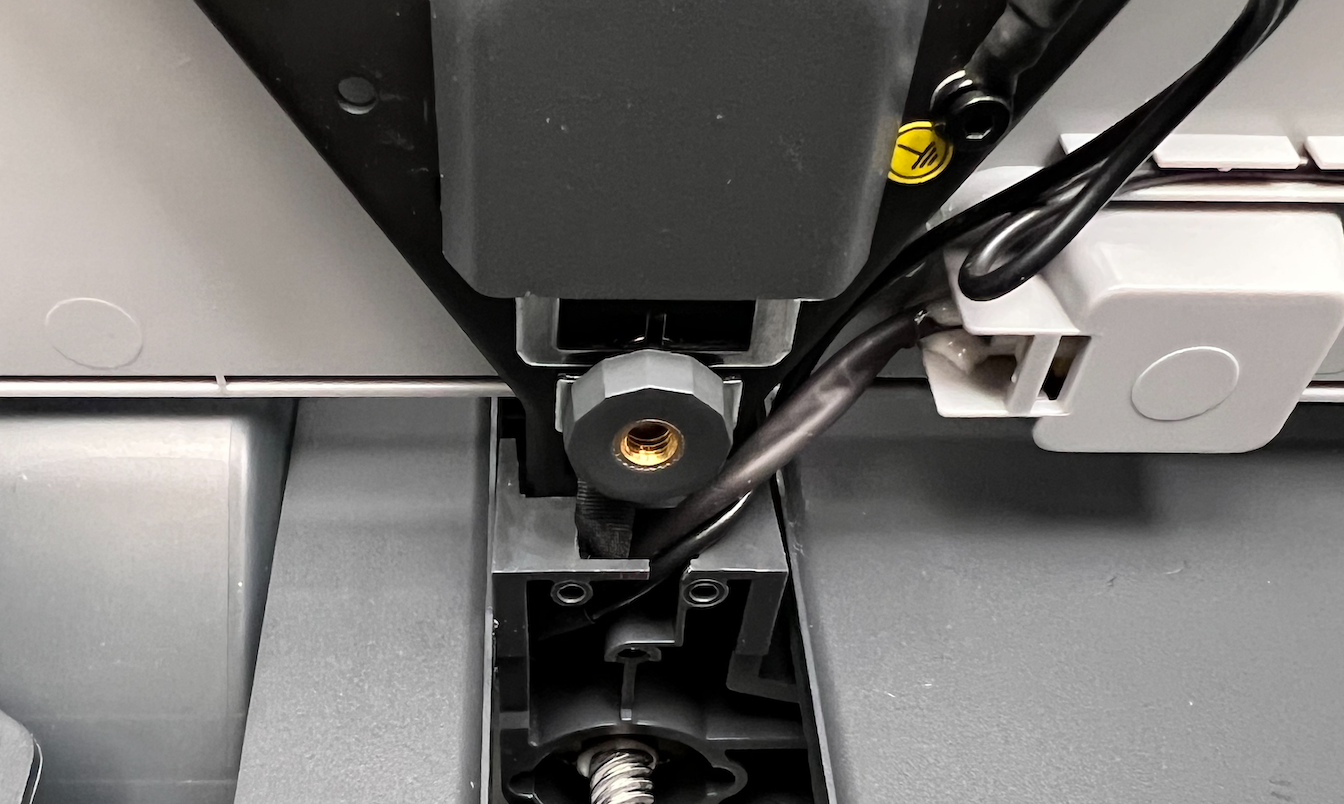
As you can see, the space where the 6-pin cable connector should be pulled through is quite small, so it’s time to cut the small plastic bracket. The main objective is to do a small cut large enough so we can fit the flat cable trough, but still have the rest of the plastic leftover to hold the wires in place.
I was able to easily cut the plastic bracket with flush cutters.
First, move all the wires and hold them in place to the left side of the bracket as shown in the picture, then cut the small plastic tab as close as possible to the right side.
Finally, cut another piece of the plastic tab. The end result should look like this:
Remove the 6-pin signal cable of the Bambu Lab X1
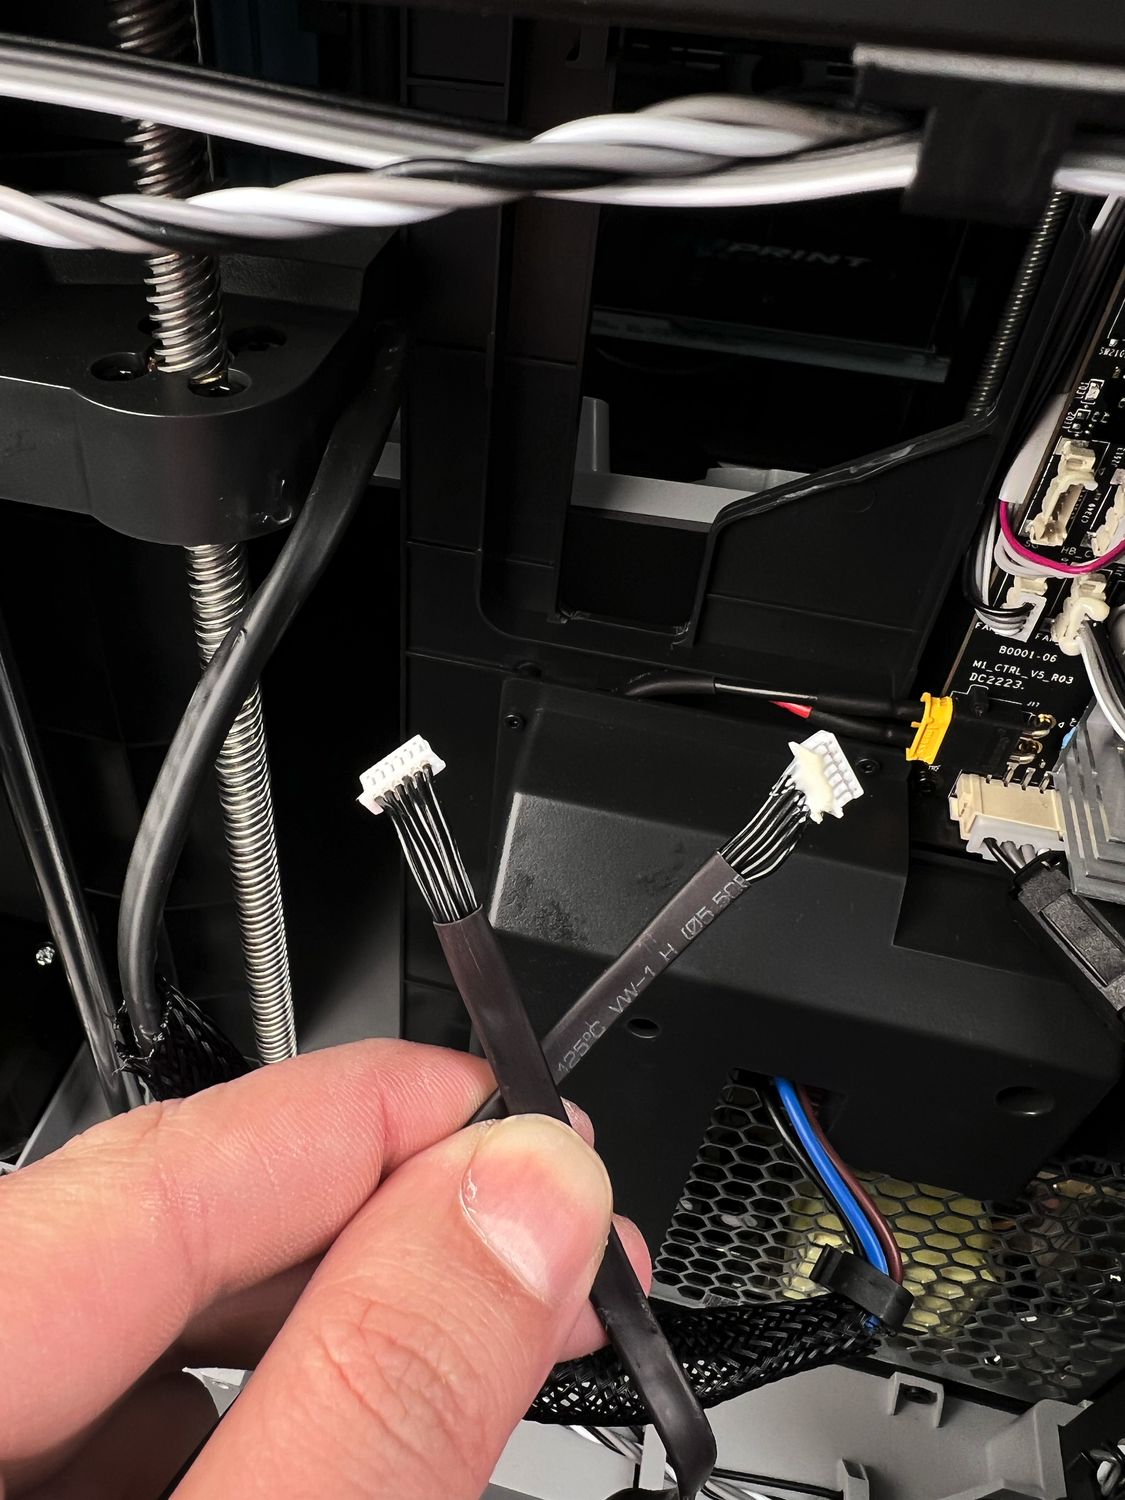
Now that the plastic heatbed support is cut, you can easily remove the flat 6-pin cable and you only need to pull it through the other hole in the back. This is much easier and doesn’t require any cutting, as you just need to move the wires to the side and then carefully fit the connector through the hole to complete the removal.
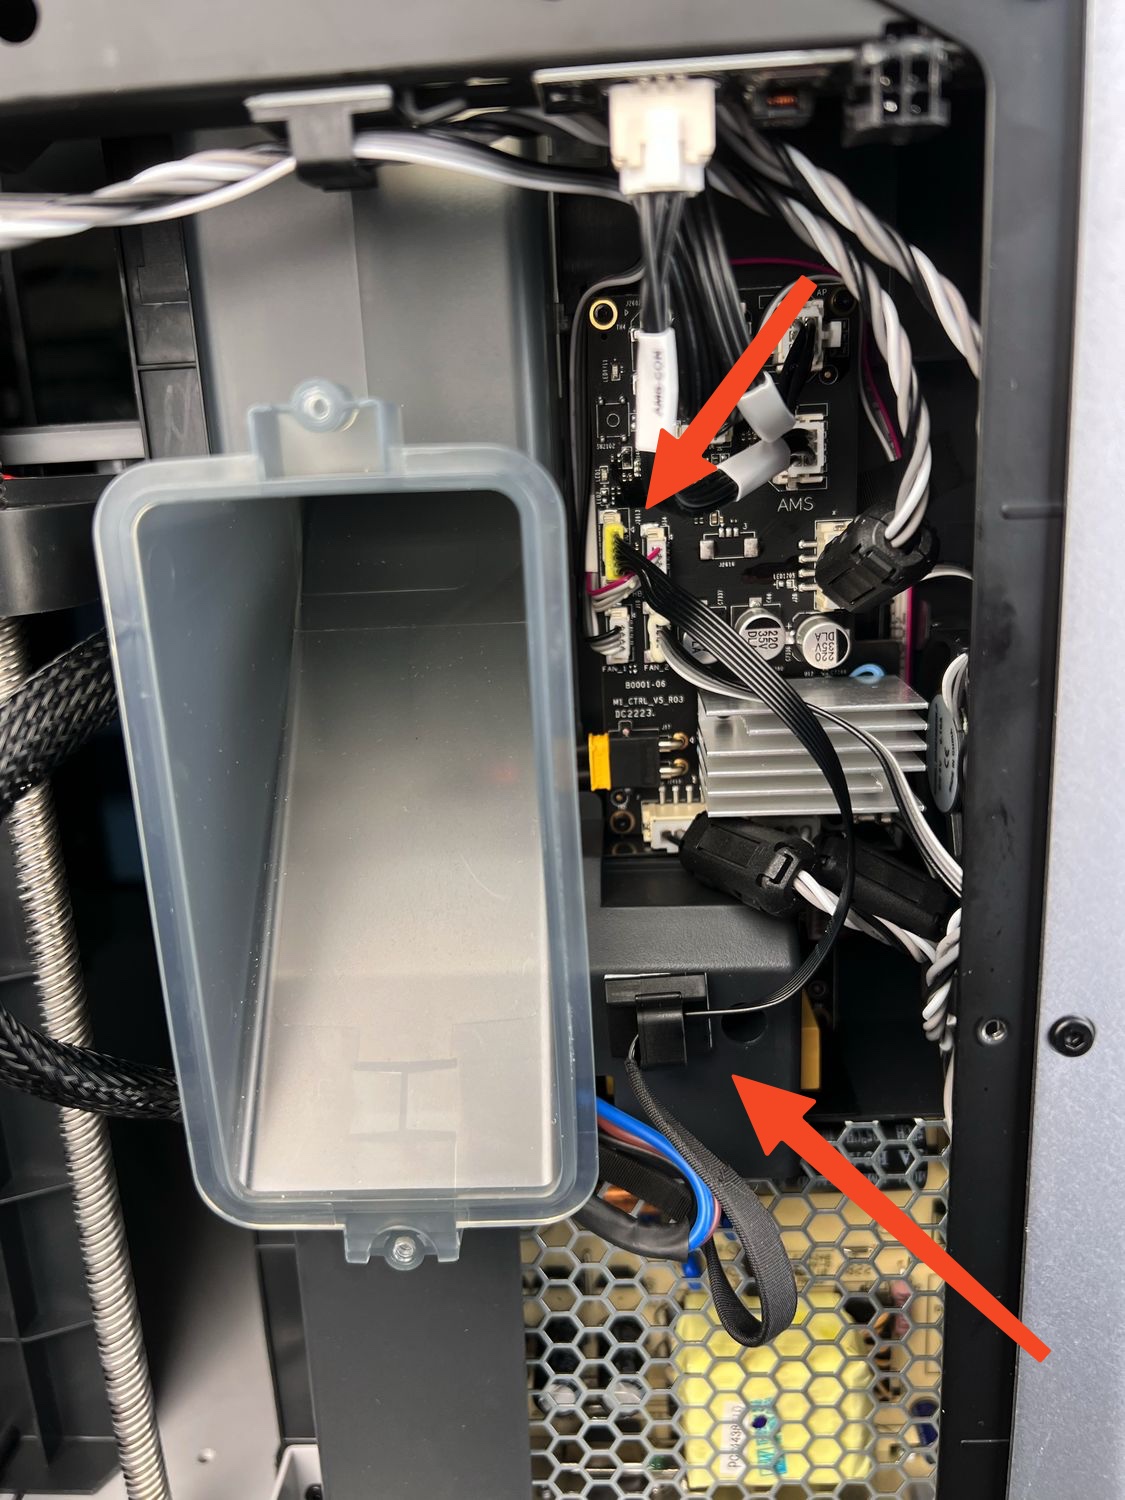
On the back side of the printer, we can now remove the other end of the 6-pin heatbed cable of the Bambu Lab X1. Just like you did on the small board under the heatbed, gently remove the cable connector and heat it up with a hairdryer if needed, to soften the glue.
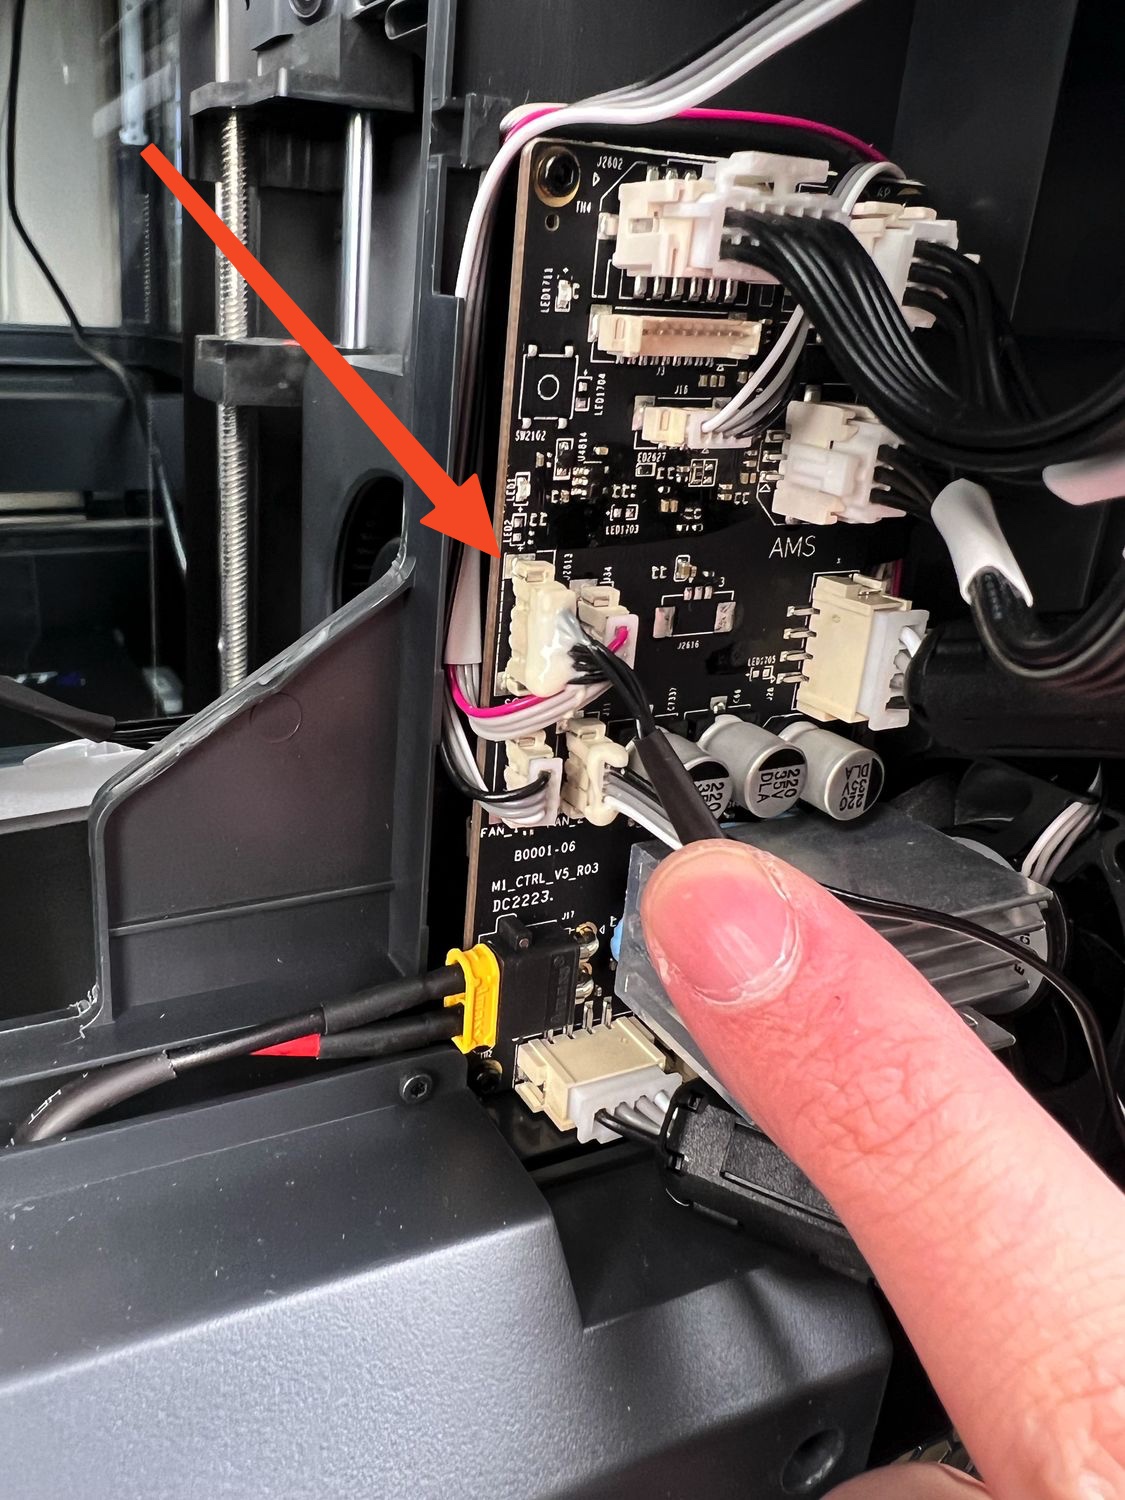
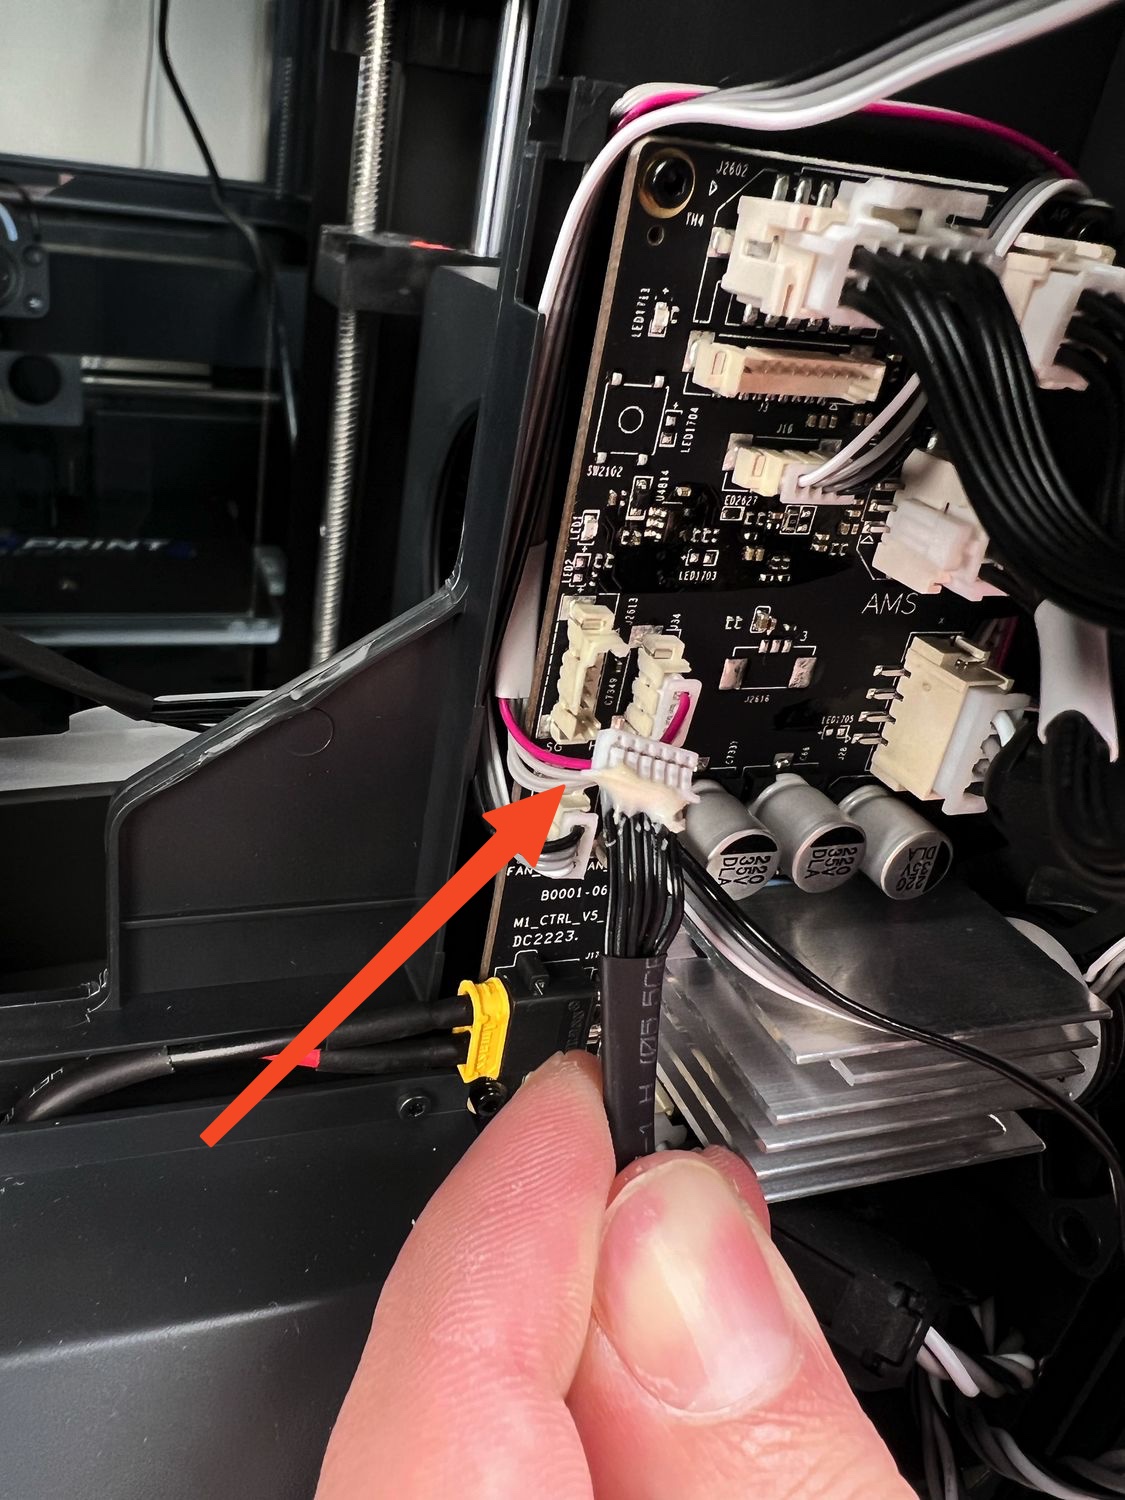
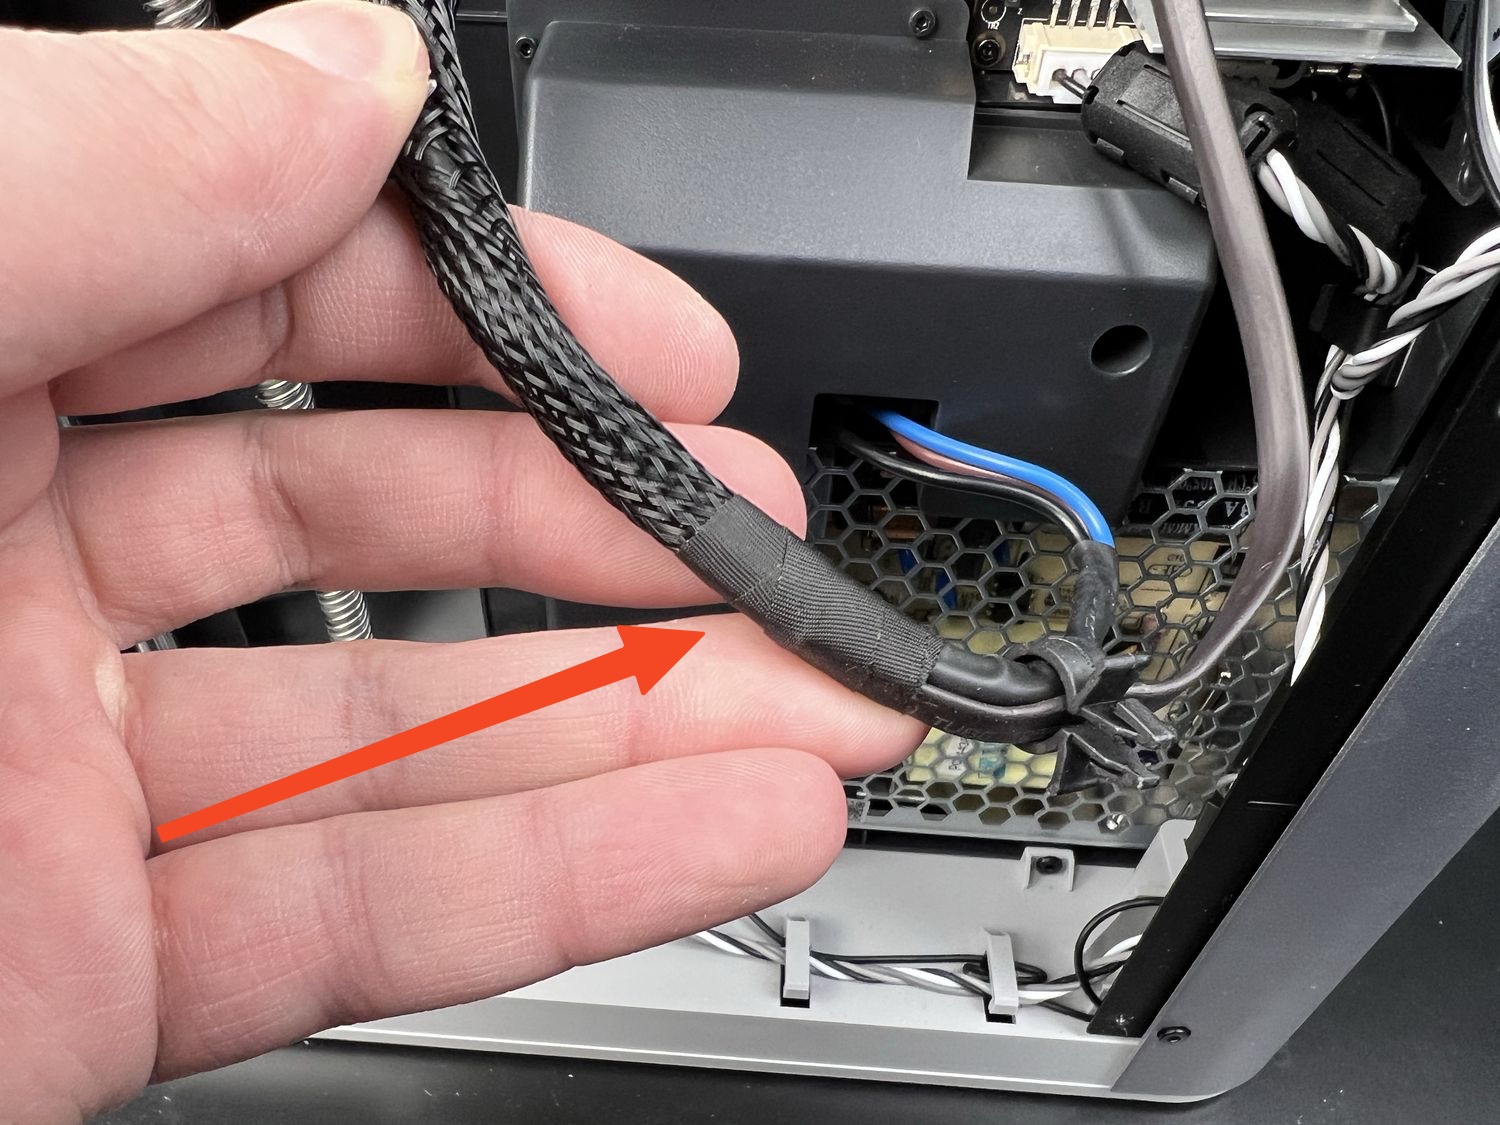
Next, carefully remove the tape holding the wire mesh over the heatbed cables. Make sure you don’t discard this tape as it will be used in a future step.
With the tape removed, you will be able to pull the entire cable out of the mesh, and now we can move to installing the new cable which will be almost the entire process we did until now, but in reverse.
Install the new cable and route it to the back
Now it’s time to install the new cable. Start by connecting one of the ends of the cable to the small board underneath the heatbed. I strongly recommend using some tape as a strain relief to cover part of the cable to ensure it’s held in place and doesn’t vibrate away during use. You can add a bit of double-sided tape if you want.
It’s also important to route the cable through the heatbed cutout as shown in the image so that you can easily align it in the next step.
Flip the heatbed bracket over, and re-install the three heatbed leveling knobs, and the heatbed thermistor, then put the heatbed back on the plastic heatbed supports.


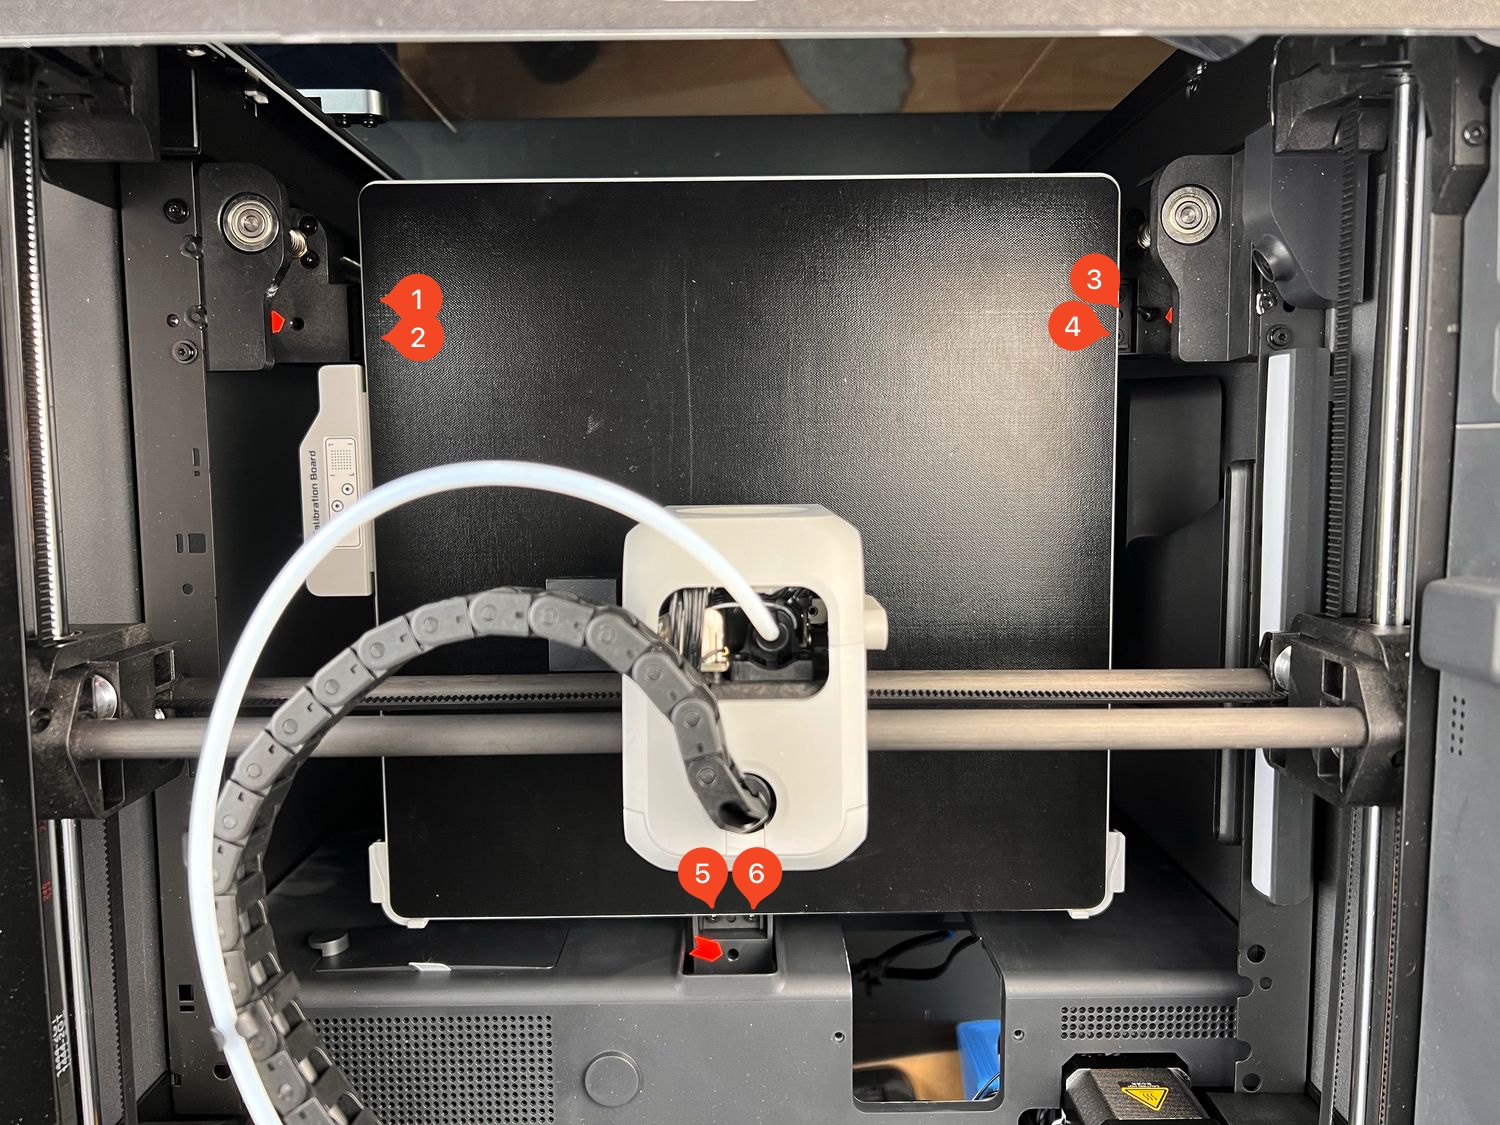
Before securing the heatbed with the 6 screws, make sure to insert the cable trought the heatbed support so it reaches the back side of the printer. It will be easier if the heatbed is not secured in place.
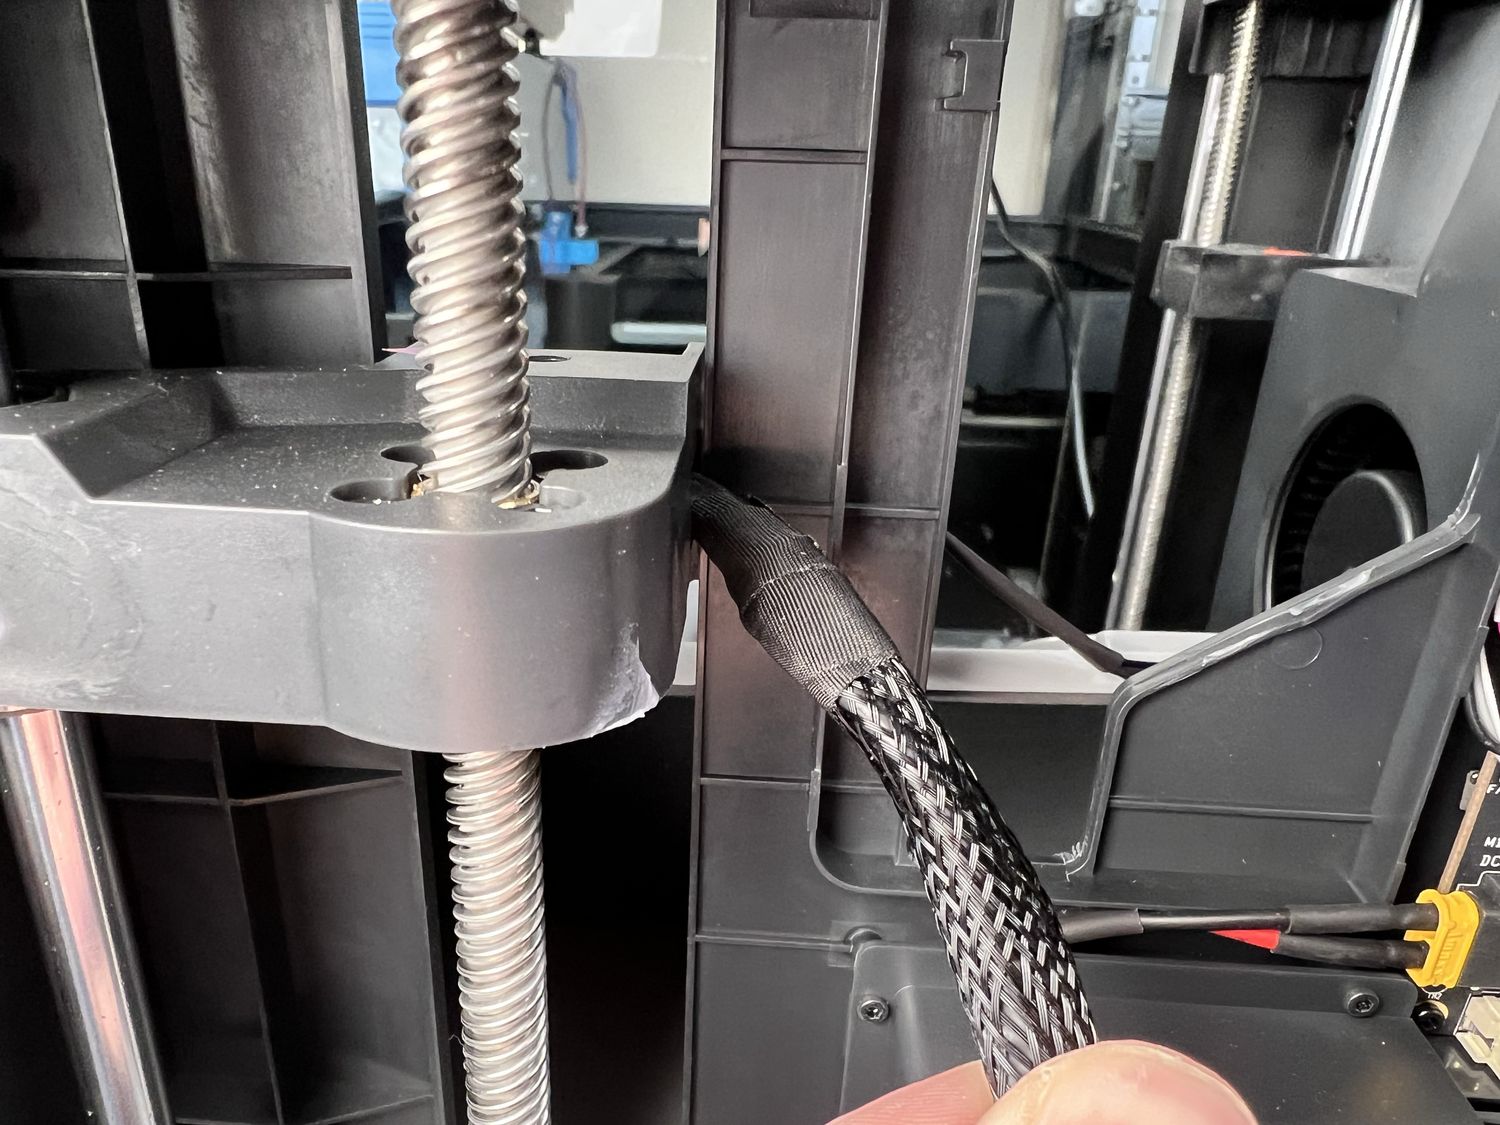
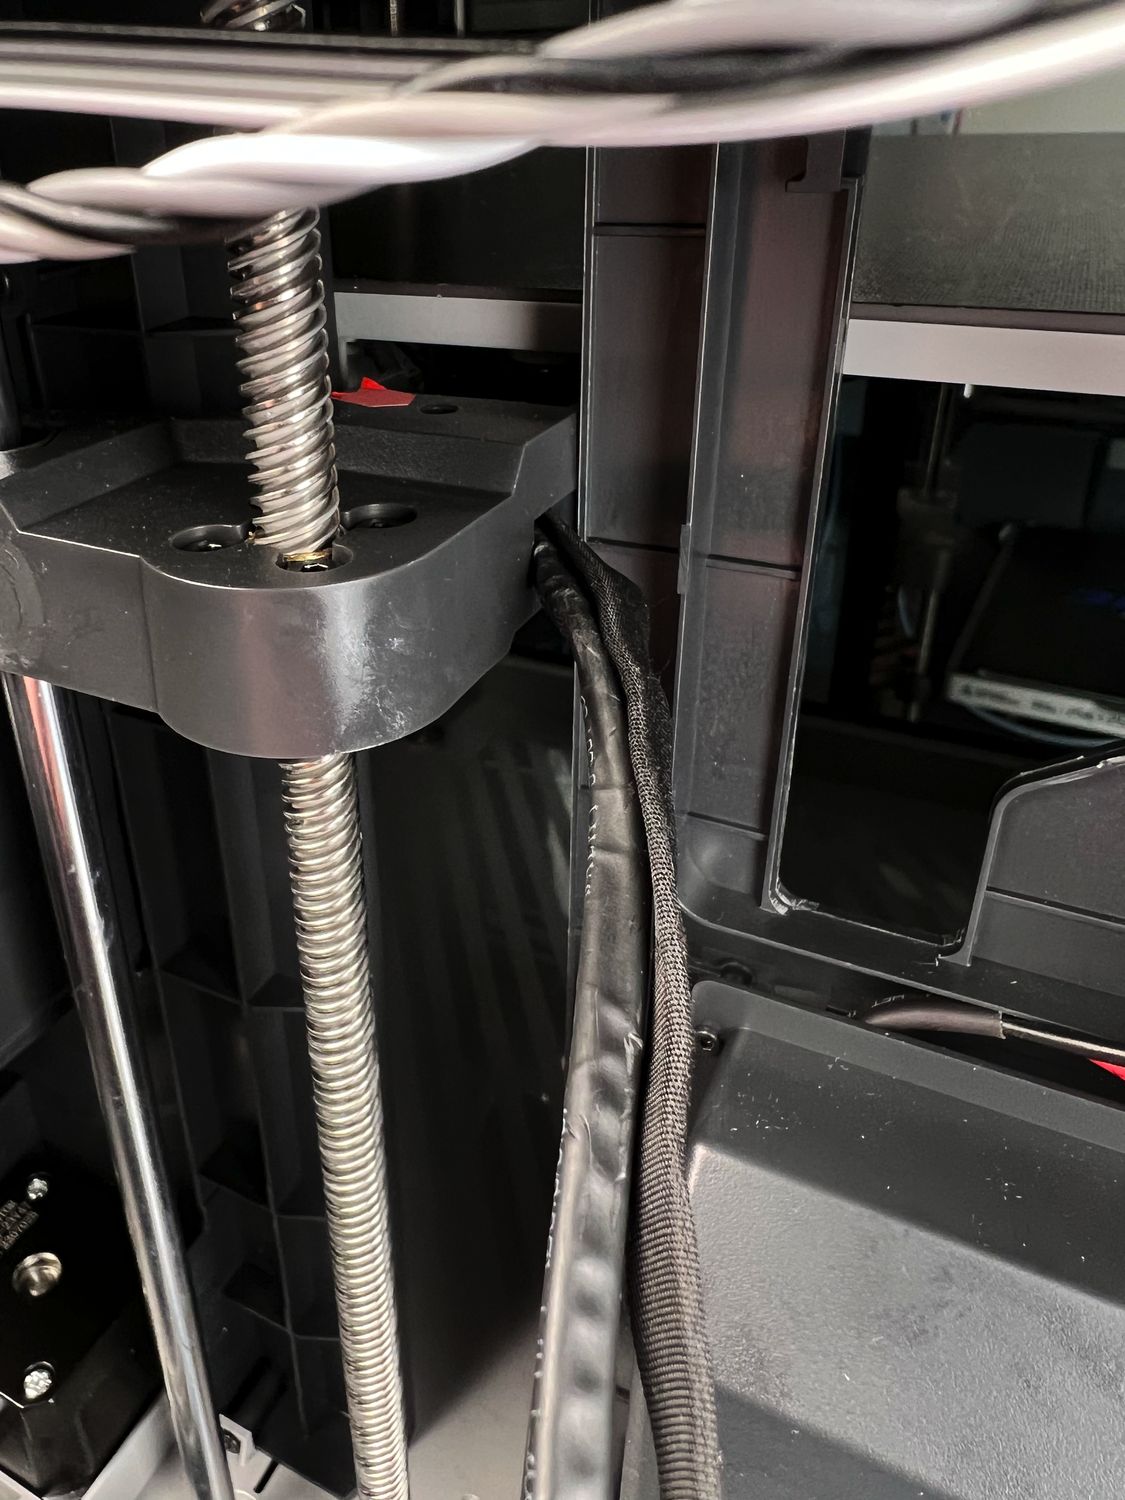
When you route the 6-pin cable to the back of the heatbed holder, ensure that you follow the same path the old cable was routed through and that it is flat and doesn’t have any strain or bends in it. In the end, the section at the back of the printer will look like this:
Next, route the wire again through the wire mesh, and use the tape we previously removed to secure it in place, as shown in the picture. Also, remember to pass the wire through the clip that gets attached to the purge chute.
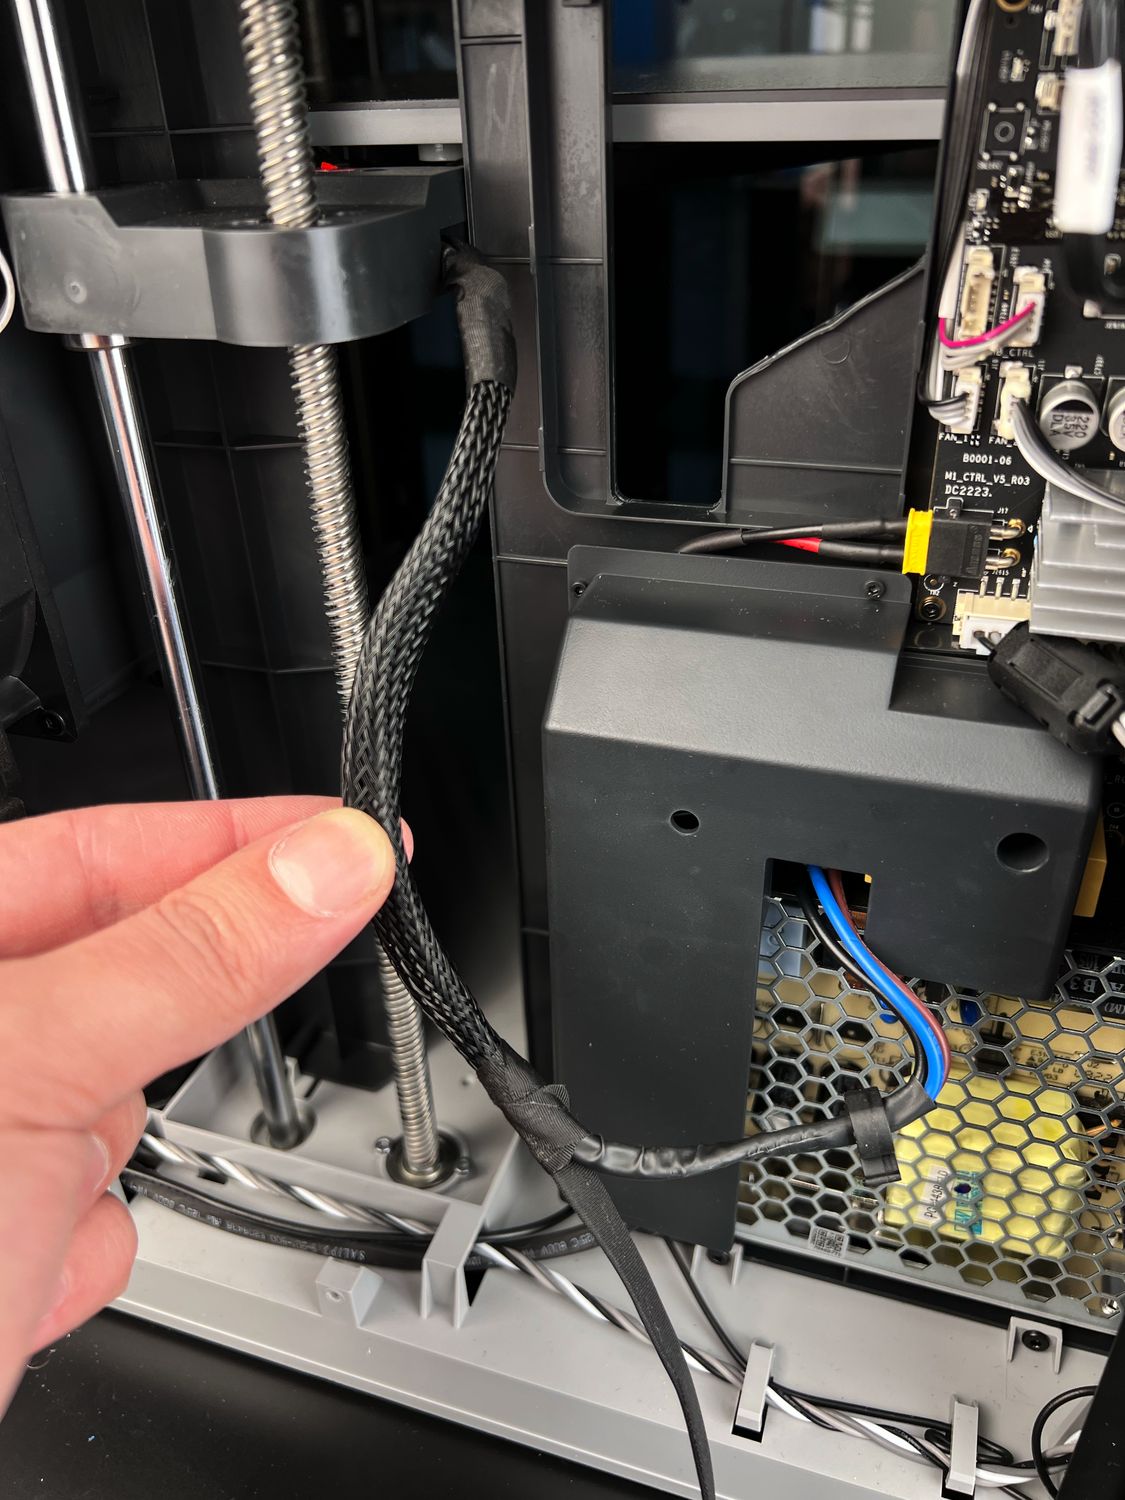
Install the wire clip on the back of the purge chute, then re-attach the purge chute back in its place with the two screws. Don’t overtighten the screws as you can easily damage the plastic. Just tighten them so that the chute is firmly held in place.
Finally, re-install the 6-pin connector on the board, and do a bit of wire management with the included self-adhesive bracket to ensure that it doesn’t move and get disconnected during use.
Congratulations. The heatbed cable of the Bambu Lab X1 is now replaced, and you can re-install the back panel. Take note that there are a few plastic screws that need to be re-installed (9, 11, 13) so don’t overtighten them, to avoid damage, just like you did on the purge bucket.
Manual Bed Leveling
After you have performed this heatbed cable replacement, the bed will not be correctly leveled and you will need to adjust it again, before calibration. I won’t go into the details as this wiki article from Bambu Lab explains it in detail and it’s very easy to do.
Don’t skip this step as it’s very important if you want to ensure good printing results.
After you perform the leveling process, you can start a full calibration of the printer, and if it’s completed successfully, you are good to go!
Wrapping up
I hope this guide on how to replace the heatbed signal cable of the Bambu Lab X1 was useful to you. I believe that the entire process is much quicker and easier to do compared to the official guide, so I would love to hear from you if this worked or if I missed anything.
Liked it?
|
|




Thank you for this. I got my printer on the tail end of Kickstarter and I got the force sensor 3 error weak signal cable about 3 months after owning it. It’s actually the only problem I’ve ever had with it besides snapping off the top of the AMS roller holder top piece which I fixed with super glue but they sent me a new AMS but it was barebones. I fixed the original with super glue but anyways, I was always able to fix that force sensor 3 error by loosening the nut under force sensor 3 and retightening it and then tapping on the bed or banging on the bed on the corner where force sensor 3 is which is the front right of the printer. Then I would stick my fingers all the way into the back of the printer near the Z lead rod and wiggle the wiring around and the error would go away sometimes for months at a when it first happened I put in a ticket to support they answered within 24 hours then 2 days later I had the brand new cable shipped to my door but since I made the error go away most of the time I never tried to replace it and they gave me store credit to fix it myself. Well 3 days ago I could not get the error to go away no matter what I tried and I came across your instructions and it made the job so much easier.I did not have to take the power cables out and disconnect them out of the connectors. I basically notched out that same little bracket piece that you did with filament cutters that come with basically every printer. Getting the old wiring out was a little difficult because of all the three Benz and sharp turns that it takes but I was going to get it out of there one way or another or even if I had to pull so hard I would have ripped the end of the connector off but it did come out in one piece. I took off the tape for the wiring loom ran the new cable through there and ran it up and threw the three different holes and connected it and I used double-sided tape and regular tape to keep it sturdy and in place on the heat bed supports. Then I pulled all the slack out trying to be careful because I know these wires are very flimsy. I put everything back together then forgot to put the stupid clip on to the bottom of the purge shoot. Once I got everything routed correctly, I left the back panel off and did a test run and noticed that the printer would bottom out really hard when I made the bed go all the way to the bottom after homing and it would make a really bad noise. It only did that twice I’m not sure why. But I unplugged it put the back panel back together then recalibrated the printer. It hasn’t made that noise again when it goes all the way to the bottom but I should have checked how tightly the wiring gets when the bed is all the way to the bottom that’s one thing I forgot to do to make sure that the cable isn’t going to get ready to snap out because I would hate to have to do this again because it was a major pain. I don’t think they intended for regular people to be replacing this specific cable. I think replacing anything else would have been much easier on the printer but thank you for this article it probably saved me $50 or more steps and a lot of time. I started off modifying and working with Creality printers so this wasn’t anything new but it was the most involved job. They only gave me $50 store credit which knowing how much work had to be done to do it it should have been a lot more than that. I ended up getting a completely loaded 0.2 mm nozzle since I had all the other nozzles and spare normal size 0.4s and I also got the black textured PEI plate which is now discontinued I believe and that only lasted 6 months and they refused to warranty that because they said it was consumable so I bought five aftermarket plates on Amazon that have been holding up well. I don’t remember if I said it but I have had the printer since September 2022 and I have well over 4,000 hours on it. I would have more hours on it but I stopped printing for 4 months and then again for another month. This thing is a beast and still runs like brand new and it has been the only brand that has been consistent and never requires any tinkering. If I wanted to tinker I would have bought another Creality or built a Voron. It’s funny that I got the smart pro and a CR5 pro high temperature version that cost more than the X1C 2 months before my bambu x1c came in. I think I used the Smart pro probably like 20 times in over 2 years and the CR5 pro high temp I have used probably 5 to 7 times and I just traded it a few months ago and the guy had nothing but a headache with it which I didn’t know about but apparently the fan was dying so I sent him new ones and Creality actually honored the warranty even though I sold it and it was over 2 years old at this point for the two linear bearings that go up on the rods and they are inside this plastic block that you can’t just buy, you can only get it from customer support and also the extruder gear had seized up and there was a couple other minor issues but he fixed everything on it so it worked out and we became friends. Hey boned about 40 printers in the last 7 to 8 years. 20 of them I believe were Creality. Some either had a major malfunction within 30 days like the fans dying on the heat block or something else major like nothing sticking to the bed no matter what to some being dead right out of the box. My buddy that I traded the CR-5 too he got a used k1 for $250 and it was probably only used like 10 times and the guy that bought it had no idea how to use apparently it worked fine for a few months then it started having all kinds of problems. I don’t want people to look at this and say oh he’s a bambu Fanboy but after my experience with all these other printers and then comparing it to the X1C that required nothing up until recently after 2 years which was just a signal cable is pretty impressive and I’m still on my original nozzle and I still could have been on my original filament cutter because when I did the major maintenance overhaul recently I took it out and although it still looked new and was extremely sharp I just replaced it anyways because it came with three spares. Still on my original extruder as well and that’s never jammed up even with all the abrasive filament I’ve ran through that and the hot end very impressed. I got the Kickstarter bundle package for a dollar which gave me the larger size nozzles for free and spare 0.4 mm fully loaded nozzles and a spare extruder. Then quite a few months ago they did a promotion where if you were a Kickstarter back or you got four full rolls of filament which were phat-cf petg-cf and two other carbon fiber ones I can’t remember for only $10 shipping. This has been the best investment so far and I’ve had many printers that cost much much more than the X1C that failed hard and quickly. I don’t know anything about the k1 Max but maybe they ironed out some of the flaws in that model, I’m not sure.