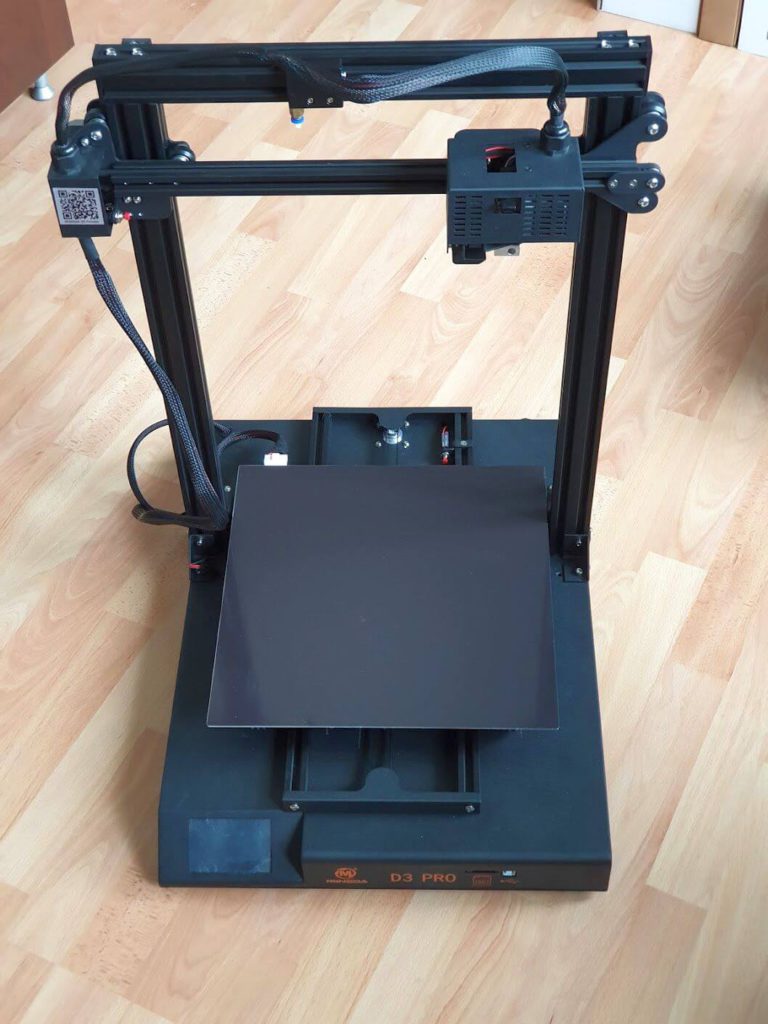
Mingda D3 Pro Review: Sidewinder X1 Alternative
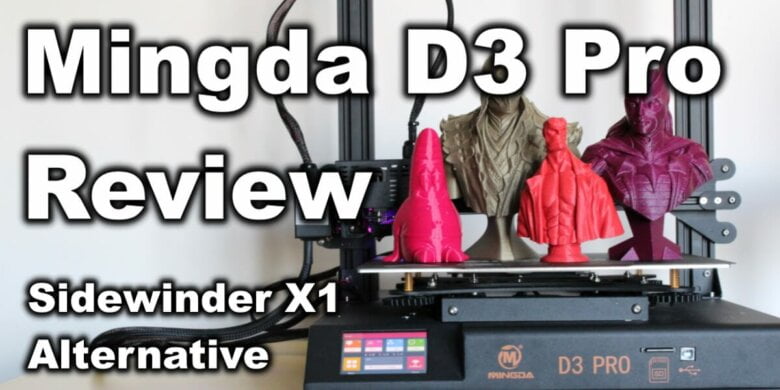
I was browsing AliExpress and I found the Mingda D3 Pro, which looked like a good Sidewinder X1 alternative with more features. I didn’t know about Mingda, but I learned that they have some experience with building industrial 3D printers for a while.
Let’s see if the Mingda D3 Pro lives up to the expectations, and if it’s worthy of your attention.
Mingda D3 Pro Shipping and Packaging
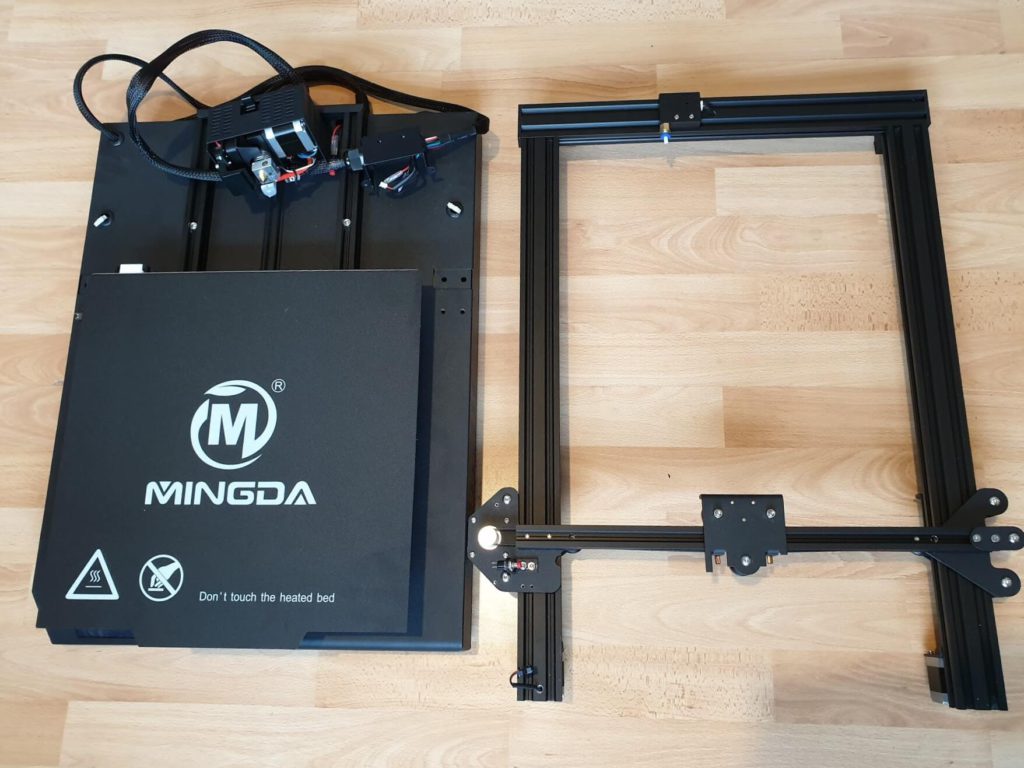
I ordered the Mingda D3 Pro from AliExpress and it was shipped from the Czech warehouse. It was delivered in 6 days (including a weekend) which is fast. The printer is well packed in a cardboard box and all the components are well protected.
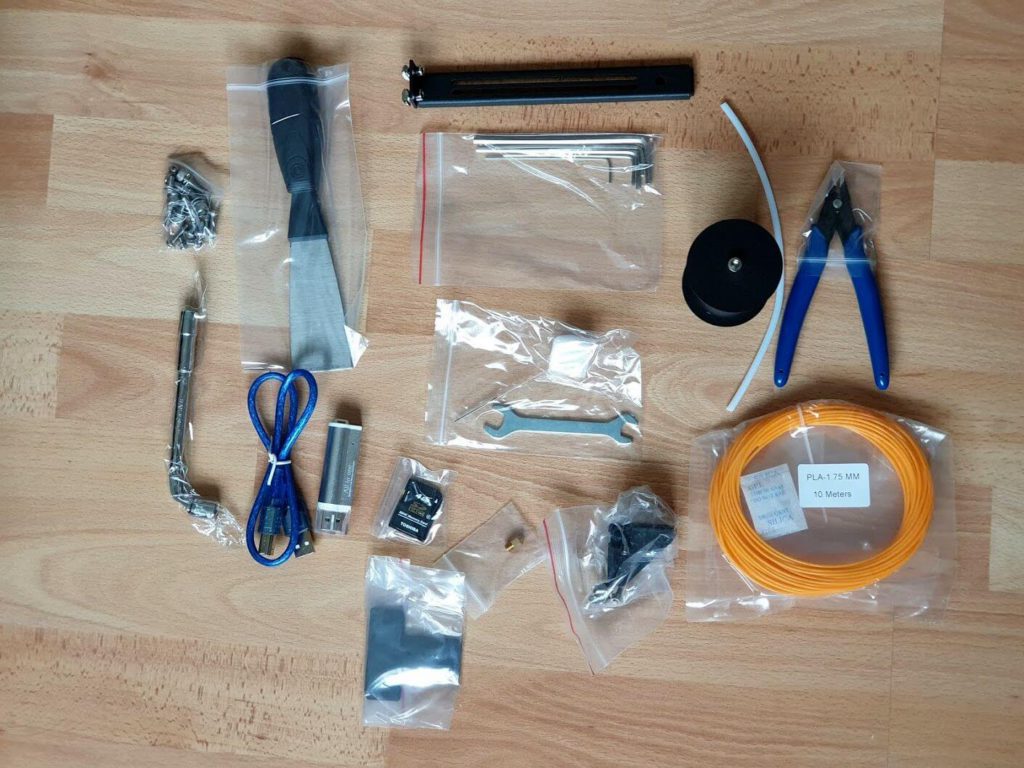
With the printer you also get a box with accessories:
- Installation screws
- Tubular wrench for nozzle changes
- Spatula
- USB cable
- 4GB Toshiba SD Card
- Card reader
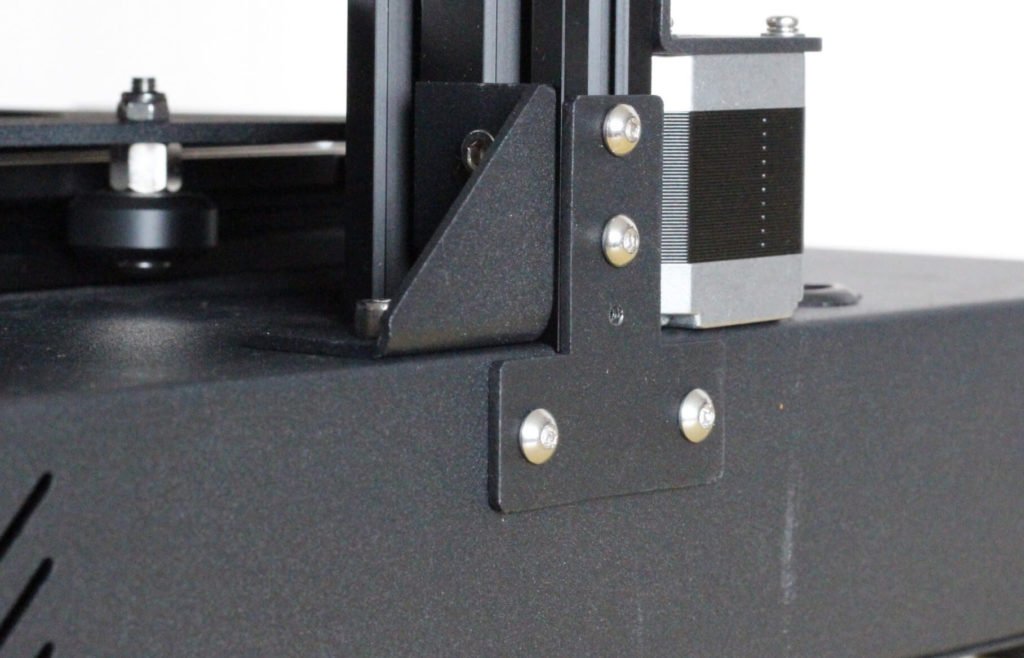
- Corner brackets and T brackets for the Z axis
- Spare 0.4 mm nozzle
- Wrench for tightening the eccentric nuts
- A set of hex wrenches
- Piece of spare PTFE tube for the hotend
- Metallic spool holder
- 10m of PLA
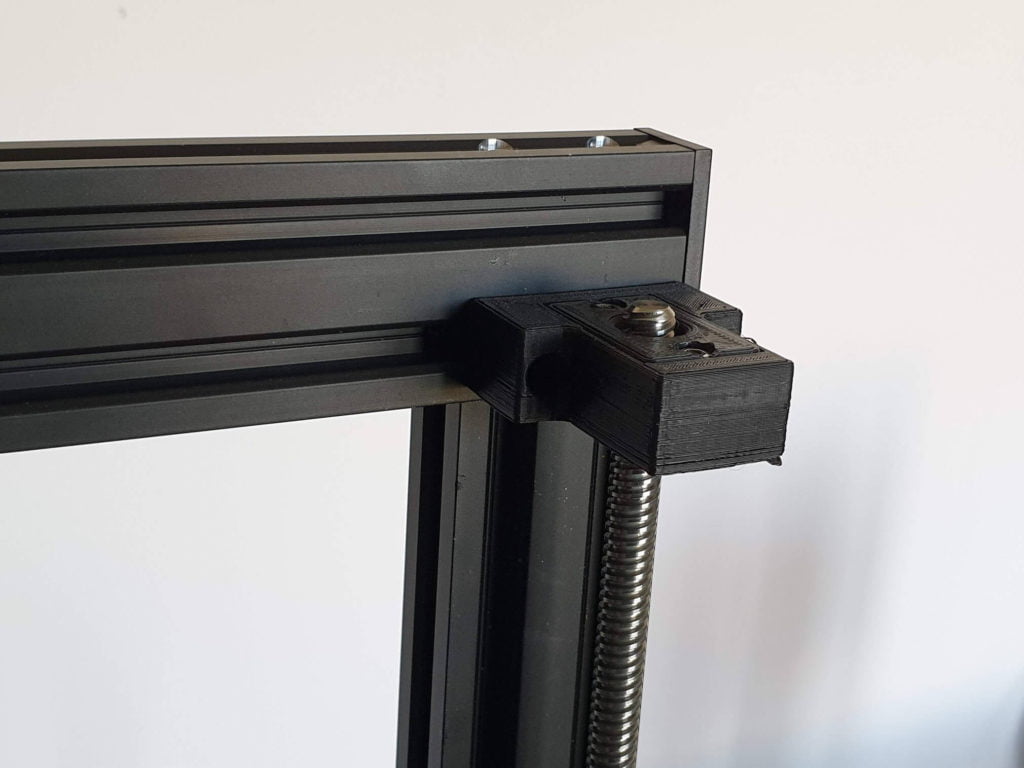
I like that they include a tubular wrench to easily swap nozzles if needed. Besides the regular installation screws, you also get a pair of corners and brackets to install on the bottom of the gantry to help with its stability.
On such a big printer, you can easily get Z wobble considering the spool holder is on top. These additions to the Z axis make the whole printer much more stable during printing.
Assembly of the Mingda D3 Pro
It took me around 60 minutes to completely assemble the D3 Pro. The printer comes mostly pre-assembled, but I always take my time to make sure everything is installed correctly to avoid issues.
Before you start, make sure you take the SD card included with the printer, and check out the installation guide to follow the steps. They include a detailed manual which helps with the installation process.
For any kind of printer you get, it’s important to do some checks while assembling:
Check all the wheels
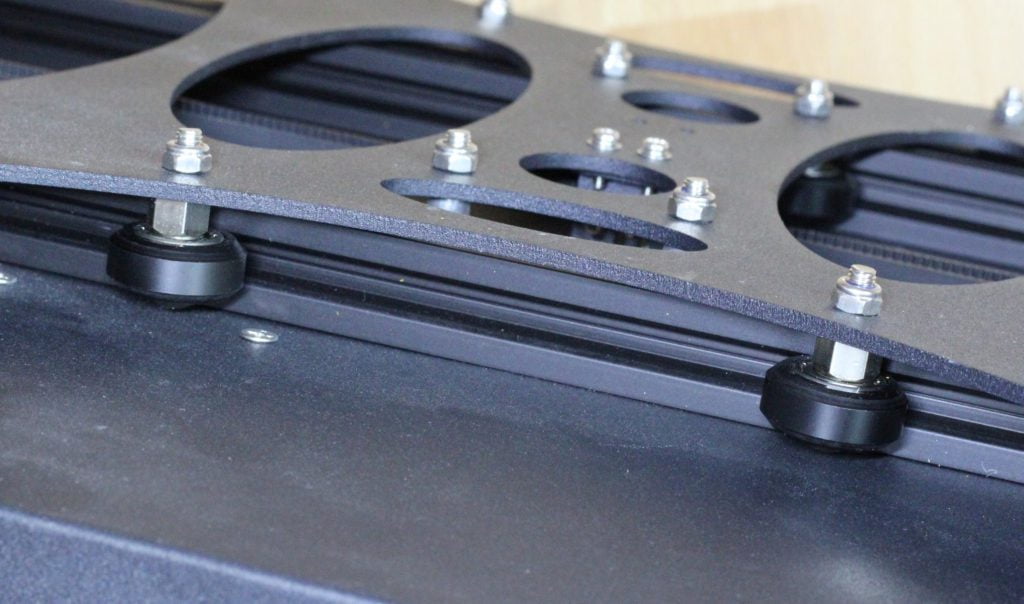
The first thing I check on a new printer are the wheels. They should be tightened just right. If they are loose, issues can show up on the prints and if they are too tight, the wheels will develop flat spots.
I tighten the wheels using the eccentric nuts just enough so they don’t slip when I try to turn them manually. This ensures the wheels are correctly tightened and the movement is smooth.
The three main locations where you can check this is the bed, the hotend and the Z wheels. If the wheels are properly adjusted, then you can proceed to the next step.
I checked all the wheels on the Mingda D3 Pro and most of them were ok, but needed a slight adjustment. The extruder bottom wheel was a bit too tight.
Ensure the frame is square
Another important step in getting quality prints is making sure that the printer is square. After I install the gantry on the base, I level the X gantry using two 3D printed supports. When both sides of the X gantry sit flush on the supports, I then double check the wheels to be properly tightened onto the Z extrusions.
Next, I manually raise the X gantry to the top of the printer. The movement should be smooth and there shouldn’t be any kind of difference in the tightness of the wheels. If there is any play, or the wheels are too tight on the top, I loosen the top screws a bit then tighten them up again.
By doing this, you ensure that the Z extrusions are parallel and the movement on the Z axis is not impacted.
Mingda D3 Pro Specs
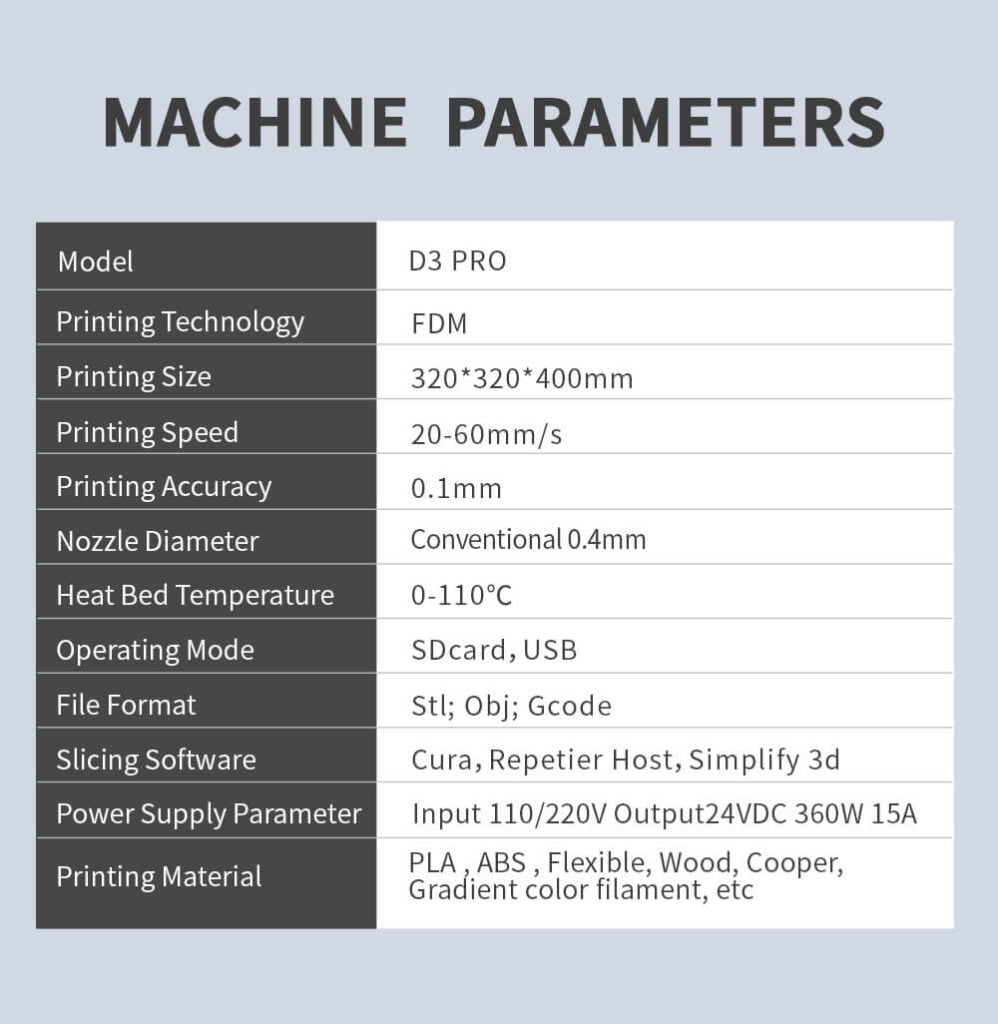
You can find the complete spec list in the image below:
Large build volume with removable build surface
The Mingda D3 Pro has a build volume of 320x320x400 which is larger than the popular Sidewinder X1. The size of the bed should be good enough for most of the people who are looking for a large format printer.
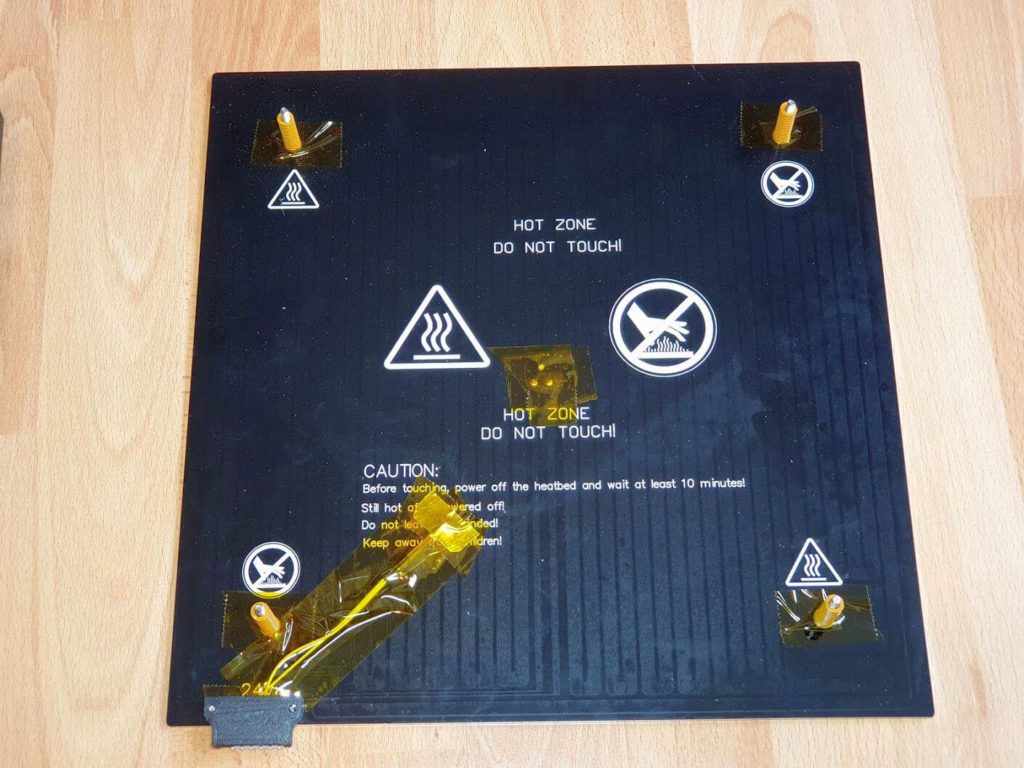
The heated bed is a 3mm aluminum plate with DC 24V power and uses a connector. There’s also a small 3D printed bracket to hold the connector and avoid issues, but unfortunately it does not have a strain relief for the cable. Fortunately, it should be easy to do a 3D printed adapter which will offer extra protection to the wires.
For some reasons, the bed thermistor is not located on the middle of the bed, but I didn’t encounter any issues with the temperatures so I guess that’s fine.
On top of the heated bed there’s a magnetic surface which is really flexible, and can be compared to a quality mouse pad. The top surface is similar to buildtak and adhesion is great. PLA and TPU can be printed without hating the bed. Prints can be removed easily after completion by peeling of the bed surface. The magnets are powerful and keep the surface flat with ease.
It can easily be upgraded in the future with a custom Flexible PEI Spring Steel Sheet while using the stock magnetic surface included with the printer but for regular materials I don’t really see a reason to do it.
The heatbed reaches 60C in 3 minutes and 90C in 13 minutes. It’s not as fast as an AC powered heat bed but it’s fast enough in my opinion.
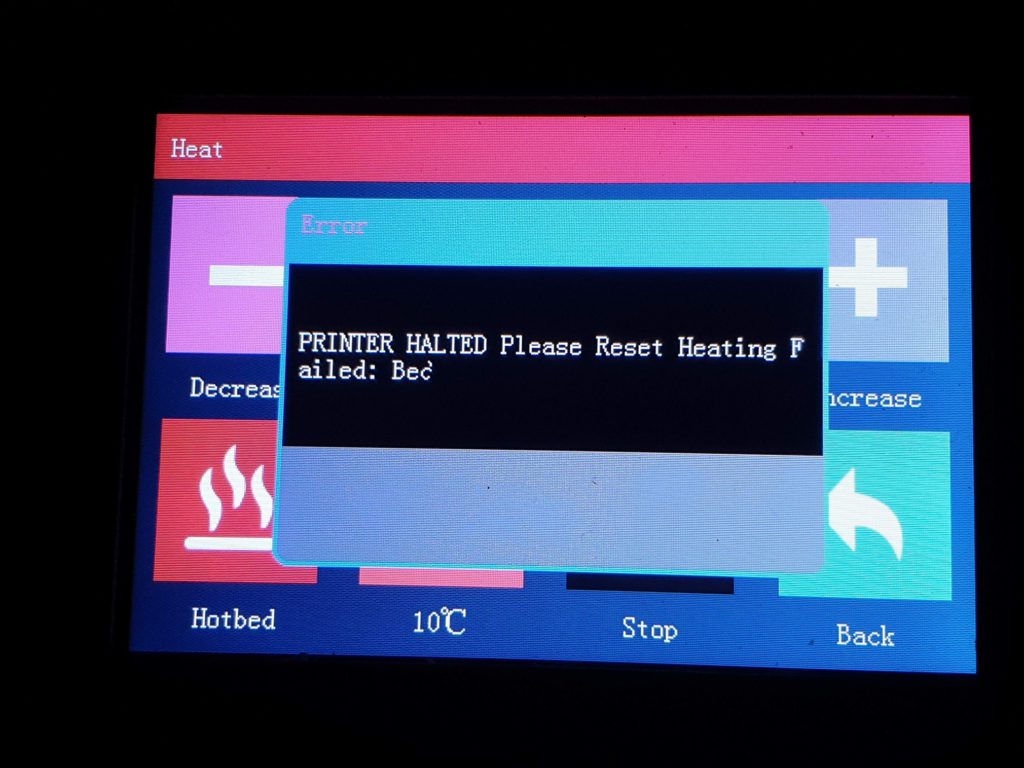
Unfortunately, the bed cannot reach 100C without triggering the thermal protection because of the lack of insulation under the bed.
There’s no insulation under the bed which increases the time required for the printer to reach the correct temperature and it will increase the overall power consumption of the printer. The good part is that an insulation pad is just a few dollars on Aliexpress so the bed can be easily upgraded.
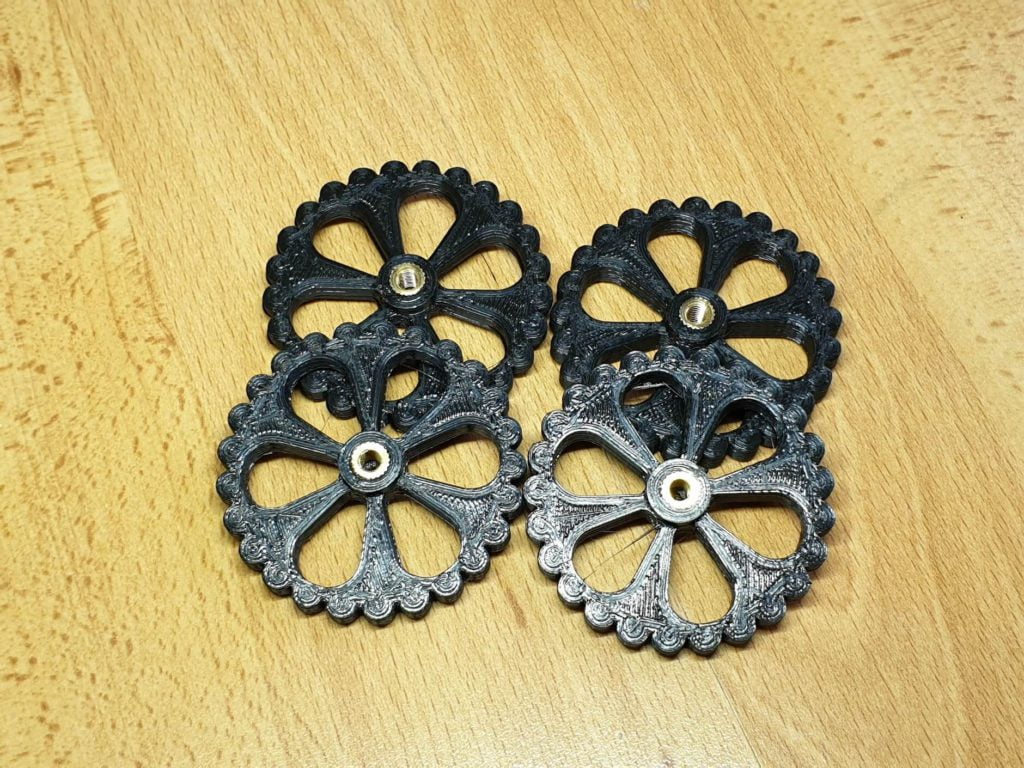
The bed can be leveled using the four 3D printer knobs. Some of you might not like the 3D printer knobs, but they do their job and I don’t have any issues with this.
Unfortunately, the springs used on the bed are a bit too soft and when leveling the bed, the screws might turn making the first leveling a bit hard to do. This is caused by the lack of four nuts which should be tight against the bed to keep the screws in place.
You can fix this by adding four M4 nuts and washers, or just compress the springs a bit and turn the wheels until there’s enough pressure so the screws don’t spin anymore.
Direct drive extruder
A lot of new printers now come with a direct drive extruder and the Mingda D3 Pro has something similar. This gives the machine better filament control, and it is easier to tune a printer profile for it.
The extruder is not geared but the performance is ok. It uses a metal extruder so no need to worry about its longevity (compared to the plastic lever found on the X1). The filament gets extruded well and it’s really easy to load filament.
A piece of metal bracket is sandwiched between the extruder and the motor which means that if you are planning to ever upgrade the extruder to a BMG Wind, or something similar, this should be a relatively easy upgrade.
The MK8 hotend has a threaded tube which screws into the extruder. The lower part of the threaded tube has a small V6-like heatsink and acts like a heat break. You can reach 210C in about 1 minute which is pretty fast.
It’s a PTFE lined hotend which means that there’s a PTFE tube which goes right up to the nozzle. With this setup, the hotend is capable of safely working up to 240C without damaging the PTFE tube and I don’t really recommend going past this temperature.
As you can see, the whole extruder assembly is beefy. It’s not what you would call a compact extruder and it’s not that light either. You won’t be able to print really fast without ringing artifacts on your prints. But the hotend is also a regular size, and not a Volcano which is another limiting factor when it comes to speed.
I am not looking to push my printer too hard to save a few minutes for a print, because I am always looking to get good prints instead of fast prints. 60mm/s is possible for some prints without too much tweaking.
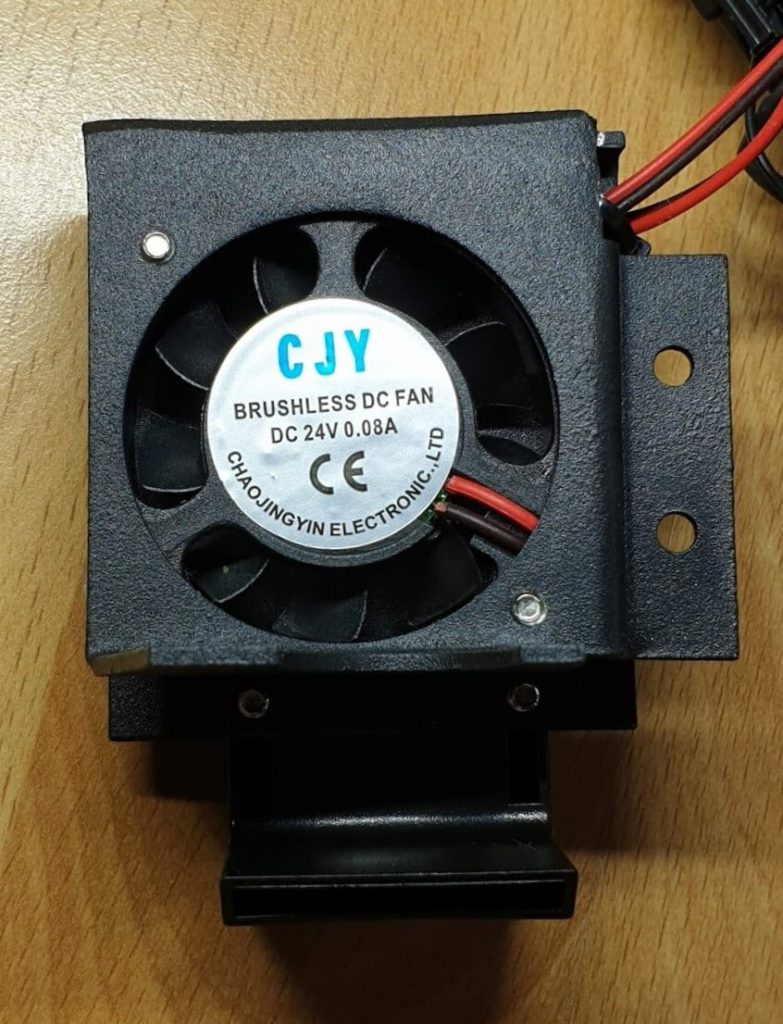
The whole hotend assembly is kept cool with a 4010 fan which blows air to the hotend heatsink and also the metal extruder to help dissipate heat more effectively.
The part cooling fan is a small 4010 radial fan, which is also silent but doesn’t push a lot of air and the fan duct doesn’t help too much. Even so, cooling is ok but it can be improved significantly with a more powerful fan, or even a 5015 fan (with some alterations to the extruder assembly).
Auto bed leveling
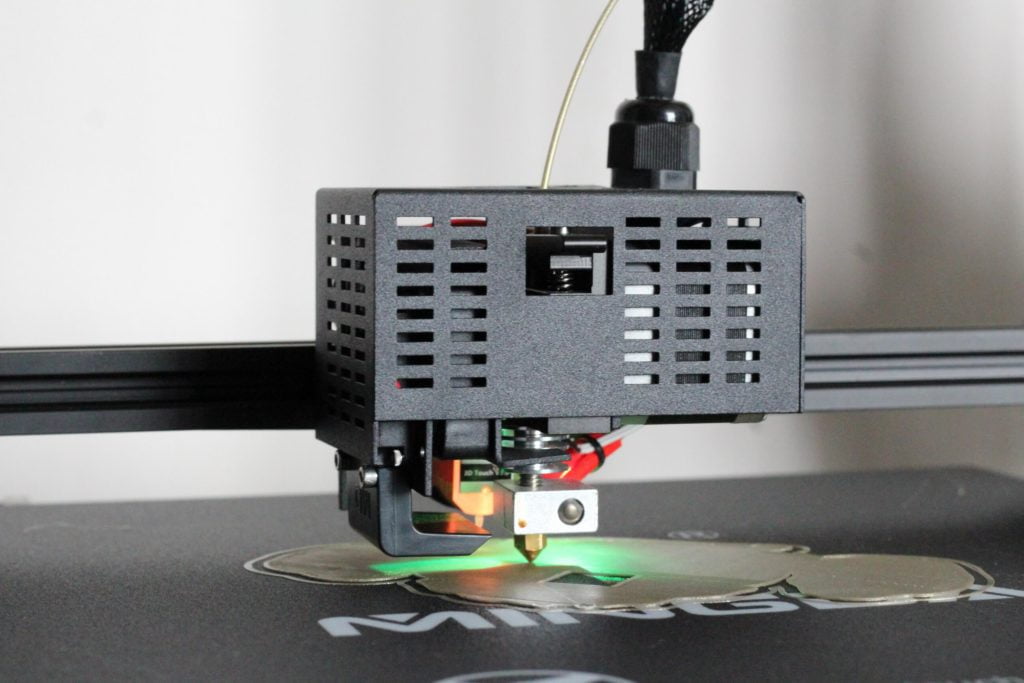
I’m happy to report that the Mingda D3 Pro also comes with auto bed leveling. This feature is provided by the inclusion of a 3D Touch sensor (BLTouch clone) which probes the bed in 9 points then compensates for any uneven spots.
It’s located right behind the hotend and its correctly installed using springs to avoid any damage if a print fails. Accuracy is good, and it worked flawlessly during my time with the printer.
Next to the nozzle there’s also a nice RGB LED light which is helpful when calibrating your first layer. Its position is not the best but this can easily be solved with a 3D printed mount if needed.
Because the D3 Pro includes the 3D touch sensor, I will surely do the bed leveling mod I did on my Artillery printers. That way, the bed will be 100% stable and any inconsistency will be compensated by the sensor.
32-bit board with silent stepper drivers
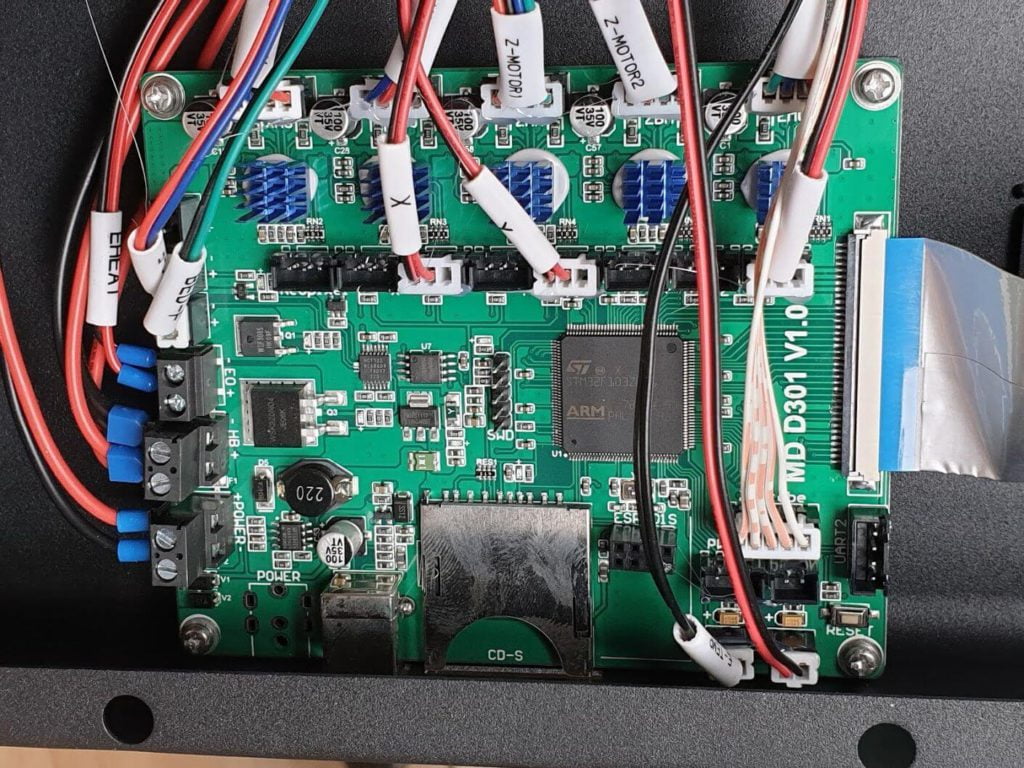
The Mingda D3 Pro comes with a proprietary 32-bit board which uses 5x TMC2208 silent stepper drivers. Unfortunately, the stepper drivers are soldered to the board but this might not be such a big issue for most of the users. All the wires are correctly crimped and properly tightened.
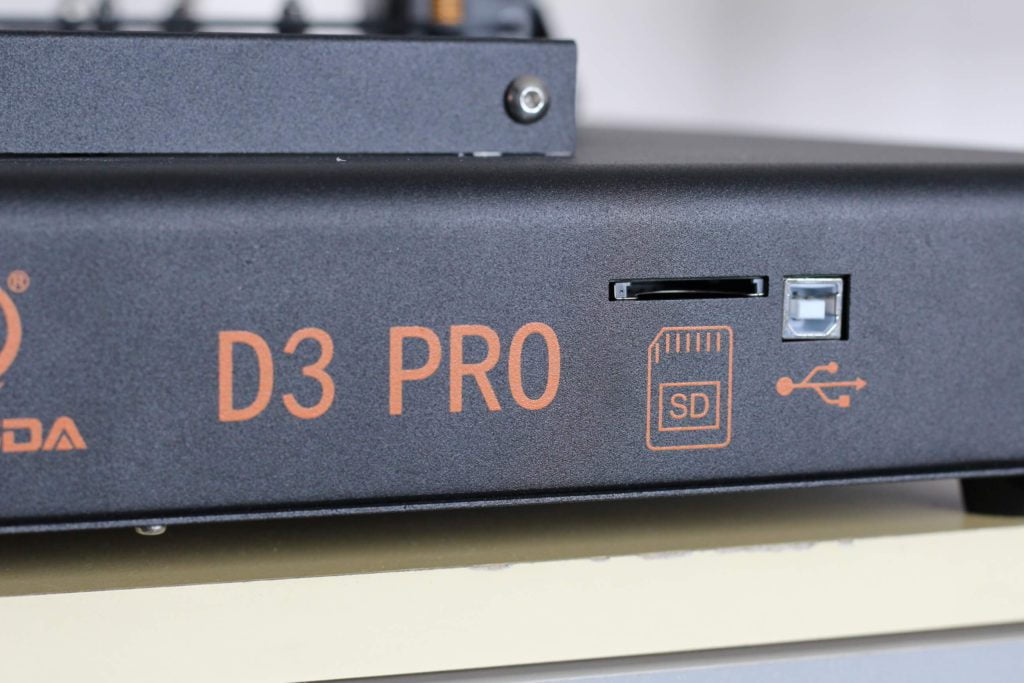
My favorite thing about this board is the possibility of using SD cards instead of the small microSD cards most printers come with. Besides that, the SD card slot is oriented in the front of the machine for easy access. This is a thing more 3D printer companies should do.
There’s also an ESP-01S slot where you can install a Wi-Fi module if you want, but usually the functionality of these adapters is not that great. The transfer speed is limited, so if you are looking to add Wi-Fi capabilities to your printer, then an Octoprint server would be better.
You can learn about this in Teaching Tech’s video.
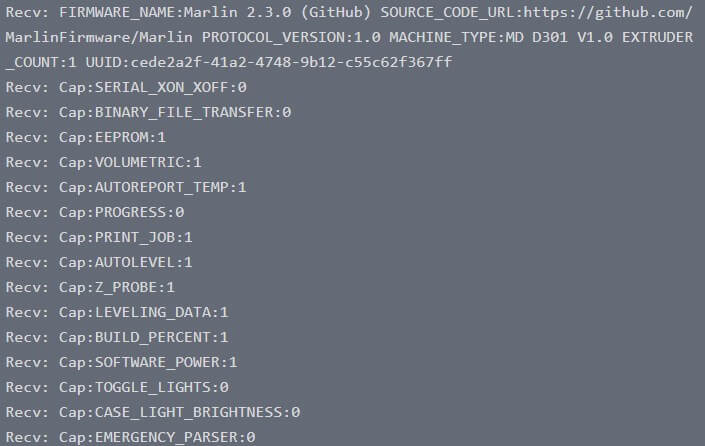
Marlin 2.3.0
It’s nice to see that the Mingda D3 Pro comes with a relatively recent version of Marlin, and it also includes the safety features. Besides that, S Curve Acceleration and Linear Advance is also enabled in the firmware, although LA has a value of 0.
TMC2208 drivers don’t work well with linear advance and the extruder motor stalls during printing so I recommend you don’t calibrate it.
EEPROM is also unlocked, so it’s easy to change settings if you need to.
Excellent touch screen with M600 support
I love the touchscreen included on the Mingda D3 Pro. It’s responsive and fast, and the interface looks remarkably similar to the TFT screens from BIGTREETECH.
It lacks the possibility of sending G-code commands like on the BTT TFT screens but otherwise it offers all the functionality you would expect for controlling the printer.
I noticed that for some reason, the bed measurements during ABL are not stored on the printer, so after a reboot, you need to re-level the bed. You can include the G29 command in your start G-code and the bed will be probed every time you start a new print. If you add the G29 S1 Z2 command to load the previous bed leveling, the printer will not start the print.
The probing sequence takes less than a minute, so not a big issue and probably will be fixed in a later firmware update. I will also work on a new firmware with the latest Marlin version which will include this.
Besides this, I also noticed that the LED control to select different colors does not work, and I got confirmation that the RGB led is not controllable.
I’m also happy to report that M600 command is supported out of the box. You can easily perform filament changes by adding the layer change command into your slicer. Prusa Slicer is the easiest way, but you can also do it with IdeaMaker.


My IdeaMaker profiles already have the M600 command set up, so it’s just a matter of setting the Pause at Height point in the Other tab, then start the print. When the printer reaches your defined layer, the nozzle will be parked and it will wait for you to change the filament, then it will continue the print.
Dual Z axis with no sync belt
There’s no surprise that the Mingda D3 Pro comes with dual Z axis considering its size. Unfortunately, it doesn’t include a sync belt to keep the stepper drivers coordinated or any anti-backlash nuts.
It’s really important to keep both sides of the gantry at the same height for good results and unfortunately the Mingda D3 Pro has a few issues. If the Z steppers are not engaged, and for example you want to change filament, then the Z steppers can get misaligned.
Generic power supply with thermally controlled fan
The power supply is a generic 360W unit, so no name brand like MeanWell. But I like that it includes a thermally controlled fan. When the printer is idle, the fan is off. When you start to heat the bed / hotend, the PSU fan will start spinning then lower its speed when there’s less load.
This is great and more 3D printer manufacturers should do this because it makes the printer more silent.
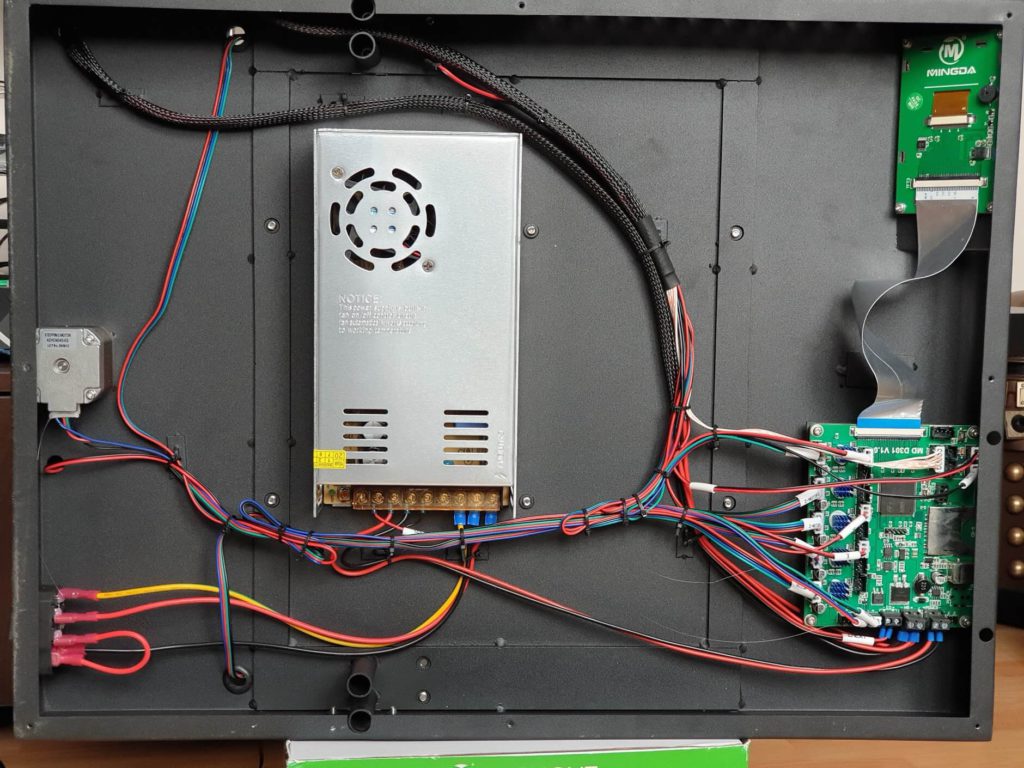
As you can see, the inside of the printer is nice and clean. Wires are properly managed and surprisingly, there are no fans to cool the board. I haven’t encountered any skipped steps or layer shifts so probably the cooling is good enough.
There’s ample cutouts over the board section and the power supply blows the air out from the printer creating a negative airflow inside the case.
Adjustable Y belt
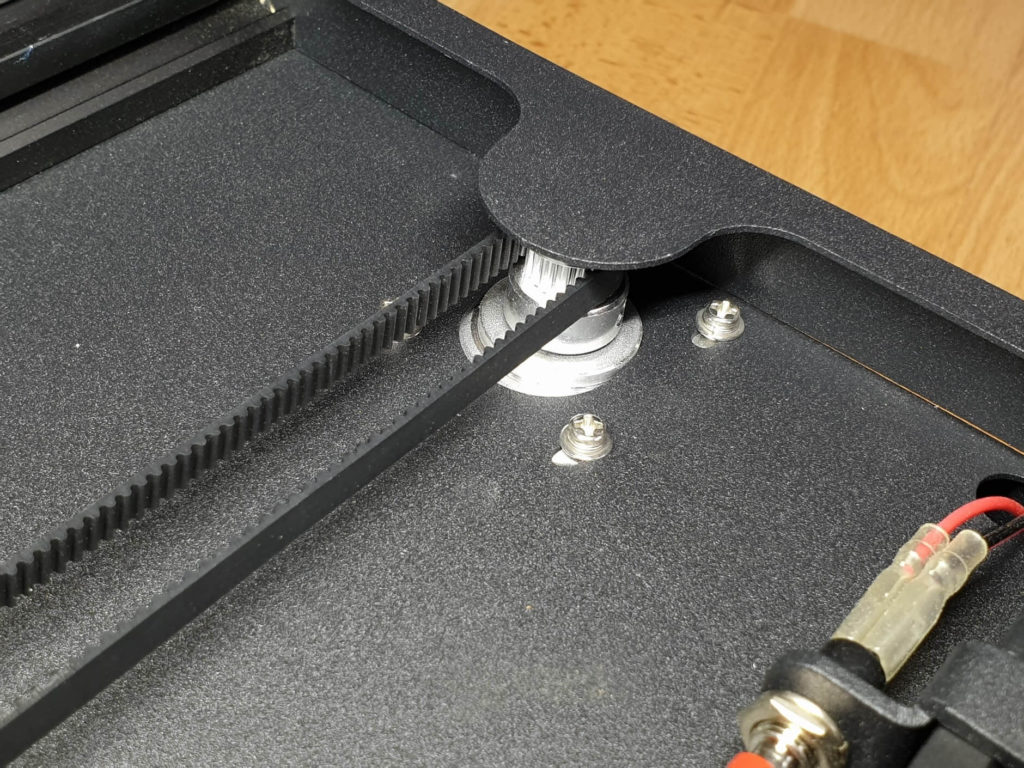
The Mingda D3 Pro doesn’t have a regular belt tensioning knob in the front, like other printers. Instead, the Y axis stepper motor can be moved a bit to increase the tension of the belt.
On this printer, the belt was a bit loose even with the motor moved right to the back, but it was a simple fix. I just loosened the stepper motor, added a small zip tie on one end of the belt then tightened it. Belt is now properly tightened and movement is good.
The length of the belt can be a bit different between printers because of the way the belt ends are crimped so maybe others will have better luck with it. Either way, this was fixed in about 10 minutes.
Relatively silent operation
The Mingda D3 Pro is silent when idle. The extruder fan doesn’t make a lot of noise and it’s almost inaudible from a few meters away from the printer.
During printing, movement is silent and the main fan you will hear is the one from the power supply. As I previously mentioned, the fan ramps up from time to time when there’s a bigger load, but nothing major. I’ve seen other printers which are much louder.
Compared to the Sidewinder X1, the printer is just a bit louder but this is only because of the PSU fan. Anyway, not really an apples to apples comparison because the X1 uses a fanless power supply and it has an always on case fan which adds to the noise.
Nozzle quality is decent
This is the stock nozzle which comes with the Mingda D3 Pro and the quality is good. Not as good as other nozzles listed in the Ultimate 3D Printer Nozzle Comparison, but overall, it’s decently machined and it performed well during my time with the printer.
If you ever want to upgrade your nozzle, then the Trianglelab MK8 Brass Nozzle is a bit better than the stock one.
Mixed feeling about the wire management
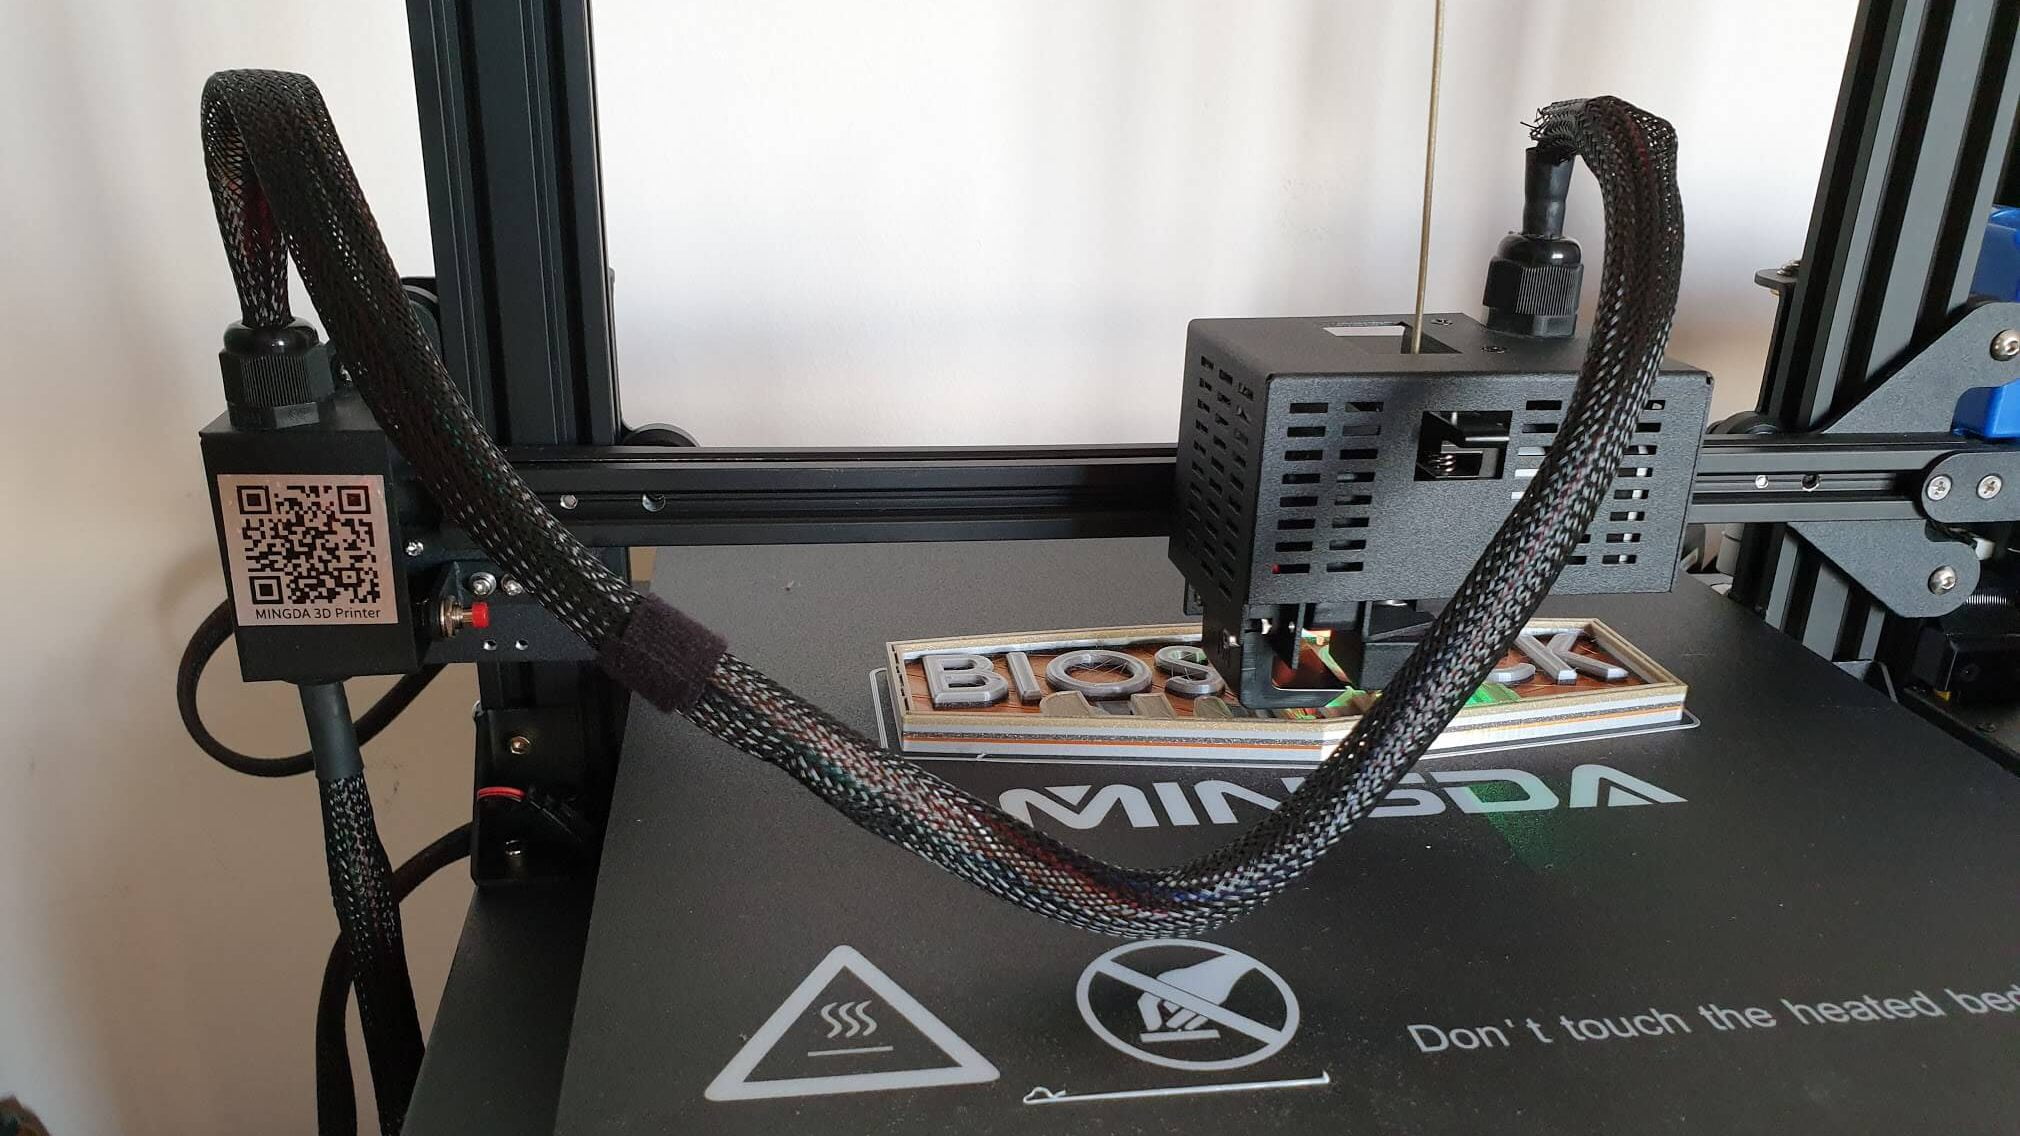
As you probably noticed, the Mingda D3 Pro has a different wire management solution compared to other printers. It’s not as clean as the Sidewinder X1 with it’s ribbon cables, but it looks ok. All the wires are sleeved, and they have a bit of strain relief but there’s nothing to keep them “tensioned”.
The bed and the Z axis wires are probably fine, but the wires going up to the extruder need some kind of support. If you don’t support the wires somehow, they will start drooping over your prints and this can cause issues.
Fortunately, there’s an easy fix. You could get a retractable access card clip which will be mounted on top of the printer.
Bad spool holder
Unfortunately, the spool holder included with the Mingda D3 Pro is not that good. Although it’s made of metal, the spool arm is really thin and when you add a full spool on it, it gets flimsy.
Besides that, the included metal spool roller can only take spools up to 75 mm in width. Most of my spools are wider and they did not fit properly on the roller. But with thinner spools this could work.
This caused some less than ideal printing situations because with a heavy spool and high friction, some extrusion issues could be noticed on some of my prints. I recommend you print an upgraded spool holder as soon as possible.
IdeaMaker profiles for Mingda D3 Pro
During my time with the printer, I also tuned three IdeaMaker profiles for the Mingda D3 Pro. These profiles are tune for the stock printer and worked well for me. If you are looking to give them a go, then feel free to download them from the links below:
Mingda D3 Pro IdeaMaker Profile – PLA – 3DPrintBeginner
Mingda D3 Pro IdeaMaker Profile – PETG – 3DPrintBeginner
Mingda D3 Pro IdeaMaker Profile – TPU – 3DPrintBeginner
As always, you might need to tune the flow rate according to your filaments. You can follow the Flow Rate Calibration article in order to do that.
Test prints on Mingda D3 Pro
3D Benchy
I always start my tests by printing a 3D Benchy. It’s the easiest way to determine what kind of settings I need to adjust on my slicer profile to improve the quality.
As you can see in the images below, the quality is ok for a first print but there’s some stringing present, the flow rate is a bit high and cooling is not that great.
- Material: Sunlu Gray PLA
- Layer Height: 0.2
- Nozzle Temperature: 205C
- Bed Temperature: 45C
- Print Speed: 50 mm/s
Calibration Cube
With my settings tweaked, I did a flow rate calibration and printed a calibration cube. The print quality increased and I think this is a good start.
A small amount of ringing is present (due to the weight of the extruder) so I also tweaked the acceleration settings a bit before moving to the next print.


- Material: Devil Design Gark Gray PLA
- Layer Height: 0.2
- Nozzle Temperature: 205C
- Bed Temperature: 45C
- Print Speed: 50 mm/s
Hellboy
This Hellboy Bust from Eastman’s Patreon was the first real test print I did on the Mingda D3 Pro. It came out well, but I noticed a few banding / extrusion consistency issues which I first blamed on inconsistent filament, but the issue seems to be in a different place.
- Material: Devil Design Red PLA
- Layer Height: 0.12mm
- Nozzle Temperature: 210C
- Bed Temperature: 45C
- Print Speed: 50 mm/s
Scorpion
My second PLA print is this amazing Scorpion bust from Eastman, printed in Gold PLA. It came out amazing with close to no banding issues. My spool had about 300 grams of filament left, so I started to think that the banding issues is somehow related to the weight of the spool.


- Material: FilamentOne PLA Glint Gold
- Layer Height: 0.12mm
- Nozzle Temperature: 210C
- Bed Temperature: 45C
- Print Speed: 50 mm/s
Batgirl
The third PLA print is Batgirl from Eastman. It’s not as good as my Scorpion print because of small extrusion inconsistencies. I now blame this on the spool holder and the full roll of filament.
With a heavy spool and going through the filament runout sensor, there’s quite a bit of drag and the extruder seems to be impacted by this. I need to investigate this issue a bit more, but it will probably be fixed by using a different spool holder.
- Material: FilamentOne PLA Glint Purple
- Layer Height: 0.12mm
- Nozzle Temperature: 210C
- Bed Temperature: 45C
- Print Speed: 50 mm/s
BioShock Plaque
To test the M600 capabilities of the Mingda D3 Pro, I tried this BioShock plaque which was printed in distinct colors by changing the filament. Everything went perfectly and the printer performed as expected.
- Material: Eryone Silk Silver PLA, Sunlu Copper Silk PLA, FilamentOne Glint Gray and Gold PLA
- Layer Height: 0.12mm
- Nozzle Temperature: 210C
- Bed Temperature: 45C
- Print Speed: 50 mm/s
Patrick Star
I also tested PETG with the Mingda D3 Pro and as you can see, the results are rather good. I also got the same small extrusion inconsistencies but otherwise, the print looks great. Model is available on Alsamen’s Cults3D profile.
- Material: DevilDesign Pink PETG
- Layer Height: 0.15mm
- Nozzle Temperature: 240C
- Bed Temperature: 50C
- Print Speed: 50 mm/s
GPS holder for drone
To also test the TPU performance of the D3 Pro, I printed a pair of GPS holders for a drone. They are small prints, but I’m happy to report that the printer can handle it. Considering that the print was done at ~45mm/s, the results are acceptable.
My TPU could have a bit of moisture inside because the roll has been opened about a year ago. so maybe the printer can do better with a new roll of filament. I will upload more prints in the future.
- Material: DevilDesign Pink TPU
- Layer Height: 0.2mm
- Nozzle Temperature: 215C
- Bed Temperature: 40C
- Print Speed: 45 mm/s
Mingda D3 Pro future upgrades
The Mingda D3 Pro is already a good machine and capable of really nice prints, but I am planning to make a few small upgrades in the near future.
POM anti-backlash nuts
I am planning to replace the stock brass nuts with POM anti-backlash nuts. This will help keep the X gantry level and eliminate any kind of backlash. It worked well on my Sidewinder X1 so considering that they’re really cheap I see no reason not to install a pair.
Better spool holder
Because of the issues I encountered when printing with a full spool, I need to find a good alternative with smoother movement. I have a few Filler spool holders which are really smooth so I will give that a shot.
5015 part cooling fan with duct
Because I feel that the printer is held back by its part cooling fan, I am also thinking about upgrading the stock part cooling fan with a bigger 5015 fan. For now, I will try to do a simple mount for a fan but because my 3D modeling skills are bad, I might just install a spare BMG Wind I have laying around which will also make the extruder more compact and lighter.
Fixed bed mod
The Mingda D3 Pro already comes with a BLTouch which can compensate for any uneven section in the bed. I had a lot of success with my fixed bed leveling mod on the Artillery printers so I will surely do it on the D3 Pro. That way, the leveling will always be on point and no more messing with the bed knobs.
Bed insulation
I already ordered a piece of 310×310 bed insulation material. It’s just a few dollars and it should make the printer a bit quieter and power consumption will get lower. This is because the heat will be contained in the bed for a longer time so there’s no need to start the heater too often.
Conclusions: Is the Mingda D3 Pro worth it?
The Mingda D3 Pro is a good large format printer. It has a lot of features including a lot of upgrades already installed, but it’s also lacking in some aspects.
Compared to the popular Sidewinder X1, the Mingda D3 Pro has a 32-bit board with better touchscreen, larger build volume with a magnetic print surface, better Z brace with the inclusion of the metallic brackets, auto bed leveling with the 3D touch and no more ribbon cables some of you hate.
To get all of these extra benefits on the X1, you would have to spend a bit more money and time for upgrades, and considering the D3 Pro includes these from the factory, for a lower price is excellent.
I would have liked to see a Z sync belt and some heatbed insulation (features which the X1 has) but these can be added later if you feel the need for them. Besides the missing features, you also need to invest a bit of extra time to make sure everything is nice and tight on the printer, but I think it’s worth it.
The printer works well out of the box with no other upgrades, but with a few extra dollars and a printer spool holder upgrade you could make it even better.
If you are looking for a larger format printer, with a lot of upgrades and good print quality, the Mingda worthy of your attention
Update: Jan 2021
I’ve used the printer for around 200 hours then it remained idle for a few months. When I plugged it back and started a print, smoke started to come out and the touchscreen was blank. After opening the machine, I noticed that the CPU from the board had burn marks.
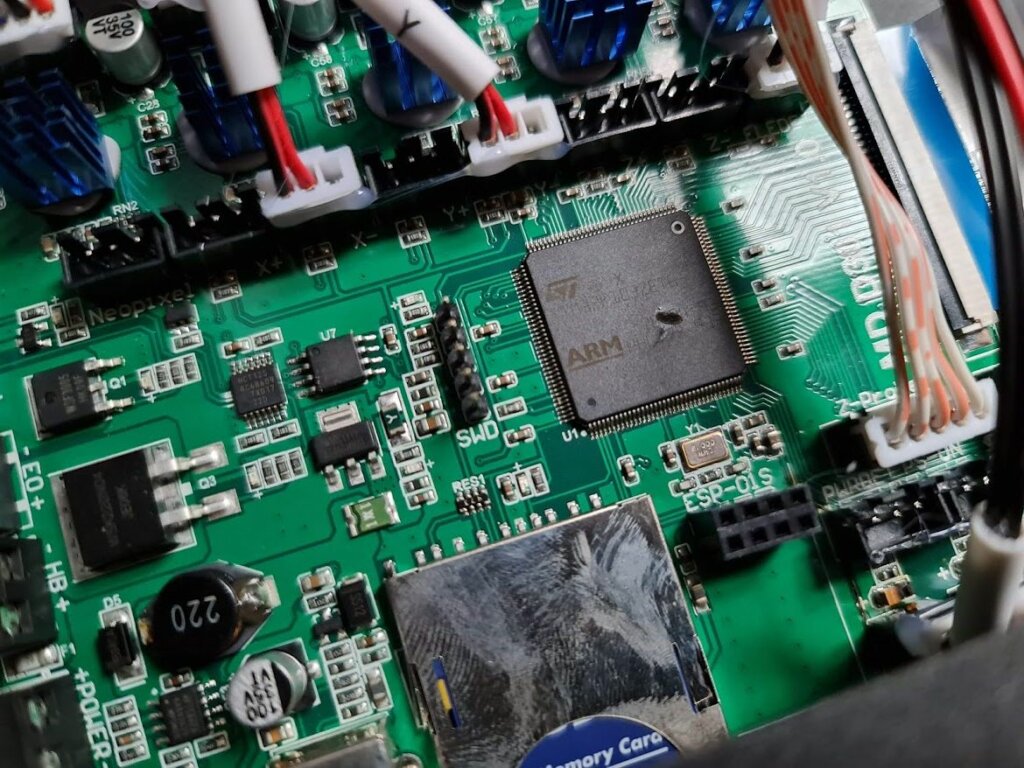
It’s the first time when something like this happened for any of my machines. I contacted Mingda to let them know about this and I had two choices:
- Send the board back to China and have it repaired.
- Purchase a replacement for around 60$.
This would cost me time and money, so I chose to leave the printer as is, planning to upgrade it soon with a SKR board.
Where to buy the Mingda D3 Pro?
You can purchase the Mingda D3 Pro from the following websites:
Amazon
AliExpress
I recommend checking out the Discount Codes page before purchasing. I regularly update the article with discount codes for various online shops, and you might find one for this particular model.
Support
If you have questions about the printer, or you are looking to get support, feel free to join the 3DPrintBeginner Discord server where there’s a dedicated channel for the Mingda D3 Pro and also their Facebook group. I would also love to hear what’s your opinion about this printer.
The Mingda D3 Pro was provided free of charge by Mingda for the purpose of this review. While the article includes affiliate links, all opinions are my own. Nobody reviewed the article before it was posted, following the Review Guidelines.
Liked it?
|
|


