Artillery Genius Auto Bed Leveling with Stock Sensor
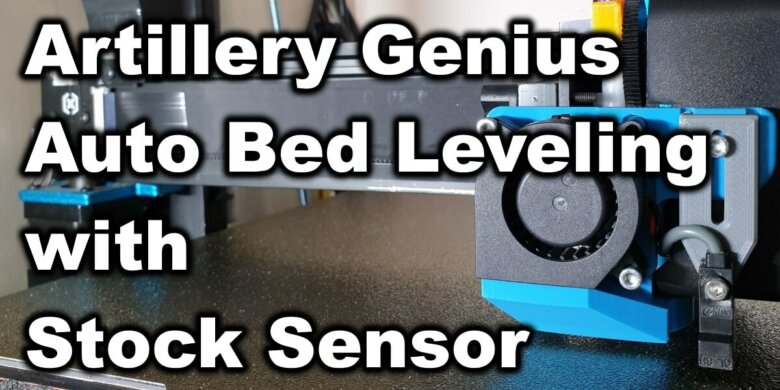
The Artillery Genius Auto Bed Leveling Mod came to live because not everybody wants to spend over 35$ for an Original BLTouch sensor, I thought it would be nice to see if I can use the stock inductive sensor. And after testing it, I can safely say it’s a good alternative.
Using the stock Z endstop, you can achieve Auto Bed Leveling on your printer without spending any money on a different sensor. Without further ado, let’s get to it.
Artillery Genius Auto Bed Leveling – Why do it?
You don’t really need Auto Bed Leveling. But it makes everything much easier and improves your 3D printing experience.
Normally, you would manually level your printer using the good old technique. Using a piece of paper you adjust all four corners of the bed using the bed leveling knobs underside. This works, but there were multiple reports of people receiving bowed glass beds where the middle of the plate is either too low or too high. This is where ABL comes to help.
Auto Bed Leveling will use the sensor to probe the bed in multiple points and generate a mesh. Then it will compensate for the unevenness of the bed for that perfect first layer.
Another benefit is the possibility of using the Artillery Bed Leveling Mod I covered in a previous article. This removes the springs under the build plate which are replaced with nuts to hold the bed firmly in place so you won’t have to fiddle with the bed for a while.
While this works fine without the sensor, adding compensation for the small uneven spots in the build surface will surely get rid of those first layer issues and a perfect first layer will always be possible without any fiddling with the printer.
Prerequisites for the Artillery Genius Auto Bed Leveling
Before starting the Artillery Genius Auto Bed Leveling mod, you need to understand a few things about how the stock sensor works.
The inductive sensor present on the Artillery Genius can only detect metallic surfaces. On the stock configuration, the sensor detects the aluminum extrusion and then stops the Z movement of the gantry.
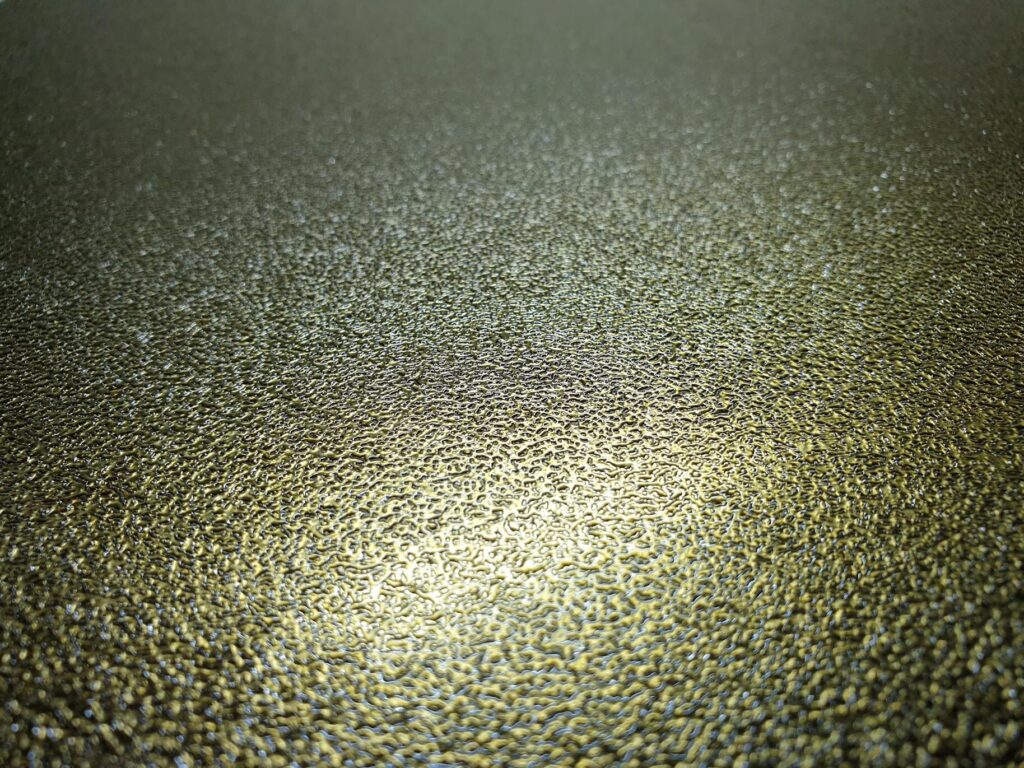
It is not possible to use the stock inductive sensor from the Artillery Genius with the stock glass bed because it will not be able to detect it, so you already need to have a spring steel sheet on the bed for this to work.
If you don’t already have one, you can check my review of the ENEERGETIC Double-Sided PEI Sheet You will need the 235×235 PEI size. There are other PEI spring steel sheets available like this PEI sheet from Banggood which can be used for the Artillery Genius.
The best dimension would be 230×230 but I could not find any in stock
Buying a PEI spring steel sheet will come with added benefits besides the free Auto Bed Leveling mod. You will be able to easily remove prints after they finish and adhesion is greatly improved compared to the stock bed.
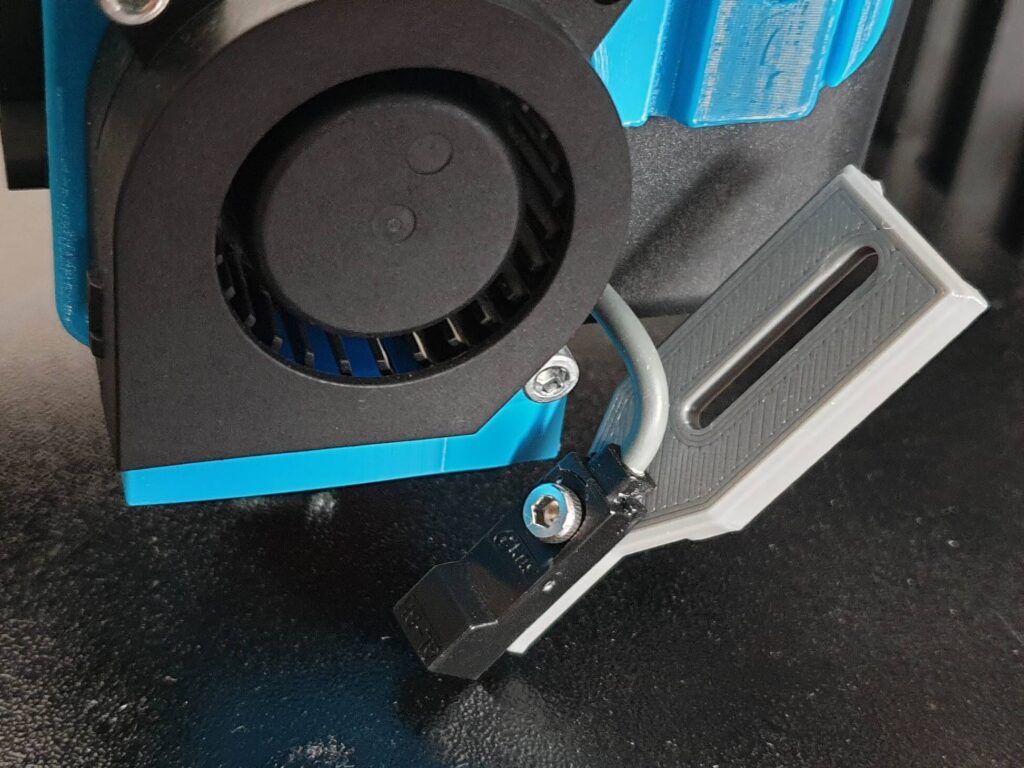
For this mod, you will need to download and print my sensor mount which works great with the Sidewinder X1 Waggster Mod BLTouch with improved Fan Duct I remixed from the awesome Waggstermod mount. Special thanks to Steve for his mounting solution. This mount also works for the Genius without issues.
Besides the PEI spring steel sheet, you will also need to flash the stock board firmware of your Artillery Genius. This is not a complicated process, but it can be a bit daunting for a beginner. Make sure you read my guide on how to install Marlin 2.5.0.3 firmware on Artillery Genius for step-by-step guidance.
Keep in mind that you will need to remove the bottom cover of your printer in order to change the location of some wires. After installing the Artillery Genius Auto Bed Leveling mod you will also loose the LED light next to the extruder.
Disclaimer
While I always try to go in detail with every guide I make, please note that some experience is needed to do this. Read the full guide carefully before starting any modification. I am not responsible for any kind of damage you might do to your printer.
If you just bought your printer don’t start modding it right of the bat. Start by learning your way around the printer and only after you get comfortable with it start doing modifications to it.
Precision of the stock inductive sensor
Because I am sure a lot of more experienced users will ask about this, I measured the precision of the stock inductive sensor with the M48 P20 X100 Y100 V2 Marlin G-Code command.
This measures the precision of the inductive sensor 20 times in the same spot then reports the deviation value.

As you can see, the sensor is very accurate, and sometimes even more accurate compared to a BLTouch (when probing a textured PEI sheet). To be honest, I was not expecting this kind of accuracy from a really simple inductive probe used as an endstop. With this in mine, I am now confident that the Artillery Genius Auto Bed Leveling mod will work well and using the stock endstop can be a reliable way to probe your bed.
Extra information about the sensor
The inductive sensor which comes with the printer is an inductive sensor. This means that your probe values can be different when the bed is hot or at room temperature.
I recommend you probe the bed at the temperature you plan to use when printing, to minimize temperature variances when probing.
It’s important to note that improper probe positioning or bad alignment can also cause issues when probing. Make sure everything is set correctly because damage to the PEI sheet is imminent if the sensor cannot probe the bed correctly.
Relocating the sensor
First, we need to remove the old sensor from the printer. This is really easy to do. You just need to unscrew it from the right side of the machine, and unplug the connector.
Installing the upgraded mount
Now, you need to install the mount which holds the sensor. This is also a trivial task so I won’t go into much detail.
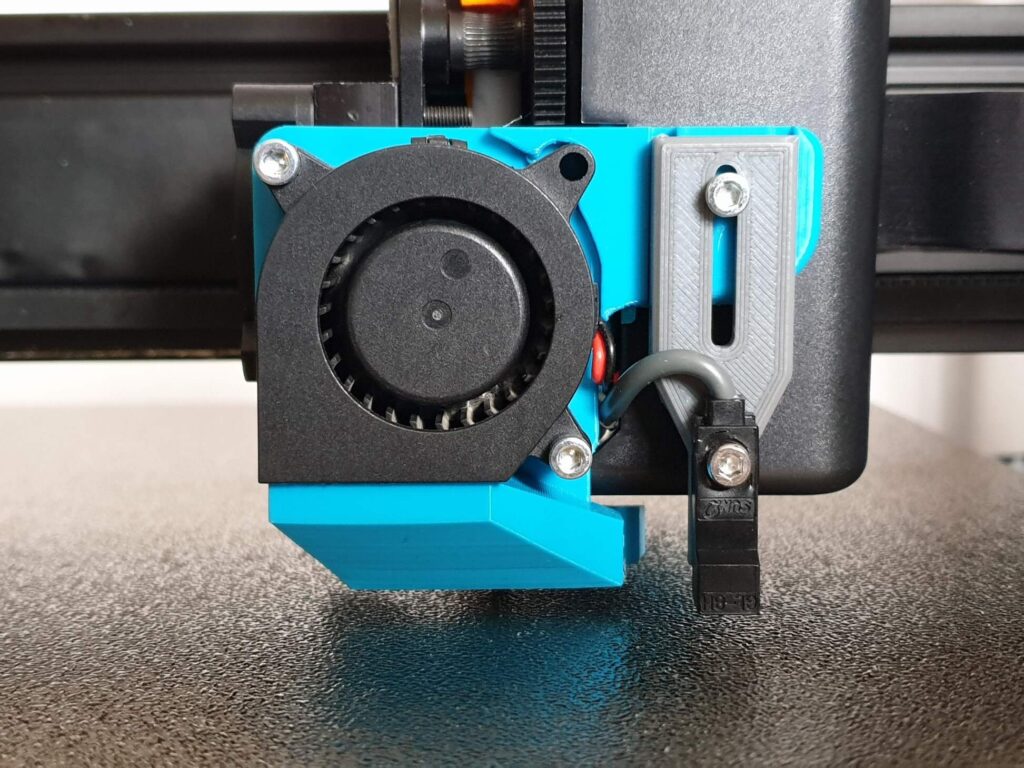
Remove the two M3 screws from the front and take out the 4020 fan. Next, install the mount and screw back the screws holding the fan. The end result should look like this.
If you are using my upgraded fan duct mount, you will have to also remove the stock fan duct. It is glued on the fan so carefully pull the duct making sure you don’t damage the fan.
Installing the sensor on the extruder
With the mount installed, you are now ready to attach the sensor. Using an M3 screw, install the sensor onto the adjustable holder. DO NOT tighten the sensor too much or you risk damaging it. It’s also recommended to use a metal washer if possible to avoid damage.
In order to install the sensor, you will need three metal pins. I had these laying around but if you don’t have something similar, they can be ordered from here. You can also cut the LED light pins, straighten them and use them.
Make sure the pins sit well in the connector. For the Artillery Genius Auto Bed Leveling mod to work reliably, no movements should be present. It’s important to have a good connection and the pins to sit snugly in the connector.
Plug in the sensor in the small extruder board, where the LED light was previously installed. The sensor will go in the first three pins labeled BGR. It’s easier to install the sensor if you remove the plastic cover from the extruder.
The orientation is important, so make sure you install the connector with the brown wire first as shown in the image below. Brown wire goes to the B pin, Blue wire goes to the G pin and Black wire goes to the R pin.
If you followed all the steps correctly, this is how your extruder will look like with the sensor installed.
Wiring the sensor on the board
Because we want to keep the clean appearance of the printer, we will change the location of the LED wires on the board. This is how the stock printer is wired:
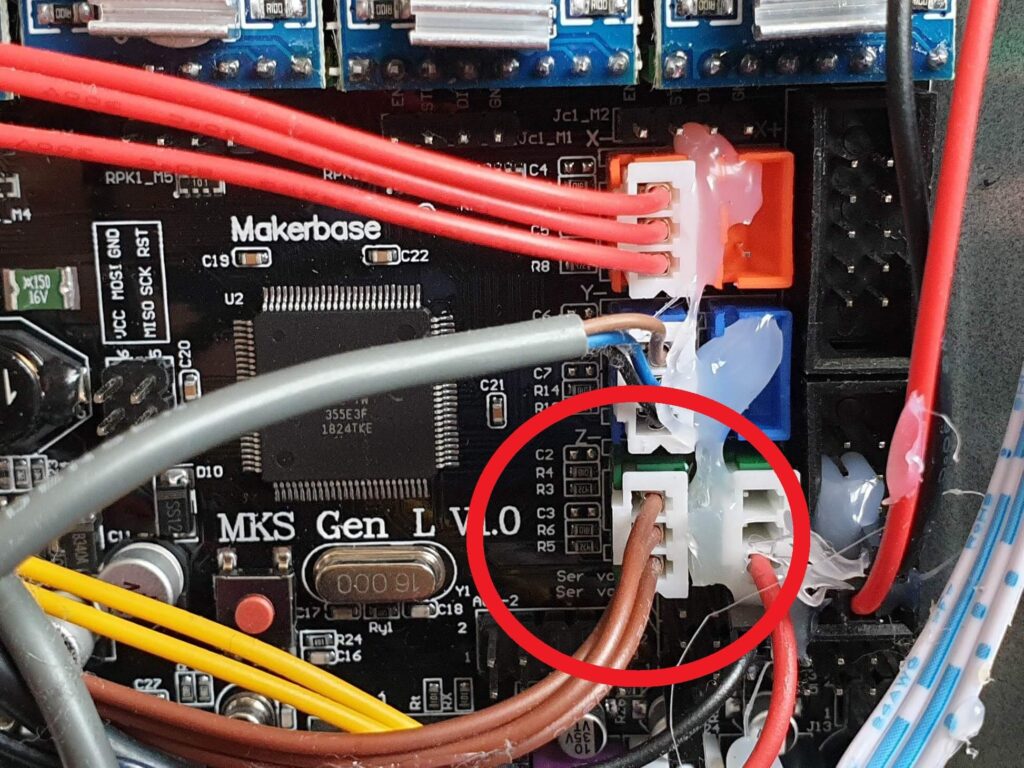
The brown wire in the image needs to be connected to the Z min header on the board. Artillery used some glue to make sure the wires are tight and don’t get loose during shipping so carefully remove the glue around the connector before pulling it from the board.
In the image below, you can see the new location of the brown wire on the stock board.
Firmware list
After connecting the wire according to the image provided, we need to flash the board firmware.
My custom firmware is based on Marlin 2.5.0.3 and it includes the following
There are multiple versions available:
- Artillery_Genius_Auto_Bed_Leveling_Firmware_(stock) – Stock configuration with added ABL feature and fast probing.
- Artillery_Genius_Auto_Bed_Leveling_Firmware_(stock slower probing) – The same firmware, with slower probing for increased accuracy and lower noise.
- Artillery Genius Auto Bed Leveling Firmware Sources available here.
Flashing the board firmware
Follow the Artillery Genius custom firmware guide for the complete steps on how to flash the board firmware. Additionally, you can also install the custom TFT firmware which will add extra functionality to the screen. Of course, you need to flash the board firmware listed above, under “Firmware List”.
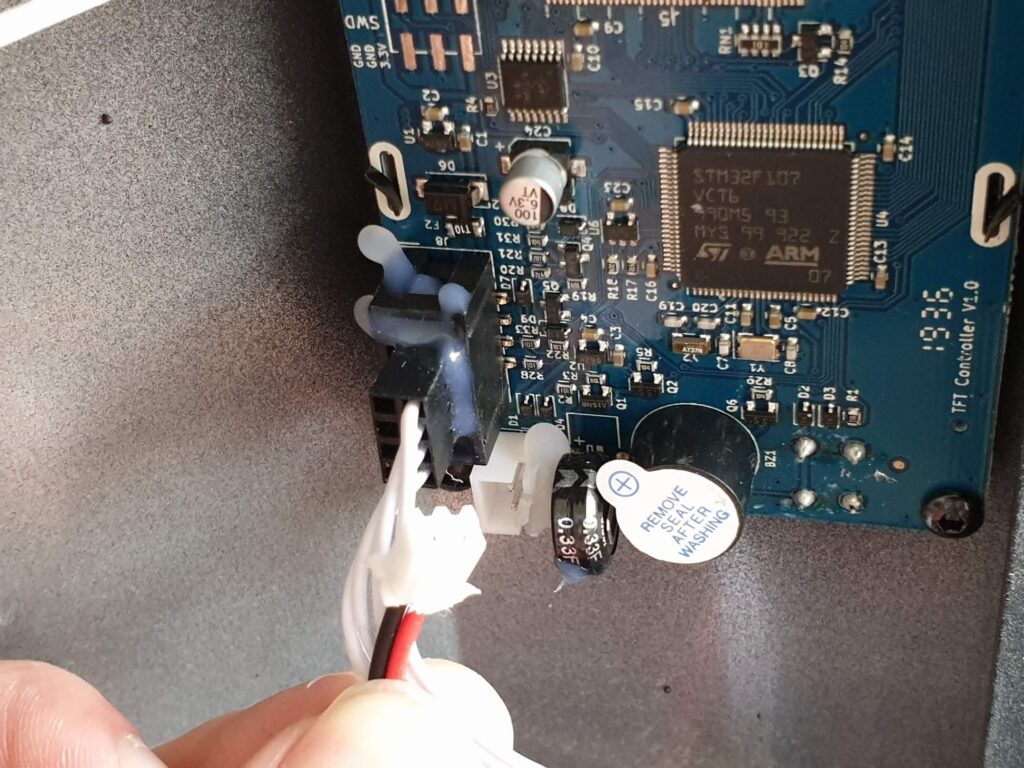
The stock TFT touchscreen cable needs to be removed in order to get a connection from the computer and flash the firmware. As you did before, carefully remove any glue that might be around the connector, then using the included USB cable, connect your printer to the computer.
As you can see, my TFT connector was full of glue so I had to remove the cable including the connector.
Bonus tip! You can also remove this red and black wire from the screen. By removing this wire you will be able to flash the screen without needing to open the printer again. If your main TFT cable is full of glue like mine, you can just remove this wire and continue with the firmware flashing.
With the firmware flashed, you can now connect the TFT cable back to its original position and put the bottom cover back.
Remember to “print” the reset EEPROM file linked here to reset your EEPROM. This is needed each time you flash a new firmware on the printer. It should take a few seconds.
After running the file, restart the printer.
Test the endstop functionality
Before doing anything, start your printer, raise the X gantry to a comfortable height and then home the printer.
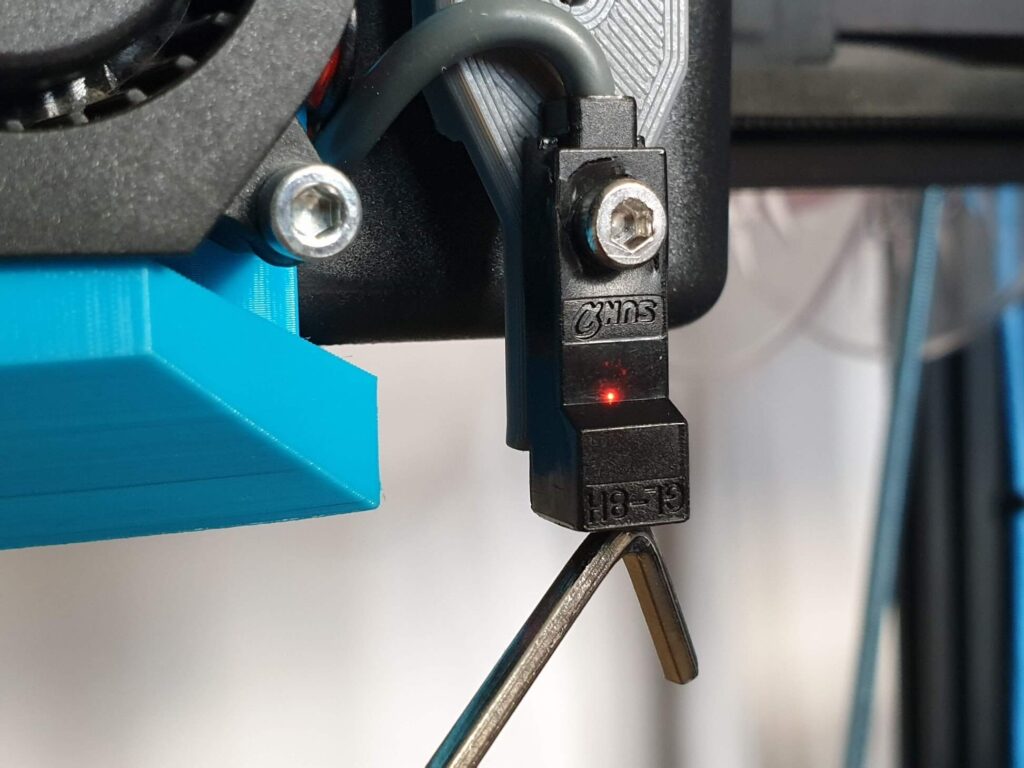
During homing, when the nozzle starts going down, use a metal object like an alan key or a screwdriver and touch the bottom of the sensor. It should stop the homing process and detect it.
If the sensor is not working, the LED is not lighting up and the movement doesn’t stop, unplug the printer then re-check all the wiring and try again. The red LED on the sensor will only light up when it detects a metal. It will not work with other materials.
Setting the correct Z offset
Now that the firmware is flashed, and the sensor is installed we can set the probe offset.
With the printer off, turn the Z motors clockwise and carefully lower the nozzle. The nozzle should touch the bed. Then, place the previously printed square under the sensor and screw it in place.
This will ensure that the sensor is mounted higher than the nozzle and will not touch your prints. At the same time, this also places the nozzle at the correct position where it can safely detect the spring steel sheet. The square is 2mm thick, so if you can use something else with the same thickness you are free to do so.
Please notice that the sensor LED is on. If your sensor is not on, then probably it’s mounted too high.
My firmware has the Z offset set to 0. You can follow 3DMNs Z-Offset calibration video, but I prefer doing it the “easy way”. When I do changes to the probe height, I just start a print and during the brim I use babystepping to lower the nozzle until I get a perfect first layer.
If the sensor was properly installed with a 2 mm spacer, then the offset should be less than 1 mm for a good first layer.
Run Auto Bed Leveling
Running Auto Bed Leveling can be achieved in multiple ways.
If your printer is already connected to Pronterface, run the G29 command and the Printer will start probing the bed.
If you installed the custom screen firmware, then navigate to Menu -> Movement -> ABL and touch the ABL icon. This will go through the same leveling process.
This is how the Auto Bed Leveling process looks like on the Sidewinder X1:
When completed, move to the next step.
Start G-Code alterations
The mesh generated by the Auto Bed Leveling command (G29) is stored on the EEPROM of the printer. You can choose to do the bed leveling before each print, but this takes time and if your bed is stable this is redundant.
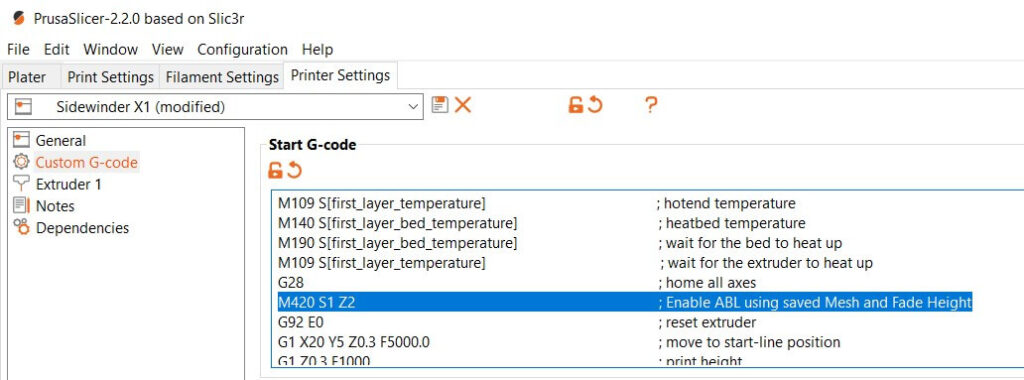
So, we will add the M420 S1 Z2 ; Enable ABL using saved Mesh and Fade Height command to the Start G-Code of your slicer. This will enable ABL for the first 2mm of your print.
The G-Code provided needs to be added right after G28 ; Home all axes.
The screenshots below are taken on for the Sidewinder X1 guide, but the same applies to the Artillery Genius.
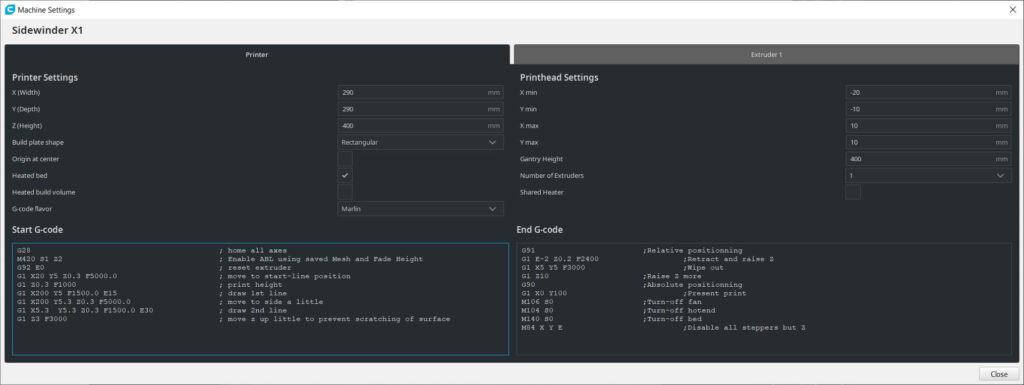
In Cura, navigate to Preferences -> Configure Cura -> Printers -> Artillery Genius -> Machine settings.
In Prusa Slicer, navigate to Printer Settings -> Custom G-code.
In IdeaMaker, navigate to Prepare to Slice -> Edit Template -> G-Code.
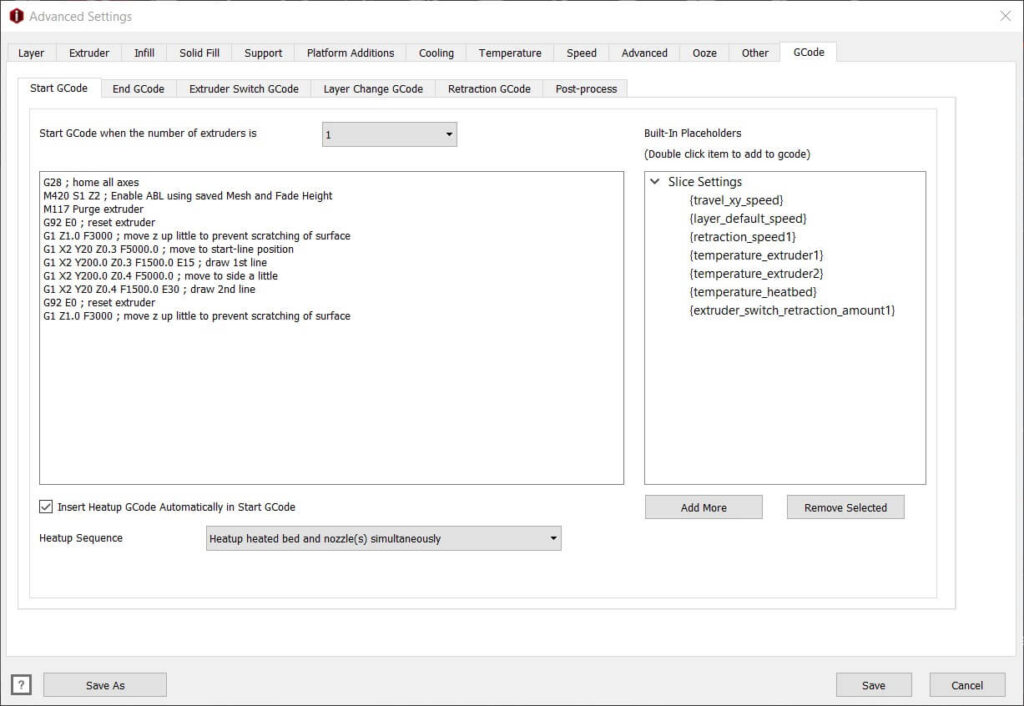
With this piece of G-Code added to your start G-Code, the printer will load the previous mesh each time a print is started.
Time for the first print
Now that you successfully installed the Artillery Genius Auto Bed Leveling mod, it’s time to start your first print. Slice a model with the new slicer settings previously added and you should have a perfect first layer.
I recommend to always use a three-line brim, so it’s easy to see if the nozzle is too high or too low. this can be corrected using the Babystepping feature on the TFT.
Be really careful on your first print and be ready to stop the printer. You can easily damage your PEI sheet if the nozzle offset is not right.
Wrapping up
Hopefully, this guide was detailed enough and now the Artillery Genius Auto Bed Leveling Mod is installed on your printer with a minimum investment. If you have any issues, please leave a comment below or head over to the 3DPrintBeginner Facebook group.
If this guide helped, consider supporting me via Patreon or Paypal. Donations are not required, but they help me buy hardware to write cool guides like this one.
Feel free to check my other articles like the Sidewinder X1 Ribbon Cable Fix to have a good connection on your extruder, or my top Sidewinder X1 upgrades where I share my experience with other mods made to for the Sidewinder X1 but most of them are also compatible with the Artillery Genius.
Liked it?
|
|

