Anycubic Vyper Review: Better than CR-6 SE?
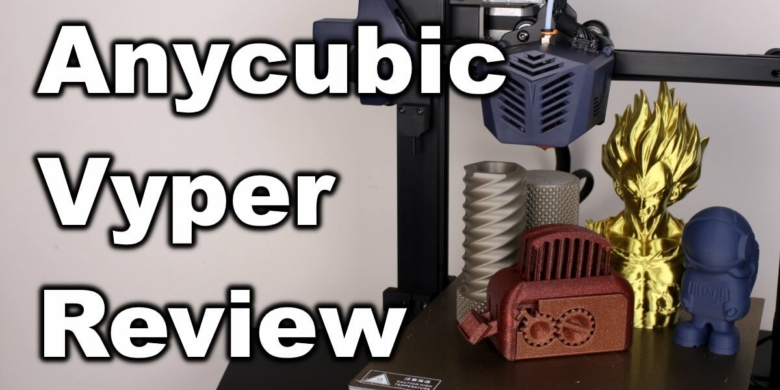
The Anycubic Vyper is my first Anycubic FDM 3D printer I used. I had elevated expectations, so in this Anycubic Vyper Review we’ll see if the expectations of quality 3D prints are met.
Anycubic Vyper Shipping and Packaging
The Anycubic Vyper comes in a carboard box with ample foam protection on all sides. All the parts are well protected, and I don’t think there will be any issues during shipping. My review unit was delivered with some box damage on one side, but there was no issue present with any of the printer components.
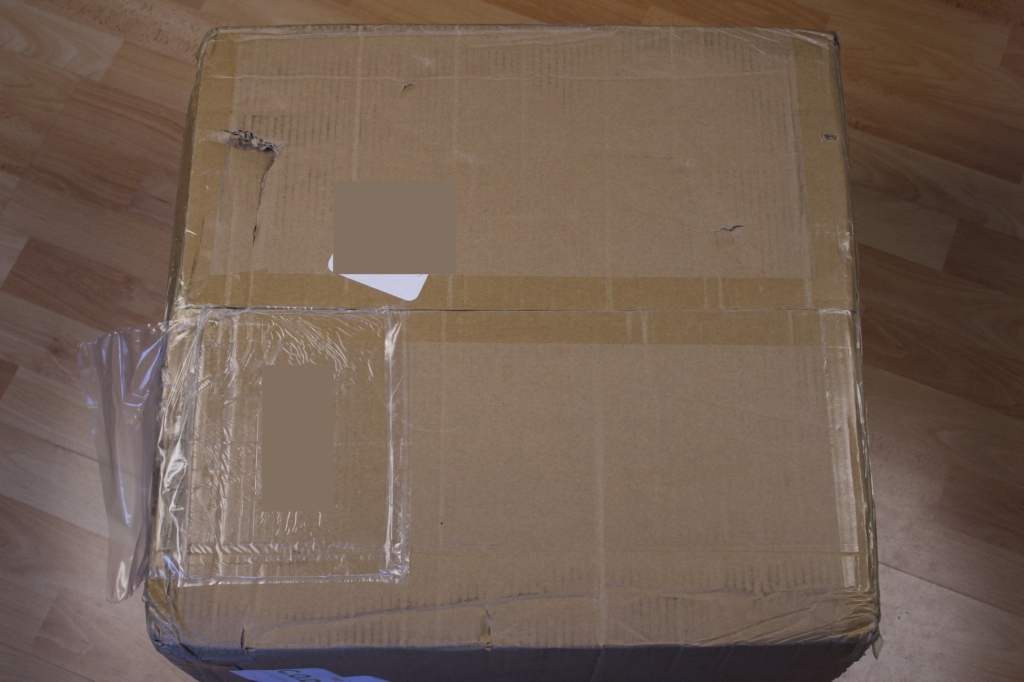
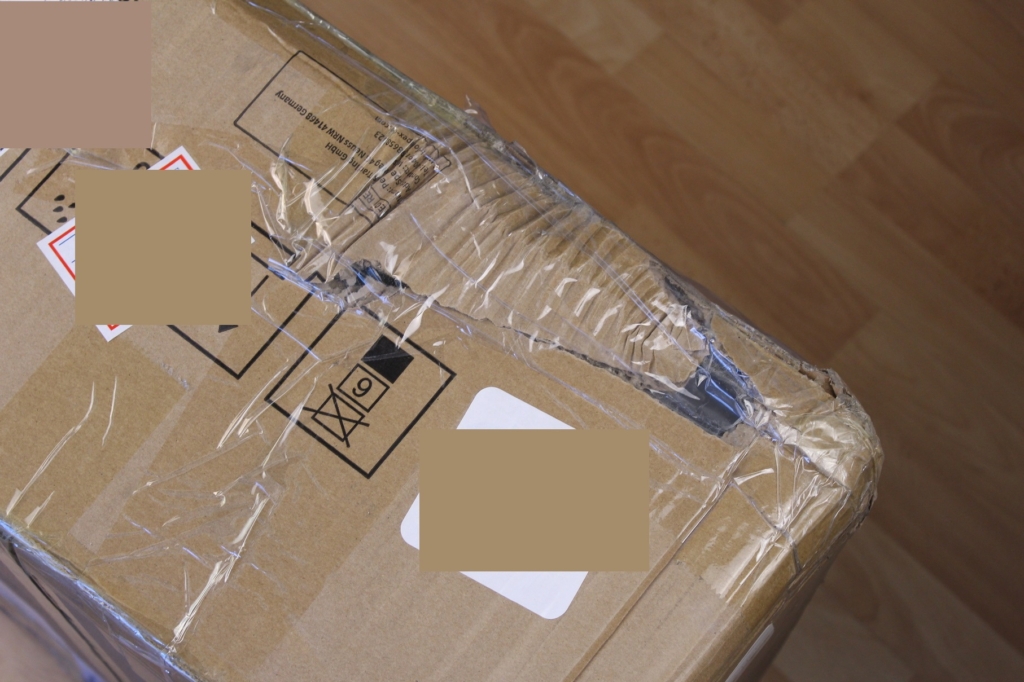
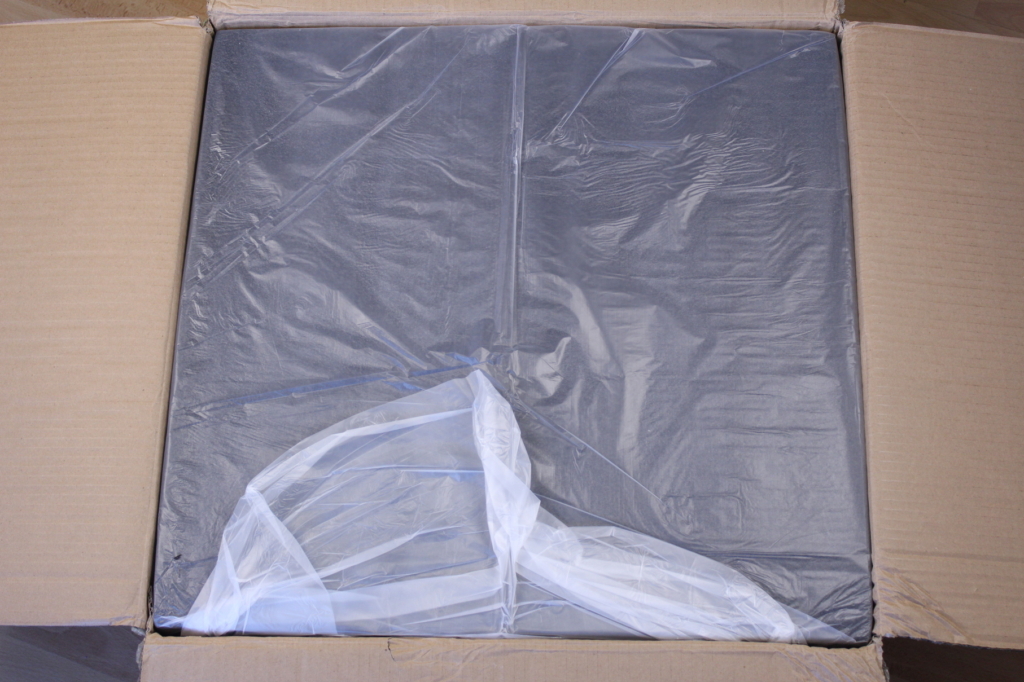
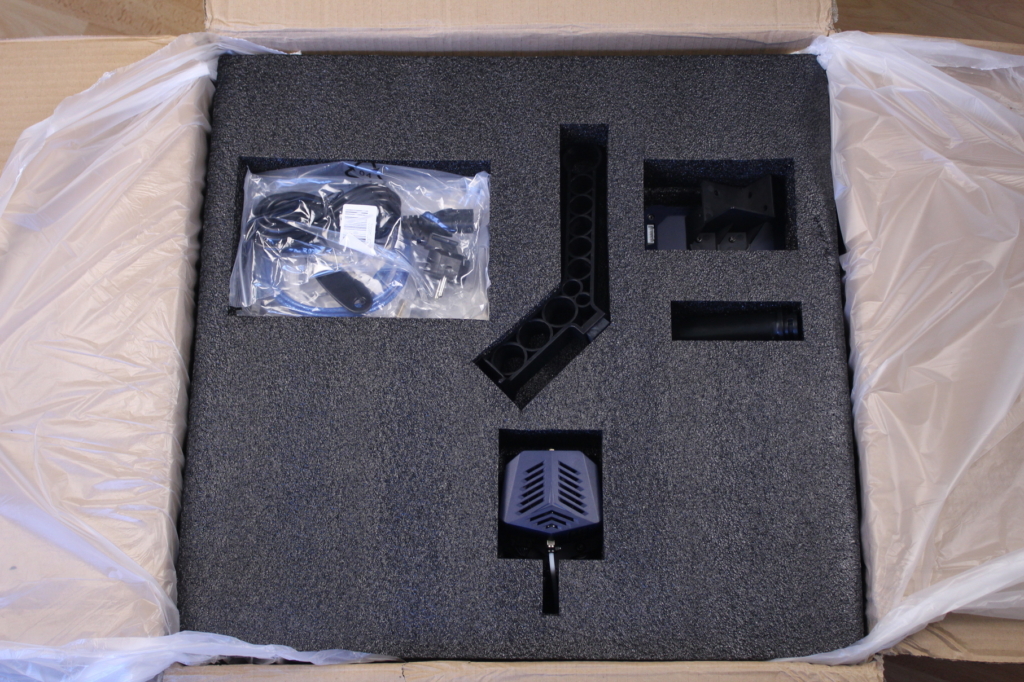
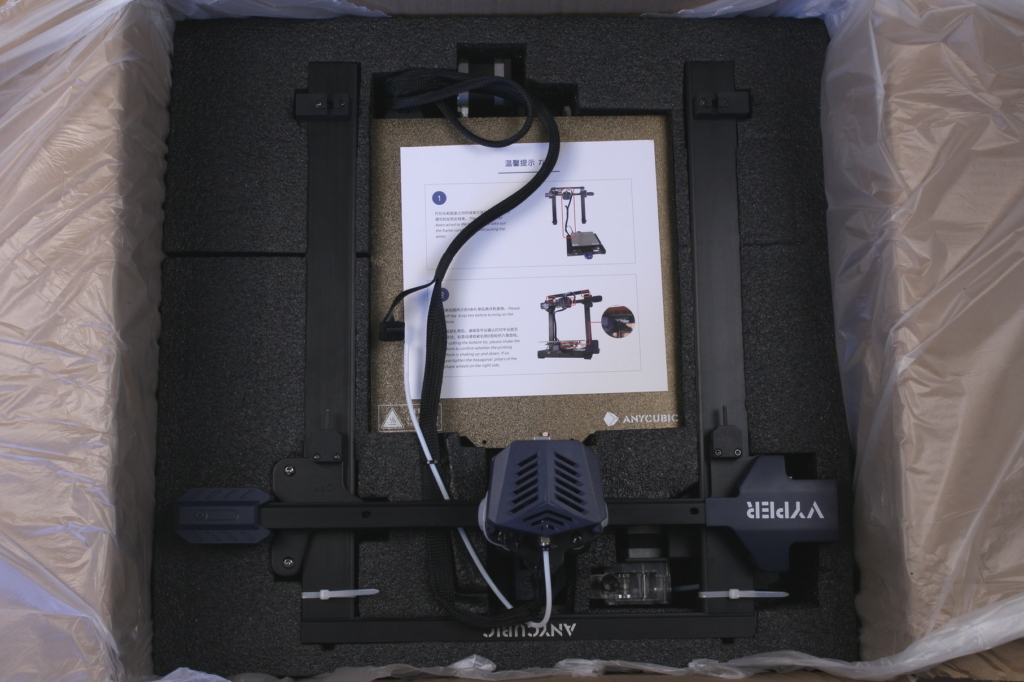
Take extra precaution when removing the printer from the box. The base and the gantry are connected so you will have to remove both at the same time. This thing is also mentioned on the tips page inside the printer box, so take your time and read it before unboxing the printer. Besides the tips sheet, I also recommend reading the Manual because it has some helpful information.
With the Anycubic Vyper, we also get the following accessories:
- Manual
- Spool holder
- Plastic spatula
- 8GB SD Card
- Power cable
- Screws
- Hex wrenches
- Filament snips
- Unclog needle
- USB cable
- Two spare Volcano nozzles
- Zip ties
- Filament sample
Anycubic Vyper Design
I really like the design of the Anycubic Vyper. The printer uses aluminum extrusions with flat sections that give it a cleaner look and I also like the navy-blue color accents on some of its parts.
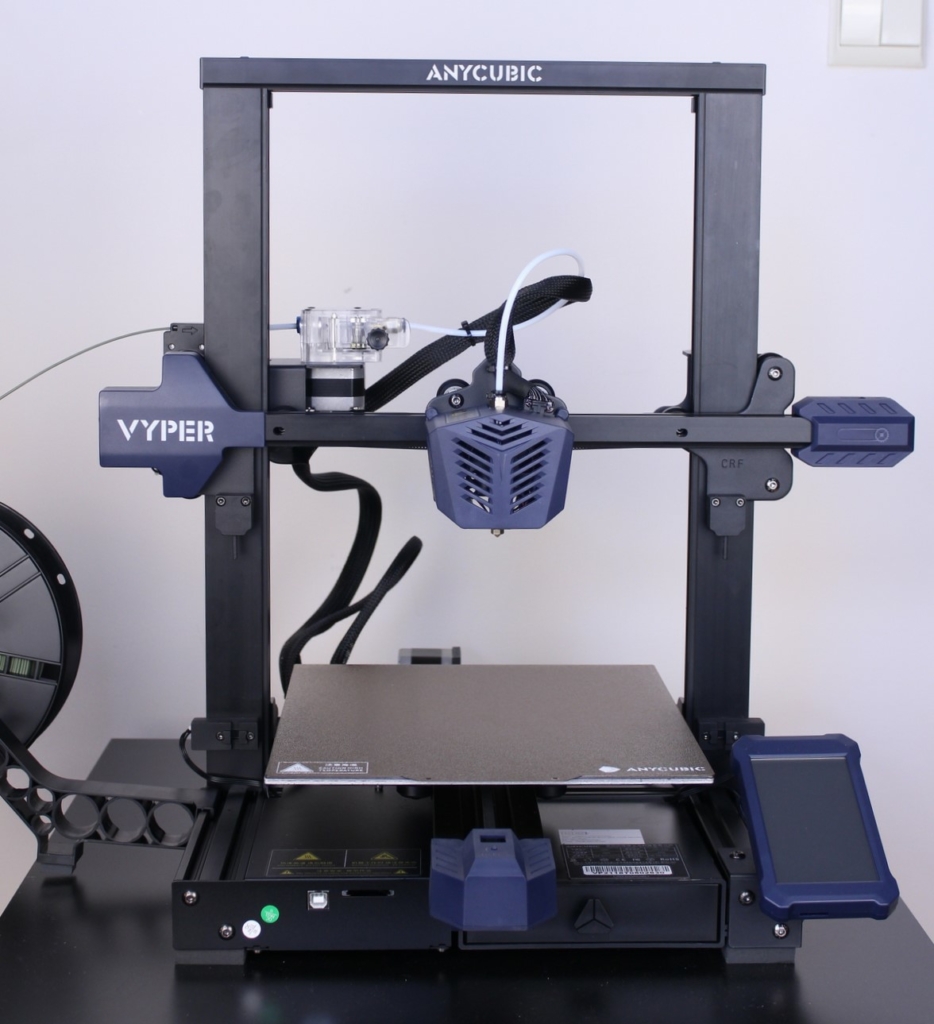
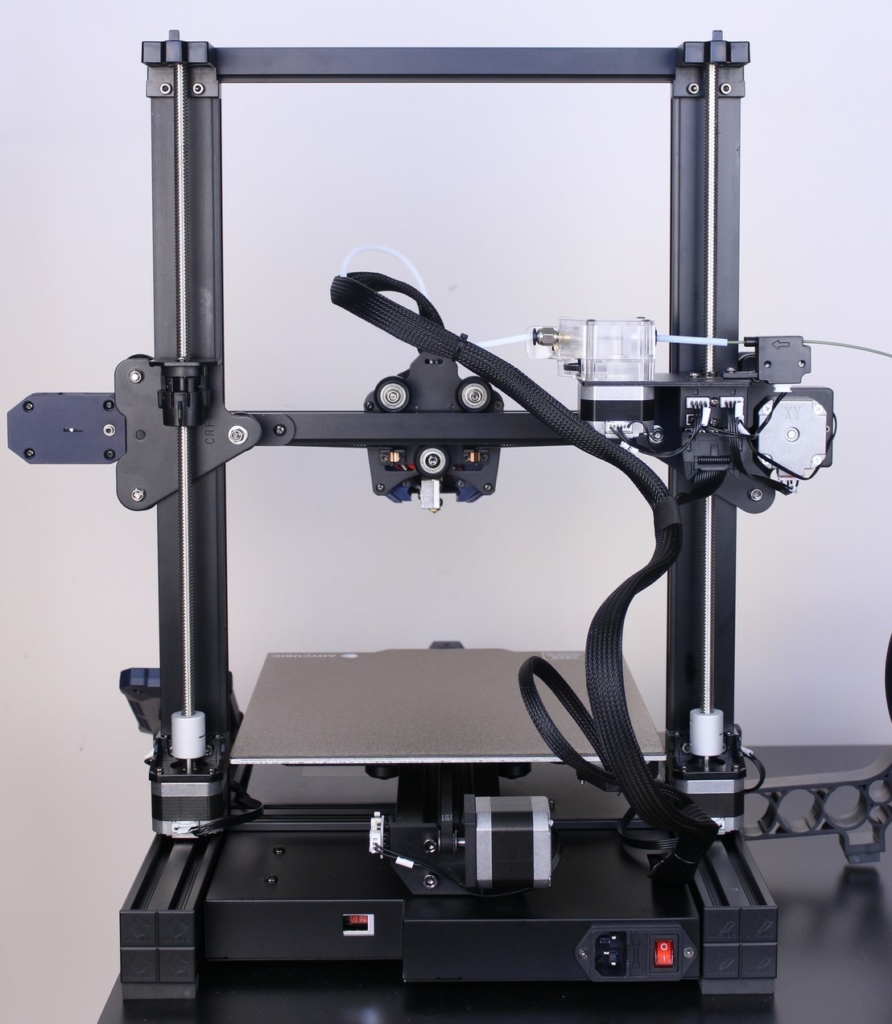
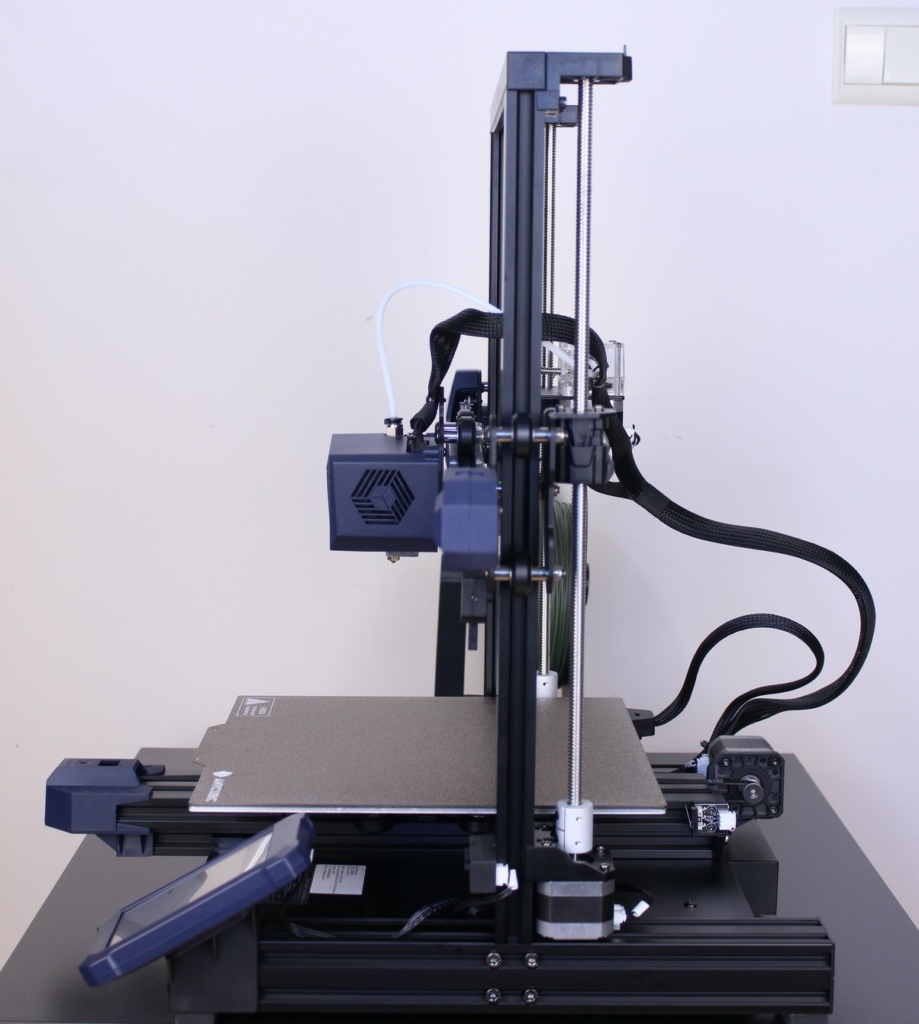
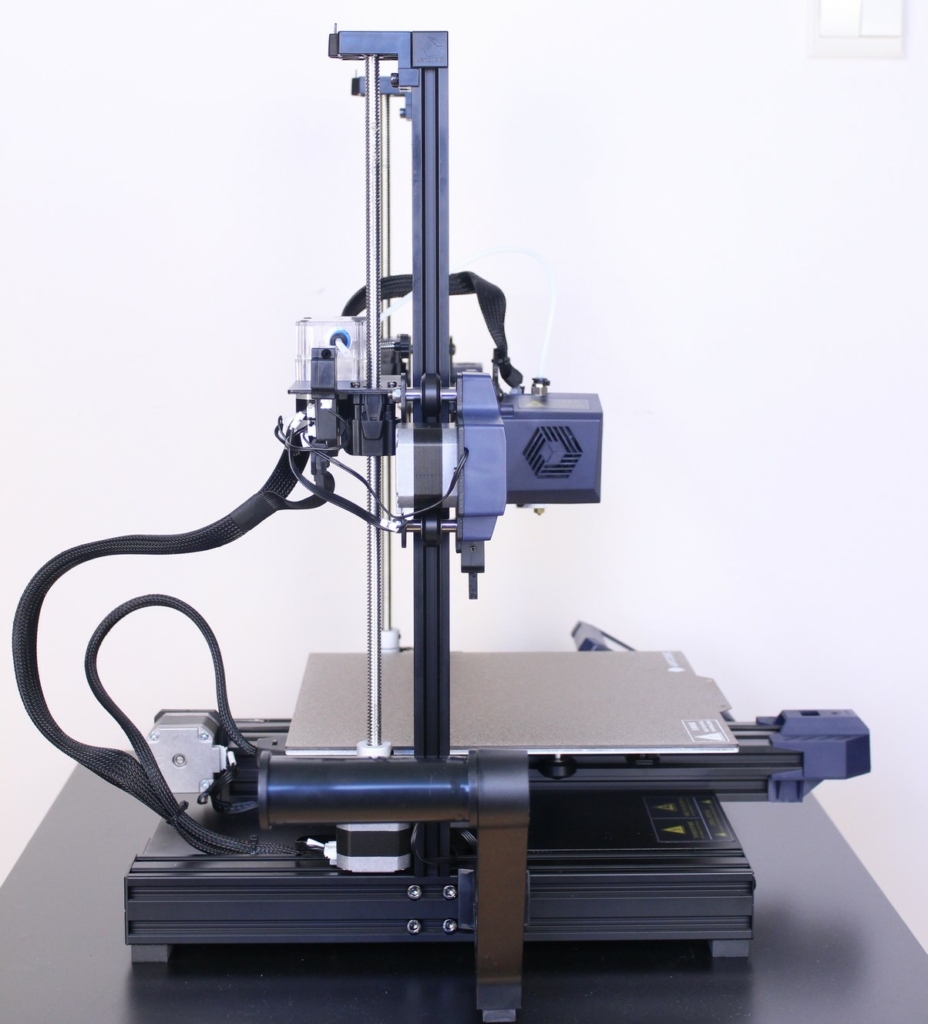
I would have liked to see the same flat extrusions present on the bottom, because that’s where most of the 3D printing debris starts to pile up, but you could also print some covers and install them if that’s a thing you want to solve.
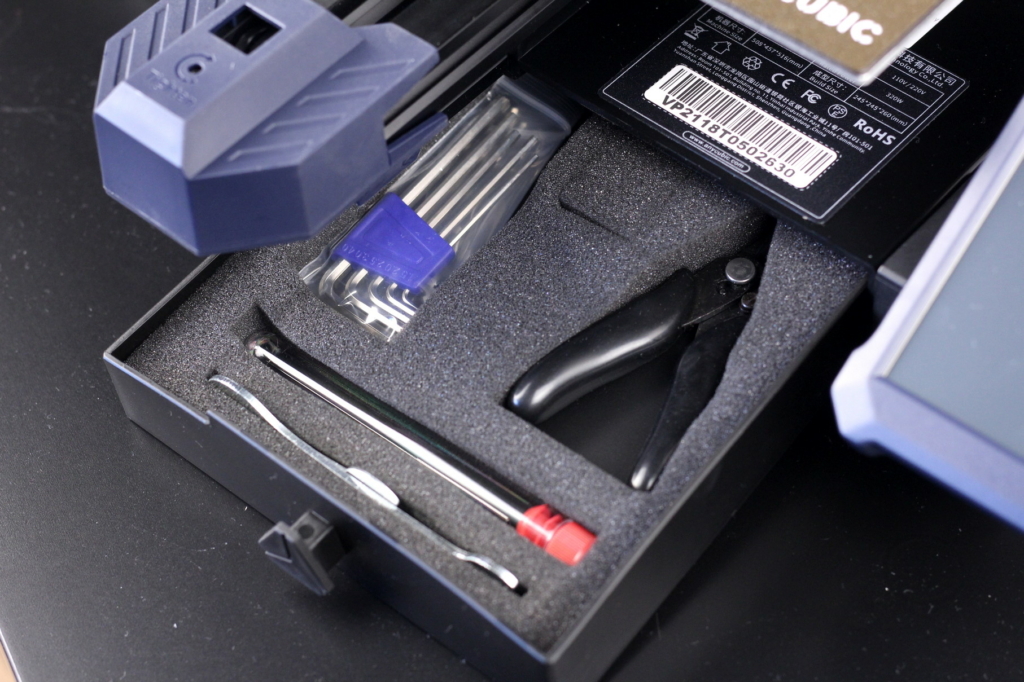
In terms of design, the Anycubic Vyper is quite like the Creality CR-6 SE and most of the Ender-3 machines out there. It also has a handy drawer on the bottom of the printer to store the included tools when not in use.
The assembly process took about 15 minutes. You only have seven screws that need to be used to assemble the printer and start printing. Four of those are used to attach the gantry to the printer, while the smaller screws are used to attach the touchscreen.
Anycubic Vyper Specs
| Printing Technology | FDM (Fused Deposition Modeling) |
| Build Volume | 245mm(L)×245(W)×260mm(H) |
| Print resolution | ±0.1mm |
| Positioning accuracy | X/Y 0.0125mm; Z 0.002mm |
| Extruder number | Single; Nozzle diameter |
| Print Speed | <180mm/s (recommended 80-100mm/s) |
| Support filaments | PLA, TPU, ABS, PETG, Wood |
| Ambient Operating Temperature | 8°C – 40°C |
| Operational Nozzle Temperature | max ≤260°C |
| Operational Hot Bed Temperature | max ≤110°C |
| Slicing Software | Cura; Output Formats |
| Input Formats | .STL, .OBJ, .AMF |
| Connection mode | SD Card; USB cable |
| Input voltage | 100V/240V AC, 50/60Hz |
| Output voltage | 24V/14.6A(350W) |
| Machine size | 508mm×457mm×516mm |
| Package Weight | Machine weight |
BMG Extruder clone
The Anycubic Vyper uses a clone BMG extruder which does a good job in providing accurate extrusion. I used BMG clone extruders on a bunch of printers with good results and the one used by Anycubic performs just as well. Filament is gripped from both sides using a dual-gear setup and the 3-to-1 gear ratio will provide more accurate filament control.
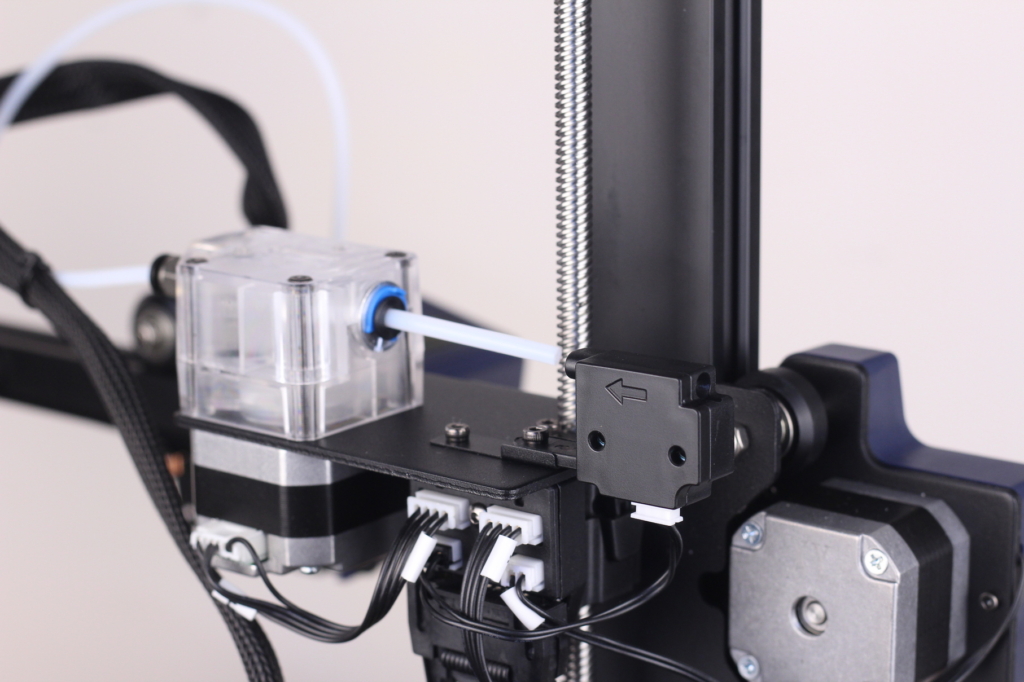
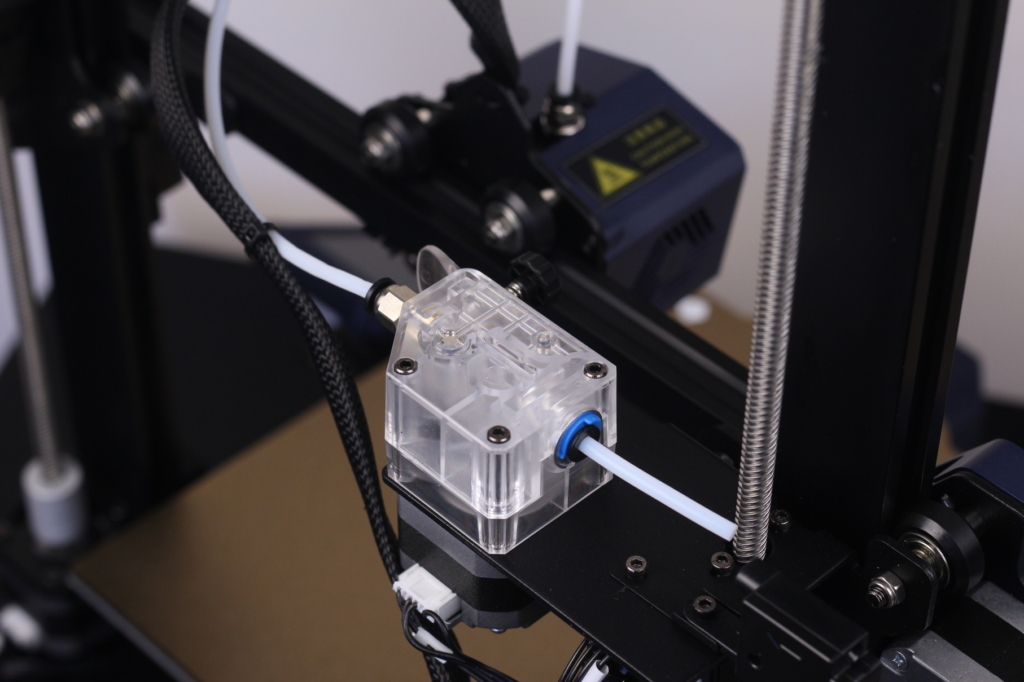
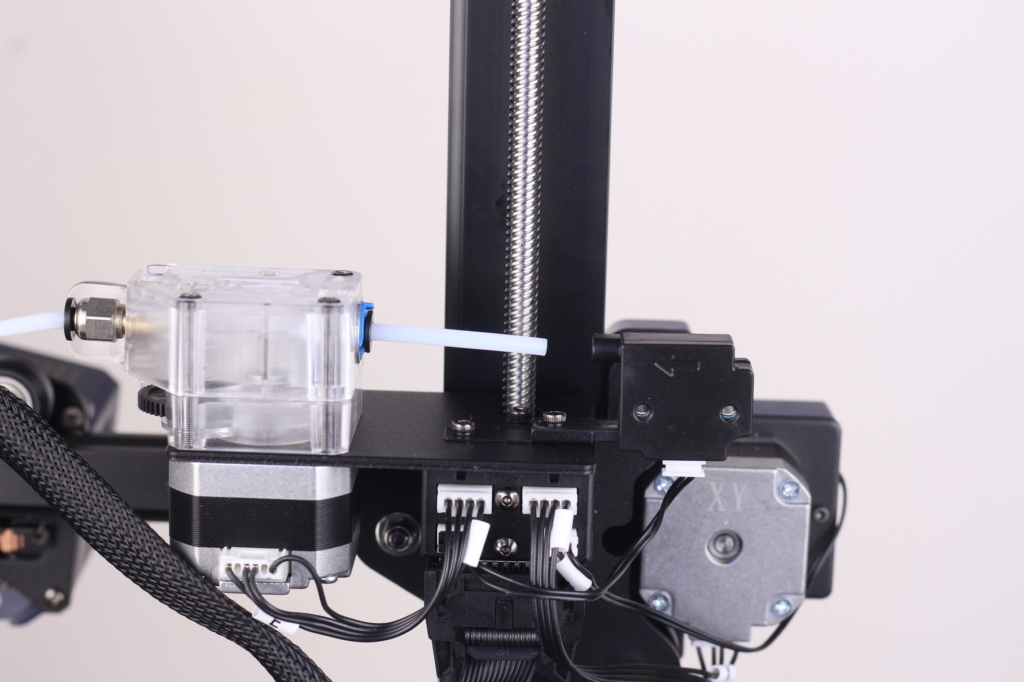
For some reason, the extruder is not sitting in the usual position. Instead, it’s flipped 180 degrees. One reason might be the space between the filament sensor and the extruder, but I think it would fit just as well.
The E steps for the Anycubic Vyper extruder are set to 405 in the firmware, instead of the usual 415 value we use with BMG setups. This was the main reason I got a lot of under-extrusion on the top layers. I’ve changed the value to 415 in my IdeaMaker profiles, but it’s something to keep in mind if you notice print issues. Hopefully the firmware will be updated soon.
I am not a huge fan of the PTFE tube between the filament sensor and the extruder, but I can’t think of another way Anycubic could have done this. And the whole setup works, so that’s great.
V6 Volcano clone with PTFE lined hotend
As with most of the printers out there, the Anycubic Vyper also uses a PTFE lined hotend. This means that your printing temperatures will be limited to around 235C-240C. You can upgrade the heat break with a bi-metallic or titanium heat break in the future, if you want to minimize the maintenance work you need to do from time to time, or if you mostly print higher temperature filaments like ABS, PETG, and PC.
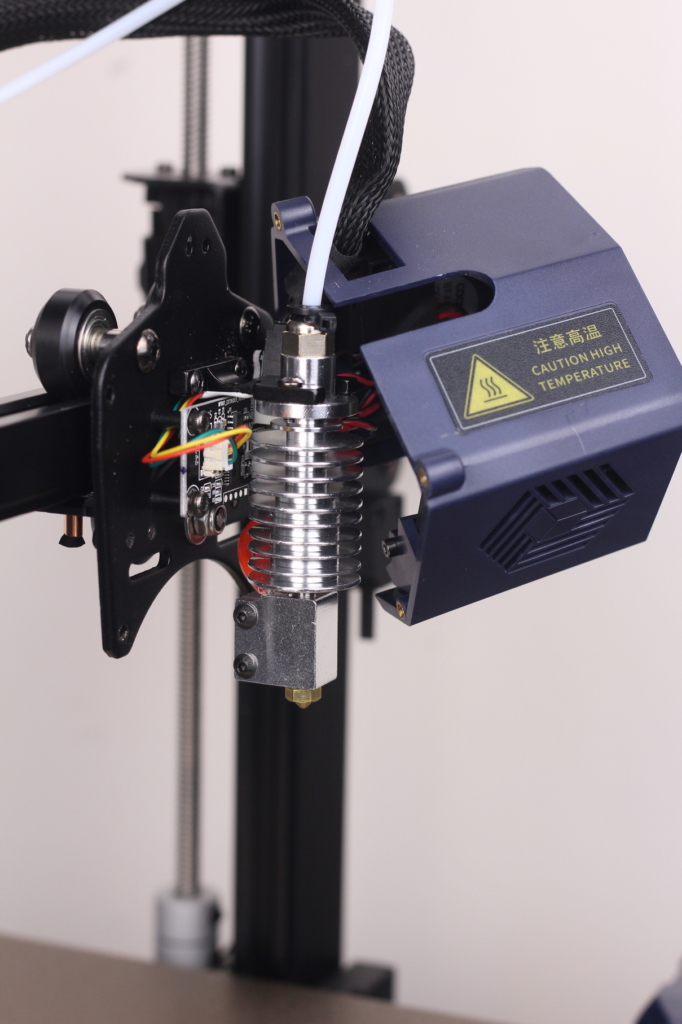
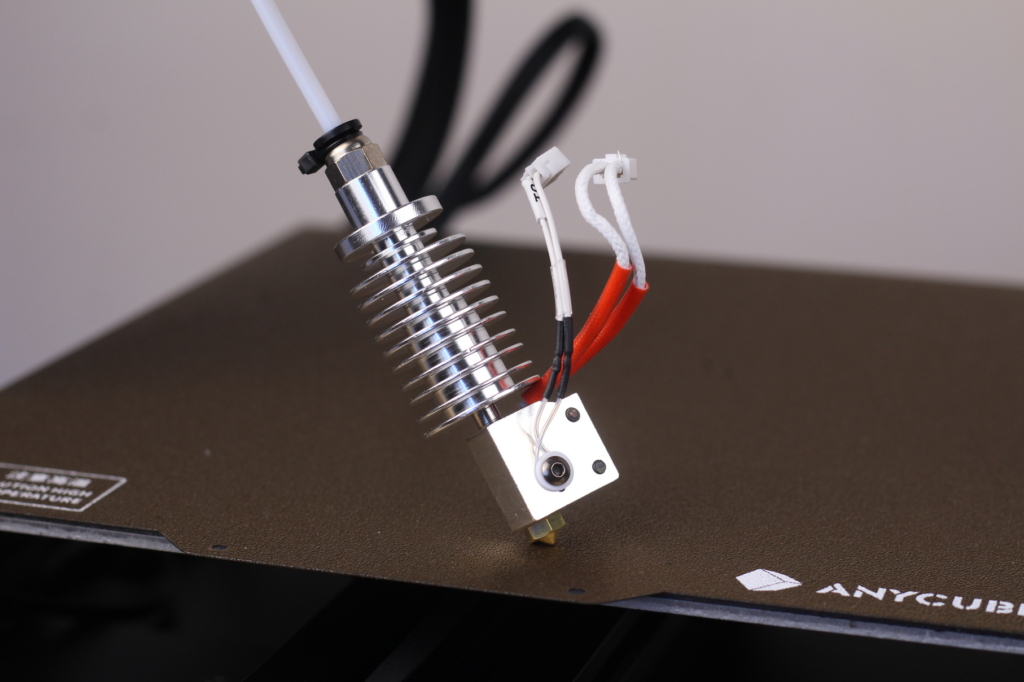
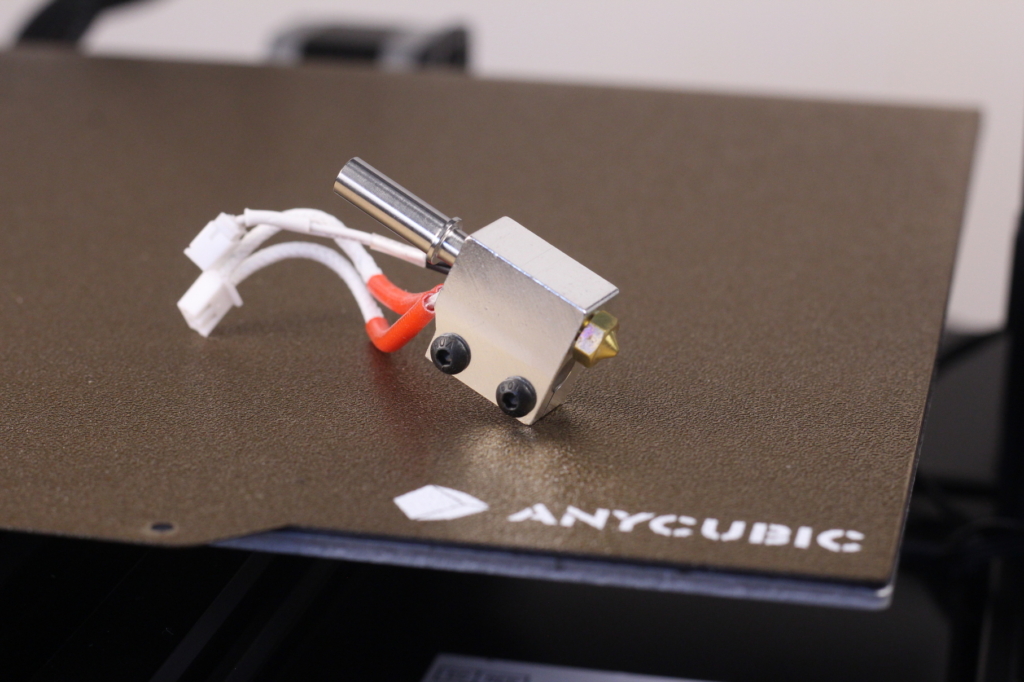
The hotend heatsink is a V6 clone customized for attaching it to the printer using two screws in the top. The heatbreak is mounted using two grub screws and it fits snuggly inside the hotend helping with thermal transfer. Unfortunately, there’s no silicone sock included with the hotend, but if you want one, it’s a cheap 2$ upgrade.
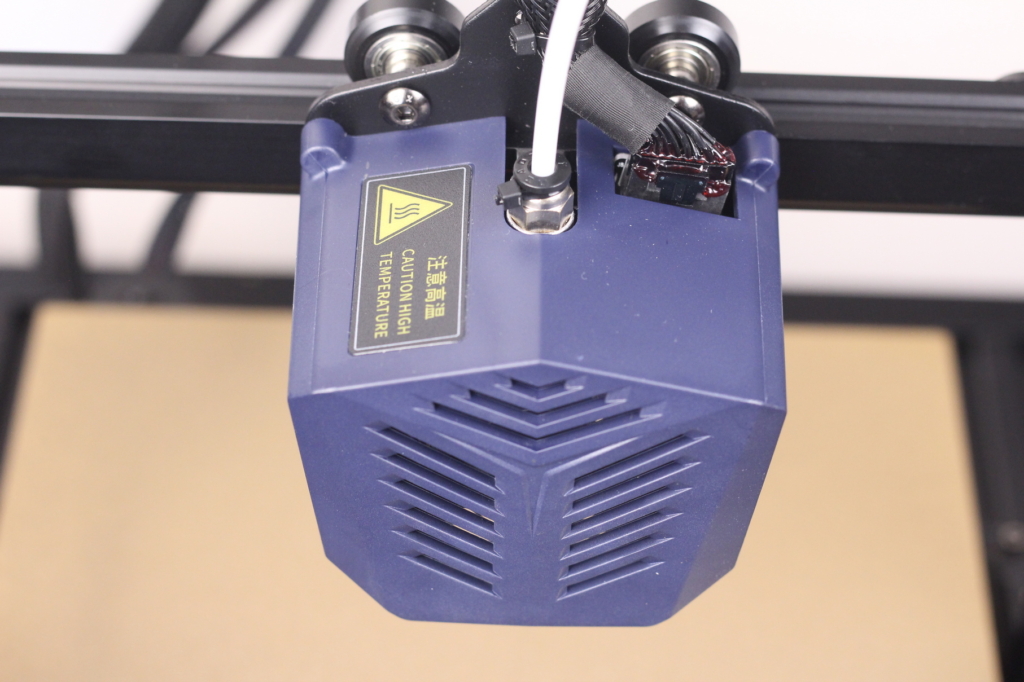
The print head cover is a bit annoying if you need to work on the hotend because it’s impossible to remove due to the added glue around the print head connector. This means that if there’s a need to work on the hotend, it will be a bit harder because the plastic cover is in the way. Not a huge issue, but something to keep in mind. In front of the nozzle, there’s a controllable white LED to iluminate your layers. Quite handy.
Another thing I’ve noticed is that the PID values used for tuning the hotend are a bit off. The printer can reach 200C quite fast, but if you set the temperature higher, it takes a bit longer than with other machines.
Dual part cooling fans
Having a volcano hotend doesn’t help too much with printing speeds if the part cooling solution is not doing its job. The Anycubic Vyper uses dual 3015 radial fans to cool the printed layers efficiently. This setup works well, and I hope a dual-fan cooling setup is used more in the future.
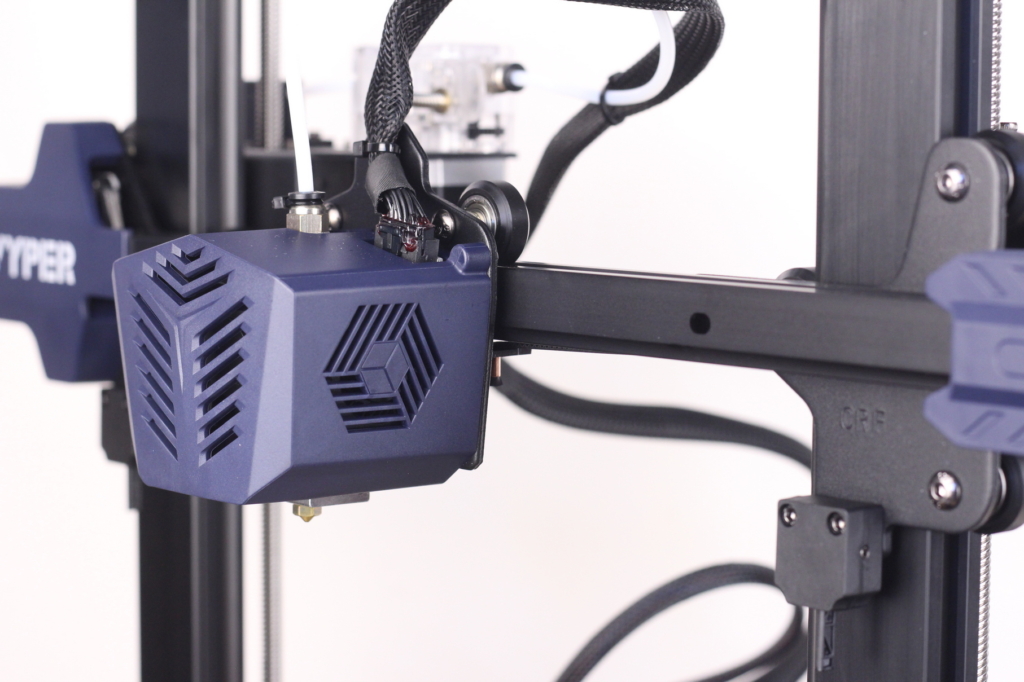
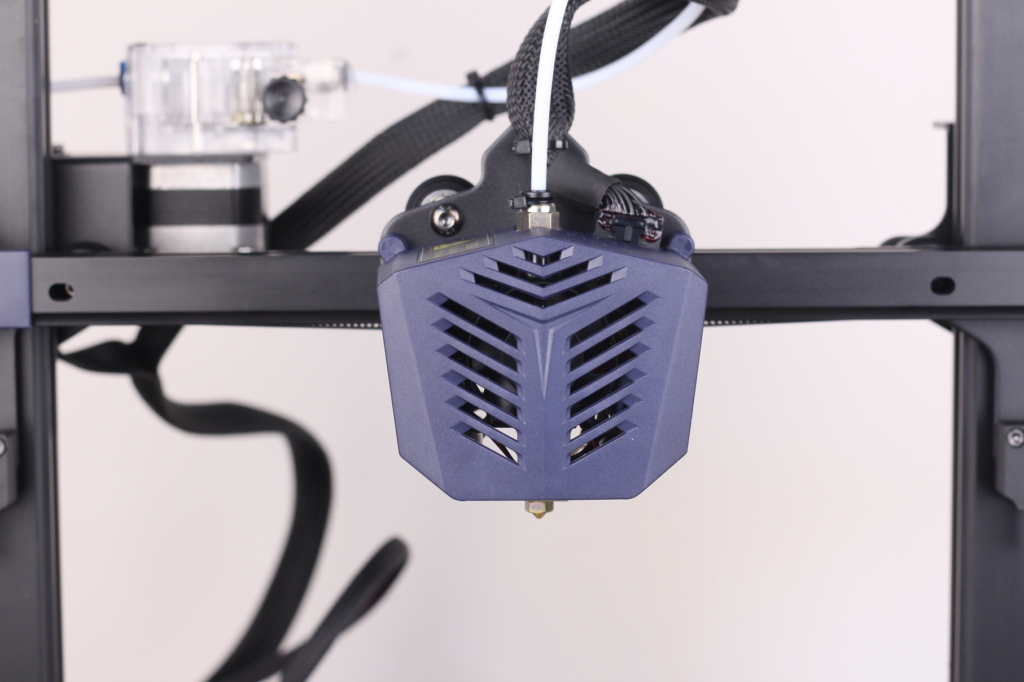
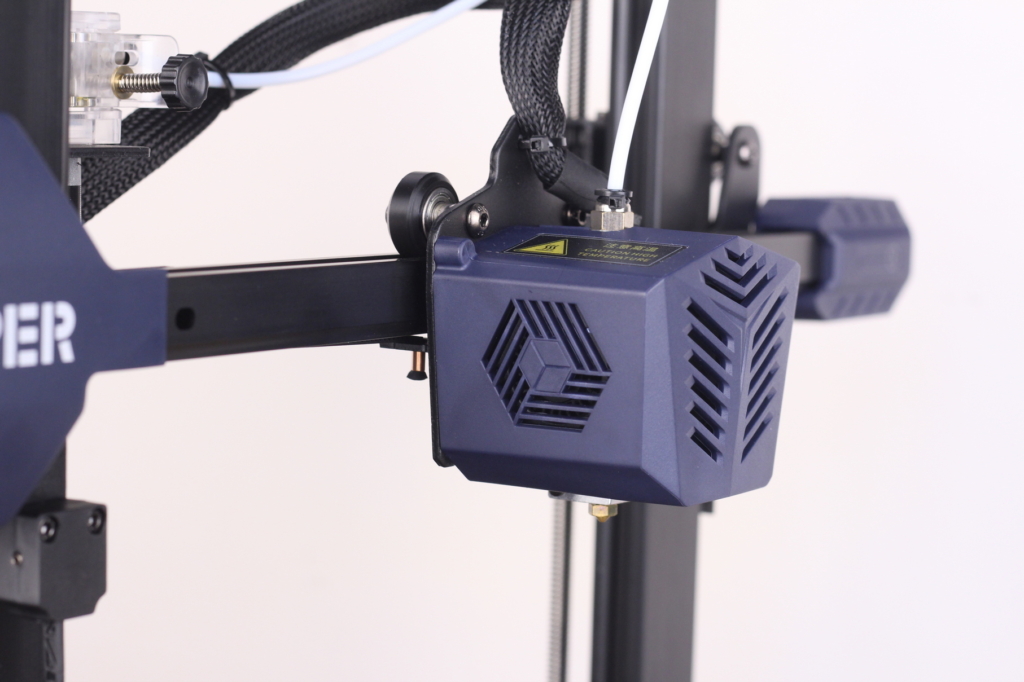
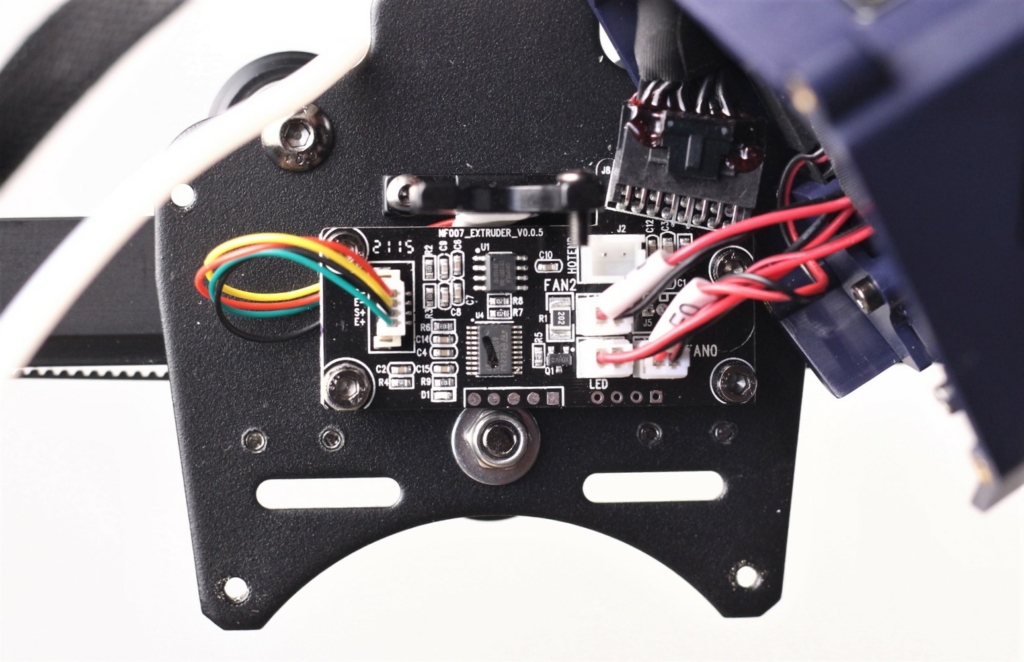
All the fans and hotend wiring have connectors that go onto the small breakout board installed next to the hotend.
Auto Bed Leveling
Just like the Creality CR-6 SE, the Anycubic Vyper uses a strain sensor which detects the small movements of the assembly when the nozzle touches the bed. This allows the printer to perform auto bed leveling without requiring a dedicated sensor.
Because the tip of the nozzle is now the probe, there’s no need to calibrate the Z offset each time you change your print surface, but to get accurate results, you need to ensure that the nozzle is clean before probing.
The heatbed is fixed in place, so you won’t need to perform manually leveling like you do with other printers. Having a fixed bed should also help with having a consistent first layer after setting the Z offset.
After assembling the printer, I started the automated leveling process. The heatbed turns on and reaches 50C, the nozzle reaches 120C then it starts to slowly probe the bed in 16 points. The measurement values will be stored in the EEPROM and you are ready to start printing.
I only needed to increase the Z offset with 0.10 mm to get a perfect first layer. After the initial bed probing, there was no need to probe the bed again and I had constant perfect layers throughout the testing period.
245mm*245mm*260mm build volume with magnetic PEI sheet
Another interesting feature of the Anycubic Vyper is the removable PEI spring steel sheet which provides excellent adhesion during printing and allows you to easily remove the printed model when it’s completed. Just a simple bend of the flexible sheet will pop the model. No need for metallic scrapers or glue stick to help with adhesion.
Having a removable print surface should be the standard with all machines, so I really hope other manufacturers will start adding these flex plates in the future. It makes 3D printing more enjoyable.
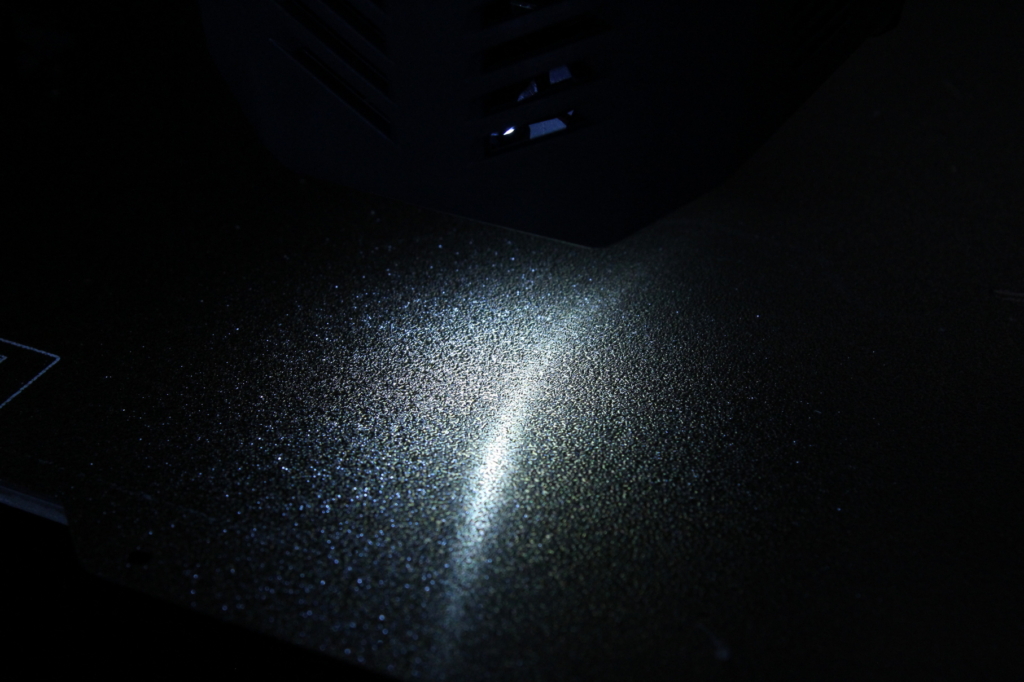
One side of the sheet has a textured surface which works great especially for PETG and TPU that leaves a nice texture on the first layer of the print. The other side is golden but doesn’t look like it has a PEI coating.
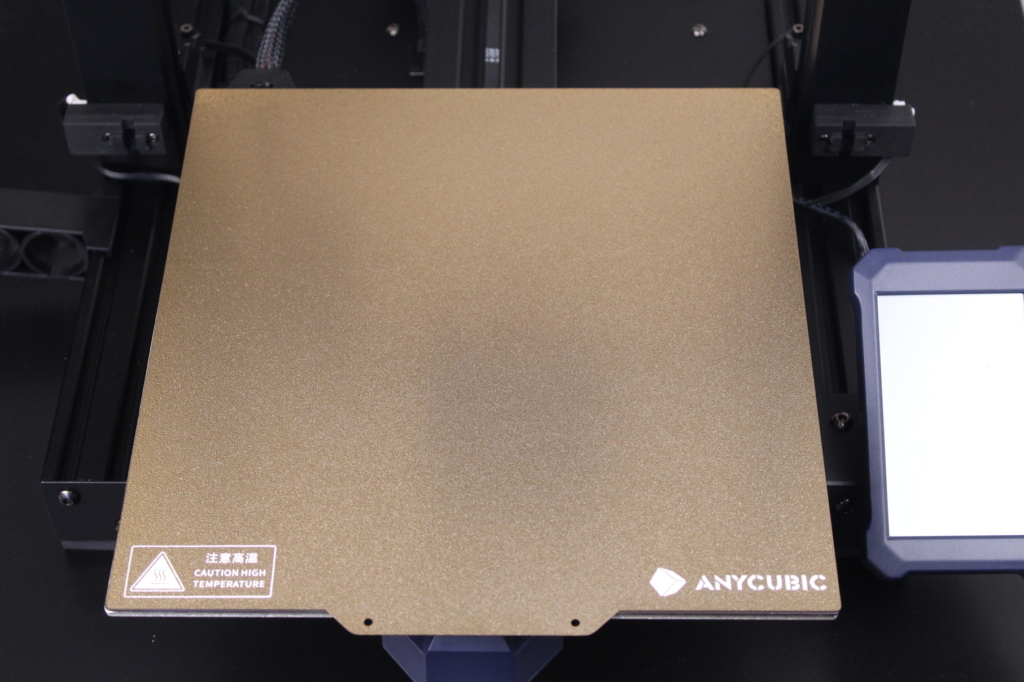

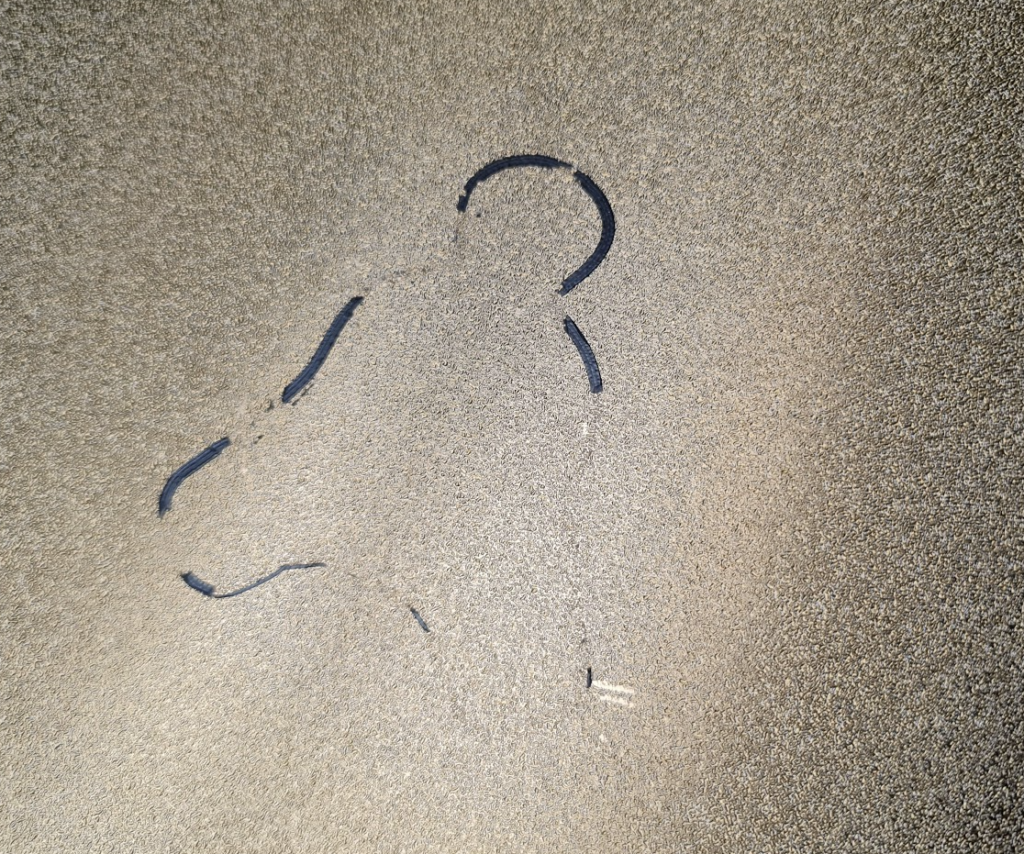
What I don’t love about the Anycubic PEI sheet included with the Viper is its durability. It feels more fragile compared to the PEI sheets sold by Energetic. For example, after I completed the ABS test print, the brim adhered too well to the sheet, and I needed to spend about 10 minutes to try and remove it. As you can see, even with careful scraping of the ABS brim, I still managed to cause a few damage scratches on it.
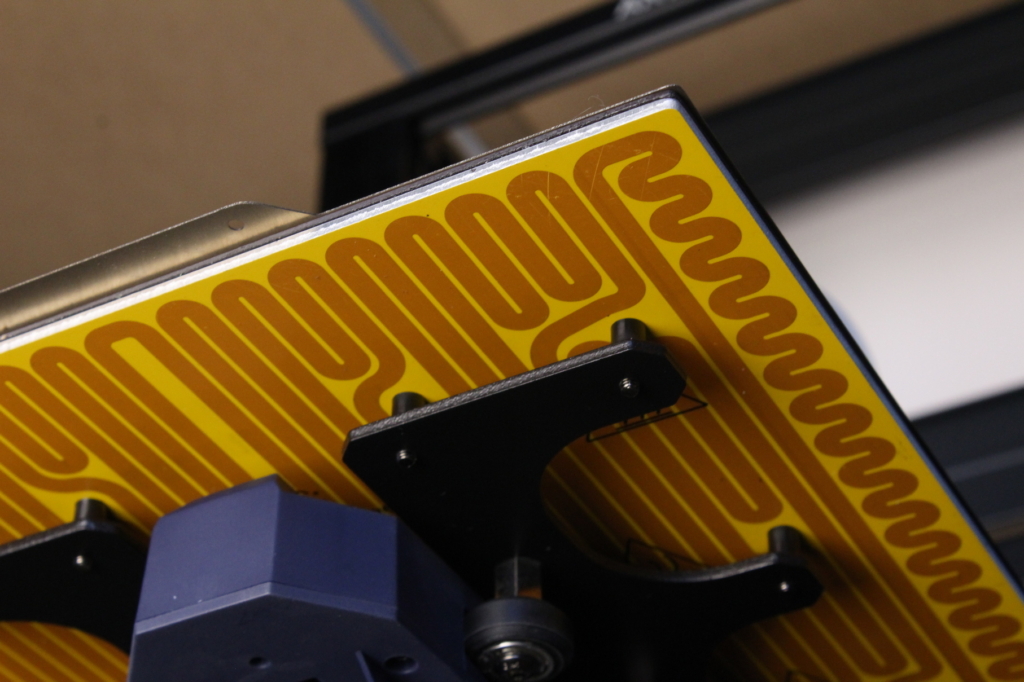
Unfortunately, the Anycubic Vyper heated bed doesn’t have thermal insulation underneath, which would make the printer more efficient in terms of power consumption. It’s also hard to install thermal insulation, because the screws holding the bed in place are covered by the magnetic surface.
TriGorilla+ V0.0.6 32-bit board with silent stepper drivers
The Anycubic Vyper comes with a proprietary 32-bit board running silent stepper drivers but for some reason they produce more noise compared to other printers running the same stepper drivers. It’s not much louder, but you can clearly hear some movement sounds during printing.
The TMC2209 stepper drivers are not removable, so if something happens and one of the stepper drivers gets damaged, you will have to replace the whole board. It’s not possible to use an aftermarket board for now because there’s no drop-in replacement available. The CR-6 SE board is not compatible due to the SD card position.
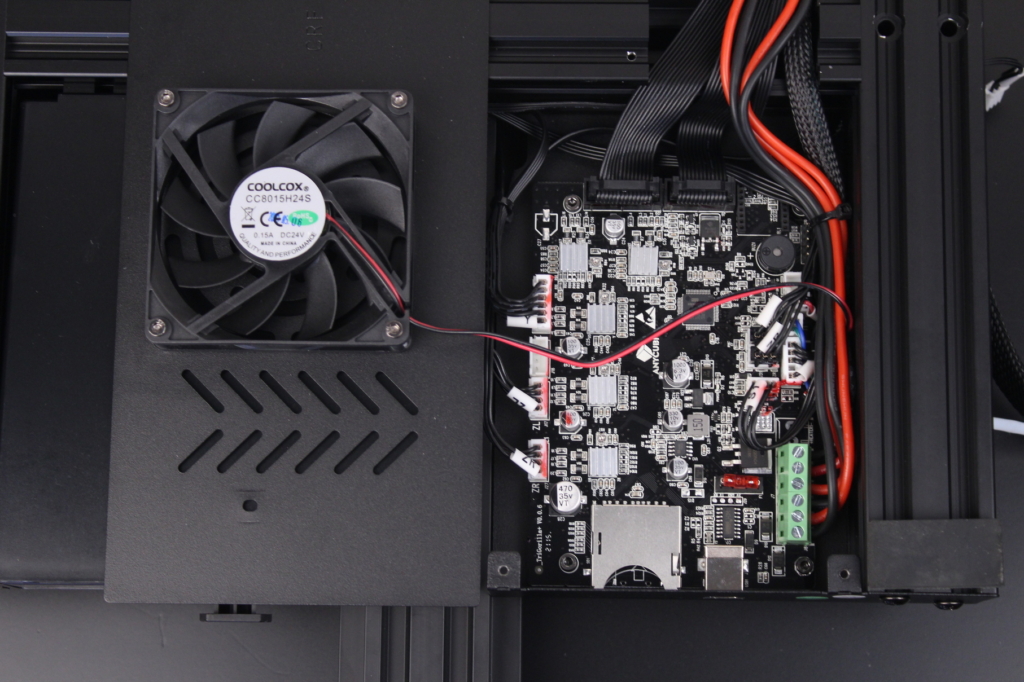
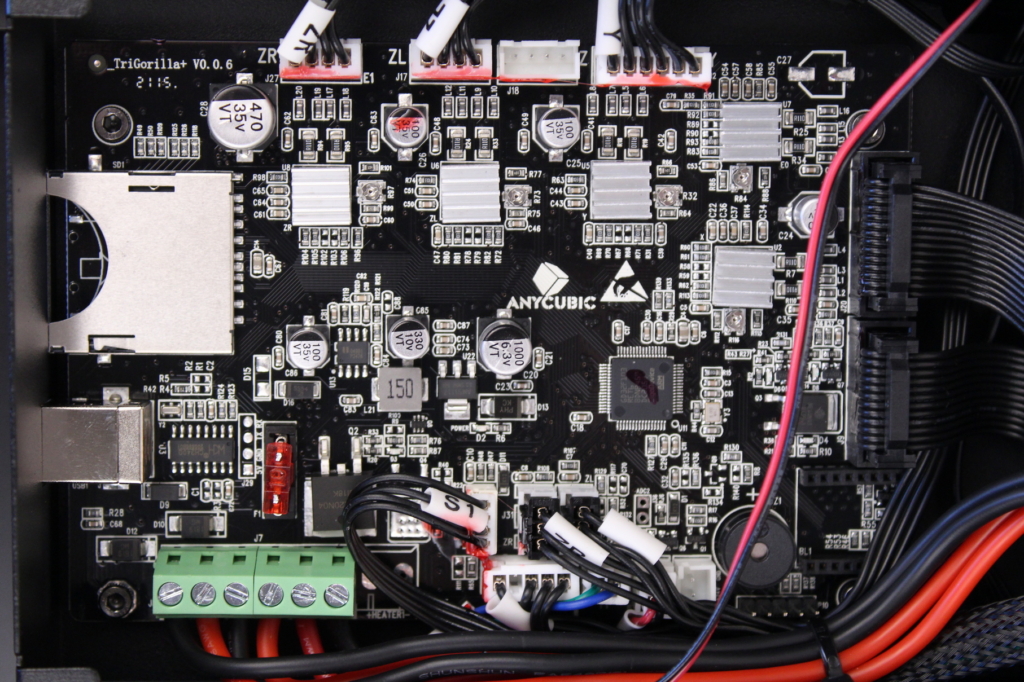
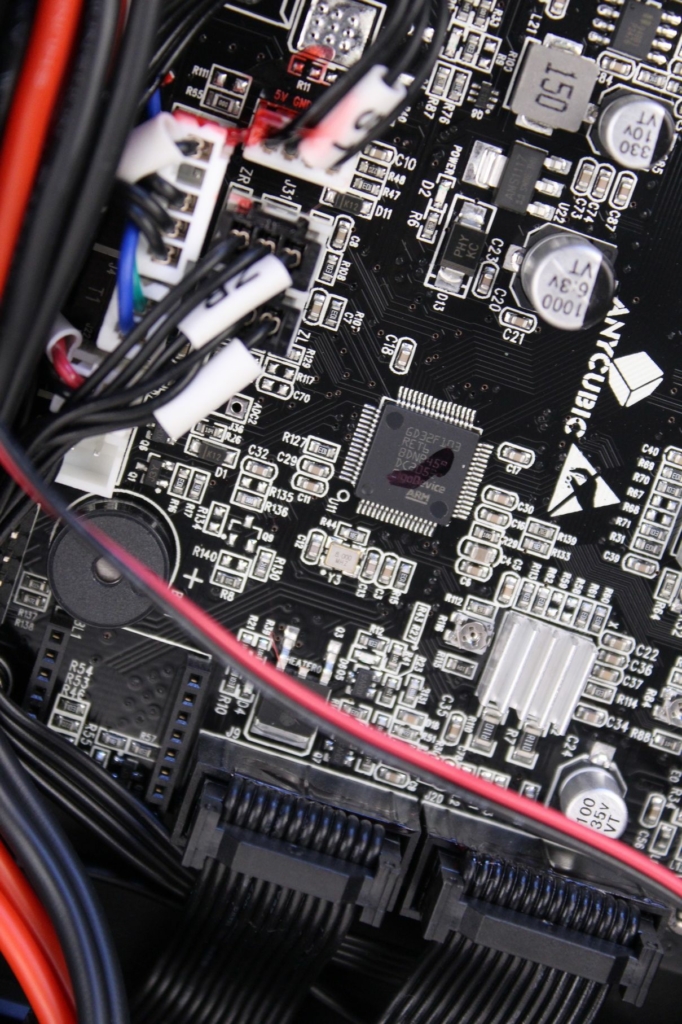
The GigaDevice GD32F103RET6 chip is a STM32-compatible Cortex-M3 MCU running at 108 Mhz with 512K of flash memory. I can also see a slot for adding a Wi-Fi adapter, so we might be able to add Wi-Fi capabilities in the future.
To cool the board and the stepper drivers, Anycubic used an 80mm fan which is able to push a lot of air over the electronics. I expected this fan to be more silent, but it spins fast and that produces a bit of noise. Much less noise compared to a 4010-fan used by other companies, but still more noise that I would have expected. The good news is that the fan stops completely when the printer is idle.
It’s also worth noting that the wires are not tinned, an issue present with a lot of 3D printers out there. Tinned wires can become dangerous because the tin can deform over time and cause an imperfect connection which can start a fire.
The Anycubic Vyper runs a development version of Marlin 2.0.x built in March. I asked Anycubic for the source code, but they were unable to provide it at the moment. I reminded them about the license and usage, so hopefully we will get the sources to re-build the firmware with a stable version of Marlin and enable Linear Advance.
Dual Z axis with optical Z endstops
Having an automated bed leveling solution is great, but if the X gantry is not paralel to the build plate, you will have issues with your first layer because the machine can only compensate for small differences.
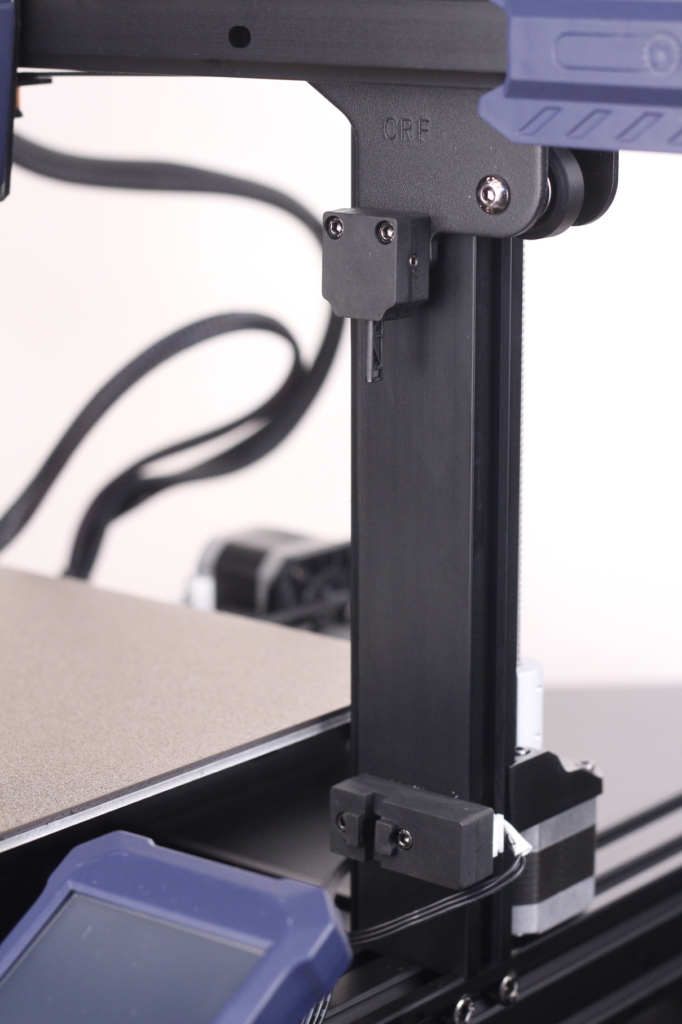
The Anycubic Vyper comes with dual lead screws and dual optical Z endstops to help counteract this issue. The printer starts homing and the movement stops after each Z endstop is triggered. This eliminates the need of having a belt between the lead screws to keep them coordinated.
Anti-backlash nuts on the Z axis
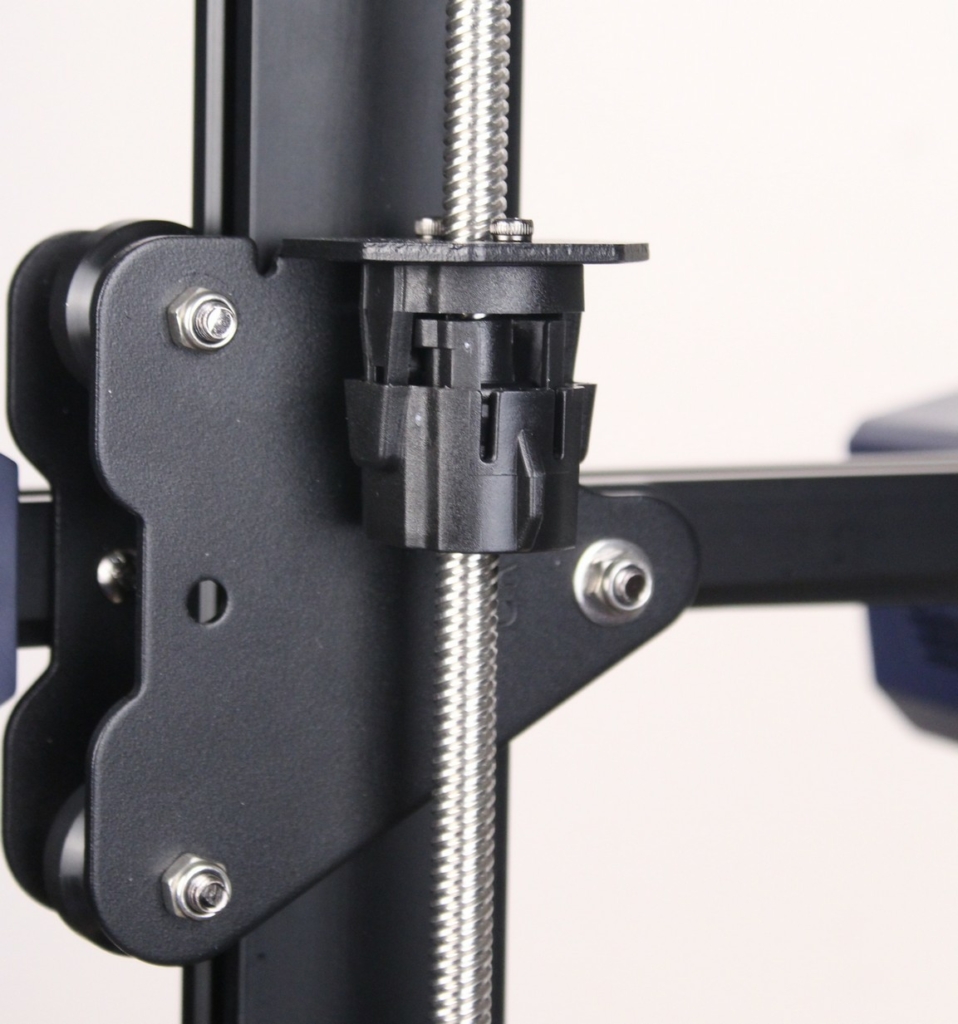
To ensure consistent Z axis movements with no backlash, the Anycubic Vyper uses custom POM anti-backlash nuts. Besides minimizing backlash, the use of POM nuts will eliminate the need of performing maintenance to your 3D printer and greasing the Z screws.
4.3-inch touchscreen
The Anycubic Vyper has 4.3-inch touchscreen on the right side of the printer, set in a vertical position. I think it’s the same kind of touchscreen used with other printers like the CR-6 SE, but with a different frame and customized firmware.
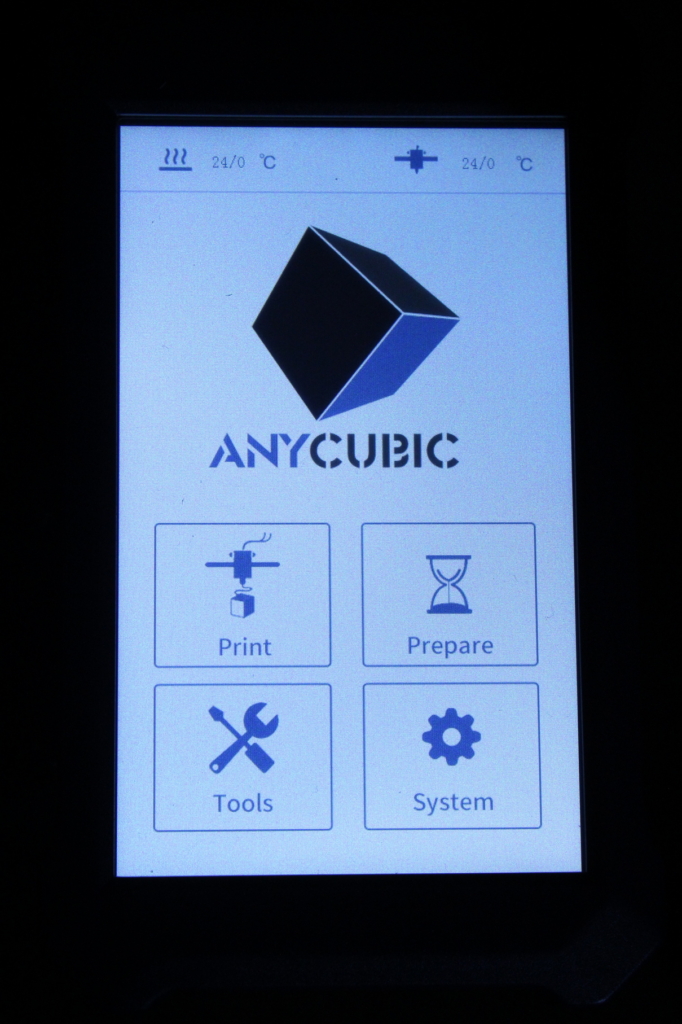
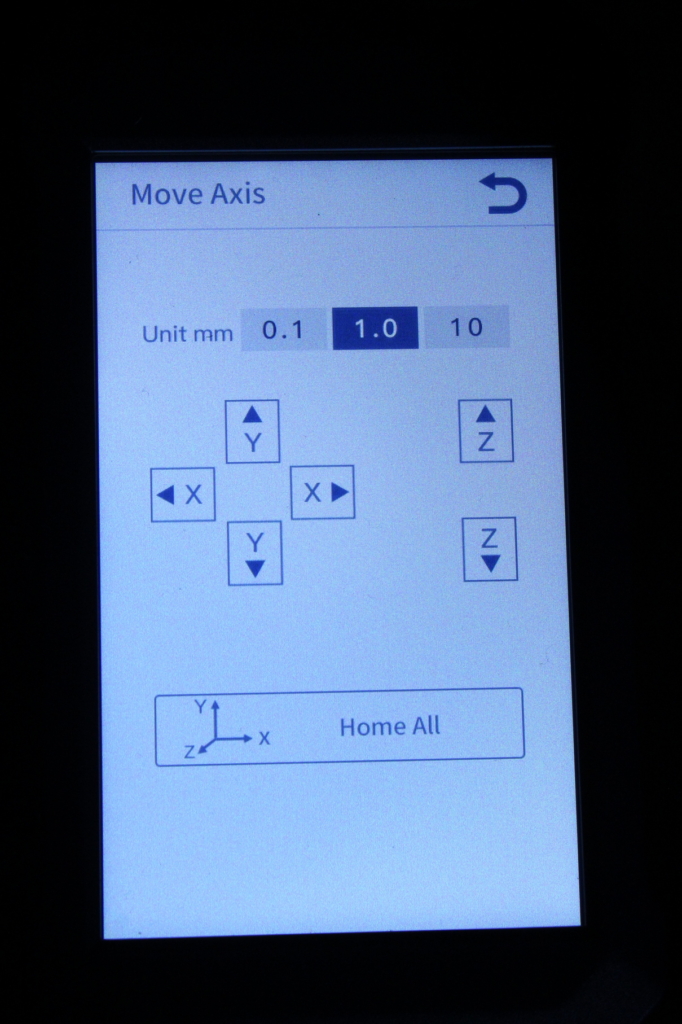
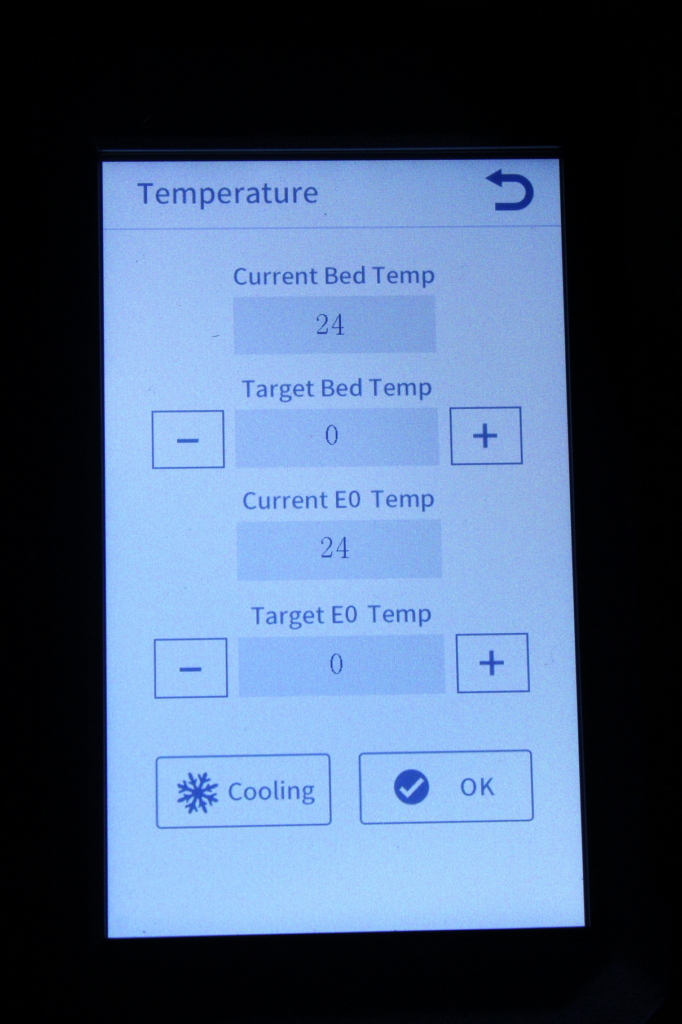
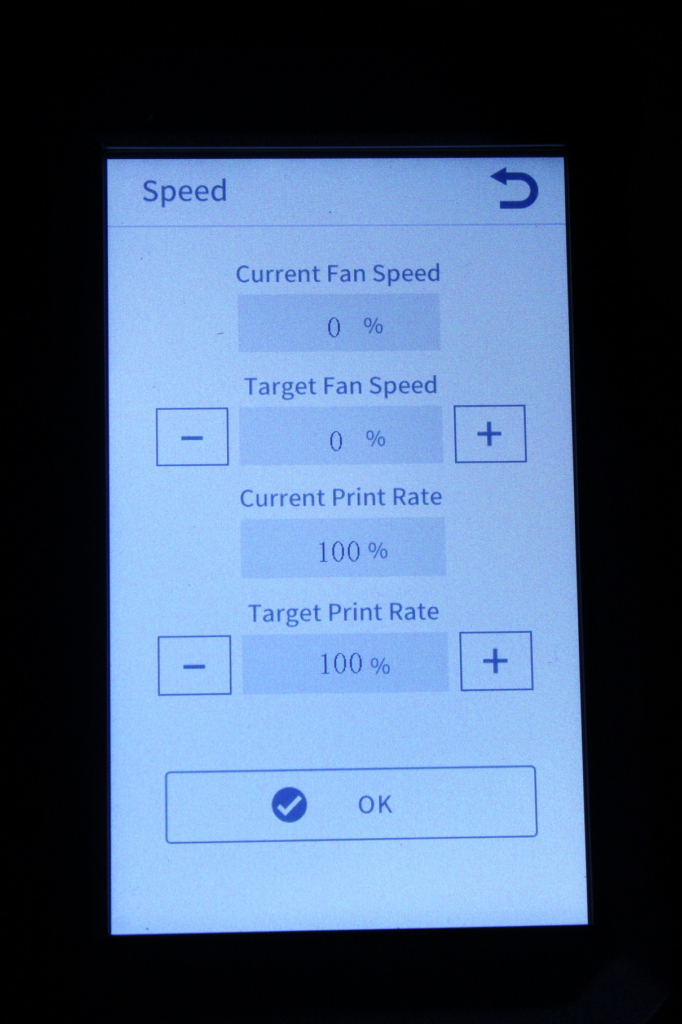
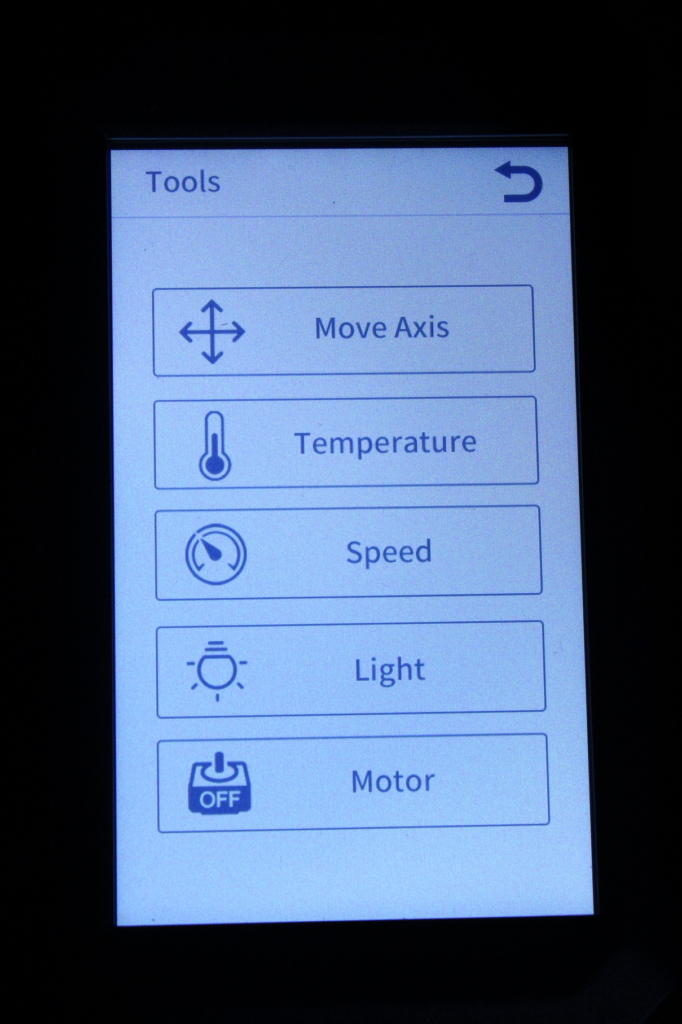
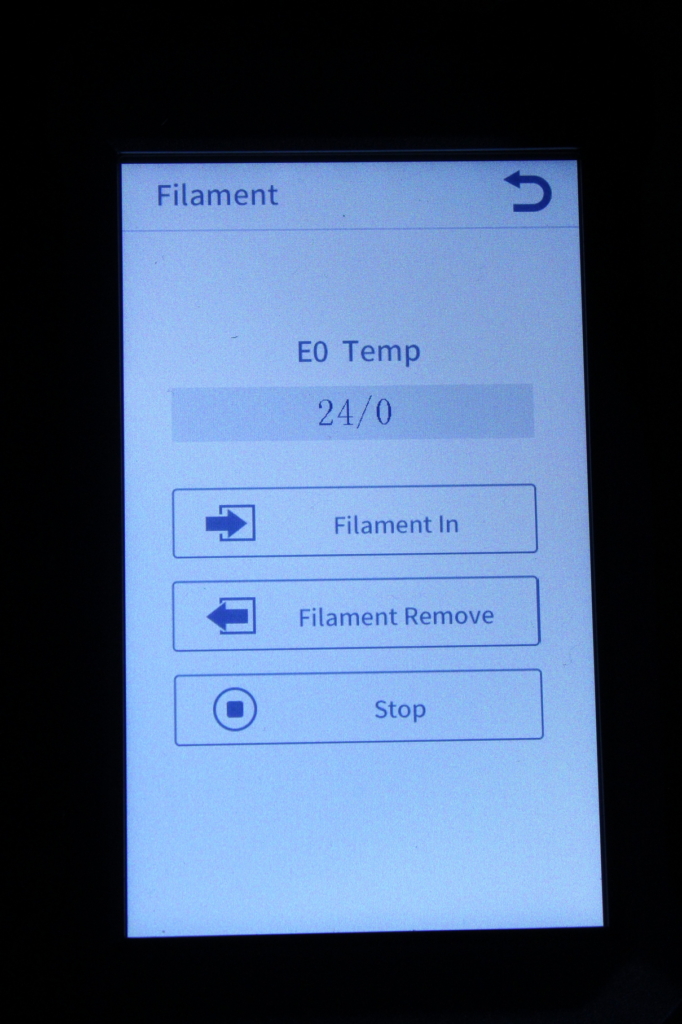
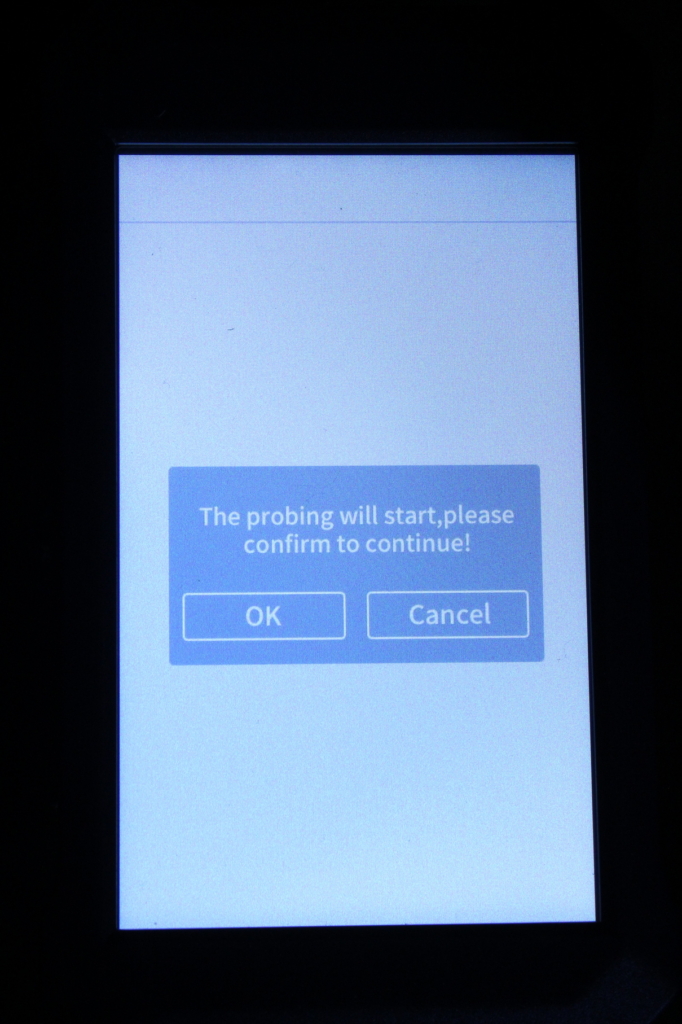
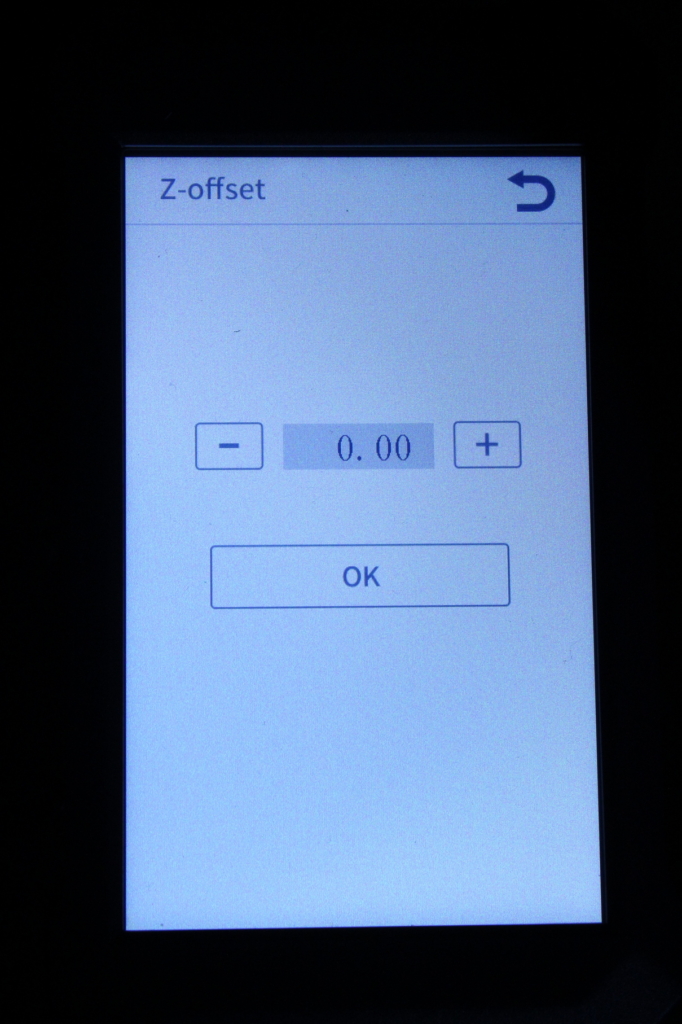
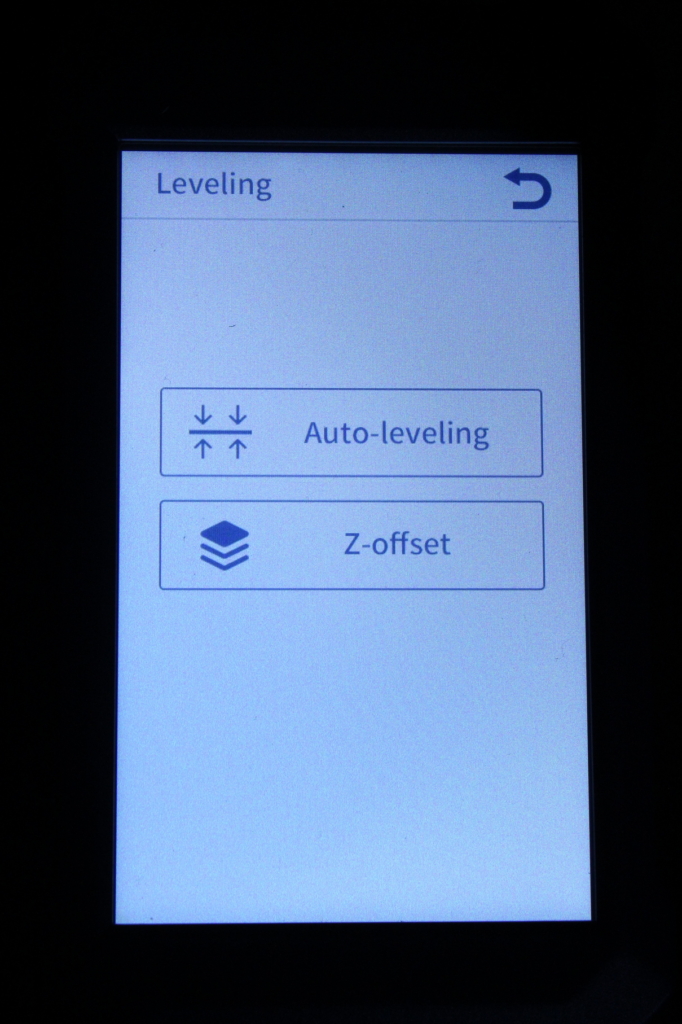
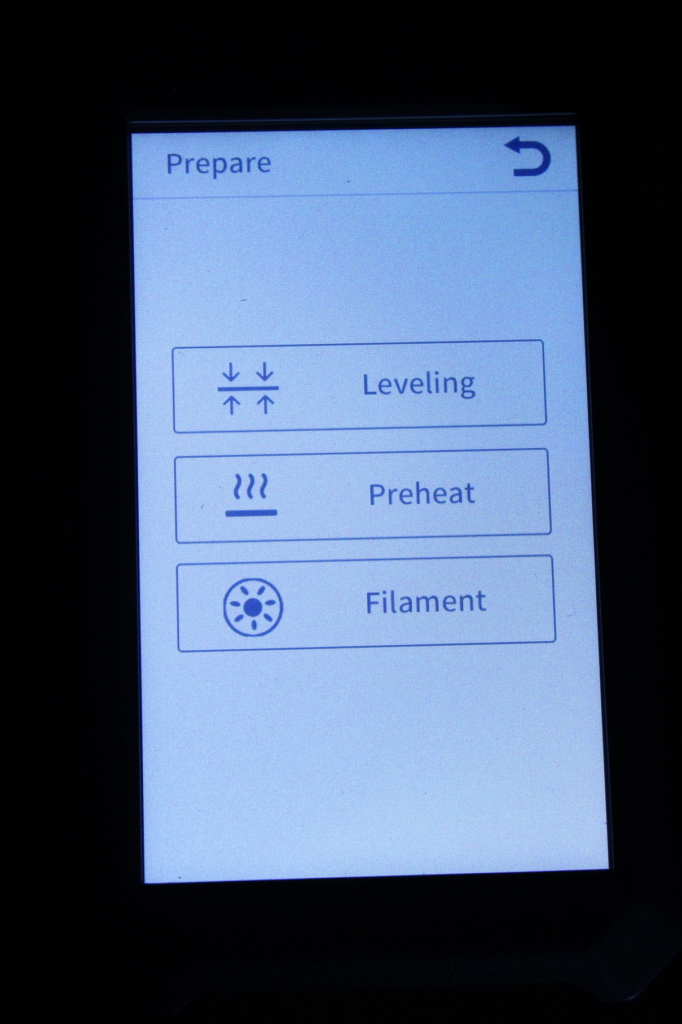
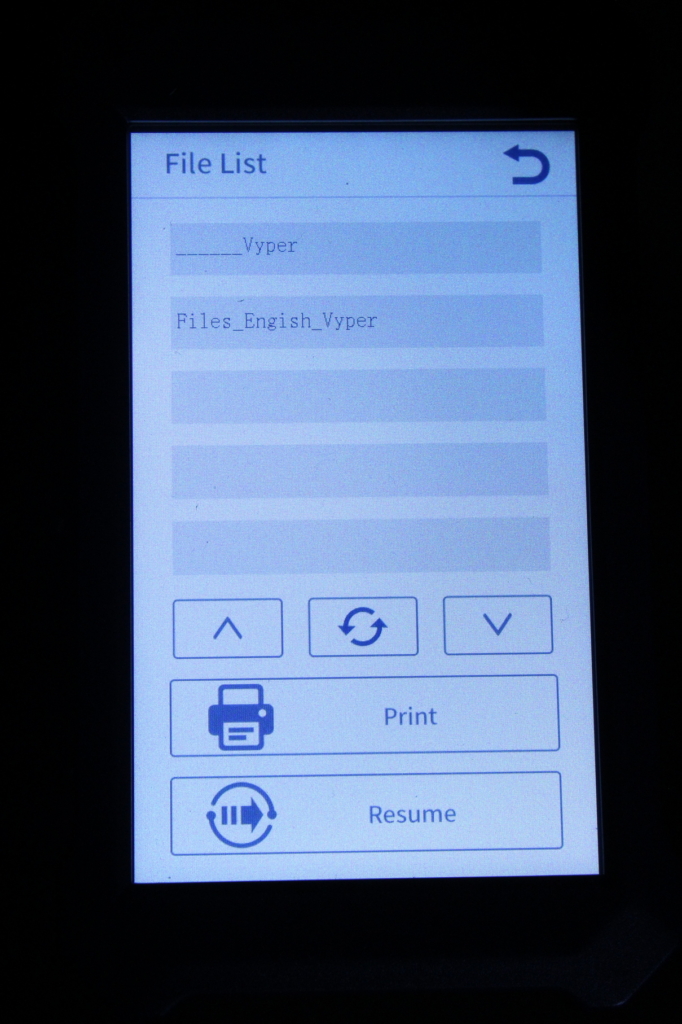
The interface is clean and responsive, but I am not a huge fan of the white theme. Besides that, the thin font letters make it a bit harder to read compared to other touchscreens I’ve used in the past. There’s also a strange effect over the screen that looks like a badly installed screen protector. I’ve double checked the screen to confirm that there’s no other screen protector to remove.
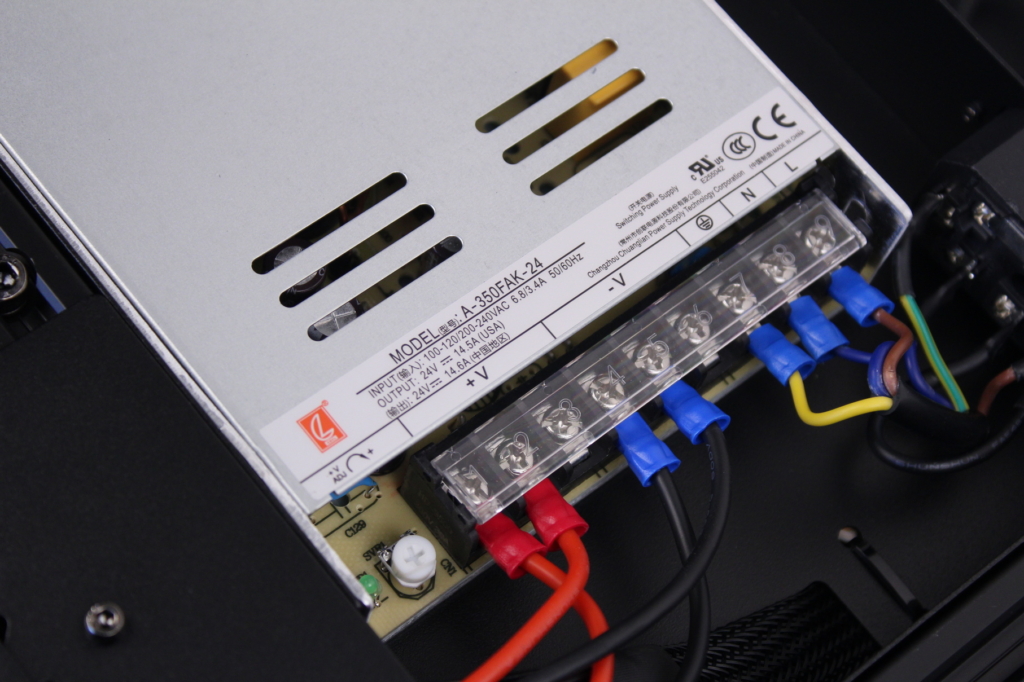
350W 24V power supply
The included power supply is a no-name unit, but it performs well. I would have liked to see a Mean Well power supply instead of this one, but since I started 3D printing, I’ve had a single machine stop working because of the power supply.
What bothers me more is the power supply fan which is running at all times during printing. It stops when the printer is idle, but after a print is started, you start to notice it’s presence.
Belt tensioners
The Anycubic Vyper also comes with belt tensioners which are a bit different compared to the regular belt tensioners we get on other printers.
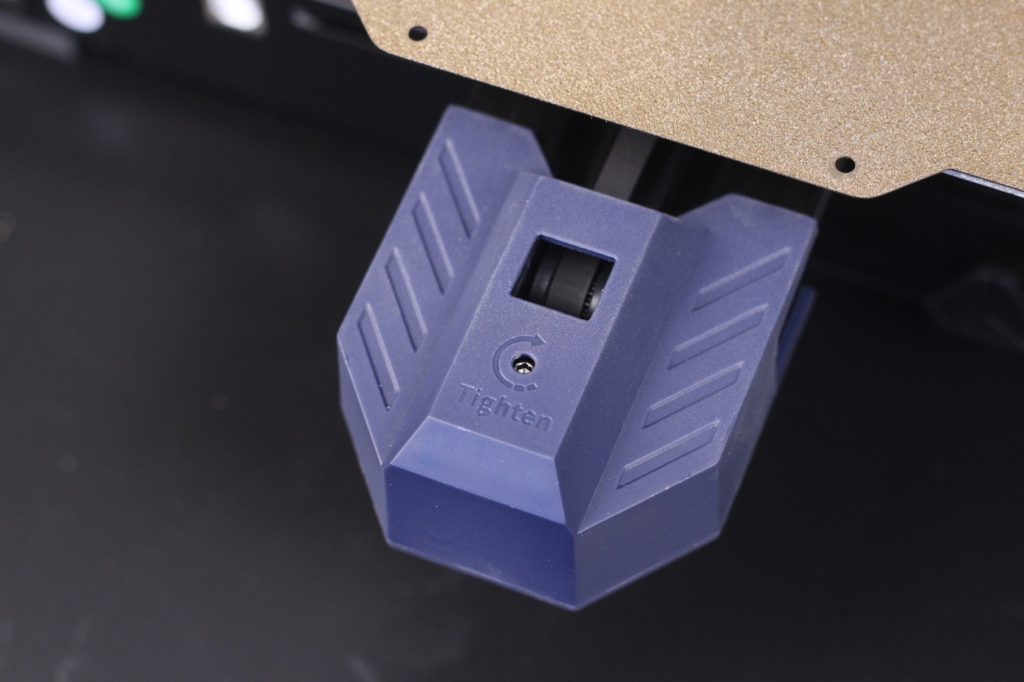
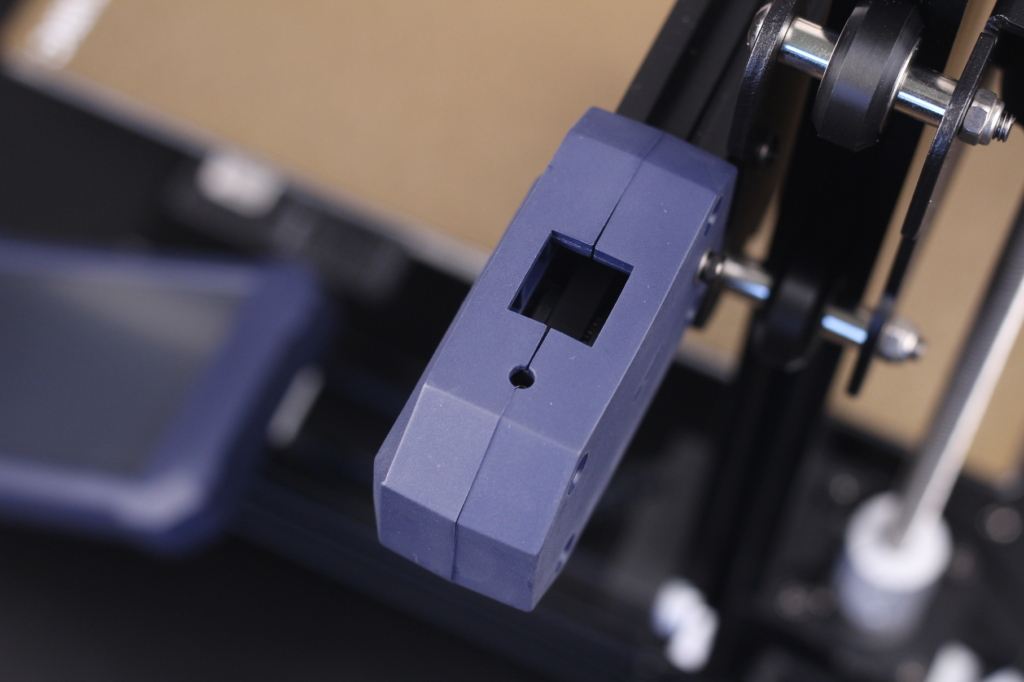
To tighten the belts, we need to use a hex wrench and turn the small screw present inside the belt tensioners. It’s not as easy as with other printers but maybe this will deter users from overtightening their belts.
Heating time and power consumption
I tested the heating time for both hotend and heat bed and here are the results:
Hotend
- 200C in 1 minute and 35 seconds
- 250C in 2 minutes and 30 seconds
Heatbed
- 60C in 2 minutes and 30 seconds
- 100C in 7 minutes
Power Draw
Idle power draw is around 9W. When the hotend and heatbed are heating up, the Anycubic Vyper draws around 300W. After it starts printing, the power draw stabilizes to around 90W.
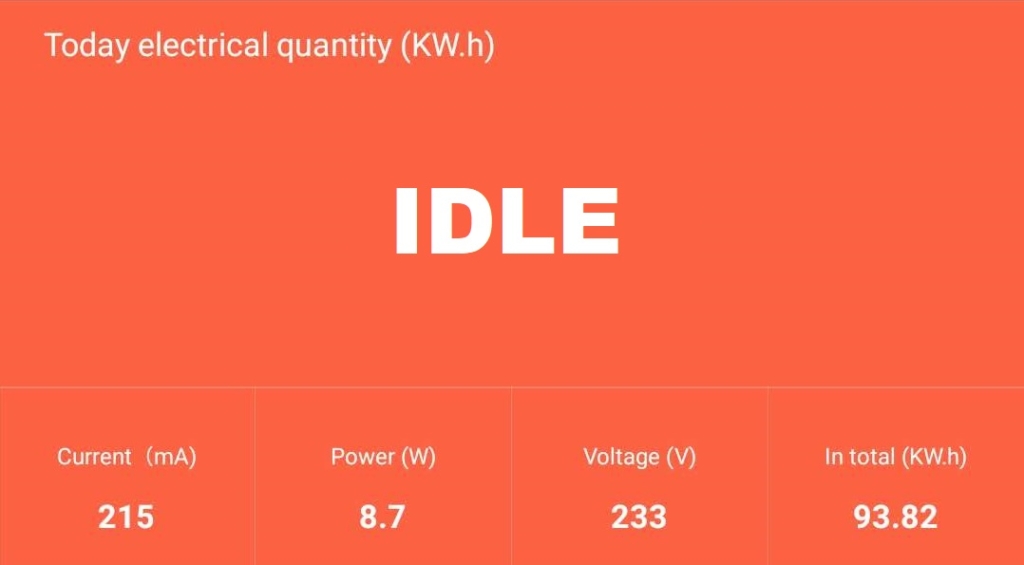
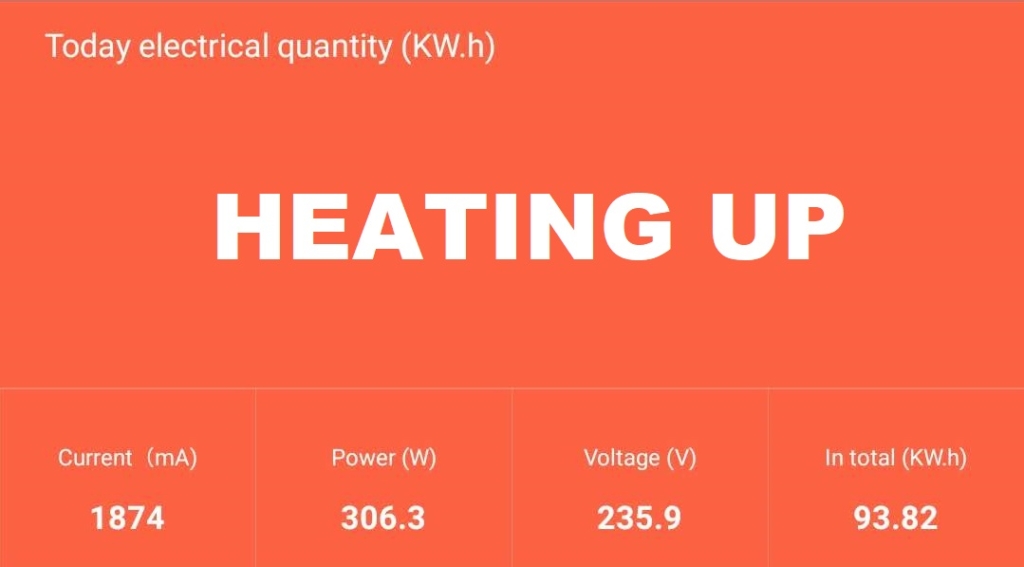
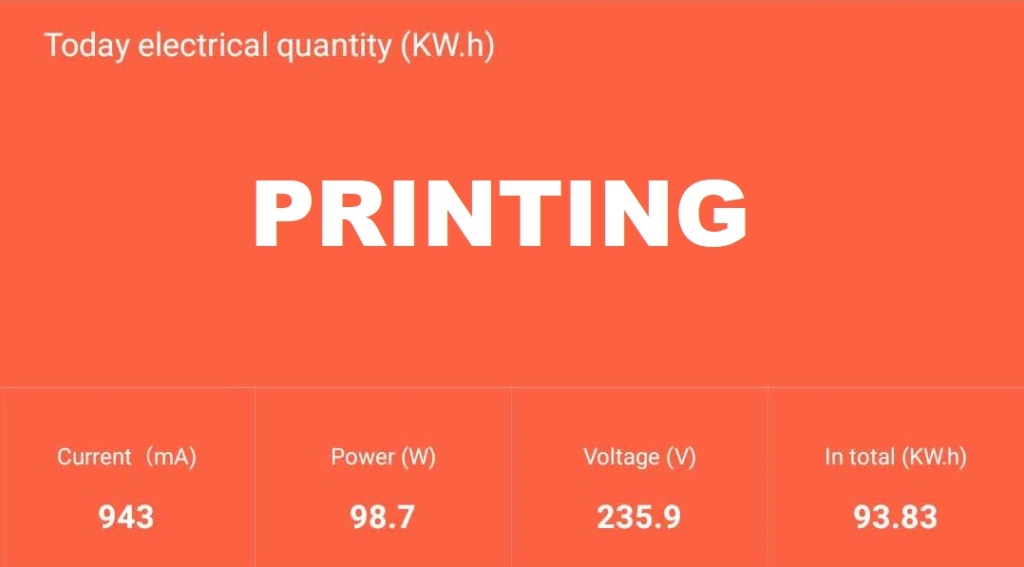
All these measurements were taken with a Blitzwolf smart power socket which indicates the power draw, and it can also be used for remotely powering on and off the printer.
Bed Temperature Uniformity
I tested the temperature uniformity for the Anycubic Vyper bed with the Flir Camera installed on the CAT S62 Pro. The bed has been set to 60C and I waited 2 minutes after reaching that temperature for the temperature to stabilize.
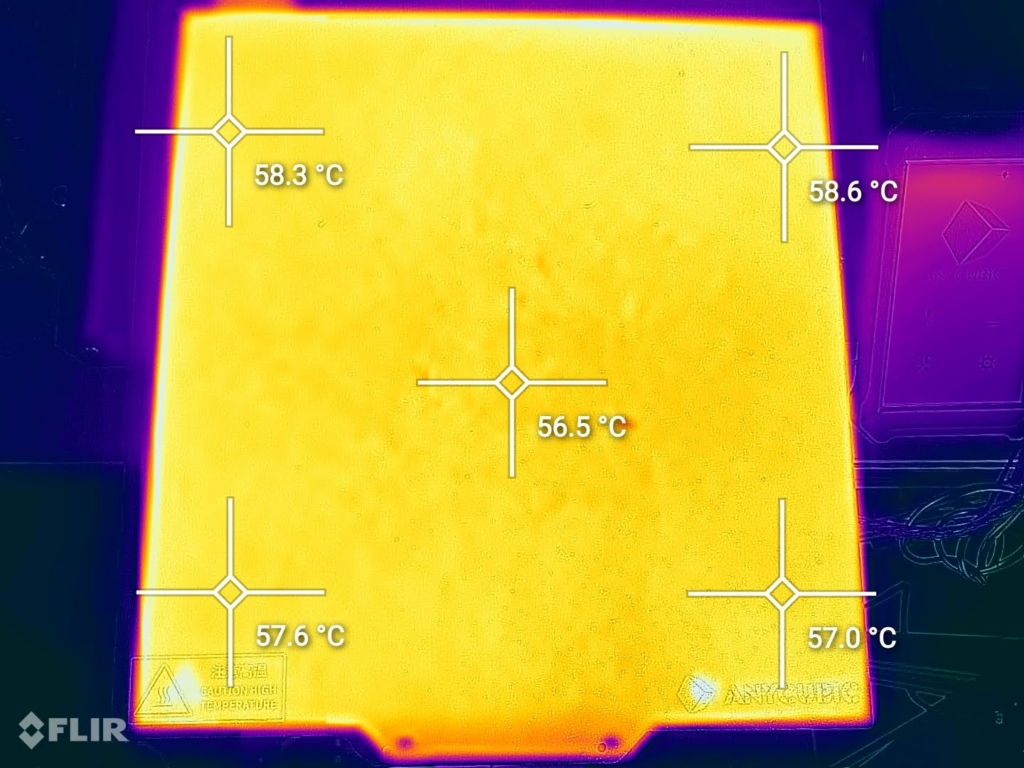
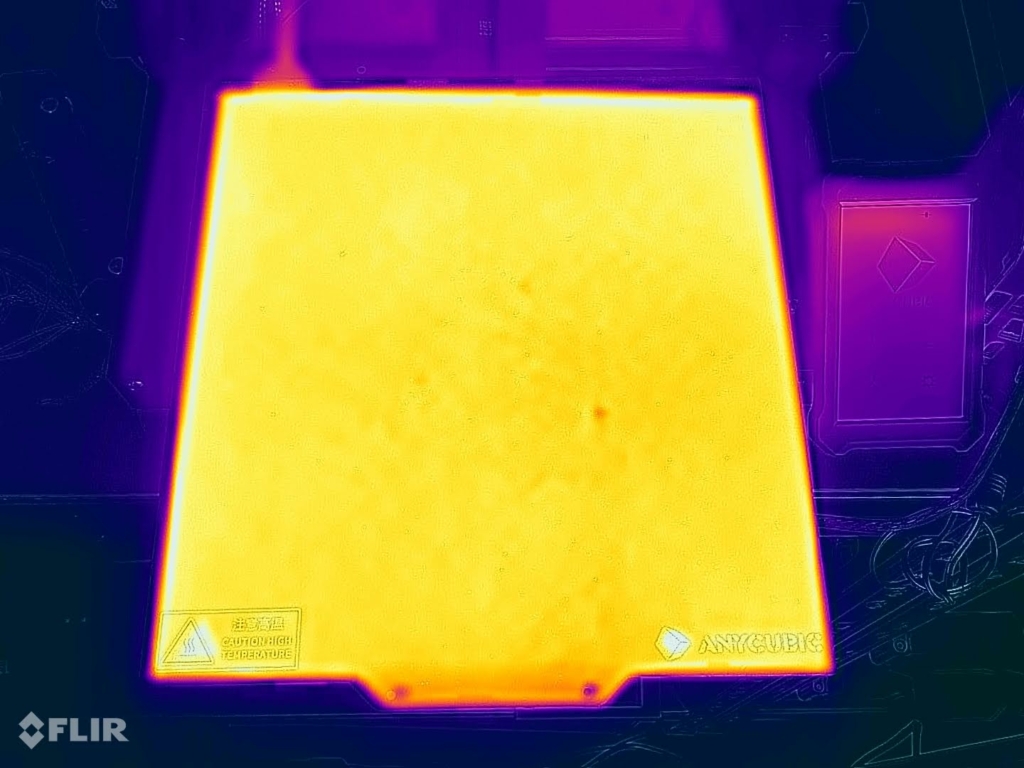
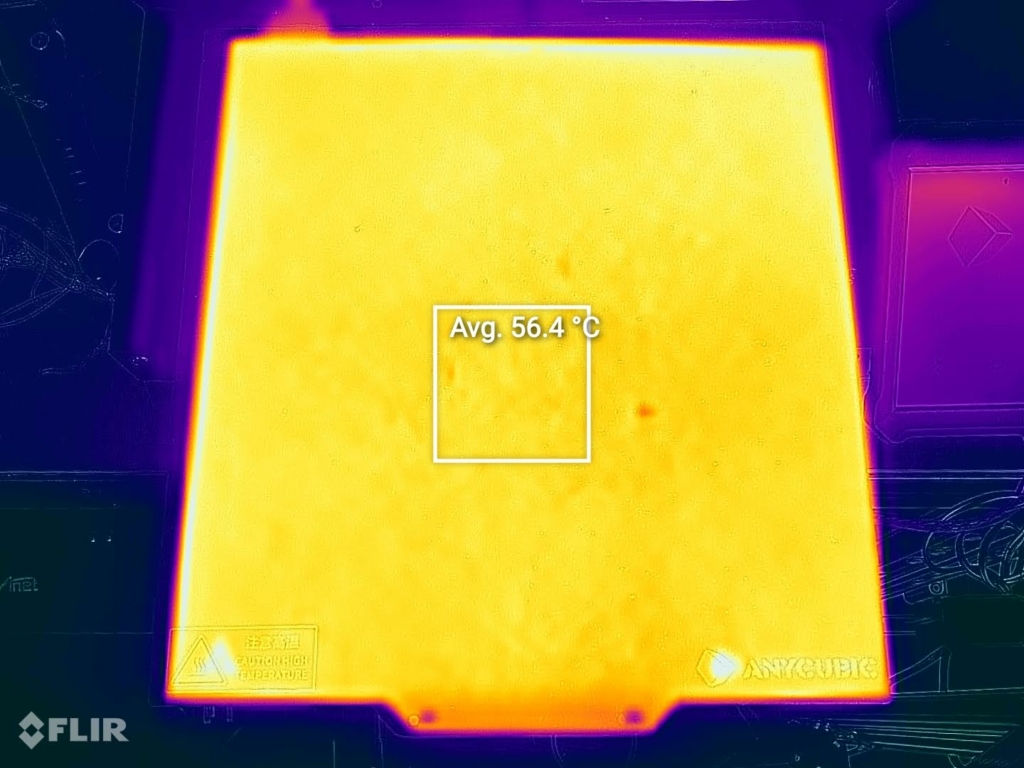
As you can see, the temperature uniformity is good with a small difference of a few degrees compared to the value set on the printer, probably because of the small insulation proprieties of the magnet.
Anycubic Vyper Noise Levels
The Anycubic Vyper is dead silent when idle. All the fans are off, and you won’t notice any sound coming from the printer. But as soon as you start a print, the power supply and board fans start to ramp up and produce some noise. Besides that, homing printer moves are noisier compared to other printers, but it’s nowhere near as noisy as running old drivers like the A4988.
The Vyper won’t win any awards in the silence department, but it’s still silent enough not to be annoying.
IdeaMaker Profiles for Anycubic Vyper
During my time with the printer, I also tuned four IdeaMaker profiles for the Anycubic Vyper using the tools available in the 3D Printer Calibration Guide using IdeaMaker article. These profiles are tuned for the stock printer and worked well for me. Feel free to give them a go.
Anycubic Vyper IdeaMaker Profile – PLA – 3DPrintBeginner
Anycubic Vyper IdeaMaker Profile – PETG – 3DPrintBeginner
Anycubic Vyper IdeaMaker Profile – ABS – 3DPrintBeginner
Test prints on Anycubic Vyper
3D Benchy
As usual, the first test print is a 3D Benchy. Print quality is good out of the box, but due to an incorrect value set in the slicer, there’s a thin imperfection line on the front of the boat. I changed the bridging settings and the issue disappeared. The top layers also suffer from a bit of under-extrusion.
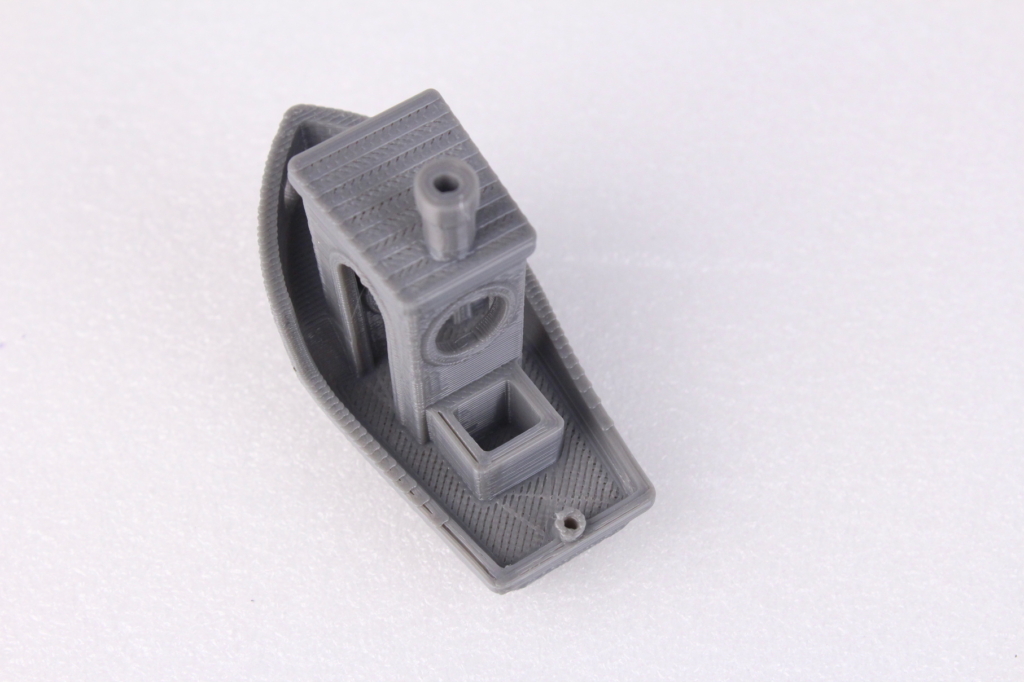
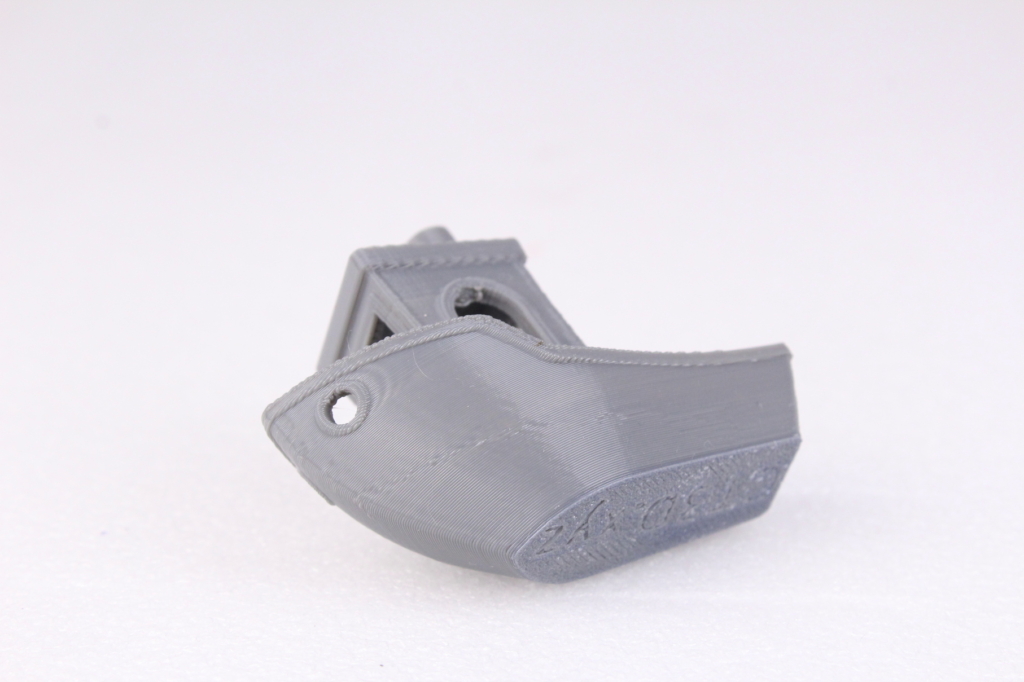
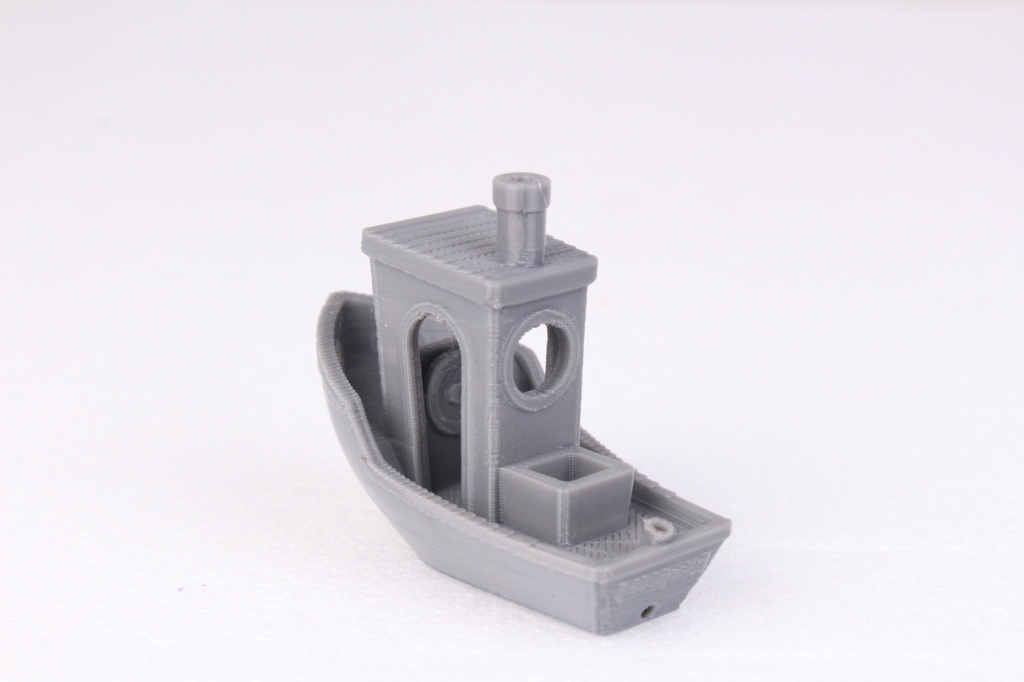
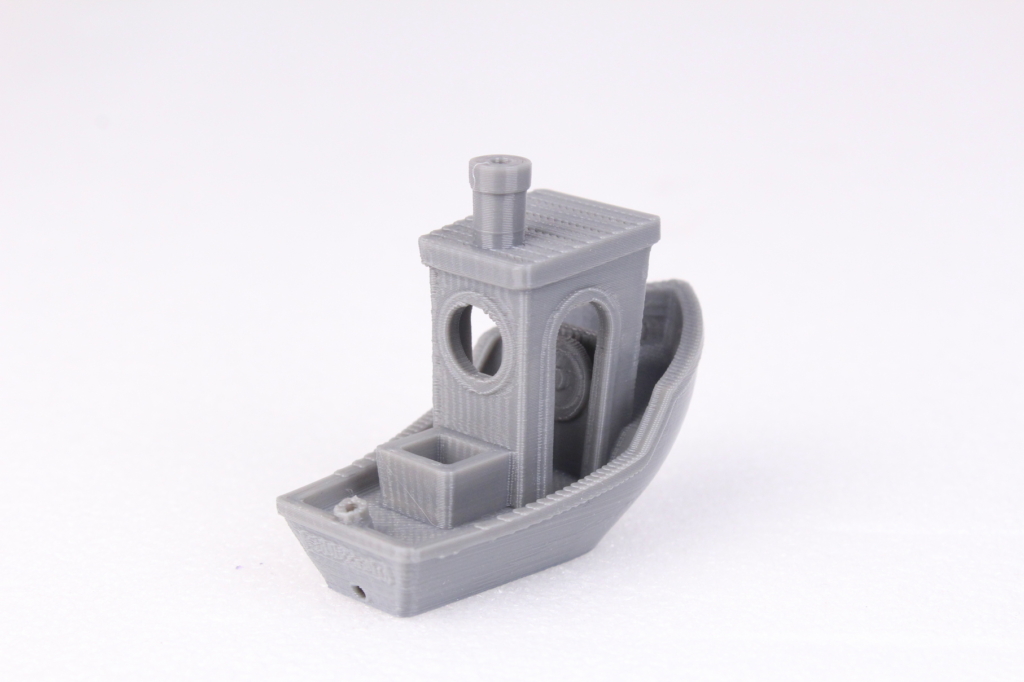
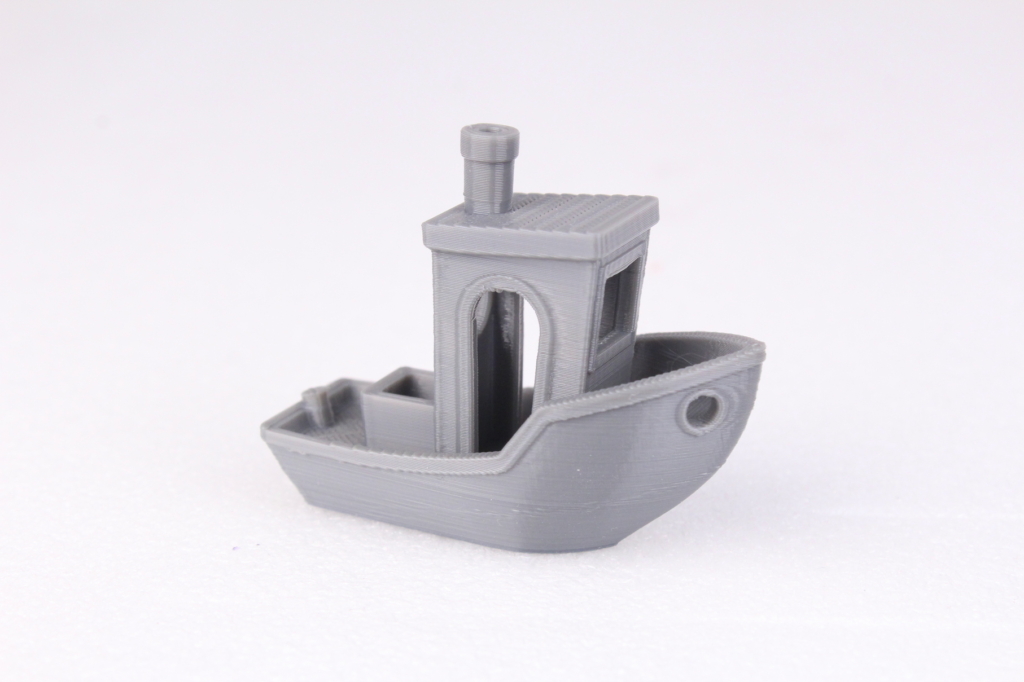
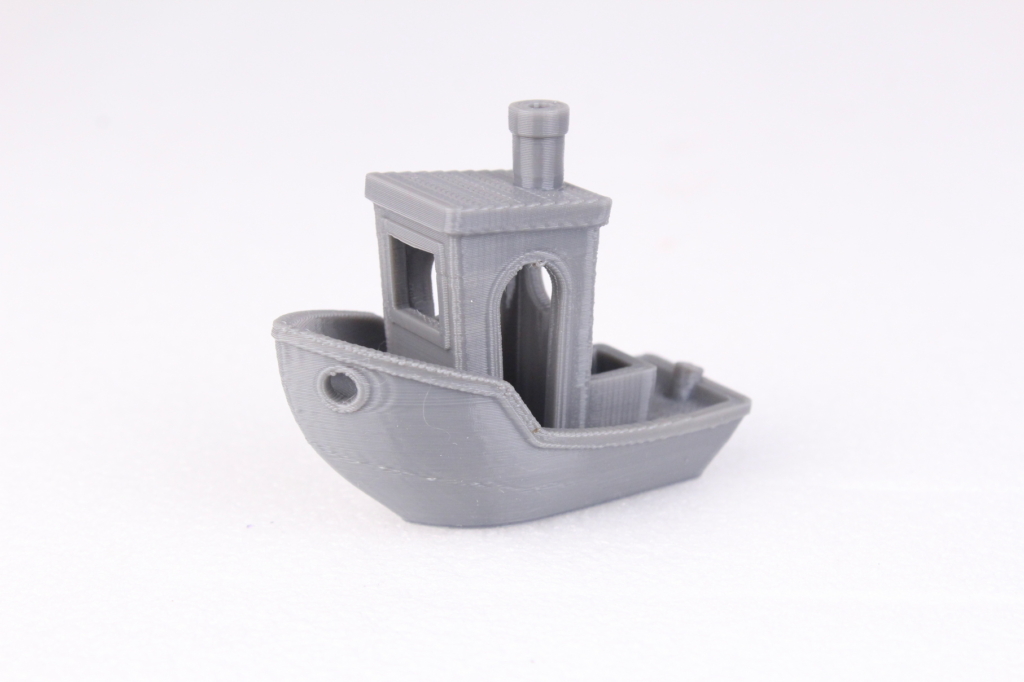
- Material: Gembird Gray PLA
- Layer Height: 0.2mm
- Nozzle Temperature: 210C
- Bed Temperature: 60C
- Print Speed: 60 mm/s
200% calibration cube
After further tuning of the profile, I printed a 200% calibration cube with good results. The extrusion is consistent, but you can easily see a ringing effect on the Y axis which can be caused by the higher than usual acceleration and jerk values used. If the external perimeter is printed a bit slower, the ringing will be less visible.
The corners are quite sharp, but if Linear Advance would have been enabled, the results could be much cleaner.
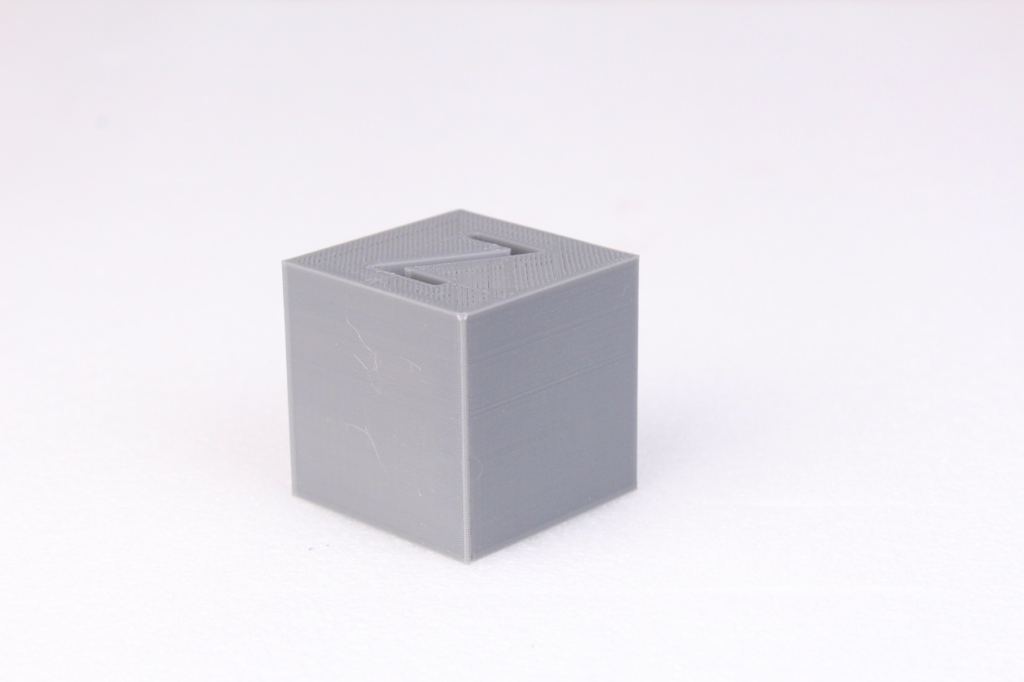
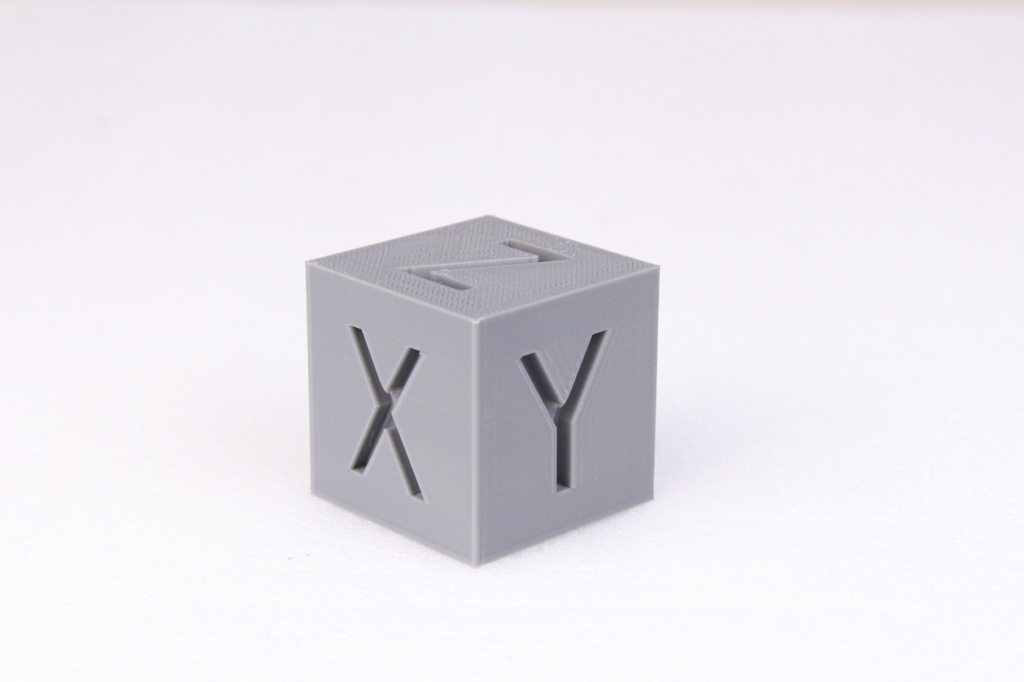
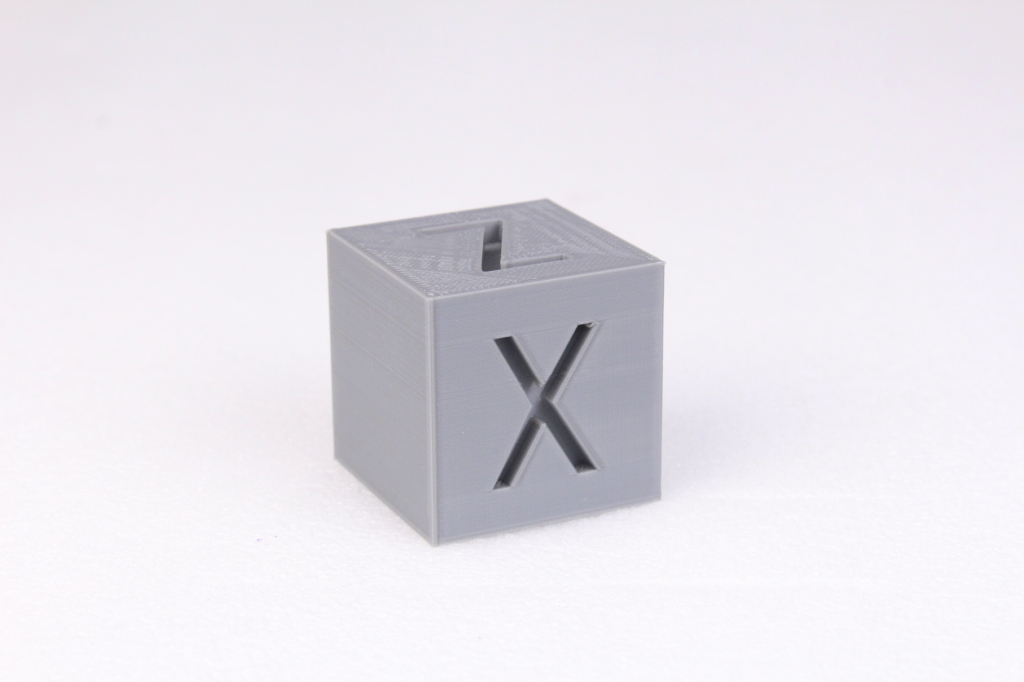
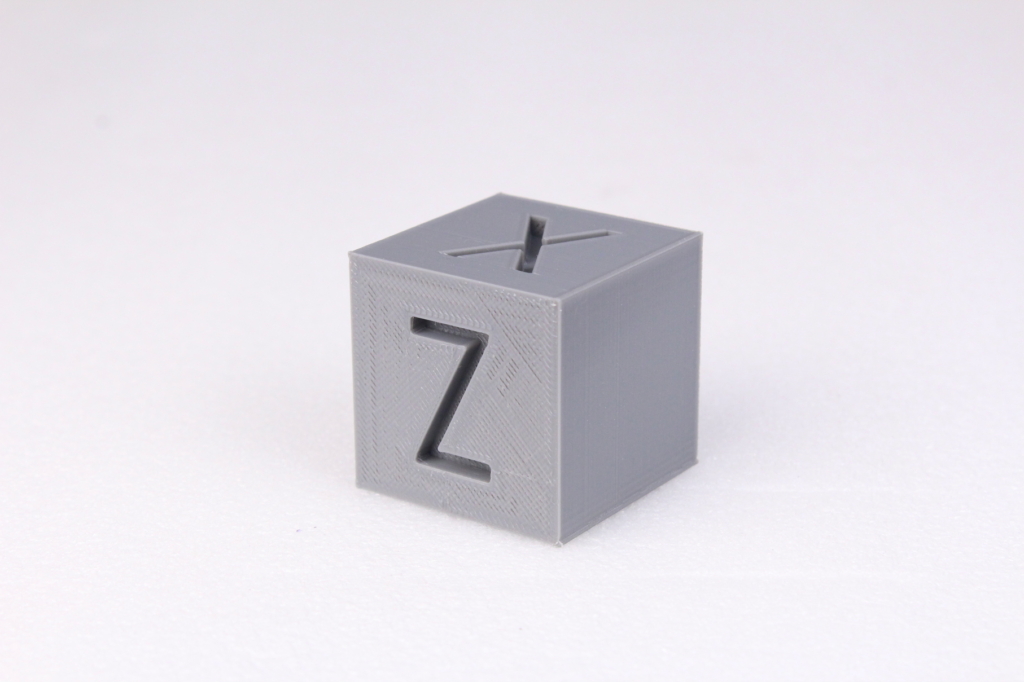
- Material: Gembird Gray PLA
- Layer Height: 0.2mm
- Nozzle Temperature: 210C
- Bed Temperature: 60C
- Print Speed: 60 mm/s
Matte PLA Phil-A-Ment
I had some matte PLA from BIQU and I thought I give it a go. The model came out great, including the steep overhangs. Extrusion is consistent and there’s not much to complain about this print.
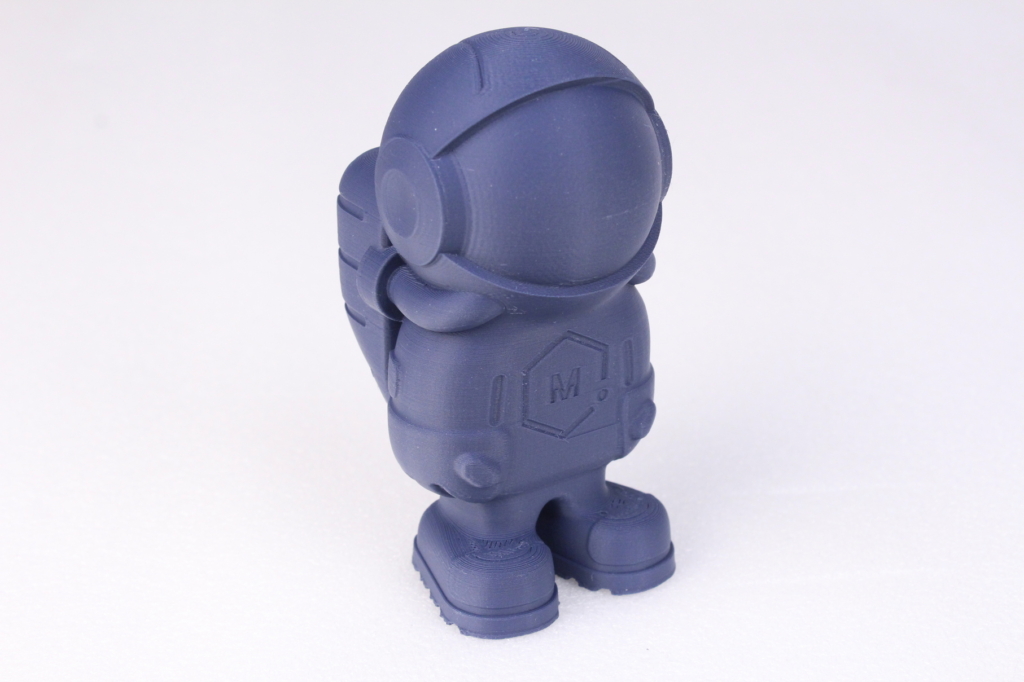
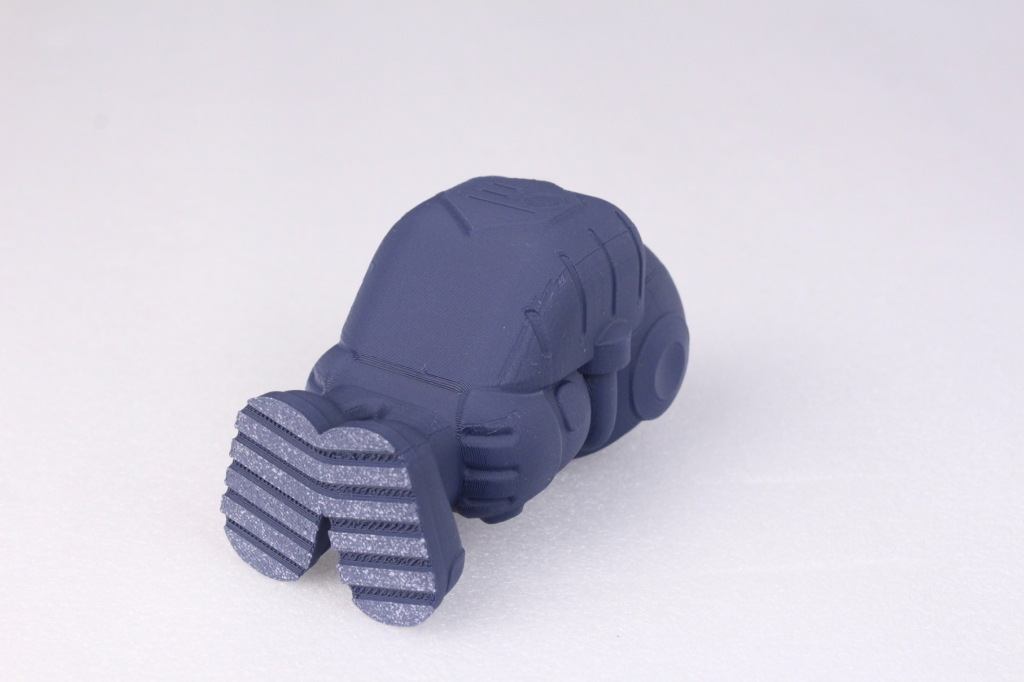
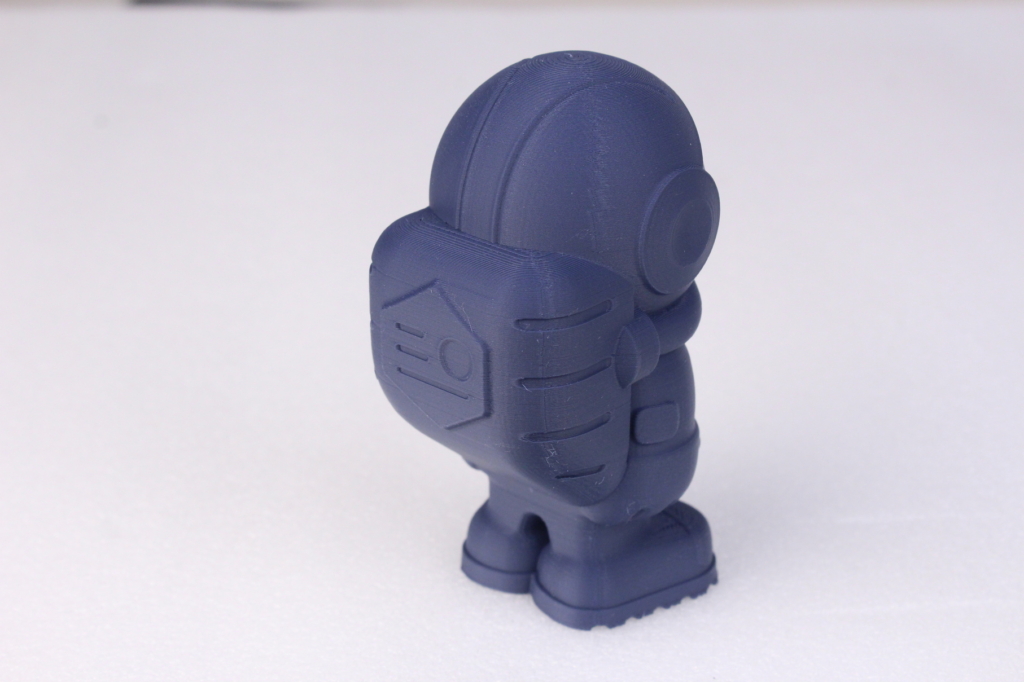
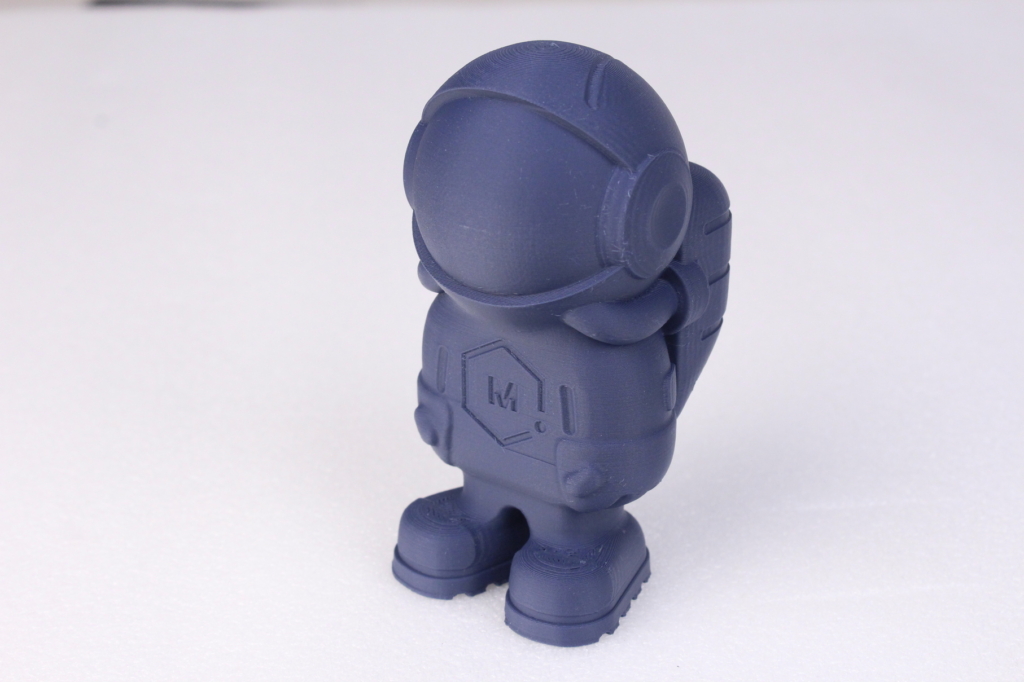
- Material: BIQU Matte Navy-Blue PLA
- Layer Height: 0.2mm
- Nozzle Temperature: 215C
- Bed Temperature: 60C
- Print Speed: 60 mm/s
PETG Phil-A-Ment
I printed the same model in some old Devil Design PETG I had laying around. Because the PETG filament was not properly stored, you can see some minor imperfections in the printed lines which were probably caused by moisture. If we ignore that, the print quality is just as good as with PLA.
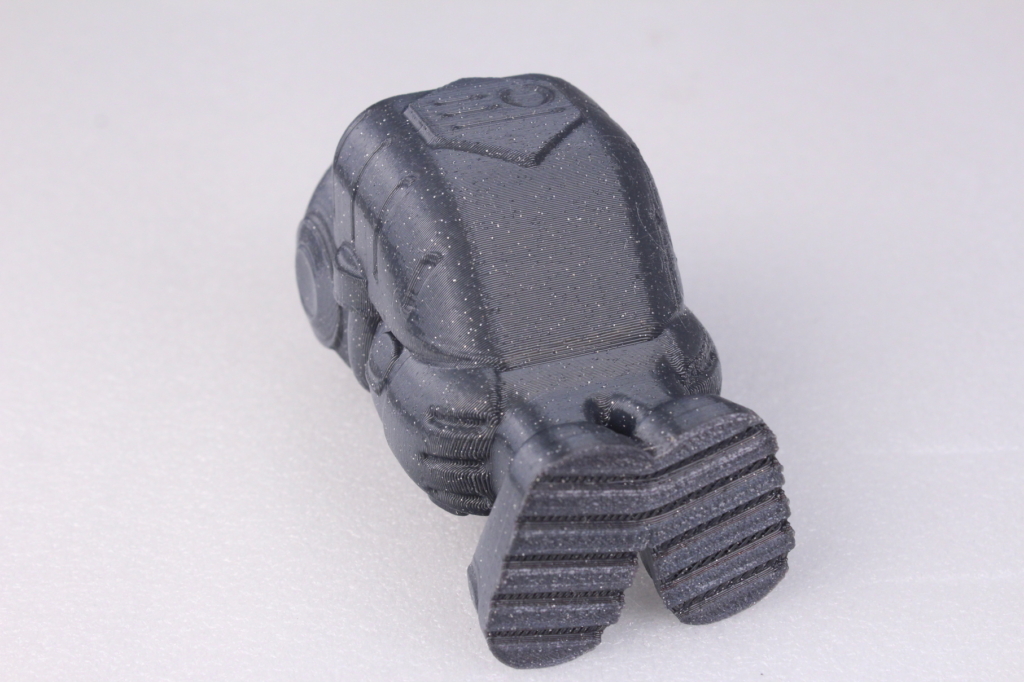
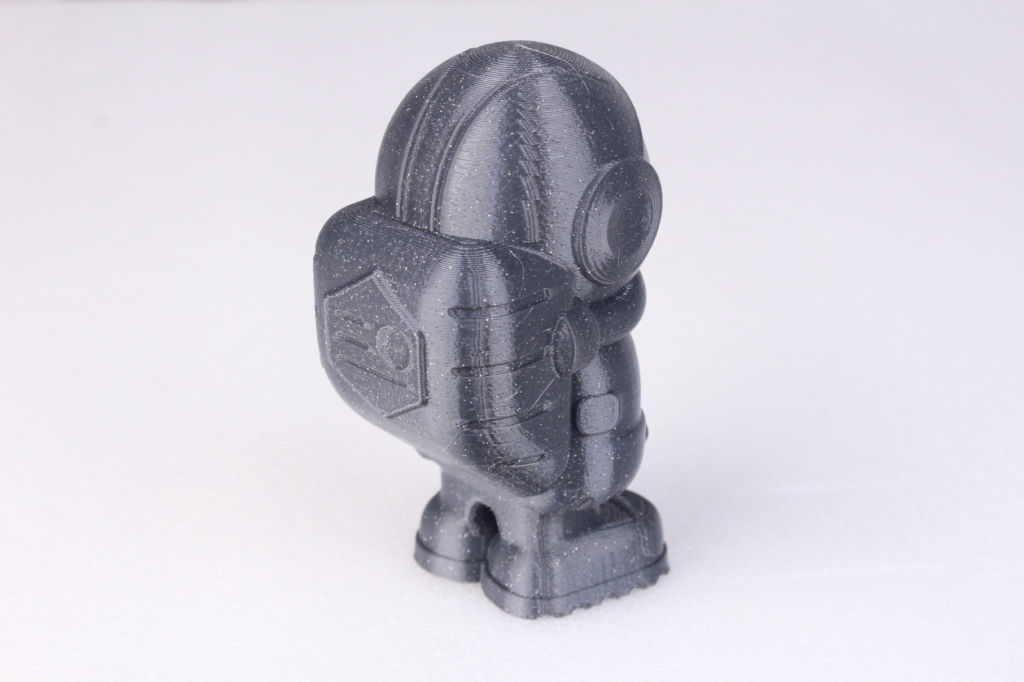
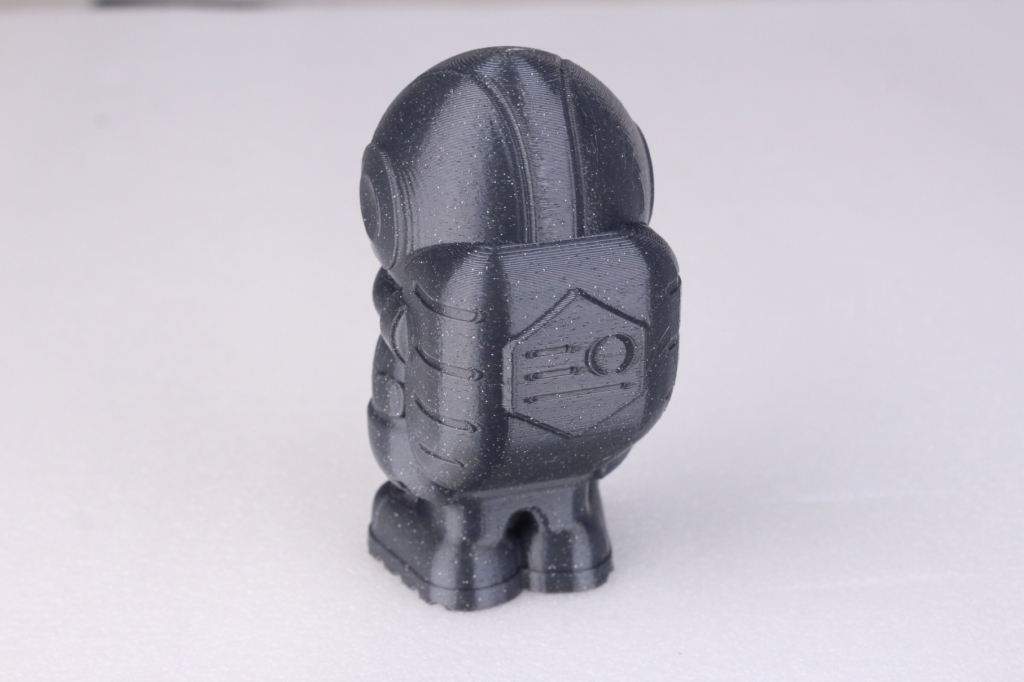
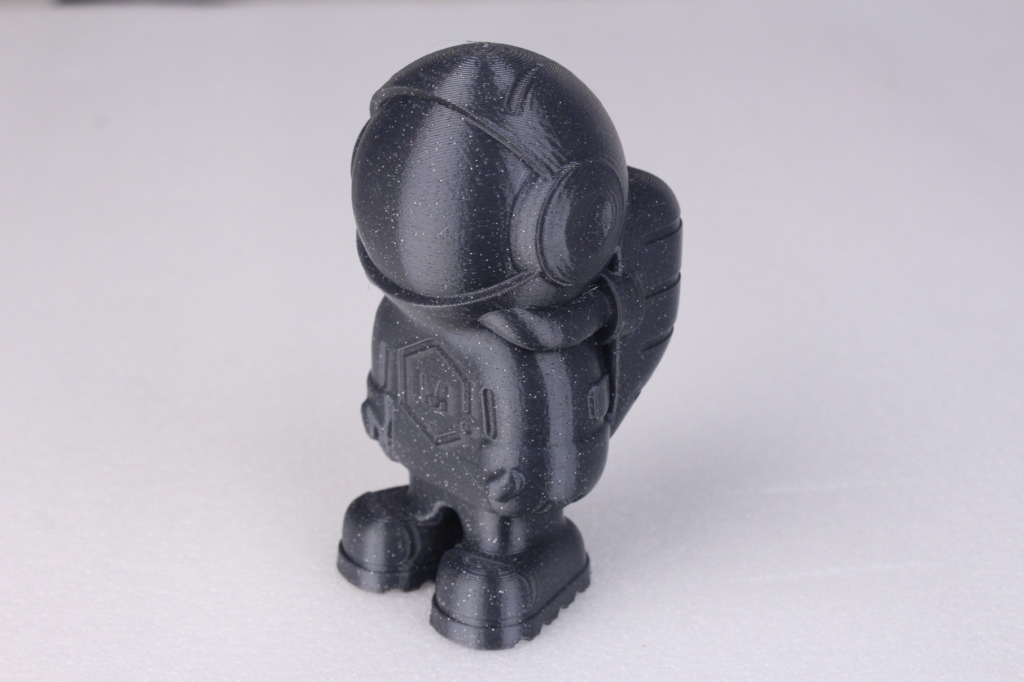
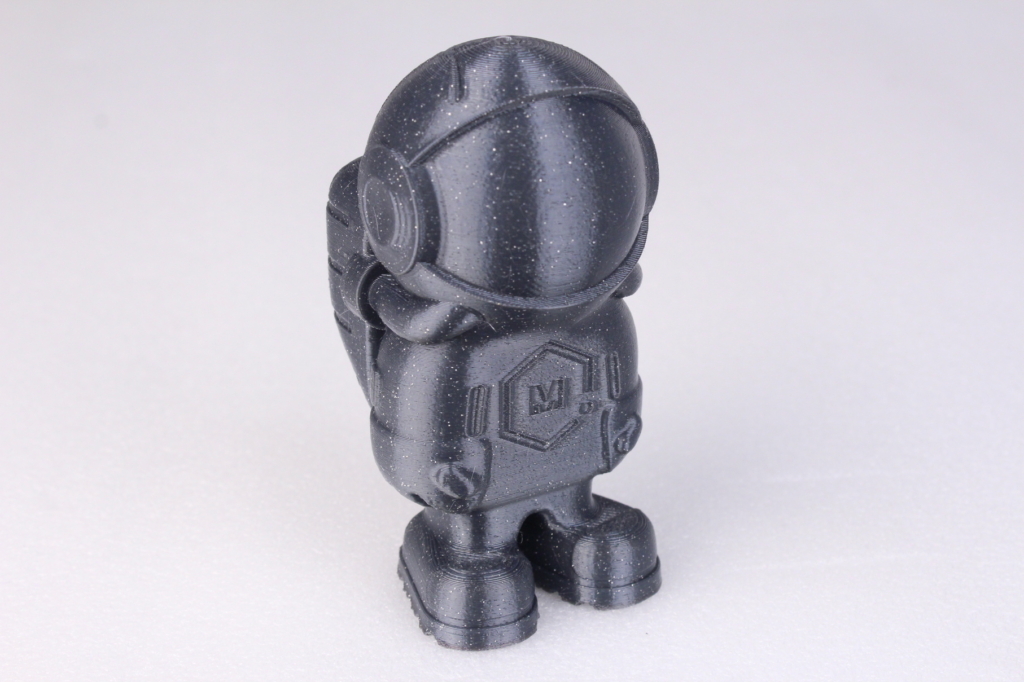
- Material: Devil Design Glitter Grey PETG
- Layer Height: 0.2mm
- Nozzle Temperature: 235C
- Bed Temperature: 60C
- Print Speed: 60 mm/s
Torture Toaster
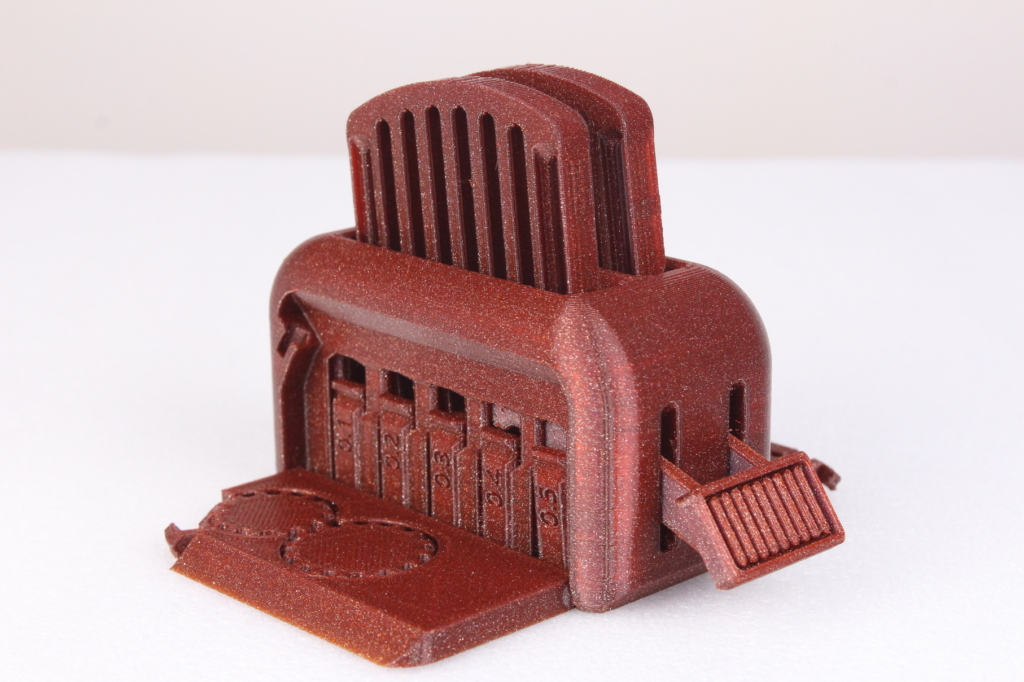
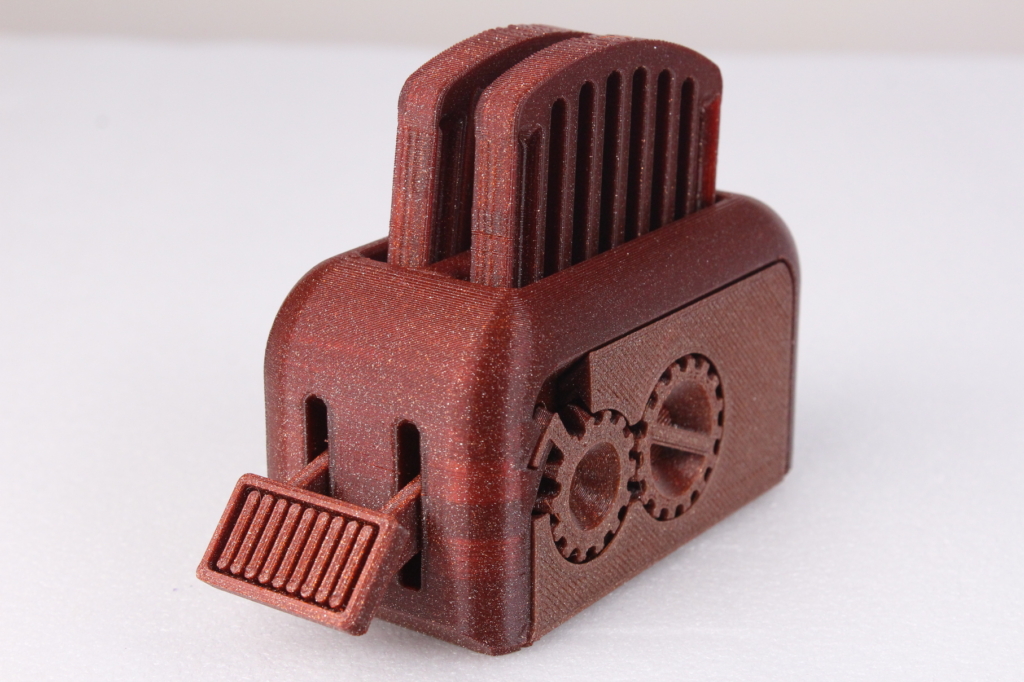
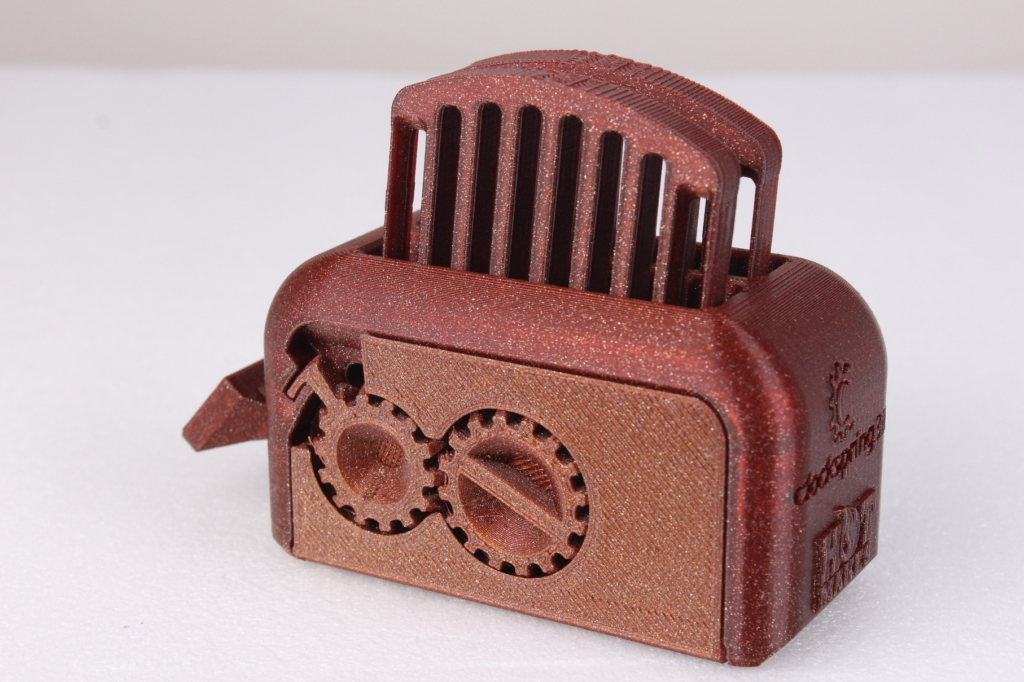
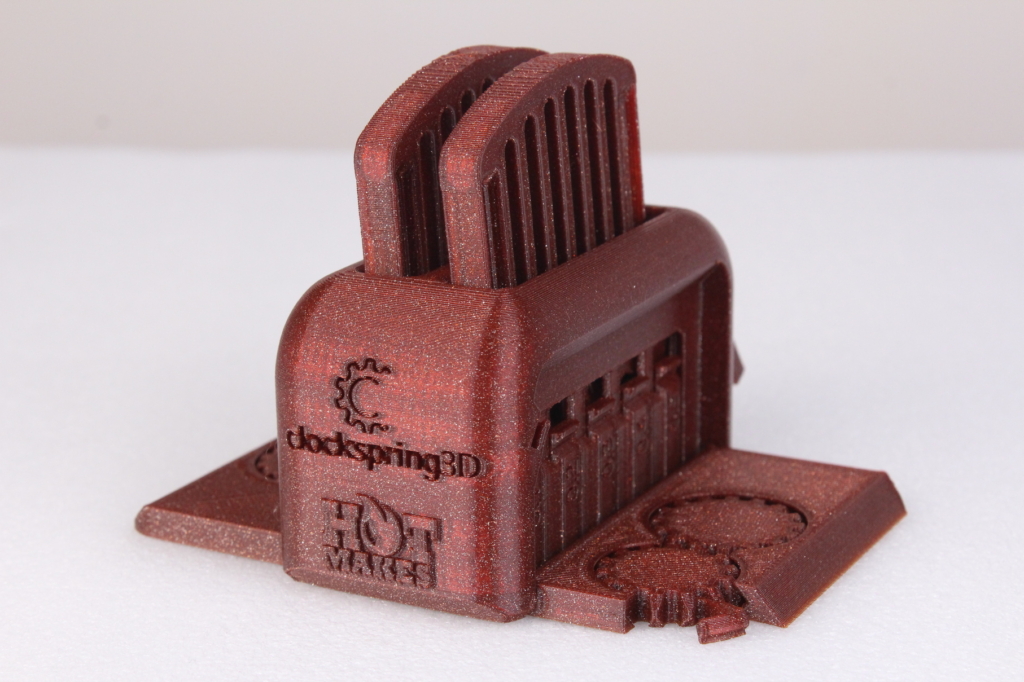
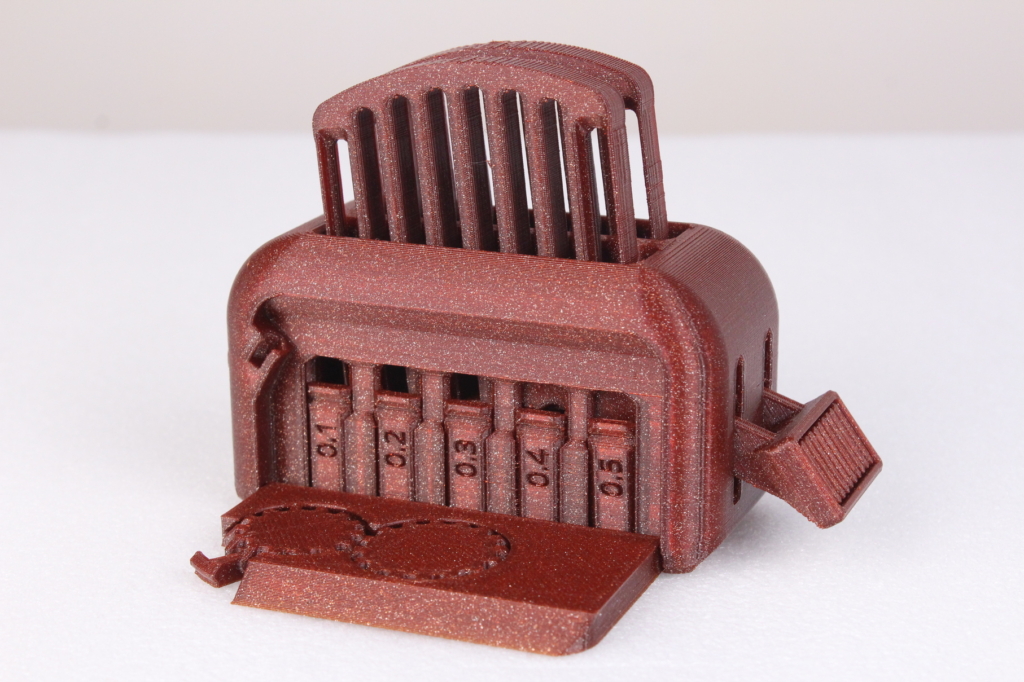
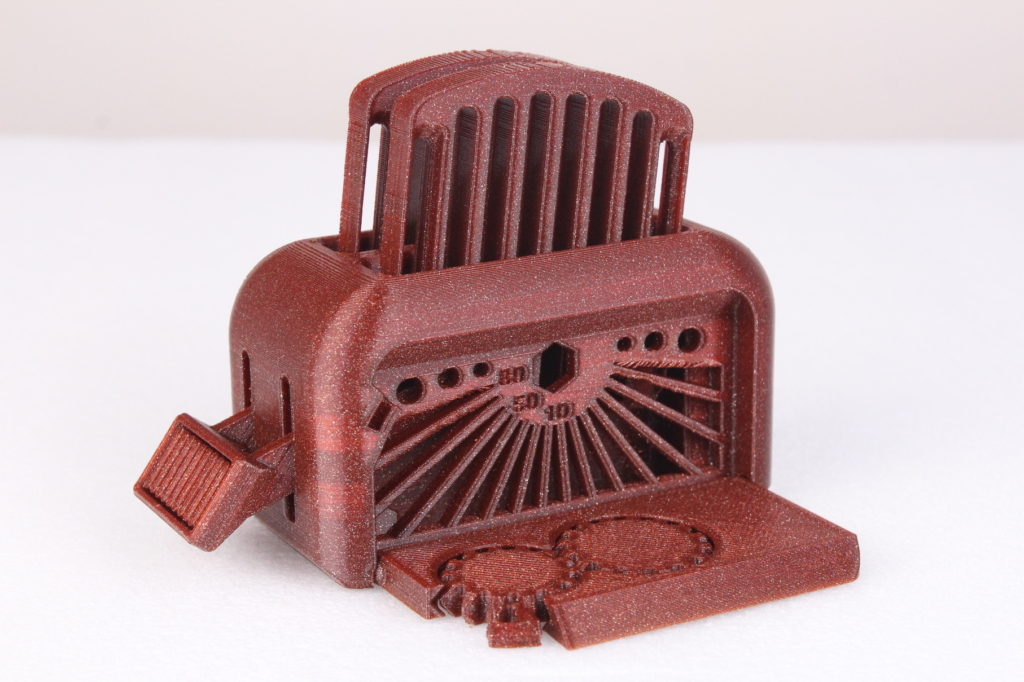
The torture toaster from Clockspring 3D is a great model for testing the capabilities of any printer and the Anycubic Vyper handled it like a champion. The print quality is great, all the overhang sections were printed well, and the “toast” function works as intended. The only disappointment is with the tolerance tests. I was only able to move the 0.5mm flag, while the rest were merged with the model. With some careful tuning of this specific filament, the results can be improved.
- Material: FilamentOne Glint Red PLA
- Layer Height: 0.2mm
- Nozzle Temperature: 215C
- Bed Temperature: 60C
- Print Speed: 60 mm/s
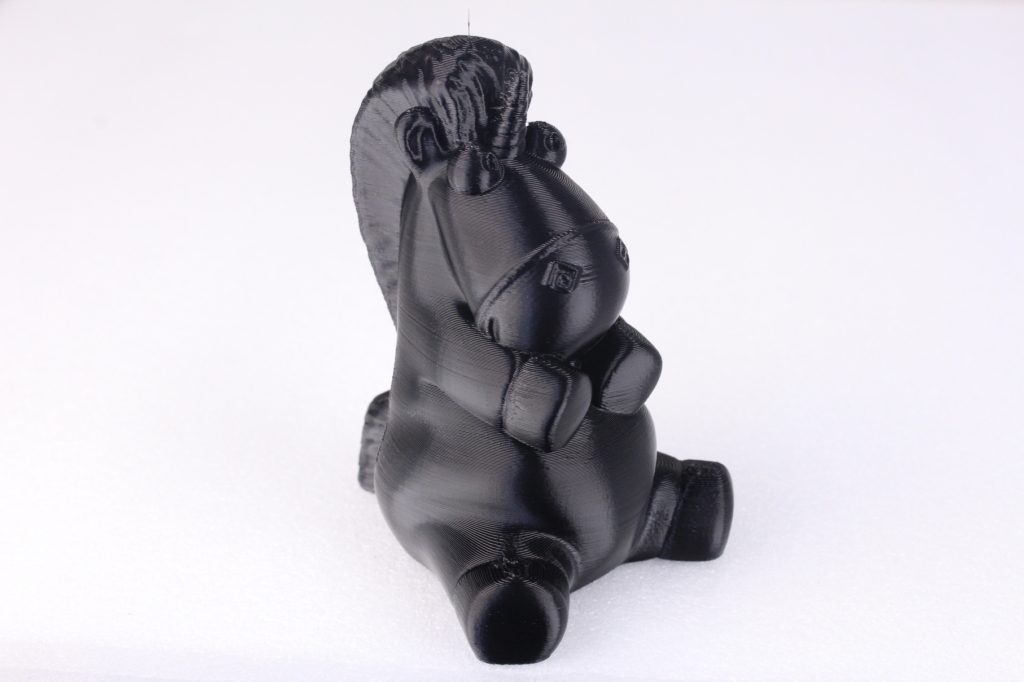
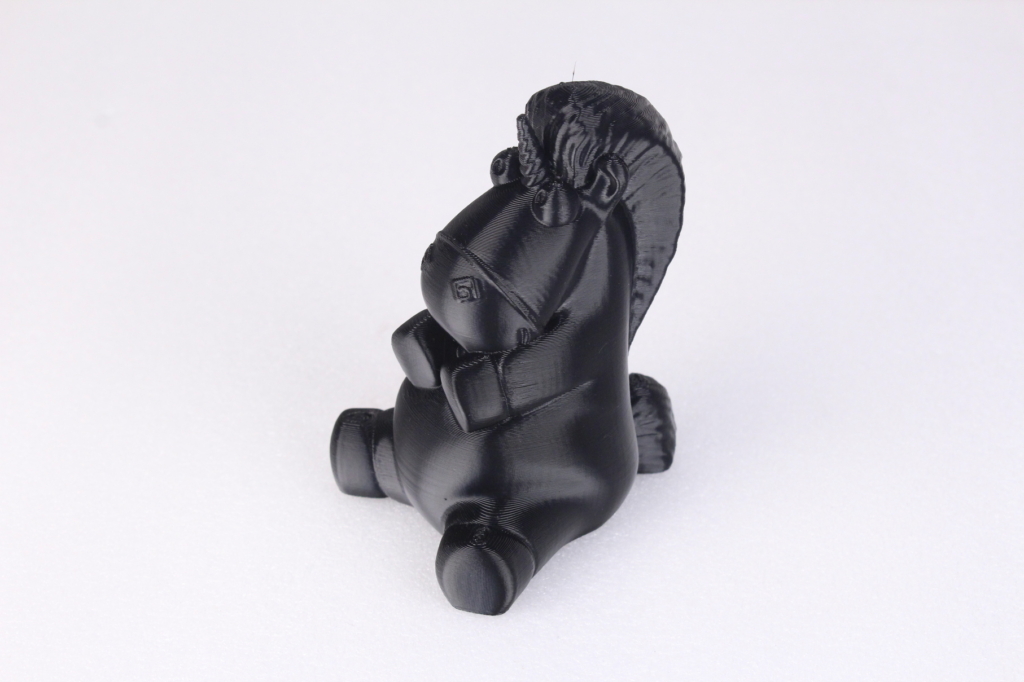
ABS Fluffy the Unicorn
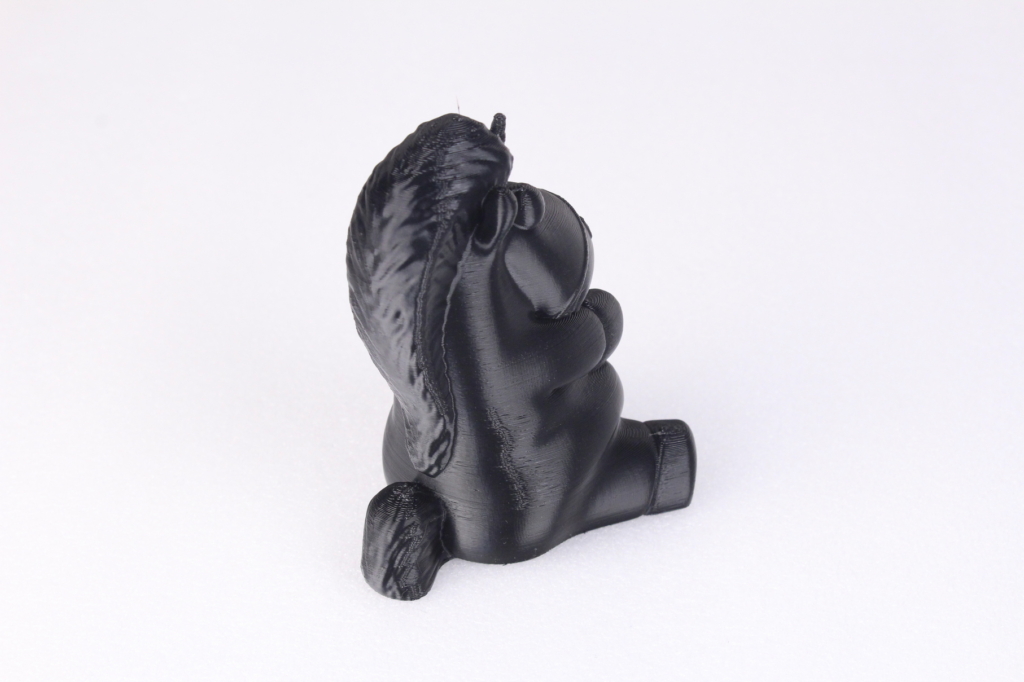
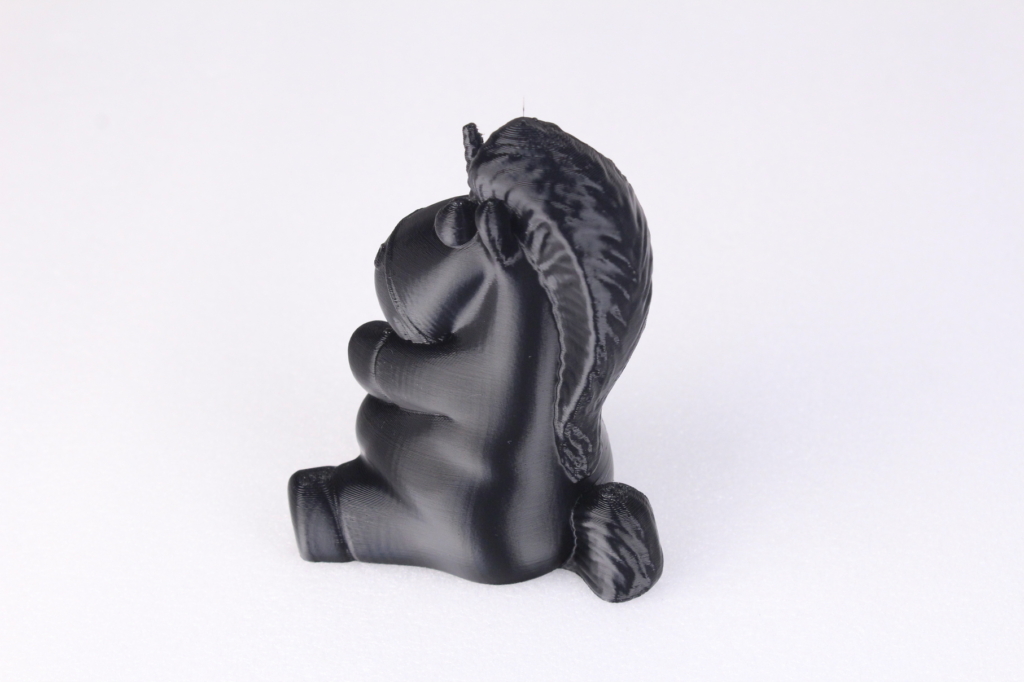
I also did an ABS print with the Anycubic Vyper, which completed successfully. It’s not a big print, but it’s good enough to see if the printer can successfully print ABS with its stock configuration. The adhesion was excellent (maybe it adhered too well because the brim was hard to remove) and the layers look great. No delamination even though the printer is not enclosed.
- Material: Gembird Black ABS
- Layer Height: 0.2mm
- Nozzle Temperature: 235C
- Bed Temperature: 100C
- Print Speed: 60 mm/s
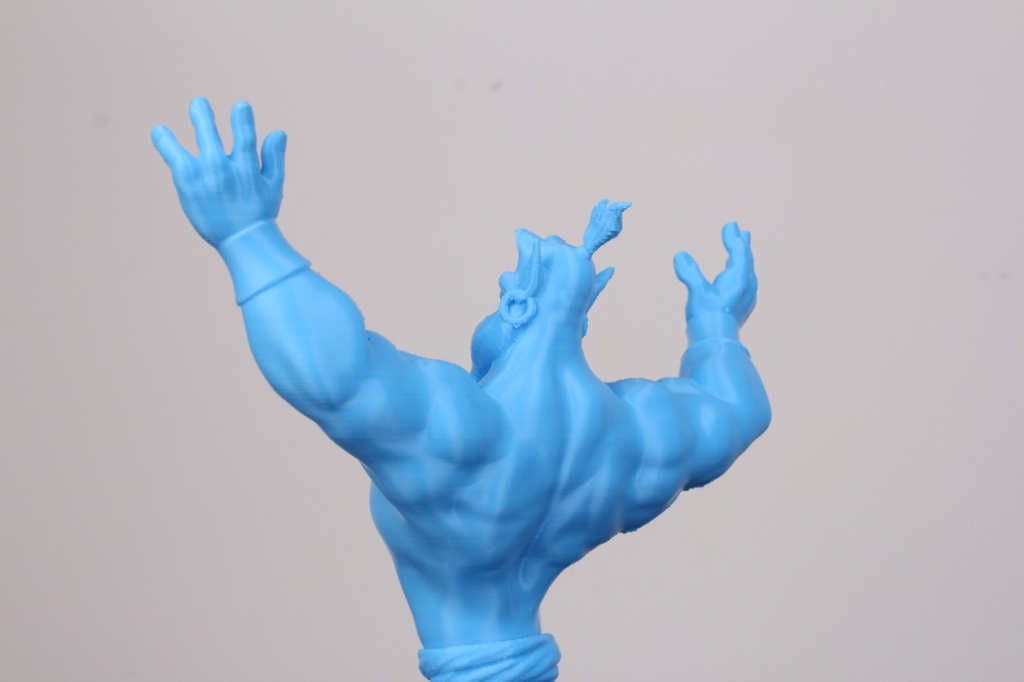
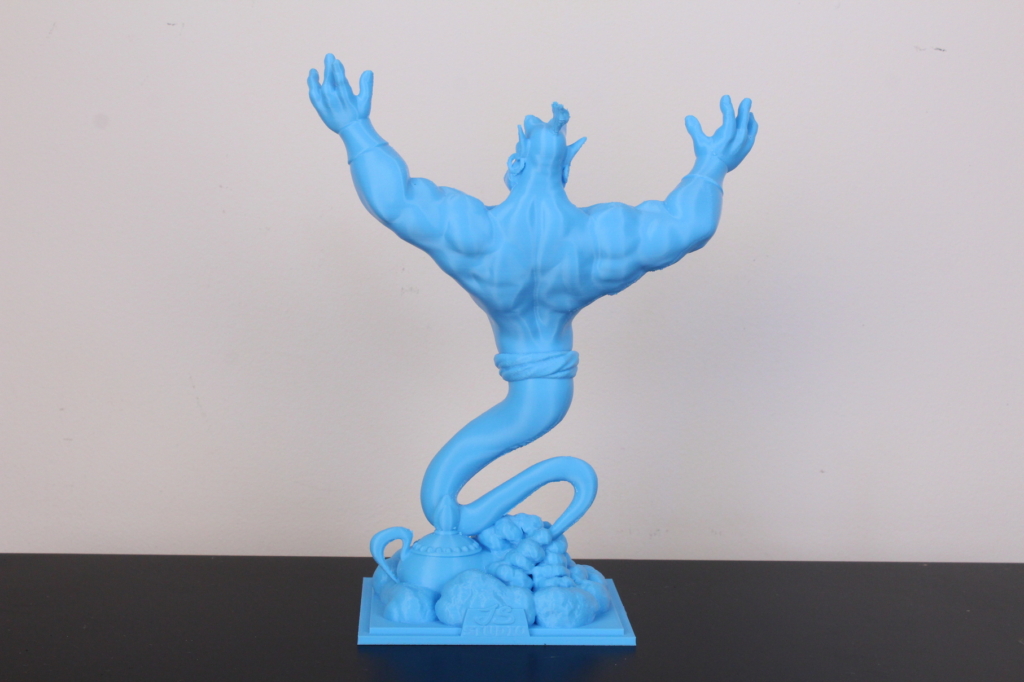
Aladin’s Genie
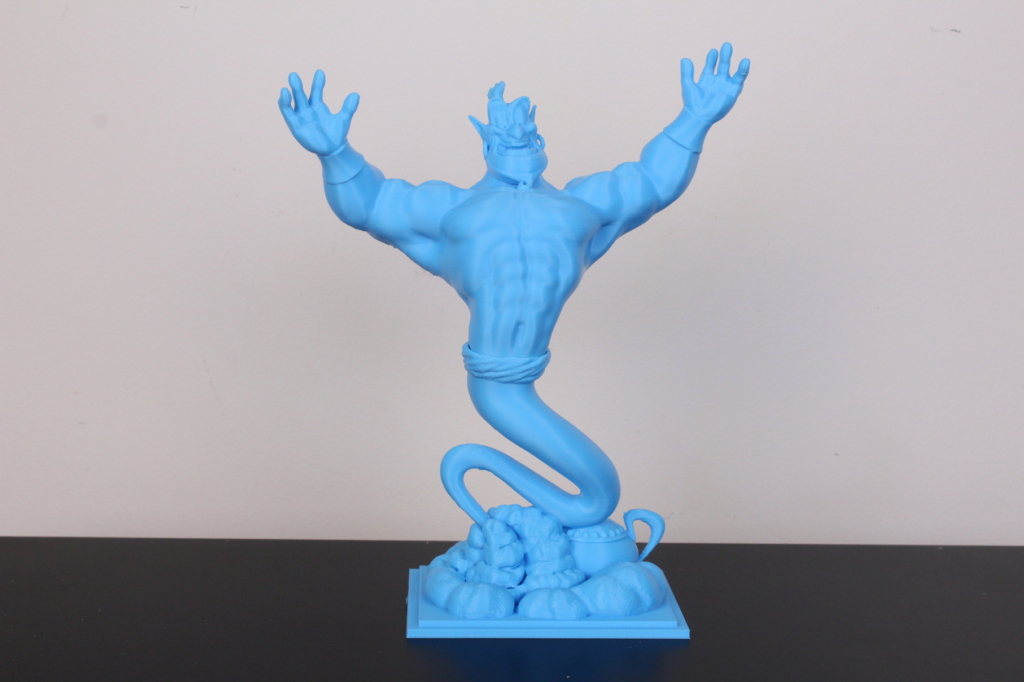
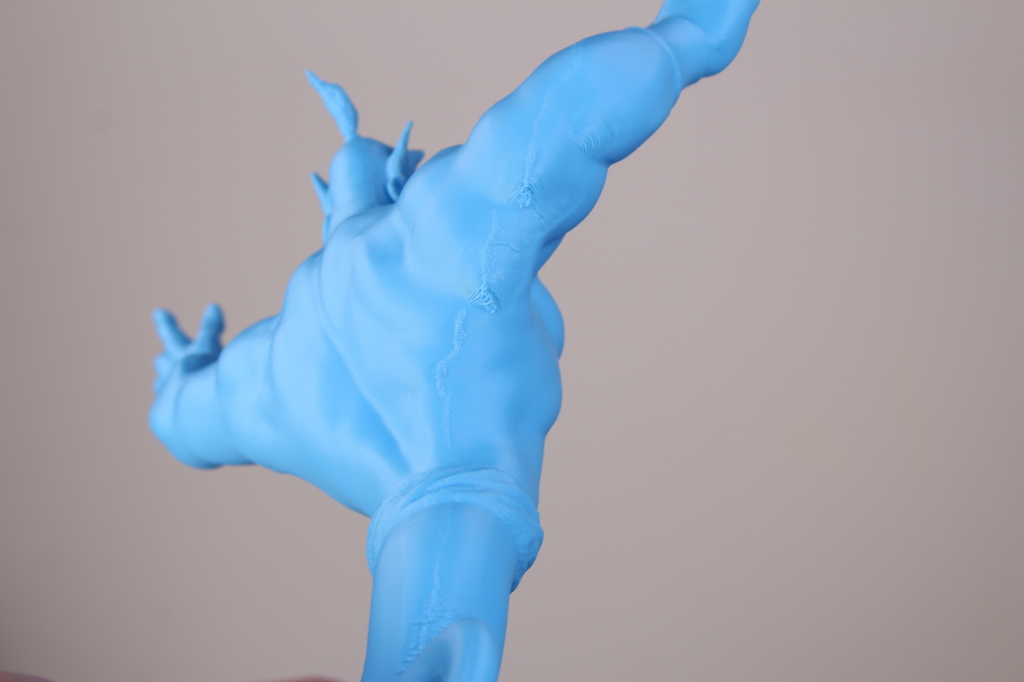
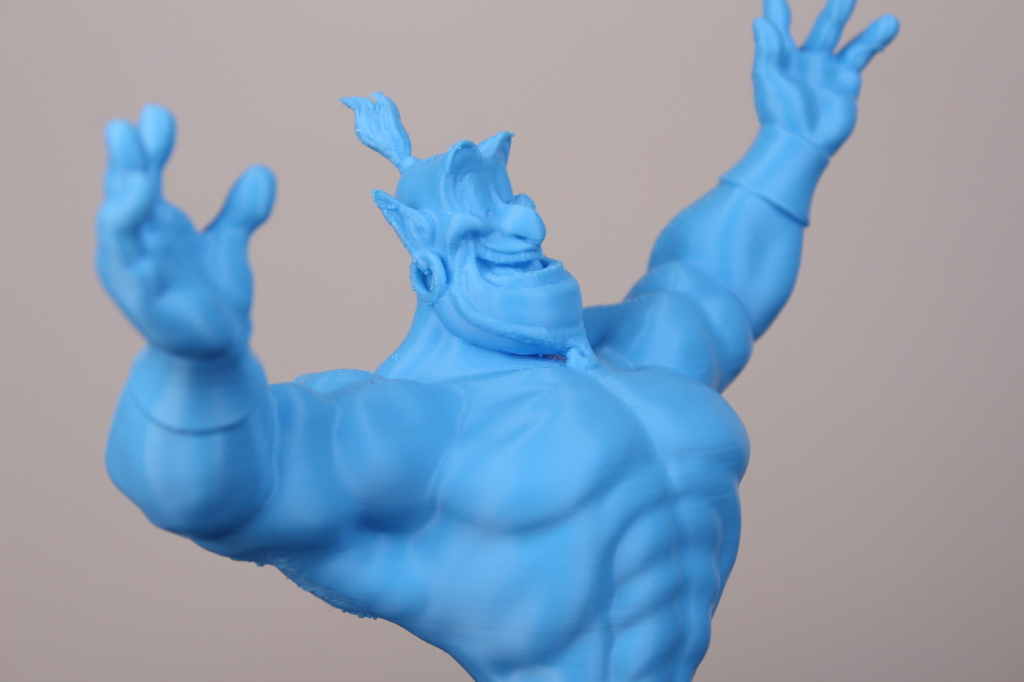
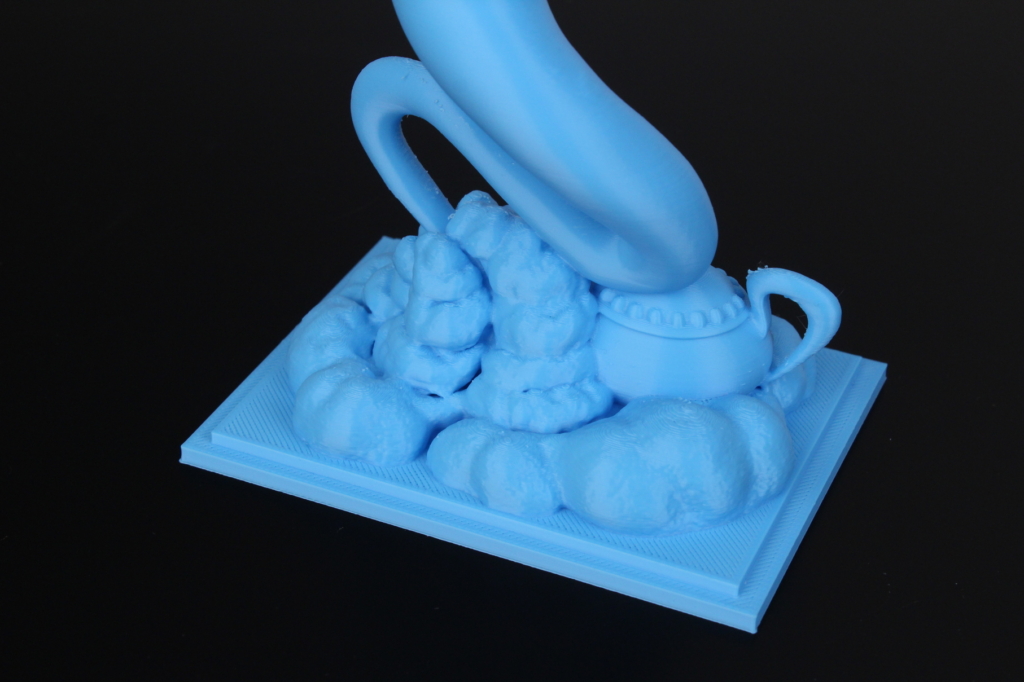
Another good print test for the Anycubic Vyper is Aladin’s Genie. Great model for testing overhangs and retractions. Print quality is good, but this model could have benefited for a bit more retraction (~3.2mm from the 0.3mm I used). This is the reason why you can see some small zits in the upper portion of the model.

- Material: Gembird Blue PLA
- Layer Height: 0.15mm
- Nozzle Temperature: 215C
- Bed Temperature: 60C
- Print Speed: 60 mm/s
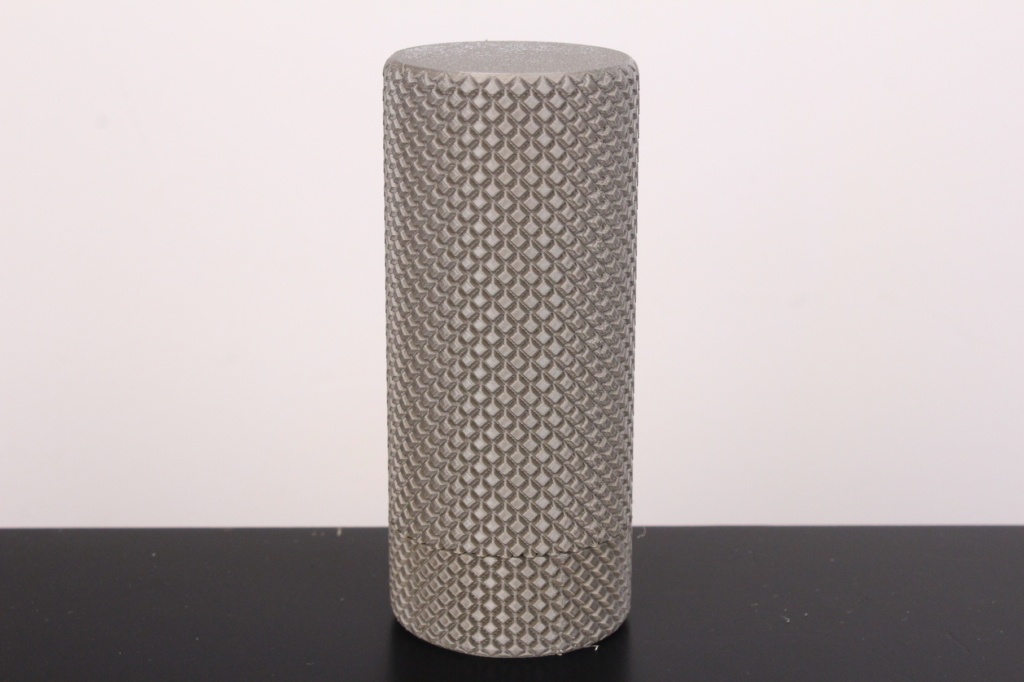
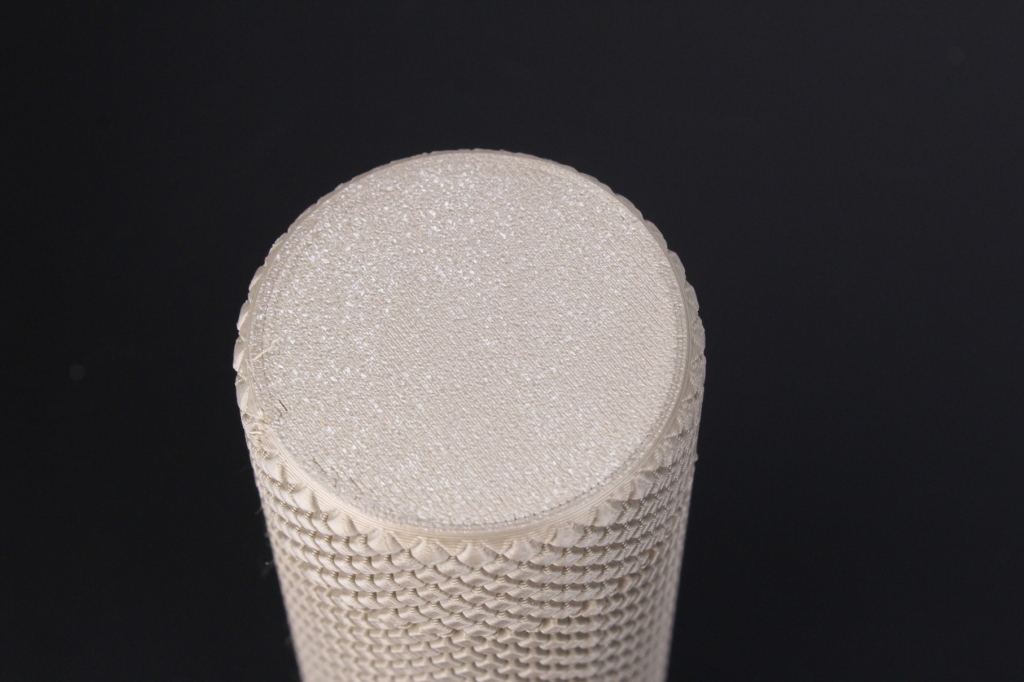
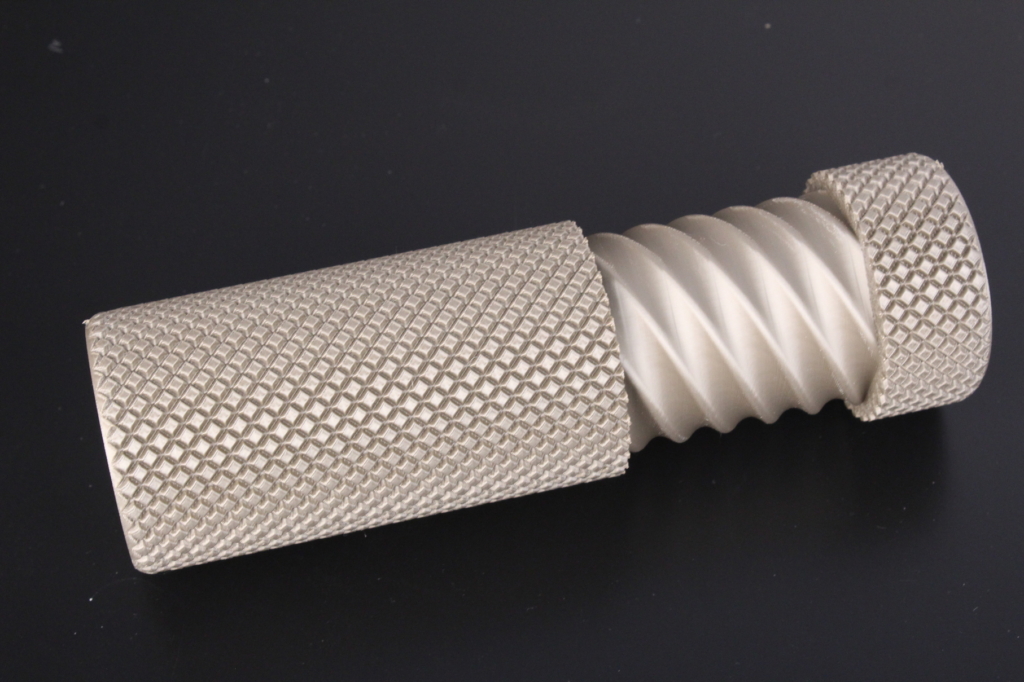
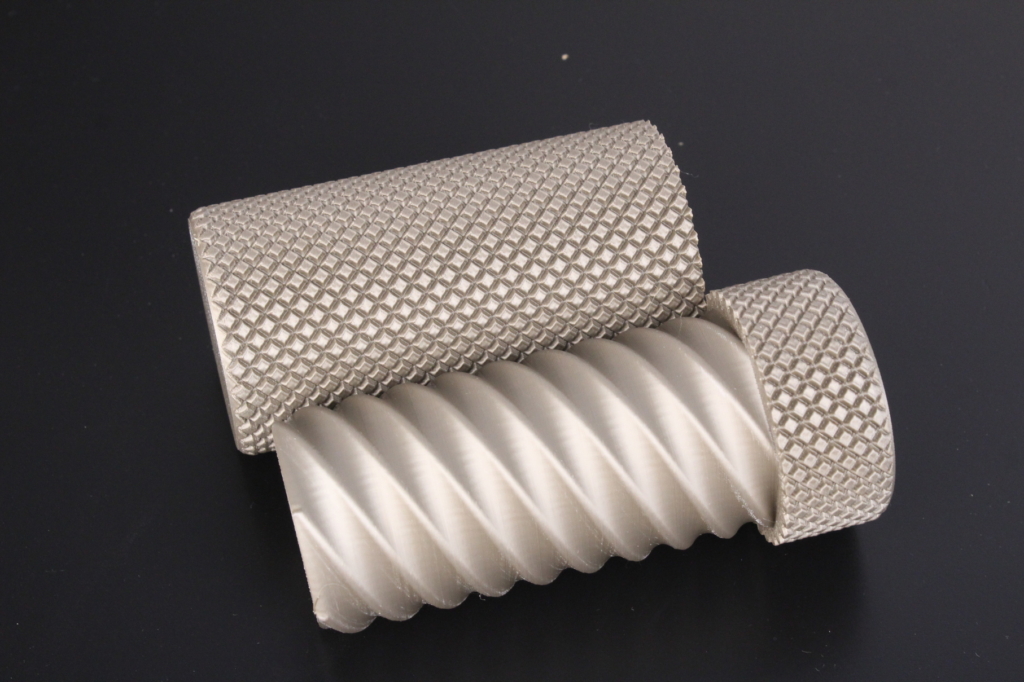
Knurled Twist Container
To test the printer accuracy, I printed the knurled twist container from Thingiverse. It came out great, but the movement is not as good as I would like. Closing the container requires turning the cap, compared to other results I’ve seen from other makers. So, flow rate could be a bit too high, just like with the torture toaster.
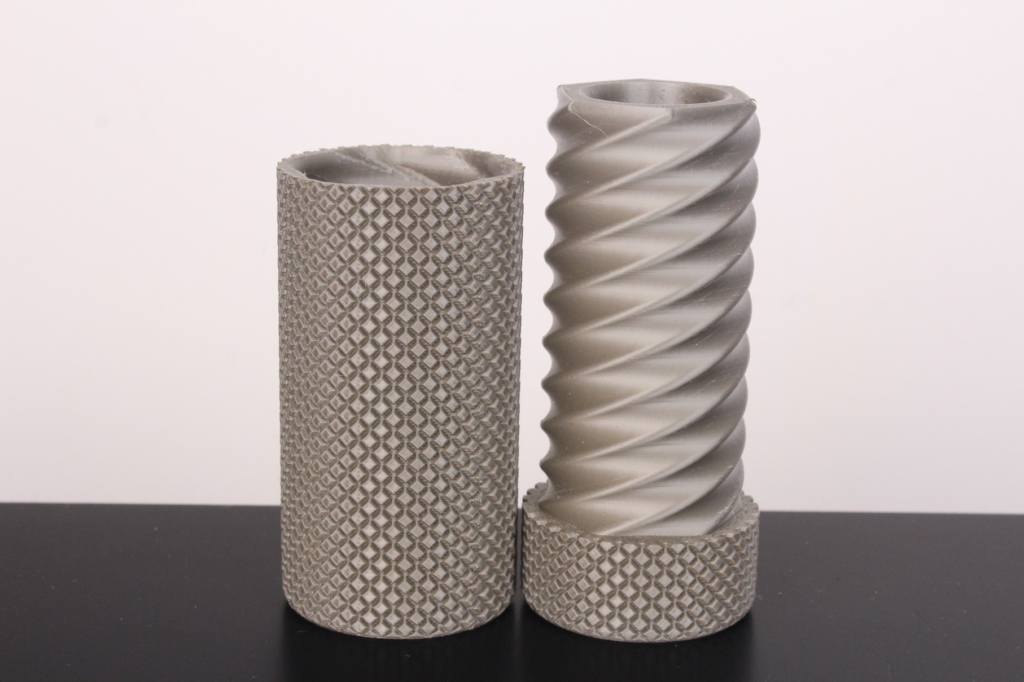
- Material: Gembird PLA
- Layer Height: 0.15mm
- Nozzle Temperature: 215C
- Bed Temperature: 60C
- Print Speed: 60 mm/s
Vegeta Bust
Finally, I printed the Vegeta bust with the awesome Devil Design Gold PLA. It’s quite impressive seeing that the model’s overhangs were printed successfully, without any support. This time, print speed was a bit lower because silk filament often needs slower print speed and higher printing temperature for good layer bonding.
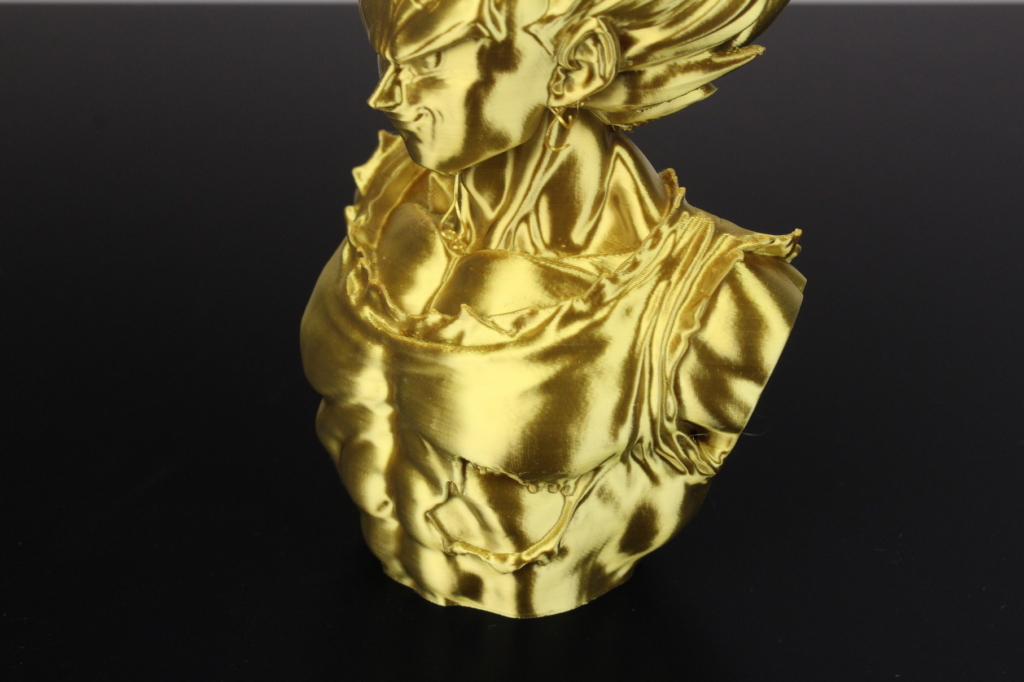
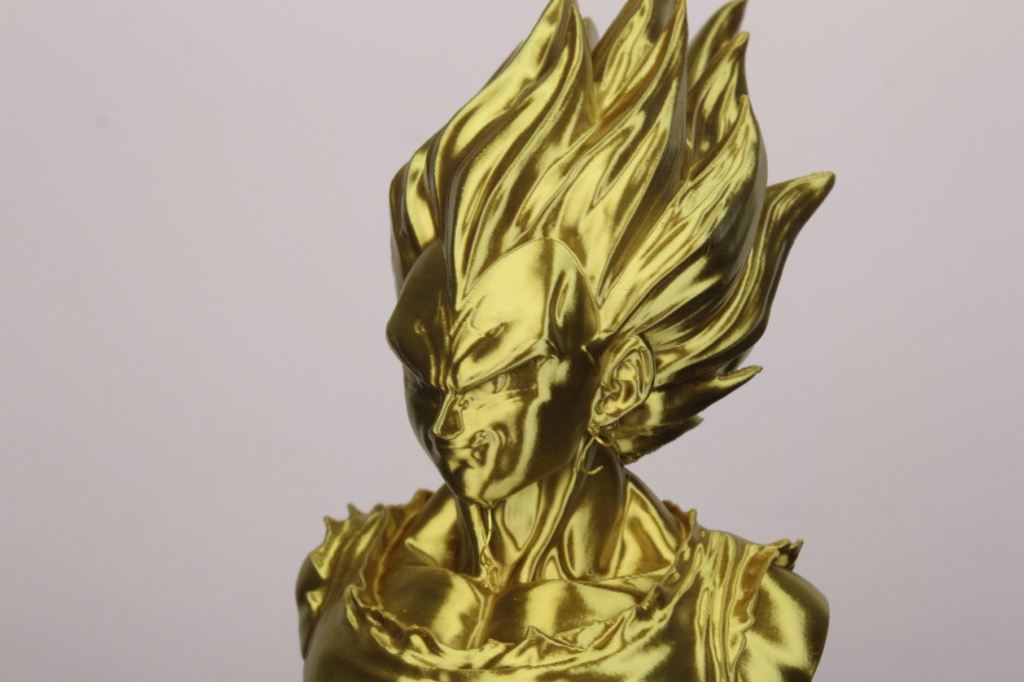
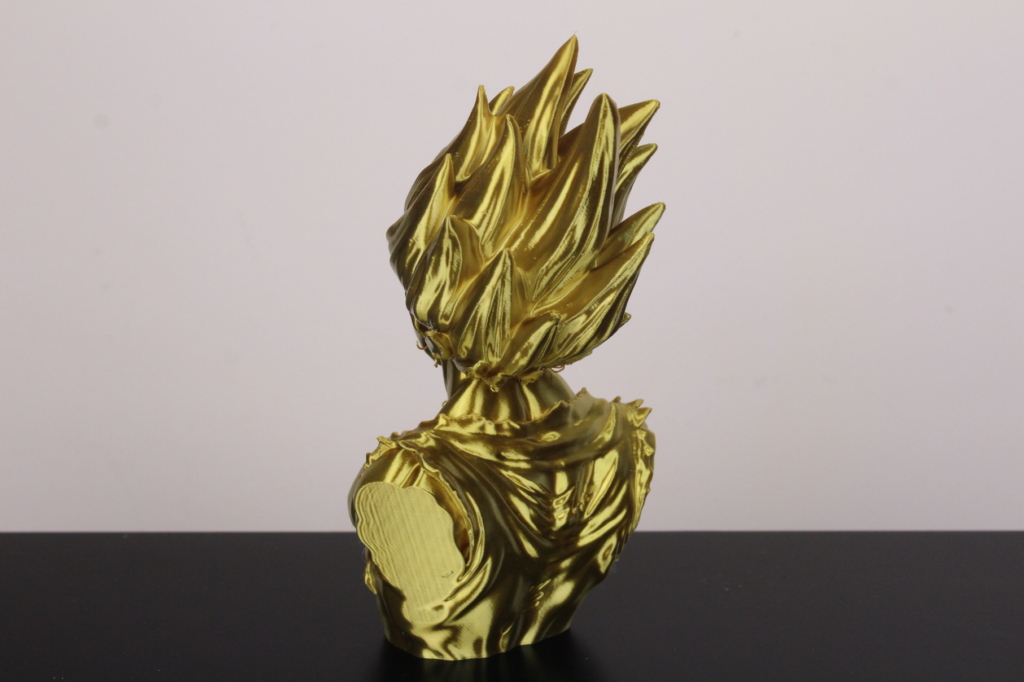
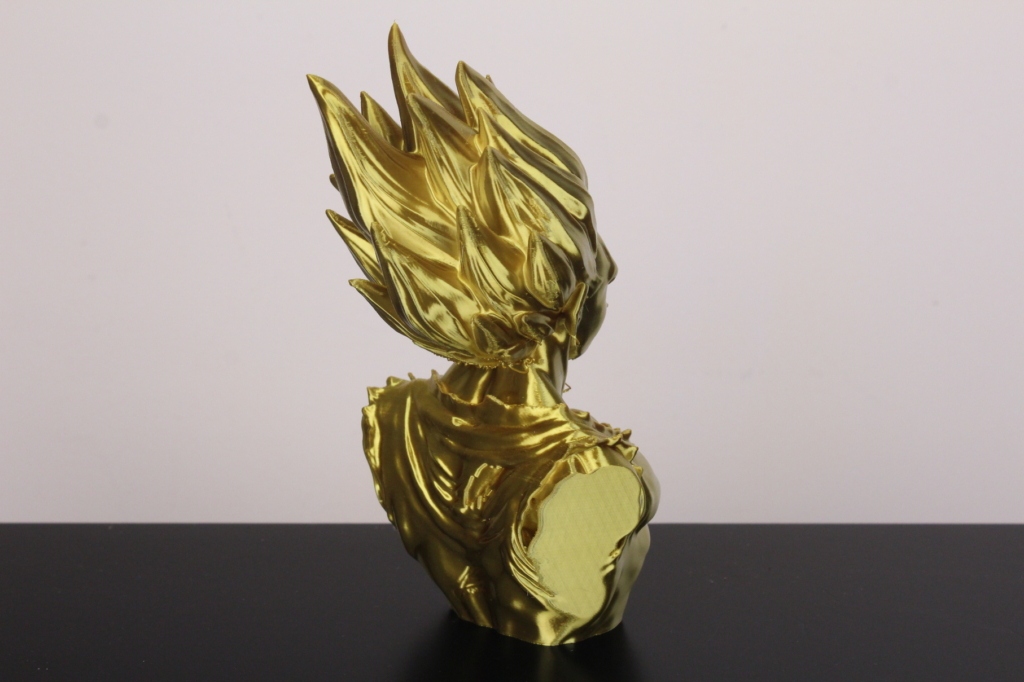
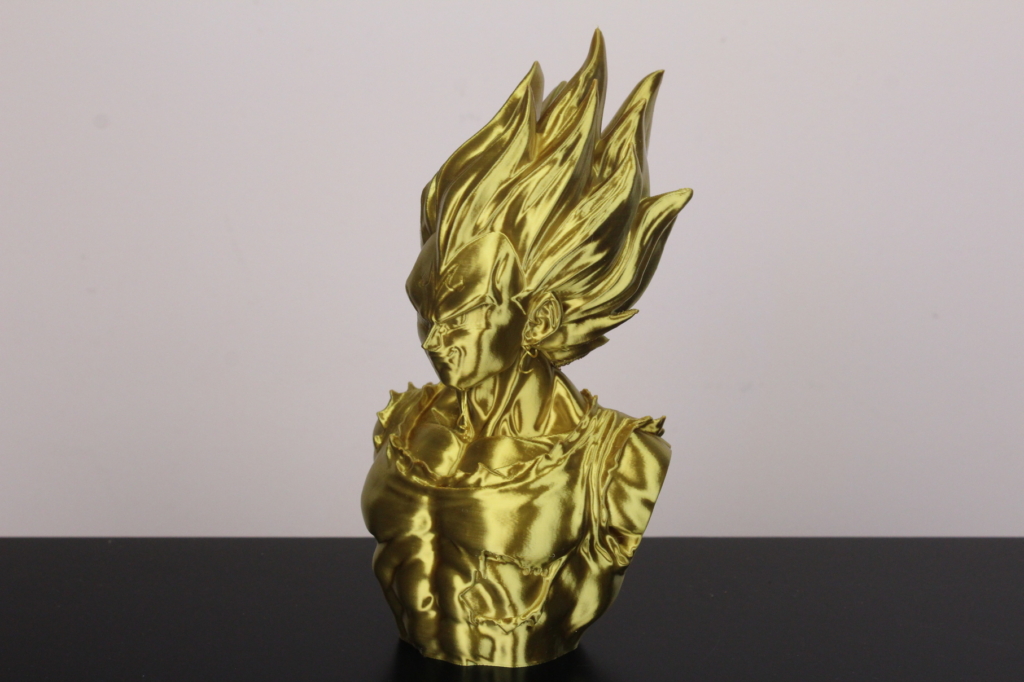
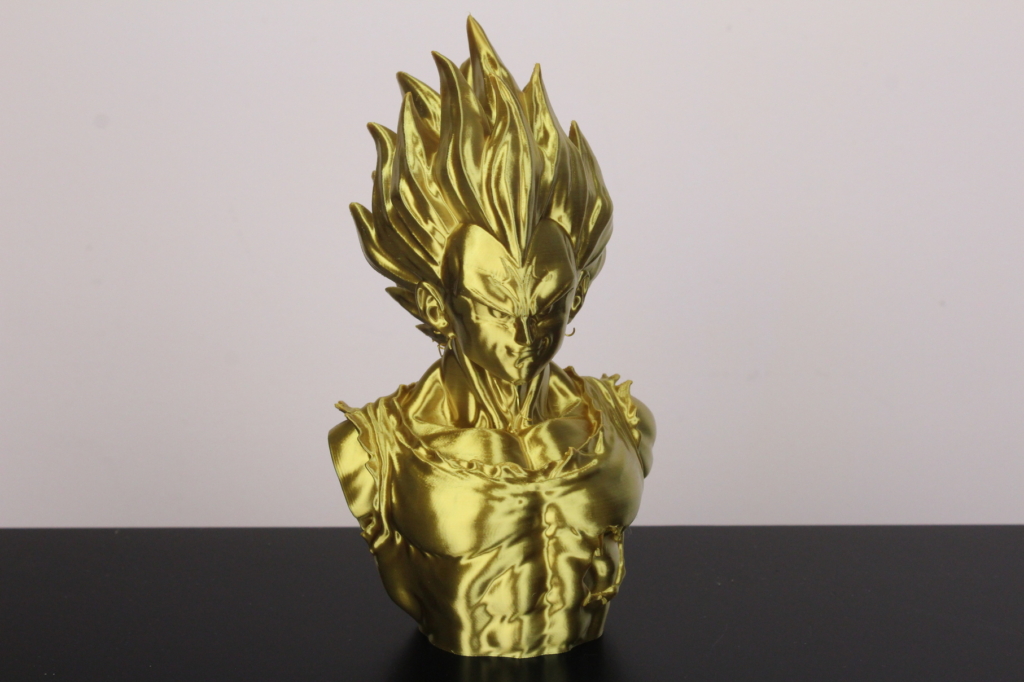
- Material: Devil Design Silk Gold PLA
- Layer Height: 0.15mm
- Nozzle Temperature: 220C
- Bed Temperature: 60C
- Print Speed: 40 mm/s
Anycubic Vyper vs Creality CR-6 SE
I think that the Anycubic Vyper was designed to be a direct competitor to the popular Creality CR-6 SE so it’s worth comparing these printers to see which one provides better value.
In terms of features, the Anycubic Vyper wins hands down. It has a better extruder, a better hotend, a removable print surface with better adhesion, dual Z endstops and improved part cooling. All these upgrades make the printer more desirable compared to the Creality CR-6 SE.
The Creality CR-6 SE has a collapsible spool holder which can be tucked away when the printer is not in use, and also a handle in the top, but I don’t think these are important addons that should weight the balance in Creality’s favor.
The price for the Anycubic Vyper is also lower. Adding all these upgrades to the CR-6 SE would cost you more than 100$ so if you need to decide between these two printers, I’d recommend getting the Anycubic Vyper.
Conclusions: Is the Anycubic Vyper worth it?
My time with the Anycubic Vype was enjoyable. The printer performed well during testing and all the extra upgraded parts it uses make it an excellent option for beginners who are looking for a good printer and don’t want to mess with upgrading a cheaper printer in the future.
Having the auto bed leveling sensor in the hotend makes tramming the bed a thing of the past, while also providing consistent readings. I don’t trust most of my printers enough to start a print and leave the room without checking the first layer. But with the Vyper, there was no need for any adjustments after the first setup. Really consistent results when it comes to leveling.
The print quality is good for all the filaments tested, even with ABS which is sometimes harder to print without an enclosure. PLA can be printed fast, without worrying that the part cooling can’t handle the speed. Good part cooling also allows the Vyper to handle steep overhangs with ease. The magnetic PEI sheet print surface is excellent, even though it feels a bit less resilient compared to Energetic sheets.
I really can’t find any significant drawbacks for the Anycubic Vyper. It’s a well-built machine with an attractive price for what you get. If you’re a beginner who needs an easy-to-use machine, or if you want a printer with consistent results which doesn’t require any tinkering to get good prints, then I see no reason not to give the Anycubic Vyper a chance if you can buy it for 300$. But I would be more reluctant in buying it over 300$ because then we move in a different 3D printing territory with alternatives like the Flsun Super Racer for just a bit more.
The printer performed well during testing and all the extra upgraded parts it uses make it an excellent option for beginners who are looking for a good printer and don't want to mess with upgrading a cheaper printer in the future. Anycubic Vyper Rating
Design
Specs
Noise Levels
Ease of use
Print Quality
Price
Where to buy the Anycubic Vyper?
The Anycubic Vyper can be purchased from the following websites:
Anycubic
AliExpress
Amazon
Banggood
Geekbuying
I recommend checking out the Discount Codes page before purchasing. I regularly update the article with discount codes for various online shops, and you might find one for this particular model.
The Anycubic Vyper was provided free of charge by Anycubic for the purpose of this review. While the article includes affiliate links, all opinions are my own. Nobody reviewed the article before it was posted, following the Review Guidelines.
Liked it?
|
|



I just received my Vyper in Germany and it turns out that the power fan and chassis fan are always running, even in idle directly after turning on the printer.
Someone else experienced that?
Hello, anycubic has released the source code for the vyper now, and it appears they have the stepper drivers set as a4988 instead of tmc2209, which would explain the noise difference. I tried to compile the firmware, but was unable to get it to compile. There are a lot of other features not turned on in the firmware, such as M600 filament change. There is also a lot missing off the display, such as pid autotune, z fade, axis location status. They also fail to address a lot of instruction, such as Is M420 S1 required in the startup gcode, and G29 crashes all axis. How does z stepper calibration work, does it work with every home sequence? G28? The nozzle does not change the Z level. if you change the bed to something with a different thickness, the nozzle sensor does not register this, and the nozzle will crash in to the bed. you either have to adjust the endstops, or change the z offset. None of this really makes sense to me.
Hello and many Thanks for your Work. But, please tell me, wich better Heatbreak i can use for the Vyper ?
Best Regards and stay healthy.
Torsten Rother
The smooth version should work, but haven’t tried it yet.
Great article! Will you be posting any instructions for using Klipper with this printer?
I don’t have anything planned for it. But I might give it a go.
Great articles.
I would like to know if there are improvements on the market for this printer.
Thank you very much for your fantastic articles.
I would only upgrade the heat break with a bi-metal. Can’t think of other upgrades needed.
Thanks for this article. I have been using Cura 4.10 and it has been working ok, but I want to give the Ideamaker a try. However, I cannot seem to figure out how to load your profiles for the Vyper into it. Can you or anyone tell me how to load the Vyper profile? I can see the .bin file inside the zip link you posted, but I don’t see where in Ideamaker it lets you load that.
Thanks!
I described the process here:
https://3dprintbeginner.com/ideamaker-profile-for-sidewinder-x1-and-genius/
Thanks for the information provided in this! I just received my Vyper a few days ago and I want to upgrade the heatbreak, not comfortable with a PTFE-lined hotend as long as when doing a filament change it forces the hotend to go to 230 haha.
Do you think a kraken or chimera (are these the same? not sure…) heatbreak would work? Or would you suggest something else? I saw the bi-metallic link but I wasn’t sure which of those would work, it looks like mk10 or the c-e versions would be fine but I don’t know the dimensions on the stock heatbreak.
Thanks for your time 🙂
I don’t know yet. But I will check and let you know when I get a Bi-metal heat break installed.
Hello, i want use your printprofile.
And How import .bin to Cura? Cura support only .curaprofile
These profiles are only for IdeaMaker
SO….how do I import your profiles into Ideamaker?
Thanks!
You can follow this guide:
https://3dprintbeginner.com/ideamaker-profile-for-sidewinder-x1-and-genius/
So you think that Flsun Super Racer is better than the Vyper ? I am a beginner and y want to buy a 3d printer so i hesitates between this 2 printer. Thank you
Both are great. The Vyper is more affordable, and the SR is faster.
Ok, after my post i saw that you have made a review about the biqu bx, for you, wich one of this 3 is the best ? Best about print quality and printing confort ?
And also the features, thank you
As always, best reviews online! Thanks for detailed article