Custom Screen Firmware for Sidewinder X1 and Genius
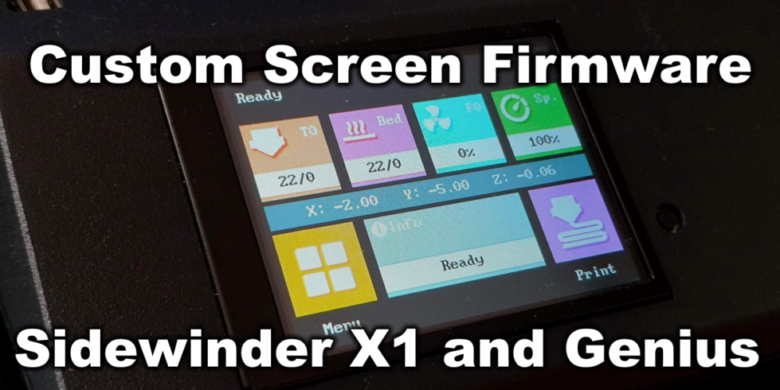
I am working on a guide for upgrading the Artillery Sidewinder X1 and Artillery Genius to 32bit with the BIGTREETECH SKR 1.3 and TMC2208. Unfortunately, the stock screen firmware has issues communicating with the board.
I was looking for a fix online, and stumbled upon delwinbest’s github repo where he ported the BIGTREETECH screen to the MKS screen used by Artillery.
I downloaded the repo, and build a custom screen firmware for Artillery Sidewinder X1 and Artillery Genius.
The new screen firmware includes BLTouch support, but it lacks the old manual leveling features.
UPDATE
I recommend using digant’s version because it’s updated and works a lot better than my version.
How to install custom screen firmware on Artillery Sidewinder X1
In order to install the new screen firmware for the Sidewinder X1, follow the steps listed below:
- Download the Sidewinder X1 screen firmware.
- Unzip the archive and copy the contents to the SD Card.
- Plug in the SD card into the printer.
- Turn on the printer and wait for the firmware to finish flashing.
- Touch the calibration points on the screen
- Restart the printer
That’s it. Now you can enjoy the new functionality offered by the new firmware.
If you want to revert to the stock screen, follow these steps:
- Download the stock Sidewinder X1 TFT screen files
- Format the SD card.
- Unzip the archive and copy the contents to the SD Card.
- Plug in the SD card into the printer.
- Turn on the printer and wait for the firmware to finish flashing.
- Restart the printer.
How to install custom screen firmware on Artillery Genius
In order to install the new screen firmware for the Sidewinder X1, follow the steps listed below:
- Download the Artillery Genius screen firmware.
- Unzip the archive and copy the contents to the SD Card.
- Plug in the SD card into the printer.
- Turn on the printer and wait for the firmware to finish flashing.
- Touch the calibration points on the screen
- Restart the printer
That’s it. Now you can enjoy the new functionality offered by the new firmware.
If you want to revert to the stock screen, follow these steps:
- Download the stock Artillery Genius TFT screen files
- Format the SD card.
- Unzip the archive and copy the contents to the SD Card.
- Plug in the SD card into the printer.
- Turn on the printer and wait for the firmware to finish flashing.
- Restart the printer.
Custom Screen Firmware demo
Disclaimer
The firmware is in “BETA” stage. It still has some issues. This procedure is for experienced users and i will have no responsibility for any damage that can occur. Please be sure you understand the procedure, before you start. You are testing this firmware on your own responsibility.
If you find any problems with it, please leave a comment. All credits should go to delwinbest and darkspr1te. Also special thanks to Blueforcer for his addition to this firmware.
Update 22/02/2020 – New firmware files uploaded with the following fixes:
- USB support
- Large icons under Print with preview support
- Manual leveling under Menu-> Leveling
- Filament Run-out sensor support
Liked it?
|
|

