How to Install Klipper on FLSUN Super Racer: Config and Setup
I previously reviewed the FLSUN Super Racer which performed great, but such a fast 3D printer would benefit from the Klipper treatment. In this article I will show you how to install Klipper on the FLSUN Super racer.
What is Klipper?
Klipper is an open-source firmware for your 3D printer that combines the power of a Raspberry Pi and your printer main board for better printer control. By doing this, you are able to run your printer at higher speeds with better precision and control.
Why Install Klipper on FLSUN Super Racer?
By installing Klipper on the FLSUN Super Racer, you will be able to print a bit faster compared to a stock printer, and you will also be able to control your printer remotely, trough Wi-Fi. The main reason to install Klipper is to use Pressure Advance and Input Shaper, which will greatly improve your print quality and speed.
If you want to learn more about Klipper, check out Nero’s video
Prerequisites
To install Klipper on FLSUN Super Racer, you need to have the following:
- Raspberry Pi Zero W (any Pi will work)
- MainsailOS or FluiddPi – In this guide I will use FluiddPi and a Raspberry Pi Zero
- FLSUN Super Racer 3D Printer and SKR 1.3 FLSUN Klipper Config
- A-Male to B-Male USB Cable
- OTG Micro USB Cable (needed only for the Pi Zero)
Before you begin

Please note that installing Klipper on the FLSUN Super Racer requires some experience with 3D printers and hardware. This is not a trivial task for beginners, and you may break your printer during the process. If you don’t feel comfortable doing this, then keep the stock firmware.
Read the full guide carefully and install Klipper on FLSUN Super Racer only after you properly understood all the steps involved. If you have questions before starting, leave a comment and wait for a reply.
I am not responsible for any damage you may cause to your printer by following this guide. You are doing this on your own responsibility.
The configuration file shared in this article, is made for the stock FLSUN Super Racer which uses the SKR 1.3 clone board. It’s also worth noting that the stock touchscreen will not work anymore, and you will need to use the WebUI for controlling the printer.
If you own the MKS Robin Nano V3 board, make sure you install and use the correct config.
Install FluiddPi on Raspberry Pi
I have covered the FluiddPi installation in a previous article, so please follow it before continuing. This will ensure you have the same setup as I do which will make the entire process a bit easier. In that article I also covered how to install KIAUH which is a helpful tool for installing and updating Klipper.
Connect your Raspberry Pi to the FLSUN Super Racer board
I chose to connect my FLSUN Super Racer to a Raspberry Pi Zero using a Micro USB cable and a MicroUSB OTG cable. I also power the Pi directly from the printer using a buck converter and the GPIO pins. This converts the 24V from the printer and powers the Pi with 5V. The whole setup is shown below.
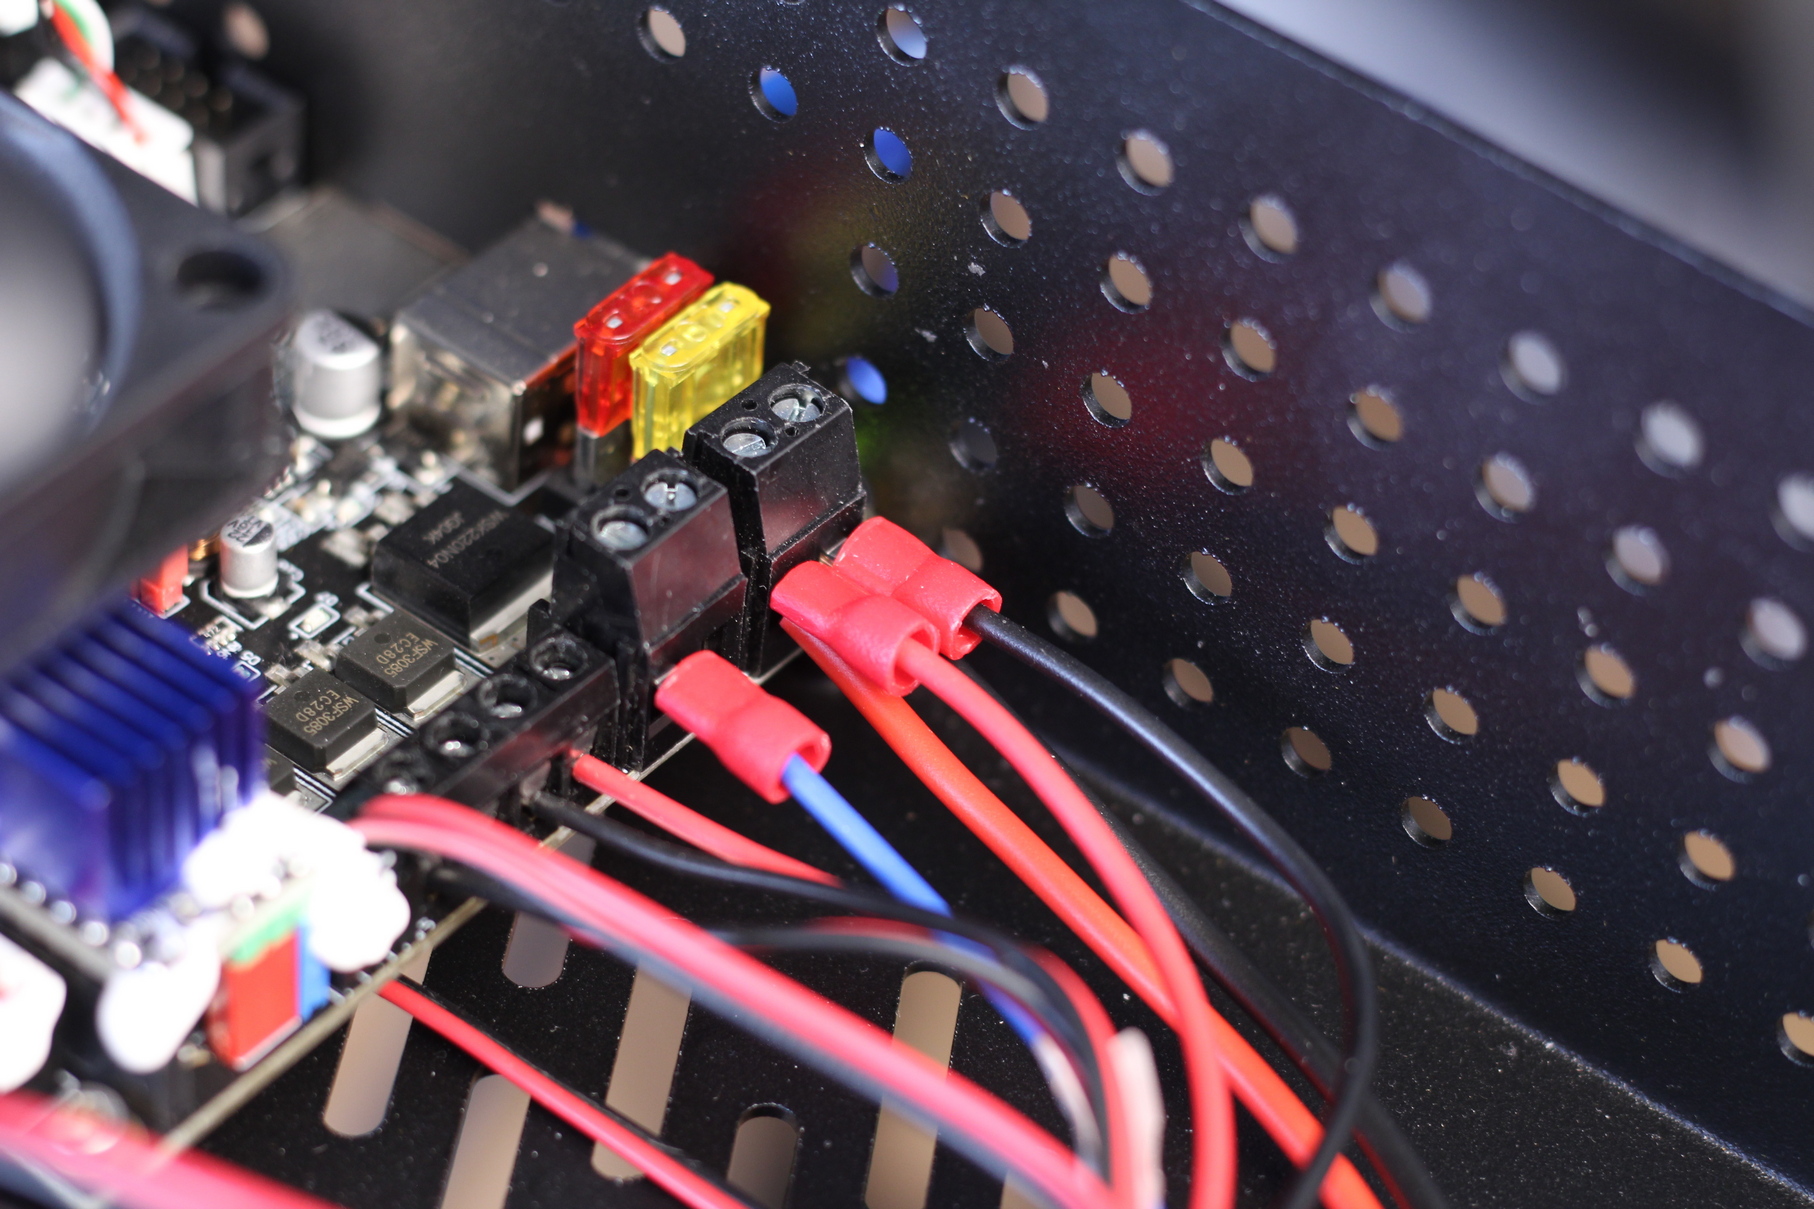
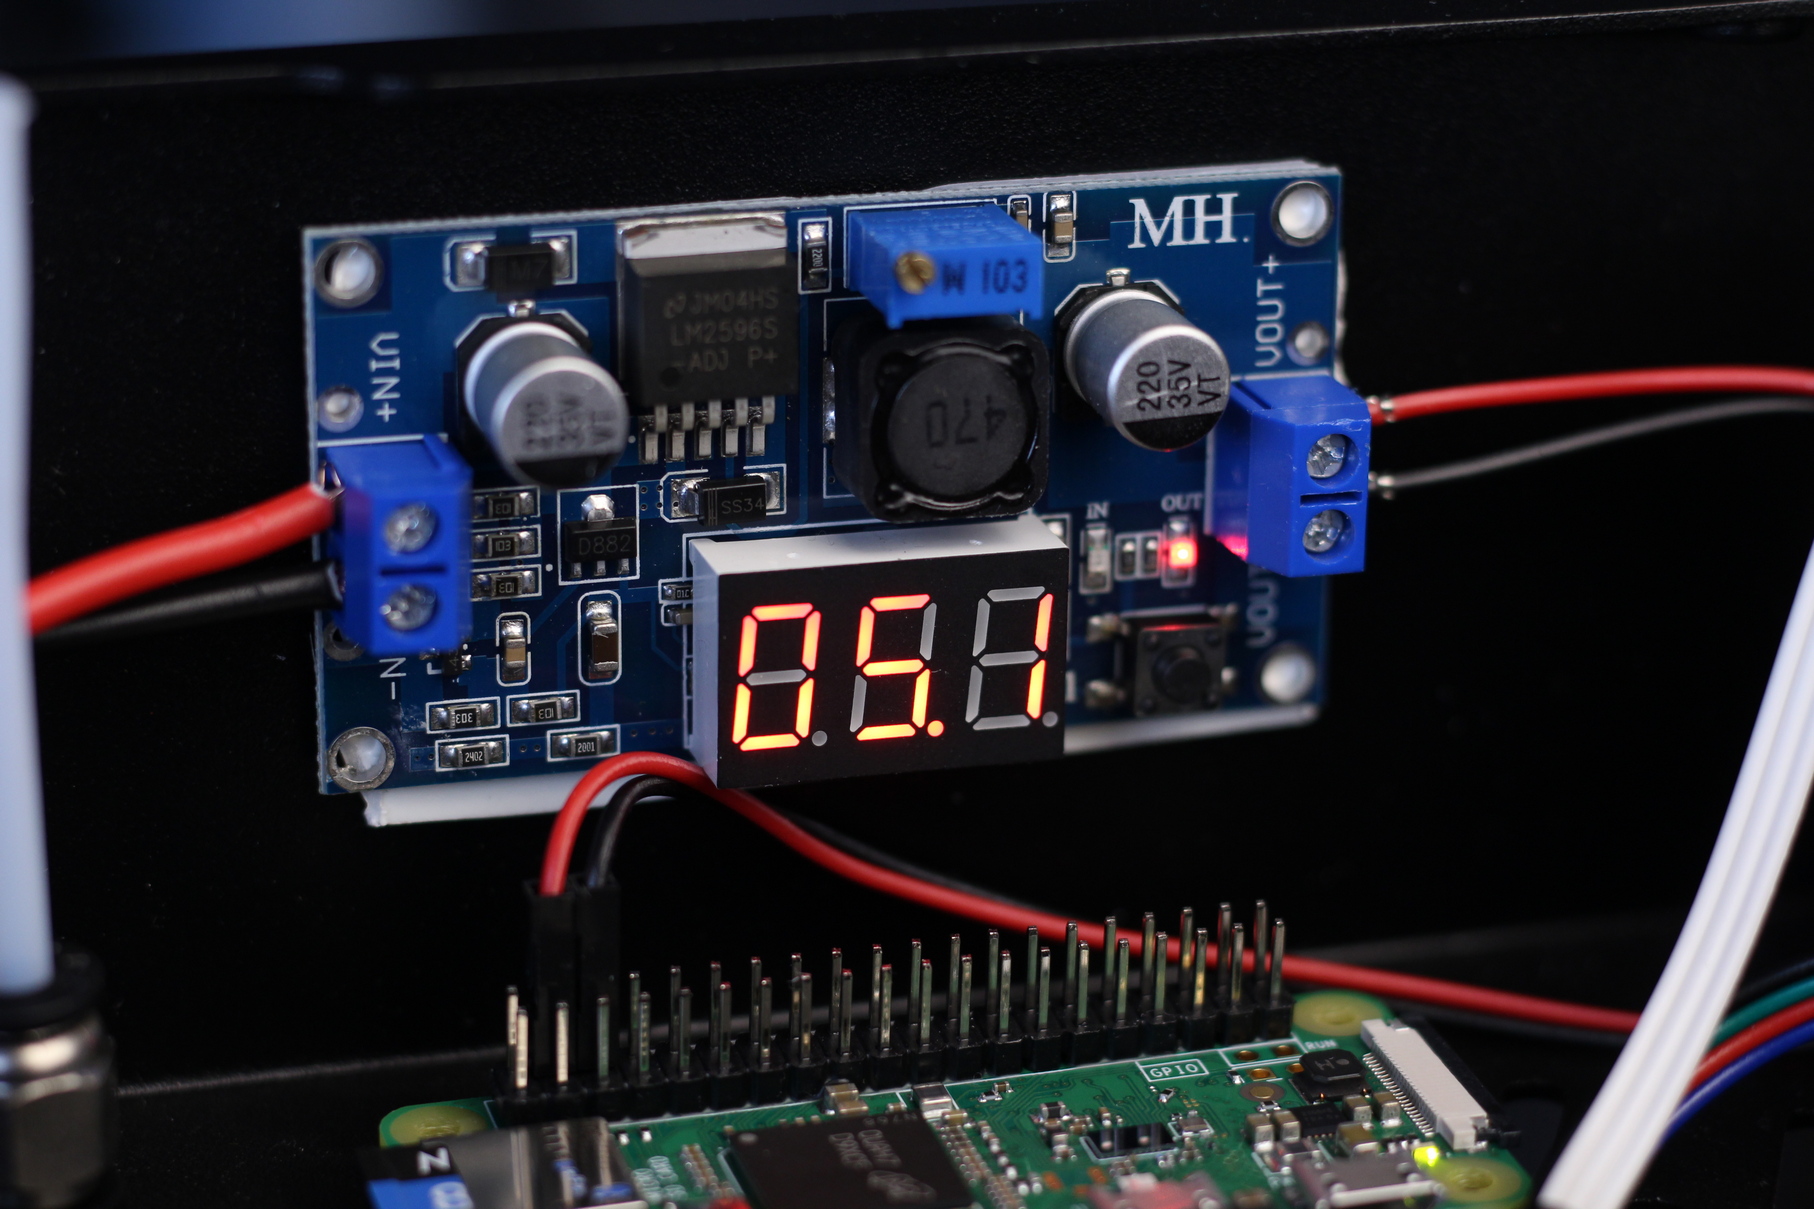
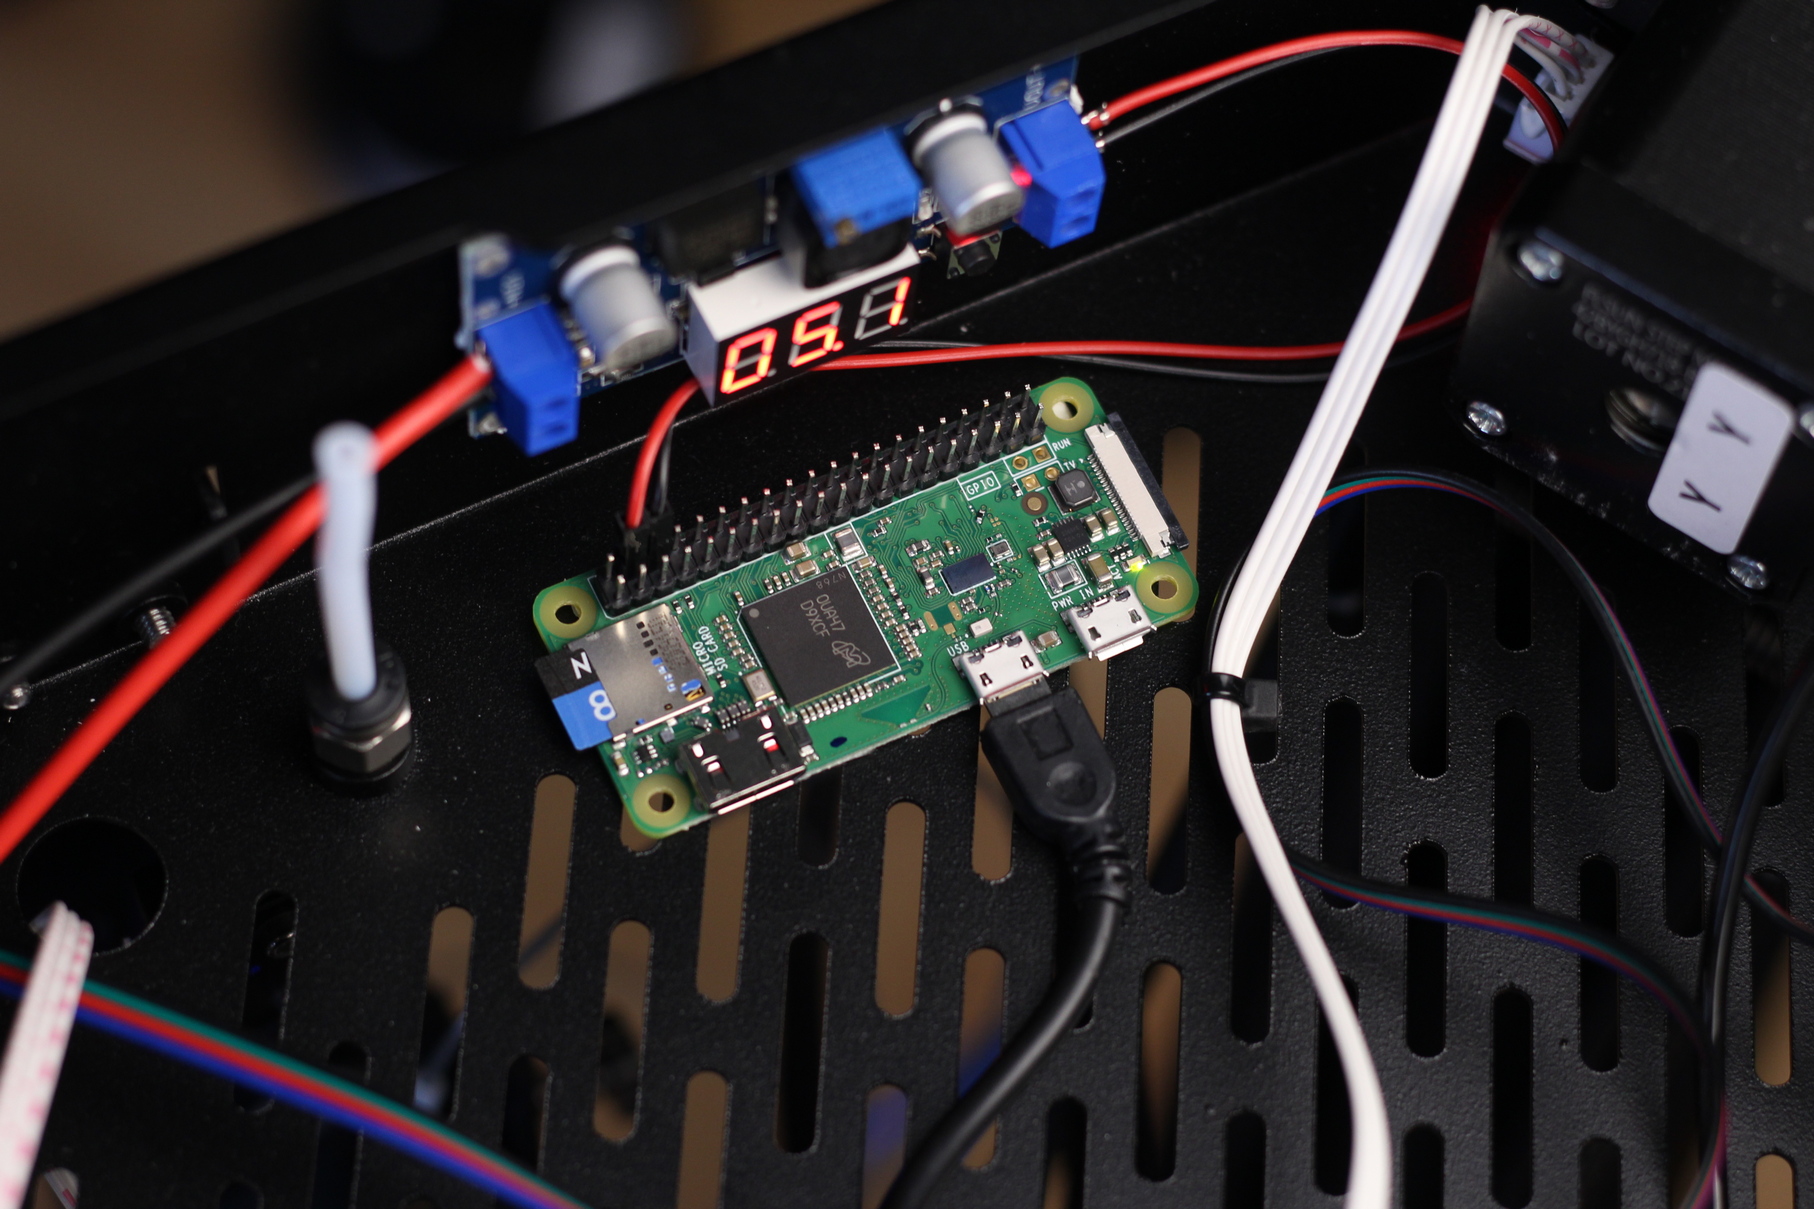
I used the Pi Zero because I already had it laying around, but if you can, purchase a faster Pi. A cheap alternative would be getting the Raspberry Pi 3A or the newer Pi 4.
If you prefer, you could also use the Raspberry Pi without installing it inside the printer and powering it using a regular Pi power supply. I chose to install it inside the electronics enclosure because I like to have everything contained in a single unit.
Prepare and install Klipper firmware for FLSUN Super Racer
Configure Klipper for FLSUN Super Racer (SKR 1.3)
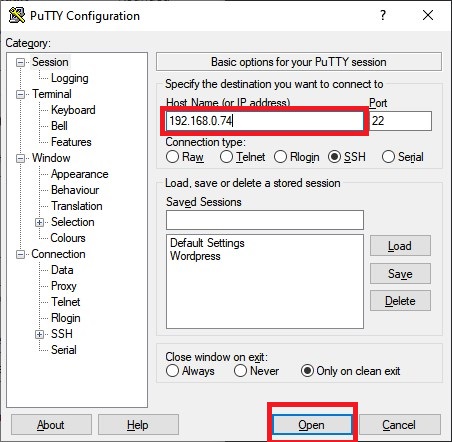
Download Putty, enter the IP of your Raspberry Pi then click Open
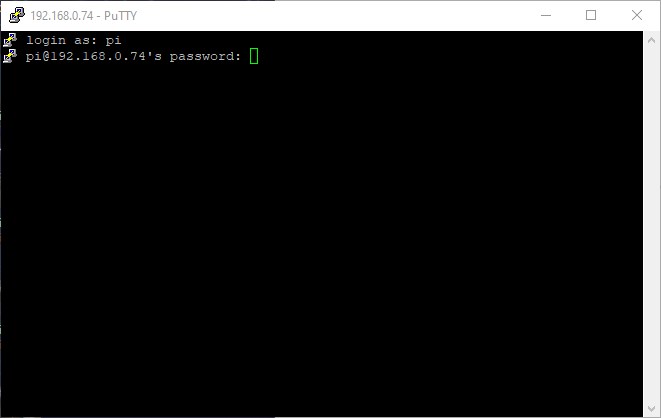
In the Login prompt, you need to enter the credentials for FluiddPi. The default user is pi and the password is raspberry. Please note that the password will not be shown when typing.
Now you are in the SSH console of your FluiddPi install. Enter the Klipper folder:
cd klipperOpen the Klipper Firmware Configuration screen using the following command:
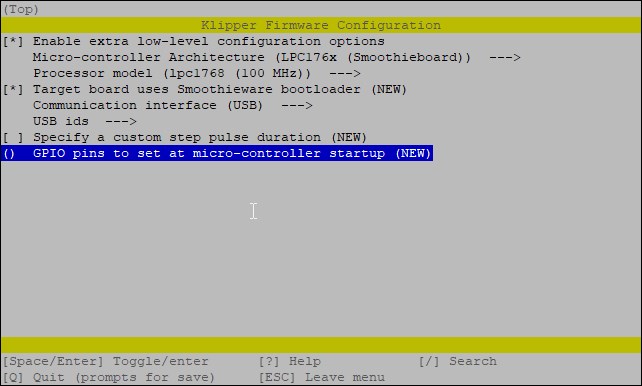
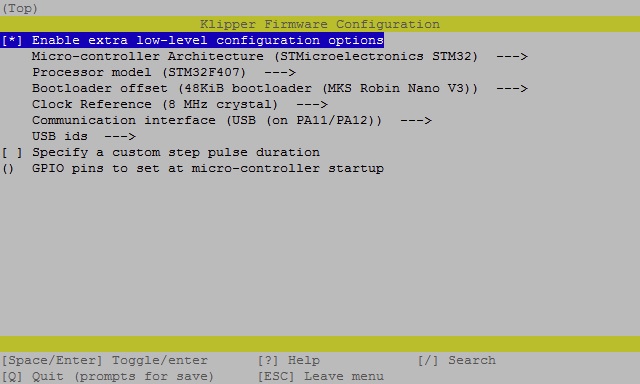
make menuconfigThe Klipper Firmware Configuration screen will appear. Using your navigation keys, move through the menus and replicate the same settings I used.
When finished, press Q then Y to save your configuration. Now run the following command to start building the firmware:
makeThe build process will start and when finished, the firmware will be ready to install. For the FLSUN Super Racer, we need to install it from the SD card.
MKS Robin Nano V3 Klipper Firmware Config
If you own the MKS Robin Nano V3 board, follow the same steps as for the SKR 1.3, but use the following settings:
The image is taken from the MKS GitHub.
How to flash Klipper firmware on FLSUN Super Racer
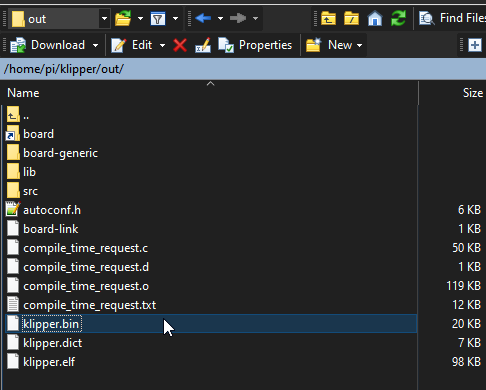
First, connect via SFTP to your Raspberry Pi. I use WinSCP. Enter the IP, username and password just like you did for Putty, then click on Login.

Navigate to /home/pi/klipper/out and copy the klipper.bin file on an SD card.
Next, plug the SD card in your printer and turn it on. The installation process takes about 15 seconds. I recommend you wait for a minute, then remove the SD card and restart your printer.
When you are flashing the board firmware, there won’t be any information displayed on the touchscreen. It will be stuck showing the FLSUN logo. Just continue to the next step.
Copy the FLSUN Super Racer Klipper config file
Now that our FLSUN Super Racer is running Klipper firmware, we need to copy the configuration file. You can download my sample configuration to get you started. This is made for the SKR 1.3 variant of the printer, and it’s already tuned for my machine. You might need to perform the calibrations again to suit your printer.
If your Super Racer uses the MKS Robin Nano V3 board, Martin Carlsson uploaded his config on GitHub. I haven’t tried it, but it should work. If there’s any issue with it, feel free to compare it with my SKR 1.3 config.
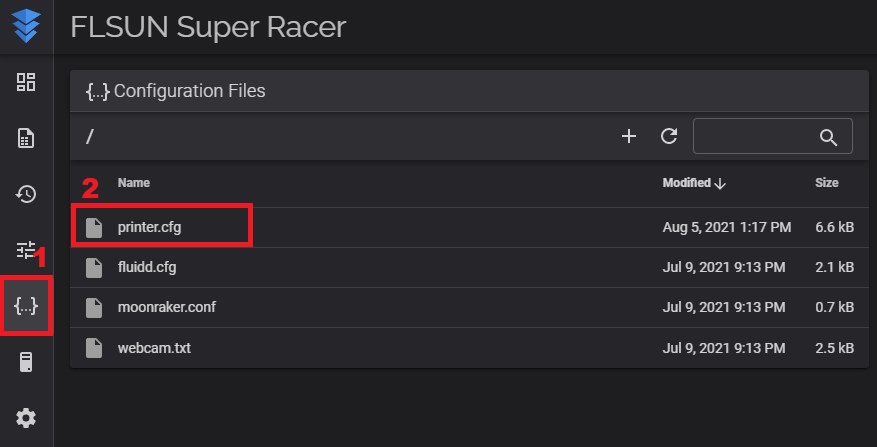
In your FluiddPi Web UI, navigate to the Configuration tab, and drag and drop the printer.cfg file in the Configuration Files section
Connect Klipper to your printer
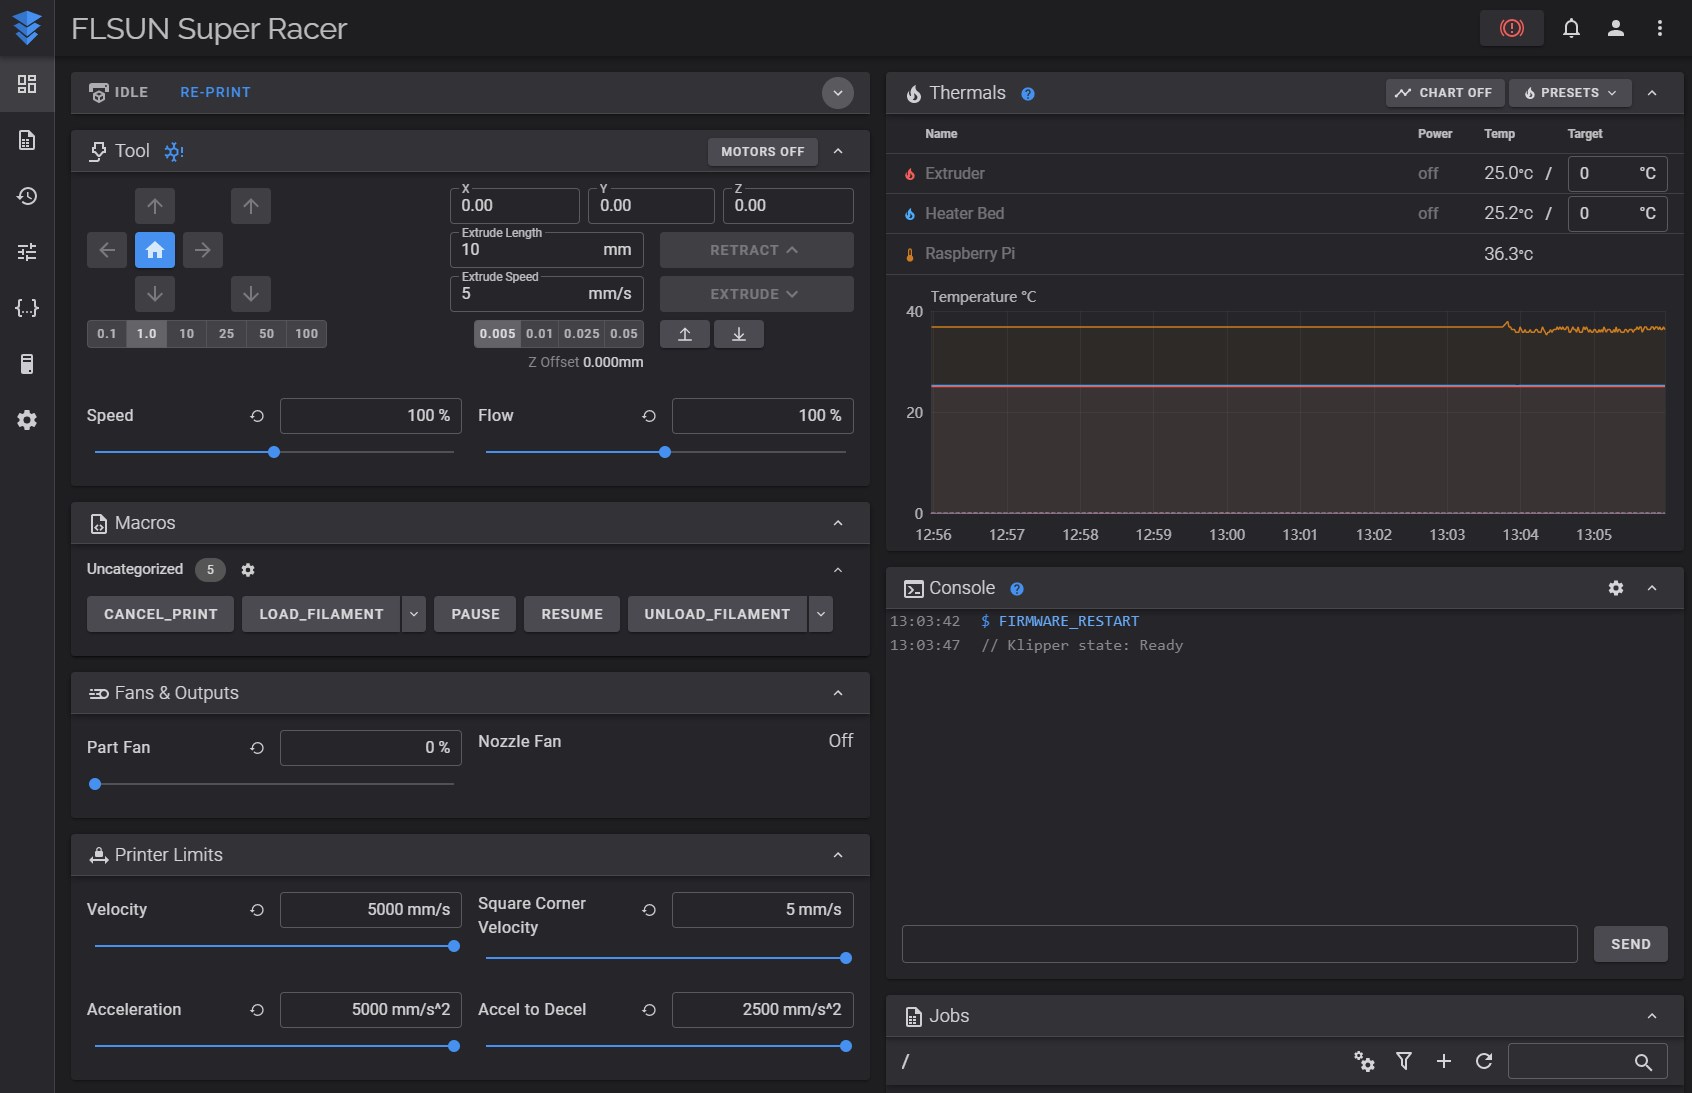
Finally, you just need to connect Klipper to your printer. This is super easy. You just need to go back on your FluiddPi Dashboard and click on Firmware Restart.
This action will trigger the connection between the Klipper service running on FluiddPi and the Super Racer firmware we just installed. If all the steps have been followed, then your printer will connect, and you will be greeted by this interface.
Feel free to home the printer first, to make sure everything is running correctly. Heat up the nozzle and heatbed and check if the temperature rises as expected. If everything looks good, then you are ready to proceed with the mandatory delta calibrations for Klipper
Perform the Klipper delta calibrations for FLSUN Super Racer
DELTA_CALIBRATE
Please carefully read the Basic Delta Calibration documentation from Klipper. Before running the calibration command remember to attach the probe to your printer. If you fail to do this, your nozzle will probably hit the bed and will cause damage to the printer.
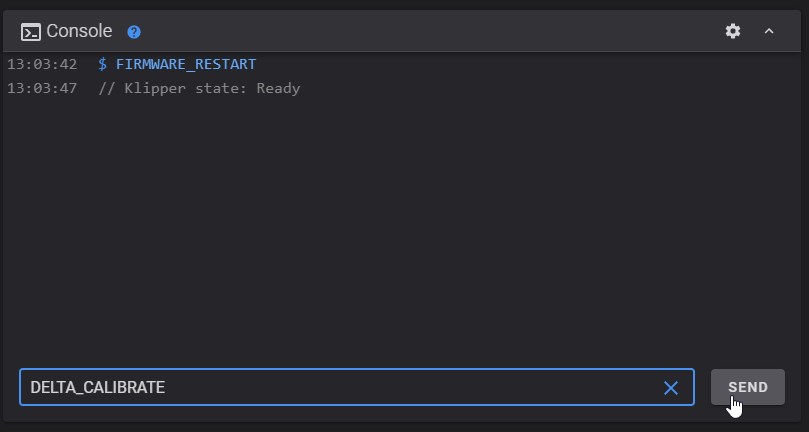
After attaching the sensor, home the printer, then run DELTA_CALIBRATE command in the console section.
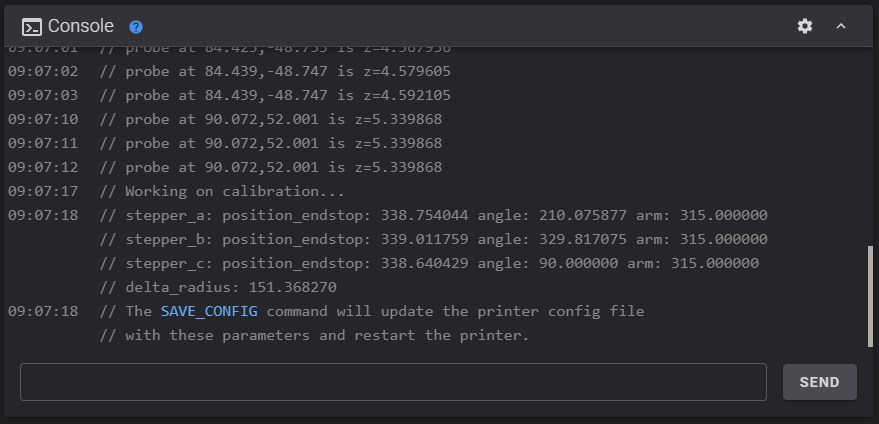
The printer will start probing the bed in multiple points. When finished, click on SAVE_CONFIG then SEND. This will save the calibration values in the config and restart the printer.
BED_MESH_CALIBRATE
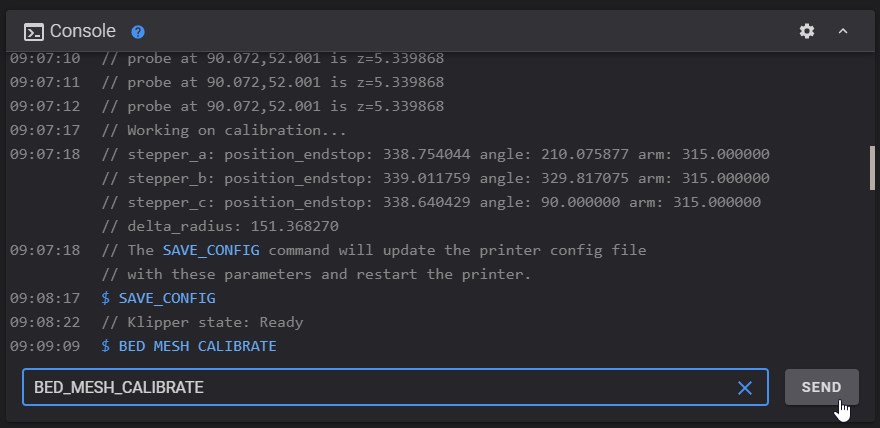
After the calibration, you can now generate a bed mesh. Run the BED_MESH_CALIBRATE command in the console to start the probing sequence. Of course, you will need to have the probe attached to the machine.
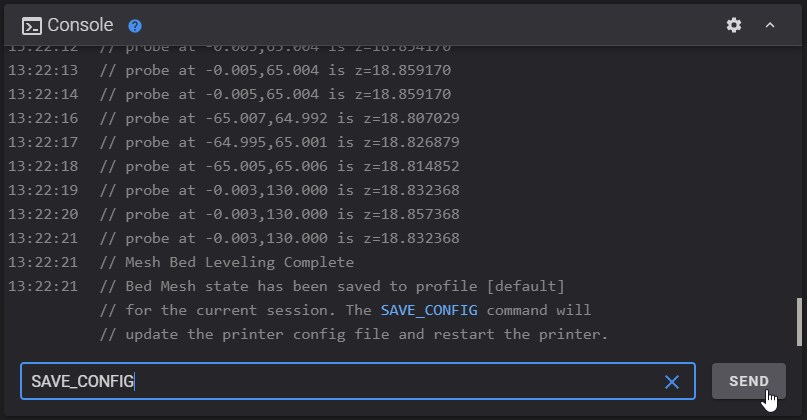
When the mesh is complete, run the same SAVE_CONFIG command to store the measurements in the config file.
Set Z offset
If you haven’t already done this during calibration, then check “the paper test” from the Klipper documentation. This will help with setting the correct Z offset.
How to revert to Stock FLSUN Super Racer Firmware?
If you decide Klipper is not for you, reverting to the stock firmware is easy. First, download the stock FLSUN Super Racer board firmware according to the type of board you have.
FLSUN Super Racer Stock Firmware – SKR 1.3
FLSUN Super Racer Stock Firmware – MKS NANO V3
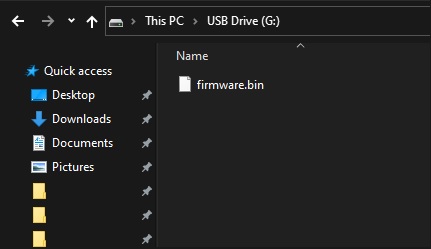
Unzip the files and copy the .bin file to the SD card. With the SKR 1.3, your file name will be firmware.bin. For the MKS Robin Nano V3. the filename will be Robin_nano_v3.bin. It’s recommended to use a small size SD card (up to 8GB).
Plug in the SD card to your printer in the SD Card slot and turn the printer on. This will trigger the board firmware update and the firmware will be flashed.
Wrapping up
That’s it! Now your FLSUN Super Racer is running Klipper. You can continue the calibration process with the Resonance Compensation guide available in the Klipper documentation. This way, you will be able to benefit from running Klipper at higher speeds without the ringing effect.
If you are looking to push your FLSUN Super Racer to its limits, then make sure you also check my FLSUN Super Racer Upgrades article.
If you encounter issues during your installation, feel free to leave a comment below and I will do my best to help you. Besides that, You can also join the 3DPrintBeginner Forum where there’s a dedicated thread for Klipper Firmware.
Liked it?
|
|







Tried install Klipper last week but didn´t sucess, under this section ” MKS Robin Nano V3 Klipper Firmware Config ” i didnt got all the options u showing in your pic.
Got the Robin Nano V3 board to
Hello to all Klipper fans,
I have had a FLSUN SUPER RACER for a little over 2 weeks.
After a few tests (OK), I decided to switch to Klipper thanks to https://3dprintbeginner.com !
And for a week now, I’ve been running around in circles without getting any good results.
I started with the ORECUS config on Github (my machine is powered by a ROBIN NANO, which I adapted for my machine …
Despite X reconfiguration, when I print on the back half of the bed, the nozzle “digs” the surface ! While returning to Marlin, … it works perfectly.
There is obviously something wrong, but what ….
I’m doing all the leveling procedures correctly…
If anyone has an answer, they will be blessed!
Could be something related to the delta calibrate command
Hello,
I did it (manually) but it’s the same…
Whereas on Marlin, no problem!
I’m not sure how you can do delta calibrate manually. It works on my side using the guide provided.
Hello,
After a long and fruitless search, I FINALLY found the answer to my problem.
I share it so that other users with the same problem can try to solve it like me.
After having tested X dozens of software solutions, I turned to the hardware side.
What could cause this problem on Klipper that did not occur on Marlin?
Well, it seems that Marlin is much more tolerant of hardware problems than Klipper, and it “fixes” the defects it finds. Klipper doesn’t do this, since everything depends on the configuration of the software.
So I tested the BELT TENSION on the 3 axes, as they came out of the factory, using an IOS application (Pano Tuner, whose equivalent surely exists on Androïd)
And there, surprise : A = 61 Hz, B = 37 Hz, C= 32 Hz !!!
With such voltage differences, there were inevitably “kinematic” problems.
Once the 3 axes are set to 60 Hz, … it works !
After DELTA_CALIBRATION, a DELTA_ANALYSIS and a BED_MESH_LEVELLING, obviously.
I “wasted” a month looking for a solution that I had practically in front of me!
Good prints
I cant say how thankful i am that you said this here. Have same issue will try this right away.
did it work?
It may be too late to get a response but anyway you can help me get it running on a name v3 board I’m a bit stuck on the installation
Hi, I also struggled for weeks with the same problem. In the end, it turned out to be the stealthChop mode of the stepper drivers (see https://www.klipper3d.org/TMC_Drivers.html) that is activated on the configuration file for the MKS Robin Nano V3, also found on this page.
Once stealthChop mode is deactivated everything works properly.
I hope this can help other people stumbling on the same issue
Hello,
Since I installed Klipper (it works great!), the heated bed takes a long time to get to 55°.
Whereas with Marlin, it was relatively short …
Is there a mistake on my part (configuration or other?)
Thank you in advance if someone has a way to solve this …
You need to do a PID tune
OK thank’s;.. i did it
Hello,
Thank you for your guide on the SR, they are superb, I would have liked to know if it was possible/useful to connect the screen of the SR to the pi?
It’s not possible
OK thanks, it wouldn’t have been very practical anyway I guess
If you have the MKS Robin Nano V3 Board you need to rename the created firmwarefile to Robin_nano_v3.bin
# The “make flash” command does not work on the MKS Robin. Instead,
# after running “make”, copy the generated “out/klipper.bin” file to a
# file named “Robin_nano_v3.bin” on an SD card and then restart the
# MKS Robin with that SD card.
Reference:
https://github.com/KevinOConnor/klipper/blob/master/config/generic-mks-robin-nano-v3.cfg
How do we shut down the pi safely? I understand that you cannot just switch it off. If you switch off your printer, it will cut the power from the pi without a proper shutdown.
How did you solve this issue?
I just power off the printer like I usually do, and live my life :))
But there’s a power off option in Fluidd/Mainsail to safely shut down the Pi before turning off the printer.
P.S. I entered the “klipper”-directory and from there the command worked 🙂
Hi, first this is a great guide, thanks a lot. I managed to install fluiddpi without problems, it’s running now and is accessable with my browser.
But I stumble upon this point:
“Now you are in the SSH console of your FluiddPi install. Open the Klipper Firmware Configuration screen using the following command:
make menuconfig”
Doing so I get this error message, even if my fluiddpi-GUI is accessable:
“make: *** No rule to make target ‘menuconfig’. Stop.”
What do I do wrong?
Thank you, it worked great
Great!