Creality Sermoon D1 Review: Looks VS Performance
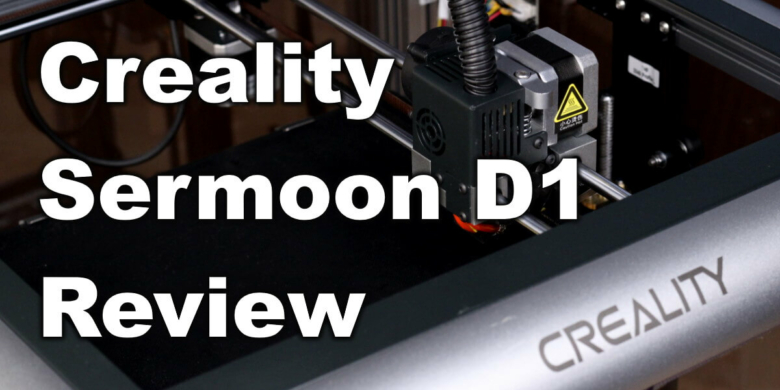
Since it was launched, I wanted to get my hands on the new Sermoon D1 3D printer from Creality because it looks great, and it comes with a direct drive extruder, which is a first for Creality as far as I know. Does it live up to the expectations? Let’s see.
Creality Sermoon D1 Shipping and Packaging
The Creality Sermoon D1 comes partially assembled in a big cardboard box with ample protection on all sides. There are a few layers of foam between the nicely packaged parts.
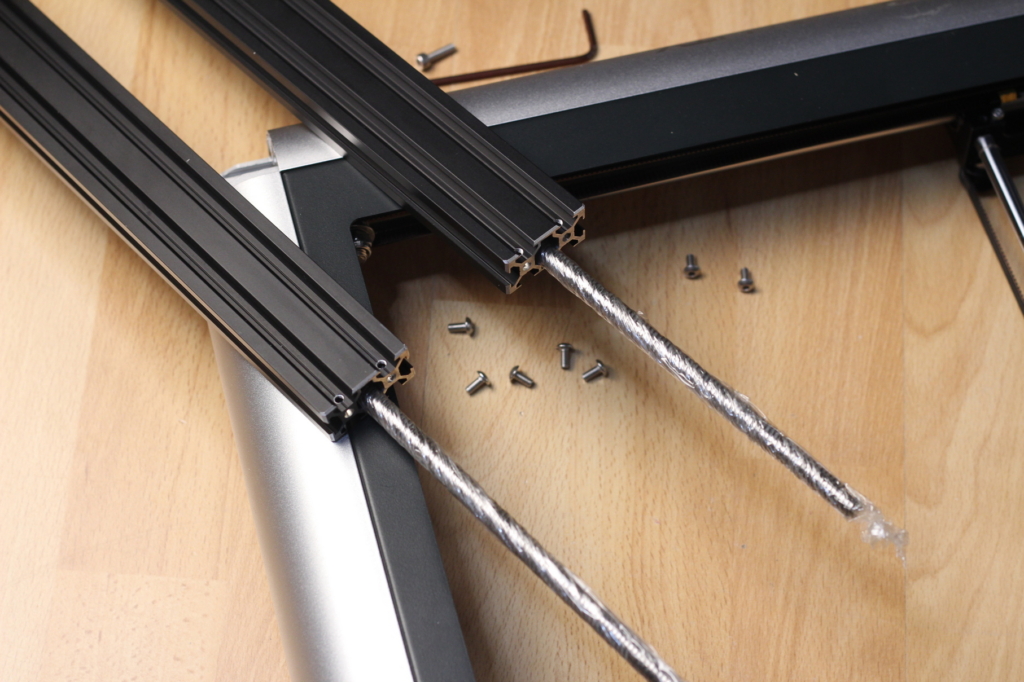
Some of these parts are so well packaged that I had the impression Creality forgot to include the Z screws. Fortunately, I later found out that they were hiding in the black aluminum extrusions, so make sure to check those too.
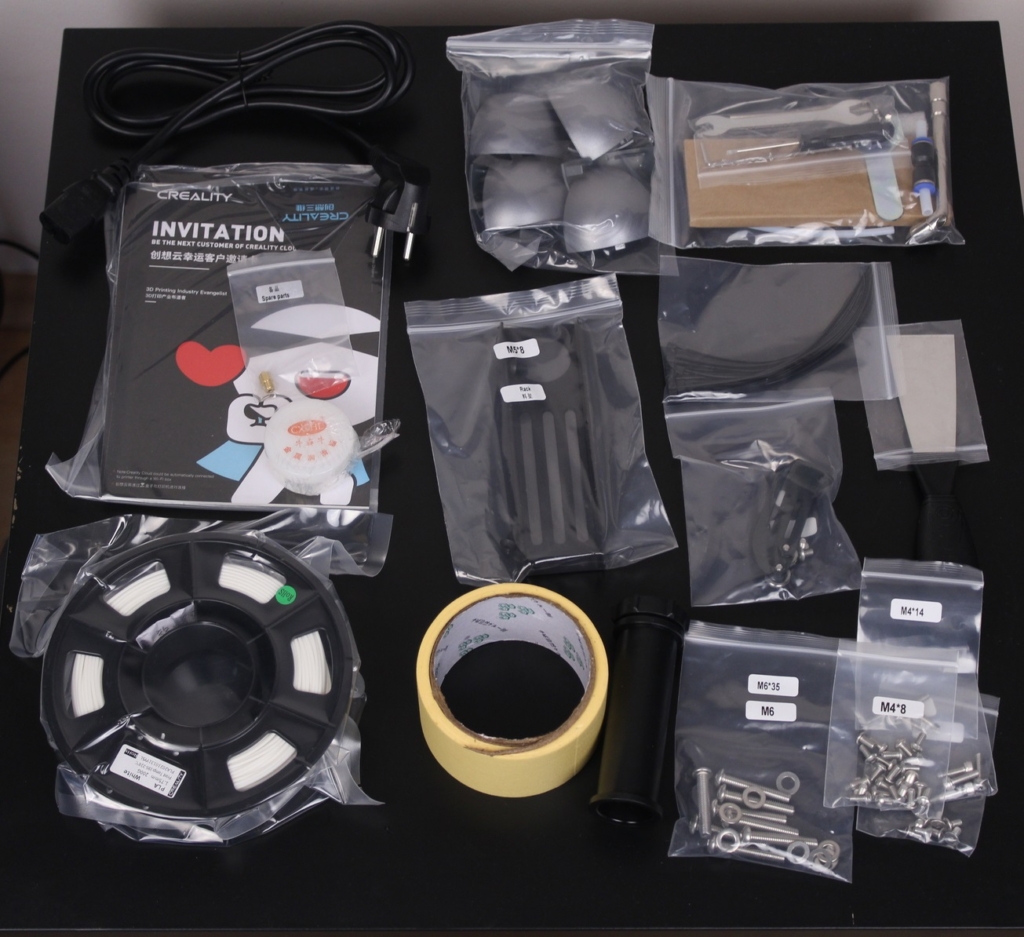
With the Sermoon D1, we also get the following accessories:
- 200g spool of white PLA filament
- Manual
- Spool holder
- Clippers
- Spare nozzle
- PTFE tube coupler with a small PTFE tube
- Needle for nozzle clogs
- Bag of screws and wires
- Scraper
- Hex wrenches
- Zip ties
- Power cable
- Glue stick
- Paper tape
- Grease for the linear rails
Unfortunately, there’s no SD card included with this printer, so you will need to source your own.
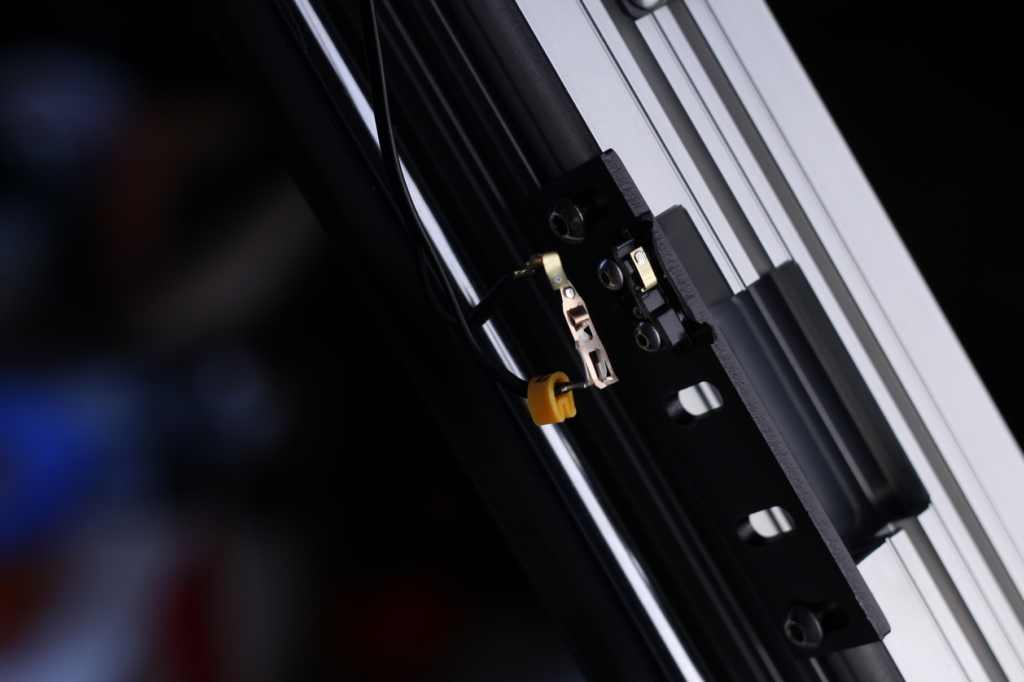
Even with good packaging, my unit came with the Z endstop destroyed, so to use it, I had to replace it and install a spare I had laying around. But if I didn’t have that replacement part at hand, I would have needed to wait for a few weeks until I got the replacement endstop and fix the printer. And this is not an isolated event, because BV3D had the same issue.
Assembly of the Creality Sermoon D1
The assembly process is straight forward. The steps are nicely described in the manual, and Creality also has a handy video which can help you set up the Sermoon D1. I was able to put everything together in about 1 hour (not considering the fact that I needed to assemble the printer twice, because I forgot to take out the Z screws).
All the parts are labeled and if you carefully follow the manual, the assembly process will be quite easy.
Creality Sermoon D1 Design
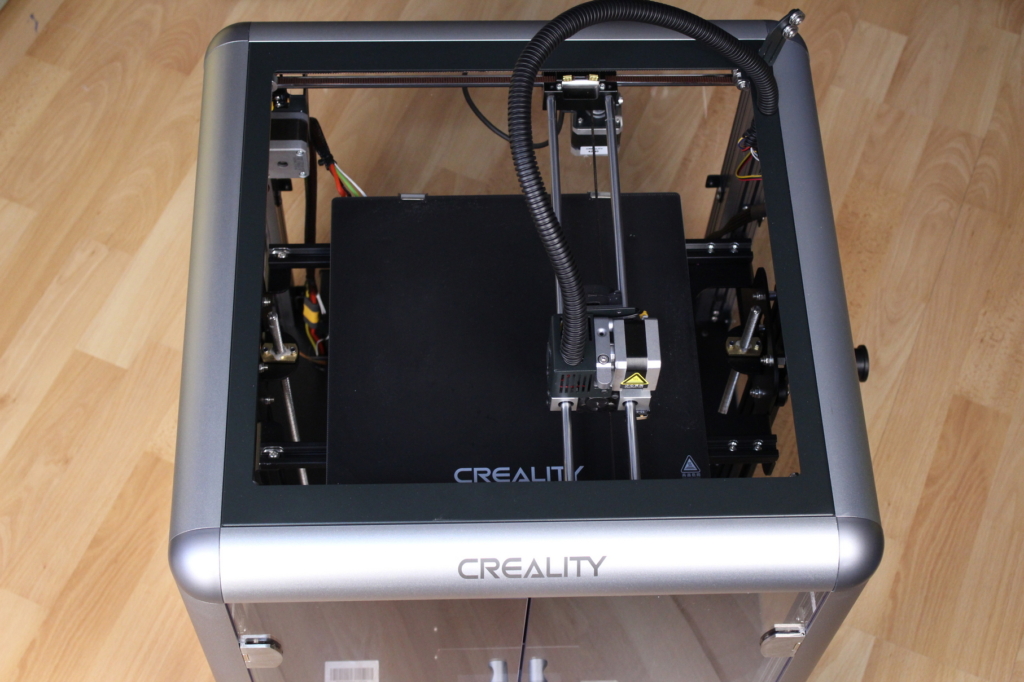
You must agree that the Creality Sermoon D1 looks awesome! The cube frame is made from sturdy silver aluminum extrusions which is sturdy and gives the printer a nice look. The extrusion corners are made from plastic, and they clip in place. Make sure you install them right at the end because they are a bit hard to remove if you need to do so in the future.


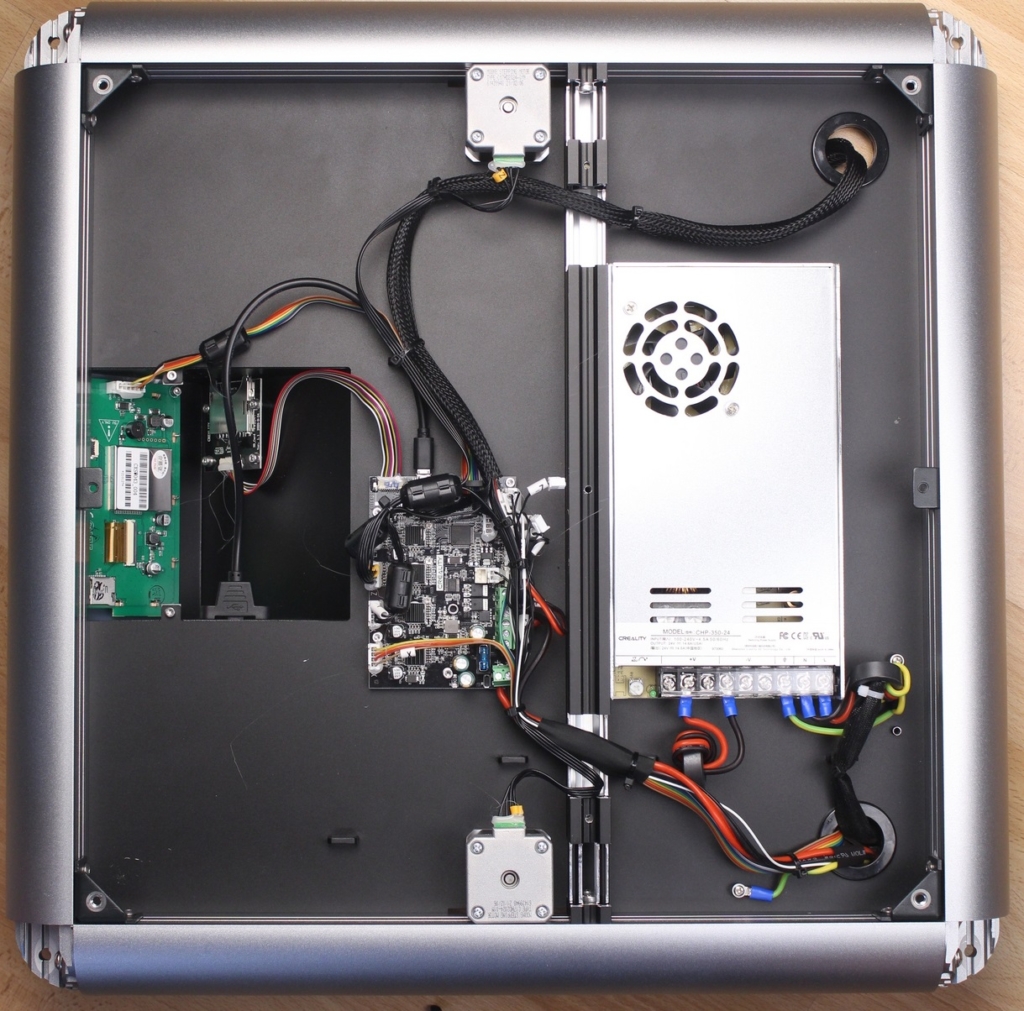
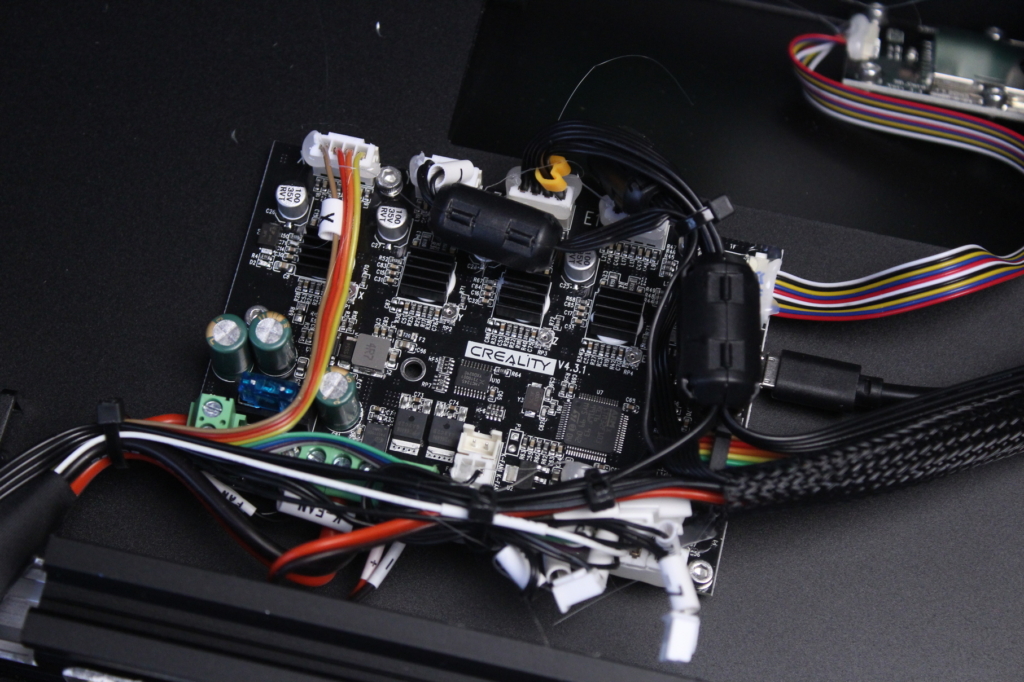
The electronics are placed in the bottom of the printer, with ample space around the components.
All the side panels are made from transparent plexiglass panels with handy door on the front which give you access to your finished print. Unfortunately, the front plexiglass doors from my unit had some kind of residue on them, and I was not able to thoroughly clean them. A bit of a bummer, because they look like they have been used for a few months with dirty greasy hands and never been cleaned.
Creality Sermoon D1 Specs
| Molding technology | FDM |
| Layer thickness | 0.1-0.4 mm |
| Printing accuracy | ±0.1 mm |
| Print size | 280*260*310 mm |
| Machine size | 500*500*531 mm |
| Package size | 590*590*410 mm |
| Hotbed temperature | ≤100 °C |
| Nozzle temperature | ≤250 °C |
| Supported filament | PLA/ABS/TPU |
| Display | 4.3-inch touch screen |
| Power supply | AC 100-240V, DC 24V |
| Nozzle diameter | Standard 0.4 mm (optional 0.2 mm/0.8 mm/1.2 mm) |
| N.W. | 20.5 kg |
| G.W. | 26.5 kg |
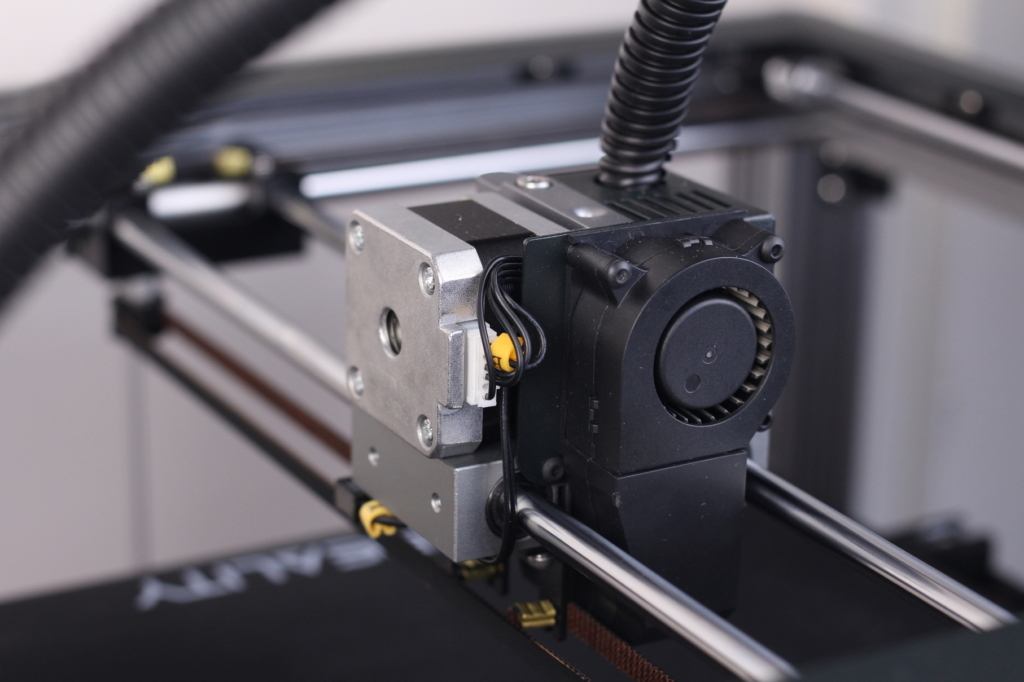
Single-gear direct drive extruder
For the Sermoon D1, Creality made a new direct drive extruder with a metallic idler which performs well for printing any kind of filament. This extruder is especially good for printing flexible filaments like TPU and TPE because the filament path is short. This translates into faster printing with flexibles, but you will later see that good flexible printing also needs good part cooling, and the Sermoon D1 lacks that.
I didn’t remove the extruder to check its weight, but it looks hefty, and because of that, some ghosting artifacts are expected if printing at higher speeds. Fortunately, the printer uses the same touchscreen as the Ender 6 so it won’t be too much trouble to upgrade it in the future with Klipper firmware to compensate for that ringing.
On the left side of the extruder, there’s a 4020-radial fan for part cooling, which is nice to see considering that most of Creality’s printers have a 4010 fan.
The printer speed is mostly constrained to about ~50mm/s for small PLA prints because the part cooling fan doesn’t push enough air to properly cool the layers. On bigger prints or other materials like PETG and ABS, the print speed can be pushed further without worrying about layer cooling, but I feel like this issue could have been avoided with a 5015 fan.
“All-metal extrusion” with a PTFE lined hotend
The Sermoon D1 is marketed as an “all-metal extrusion” printer. This made me think about the printer as having an all-metal heat break. Compared to PTFE lined hotends, an all-metal heat break should allow for more consistent performance over time while minimizing the work you need to do for regular servicing. But after disassembly, I was surprised to find a PTFE lined heat break.
The heat break is non-standard, and it’s much longer compared to other readily available parts out there. It’s worth noting that there is no thermal paste on the heat break which would have improved the thermal transfer a bit. I would have liked to see the hotend braced with two screws, just like their regular PTFE lined hotends because single-handed nozzle changes would have been possible.
The maximum temperature you can print at is 260C which is a bit of a bummer, but it’s probably because of the small heat break fan and heatsink and because of the use of a PTFE tube which touches the nozzle. The PTFE tube was also cut a bit too short, which can cause inconsistent extrusion, bad retraction values and clogs.
The heat break is cooled by two 3010-fans located on the right side of the extruder and the heatsink is integrated in the extruder. And here comes the award for a bad design. One of the cooling fans is wired in paralel with the part cooling fan which means that the hotend gets properly cooled only when the part cooling fan is active, to enable the second extruder fan. So, if you plan to print higher temperature materials like PETG and ABS which don’t require a lot of cooling you might encounter clogs.
I would have tested the temperature inside the heat break, but my temperature probe doesn’t fit the PTFE tube inside the heat break, so that’s not possible. During my time with the printer, I was lucky enough not to encounter any clogs, and the thermal mass of the whole extruder probably helped.
Cartesian motion system in a cube
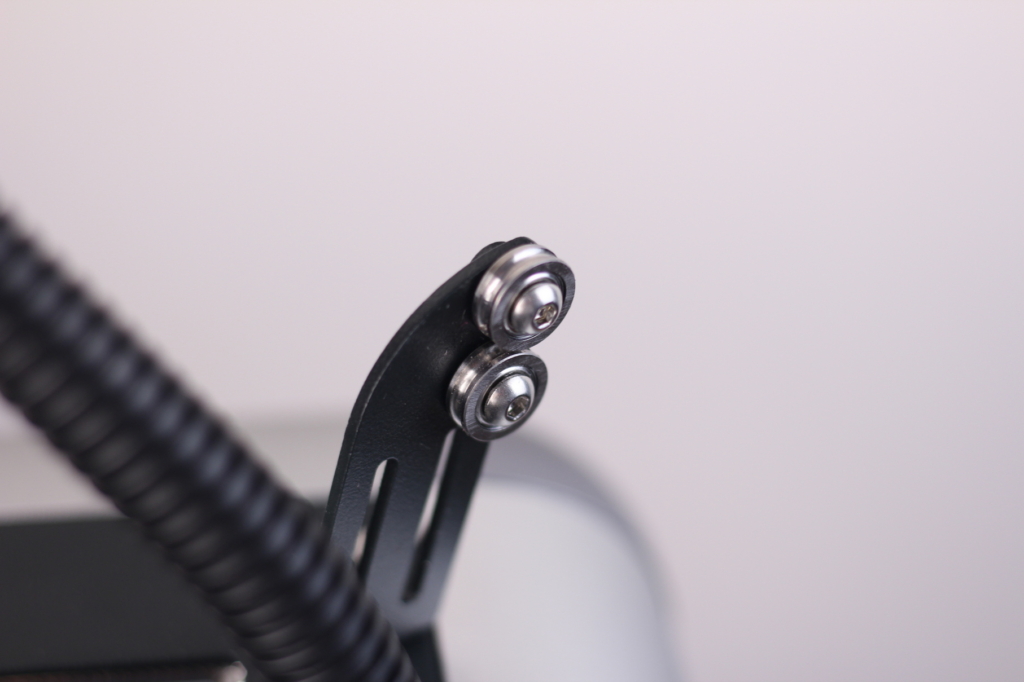
While it looks like a Core XY design like the Ender 6, the Sermoon D1 still uses a cartesian motion system, just like the CR-5 Pro. It’s also similar to the Ender 5 Plus motion system, but instead of running v-slot wheels the Sermoon D1 uses linear rods and cylindrical bearings. The X axis runs on a pair of linear rails which give the direct drive extruder a sturdy mount considering the weight.
This motion system is a bit noisier at higher speeds, but this 3D printer won’t win any speed awards, so this is not a big issue. I just wonder how hard it is to replace the rods and/or bearings after a few thousand hours of printing. The belt can be tightened on the Y axis by adjusting the motor position.
While the movement is smooth, I noticed a small “printing pattern” on the external walls of the print which I think it’s caused by the bearings used with this printer. Even after I greased the linear rods with the included grease, the pattern still showed up. You can see this pattern in some of my printed test models.
Dual Z axis
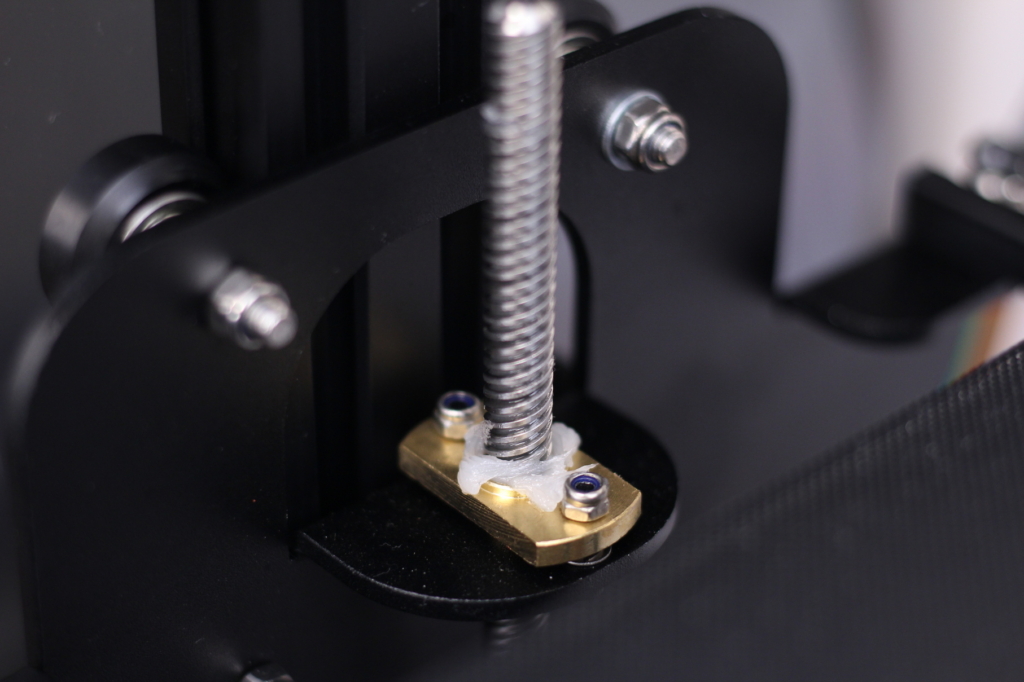
It’s great to see that the Creality Sermoon D1 uses a dual Z axis design which helps with keeping the bed stable during printing. The bed moves up and down on the Z axis with v-slot wheels. The movement is smooth, and it works better than I expected.
I would have loved to see anti-backlash POM nuts just like with the Ender 6. This addition would have made greasing the nuts a thing of the past and would have also helped with the bed dropping when steppers are not in use. Fortunately, the lead screw pitch keeps that from becoming a problem.
Partially enclosed
As previously mentioned, the Sermoon D1 has side panels which make it partially enclosed. This might be a good solution for printing higher temperature materials.
For good quality ABS prints, all the sides should be enclosed to elevate the enclosure temperature inside the chamber and keep some of the smell inside. Unfortunately, the top is open and that means that most of the heat escapes trough the top of the printer.
As with the CR-5 Pro and the Ender 6, Creality will probably take the chance to sell you another accessory in the form of a cover which you can install and completely enclose the printer.
What I don’t really like is the missing attachment brackets right at the bottom of the side panels. The plexiglas panels rattle at high printing speeds and that’s annoying. You could fix this by adding a small shim to keep the panels in place, but it’s a design issue that should have been detected in the design phase.
Another small issue I found is that the spool holder doesn’t have a small spacer to keep the spool from rubbing on the side panel. Without this, scratches will appear quite fast on the side panel.
Creality V4.3.1 board with silent stepper drivers for X and Y axis
The printer is mostly silent when printing, because of the silent stepper motors but when you home the printer you will notice increased noise. It’s the same board you get with the cheaper Ender 3 Max.
I really don’t understand why Creality does this instead of equipping the printer with a board that runs silent stepper drivers for all axis especially considering that this is a more premium machine compared to other budget offerings.
Even the cheapest entry-level printers out there use silent stepper drivers, so Creality doesn’t have any kind of excuse this time.
As with most of the Creality 3D printers out there, the wires are tinned, and this can be an electrical hazard if not properly tightened. It’s recommended to strip the tinned ends and install ferules, but if you don’t have those at hand, then you can always just cut the soldered part, twist the wire ends and install them in their connectors.
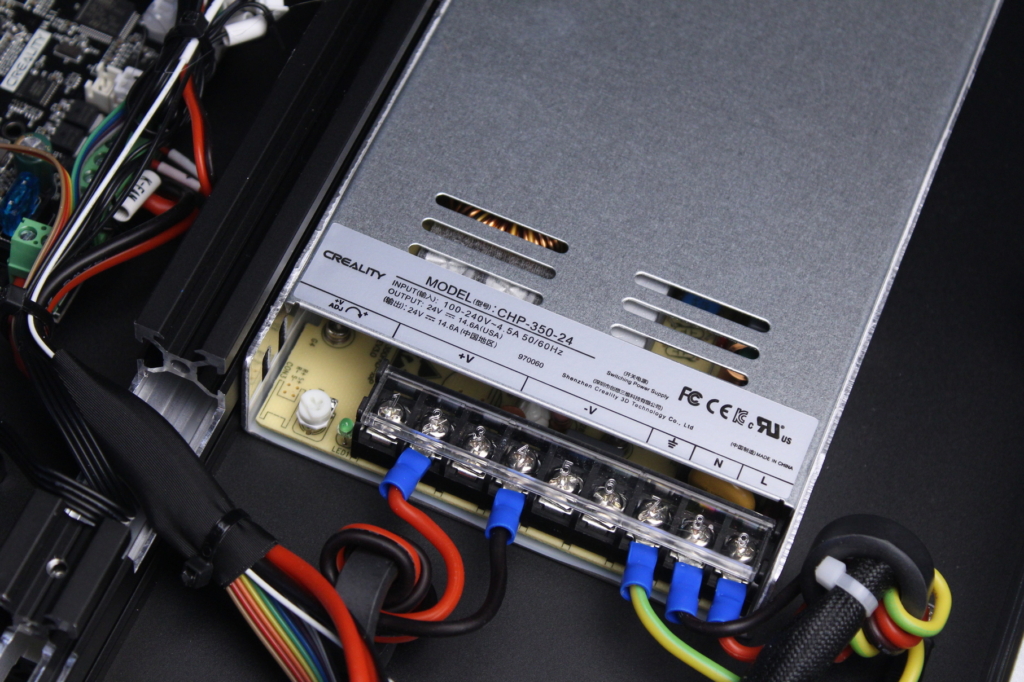
Creality CHP-350-24V power supply
I was expecting to find a no-name power supply inside the Sermoon D1, but instead, Creality installed a CHP-350-24 power supply which strongly resembles the popular Mean Well power supplies we sometimes get with Creality 3D printers. This might be a rebranded Mean Well, but I can’t really confirm. What can be confirmed is the use of a relatively silent fan, which makes the printer quieter than I was expecting.
As with the Ender 6, Creality included ferite cores for the power and stepper motor cables to minimize electrical interference.
4.3-inch touchscreen
The 4.3-inch screen is the same unit we get with other Creality printers like the Ender 5 Plus and Ender 6. It doesn’t have any special features, but it works well, it’s responsive and has good viewing angles.
I don’t really like the positioning of the screen, because every time I need to start a new print, the doors need to be opened to access the SD card and control the printer.
Nice wiring solution
The Creality Sermoon D1 gets extra points for the nice wiring solution which looks similar to the one used for the Ender 6. The fans, extruder and sensors are connected using a single ATX-like cable which terminates in a breakout board. There are also small clips in place where you can secure the wiring to the aluminum extrusions with zip ties.
Glass textured print surface
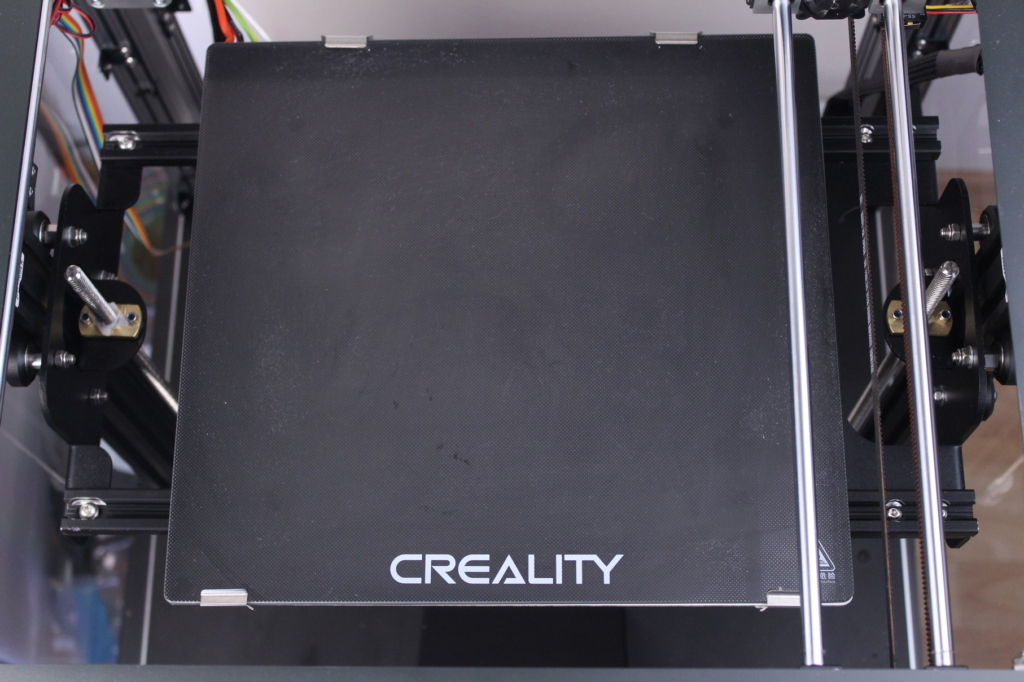
As with most of the Creality 3D printers, we get a glass textured print surface on top of the aluminum heated bed, with metallic clips to hold it in place. Unfortunately, I noticed that the included glass surface has a bit less adhesion compared to the one used with the Ender 6 or other Creality printers I’ve tested in the past, and I needed to use some glue stick in a few cases to help the first layer stick better.
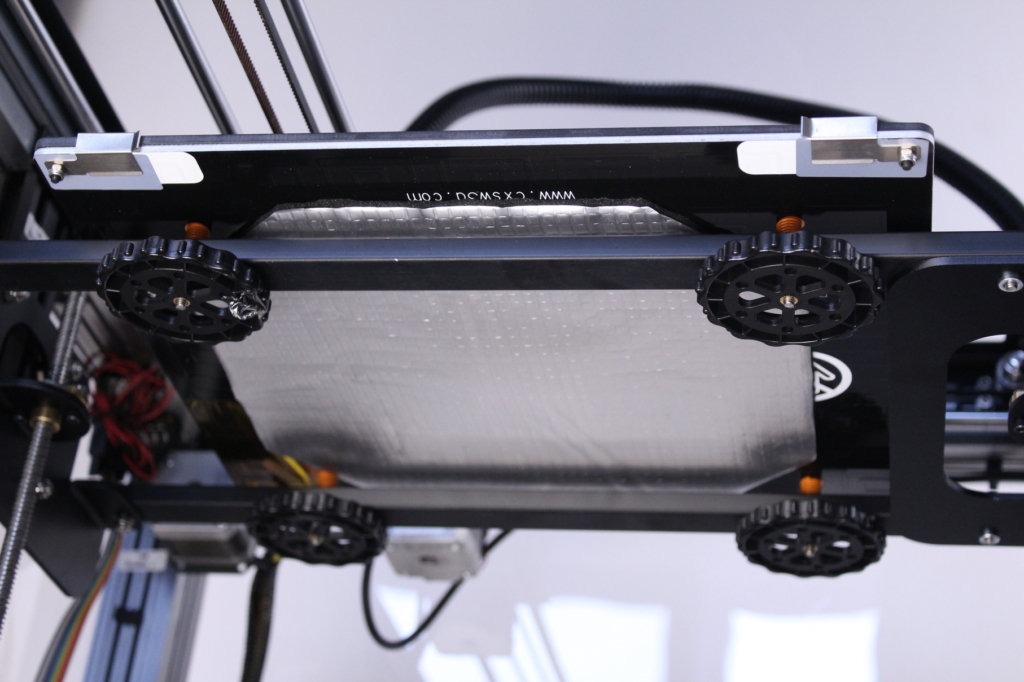
The bottom side of the bed is insulated, but the insulation material doesn’t quite cover all the corners of the bed.
Bad filament guide
There’s also a small filament guide which is used to direct the filament from the spool to the extruder. It’s quite annoying because it adds a bit of drag to the filament and this can cause inconsistent extrusion if the extruder idler tension is not set right. I would have liked to see a reverse bowden setup instead.
Heating time and power consumption
I tested the heating time for both hotend and heat bed and here are the results:
Hotend
- 200C in 1 minute and 25 seconds
- 250C in 2 minutes
Heatbed
- 60C in 3 minutes
- 100C in 10 minutes
Power Draw
Idle power draw is around 10W. When the hotend and heatbed are heating up, the Creality Sermoon D1 draws around 315W. After it starts printing, the power draw stabilizes to around 120W.
All these measurements were taken with a Blitzwolf smart power socket which indicates the power draw, and it can also be used for remotely powering on and off the printer.
Bed Temperature Uniformity
I tested the temperature uniformity for the Creality Sermoon D1 bed with the Flir Camera installed on the CAT S62 Pro. The bed has been set to 60C and I waited 2 minutes after reaching that temperature for the temperature to stabilize.
The bed temperature is mostly uniform across the print surface, with small inconsistencies on the corners where the bed is not properly insulated. Not perfect, but good enough in my opinion.
Creality Sermoon D1 Noise Levels
I was expecting the Sermoon D1 to be noisy, but for regular printing speeds (~50mm/s-60mm/s) the printer is mostly quiet. On quick movement speeds the side panels start to rattle but that can be fixed. I like the use of more silent fans compared to other Creality printers which is a welcome addition.
In the video the printing noise feels higher than it really is, so don’t get discouraged by it.
IdeaMaker profiles for Creality Sermoon D1
During my time with the printer, I also tuned four IdeaMaker profiles for the Creality Sermoon D1 using the tools available in the 3D Printer Calibration Guide using IdeaMaker article. These profiles are tuned for the stock printer and worked well for me. Feel free to give them a go.
Creality Sermoon D1 IdeaMaker Profile – PLA – 3DPrintBeginner
Creality Sermoon D1 IdeaMaker Profile – PETG – 3DPrintBeginner
Creality Sermoon D1 IdeaMaker Profile – TPU – 3DPrintBeginner
Creality Sermoon D1 IdeaMaker Profile – ABS – 3DPrintBeginner
Test prints on Creality Sermoon D1
3DBenchy
With the 3D Benchy, I managed to find the first significant drawback of the Sermoon D1, and that’s the part cooling fan. If you look closer, you can see that one side of the print is shinier compared to the other side. For PLA prints, you need a good amount of air to cool the layers, especially for small models like this. Besides that, its position is not the best. The extrusion was not that consistent, but after I tightened the idler spring a bit, the next prints came out much better.


- Material: SUNLU Grey PLA
- Layer Height: 0.2mm
- Nozzle Temperature: 210C
- Bed Temperature: 65C
- Print Speed: 50 mm/s
Voron Cube
I also printed the Voron Cube because it’s an easy way to test the printer tolerances and I can easily compare it with other printers I’ve tested. Overall, the model looks good, the bridging part was printed well, and the dimensions are pretty accurate.
- Material: SUNLU Grey PLA
- Layer Height: 0.2mm
- Nozzle Temperature: 210C
- Bed Temperature: 65C
- Print Speed: 50 mm/s
Phil-A-Ment
The Phil-A-Ment model came out really nice. Extrusion is consistent across the model, but you can see that the part cooling fan doesn’t perform that well on large overhangs. This model shows the “printing pattern” I was mentioning in the beginning, which you can see it best around the MatterHackers logo in the front.
Torture Toaster
I wasn’t expecting for the Torture Toaster from Clockspring 3D to finish successfully but the Sermoon D1 proved me wrong. Sure, it was helped by the thin layer of glue stick I applied before starting the print, but it’s still a good achievement considering the complexity of this model. All the moving parts work as intended, and I was able to move three tolerance pins, including the 0.3 mm one. The model took just under 9 hours to print.
- Material: Gembird Red PLA
- Layer Height: 0.2mm
- Nozzle Temperature: 210C
- Bed Temperature: 65C
- Print Speed: 60 mm/s
Winter Soldier
I have a hefty backlog of models to print from Fotis Mint’s Patreon, so I grabbed the Winter Soldier bust and gave it a go. The print came out great, but you can see some spots where filament started to curl. This is caused by the small amount of air pushed by the part cooling fan, which is a bit of a drawback for PLA prints.
- Material: Extrudr BioFusion
- Layer Height: 0.15mm
- Nozzle Temperature: 215C
- Bed Temperature: 65C
- Print Speed: 40 mm/s
Black Noir
I also tested the ABS printing performance of the Sermoon D1. I didn’t have high hopes for a success considering the printer is not enclosed, but the Black Noir bust from Fotis Mint was printed successfully. The added layer of glue stick probably helped a lot with adhesion, and I also used a small brim to give the print more chances of success.
- Material: Gembird Black ABS
- Layer Height: 0.15mm
- Nozzle Temperature: 235C
- Bed Temperature: 100C
- Print Speed: 50 mm/s
TPU 3D Benchy
Having a direct drive extruder is one of the main selling points for the Sermoon D1, promising faster printing for flexibles compared to a bowden setup. While the extruder can easily keep up during printing, I noticed a lot of cooling issues. On a small print like this 3D Benchy, the layers don’t have enough time to be cooled so printing over ~40mm/s on small models is almost imposible.
The better looking benchy was printed at ~40mm/s and the one with cooling issues was printed at ~50mm/s. Such a small difference in speed can have a big impact on print quality for small models, and I don’t think you can push the speed further without adding a more powerful part cooling fan. You can also see some stringing and I blame this on the small empty space between the nozzle and the PTFE tube inside the heat break.
- Material: DevilDesign Pink TPU
- Layer Height: 0.2mm
- Nozzle Temperature: 220C
- Bed Temperature: 60C
- Print Speed: 40-50 mm/s
200% PETG Calibration Cube
To prove a point about the bad part cooling setup, I also printed this 200% PETG calibration cube at 60mm/s, with 50% fan speed (which is more than the usual 30% I use for PETG) and as you can see, the print quality is great. Extrusion is consistent and the corners look better than expected, even though Linear Advance is enabled.
- Material: DevilDesign Pink PETG
- Layer Height: 0.2mm
- Nozzle Temperature: 235C
- Bed Temperature: 70C
- Print Speed: 60 mm/s
Conclusions: Is the Creality Sermoon D1 worth it?
Answering this question is a bit hard, because after testing the Ender 6 I feel that the Sermoon D1 wins mostly in the looks department. I like that it comes with a direct drive extruder, but after discovering that the hotend is still PTFE lined I am a bit disappointed. Upgrading with a different aftermarket hotend is close to impossible so you will be stuck with an enclosed printer limited to printing regular filaments.
I also don’t really like the touchscreen position inside the printer. I think the Ender 6 does a better job allowing for screen interaction without opening up the enclosure. And speaking about the enclosure, I still believe that the printer should have been sold with a cover in the package.
Print quality is decent, but print speed is limited by the low part cooling fan performance, especially for PLA. The included board is also lower quality (because it still has some noisy drivers) and the filament guide is annoying. The side panels are not secured on all sides, and that also caused some resonance during quick movements.
What I really love about the Sermoon D1 is the low noise it produces during printing. At regular speeds, the printer is one of the quietest I’ve tested to date.
If I were to choose a printer between the Sermoon D1 and the Ender 6, I would choose the Ender 6 because the price is similar, it has better hardware and it’s also more customizable/serviceable. Make sure you read my Ender 6 Review before making a purchase decision because it might be a better alternative for you.
Where to buy the Creality Sermoon D1?
The Creality Sermoon D1 can be purchased from the following websites:
I recommend checking out the Discount Codes page before purchasing. I regularly update the article with discount codes for various online shops, and you might find one for this particular model.
The Creality Sermoon D1 was provided free of charge by Creality for the purpose of this review. While the article includes affiliate links, all opinions are my own. Nobody reviewed the article before it was posted, following the Review Guidelines.
Liked it?
|
|











for me one of the best looking printer on the market with huge potential (by look of it), shame about its final performance and completely missed opportunity