Forget Wi-Fi Passwords: Print a Wi-Fi Coaster
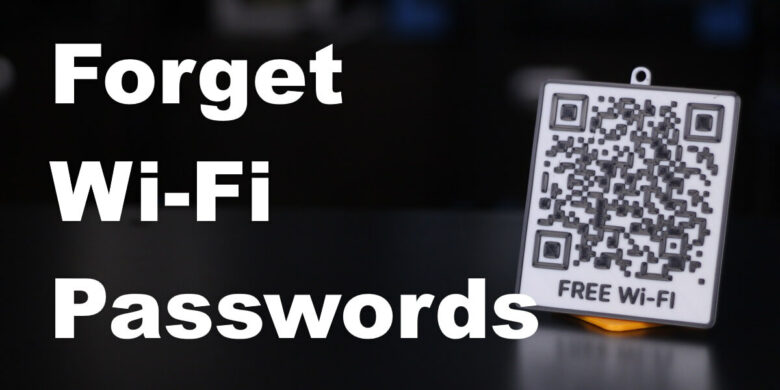
I rarely print functional objects with my 3D printers, but from time to time I melt filament in objects that actually provide a use. This time, I printed a Wi-Fi coaster.
In this guide, I will show you how you can easily print a Wi-Fi coaster which will allow you to connect to your Wi-Fi network without having to type in those pesky Wi-Fi credentials.
Prerequisites
In order to print a Wi-Fi coaster, your printer needs to have M600 filament change feature enabled. This feature allows the printer to be stopped at a certain layer set in the slicer and allow the filament change.
Most of the printers out there don’t have this feature enabled, but I recommend looking for a custom firmware made for your 3D printer. It will probably have this feature already enabled.
You could also watch the model and do the filament change manually, when the time comes, but that requires you to spend a bit of time checking on your printer.
Generate the 3D model
Before we start printing, we need to generate the 3D model. I found an easy-to-use website which provides all the tools and customization features to generate the model.
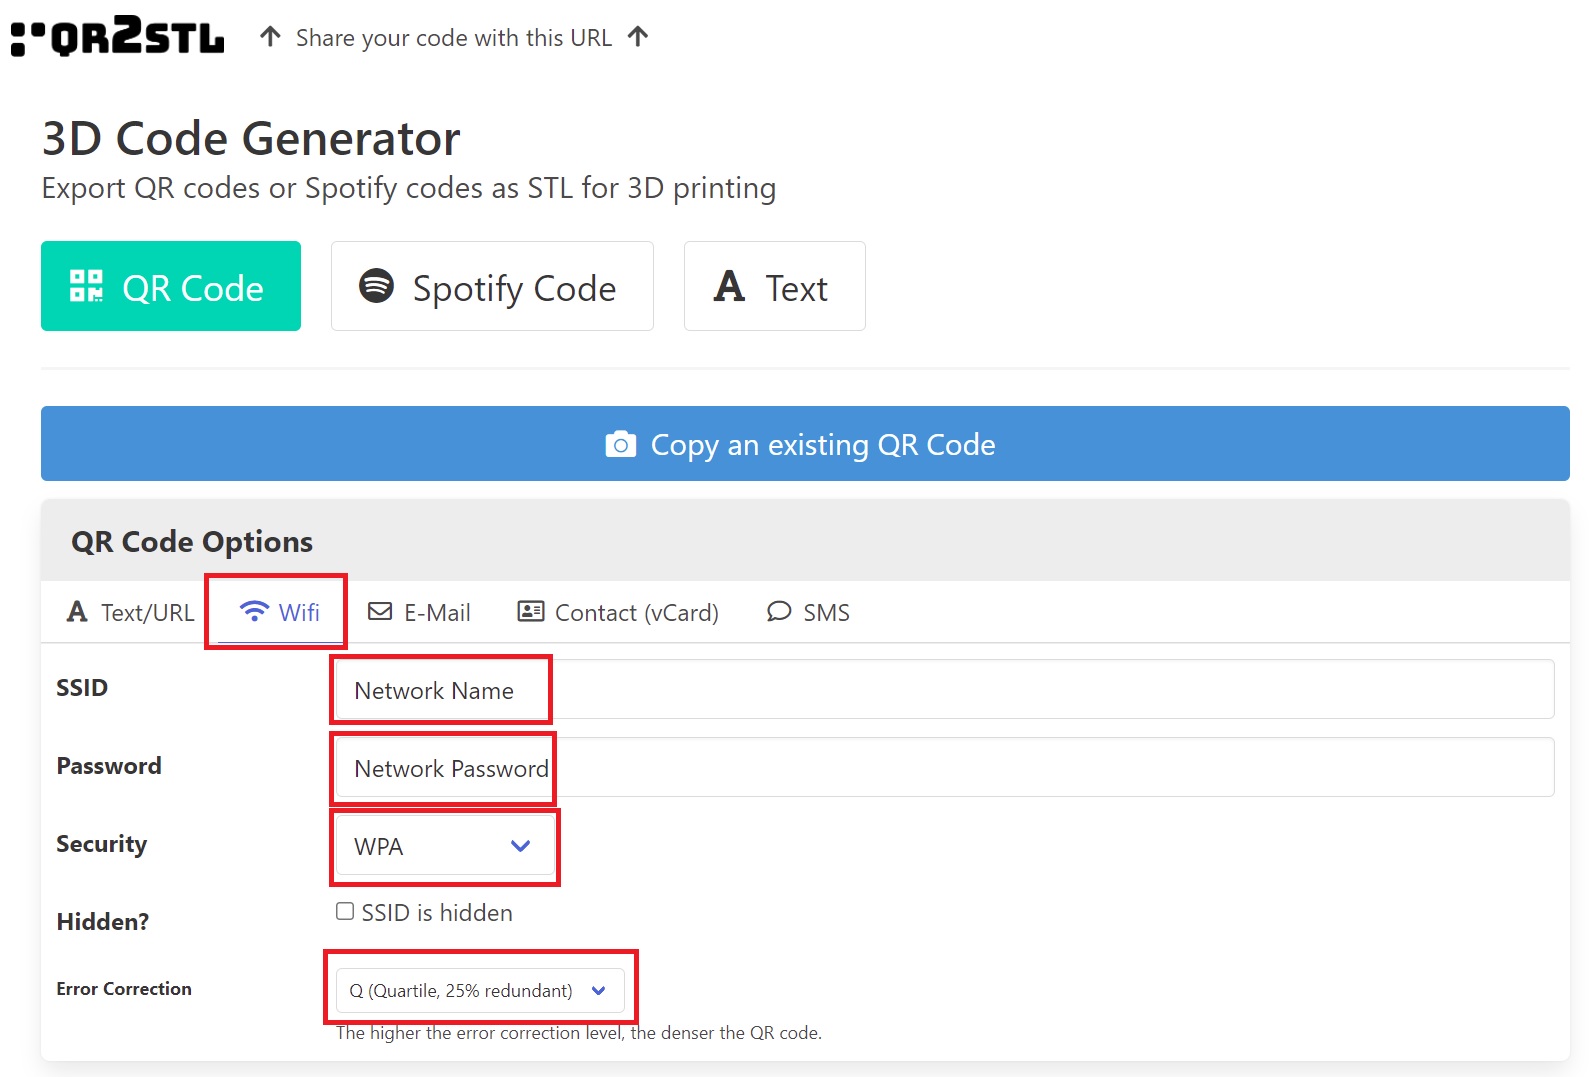
Navigate to this link using your browser then click on the Wi-Fi tab and enter your network credentials:
SSID – Enter the name of your Wi-Fi network
Password – Enter the password of your Wi-Fi network
Security – Choose between WPA and WEP. Most of the network devices should use WPA
Error Correction – I recommend setting it to 25%. This value works great even if the model is small
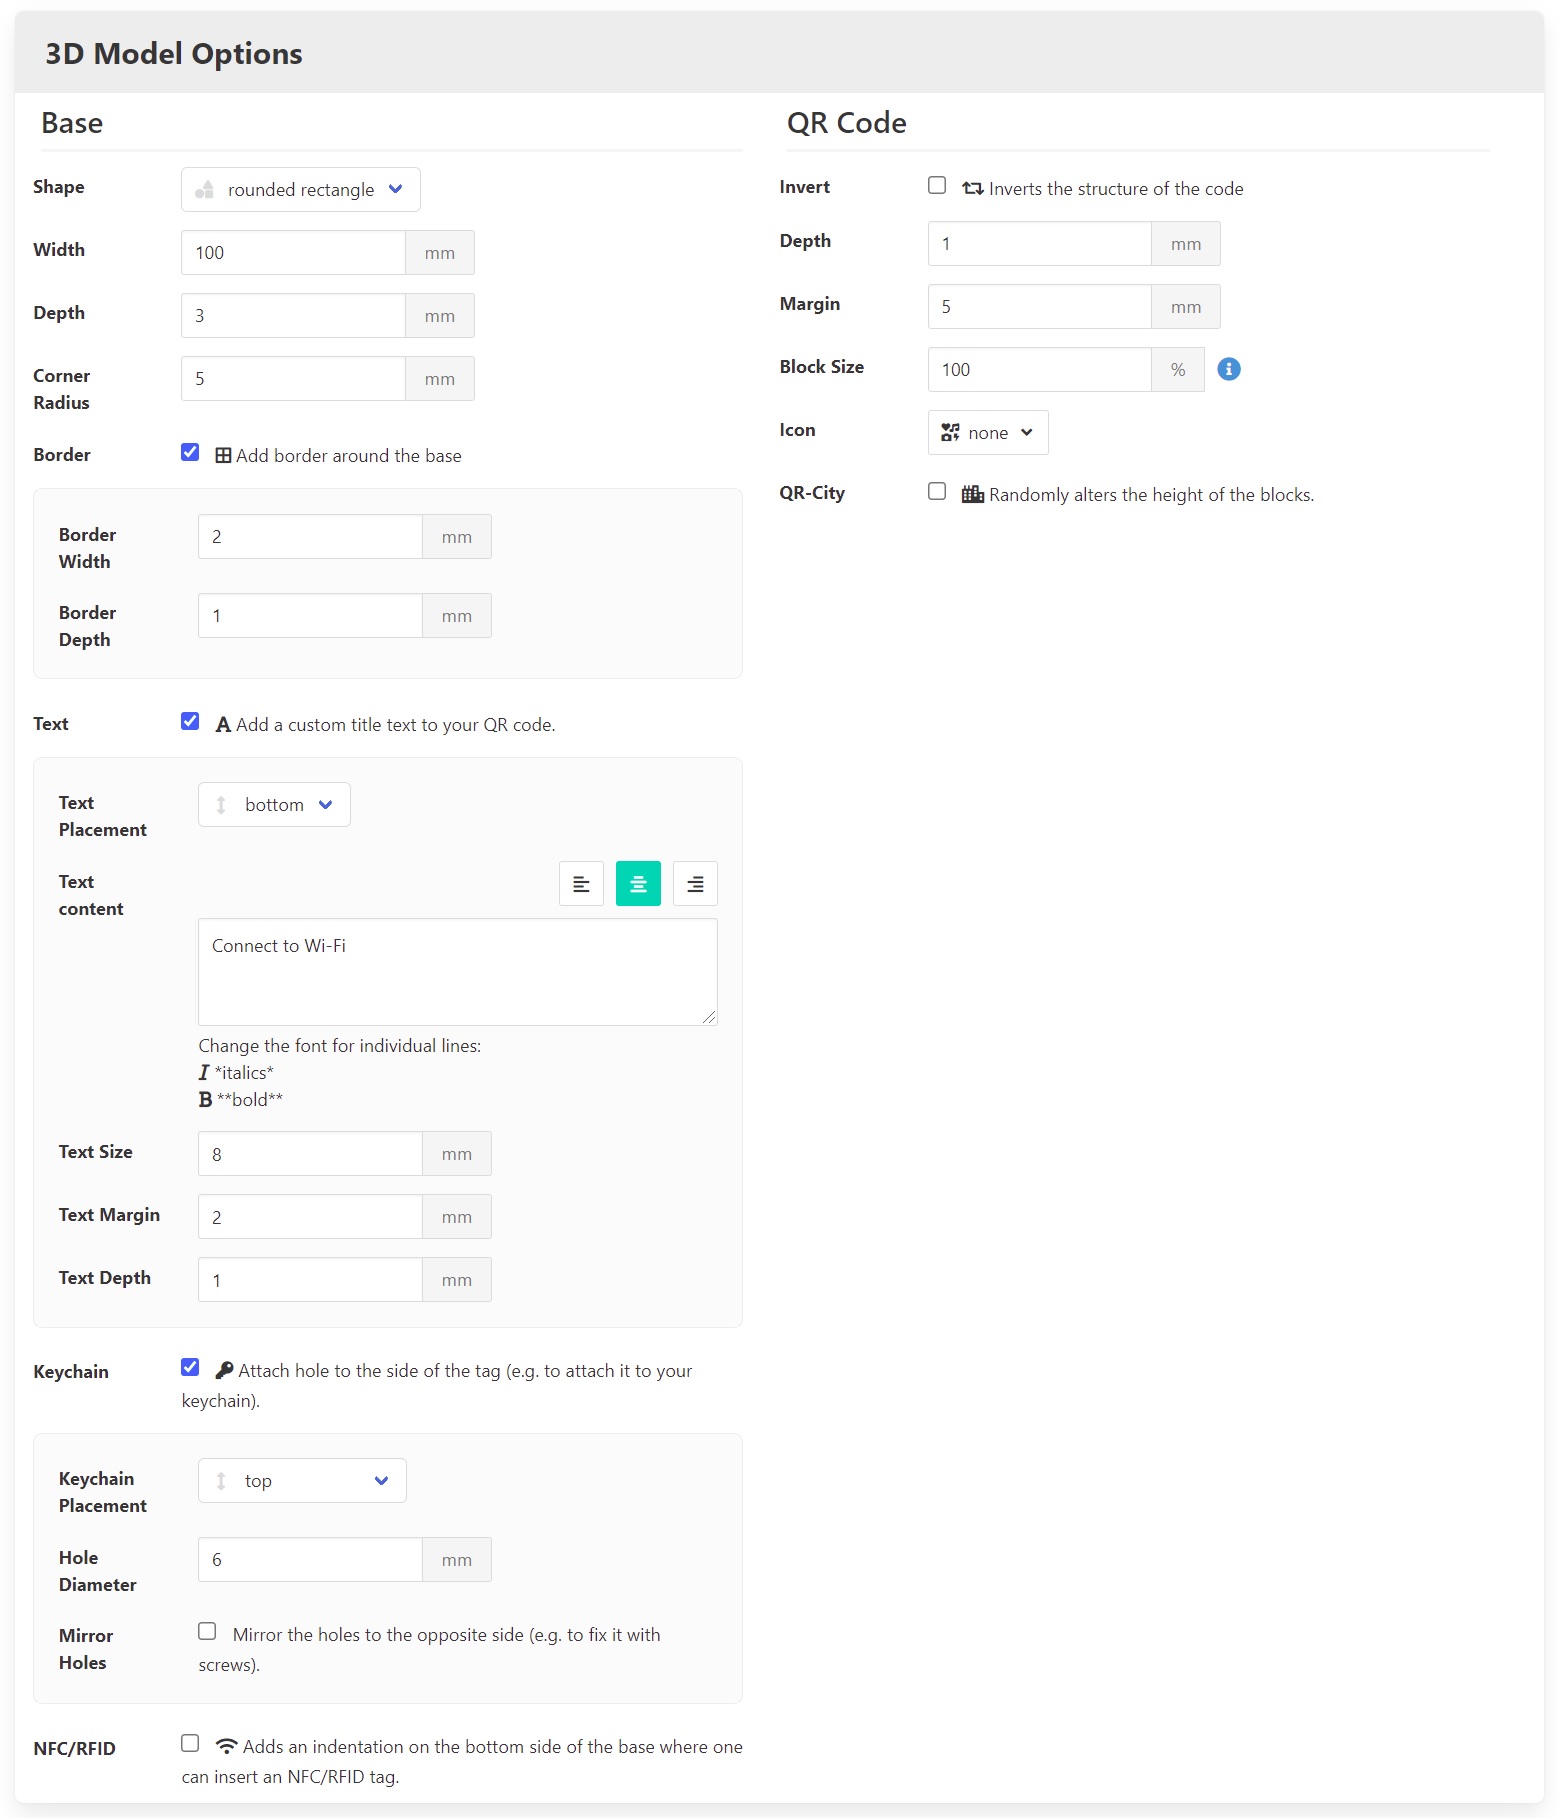
In the 3D Model Options section, there are a lot of configurations which can be set for the STL you want to generate. I chose to also add some text under the QR code, and include a keychain hole. Here’s the settings I used for my print.
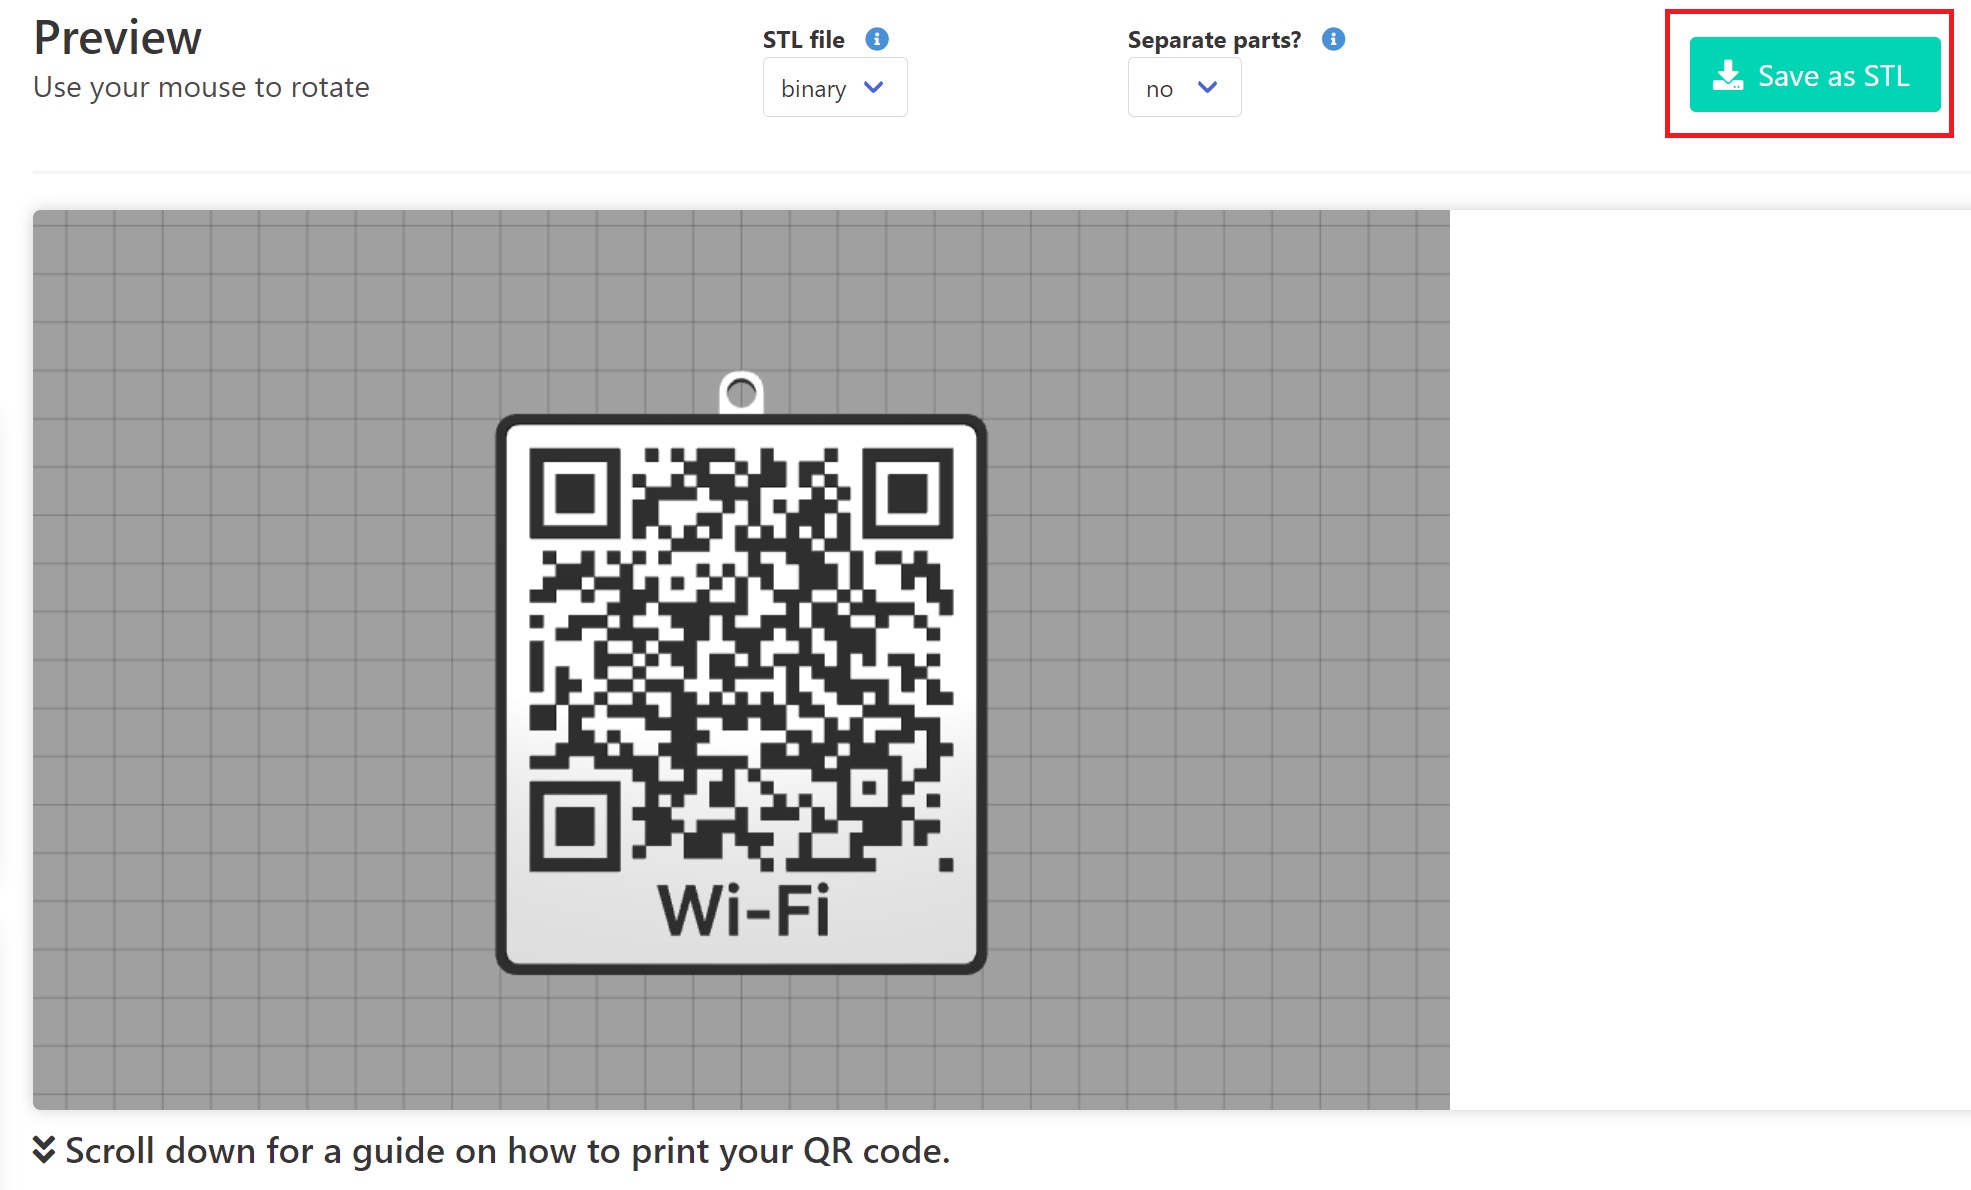
After you configure your desired settings, click on the Generate 3D Model and in a few seconds, your model will be generated. Click on Save to STL to download your model.
Slice the Wi-Fi coaster
Now that the STL model has been generated, we can take it to the slicer and prepare it for printing. In my example I use IdeaMaker, but you can do it with other slicers too.
First, ensure that the M600 filament change command is added to the slicer profile. This is under Printer Settings -> Advanced -> Pause at Height GCode
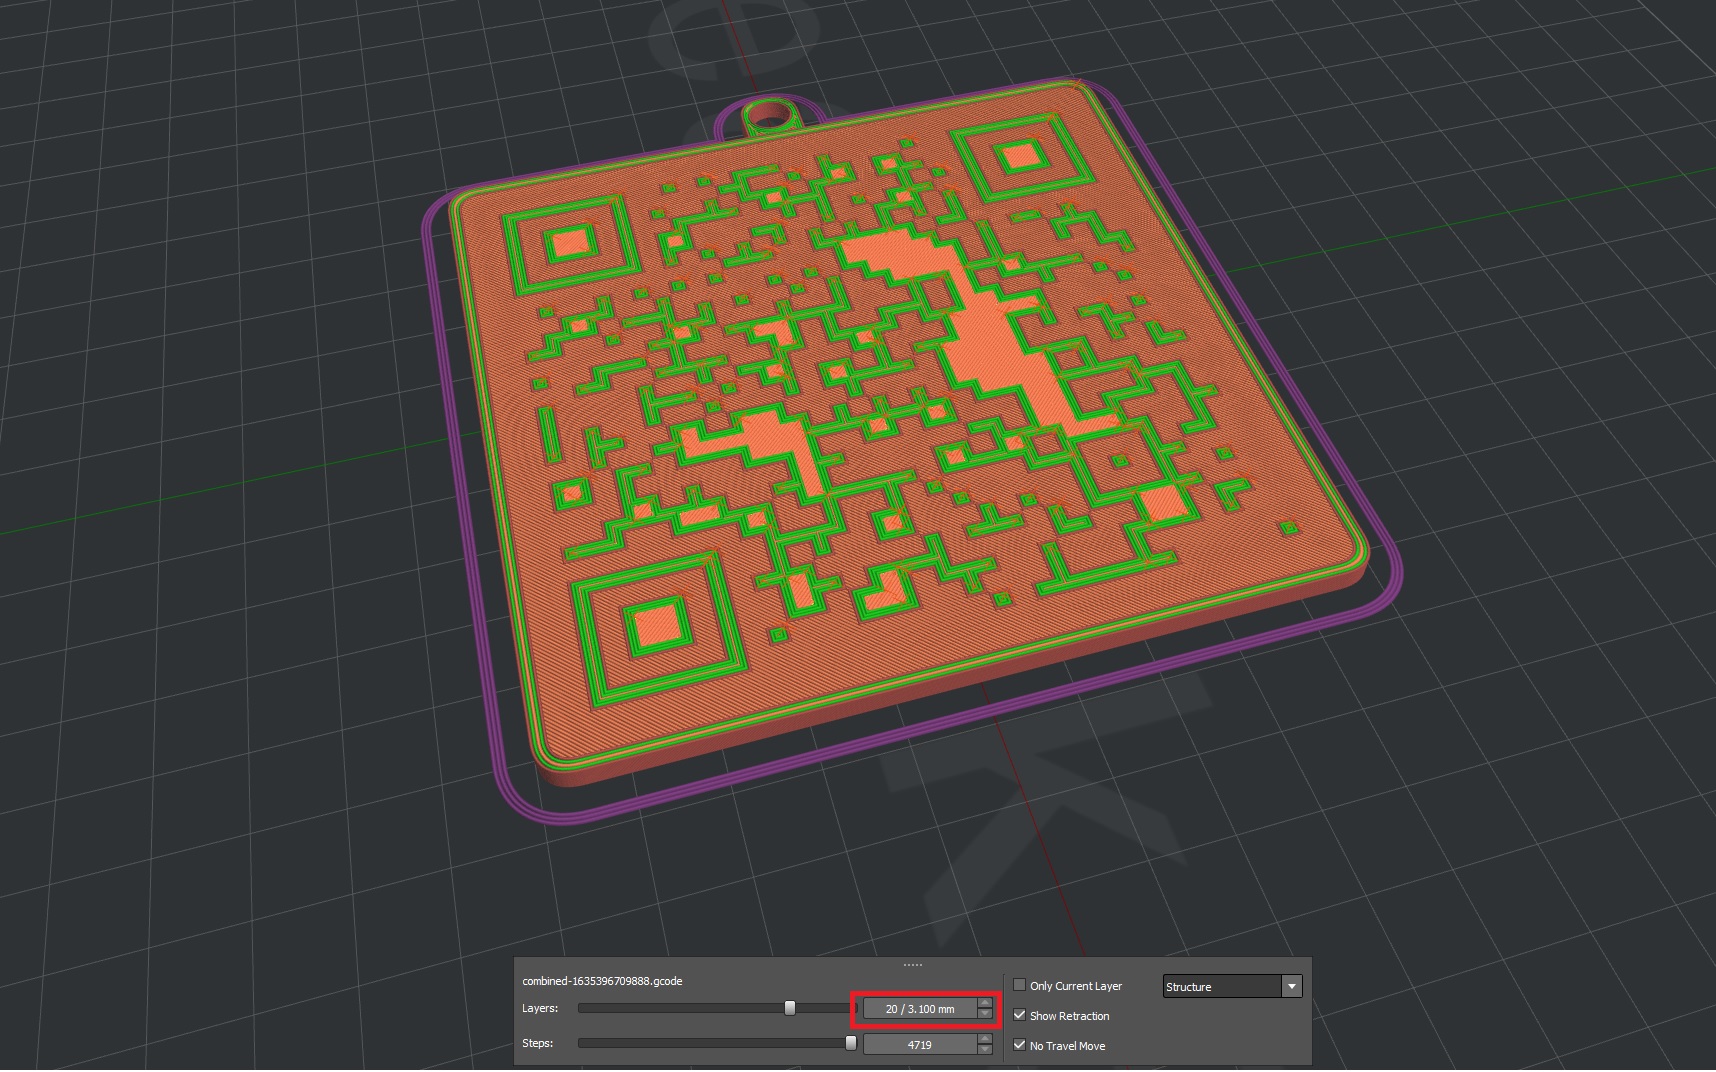
Next, slice the model and check the position where you want your printer to stop for the filament change. In my case, it’s at 3.1 mm.
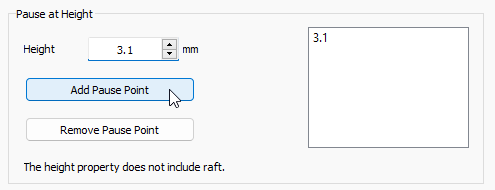
Add the Pause at Height position in IdeaMaker, and slice the file. This is under Advanced Settings -> Other -> Pause at Height.
Now you can start the print, and change the filament when the time comes. If everything is done correctly, you will have a ready-to-use QR coaster which will hold the credentials to your Wi-Fi network.
Wrapping up
This was a useful model to print for me, and I hope it’s also helpful for you. The M600 Filament Change in IdeaMaker topic has been covered in more detail before, so I recommend checking that article too. If you get stuck, feel free to join the 3DPrintBeginner Forum and ask for help.
Liked it?
|
|



You can leave a comment for this article on the 3DPrintBeginner Forum