3D Printer Farm with OctoPrint and Docker: Control Multiple Printers with a Single Raspberry Pi
OctoPrint is designed to be used with a single printer. But what do you do if you want to control multiple printers at the same time, and remotely manage your 3D printer farm? Using Docker containers could be an option, so in this guide I will show you how to set up multiple instances of OctoPrint with Docker.
Prerequisites for multiple OctoPrint instances
To control multiple 3D printers with OctoPrint and Docker, you need the following:
- Raspberry Pi (Raspberry Pi 4 with 4GB is strongly recommended for best performance with multiple Docker containers).
- Good quality 16 GB MicroSD card or higher.
- Good power supply for the Pi – Any adapter works if it’s capable of delivering at least 2.5 A of power
- Docker service already installed
How to set up OctoPrint in Docker?
Install Docker
Before we install multiple OctoPrint instances, we first need to install Docker on our Raspberry Pi. I previously covered this process in a previous article: Install Docker on Raspberry Pi. The installation process is easy, but it’s crucial to carefully follow every step of the guide for a successful installation. After Docker is installed and ready to go, you can move on the next step.
Create and edit the docker-compose file
I use Docker Compose to setup multiple OctoPrint instances in Docker. Docker Compose takes the settings we define in the file and instructs Docker how to create the new container.
First, we need to create a folder where to store all out Docker containers. Run the following command:
mkdir /home/dietpi/dockerNext, we need to copy the OctoPrint contaier definition in the docker-compose.yml file. Run the following command, to open and edit the file:
nano /home/dietpi/docker/docker-compose.ymlCopy the contents and paste them into the terminal window
version: '3.6'
 services:
 Octoprint
 octoprint1:
      container_name: Octoprint1
      image: octoprint/octoprint
      hostname: Octoprint1
      restart: unless-stopped
      ports:
        - 5000:5000
        - 8080:8080
      volumes:
        - /home/dietpi/docker/octoprint1:/octoprint1
      environment:
        - ENABLE_MJPG_STREAMER=true
        - MJPG_STREAMER_INPUT=-n -d /dev/video0:/dev/video0 -r 1280x720 -f 30
      devices:
      #Printer Port
        - /dev/ttyACM0:/dev/ttyACM0
      #Webcam port
      #  - /dev/video0:/dev/video0
The file contents should look like this. Save the file by pressing CTRL+X then Y to confirm
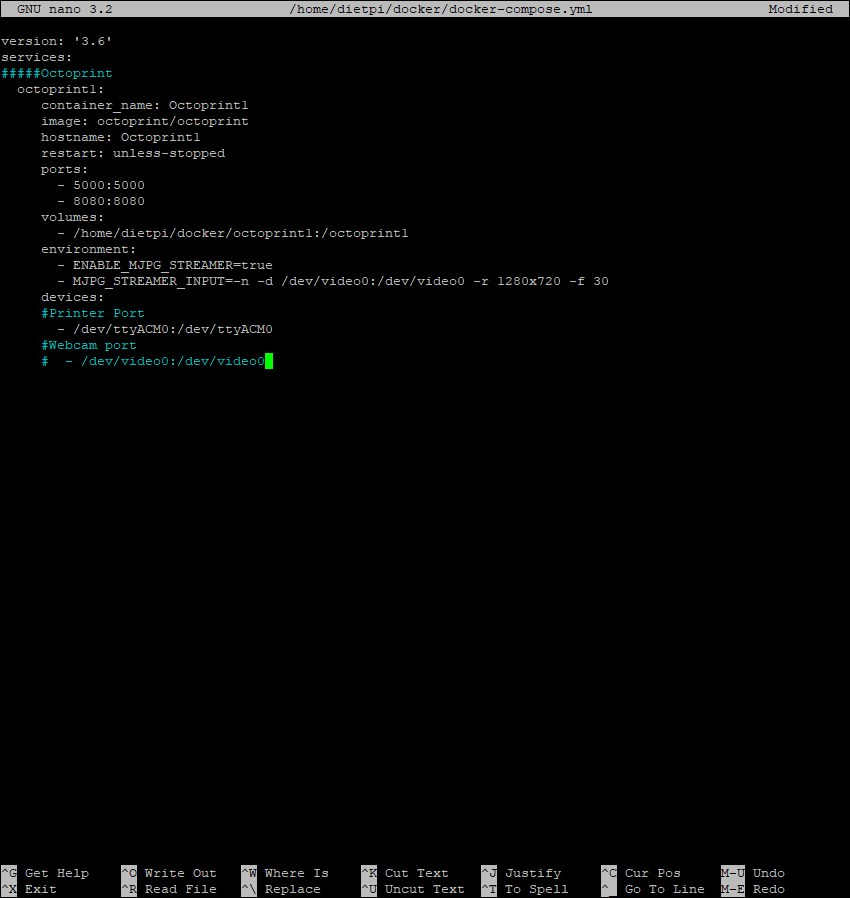
Make sure you paste the code correctly, because the text alignment is important for a successful deployment. If there are extra spaces and the settings are not correctly defined, you will get errors when trying to deploy the OctoPrint Docker container.
To start the OctoPrint Docker container, run the following command:
docker-compose -f /home/dietpi/docker/docker-compose.yml up -dDocker will start pulling the latest version of OctoPrint, and install it. When completed, the docker container will be started and you will be able to access it via the IP and port defined. In my case, it’s https://192.168.0.197:5000.
How to add multiple OctoPrint Docker instances?
Now that we have the first container up and running, we can start deploying extra OctoPrint containers. Just like we did in the previous deployment, we need to open the docker-compose.yml file just like we did before and add another container
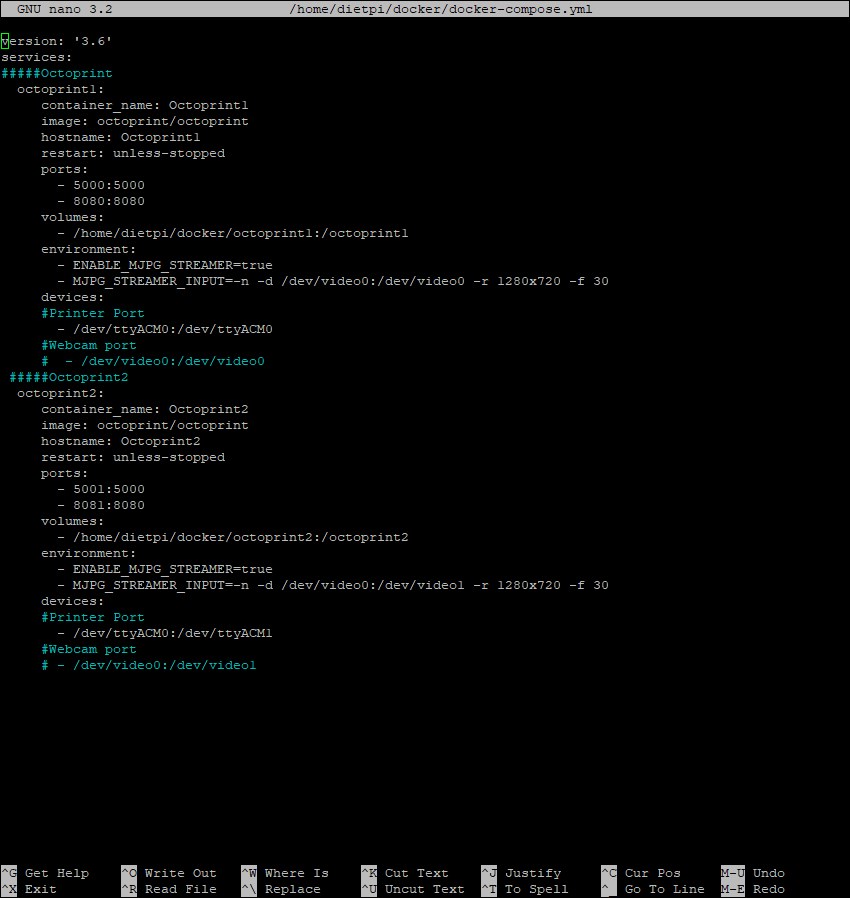
In the example below, I added the OctoPrint 2 container underneath the previous one.
version: '3.6'
 services:
 Octoprint
 octoprint1:
      container_name: Octoprint1
      image: octoprint/octoprint
      hostname: Octoprint1
      restart: unless-stopped
      ports:
        - 5000:5000
        - 8080:8080
      volumes:
        - /home/dietpi/docker/octoprint1:/octoprint1
      environment:
        - ENABLE_MJPG_STREAMER=true
        - MJPG_STREAMER_INPUT=-n -d /dev/video0:/dev/video0 -r 1280x720 -f 30
      devices:
      #Printer Port
        - /dev/ttyACM0:/dev/ttyACM0
      #Webcam port
      #  - /dev/video0:/dev/video0
  #####Octoprint2
   octoprint2:
      container_name: Octoprint2
      image: octoprint/octoprint
      hostname: Octoprint2
      restart: unless-stopped
      ports:
        - 5001:5000
        - 8081:8080
      volumes:
        - /home/dietpi/docker/octoprint2:/octoprint2
      environment:
        - ENABLE_MJPG_STREAMER=true
        - MJPG_STREAMER_INPUT=-n -d /dev/video0:/dev/video1 -r 1280x720 -f 30
      devices:
      #Printer Port
        - /dev/ttyACM0:/dev/ttyACM1
      #Webcam port
      # - /dev/video0:/dev/video1
This is how the docker-compose.yml file should look like.
As usual, run the docker-compose up command, to re-create the containers based on the modified file.
docker-compose -f /home/dietpi/docker/docker-compose.yml up -dYou can add as many OctoPrint Docker containers as you want, following the same format. Just remember to use different container names, and correctly map the devices, ports, and volumes.
Please note that for the second container, I haven’t added the version and services definition. This needs to be added only once, at the top of the file. Also note that I set the container name to Octoprint2, the volume location to /home/dietpi/docker/octoprint2 and the external port to 5001 for OctoPrint and 8081 for MJPG Streamer.
If you want to use a webcam, make sure you connect it before creating the container, and uncommenting the Webcam port definition. (delete the # before – /dev/video…).
Monitoring the resource consumption
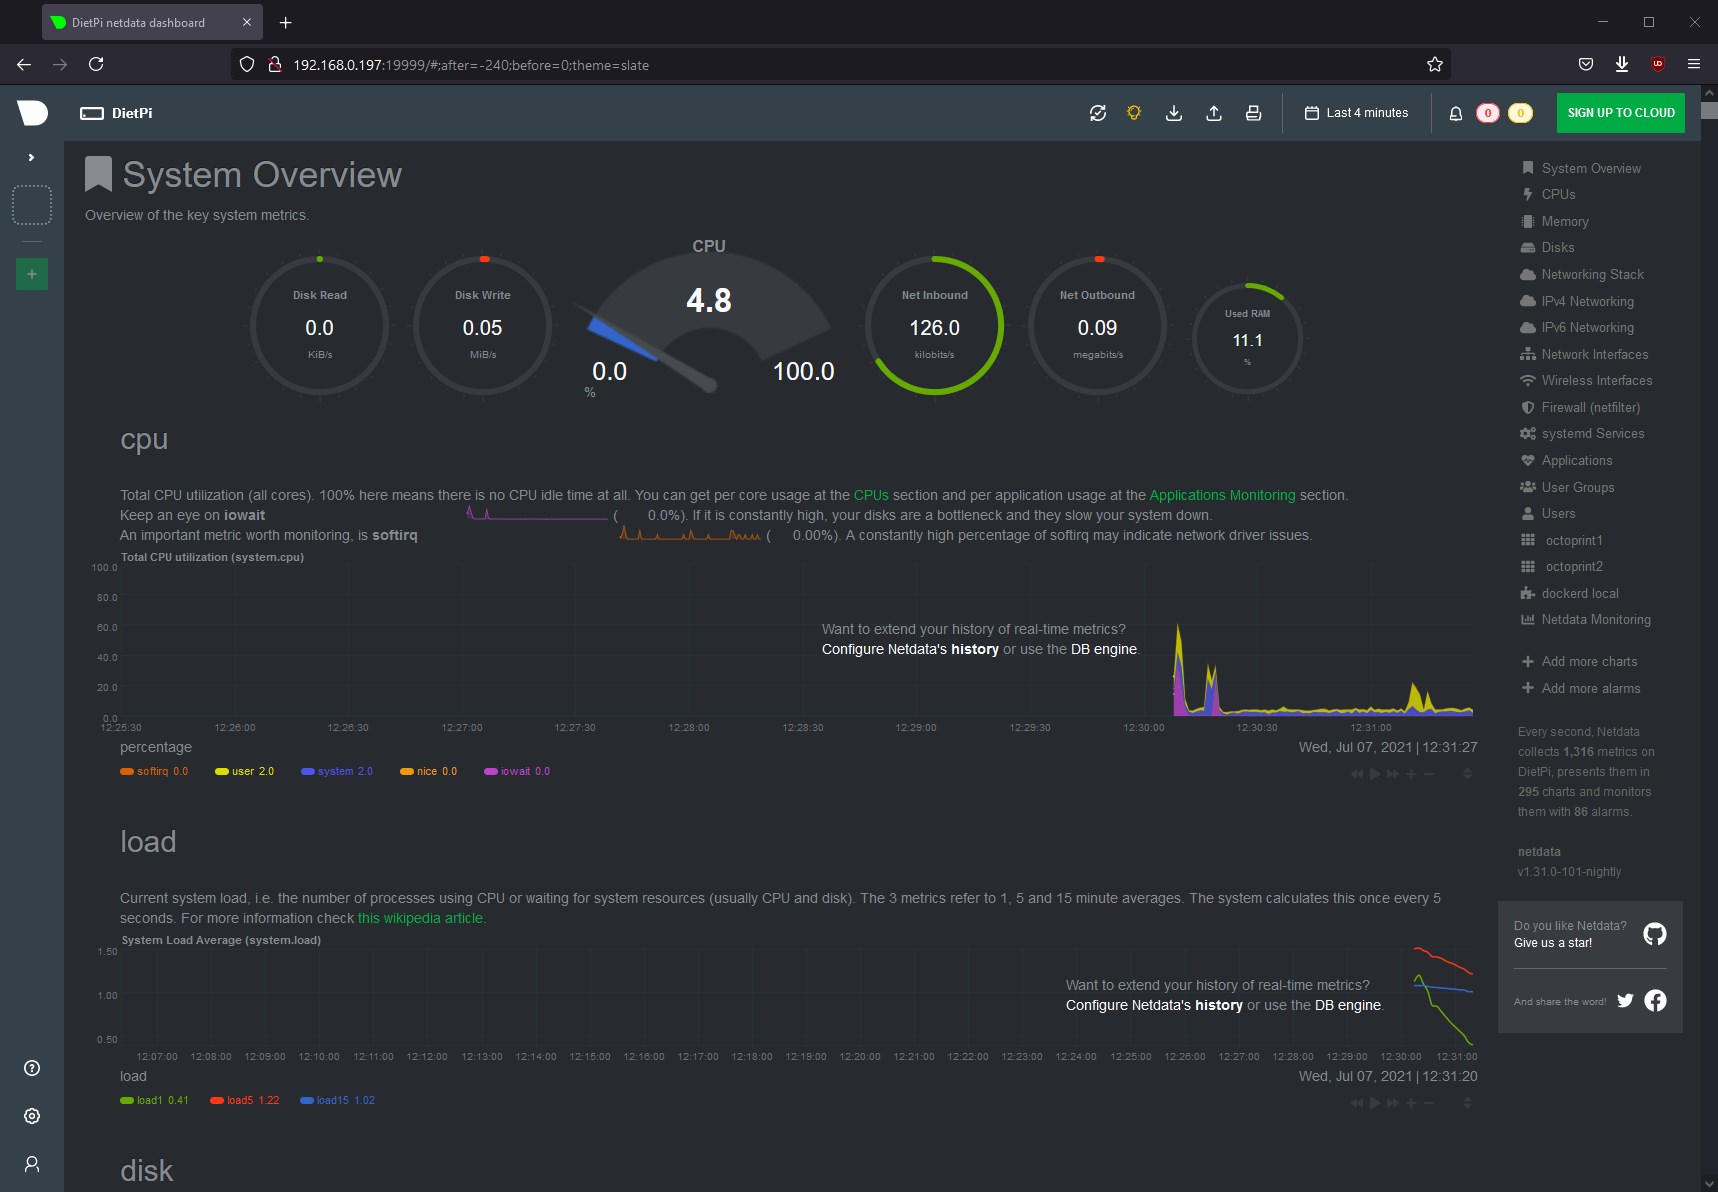
The amount of OctoPrint Docker containers you can run is only limited by the resources of your Raspberry Pi, so it’s a good idea to keep an eye on the resource usage. If you want to have an easy way to monitor the resources used by the containers, I recommend installing Netdata.
The installation is easy. Just paste a single line in the terminal, then press enter to start the install process.
bash <(curl -Ss https://my-netdata.io/kickstart.sh)After a few minutes, the lastest version of Netdata will be downloaded and installed on your Raspberry Pi. It’s running on port 19999.
Keep in mind that Netdata will take extra resources on your Raspberry Pi so I recommend using it only on Raspberry Pi 4. I use it on an Intel NUC which hots all my 3D printing docker containers.
Wrapping up
I hope this article was helpful, and you started to develop a taste for Docker. As you can see, Docker simplifies the task of adding multiple services to a single Raspberry Pi. If you encounter any issues with the installation, feel free to join the 3DPrintBeginenr Discord Server or leave a comment below. In a future article, I will show you how to add a VPN server to Docker, which will ensure a secure connection to OctoPrint from anywhere in the world.
Liked it?
|
|






The new version of docker-compose using “docker compose” as a command
New command line example: “docker compose -f /home/dietpi/docker/docker-compose.yml up -d”