RepRap Firmware on Sidewinder X1: SKR 1.3/1.4
Because of the LPC project, now it’s possible to install RepRap firmware on Sidewinder X1, by upgrading your board to a SKR 1.3 or SKR 1.4 made by BIGTREETECH. In this guide I will show you how to run RepRap Firmware on Sidewinder X1 with SKR 1.3 and stock touchscreen.
RepRap Firmware on Sidewinder X1 – Why do it?

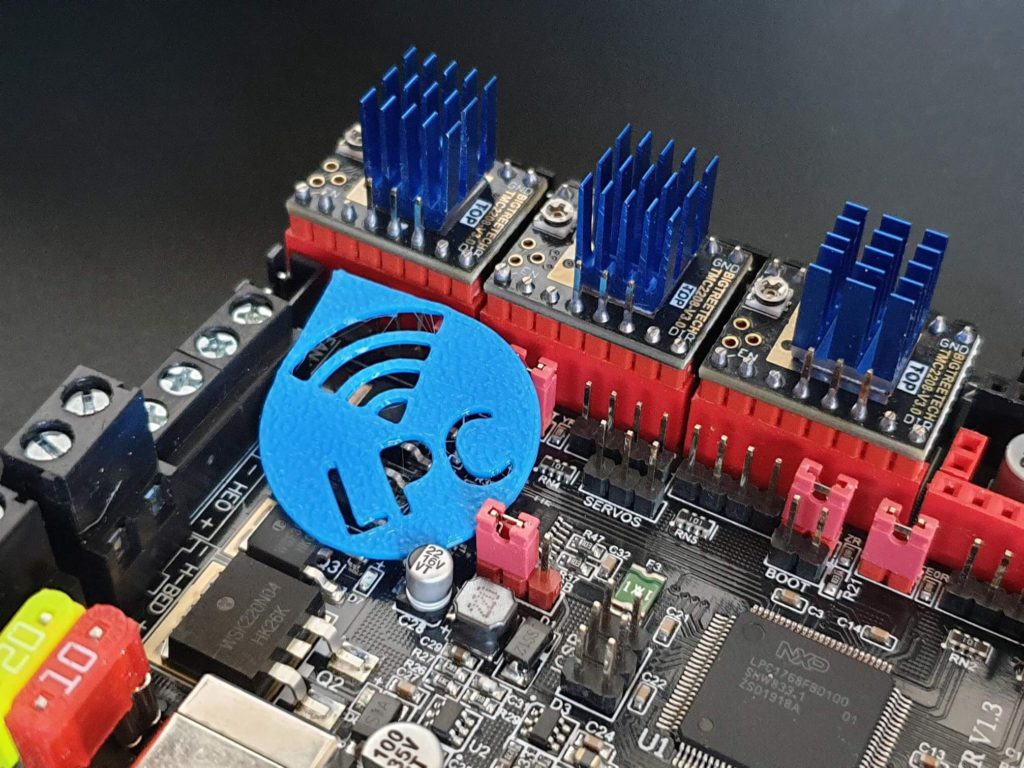
A few months ago, RepRap Firmware (also known as Duet Firmware) was only available to use with the Duet boards like the Duet 2, Duet Maestro or Duet 3. The LPC project made RepRap Firmware compatible with the popular SKR 1.3 and SKR 1.4 boards.
In order to install RepRap Firmware on Sidewinder X1, you need to upgrade your Sidewinder X1 to a SKR board. The upgrade process is described in the SKR 1.3 Upgrade for Sidewinder X1 article. Now, with the possibility of installing Duet Firmware on SKR boards, there’s another reason why the SKR board upgrade for the Sidewinder X1 is worth it.
Duet Web Control (DWC)
The main reason to install the RepRap firmware is the added web interface which allows much better control of the printer and offers a lot of extra information which is not available anywhere else.
From the Duet Web Control dashboard you can see the print speed in real time for each movement and control the printer. You can even start the leveling process (if you use a probe) and generate a detailed 3D heightmap of your bed allowing easy troubleshooting of your print surface.
You can connect to DWC from any device with a browser, like a tablet or smartphone. This allows you to control your printer with ease.
Firmware modifications directly from DWC
The firmware configuration can be edited directly from Duet Web Control eliminating the need of constantly flashing the board when you do major changes like with Marlin.
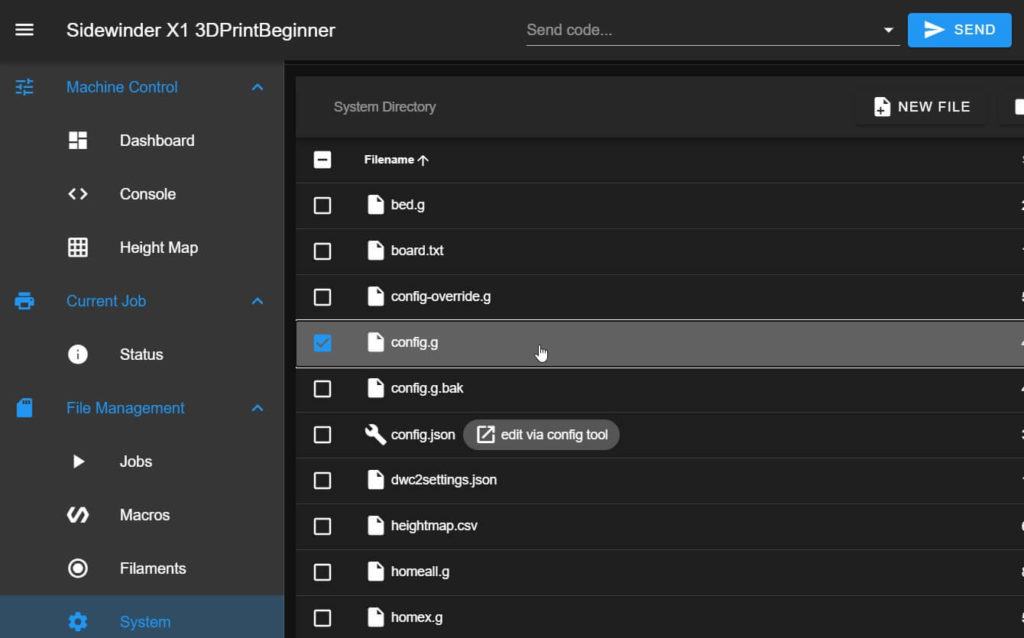
Most of the configuration settings are stored in the config.g file and it’s a lot easier to manage it this way. Because all the configuration files are easily available, you can back up a working configuration in just a few clicks. The backup can be restored just as easy if there’s a need for that.
RepRap features
With the RepRap Firmware on Sidewinder X1, you will be able to use features previously available only on Duet boards . Features like Pressure Advance (comparable with Linear Advance in Marlin) and Dynamic Acceleration are now available.
Sending live G-Code commands during printing is a really nice RepRap feature. This allows you to easily calibrate your printer. For example, when calibrating pressure advance, you can start a test print, then modify the PA value until the print looks good.
Macros are also a big thing in RepRap firmware. These can be set up for any kind of task you want your printer to do, allowing a great degree of automation.
Newer drivers and better hardware compatibility
A good reason to install RepRap firmware on Sidewinder X1 using SKR boards is the possibility of using more silent drivers like the TMC2208 and TMC2209. This is currently not possible with the Duet boards, because you are limited to the default stepper drivers included.
In the latest firmware, StealthChop and Sensorless Homing is supported. There’s also the added benefit of being able to use the default connectors from the Sidewinder X1 without the need of crimping connectors like with a Duet board. For me this is one of the best features. I hate crimping.
Current drawbacks for RepRap Firmware on Sidewinder X1
Unfortunately, there are also a few drawbacks when using RepRap Firmware on Sidewinder X1:
Single connection via WiFi
Currently, you can only connect with a single device to the IP of your printer. This is a limitation of the WiFi adapter. It’s possible to use an SBC like the Raspberry Pi 3 / 4 which will handle more connection and also improve performance. The SBC connection is detailed in the RRF LPC Wiki.
I will cover this in a future guide.
Stock TFT28 screen is not great
While the custom firmware available for the Sidewinder X1 touchscreen works, it sometimes looses connection. It’s also not possible to print using the USB or SD card connections for now.
For me this is not an issue, because the main reason why I did this mod is to be able to remotely send prints to the printer. Considering you can use any device to connect on the DWC interface, I don’t think you will miss the touchscreen.
Before you begin

Please note that in order to install this upgrade you need to have some experience with 3D printers and hardware. This is not a trivial task for beginners and you may break your printer during the process.
Read the full guide carefully and do the install RepRap Firmware on Sidewinder X1 only after you properly understood all the steps involved. If you have questions before starting, leave a comment and wait for a reply.
I am not responsible for any damage you may cause to your printer by following this guide. You are doing this on your own responsibility.
The guide was written as detailed as possible. If I missed anything please let me know.
Prerequisites for RepRap Firmware on Sidewinder X1
In order to install RepRap firmware on Sidewinder X1, you need the following:
- SKR 1.3 / SKR 1.4 board
- ESP8266 WiFi adapter
- Auto Bed Leveling sensor (recommended)
The SKR boards can be ordered from Aliexpress, Banggood or Amazon according to your location. Then, you can follow my SKR 1.3 Upgrade for Sidewinder X1 guide. It’s important to have everything up and running with Marlin before trying to convert to RepRap Firmware. This makes troubleshooting a lot easier.
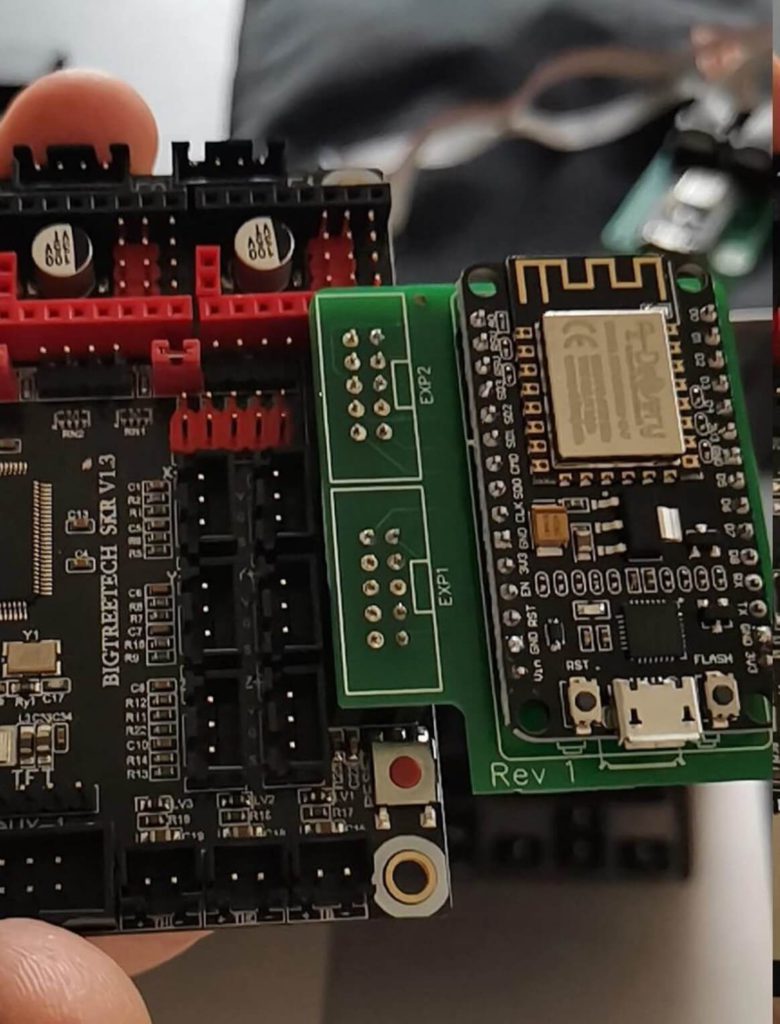
For RepRap Firmware on Sidewinder X1 you also need an ESP8266 WiFi adapter. There’s ways to build your own, but if you are looking for an easy solution Peter has already made some adapters and are available on his Tindie listing.
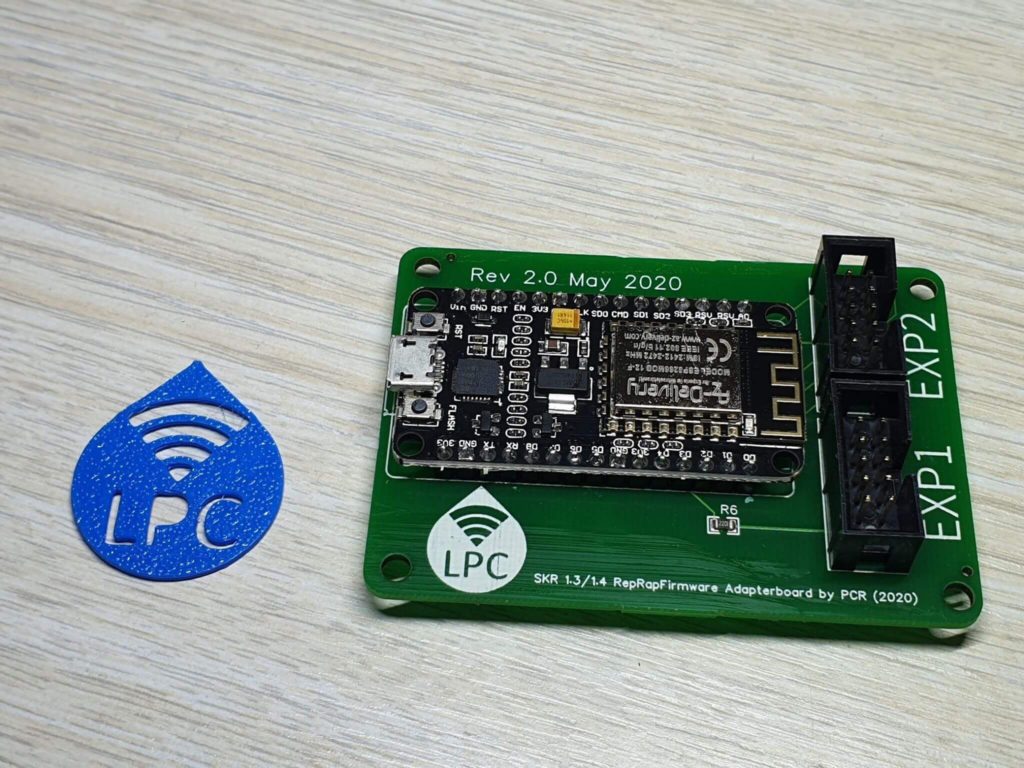
I bought the older version which uses a pair of extension cables but now the latest version is improved and can be installed directly on the board.
I also recommend installing an Auto Bed Leveling sensor like the BLTouch or even use the stock sensor from the Sidewinder X1 (if you have a PEI spring steel sheet installed).
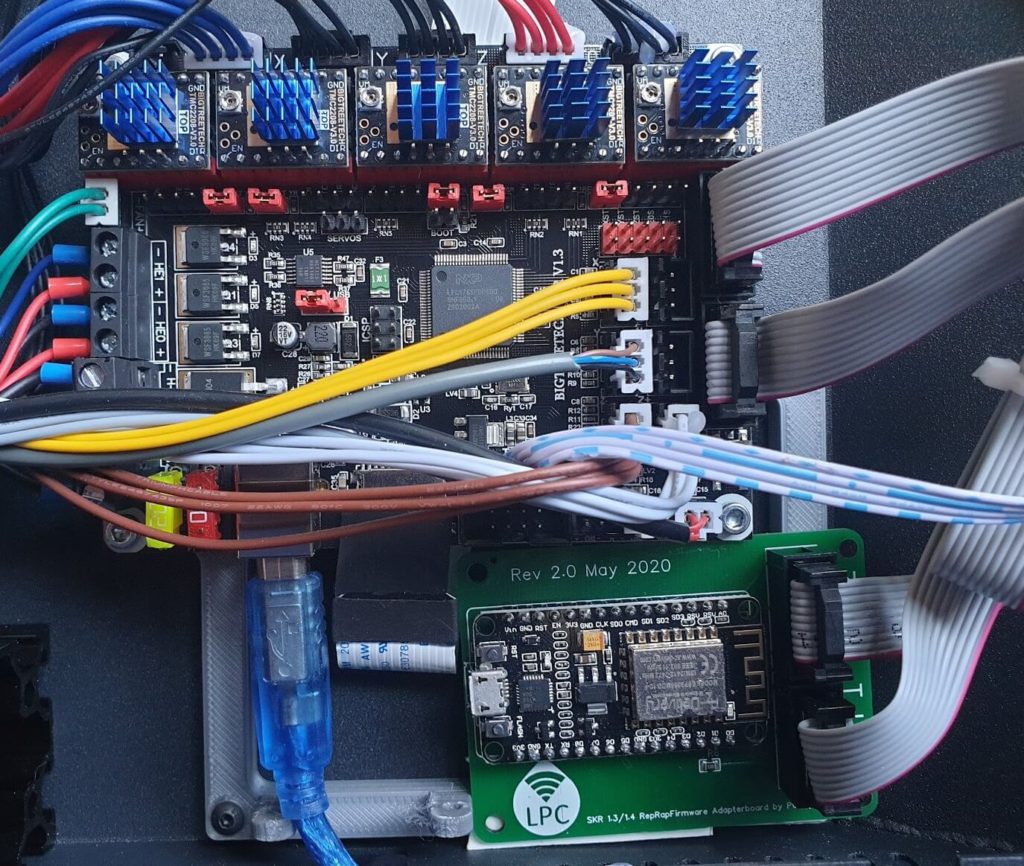
In this guide I am using the Sidewinder X1 with an SKR 1.3 board running TMC2208 drivers, the ESP8266 WiFi adapter from Peter and the stock sensor from Sidewinder X1.
Install RepRap Firmware on Sidewinder X1
Install the WiFi adapter
The process of installing the WiFi adapter is easy. You just need to connect the EXP1 and EXP2 headers to their counterparts on the SKR board. The new adapter is connected directly on the board.
In my case, I used some double-sided tape to mount it next to the case.
Copy the RepRap firmware to the SD card
Download the RepRap firmware for Sidewinder X1 – SKR 1.3 + TMC2208 and unzip it.
Before we copy the firmware to the SD card, we need to edit the credentials for WiFi. Open the SetNetwork file from the macros folder with Notepad and enter your network name and password, then save the file.
Next, copy the contents of the firmware folder to your SD card and plug it into the SKR board.
Upgrade the TFT firmware
The user bcmob has compiled the TFT35 firmware from BIGTREETECH to work with RepRap firmware. I compiled all the files needed to flash the TFT firmware on the Sidewinder X1.
In order to install the RepRap TFT firmware for the Sidewinder X1, follow the steps listed below:
- Download the RepRap TFT firmware for Sidewinder X1.
- Unzip the archive and copy the contents to the SD Card.
- Plug in the SD card into the printer.
- Turn on the printer and wait for the firmware to finish flashing.
- Touch the calibration points on the screen.
- Restart the printer or reset the screen using the button.
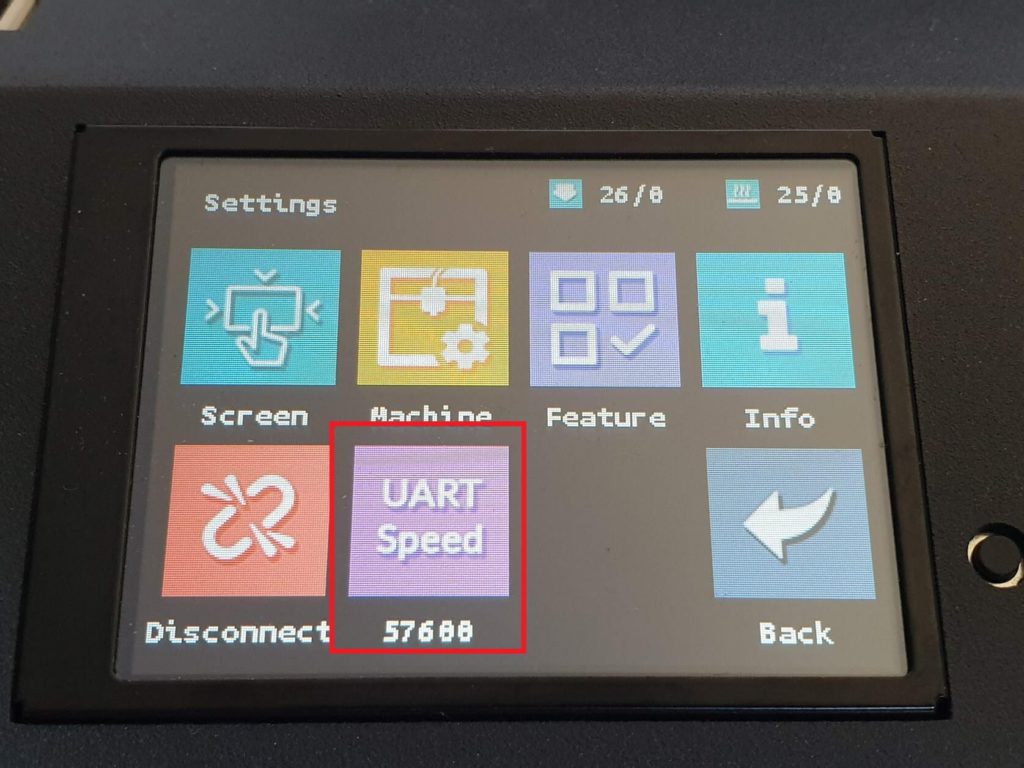
With the screen firmware installed, we need to change the baud rate on the screen. Navigate to Menu -> Settings and touch the UART speed button until you reach 57600. This is the value which works on the Sidewinder X1 running RepRap firmware.
If you can see the nozzle and bed temperature, then the TFT screen is connected, and we can go ahead and connect to WiFi.
Connect to WiFi for the first time
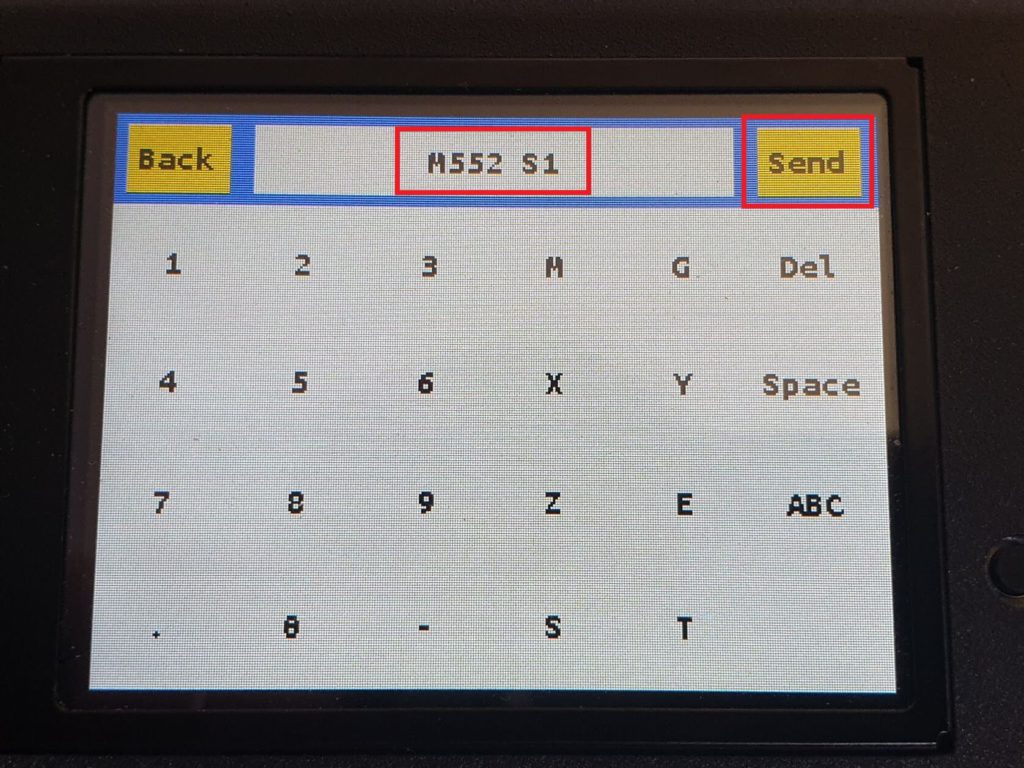
Because we already defined the credentials for our WiFi setup, we just need to run the M552 S1 command. Navigate to Menu -> GCode, enter the M552 S1 command then touch Send. This will turn on the WiFi adapter and connect the printer to your network.
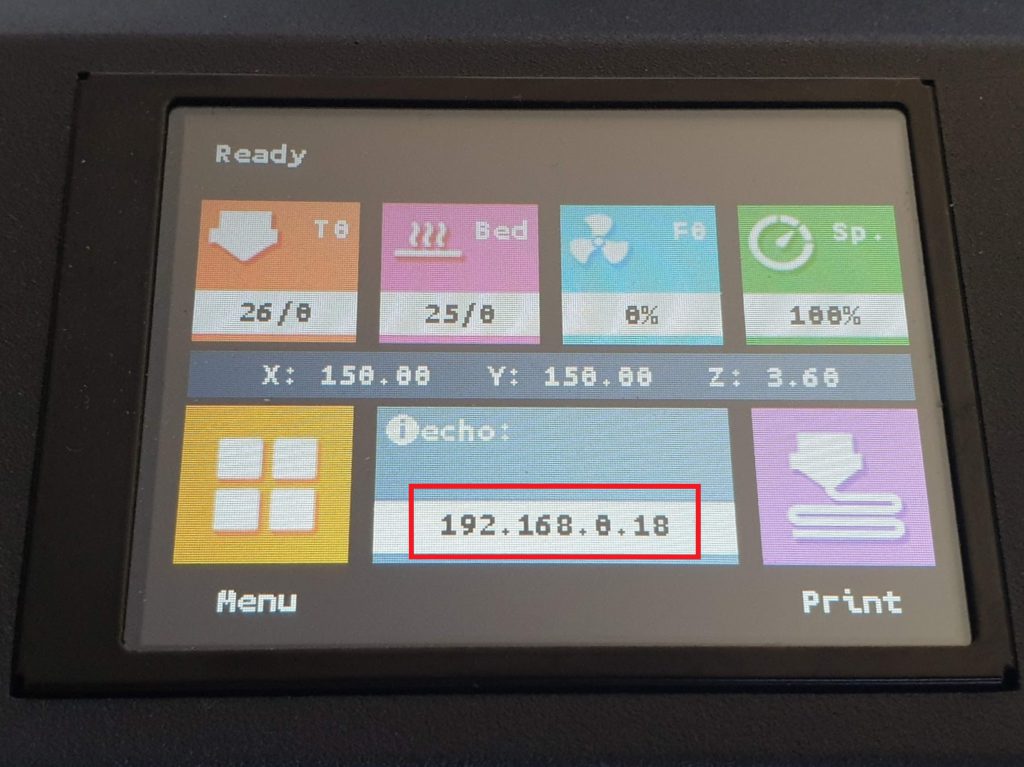
In about 30 seconds, the printer should be connected and the printer IP will be displayed on the TFT home screen. You can enter this IP in your browser and Duet Web Control will load.
If you have issues with this method, follow the duet wiki post.
Test the printer functionality
If you managed to connect to the Duet Web Control interface, it’s now time to check the functionality of the printer. Before doing anything you need to home the printer.
Start with the Home X button and be ready to click on the Emergency Stop button if something goes wrong.
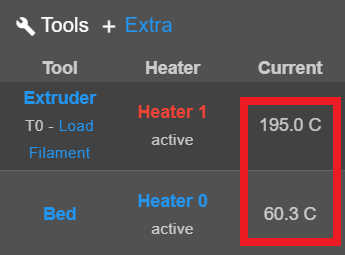
After homing X, Y and Z try to heat up the hotend and heatbed and monitor temperatures. Everything should work properly.
Mandatory calibration for RepRap Firmware on Sidewinder X1
While I included my calibrated settings in the firmware configuration, every printer is different. So it’s important to do these three calibration steps before going further.
Hotend PID Tuning
- Home the printer.
- Turn on the part cooling fan to 100% and set the bed temperature to 60C.
- Run the M303 H1 S195 command.
- Wait for the process to finish.
- Run the M500 command to save the values.
I am using 195 for the S value because that’s the hotend temperature I use most of the time. Please use your own value according to the material you use during printing
Heatbed PID Tuning
- Home the printer.
- Turn on the part cooling fan to 100%.
- Run the M303 H0 S60 command.
- Wait for the process to finish.
- Run the M500 command to save the values.
I am using 60 for the S value because that’s the bed temperature I use most of the time. Please use your own value according to the material you use during printing.
Z Offset Calibration
1. Home the printer
2. Set the hotend to 195C and heatbed to 60C. Please use your own value according to the material you use during printing (ex: 230/70 for PETG) The offset can change according to the temperature.
3. Place a piece of paper between the nozzle and the bed.
4. Lower the nozzle using the Z -0.05 increment button until the nozzle barely grips the paper.
5. Run the G92 Z0 command to define the 0 position.
6. Move the Z axis 10 mm up by clicking the Z+5 button twice.
7. Run the G30 S-1 command.
8. Copy the Z height value from the home screen.
9. Open config.g and edit the Z value under the G31 command then save your modification.
Wrapping up
I hope this guide helped you install RepRap firmware on Sidewinder X1 and now your printer has more functionality.
Special thanks to everybody who is working on the LPC Development. Especially to gloomyandy who contributed with the RepRap Firmware 3.1 port, which is available on his Github repo and jaysuk who helped me figure out things fast and also made a firmware configurator.
Teaching Tech also has a guide for this, so make sure you check it out.
If you want to learn more about Duet Firmware, head over to the Duet3D Documentation portal. You can also read more in the RepRapFirmware wiki. There’s also a Discord server where people discuss about the project, and I also have a dedicated channel on my discord server where you can ask for help specifically for the Sidewinder X1.
Liked it?
|
|


