How to Install Klipper on Kingroon KP3S: Config for Printing Fast
In this guide I will show you how to install Klipper on Kingroon KP3S, to speed up your prints and improve print quality. The KP3S is an impressive 3D printer considering the cost, and you can read more about it in the Kingroon KP3S Review.
What is Klipper?

Klipper is an open-source firmware for your 3D printer that combines the power of a Raspberry Pi and your printer main board for better printer control. By doing this, You are able to run your printer at higher speeds with better precision and control.
Why Install Klipper on Kingroon KP3S?
By installing Klipper on Kingroon KP3S, you will be able to print much faster compared to a stock printer, and you will also be able to control your printer remotely, trough Wi-Fi.
In the video below, you can take a glimpse of the speeds you can achieve with Klipper on Kingroon KP3S. At the end of the video, you can see that the print quality is quite good considering the speed.
Besides the speed benefits, there’s also the added ease of use. With Klipper you can edit the configuration of your printer without needing to constantly compile and update the firmware, like with Marlin.
Prerequisites
To install Klipper on Kingroon KP3S, you need to have the following:
- MainsailOS installed on a Raspberry Pi
- Kingroon KP3S 3D printer
- BTT PITFT50 Touchscreen for extra functionality (optional)
Before you begin

Please note that in order to install Klipper on Kingroon KP3S you need some experience with 3D printers and hardware. This is not a trivial task for beginners, and you may break your printer during the process.
Read the full guide carefully and install Klipper on Kingroon KP3S only after you properly understood all the steps involved. If you have questions before starting, leave a comment and wait for a reply.
I am not responsible for any damage you may cause to your printer by following this guide. You are doing this on your own responsibility.
The configuration file shared in this article, is made for the Kingroon KP3S with the Titan Aero extruder.
Also, please keep in mind that the stock screen will not work with Klipper and you are limited to using the Octoprint interface exclusively.
Install MainsailOS on Raspberry Pi
I have covered the MainsailOS installation in a previous article, so please follow it before continuing. This will ensure you have the same setup as I do which will make the entire process a bit easier.
In that article I also covered how to install KIAUH which is a helpful tool for installing and updating Klipper.
Build Klipper firmware for Kingroon KP3S
The first step in running Klipper on Kingroon KP3S is to build the firmware. SSH to your MainsailOS installation, and navigate to the kiauh folder
cd kiauhNext, run the kiauh.sh script to open the gui
./kiauh.shIn the Main Menu, type 4 to select the Advanced Menu
Next, type 3 to build the firmware
The Klipper Firmware Configuration screen will appear. Using your navigation keys, move through the menus and replicate the same settings I used. Please don’t forget to add the GPIO pins accordingly.
When finished, press Q then Y to save your configuration.
The build process will start and when finished, the firmware will be ready to install, but for the Kingroon KP3S, we need to install it from the SD card.
But before we do that, we also need to run the following command:
cd ~/klipper/Next, the following command
./scripts/update_mks_robin.py ./out/klipper.bin ./out/Robin_nano.binCopy the firmware and install it on Kingroon KP3S
First, connect via SFTP to MainsailOS. I use WinSCP.
Enter the IP, username and password just like you did for Putty, then click on Login.

Navigate to /home/pi/klipper/out and copy the Robin_nano.bin file on an SD card.
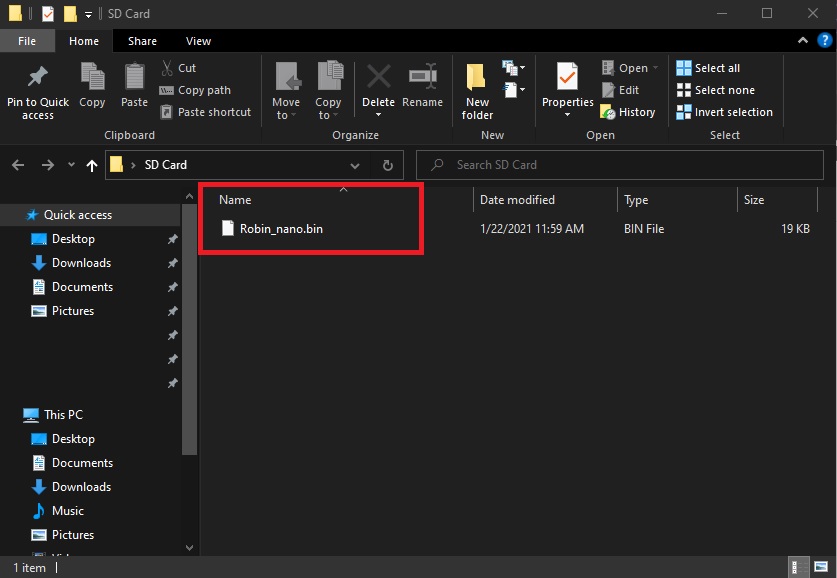
Next, plug the SD card in your printer and turn it on. In a few seconds the firmware will be installed, and your touchscreen will be blank. Wait for 15 seconds then restart your printer.
Copy the configuration file
Now that our Kingroon KP3S is running Klipper firmware, we need to copy the configuration file. You can download my sample configuration to get you started.
Please note that this configuration file has all my calibration values installed, and it’s strongly recommended you re-do some of the calibrations for Pressure Advance and Resonance Compensation.
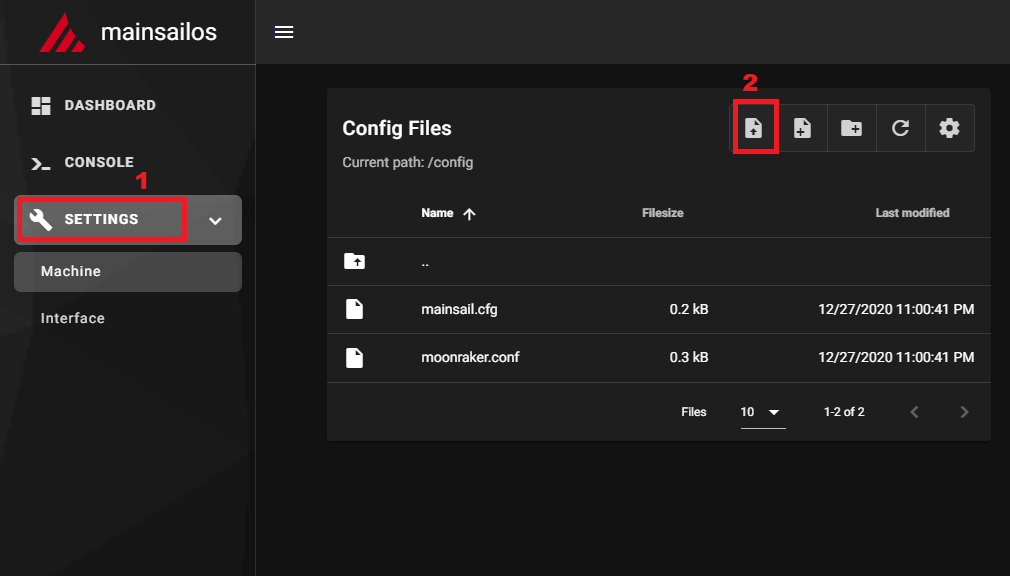
In your MainsailOS Web UI, navigate to Settings, and click on the Upload File icon.
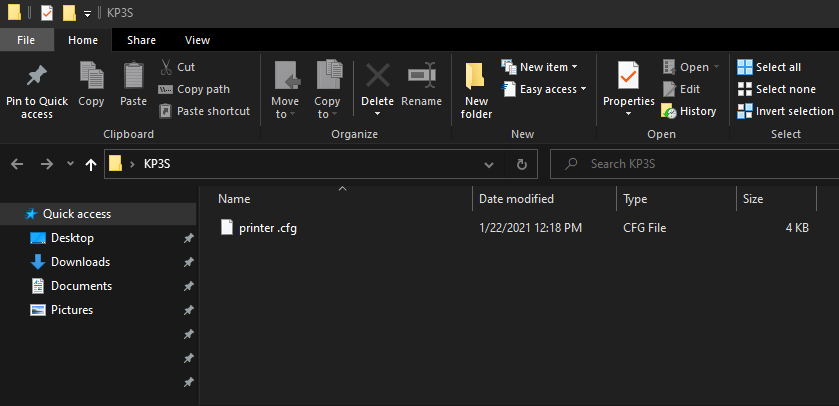
Select the printer.cfg file you previously downloaded and upload it.
Connect Klipper to your printer
Finally, you just need to connect Klipper to your printer. This is super easy. You just need to go back on your MainsailOS Dashboard and click on Firmware Restart.

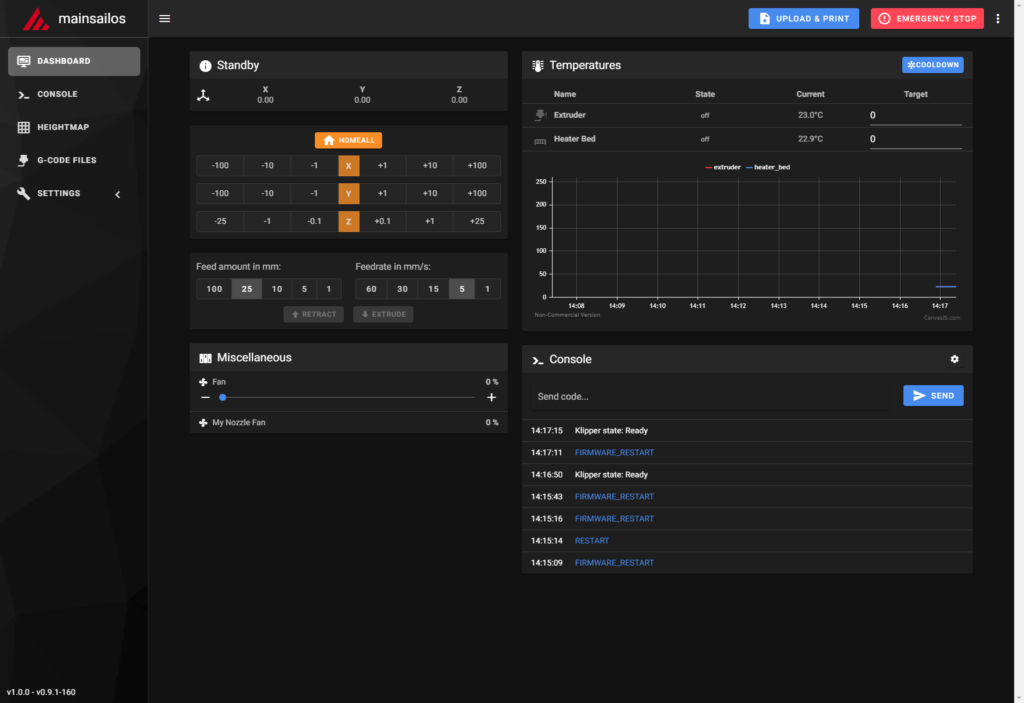
This action will trigger the connection between the Klipper service running on Mainsail OS and the Kingroon KP3S firmware we just installed. If all the steps have been followed, then your printer will connect, and you will be greeted by this interface.
Feel free to home the printer first, to make sure everything is running correctly. Heat up the nozzle and heatbed and check if the temperature rises as expected. If everything looks good, then you are ready to start your first print with Klipper.
How to revert back to Stock KP3S Firmware?
If you decide Klipper is not for you, reverting to the stock firmware is easy. First, download the stock firmware and unzip the archive
Next, copy the contents of the folder on the SD card
Finally, plug in the SD card to your printer, and restart it. This will trigger the firmware update and the firmware will be flashed.
Wrapping up
Even though the installation steps seem to be a bit hard to follow, I hope this guide helped you and now you are running Klipper on your Kingroon KP3S.
You can also check out my Ultimate 3D Printer Upgrade Purchase Guide article if you are looking for other upgrades you can do to the Kingroon KP3S.
If you encounter issues during your installation, feel free to leave a comment below and I will do my best to help you. Besides that, you can also join the 3DPrintBeginner Forum where there’s a dedicated thread for Klipper Firmware.
Liked it?
|
|






I know that this is an old post but I just flashed Klipper on my KP3S but I’m getting an error:
Unable to read tmc uart ‘stepper_y’ register IFCNT
Once the underlying issue is corrected, use the
“FIRMWARE_RESTART” command to reset the firmware, reload the
config, and restart the host software.
Printer is shutdown
This happens everytime and due this I can do nothing with Klipper.
Any clue of how to solve this? I dug a little on google but the people always say something about the motor not being energized, however, when I turn back to stock firmware, everything works just fine so I’m a little bit confused here.
Really amazing tutorial ,
Have a question please , you are setting the acceleration to 3000 , some others set it to 1800 , I believe the same stepper with the same specs , so why 3000 and not 1800 ?
Extruder rotation_distance is 31.776 for Kingroon KP3S ? Or need uncomment :rotation_distance: 7.940 in extruder.cfg file ?
Any idea if this tutorial would work on a Kingroon KP5L?
Hi i get this error Option ‘default_parameter_x’ is not valid in section ‘gcode_macro pause’
You can remove the pause macro, or update it with a new version.
Do you have config for bl touch?
Can you post what you have configured for END_PRINT? The nozzle sits on top of the print and stays there, causing filament to harden and attach itself to the print.
You need to configure your end g-code in the slicer.
Haveaanyonebeen able to get klipper on to the stm32f407 boards for kp3s? I have been full of failiures here so any input would be helpful
I copy the printer.cfg file provided but this file doesn’t work anymore with latest klipper due to syntax upgrade in default_parameter…. Have you a new printer.cfg file ?
I haven’t updated it. But the config should be the same.
I succeeded in running latest klipper but I had to remove gcode macro, I’ll have to rewrite them. Thank you very much for your clear explanations.
I got mine to work by just erasing the pause and resume macros in printer.cfg and copy/pasting the macros from mainsail.cfg. et voila! Good enough for me. Haven’t printed with it yet. Just finished a minute ago.
Has anyone gotten this up and running on the 1.2 board? Im just getting stucked on TFT updating 100%
You should have forgotten to use :
./scripts/update_mks_robin.py ./out/klipper.bin ./out/Robin_nano.bin
I had the same problem just compiling the firmware from klipper folder. After using this command everything works as expected here on my 2 days old kp3s with F103 chip.
Ran those commands have other printers rrunning klipper just cant get the f407 kp3s to run klipper been through several configs with no sucess. Seems like kingroon dont know either.