Voxelizer Slicer – Real Tree Supports for FDM

Voxelizer Slicer is probably not known that much in the 3D printing communities. It’s made by ZMorph, the company which sells the awesome ZMorph VX machines (we can’t really call them 3D printers because they can do much more).
The Voxelizer Slicer is easy to use and it also includes some different supports compared to the regular slicers we are used with. I am mostly interested in the tree supports. So let’s get started, and see what the version 2.0 of Voxelizer Slicer can do.
Voxelizer Slicer Installation Process
The Voxelizer Slicer can be downloaded from its own website. The installation is straight forward, just like any other software.
It’s available for Windows and MacOS. Please note that you will need to register on the site to create an account.
Adding a new printer in Voxelizer Slicer
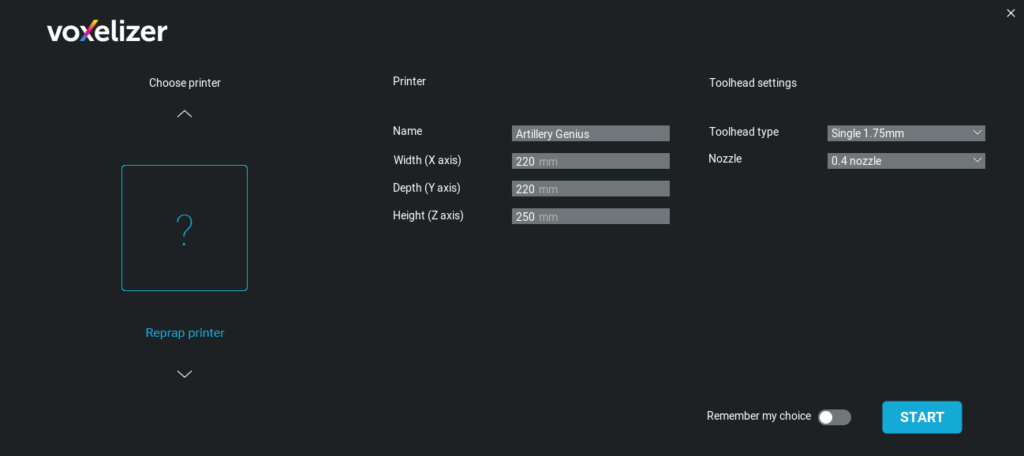
I started using the Voxelizer Slicer with my Artillery Genius printer. In the first screen, I chose “RepRap printer” and entered the printer settings.
After setting your printer, you will reach the Voxelizer Slicer interface.
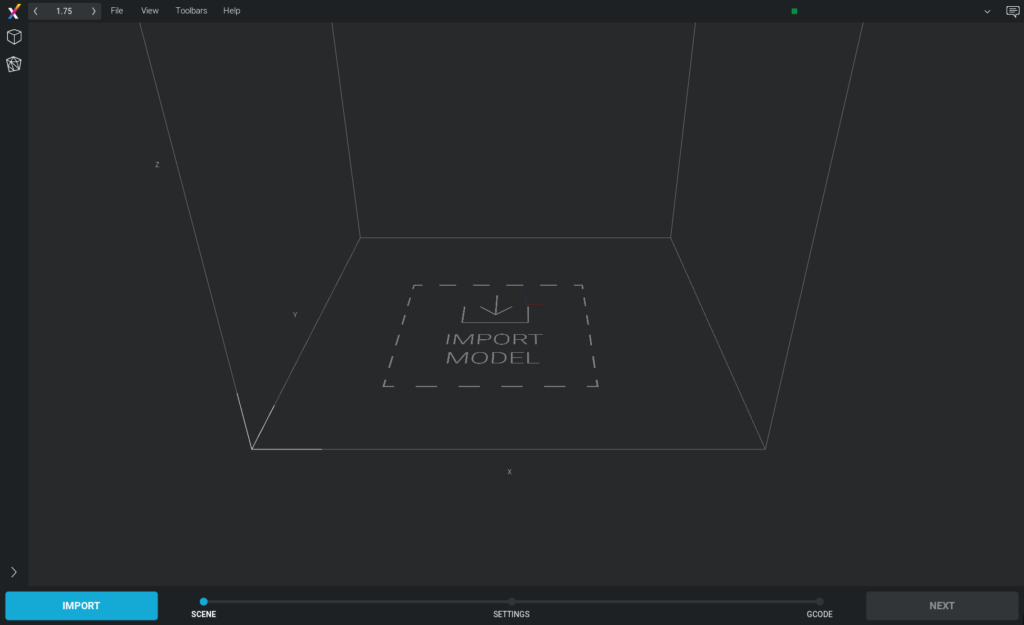
As you can see, the interface is really simple. First, you need to import the model using the bottom left Import button. You can also drag and drop your STL directly into the slicer.
The whole workflow in Voxalizer slicer goes through 3 main points: SCENE, SETTINGS and GCODE.
Scene
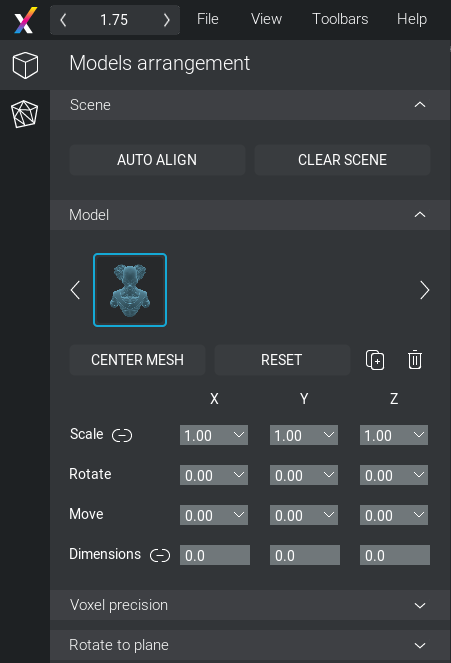
In the Scene section, you can do the basic movements for the model, and set the scale.
Voxalizer can also automatically repair meshes, if the feature is enabled.
Settings
Printing Settings
In this section you have all the settings for your previously loaded model.
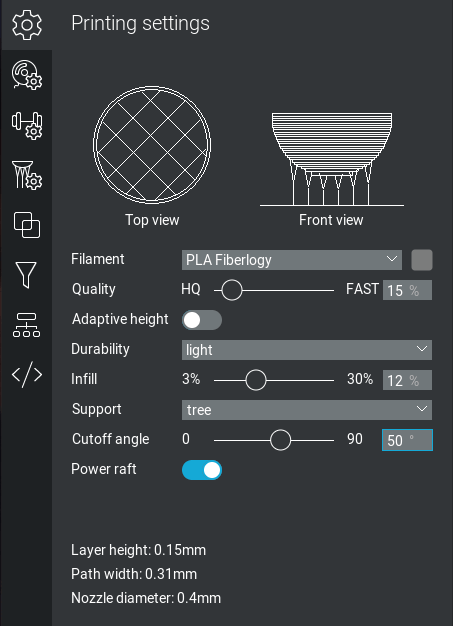
We start with the Printing Settings, where you choose your filament type. If you can’t find your filament manufacturer, choose any from the list. You will be able to edit the presets, and save them as a new filament.
The slider to control the Quality. As you can see, this controls the layer height.
You can also use Adaptive height with Voxelizer. This automatically selects the proper layer height across the model to maintain quality but speed up the print.
On the Durability setting you can select how strong your model should be. This adds extra perimeters to the model. I used light, because for figures 2 walls is usually enough. For infill, I used 10%, but you can go as low as 5 with figures, to save material and print time.
In Supports, I used tree with a cutoff angle set to 50 degrees. There are other types of supports available like lattice, which is also interesting. The power raft is enabled to make sure the support base is properly attached to the build plate.
If you want to know which are the best supports to use according to your model, visit the Support Guide from ZMorph.
Filament preset
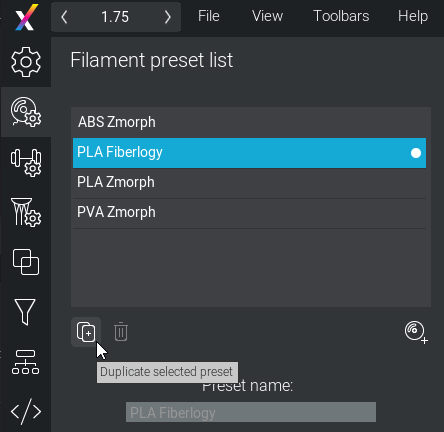
In the filament preset section, you can edit a lot of settings for your printer. I selected PLA Fiberlogy Filament but the print was done with Sunlu PLA.
Just click on the filament preset, then duplicate the selected preset. This will allow you to easily edit the settings according to your needs.
You can check all of my settings I did for the Artillery Genius in the image below. I changed the speed, extrusion multiplier, temperature and retraction values.
The retraction values are really important because if this is not properly tuned you will have issues during printing.
The tree supports will put your extruder to work, and a lot of retraction will be used for printing them.
Support preset
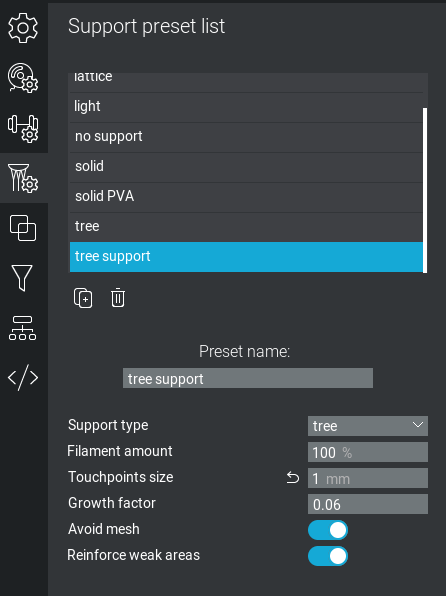
In the Support preset section, you can copy the settings just like you did in the filament section.
For my first print, I used the default settings, but you can fine tune your tree supports.
I duplicated the preset, and changed the touchpoint size to 1 mm (to have a bit more contact with the model) and enabled the avoid mesh setting.
Filters
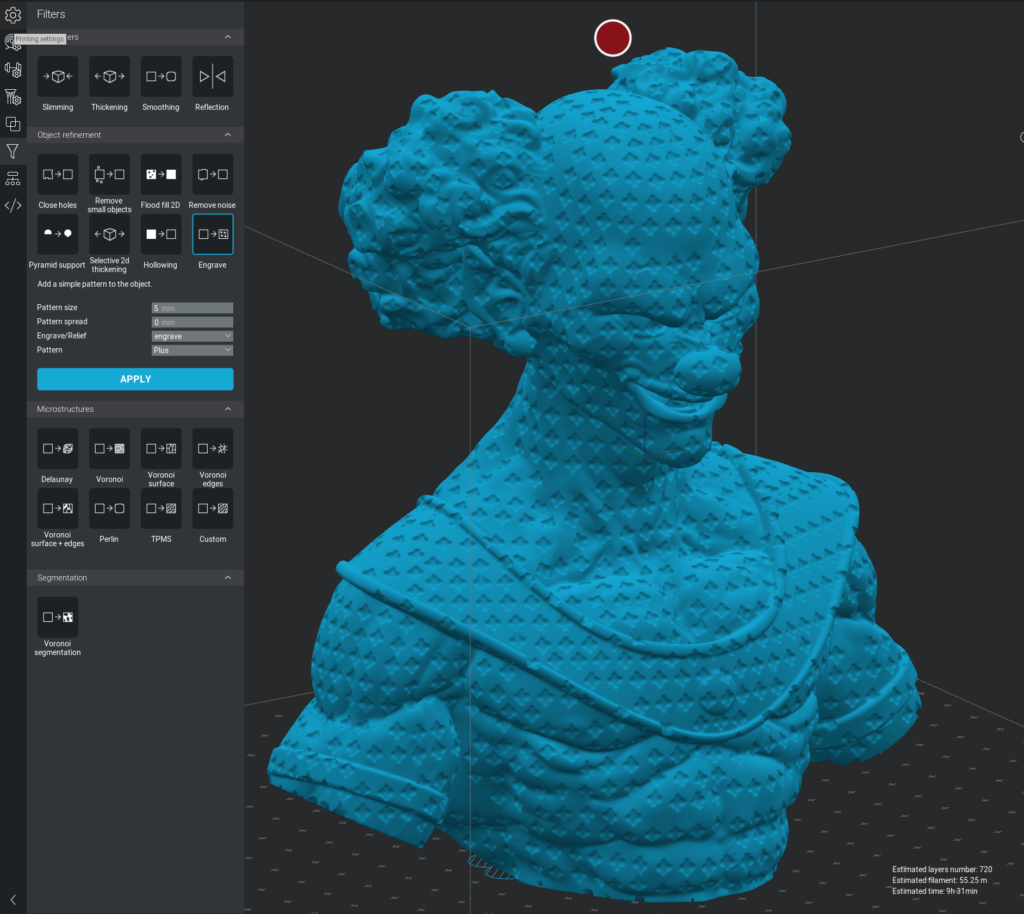
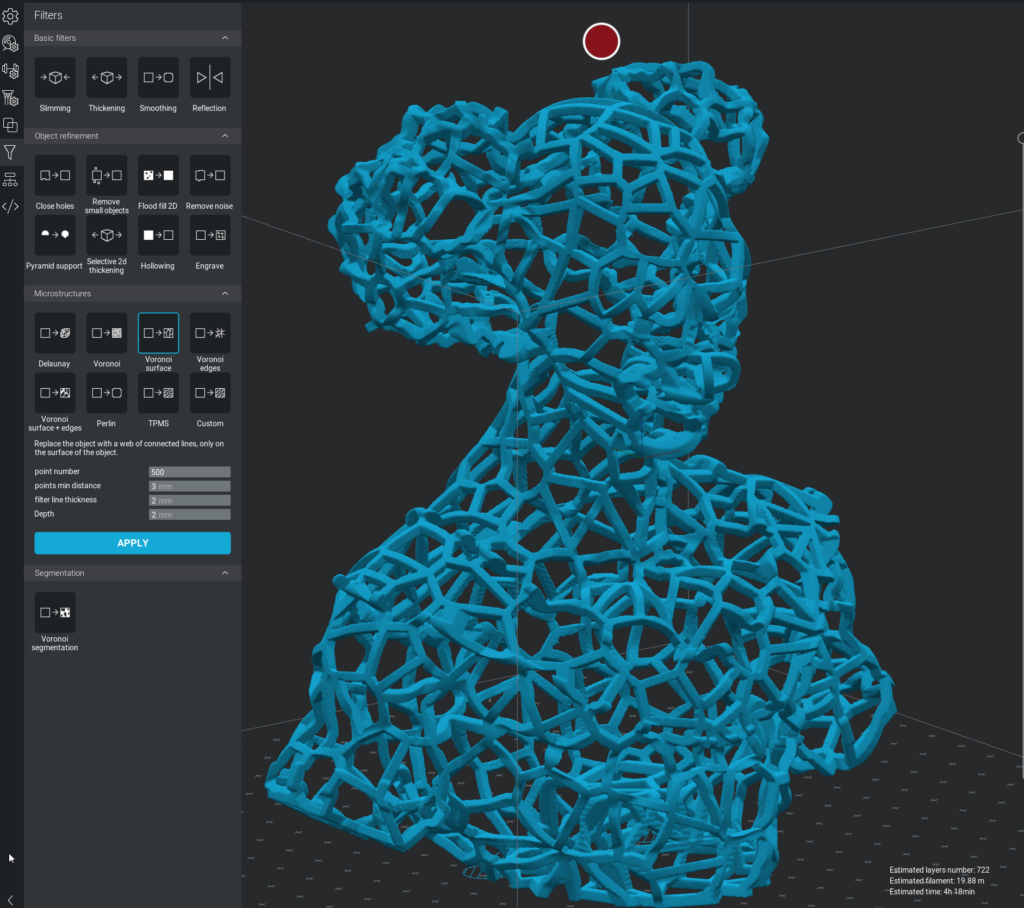
The filters section from Voxelizer is really interesting. You can do a lot of alterations to your model with a simple click.
For example, you can see how I used the engrave option to add a “plus” pattern on the model surface.
The Voronoi surface option replaces the object with a web of connected lines
Play around with the options, and you will probably find one which suits your needs.
GCODE
Finally, in the GCODE section you can preview your model, and export the file for printing. This is pretty much self-explanatory.
Print Results
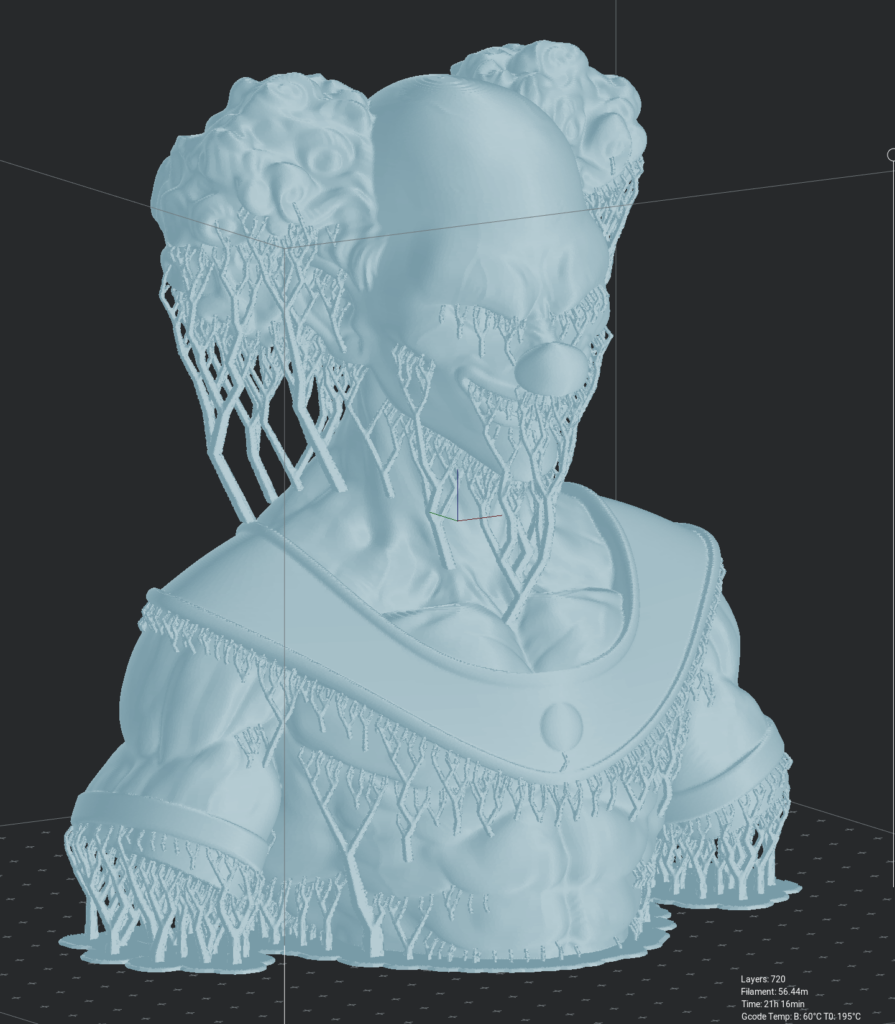
In order to test the tree supports from Voxelizer, I printed the Belmod Bust from MyMiniFactory. The results can be seen below.
The supports were easily printed and the quality is great. Unfortunately, because I used a temperature too high for this particular PLA (215C instead of the usual 190C) the removal of the supports was not that great.
Next time when I have some extra spare time, I will further tune my settings for better removal. For now, that’s it!
Wrapping Up
Hopefully, this little introduction for Voxelizer Slicer can get you started. Play around with the settings until you get comfortable with it.
I currently use IdeaMaker as my main slicer, but I will always get back to Voxelizer when I need to print something with good tree supports.
Liked it?
|
|


