Artillery Sidewinder X1 Firmware with Marlin 2.0.5.3
The Artillery Sidewinder X1 is awesome and the firmware it comes with is properly configured, but unfortunately it uses an older variant of the Marlin firmware and it lacks some features.
It is recommended to upgrade the Artillery Sidewinder X1 to Marlin 2.0.5.3 in order to get all the features it offers.
Update: Outdated firmware
The current firmware is currently outdated. Please use Digant’s firmware. He maintains it better than me and he also added a lot more functionality to the touchscreen.
Why should you upgrade to Marlin 2.0.5.3?
Compared to the original firmware, the firmware I compiled has the following features implemented:
- Save to EEPROM
- Manual Bed leveling
- Linear Advance 1.5 enabled and configured K Factor to 0.13
- S Curve Acceleration and Adaptive Step Smoothing is enabled
- Added preheat presets for PLA and PETG
- Babystepping Z enabled
- Quick Home enabled for faster homing
- Changed Feedrate and Acceleration values for smooth and silent operation
- BLTouch functionality (for BLTouch users)
Please read the full article before starting the flash. More information is covered, to better understand the process.
Firmware flashing prerequisites
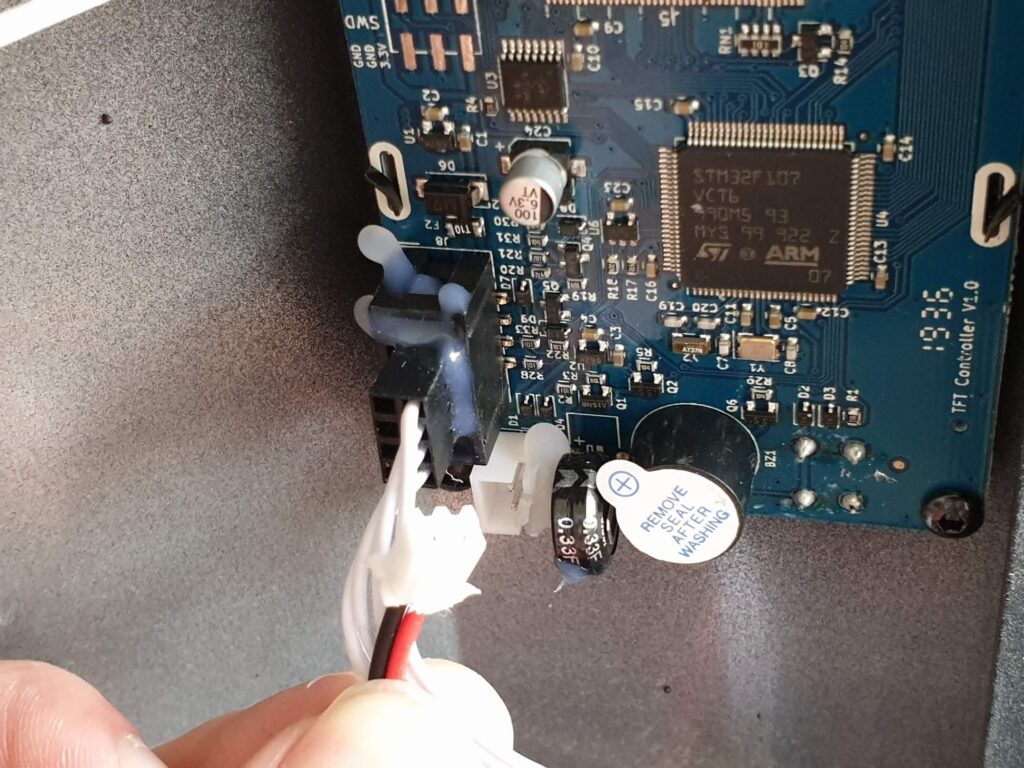
The stock TFT touchscreen cable needs to be removed in order to get a connection from the computer and flash the board firmware.
As you can see, my TFT connector was full of glue so I had to remove the cable including the connector. Carefully remove any glue that might be around the connector, then using the included USB cable, connect your printer to the computer.
Bonus tip! You can also remove this red and black wire from the screen. By removing this wire you will be able to flash the screen without needing to open the printer again. If your main TFT cable is full of glue like mine, you can just remove this wire and continue with the firmware flashing.
With the firmware flashed, you can now connect the TFT cable back to its original position and put the bottom cover back.
How to flash Artillery Sidewinder X1 with Marlin 2.0.5.3
First, you need to flash the board firmware. I am using Prusa Slicer to flash.
1. Download the Marlin 2.0.5.3 for Sidewinder X1
2. Open Prusa Slicer
3. Go to Configuration -> Flash printer firmware
4. Select the Marlin-2.0.5.3_Sidewinder_X1_3DPrintBeginner.hex file provided, and choose the correct serial port for your printer
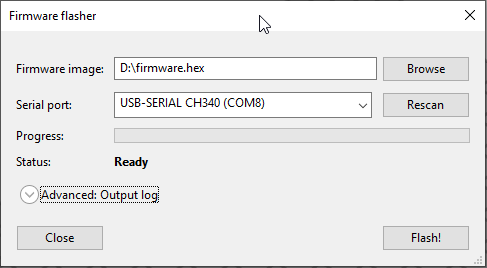
5. Click Flash! and wait for the process to finish.
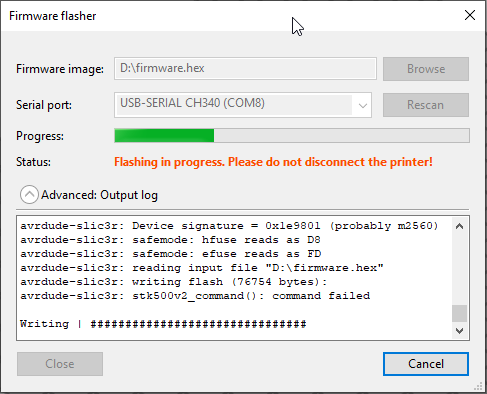
After flashing the firmware, make sure you first run the G-Code provided, to reset to factory defaults and clear EEPROM. Copy the .gcode file on your SD Card and “print” it.
You can also run the following commands in sequence:
M502
M500
M501
Flash Artillery Sidewinder X1 custom LCD Firmware
Please note that this version of custom LCD firmware is not the same as stock. You can read more about it here: Custom Screen Firmware for Sidewinder X1 and Genius.
In order to install the new screen firmware for the Sidewinder X1, follow the steps listed below:
- Download the Sidewinder X1 screen firmware.
- Unzip the archive and copy the contents to the SD Card.
- Plug in the SD card into the printer.
- Turn on the printer and wait for the firmware to finish flashing.
- Touch the calibration points on the screen
- Restart the printer
That’s it. Now you can enjoy the new functionality offered by the new firmware.
If you want to revert to the stock screen, follow these steps:
- Download the stock Sidewinder X1 TFT screen files
- Format the SD card.
- Unzip the archive and copy the contents to the SD Card.
- Plug in the SD card into the printer.
- Turn on the printer and wait for the firmware to finish flashing.
- Restart the printer.
Artillery Sidewinder X1 BLTouch Firmware
Due to popular request, the Sidewinder X1 Firmware containing the BLTouch settings is currently available.
You can use the Waggster Mod video for information on how to install the pins.
The firmware including BLTouch can be downloaded from here. If you want a better cooling duct that works with the firmware settings and BLTouch, you can download my remix from Thingiverse.
Sidewinder X1 Auto Bed Leveling with Stock Sensor
You can also achieve Auto Bed Leveling on your Artillery Sidewinder X1 using the stock Z endstop sensor.
Read mode about it in the Sidewinder X1 Auto Bed Leveling with Stock Sensor article
Disclaimer
Use at your own risk! The firmware and Config Files are provided “as is” without warranty of any kind, either express or implied.
If you want to customize your own version of Marlin, you can visit my Github repo where also uploaded the source files.
Liked it?
|
|


