Install OctoPi on Raspberry Pi – OctoPrint Install Guide
OctoPrint is an open-source project that adds a lot more functionality for your 3D printing needs. From remote monitoring and better time estimations to gorgeous time-lapses, OctoPrint is the best tool to use in order to improve your 3D printing experience.
In this article, I will show you in detail how to install OctoPi on Raspberry Pi.
Why install OctoPi ?
OctoPi is a distribution of Raspbian maintained by Guy Sheffer with OctoPrint already installed and configured, made specifically for the Raspberry Pi.
The main reason why you would want to install OctoPi is the possibility of adding a webcam in order to remotely monitor your prints. OctoPrint can be integrated with Telegram or Slack allowing for remote communication with your 3D printer without the need of opening firewall ports and exposing OctoPrint to the internet. Besides this, you also get the web controls for your printer allowing you to move the print head along all axes.
With OctoPi you also get access to the terminal allowing custom GCODE commands to be run on the printer. This feature will help a lot with PID Tuning and extruder calibration.
Another good reason to install OctoPi is the possibility of creating time-lapses with your print with the Octolapse plugin.
A complete feature list is available on the OctoPrint website.
Prerequisites
In order to install OctoPi you will need the following:
- Raspberry Pi (Raspberry Pi 3B, 3B+ or 4 is strongly recommended for best performance).
- 16 GB MicroSD card.
- Good power supply for the Pi – Any adapter works if it’s capable of delivering at least 2.5 A of power
- Webcam for monitoring your prints (optional).
Install OctoPi image on SD Card
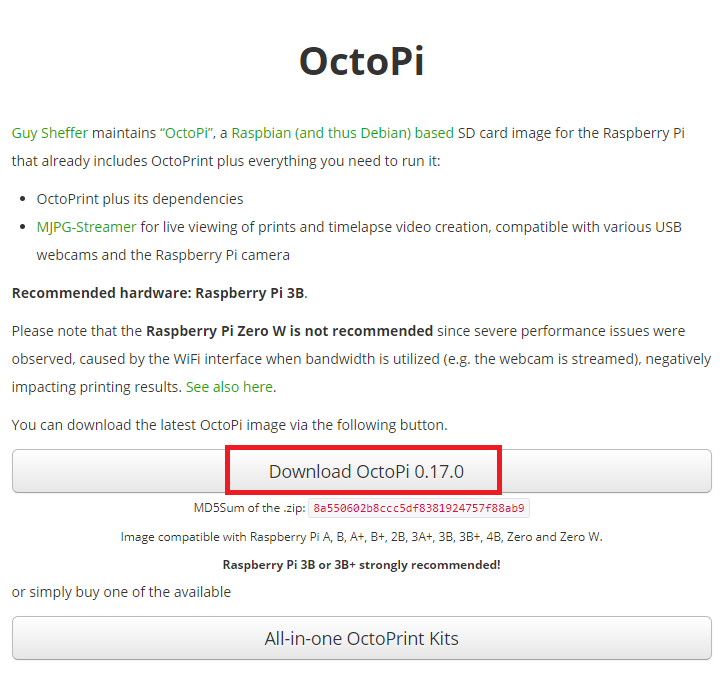
Download the OctoPi image and unzip the archive.
Download and install Win32 Disk Imager.
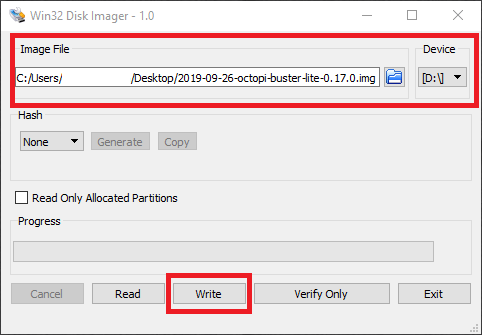
Open Win32 Disk Imager, load the .img file unzipped in step 1 and select your SD card drive letter. Click on Write to begin installing OctoPi on the SD card. This process will take a few minutes, depending on the speed of your SD card.
After the OctoPi image has been written to the SD card, you can remove the SD card and insert it in your Raspberry Pi
Power On the Raspberry Pi and wait 5 minutes for the operating system to boot and start listening to SSH connections.
Find the IP of your OctoPi install
In order to connect to your OctoPi install, you first need to find your the IP address your Raspberry Pi received from the DHCP server.
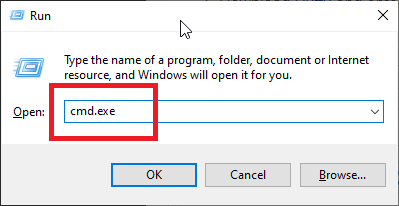
Press Windows Key + R at the same time to open Run.
Type cmd.exe then press Enter to open Command Prompt.
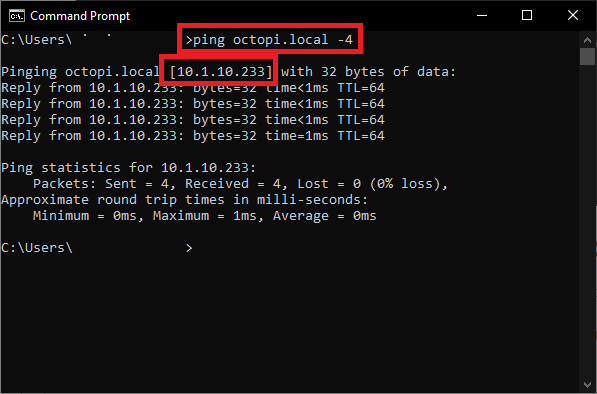
In the Command Prompt window, type ping octopi.local -4 and press enter. This will return the IP of your Raspberry Pi.
Connect to OctoPi via SSH
Now that we discovered the IP of our OctoPi install, we can connect to it via SSH to change the root password and apply updates.
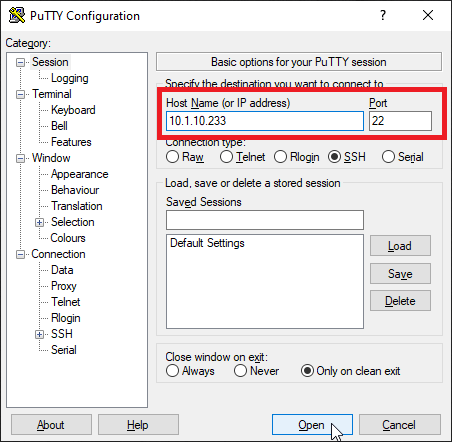
Download Putty , enter the IP of your Raspberry Pi then click Open
In the Login prompt, you need to enter the credentials for OctoPi. The default user is pi and the password is raspberry. Please note that the password will not be shown when typing.
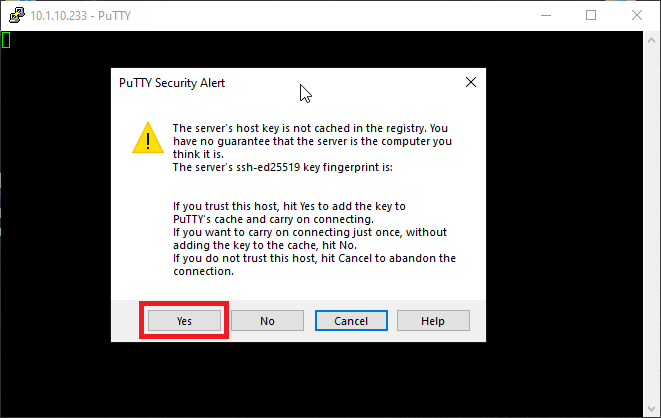
If you enter the credentials correctly, the servers’ SSH fingerprint prompt will show up. Click on Yes.
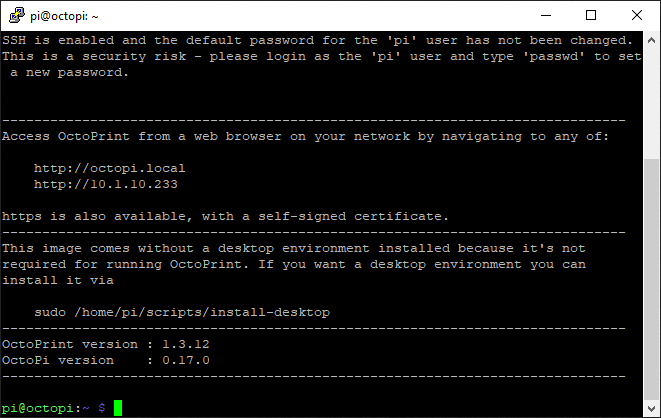
Now you are in the SSH console of your OctoPi install.
Change OctoPi default password and apply updates
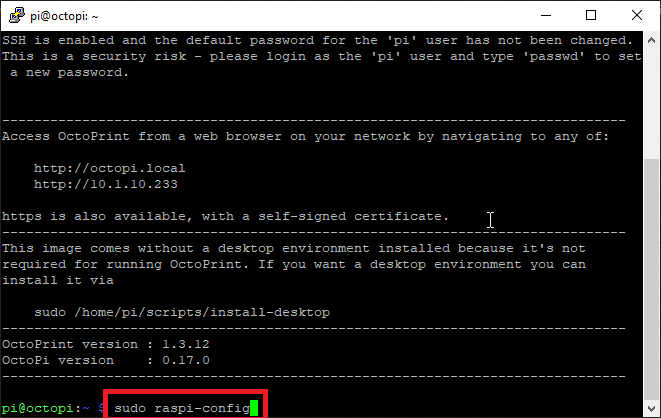
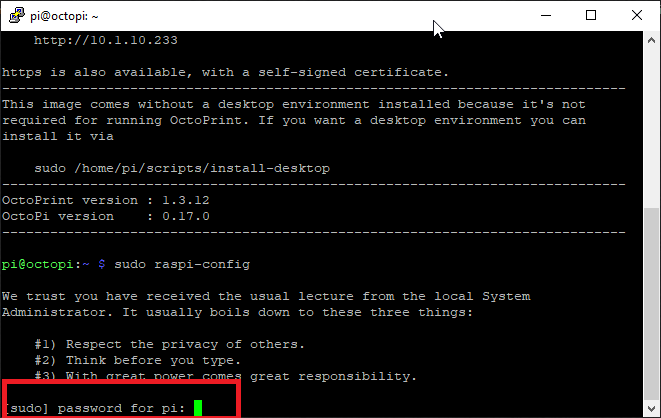
Type sudo raspi-config and press Enter.
In the Login prompt, enter the same password used before – raspberry.
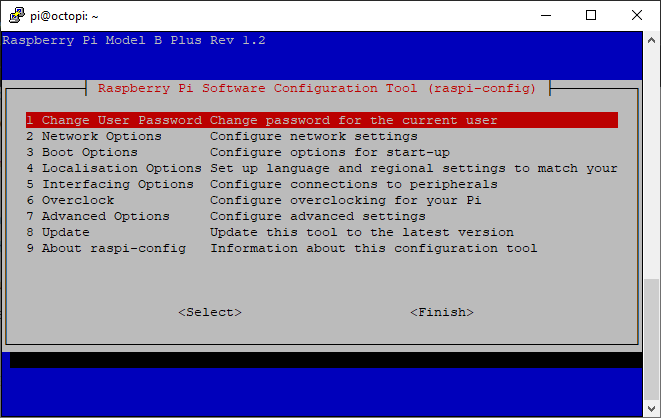
Select Change User Password and press Enter.
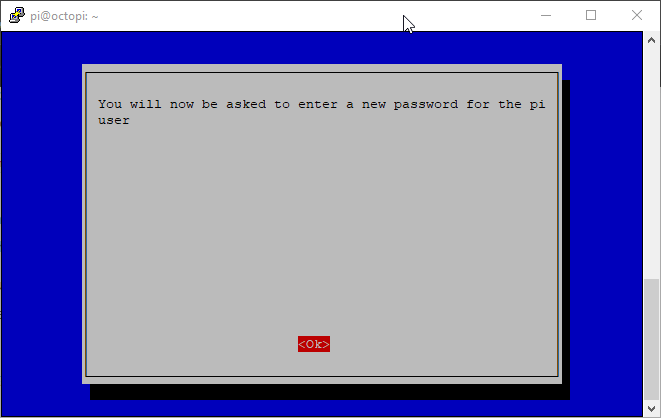
You will be asked to enter a new password. Press Enter.
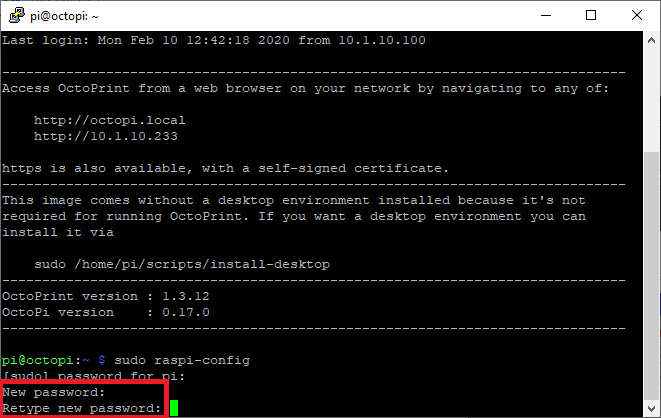
Enter your new password twice.
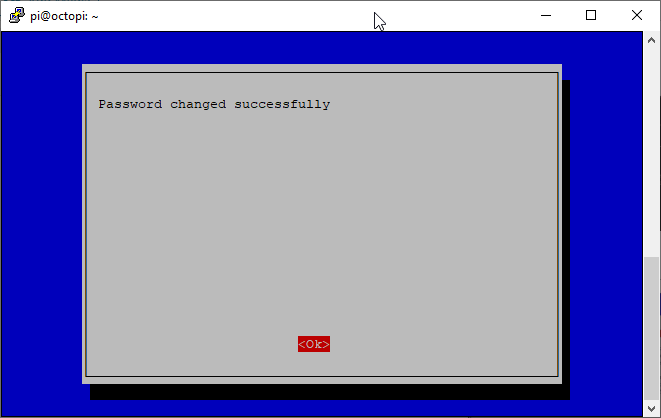
If the new passwords match, you will receive a confirmation for the password change.
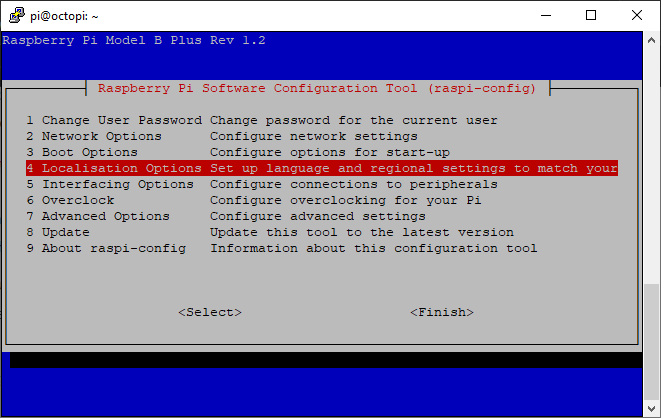
Next. select Localisation Options and press Enter.
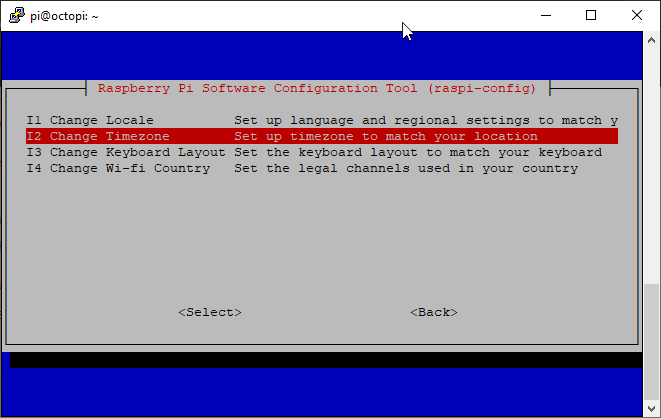
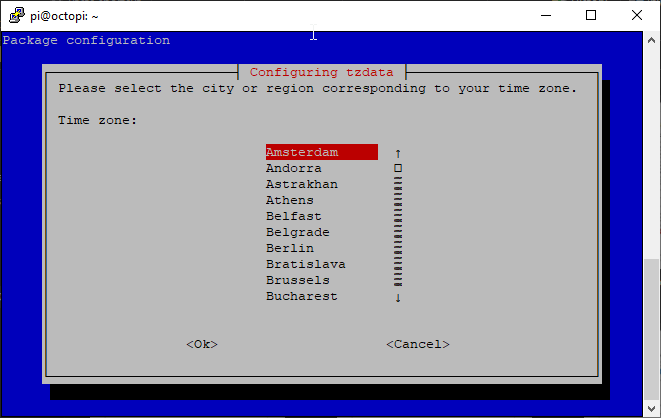
Select Change Timezone and press Enter.
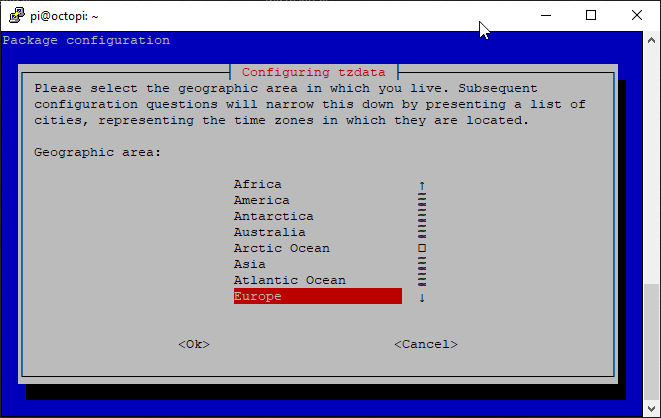
Chose your Geographic Area and press Enter.
Select your Time zone and press Enter.
Configure OctoPrint
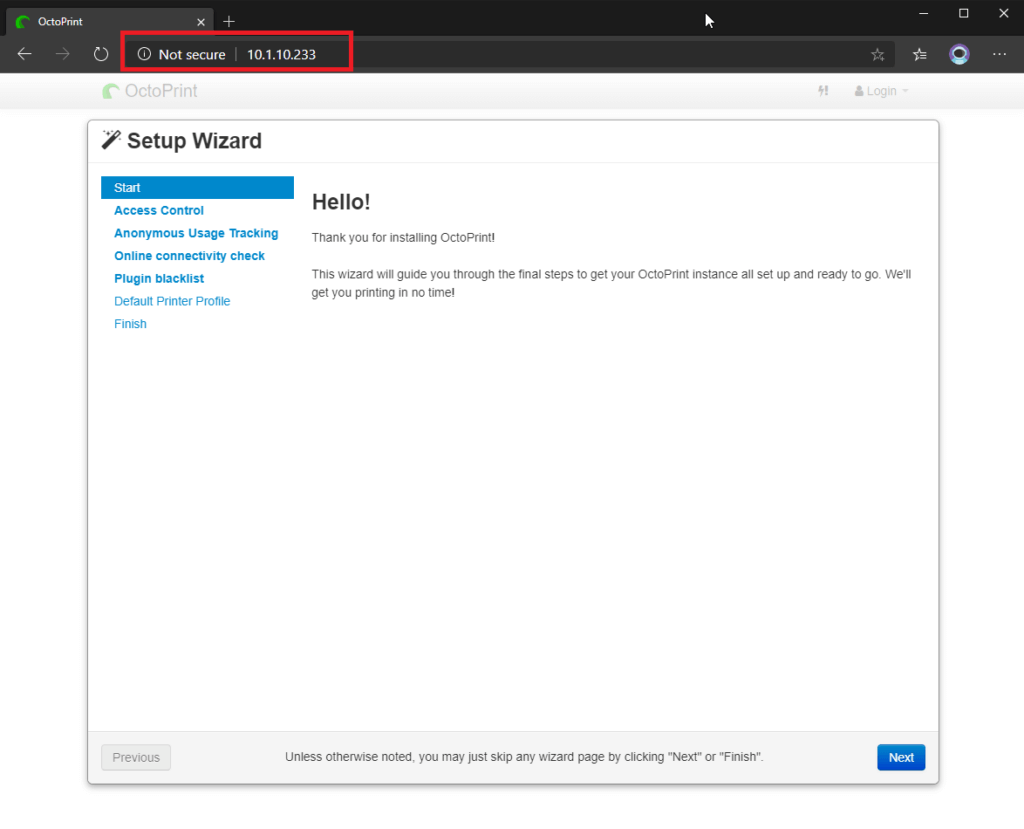
Open a browser and enter the IP of your OctoPi instance then click Next to begin the OctoPrint Setup.
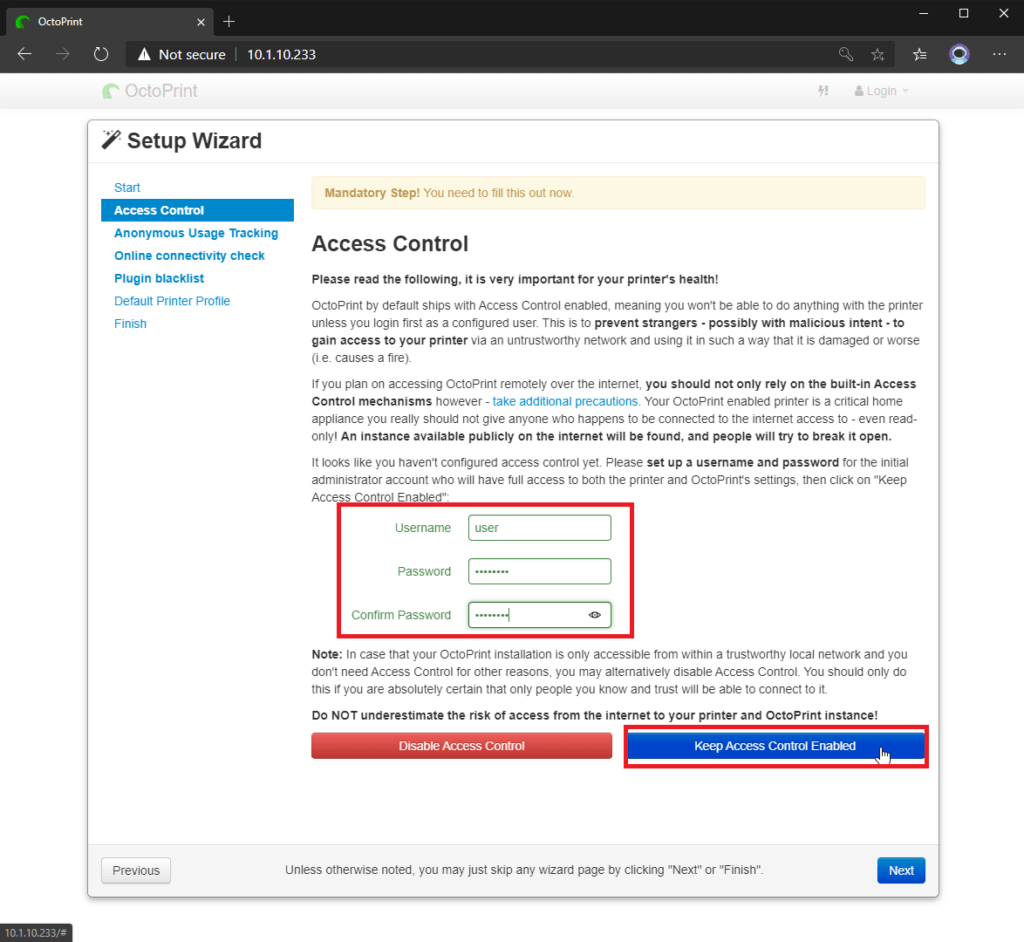
Enter a username and password to secure your OctoPrint instance, click on Keep Access Control Enabled then click Next.
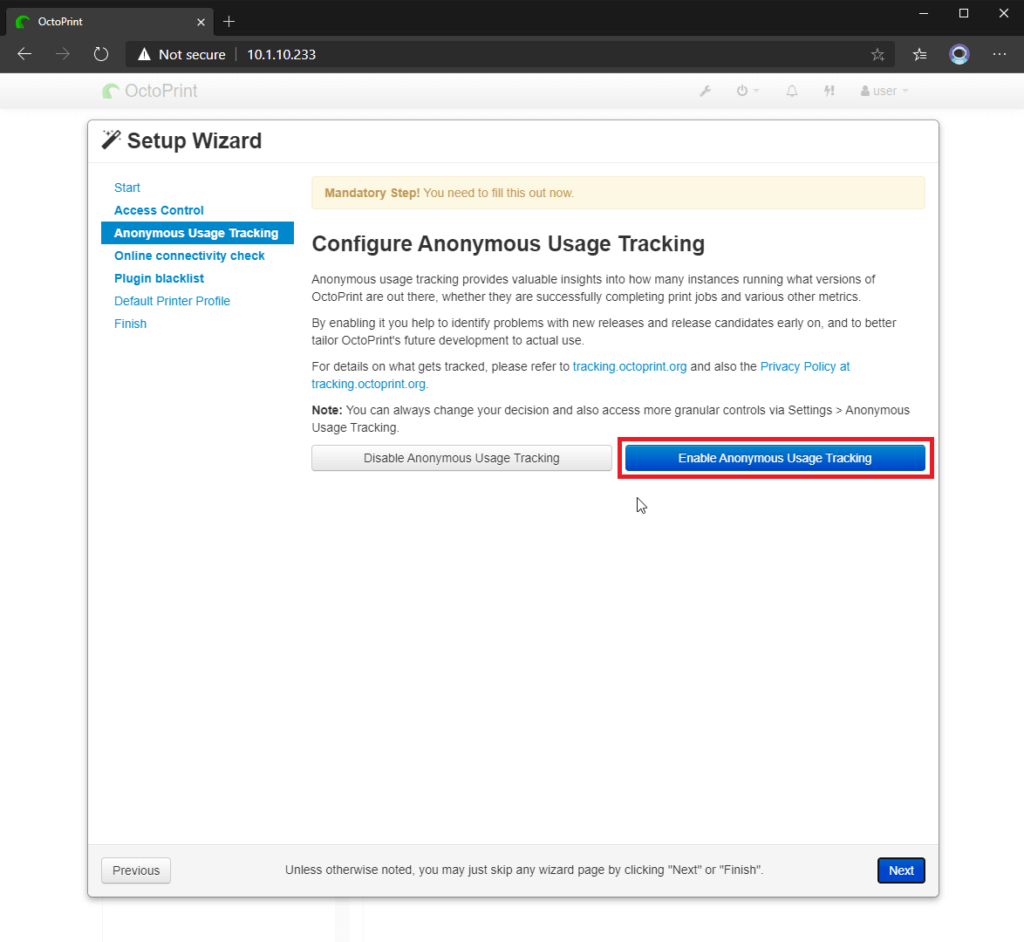
Choose whether to Enable or Disable Anonymous Usage Tracking then click Next.
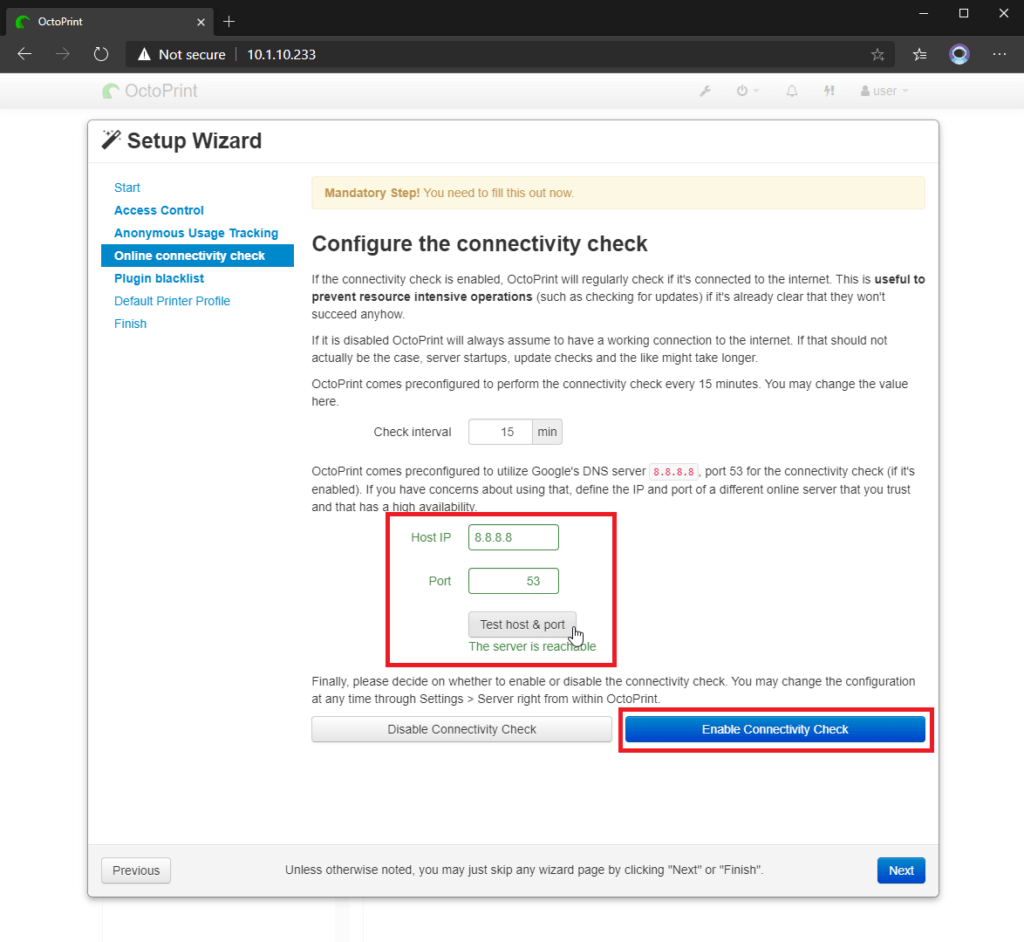
Click on Test host & port then clock on Enable Connectivity Check, then click Next.
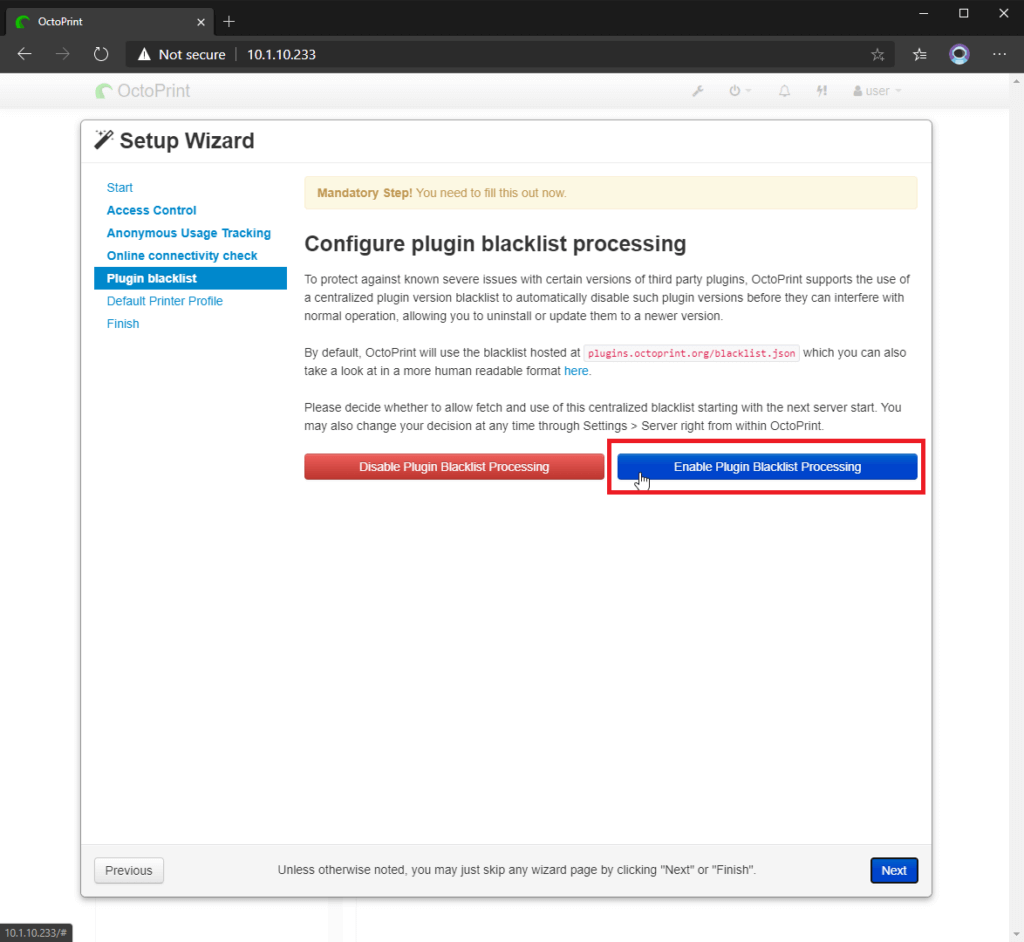
Choose whether to Enable or Disable Blacklist Processing. I recommend enabling this feature. After selecting an option, click Next.
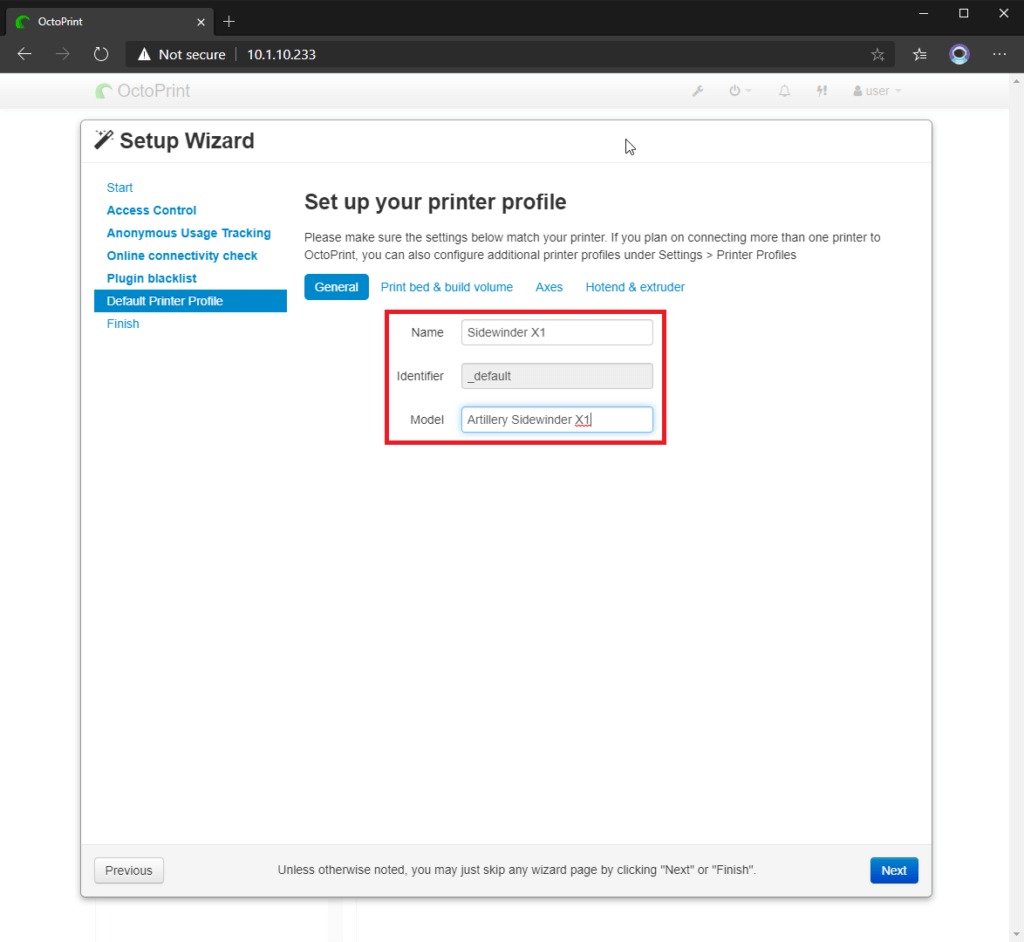
Enter a name and a model for your printer profile, then click Next.
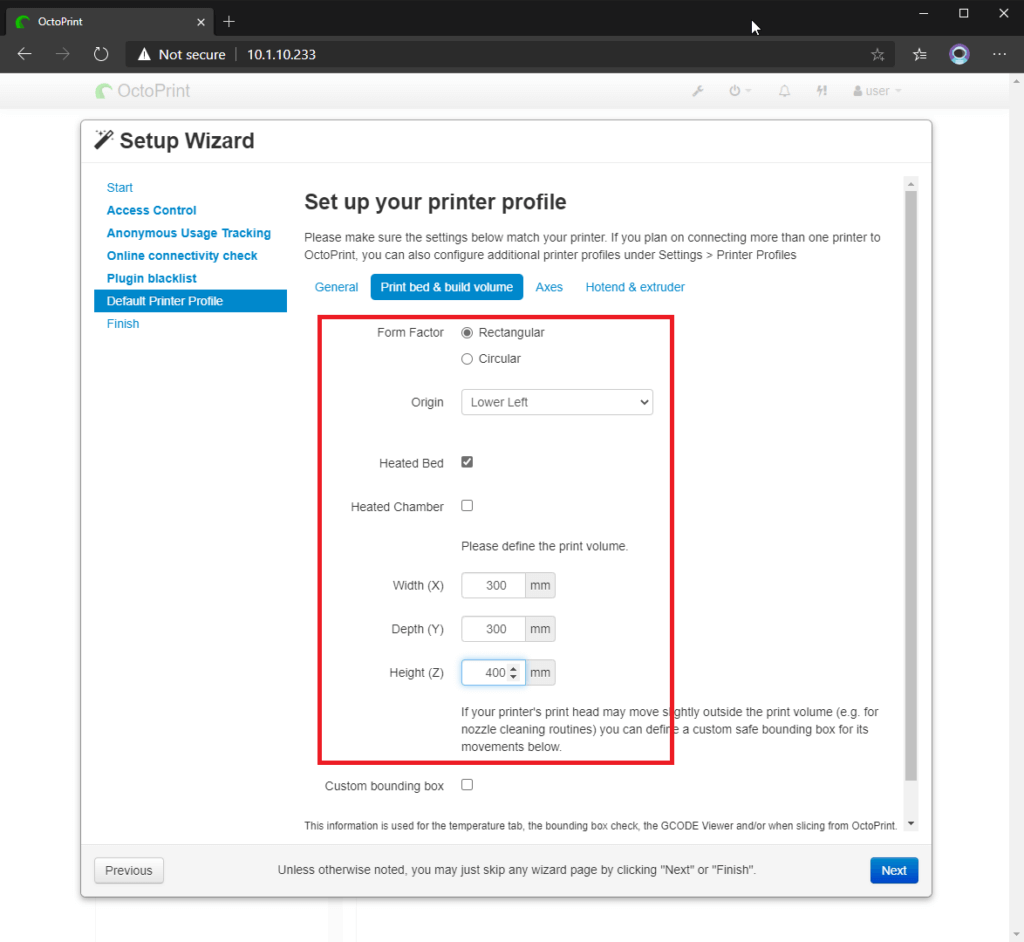
Enter your print volume according to your printer, then click Next.
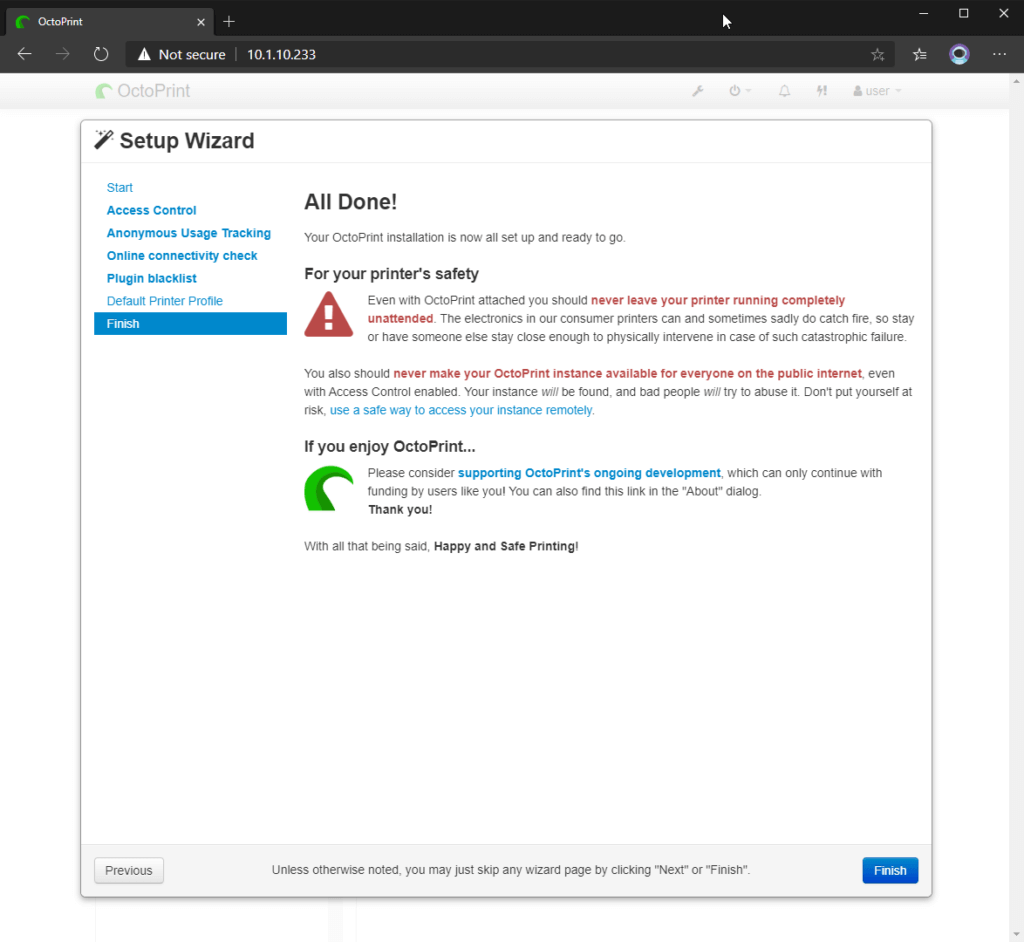
Click Finish to complete the OctoPrint setup process.
Octopi setup is complete!
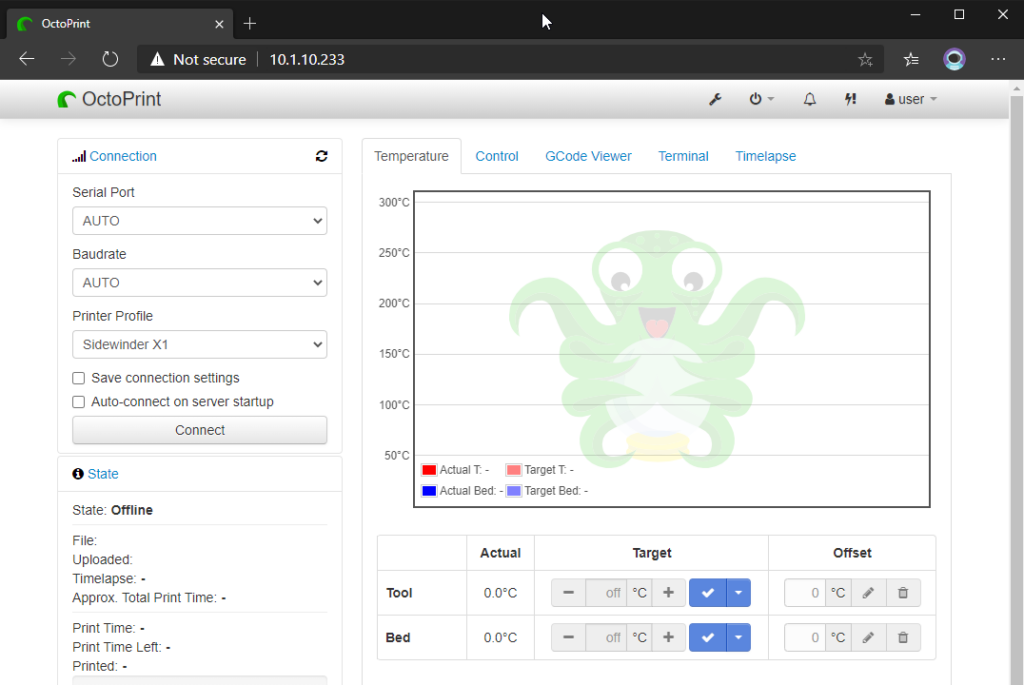
That’s it. Now you can connect your printer to the Raspberry Pi, and click Connect. Your printer will be connected to Octoprint and the Temperature graph will show the values read from the printer.
You can also join the 3DPrintBeginner Forum where there’s a dedicated OctoPrint thread.
Liked it?
|
|

