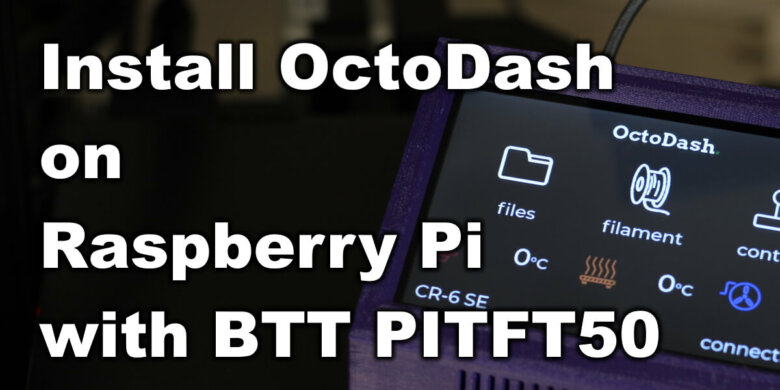
Install OctoDash on Raspberry Pi with BTT PITFT50
What is OctoDash?
OctoDash is an opensource project available for the Raspberry Pi which connects to OctoPrint and overlays a beautiful touchscreen interface that allows you to control your 3D printer. It offers most of the OctoPrint functionality but with an interface designed for your fingertips.
If you already own a Raspberry Pi, you can add a cheap upgrade to it in the form of a touchscreen. The PITFT50 from BIGTREETECH is about 35$ and allows you to install OctoDash.
Why install OctoDash ?
While we all love OctoPrint, the interface is not that user friendly when you open it up on your smartphone. You would install OctoDash to have a touchscreen interface independent from your printer screen and smartphone.
The main reason to install OctoDash on Raspberry Pi with the BTT PITFT50 is to have a separate touchscreen interface to control your printer. You can have more information displayed on the PITFT50 like a 2D representation of your printed model, used filament, time to completion and so on.
Finally, there’s also the tinkering part. Installing OctoDash gives you another reason to tinker with your printer, which is awesome if you enjoy doing that.
OctoDash interface on BTT PITFT50
If you are wondering how the OctoDash interface looks on the BTT PITFT50, I took some screenshots. As you can see, the interface is nice and clean with easy to use controls. The menus are suited for a touchscreen and offer most of the functionality you would expect.
The home screen gives you easy access to the files available on the SD card inserted in the printer, or the files available in OctoPrint. The control menu has movement buttons for the XYZ axis and a few extra buttons.
Touching the hotend, heatbed or fan icon opens a different menu where you can set temperatures or fan speed.
Prerequisites for OctoDash
To install OctoDash you will need the following:
- Raspberrpy Pi (Raspberry Pi 3B, 3B+ or 4 is strongly recommended for best performance).
- 16 GB MicroSD card.
- BTT PI TFT50
- USB cable to connect to your printer
Install OctoPi on Raspberry Pi
I previously wrote a guide on How to install OctoPi on Raspberry Pi which I recommend you follow. After you install OctoPi and your OctoPrint instance is up and running, you can proceed to the next step.
Attach the Raspberry Pi to the BTT PITFT50
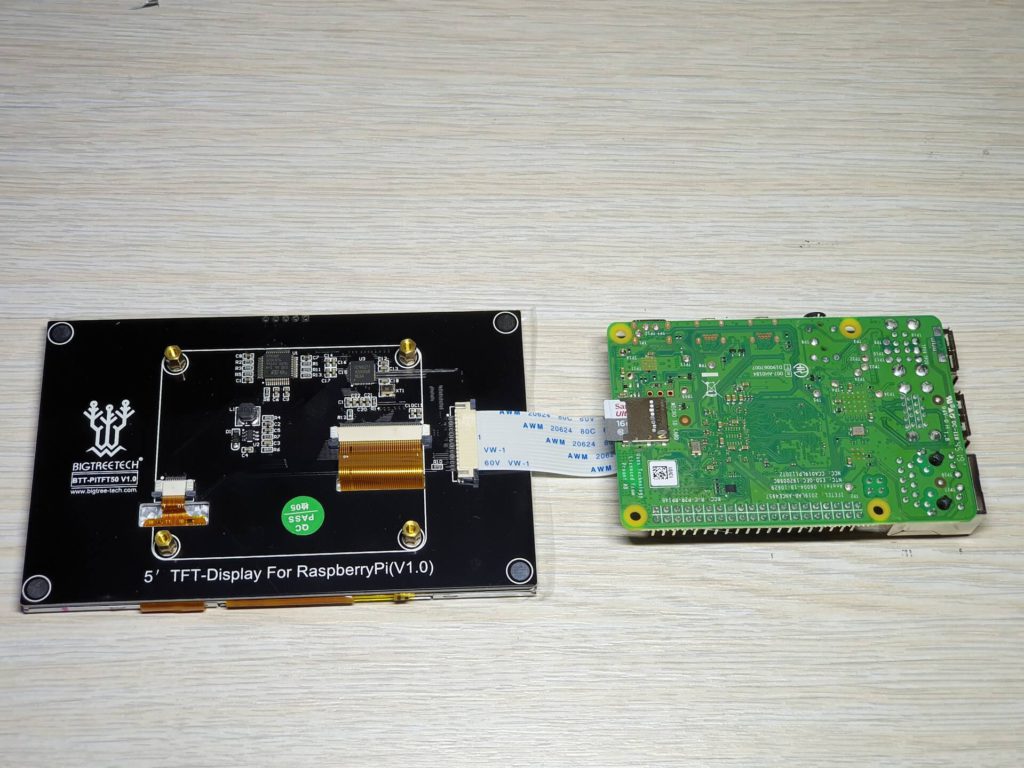
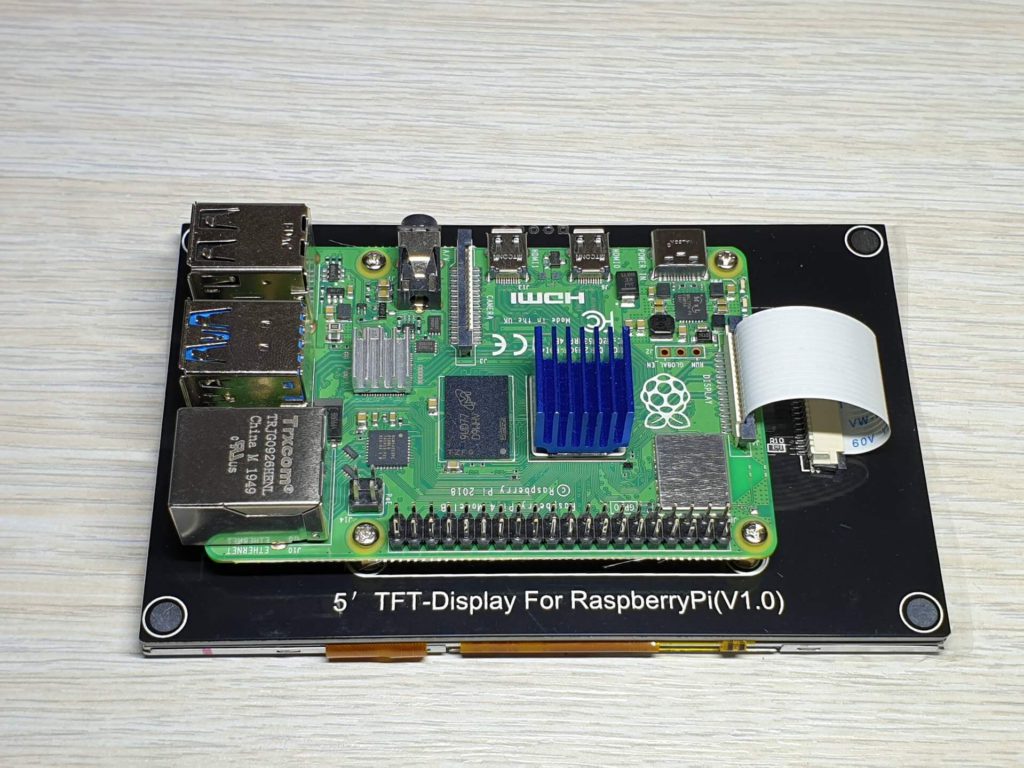
Attaching the Raspberry Pi to the touchscreen is easy. First, you connect the ribbon cable to the Raspberry Pi and the BTT PI TFT50.
Finally, you install the four screws and secure the Raspberry Pi to the BTT PITFT50.
When you boot your Raspberry Pi, the console output should be displayed on the screen. This confirms that the installation has been successful.
Print a case for the BTT PITFT50 and Raspberry Pi
I strongly recommend you print a case for the whole assembly. This will protect your Raspberry Pi, PITFT50 Touchscreen and will also make the whole thing look better. There are 3D models available for a range of setups, from attaching the screen to the printer extrusion, to a standalone case which sits next to the printer.
I chose to have it next to my printer because that allows me to use OctoDash on other printers easily.
The BTT PITFT50 case made by StrangeCalling is a great case for the Raspberry Pi and the PITFT50, which also has some room to install a 4010 fan for better cooling. It’s easy to print, without adding extra supports and it looks great!
Install OctoDash on Raspberry Pi
The OctoDash installation on Raspberry Pi is easy.
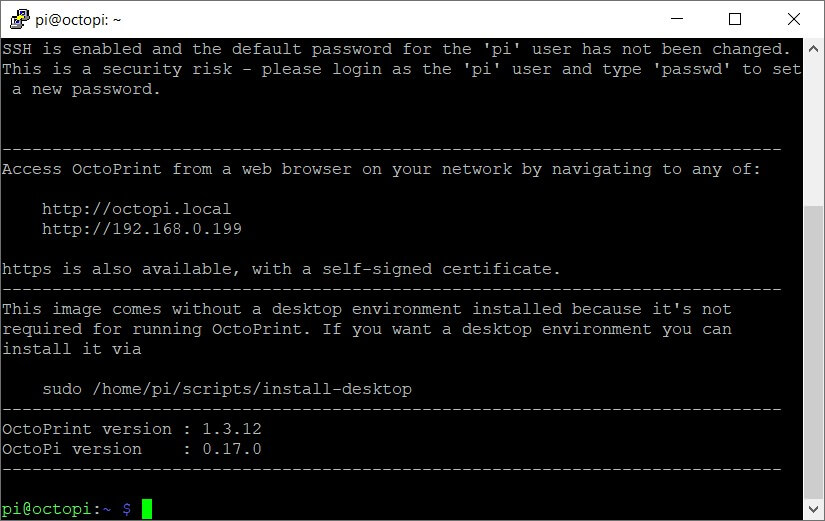
Connect to your Raspberry Pi using SSH
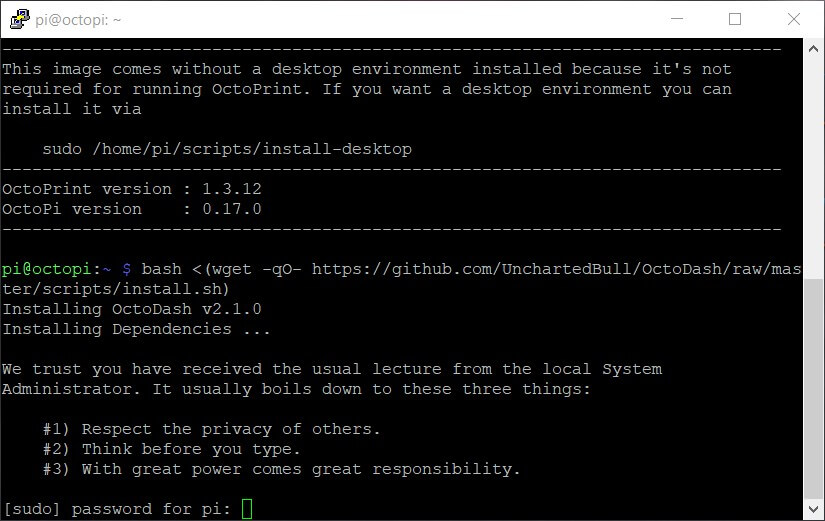
Run the installation command and enter your password
bash <(wget -qO- https://github.com/UnchartedBull/OctoDash/raw/main/scripts/install.sh)
The installation process will start, which will take a couple of minutes, depending on the Raspberry Pi version you are running.
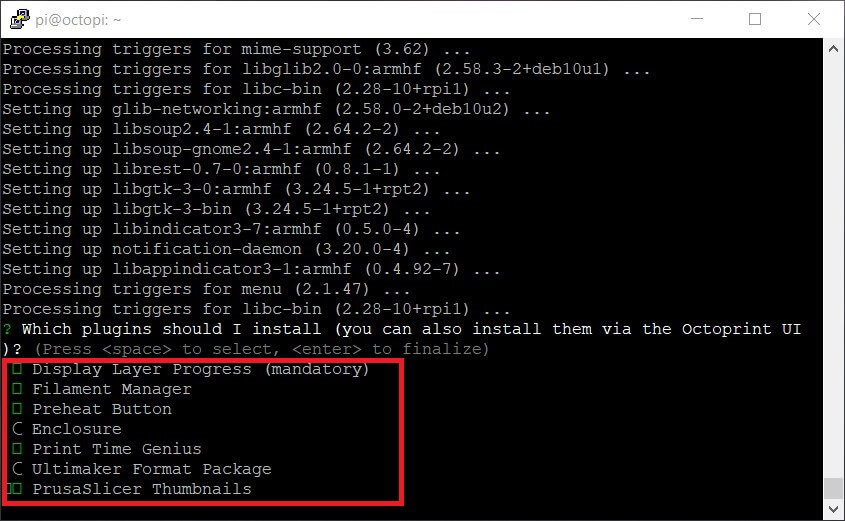
During the installation, you will be asked to select what plugins you want to install. I recommend installing the ones I selected in the image below.
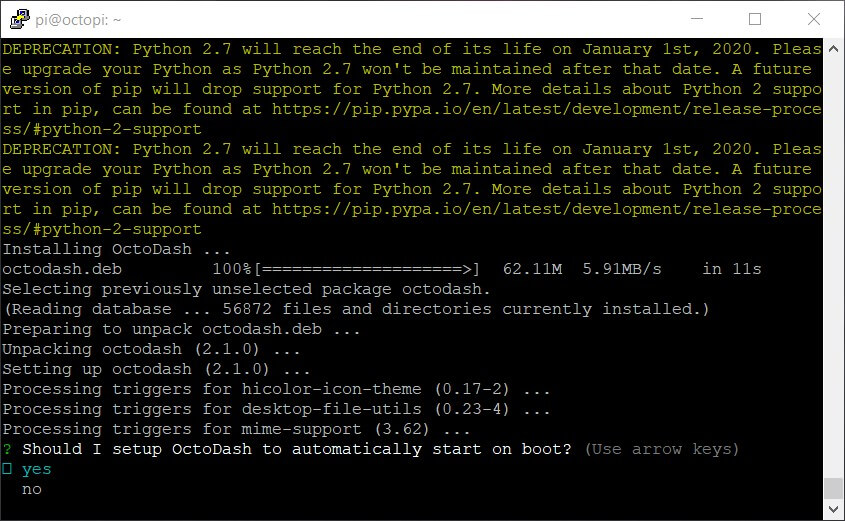
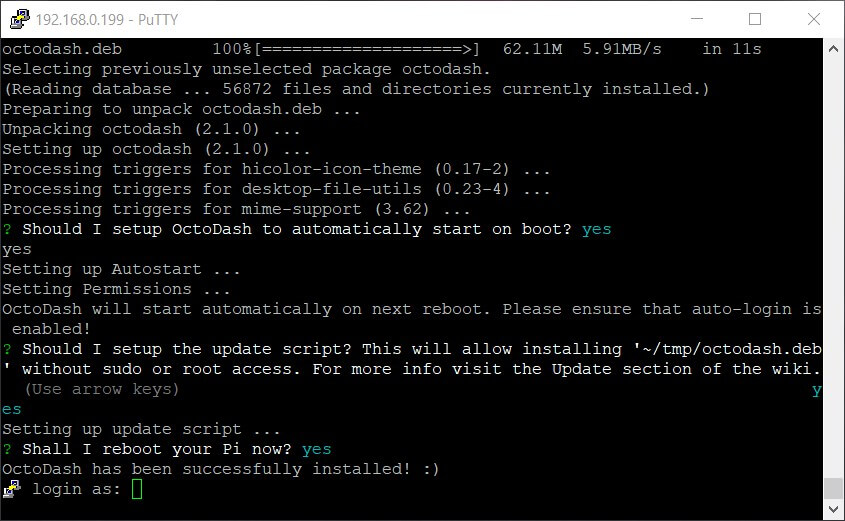
Enable OctoDash to start automatically
Reboot the Pi
Enable OctoDash for BTT PITFT50 Display
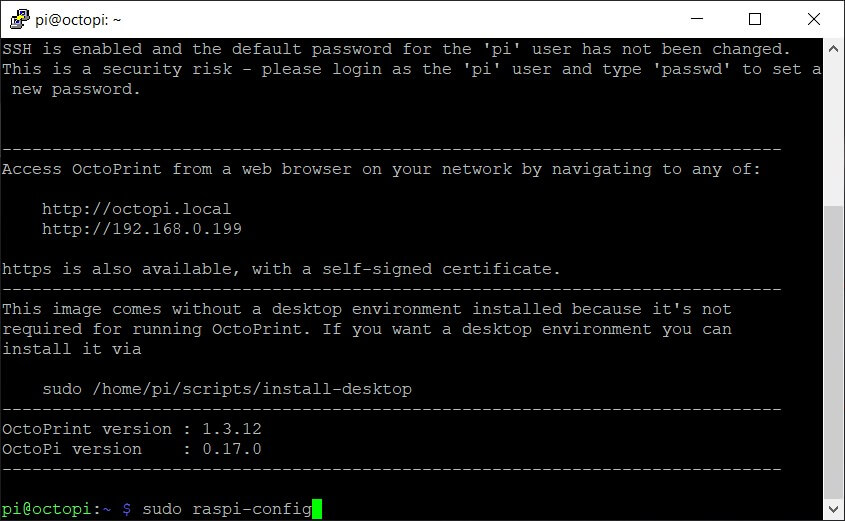
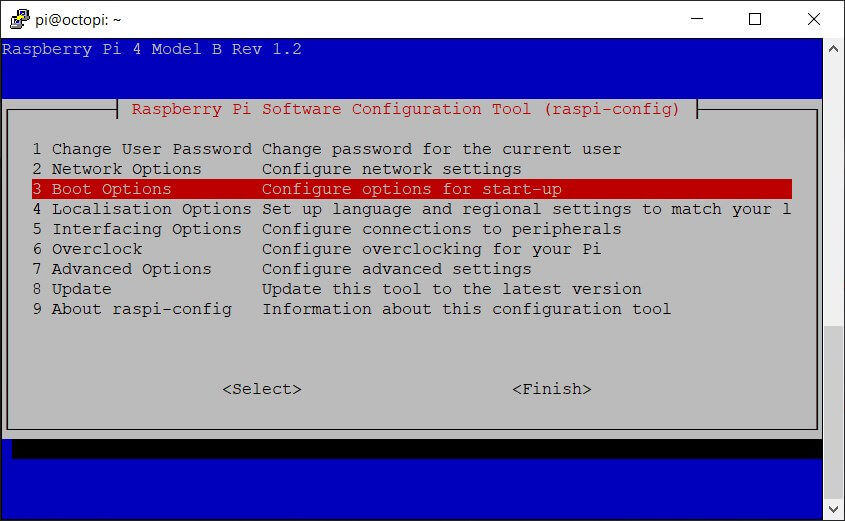
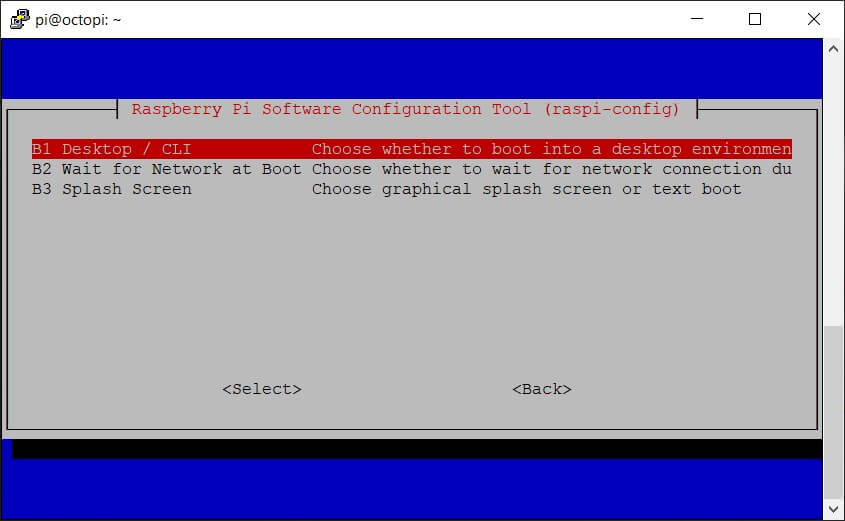
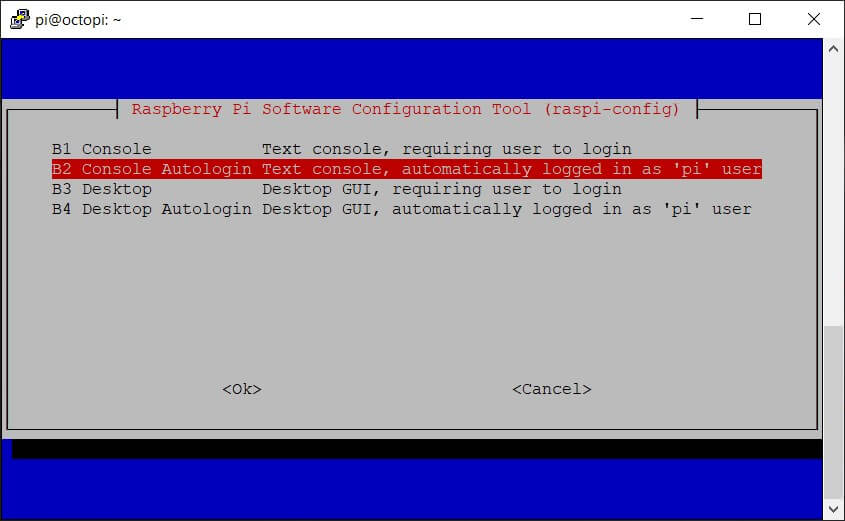
Now that we installed OctoDash, we need to configure it to start automatically after a reboot. To do this, we need to connect via SSH again and do the following:
Run sudo raspi-config command
Select 3: Boot Options
Select B1: Desktop / CLI
Select B2: Console Autologin
Select Finish and accept the reboot
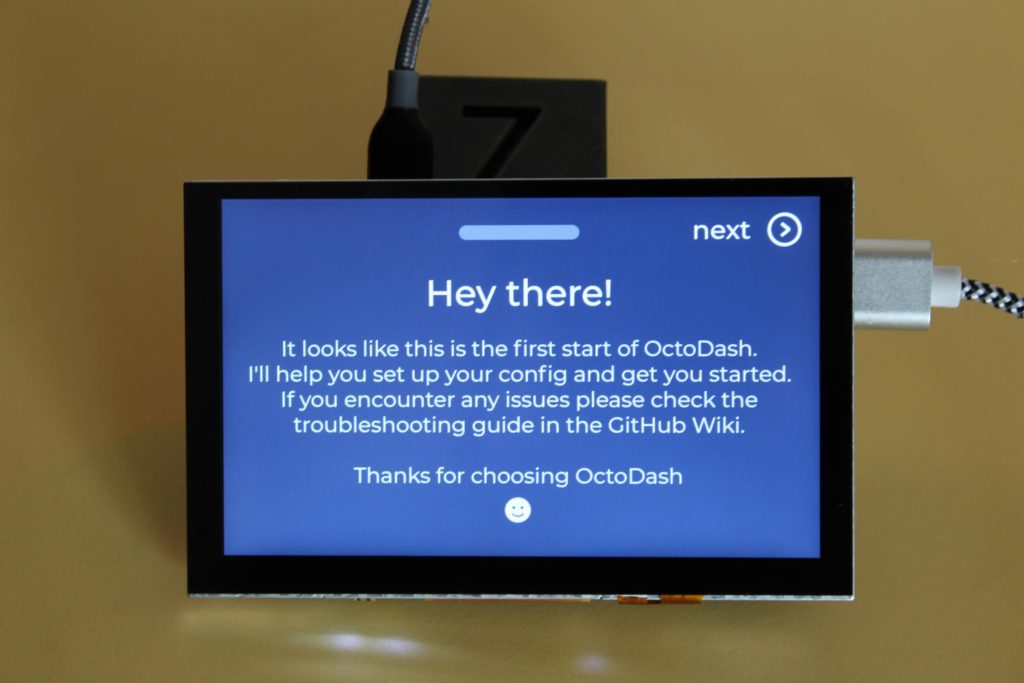
Go through the OctoDash Wizard
If you carefully followed the guide, then the OctoDash Wizard will come up on the touchscreen. You will be greeted by the following screen.
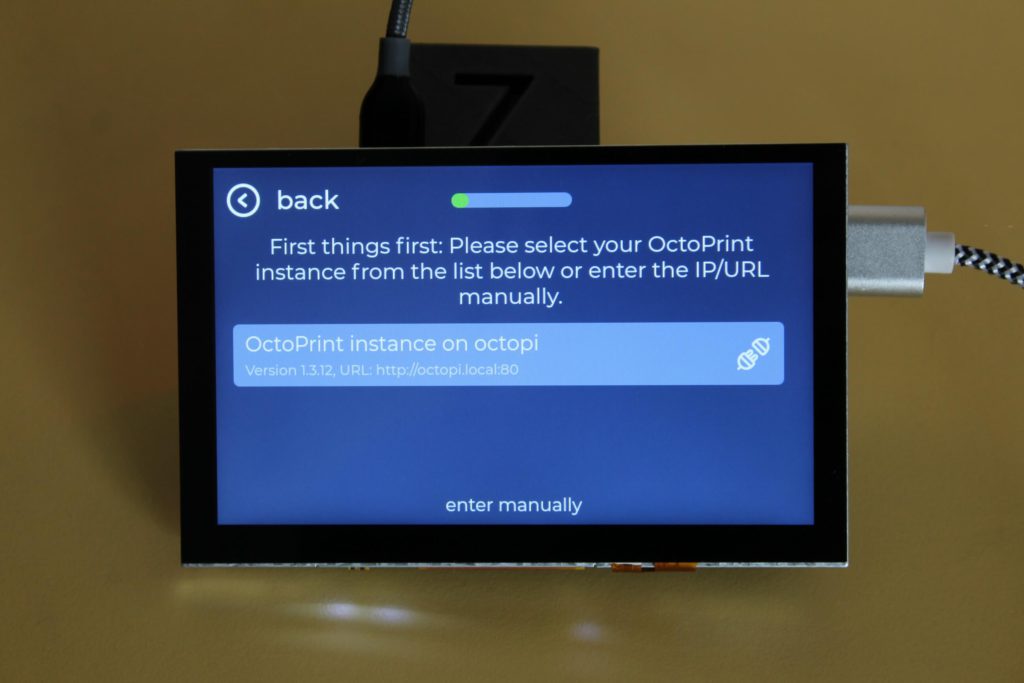
In the next screen, you need to select your OctoPrint instance
To connect OctoDash to OctoPrint, you need to enter the API Key. The easiest way is to login on the OctoPrint web interface and confirm the request from OctoDash.
After confirming the API request, you can configure the printer name, feed length and speed.
You can go use the default settings on the next screens.
That’s it! Now, OctoDash is running on your Raspberry Pi and you can start using it.
Wrapping Up
Hopefully, this guide helped you install Octodash on Raspberry Pi with BTT PITFT50. If you encounter any issues, leave a comment, or join the 3DPrintBeginner Discord server where you can get assistance.
If you want to find out more about OctoDash, feel free to join their Discord server where you can contact other OctoDash users.
Liked it?
|
|

