How to add 3D Touch (BLTouch clone) to the CR-10S PRO
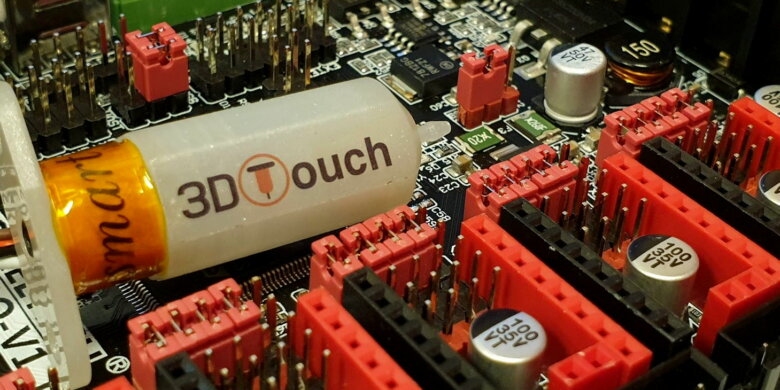
The Creality CR-10S PRO is a great printer but unfortunately, the capacitive sensor it ships with is not reliable and i decided to use a 3D Touch instead.
This is a BLTouch clone from Aliexpress that does the same thing as the original.If you have concerns regarding the accuracy, please watch this Youtube video from Chris Riley where he tests the precision of each sensor.
The 3D Touch did not work out of the box with the CR-10S PRO, so in the following article i will show you how to add a 3D Touch sensor to the CR-10S PRO
Wiring the 3D Touch
First thing you need to do is remove the original capacitive sensor, and install the 3D Touch. The wiring of the 3D Touch to the motherboard is shown in the picture below:
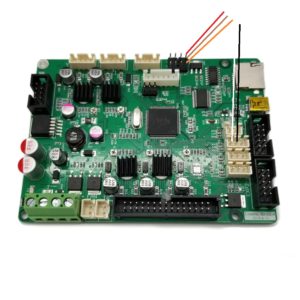
In my case, the original firmware from Creality did not work properly, so i installed the TinyMachines firmware.
Installing the TinyMachines firmware
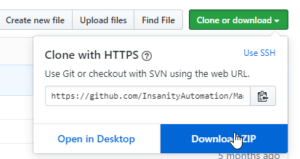
- Download the latest version of the TinyMachines firmware from Github by clicking on the Clone or download button
Download TinyMachines latest firmware - Download and install the latest version of the Arduino IDE
- Unzip the contents of the archive, and double-click the Marlin.ino from Marlin-Creality_DWINTest\Marlin\Marlin.ino
- Click on the Configuration.h tab, and locate the #define MachineCR10SPro line then activate it by commenting out the // like in the screenshot below:
Define Machine CR-10S PRO - Locate the #define ABL_TOUCH line, then activate it
Define ABL_TOUCH - Click on the Marlin_main.cpp tab and comment out the 2142 to 2146 lines like in the screenshot below
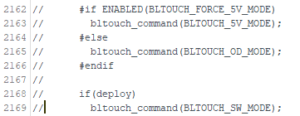
Comment out lines 2142 to 2146 - In the same tab, comment out the 2162 to 2169 lines like in the screenshot below
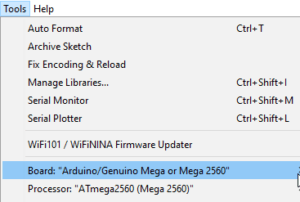
Comment out lines 2162 to 2169 - Connect your printer to the computer, click on the Tools menu and make sure the correct board is selected, like in the screenshot below:
Select the proper board in the tools menu - Click on the Arrow icon to start compiling the code and upload the firmware to the printer.
Installing the TinyMachines Screen firmware
To make sure everything works as intended, we also need to upgrade the screen to the same version of firmware.
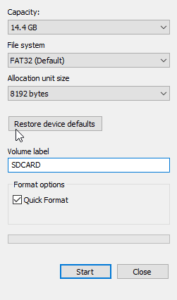
- Grab an Micro SD card, and format it to FAT32 with an allocation size of 4096 bytes.
Format SD Card - Copy the DWIN_SET folder from Marlin-Creality_DWINTest\10sPro_1.70_ScreenFiles to the SD Card
- Plug the SD Card into the LCD and turn on the printer.
- The firmware will start installing and after a few minutes, the message “Done!” will be shown. At that moment, the firmware upgrade is complete and after taking out the SD card, you can reboot the printer.
TeachingTech made a great YouTube video on how to upgrade the screen files on the CR-10S PRO, so make sure you check it out if you have any issues with this step.
After the firmware upgrades have been completed, it is a good idea to reset the printer settings. You can download and “print” this gcode file to reset your printer, or connect to the printer using a tool like Pronterface or Octoprint and run the following commands:
M502 – factory reset
M500 – save settings
M501 – restore settings
Original BLTouch vs 3D Touch
As you can probably see, the 3D Touch is a bit harder to install and configure, and if possible, you should always buy the Original BLTouch. This way, you are supporting the original developer of the technology (Paris Kyung-yeon Lee) and ANTCLABS. Besides that, you also get full support when installing and configuring the BLTouch on other printers. With 3D Touch you sometimes need to fiddle with it.
In my experience, my first 3D Touch was defective i needed to receive a replacement from the seller until i managed to use it. I don’t think this is the case with an original probe as rarely i’ve seen people have issues with the original.
It is also demonstrated by the YouTube video from Chris that the clones have a bit less precision, so if you want the upmost precision and support the Original BLTouch is the way to do it.
The Original BLTouch V3.0 can be purchased for around 35$ on AliExpress
Wrapping up
Now that you installed the sensor and the firmware, you are ready to use the printer. Home the printer and set the Z-offset correctly, then level the bed. You will notice much improved and consistent results compared to the original sensors.
If you have any issues with this process, please let me know and i will do my best to help you out.
Happy printing!
Liked it?
|
|

