3D Printer Heatbed Insulation: Is it worth it?
I am constantly talking about heatbed insulation in my reviews, and how a simple and cheap piece of insulating material can have a big impact on power consumption and bed temperature uniformity. I am also posting power draw measurements for the exact same reason.
In this article, I will do a practical test where I test the differences between the heated bed from the Voron Trident 350 with and without insulation. This should give you a better understanding of how this insulation material impacts the way your printer works.
Test Printer and Testing Methodology
For this test, I used the FYSETC Voron Trident 350 printer I recently reviewed. I think this is a good candidate for the test because it has a large print surface, it also has a thick magnetic sticker applied with a PEI flex plate and the thick aluminum bed has some thermal mass.
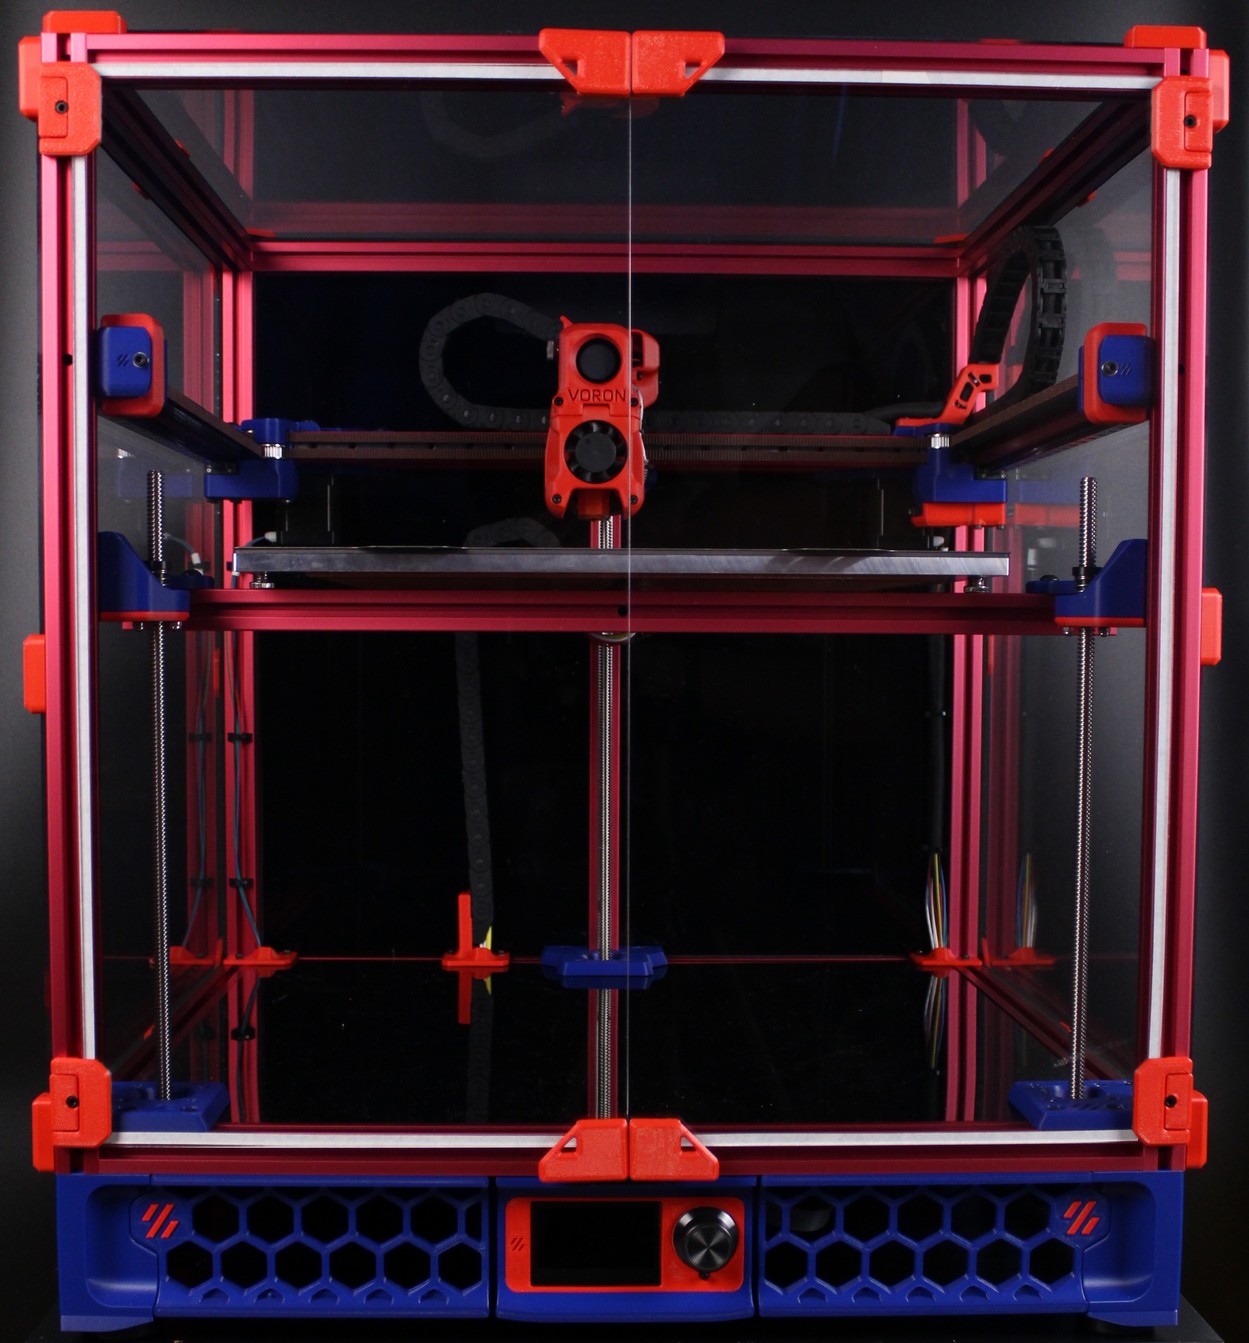
The thermal measurements were made with the FLIR Camera installed on the CAT S62 Pro and for measuring the temperature inside the chamber, I used a simple thermal probe that came with my multimeter.
The probe was located just over the top of the Afterburner extruder with direct visibility to the bed. Also note that my Voron Trident 350 is not completely enclosed. I didn’t print the air filter duct which sits at the top of the machine.
To measure the power consumption, I used a Blitzwolf smart power socket which indicates the power draw in real-time and also measures the power draw for a single day.
All the measurements were done at a 22C environment temperature.
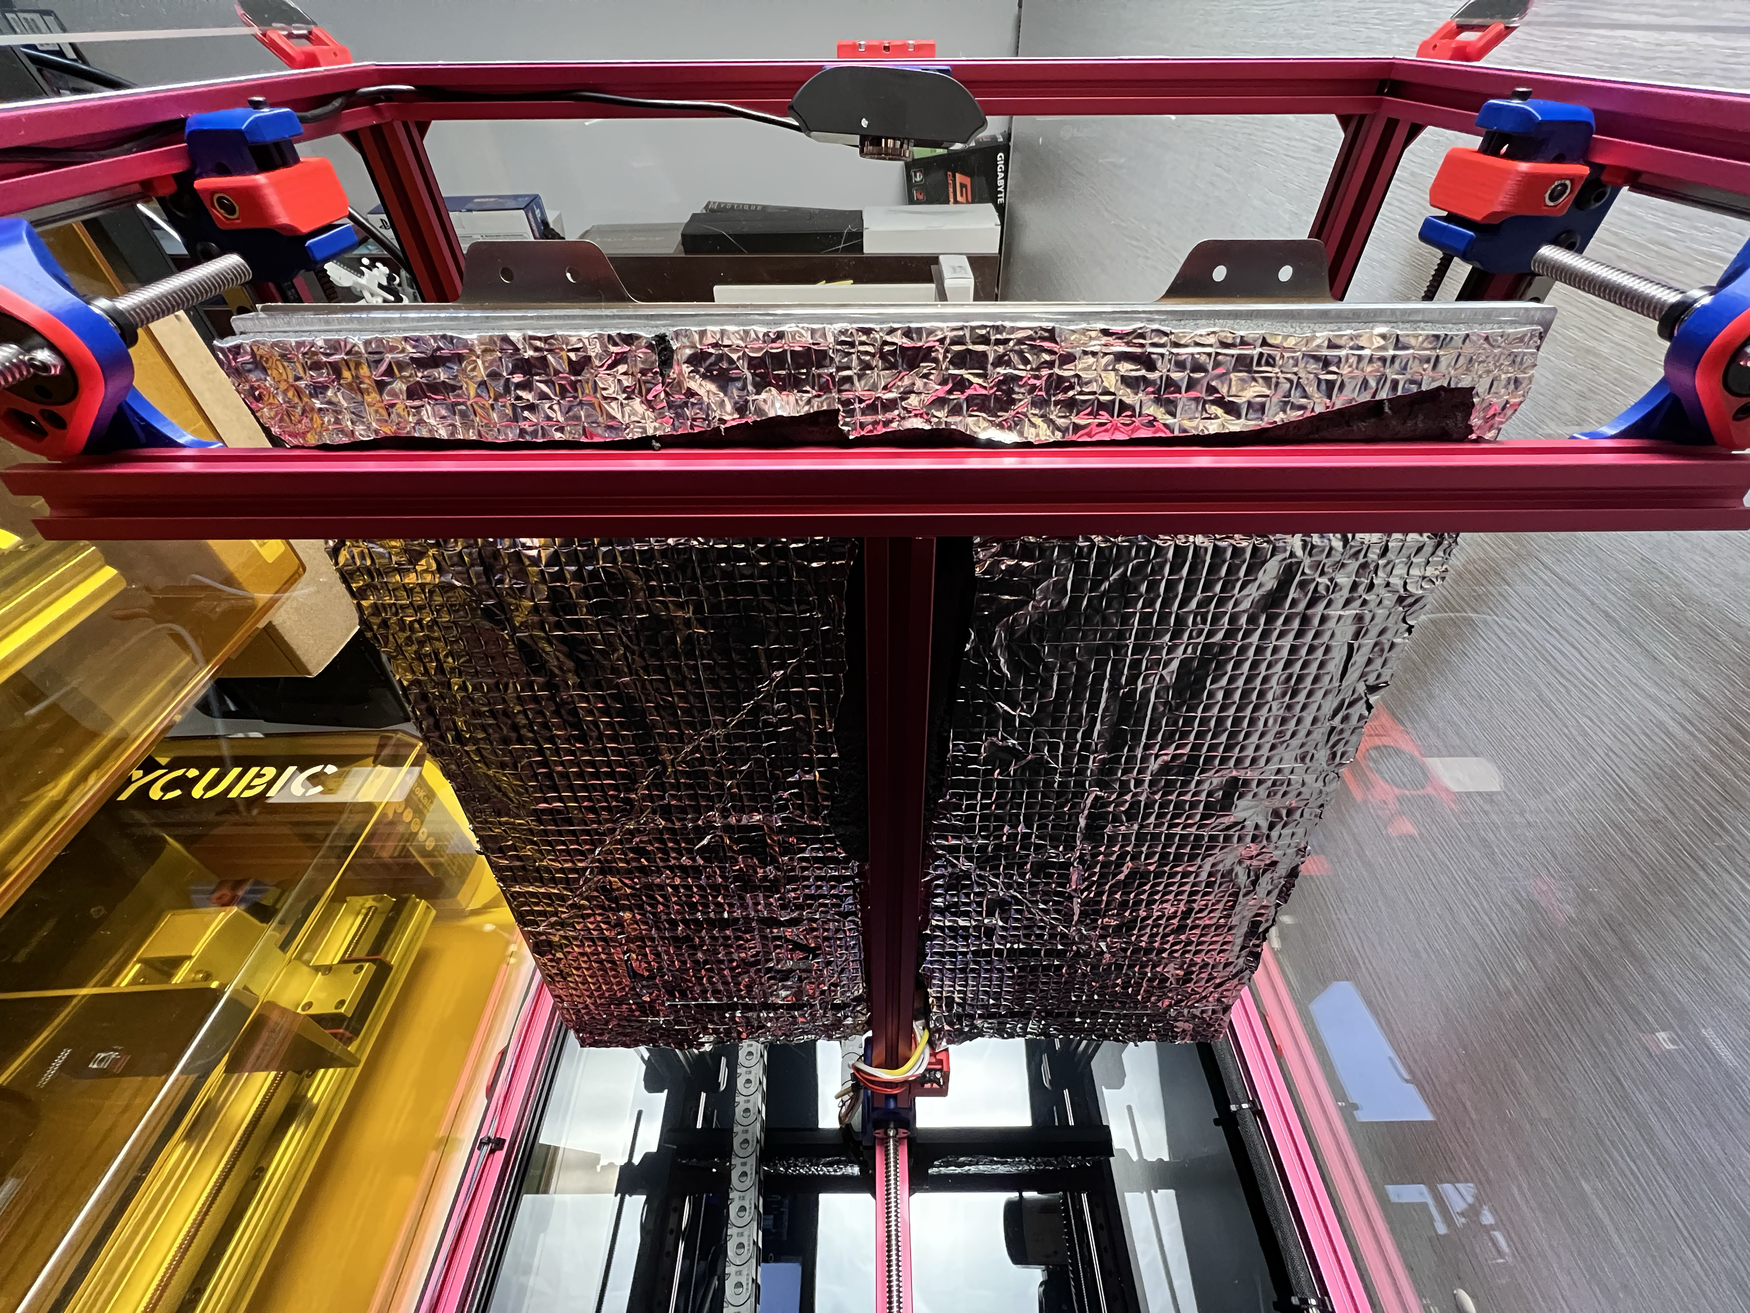
I used this 400x400mm heatbed insulation material which I cut to size, and partially sculpted so it fits around the aluminum extrusions for the bed. Not my best work, but it’s good enough.
Print Surface Temperature without insulation
60% power
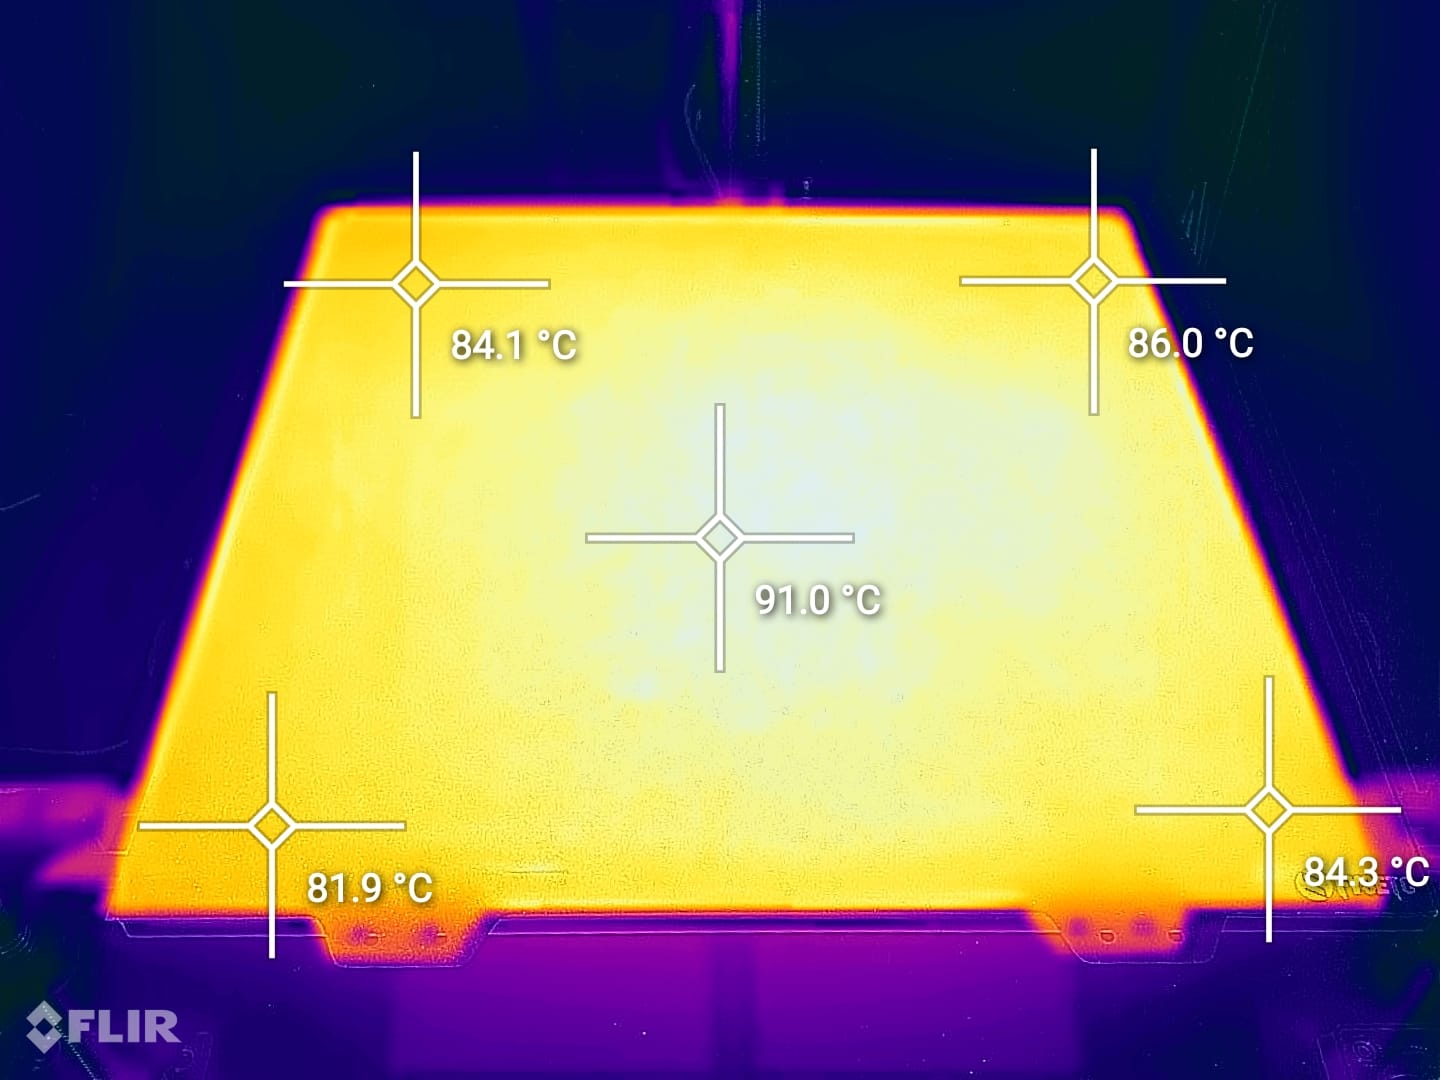
Heating the bed to 100C takes 12 minutes with 414W of power drawn from the wall. The surface of the bed only reaches 84C at the highest point even though the thermistor reports 100C and the heat distribution is not good with temperature differences up to 12C.
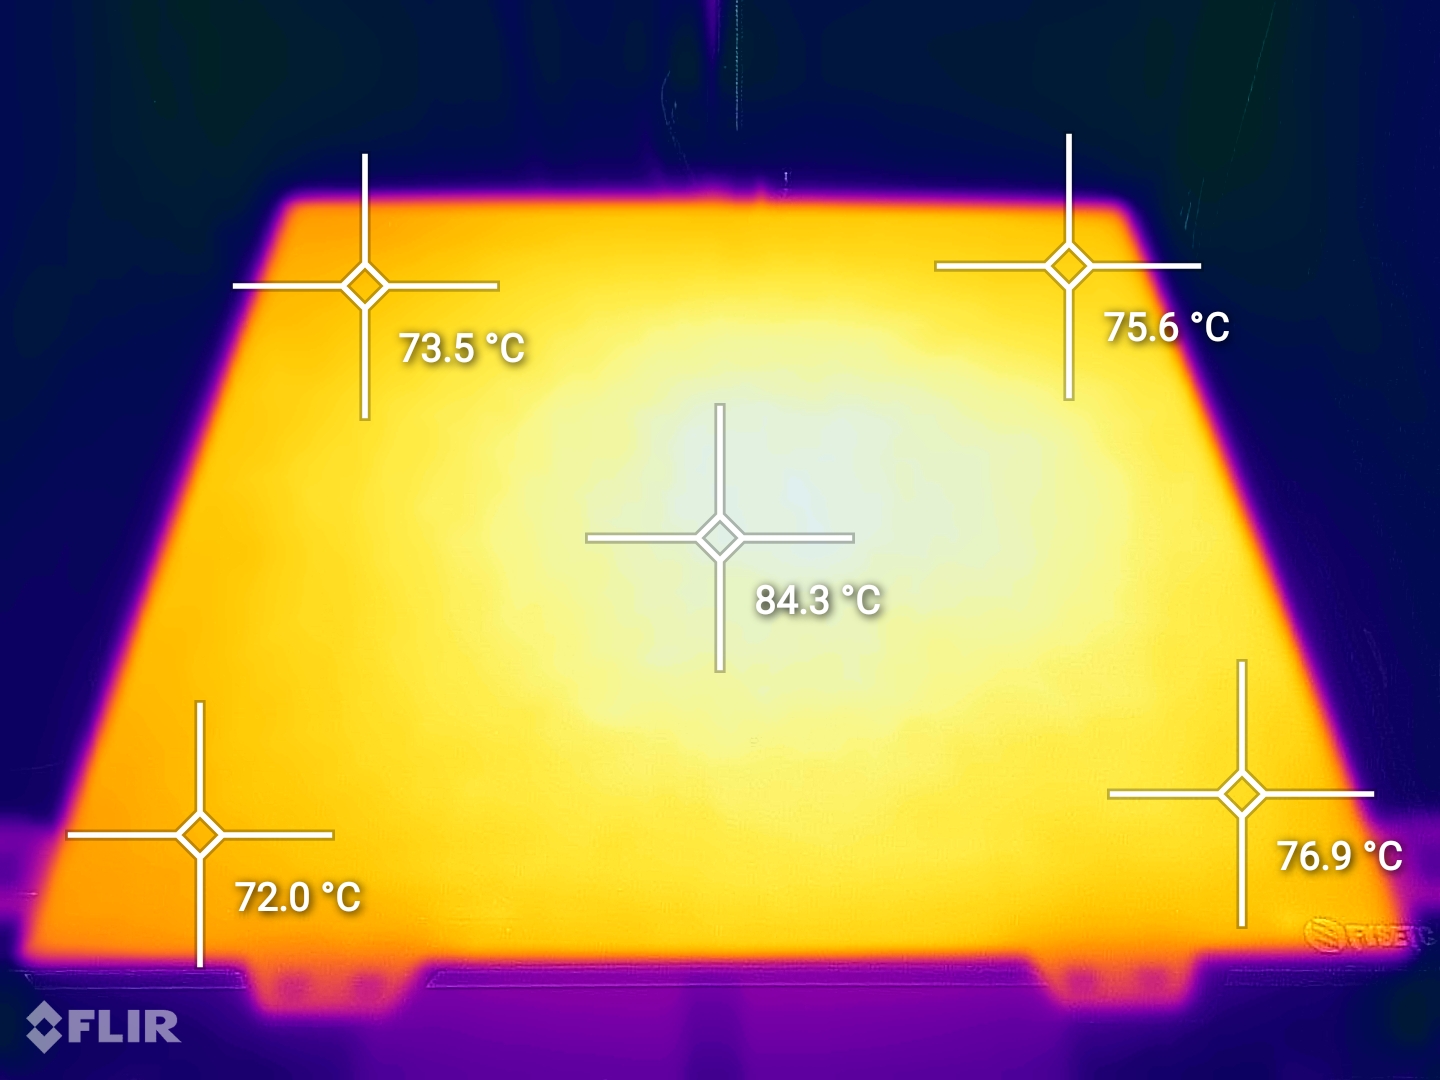
After 30 minutes, the print surface reaches 91C which is still 9 degrees lower compared to the set temperature. You can also see that the temperature distribution across the print bed is not as expected, even after waiting for 30 minutes.
100% power
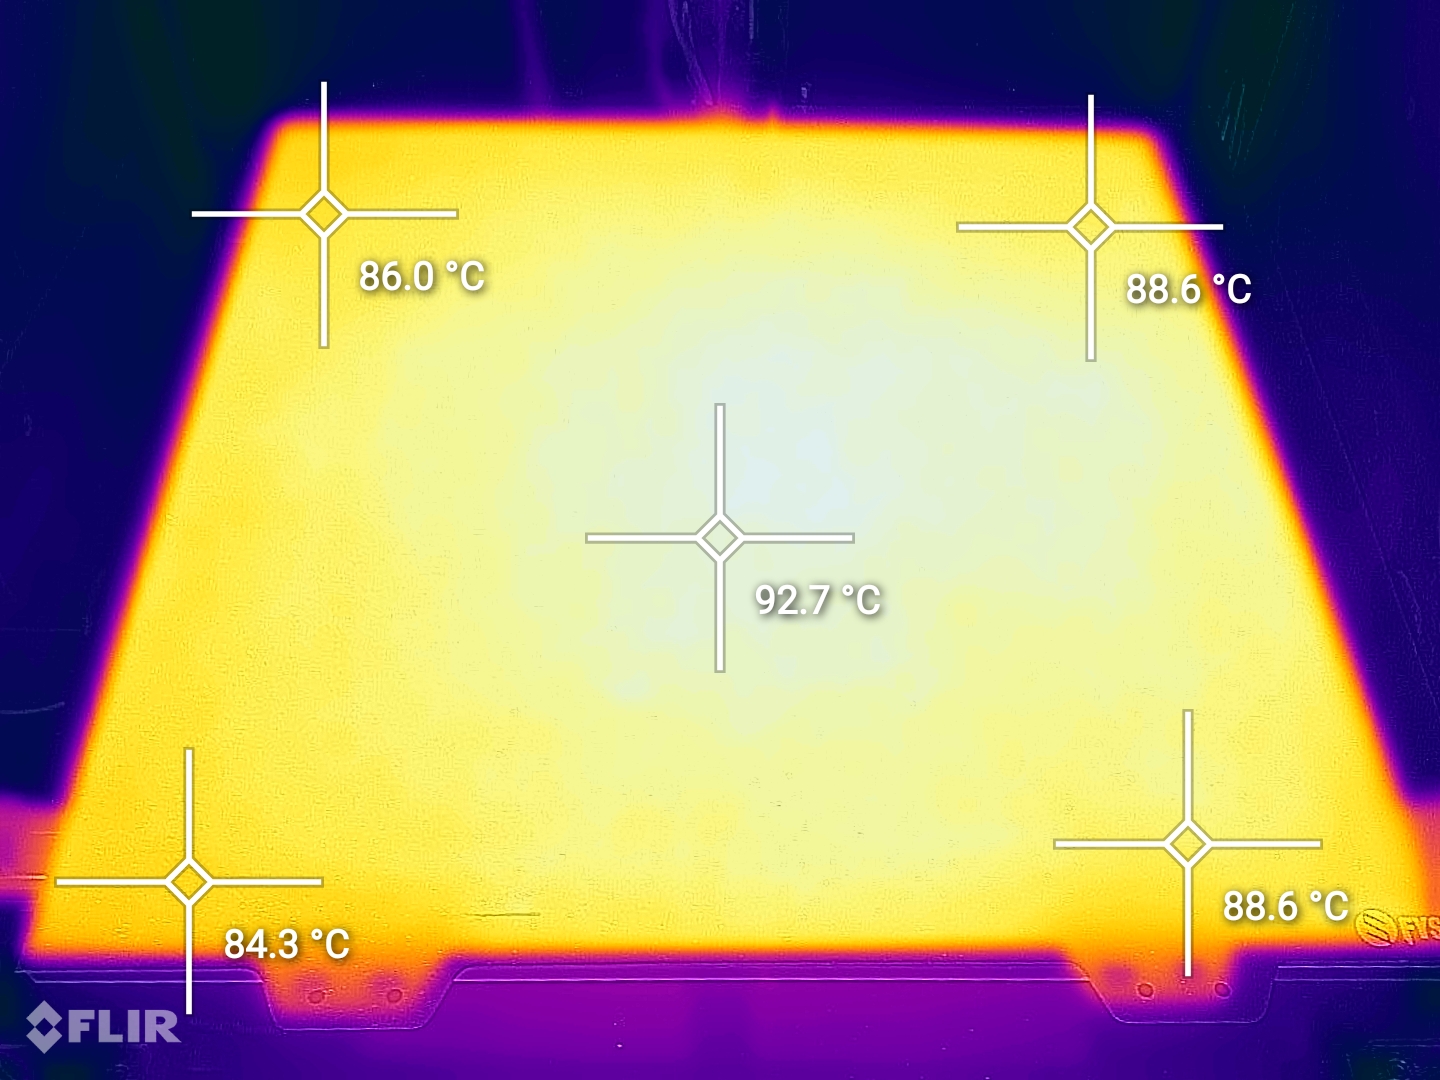
Heating the bed to 100C takes 3 minutes and 15 seconds while drawing 630W of power from the wall. The surface of the bed only reaches 71C at the highest point even though the thermistor reports 100C and the heat distribution is not good with temperature differences of about 16C.
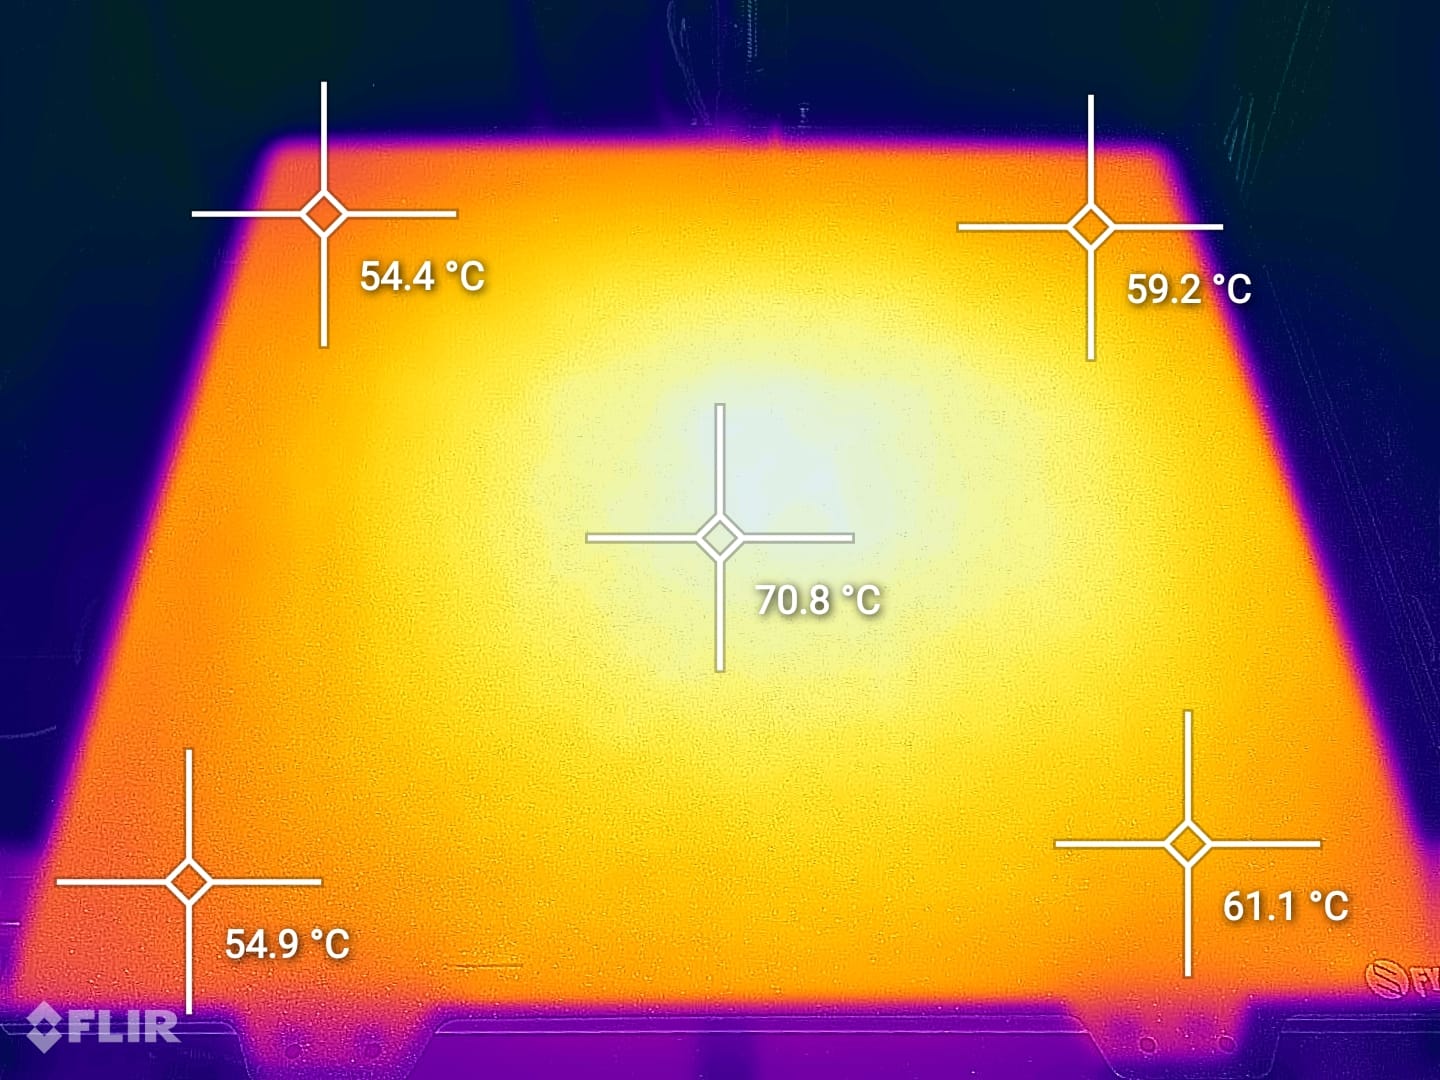
After 30 minutes, the print surface reaches 93C which is 7 degrees lower compared to the set temperature. You can also see that the temperature distribution across the print bed is not as expected, even after waiting for 30 minutes, but pretty close to ideal.
Print Surface Temperature with insulation
60% power
After insulating the bed, I set the power to 60% and started the heating test again.
Heating the bed to 100C takes 9 minutes and 20 seconds with 435W of power drawn from the wall. The surface of the bed only reaches 82C at the highest point even though the thermistor reports 100C and the heat distribution is not good with temperature differences up to 12C.
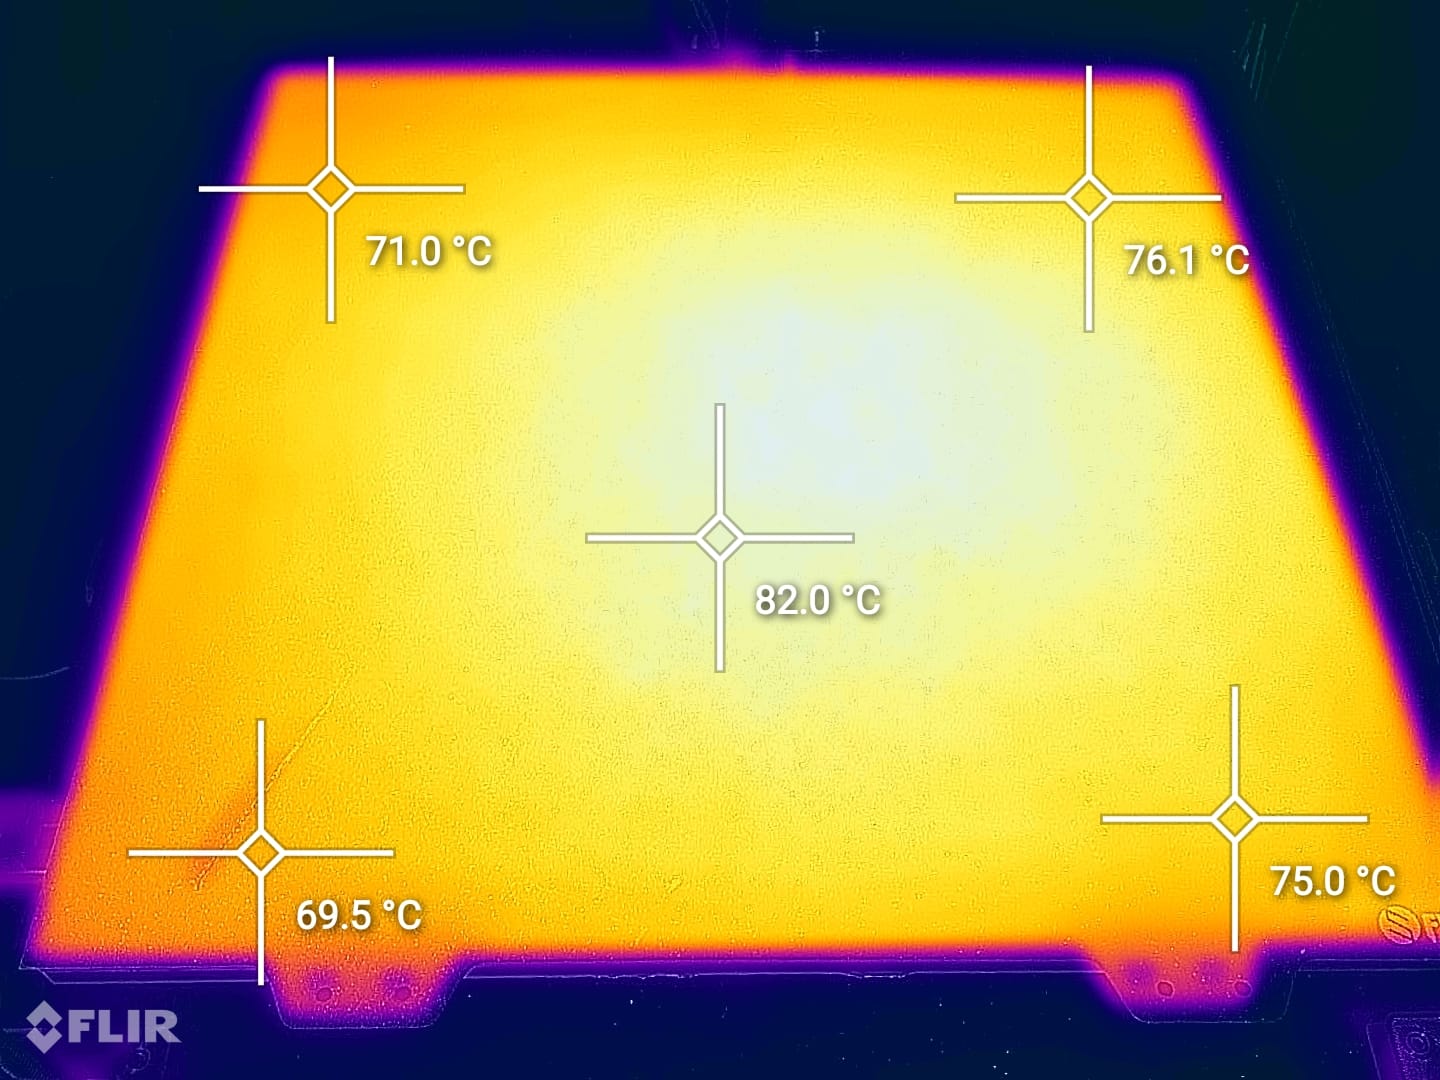
After 30 minutes, the print surface reaches 91C which is 9 degrees lower compared to the set temperature. You can also see that the temperature distribution across the print bed is not as expected, even after waiting for 30 minutes.
100% power
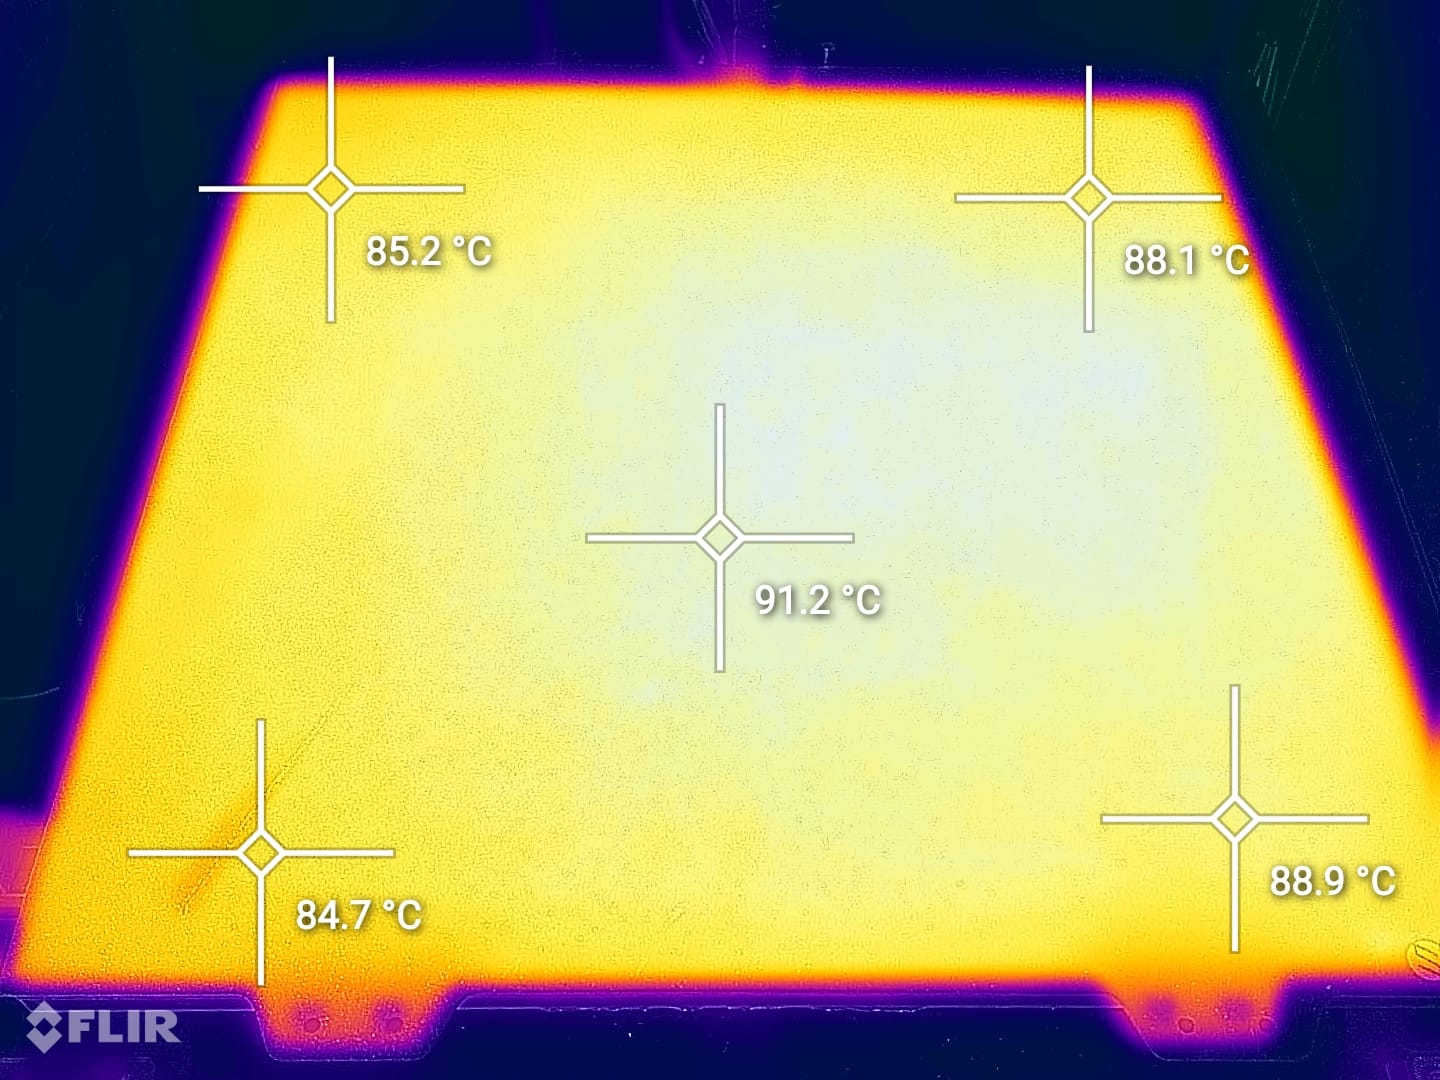
Heating the bed to 100C takes 4 minutes and 45 seconds with 630W of power drawn from the wall. The surface of the bed only reaches 73C at the highest point even though the thermistor reports 100C and the heat distribution is not good with temperature differences up to 17C.
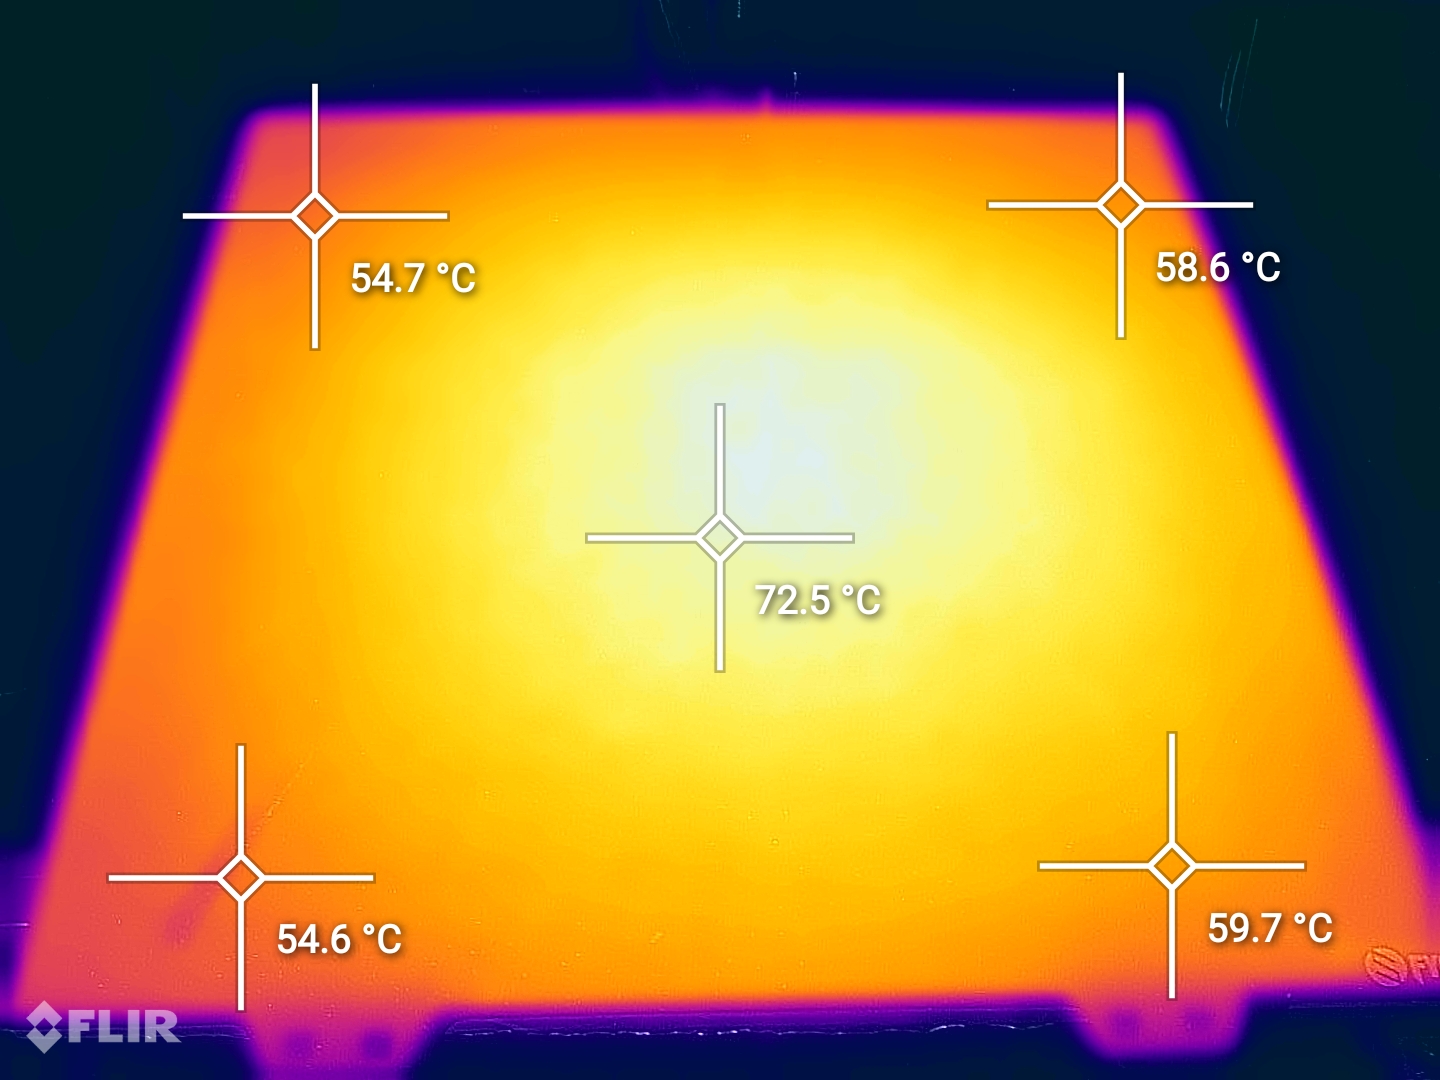
After 30 minutes, the print surface reaches 91C which is 9 degrees lower compared to the set temperature. You can also see that the temperature distribution across the print bed is not as expected, even after waiting for 30 minutes.
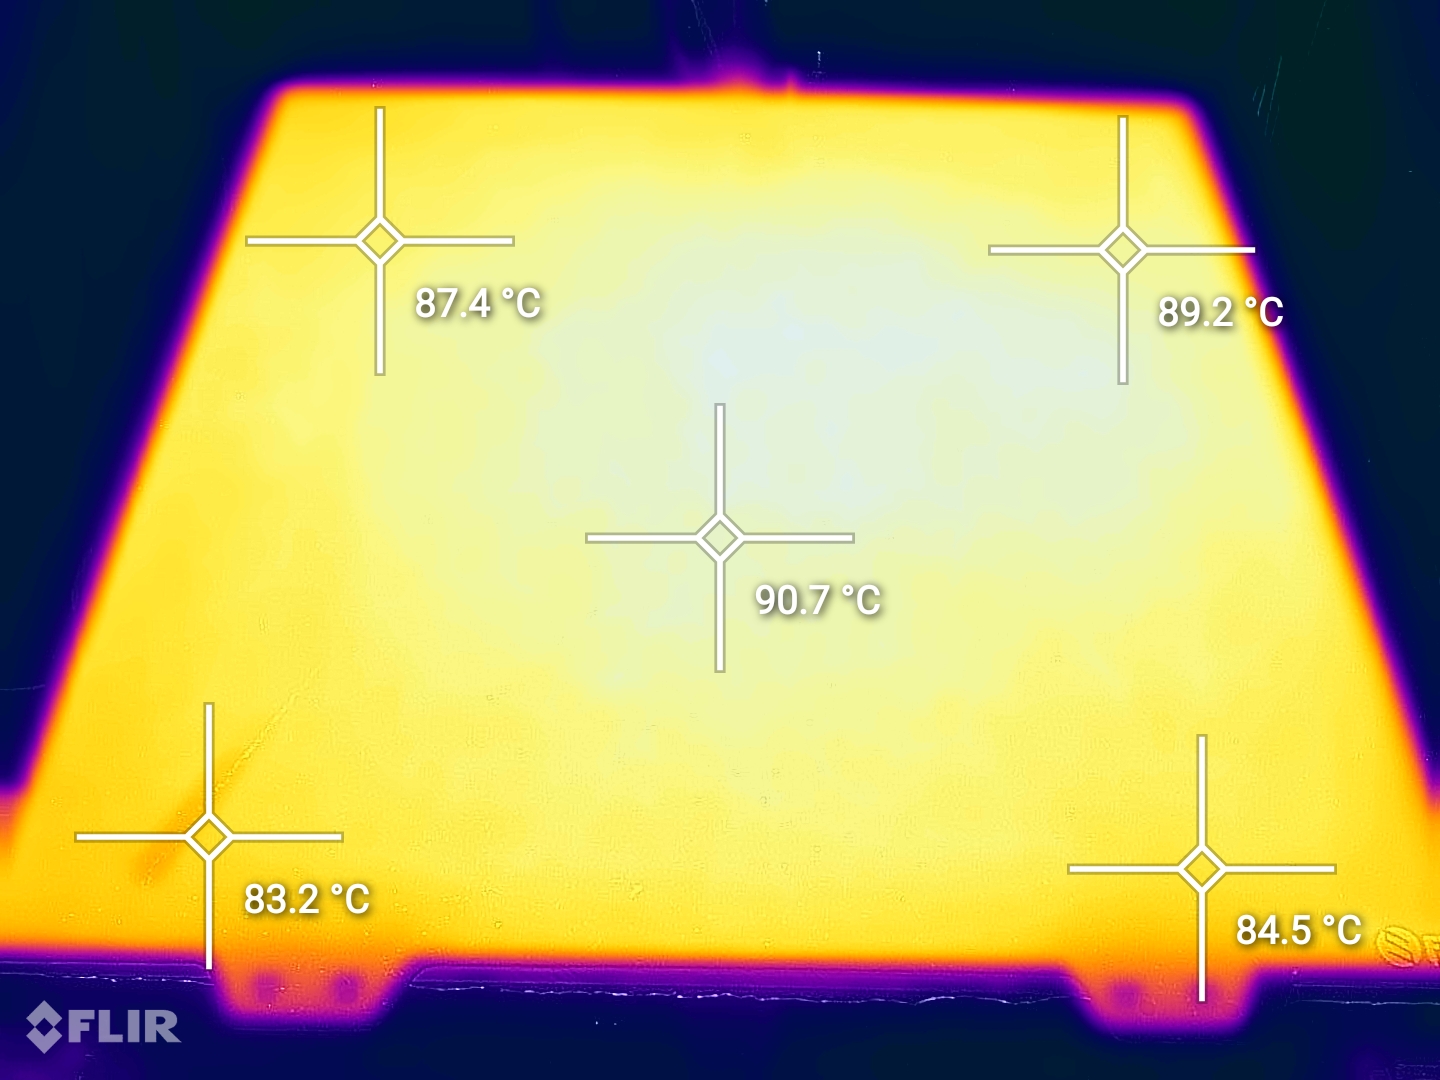
Power Consumption after 1 hour ABS print
To get an accurate reading of the power draw during operation, I sliced a 200% calibration cube with settings that take 1 hour, which was printed in ABS with 250C for the hotend and 100C for the heatbed. The same G-Code was used for both tests.
Without insulation
Before the bed was insulated, the power draw ranges from 210W to 275W. After a 1 hour print, the printer used 0.24 KWh. This means that a 24-hour print will use about 5.76 KWh.
With insulation
After the bed has been insulated, the power draw during printing ranges from 161W to 280W. After 1 hour of printing, the printer used 0.15 KWh. This means that a 24-hour print will use about 3.6 KWh.
Changes in the Bed Mesh Variance
Without insulation
Before installing the bed insulation material, the Bed Mesh Variance was at 0.288mm.

With insulation
After installing the bed insulation material, the Bed Mesh Variance was at 0.330mm.

As you can see, there is a change in the bed mesh, but for me it is insignificant and it’s easy to compensate for that during printing. We also need to remember that we are dealing with a 3D printer, not with a super high-precision machine.
Enclosure temperature
Without insulation
The enclosure temperature after the 30 minutes heating time reached 45C.
With insulation
The enclosure temperature after the 30 minutes heating time reached 48C.
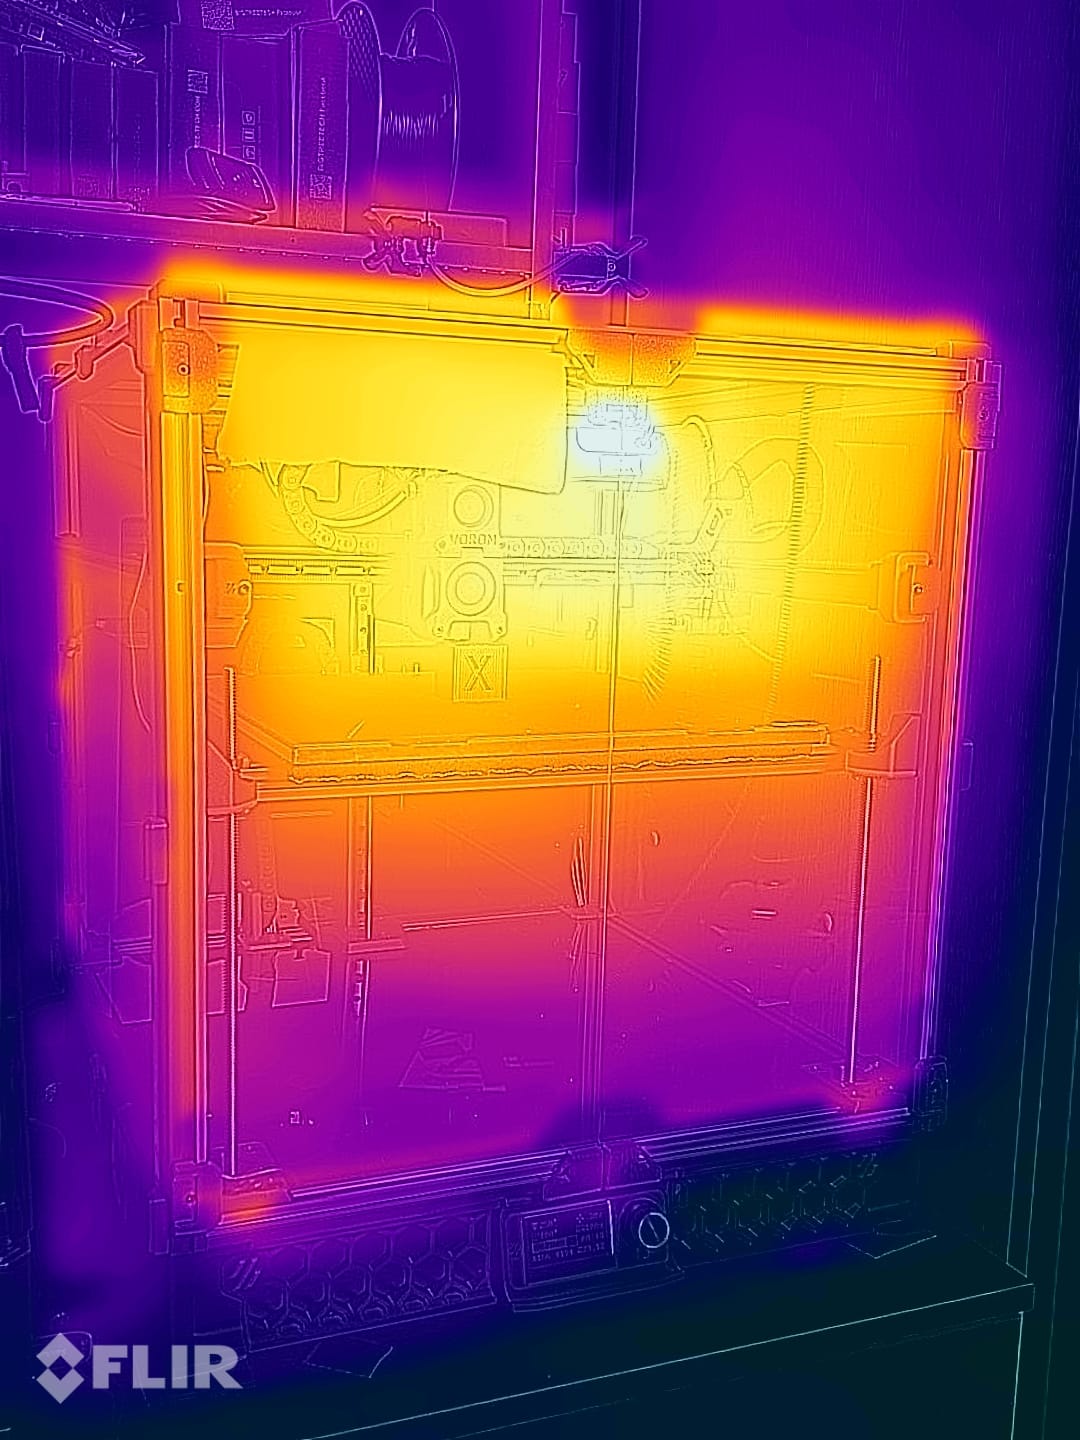
As a bonus shot, I also took a picture during the 1 hour ABS print to showcase how the hot air rises and is trapped in the printing area. So there is no reason to be concerned about the temperature inside the printer, for the Voron Trident.
This might be an issue for a Voron 2.4 which has the bed fixed on the bottom of the enclosure where the air will be cooler. The enclosure temperature will also be different according to the fan speed set on the exhaust.
Conclusions
After doing these tests, I’ve reached the following conclusions:
- For this specific case, the Voron Trident 350 only benefits from having a bed insulation material installed when it comes to power efficiency. Other printers with thinner heated beds benefit more from this.
- The temperature on the print surface is mostly the same, with or without the bed insulation material, and should be compensated by adjusting the slicer settings. Of course, this applies if you have a magnetic sticker applied to the aluminum bed. If you have magnets embedded, then this is probably not needed.
- Enclosure temperature does not change significantly and you can get 45-50C when printing ABS without any issues. Higher temperatures could be reached if more insulation is applied for the sides of the printer, but I don’t think that’s needed, especially for ABS.
- Bed Mesh Variance changes a bit after installing the bed insulation material, but the change is not significant in my opinion and the printer can compensate for that. This might be different for other people depending on the quality of their aluminum bed.
- Using 100% power doesn’t actually help because the aluminum bed cannot absorb the heat efficiently. The heater will reach the set temperature and will stop heating even though the aluminum bed didn’t reach it, making the heating process take longer. It usually takes about 10 minutes for the aluminum bed to reach a temperature close to the one set in the printer settings.
In my opinion, installing a bed insulation material is well worth the effort for any kind of printer. The power draw will be lower saving you money over time which would be otherwise spent on paying for electricity.
But what do you think? Feel free to join the discussion about this topic on the 3DPrintBeginner Forum.
Liked it?
|
|





You can leave a comment for this article on the 3DPrintBeginner Forum