Artillery Genius Review – Is it any good?
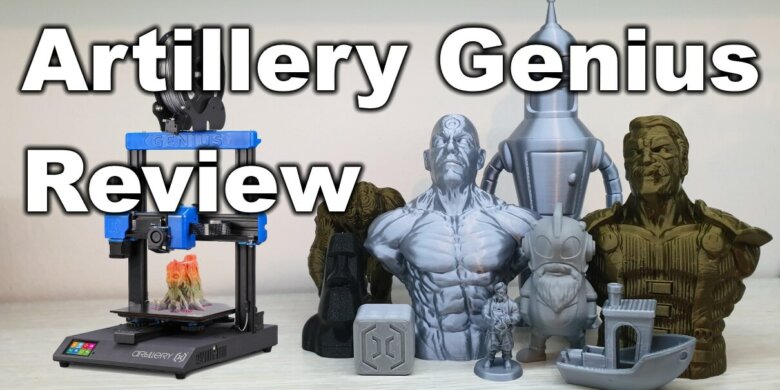
If you are active in the 3D printing community, you probably heard about Artillery. It’s a company that produces quality 3D printers for an affordable price.
I previously reviewed the Artillery Sidewinder X1 3D printer, and i loved it. In this article i will review the little brother in the Artillery family. In this article we will see if the Artillery Genius 3D printer can deliver the same quality prints as it’s bigger sibling.
Artillery Genius Packaging
The Artillery Genius keeps the same great packaging we got with the X1. It comes in a big box with generous amounts of foam protecting the printer.
Assembly and contents
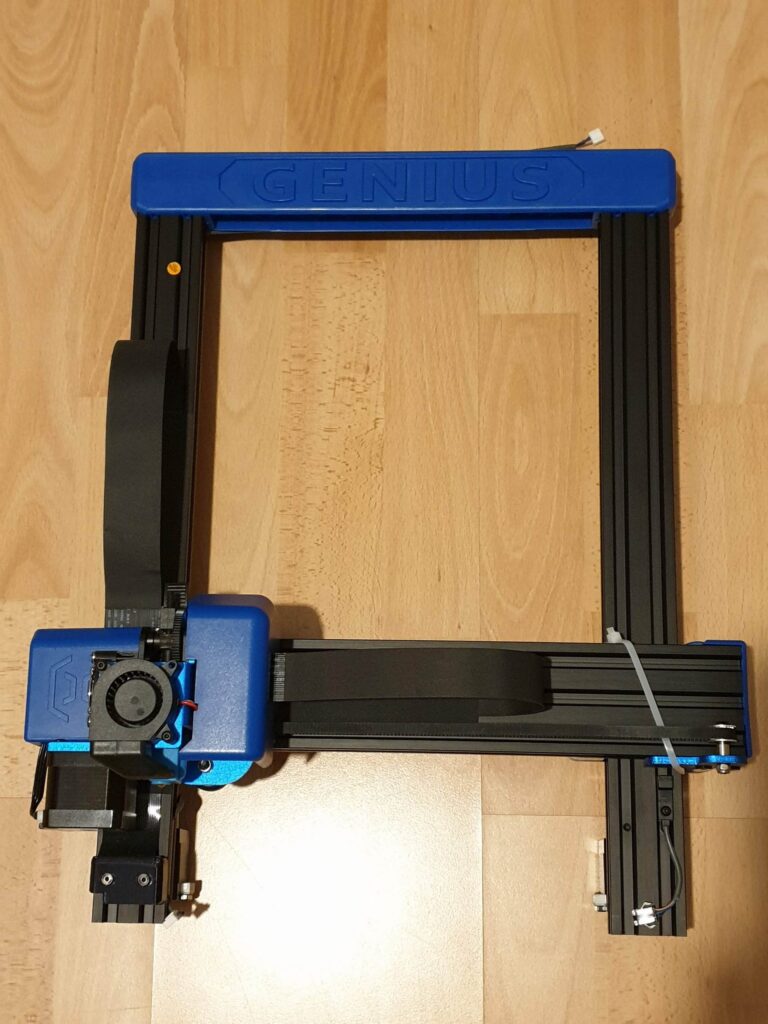
The Artillery Genius is partially assembled and the final assembly takes less than 10 minutes. After installing the 4 bottom screws connecting the gantry to the printer base, the printer is almost ready. Checking the belt tension and the X carriage wheels is a must. Read the Artillery Sidewinder X1 calibration guide which can be applied to the Genius. Perform the mechanical checks to make sure everything is tight, before your first print.
Plastic top gantry and Z coupler mounts
I was concerned with the plastic parts used in the Artillery Genius. After assembling the printer I found out that this is not an issue. The plastic parts are sturdy enough and i did not have any issues with it during usage.
Improved connector
While the Artillery Sidewinder X1 uses a flat cable for connecting the electronics, it’s nice to see that on the Genius they changed the connector. The Artillery Genius uses a PCI-E like connector like the ones used with computer motherboards. This connector should be a lot better and provide less issues in the long run. It also minimizes the risk of damaging the connector in the assembly process.
Silicon sock and BLTouch connector
The extruder is a Titan Aero clone with a Volcano hotend, just like on the Sidewinder X1. This time, the hotend comes with a blue silicon sock which will insulate it better and help maintain a constant temperature without fluctuations.
There’s also a BLTouch connector if you want to add auto-leveling capabilities to the Artillery Genius. Considering that the heatbed is 220mm x 220mm in size, a BLTouch is not really needed. I manually leveled the bed when I first assembled the printer, and the first layer was consistent for the rest of my prints. Chances of receiving a bowed heatbed is low (compared to the Sidewinder X1).
Nozzle quality is bad
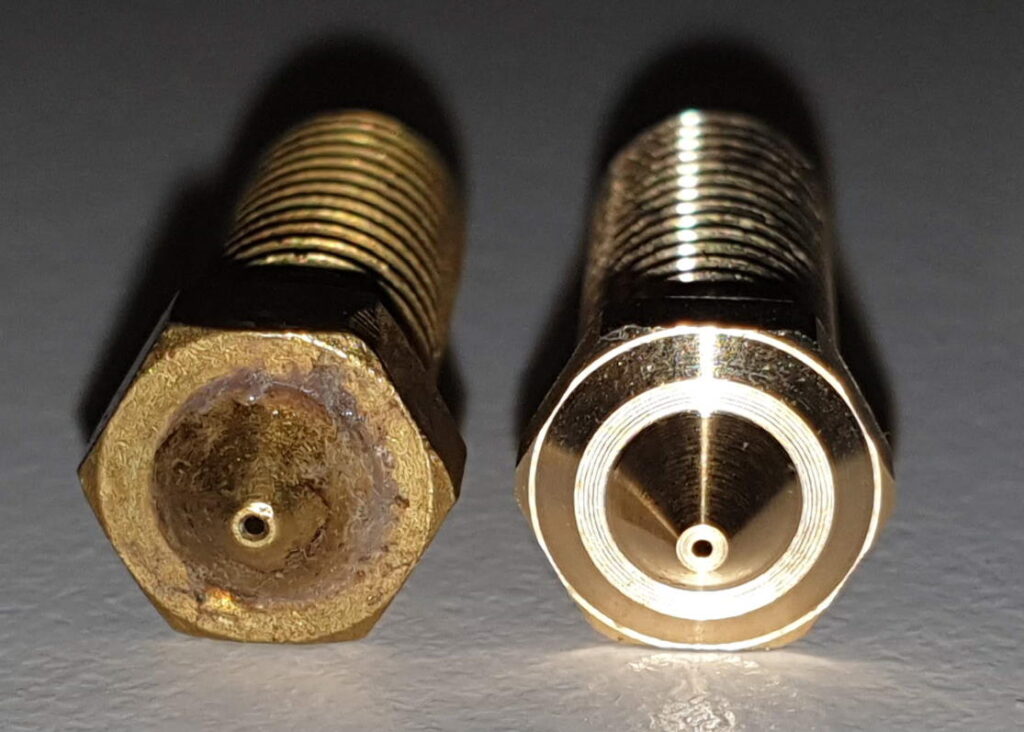
Unfortunately, the nozzle isn’t the best. I managed to print with it without any issues, but i recommend buying a better Volcano nozzle like the NF-V6 Sharp Volcano from Mellow or the brass nozzle from Trianglelab . The nozzle hole is more accurately cut and this can bring an improvement in your prints. You can clearly see in the photo attached the difference in the machining. On the left, the stock nozzle. On the right, the NF-V6 Sharp nozzle from Mellow
Of course, the original nozzle is not brand new, but this is how it looks after just 24 hours of printing.
For a bit more money you can also get the T- Volcano Plated Copper Nozzle from Trianglelab, which has better thermal conductivity and a non-stick coating.
If you need nozzles faster, then you can order the Micro Swiss plated nozzle or an E3D Volcano brass nozzle.
The Nozzle-X from E3D is one of the best nozzles you can buy currently, if you don’t mind spending a bit more money.
Under the hood
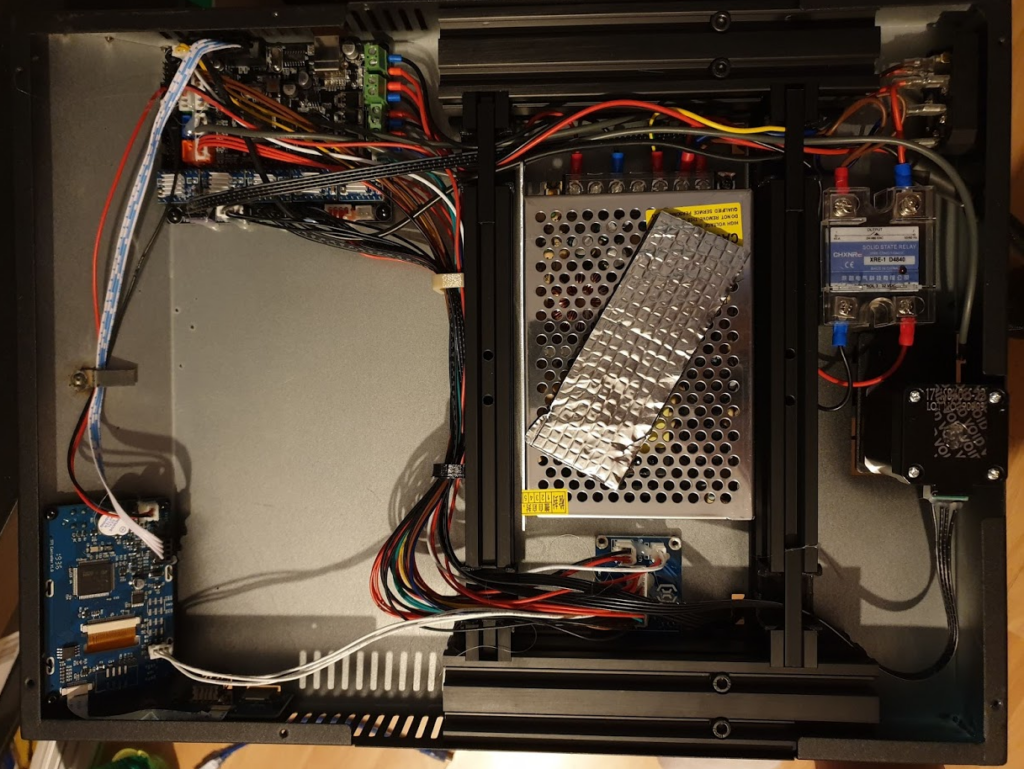
The Artillery Genius uses the same components just like it’s bigger brother, the X1. The only difference is that everything is packed in a smaller space.
I like that they use a big 24V 80mm fan that keeps everything cool. It pulls hot air from the inside of the printer, and cool air gets in trough the cutouts close to the board.
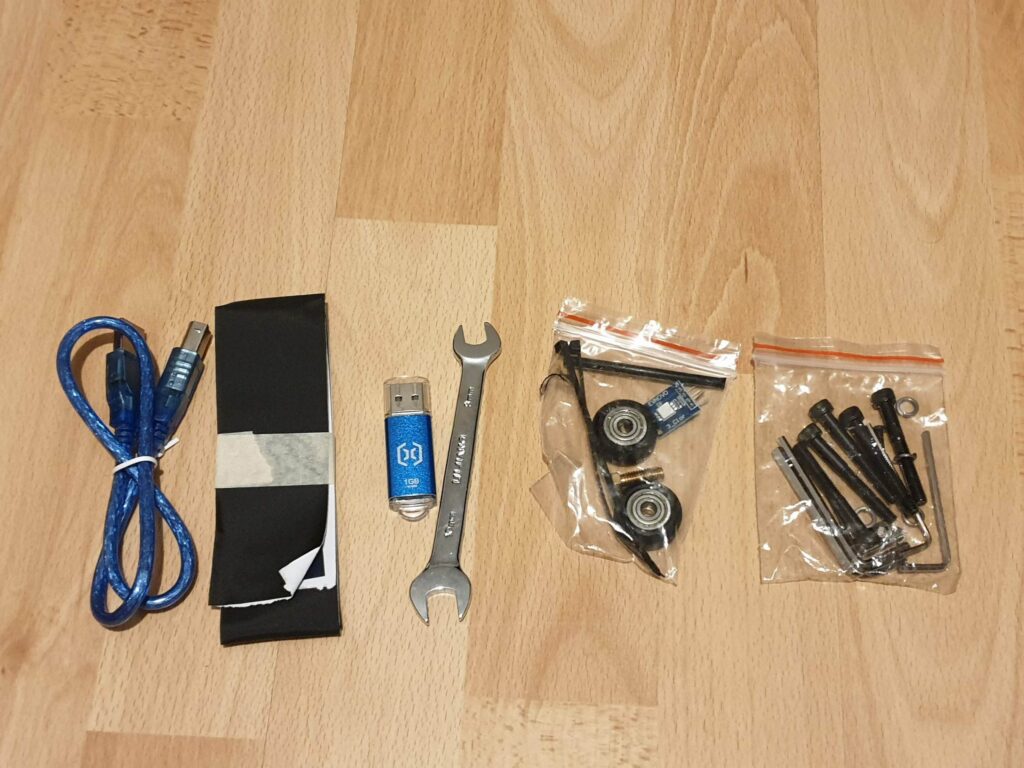
Artillery also includes the same pack of spare parts found with the Sidewinder X1, which is nice to see. In case of any fault you can get up and running quickly.
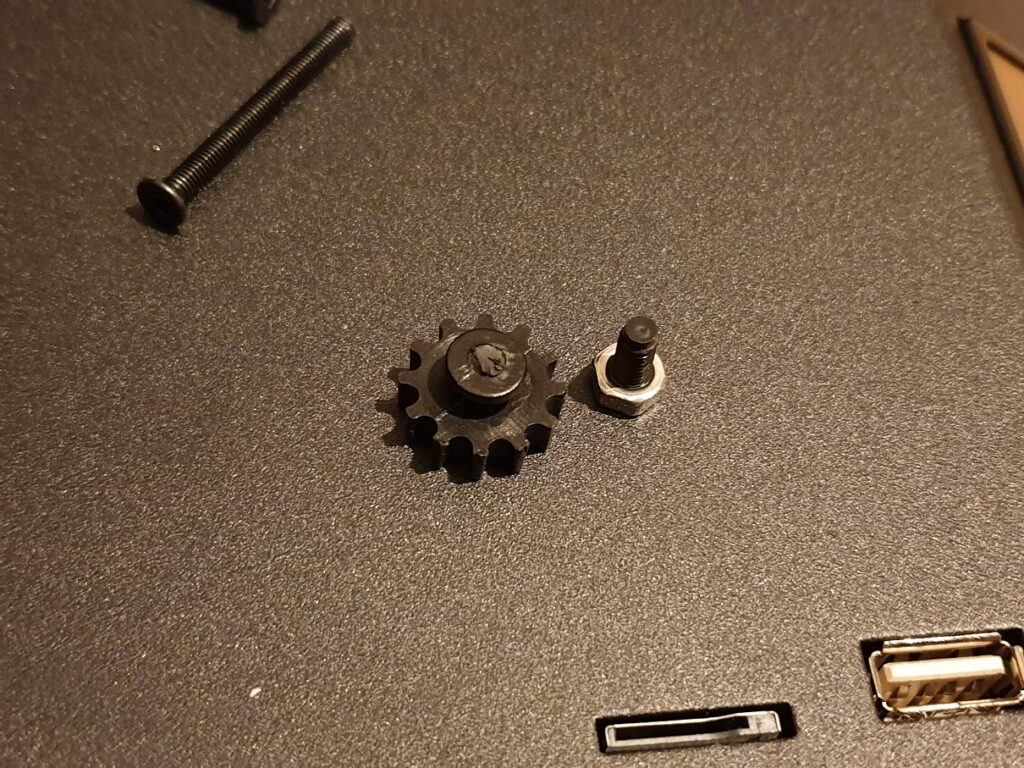
I wish they also included a thumb-screw for the extruder. In my case, it was over-tightened, and when i tried to turn it and make it looser, the plastic part broke. Fortunately, i had a spare thumb-screw and managed to replace it quickly. Hopefully, Artillery will include better parts in the future with the extruder assembly. The plastic used currently is somewhat brittle and can lead to issues.
Besides the thumb-screw issue, i also encountered problems with the touchscreen. After a few prints, the printer refused to detect an SD Card or USB stick. I contacted support and after a few emails they concluded that the screen is broken, and they issued a replacement which is shipped and i am waiting for it to arrive. I am not happy with this, but i am glad Artillery is handling support properly and helps users with this kind of issues.
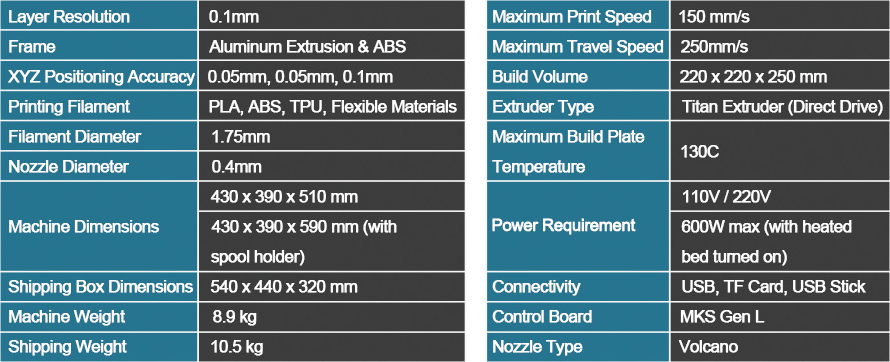
Artillery Genius Specs
Test Prints on the Artillery Genius
Bender from Futurama
The first print is Bender from Futurama by Rober Rollin printed in Gembird Silver Silk PLA, with 0.15mm layer height, 55mm/s, 0.5-line width and 190C.
When starting the print, I was thinking that i may have some issues with stringing, but this was not the case.
Printed in about 10 hours.
Dr. Manhattan
Second print is Dr Manhattan by Rober Rollin printed in Gembird Silver Silk PLA, with 0.15mm layer height, 55mm/s, 0.5-line width and 190C.
I am really happy with how this bust turned out, and i can’t see any issues with it. Layer lines are good and the end result is great!
Print time was around 7 hours.
The Comediant
Next print is The Comediant by Rober Rollin printed in Sakata 3D Ingeo 3D850 PLA, with 0.12mm layer height, 55mm/s, 0.5-line width and 190C.
Apart from a few stringing issues that can be corrected by lowering the temperature to around 185C, the print came out beautifully. Tuning the coasting feature should further improve the end results.
Print time was around 8 hours.
Brain Golem
Brain Golem from EC3D Design was printed in Sakata 3D Ingeo 3D850 PLA, with 0.1mm layer height, 40mm/s, 0.5-line width and 190C.
Impressive results, and nothing to complain about the print quality of the Artillery Genius.
Barkeep
The smallest test print is the Barkeep by Vae Victis miniature printed in Gembird Silver Silk PLA, with 0.1mm layer height, 35mm/s, 0.5-line width and 180C.
I really like how this miniature turned out. With a bit of tuning, the Artillery Genius is a good printer for miniatures.
Tweaking the profile further should further improve the end result.
Print time was around 1h 20 minutes.
Captain Jean-Luc Picard
Captain Jean-Luc Picard by Eastman printed on the Artillery Genius in Eryone Silver Glossy PLA
80% size, 0.1-layer height, 50mm/s, 195c, in around 24 hours. The STL can be obtained by subscribing to Eastman’s Patreon. It’s totally worth it!
Donkey Kong
Printed Donkey Kong in Silk Red Copper filament from Sunlu on the Artillery Genius.
0.16-layer height, 50mm/s and 13 hours of printing. Stock printer with custom firmware and a better-quality nozzle.
Banzai Bill
Banzai Bill was pritned at 70mm/s, 0.15-layer height
Recommended upgrades for the Artillery Genius
I previously mentioned that it is really important to upgrade the stock nozzle and buy a quality alternative, because this can significantly improve your prints. But if you are looking for printable upgrades, the only thing i recommend is an improved fan duct.
The Artillery Sidewinder X1 Fan shroud with dual vents from Thingiverse is compatible with the Artillery Genius, and can be easily printed and installed. Just make sure you are printing it in PETG or ABS to minimize issues.
By cooling the print from both sides, you will have better overhangs and a nicer finish overall.
Conclusions
The Artillery Genius is a really good printer for the money. It can be ordered from:
AliExpress
Banggood
Amazon
3D Jake
I recommend checking out the Discount Codes page before purchasing. I regularly update the article with discount codes for various online shops, and you might find one for this particular model.
The Good
- Solid construction with big aluminium extrusions for X and Y axis.
- Geared Titan extruder that offers precise movement and good flexible filament prints.
- Volcano hotend allowing for fast prints.
- Clean flat and flexible cables, with improved connections compared to the Artillery Sidewinder X1
- Dual Z axis synchronized by belts.
- Insulated AC powered heatbed for fast heating.
- Color touch screen.
- Filament runout sensor.
- Quiet stepper drivers and fans that allow for silent operation.
- Inductive endstops.
- USB slot for printing, besides the regular SD card.
- Good quality print surface that eliminates the need for print adhesion solutions.
- Good support, with quick replies.
- Great packaging for ensuring the printer arrives safely.
- Considering the printer is 95% assembled when received, the assembly is easy.
- Package with spare parts in case issues occur.
The Bad
- The flexible cables don’t have a proper way of securing them, causing issues.
- Quality control is not the best and can be improved.
- The stock firmware does not support EEPROM save.
- Sometimes, the prints adhere to the heatbed too well.
- Nozzles included with the Genius are not the best quality, and prints can be improved by replacing them with more precisely cut variants.
The Ugly
- The filament run out sensor has an awkward mounting solution.
Simplify 3D and Prusa Slicer profiles can be downloaded from here.
Cura profiles still need a bit of work
The Artillery Genius was provided free of charge by Artillery for the purpose of this review. While the article includes affiliate links, all opinions are my own. Nobody reviewed the article before it was posted, following the Review Guidelines.
Liked it?
|
|


