Remote Printing with RaiseCloud, IdeaMaker and OctoPrint
The latest IdeaMaker 3.6.1 update was just released including RaiseCloud Support with Octoprint which was previously available only in the beta.
In this article I will go over the process of enabling the RaiseCloud on your OctoPrint instance, then show you how to start your first print from the cloud.
Why add RaiseCloud plugin to OctoPrint?
By installing the RaiseOcto plugin for OctoPrint, you add more functionality to your printer. If you also use IdeaMaker as your slicer you can upload prints directly to RaiseCloud. Here are some of the benefits of enabling RaiseCloud on your OctoPrint server.
Cloud access from any browser
The main reason to install the RaiseCloud plugin for OctoPrint is to access your printers remotely trough a web interface accessible from anywhere.
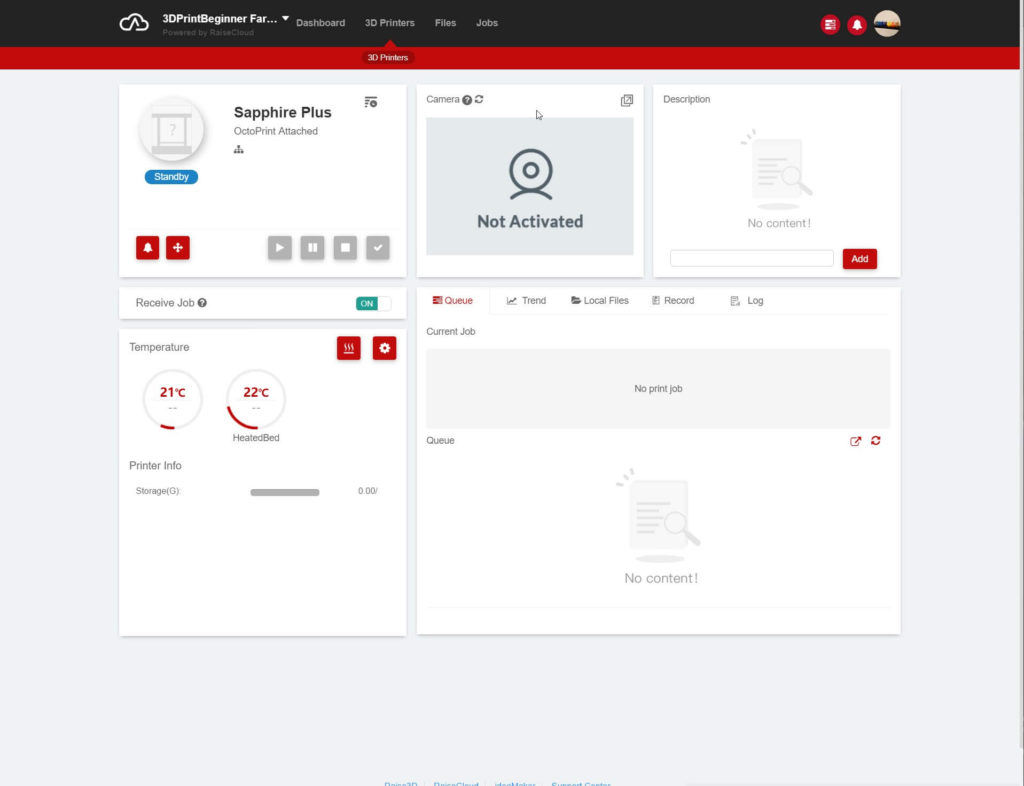
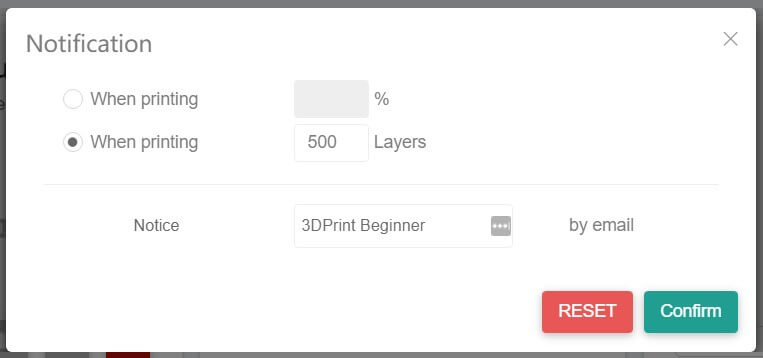
You can see the printer temperatures and print job status, there are controls for moving the print head on the X Y Z axis and there’s also a notification feature which allows you to set email notifications.
For example, when printing 500 layers and you want to do a color change, you would like to get notified when the printed reaches that point. You can do that in the RaiseCloud interface.
You also get 2GB of storage space where you can upload your Gcode files to RaiseCloud. This can be done directly from IdeaMaker (after slicing) or manually.
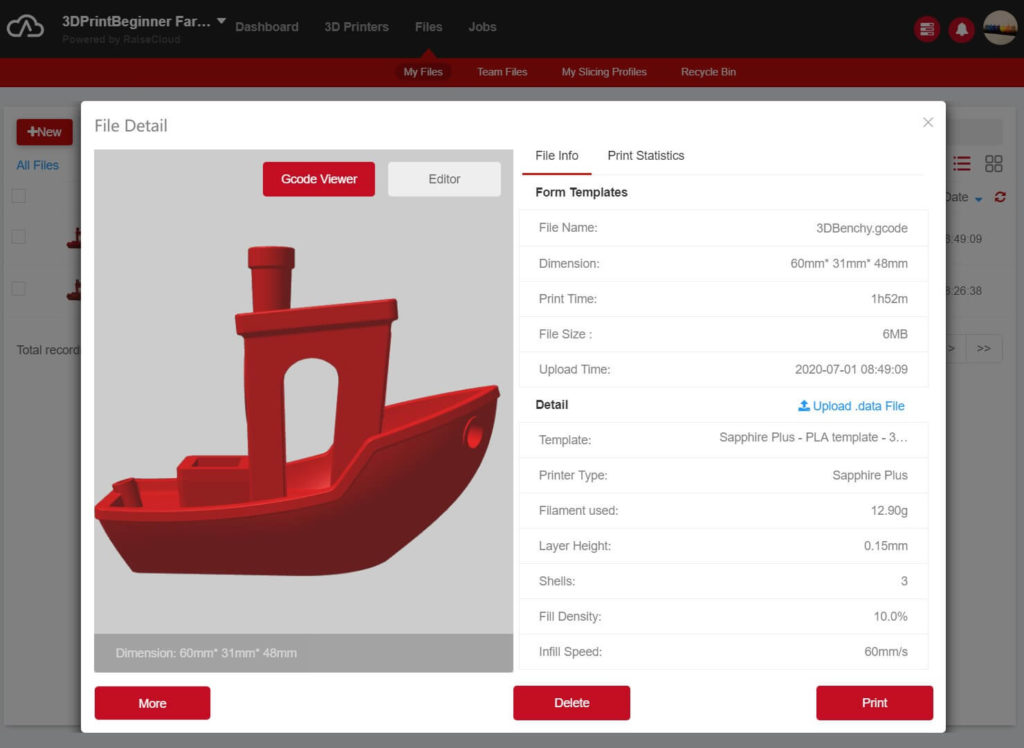
After the files reach the cloud, you will be able to see a preview of the model you uploaded with all the slicing information. There’s even a Gcode viewer functionality to go trough layers and see the movements your printer will do.
Mobile App support
Connecting your printer to the cloud is great, but the experience wouldn’t be complete without a mobile app. Don’t worry, Raise3D took care of that. You can use the RaiseCloud app and have most of the functionality available right on your phone.
Integrated cloud slicing
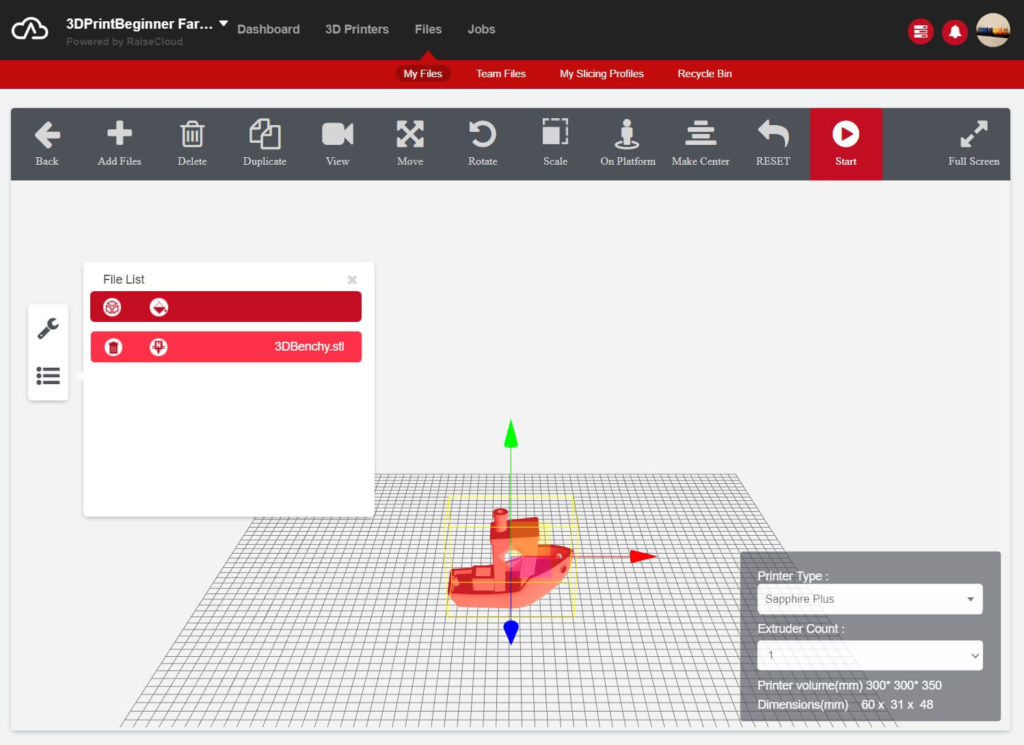
With RaiseCloud you can even slice your own models directly from the browser with an imported IdeaMaker profile.
RaiseCloud prerequisites
In order to install and use the plugin, you will need the following:
- OctoPrint instance already up and running (I covered the install process in this OctoPrint Install Guide)
- A Raise3D account
- A team configured in the RaiseCloud account.
It’s good to know that the RaiseCloud plugin is still in Beta so there might be some issues along the way. If you find them, feel free to contact the Raise team and let them know.
Create a team in RaiseCloud
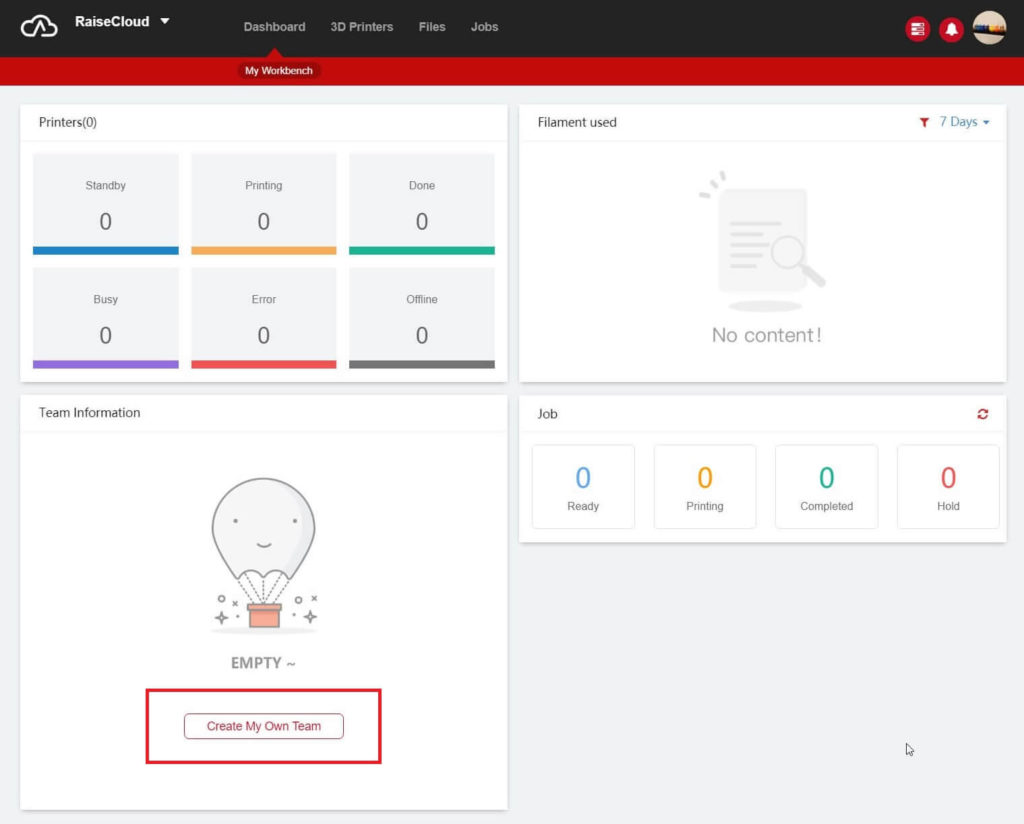
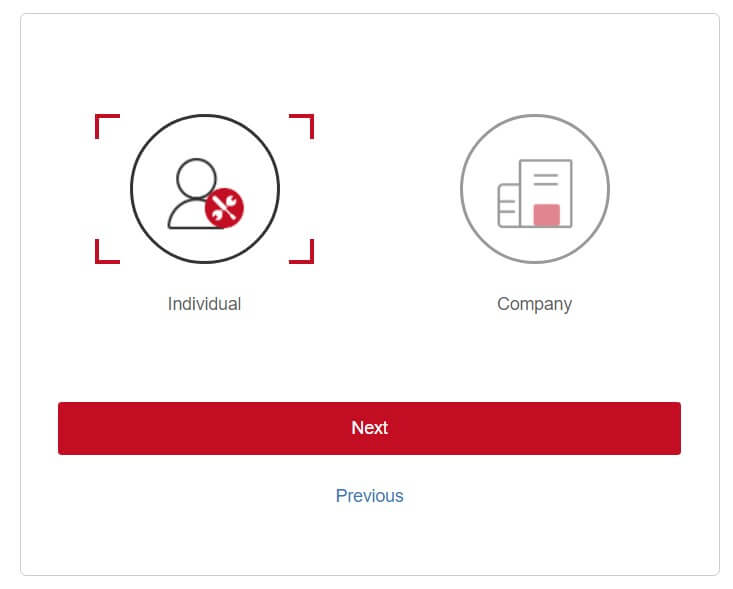
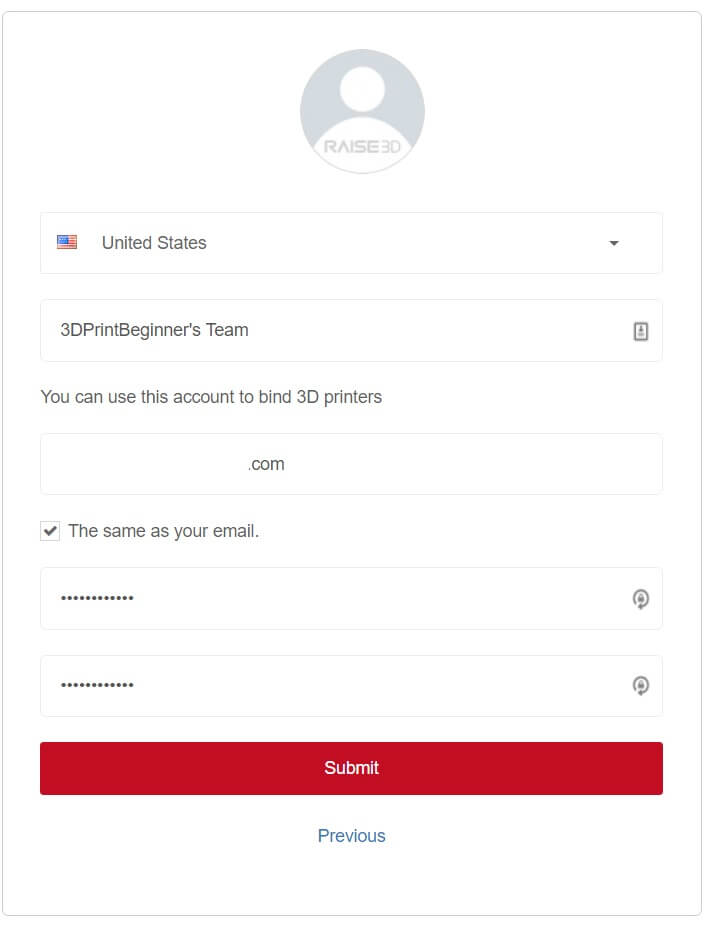
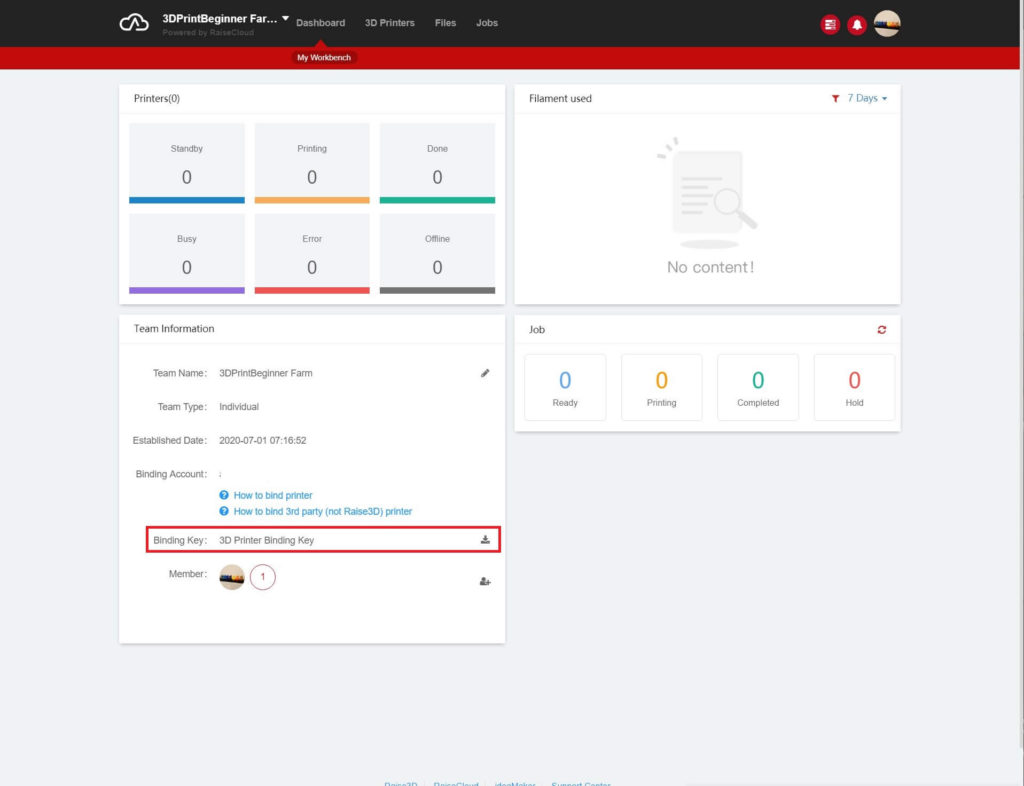
It’s important to create a team after you first login in your RaiseCloud dashboard. To do this, follow the steps below:
1. In the RaiseCloud dashboard click on Create My Own Team.
2. Select the type of user.
3. Enter your team information.
4. After you submit the information, your team will show up on the dashboard. From this place, you can now download the Binding Key needed in the next step.
How to install RaiseCloud plugin in OctoPrint?
Raise3D has an installation manual for the RaiseCloud plugin on their support page where they describe the installation process starting starting from scratch. If you just want to install the plugin, here’s how you do it.
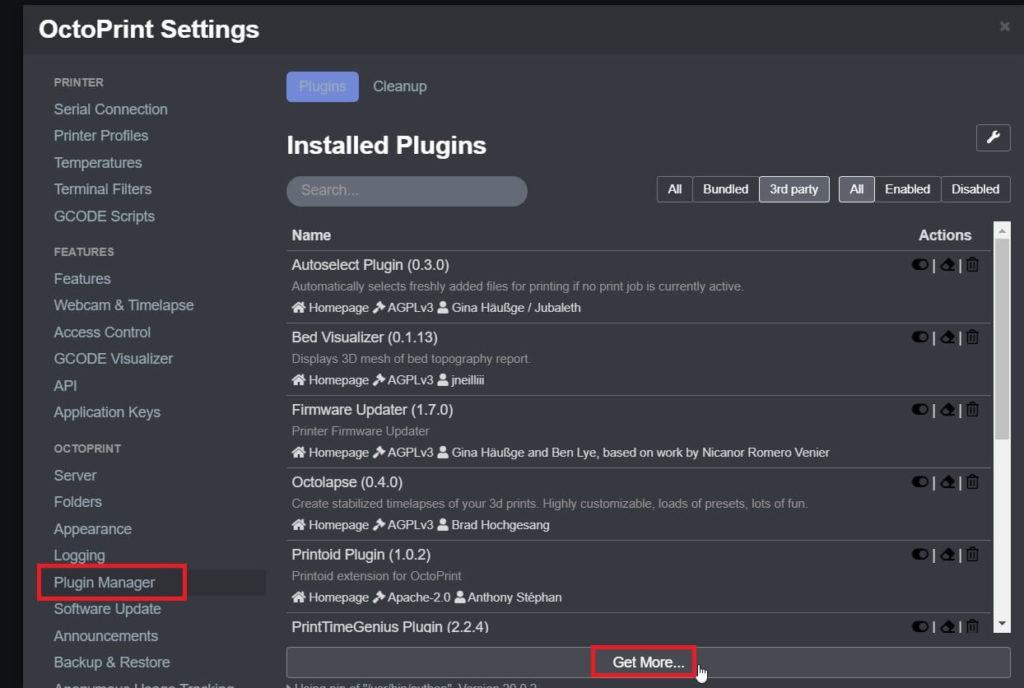
1. In OctoPrint, navigate to Settings -> Plugin Manager and click on Get More…
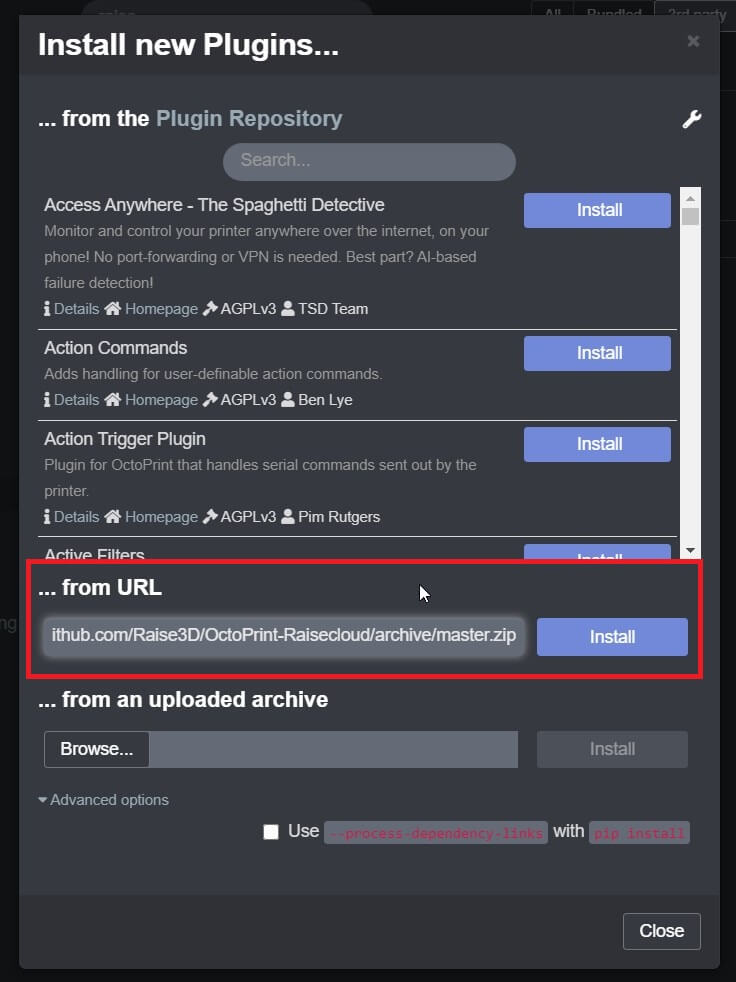
2. Paste the https://github.com/Raise3D/OctoPrint-Raisecloud/archive/master.zip link in the “…from URL” section and click Install.
3. Wait for the process to finish then restart OctoPrint.
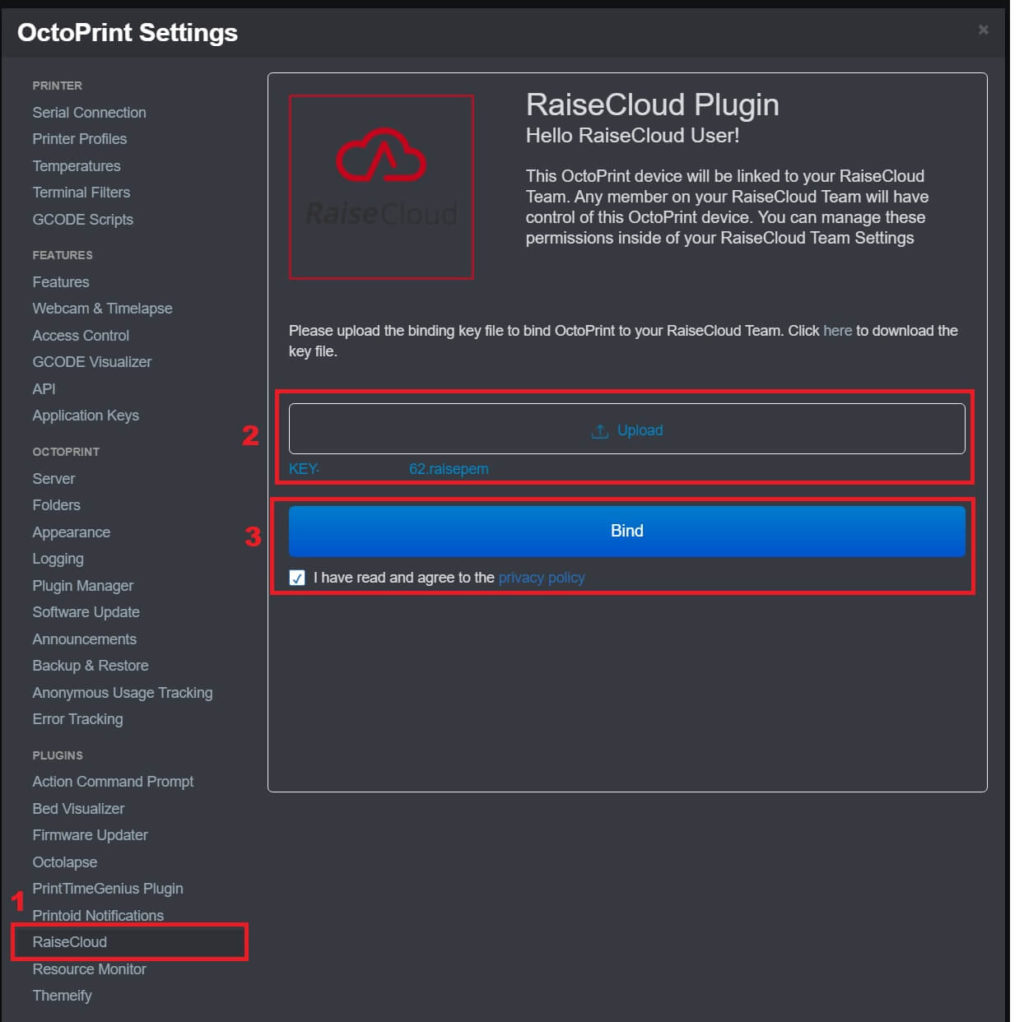
4. Navigate back to OctoPrint Settings and click on RaiseCloud. Then, upload your .raisepem key you generated previously then click Bind.
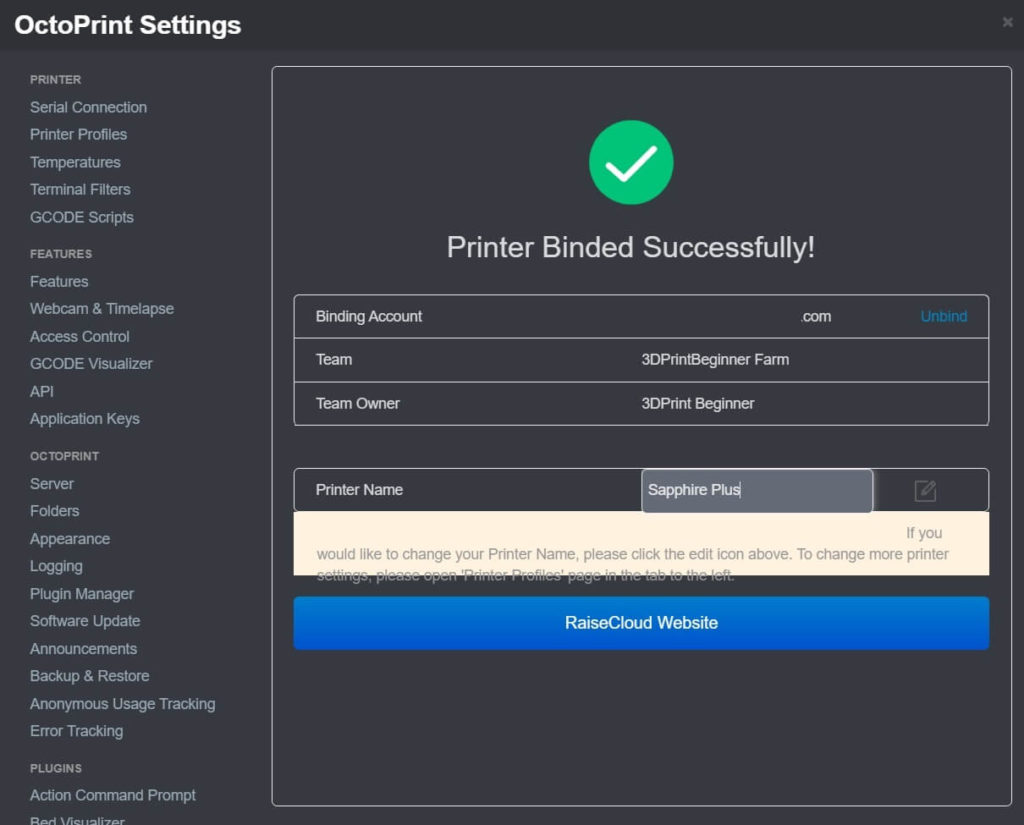
5. If you followed the instructions correctly, you will get a confirmation that the printer binded successfully.
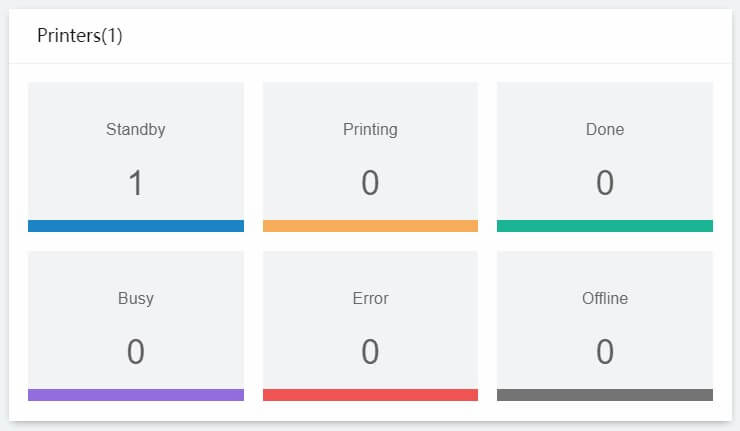
6. The printer will now show up in the RaiseCloud Dashboard in StandBy.
How to send prints from IdeaMaker to RaiseCloud?
Now that we have RaiseCloud enabled and configured, we can send our first print from IdeaMaker.
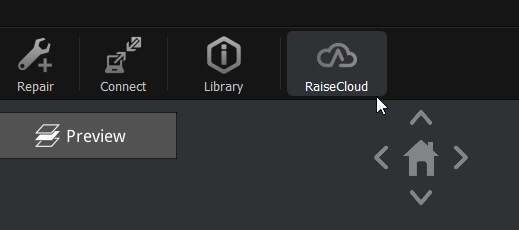
1. Open IdeaMaker and click on the RaiseCloud icon from the top-right corner.
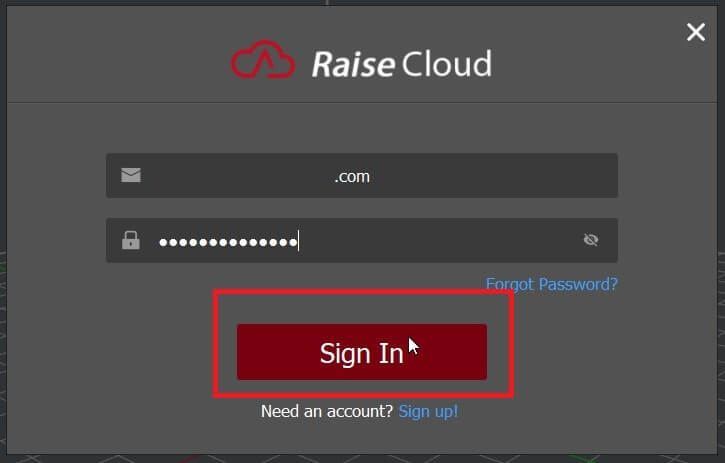
2. Login with your Raise3D account.
3. Import and slice your model. When you are done, click on the Upload -> Upload to Raise Cloud.
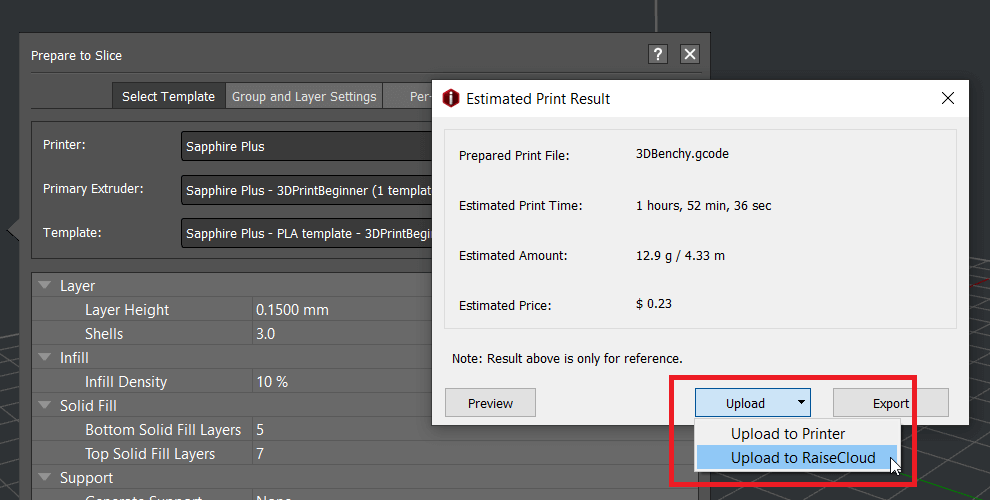
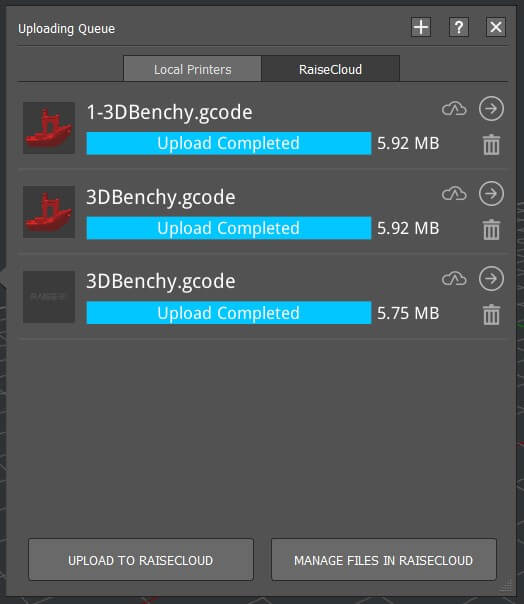
4. Your upload queue will show. When the upload is complete, you can click on Manage Files in RaiseCloud to go back in the Dashboard.
How to start a print from RaiseCloud ?
After uploading the files in the cloud, we can now start a print.
1. Navigate you to the Files section in RaiseCloud.
2. Hover over the Gcode file you want to print, then click on the Print icon.

3. Select your printer and click on Start Print Now!
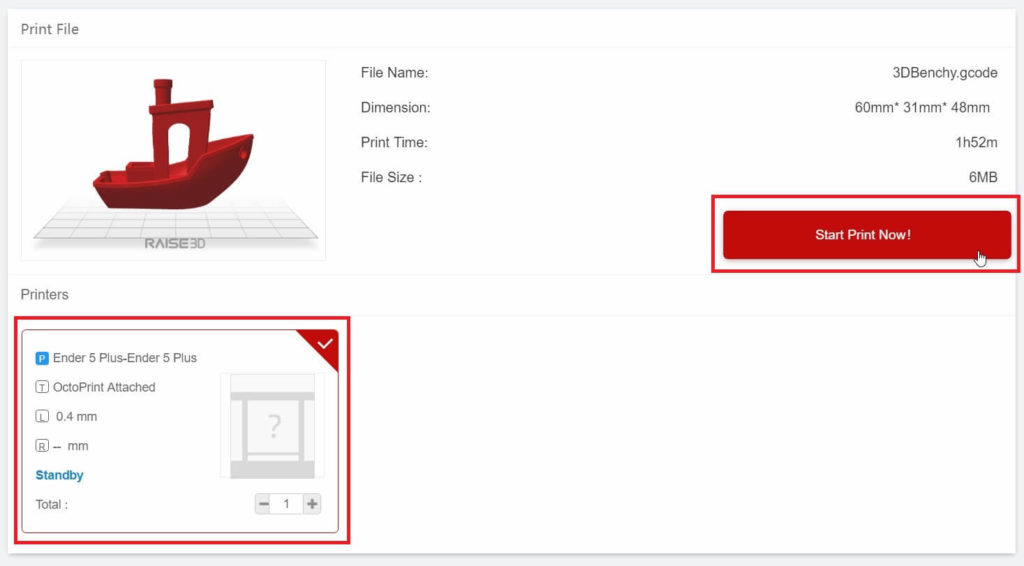
4. Your printer will now heat up and start printing. The printer can be easily monitored from your printer’s tab.
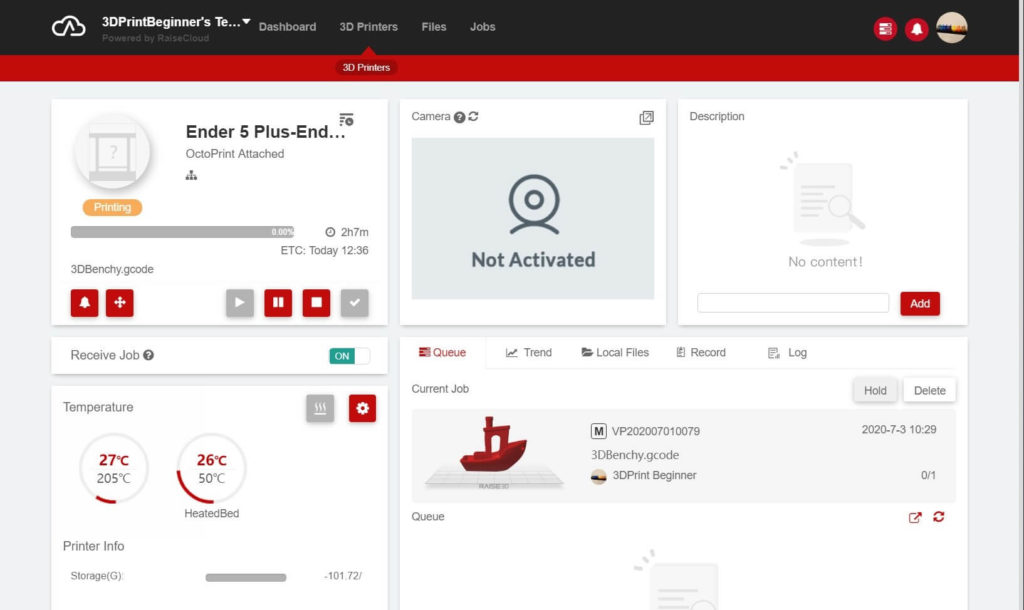
If your print doesn’t start, RaiseCloud might interfere with a plugin. I had issues with Print Time Genius. Prints would start only after I disabled the plugin.
Where do I get IdeaMaker profiles?
If you are looking to move to IdeaMaker, I already tuned a few profiles which are available below:
IdeaMaker Profile for Sidewinder X1 and Genius
IdeaMaker Profile for Sapphire Plus – PLA / PETG / TPU
There’s also the IdeaMaker Library where you can find other IdeaMaker profiles made by the community.
How to import a profile in RaiseCloud?
Importing a profile in RaiseCloud is easy. Just follow the steps below:
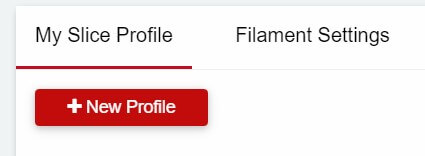
1. Navigate to the My Slicing Profiles section and click on New Profile.
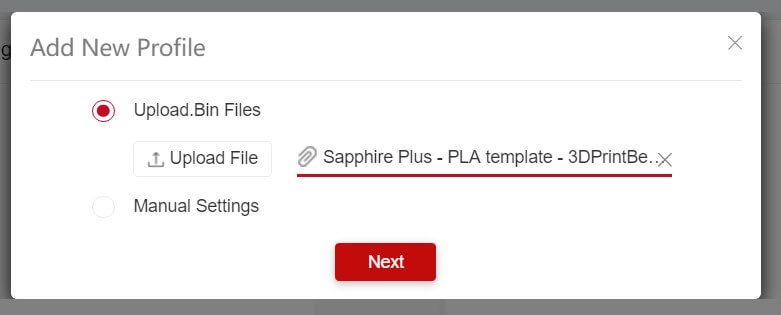
2. Select the previously downloaded profile, and click Next.
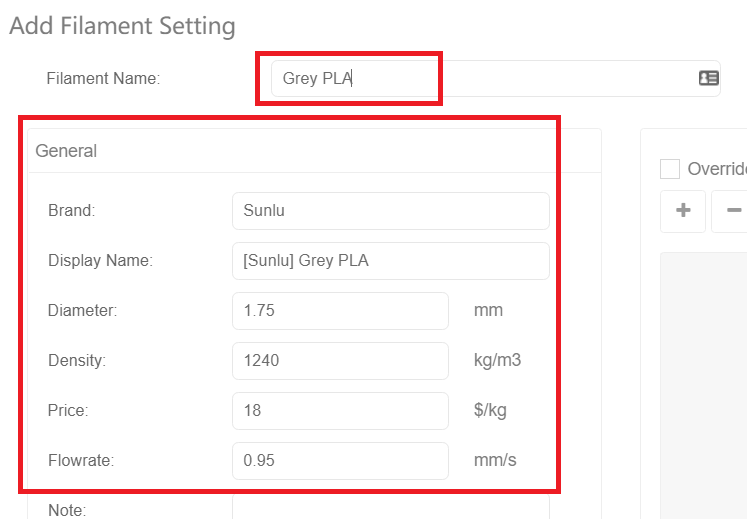
3. Give the profile a name, select the Printer Type then click on Add Filament Setting.
4. Enter the filament settings, then save.
5. Select the right filament in the Slicing Profile, then save.
How to slice online with RaiseCloud?
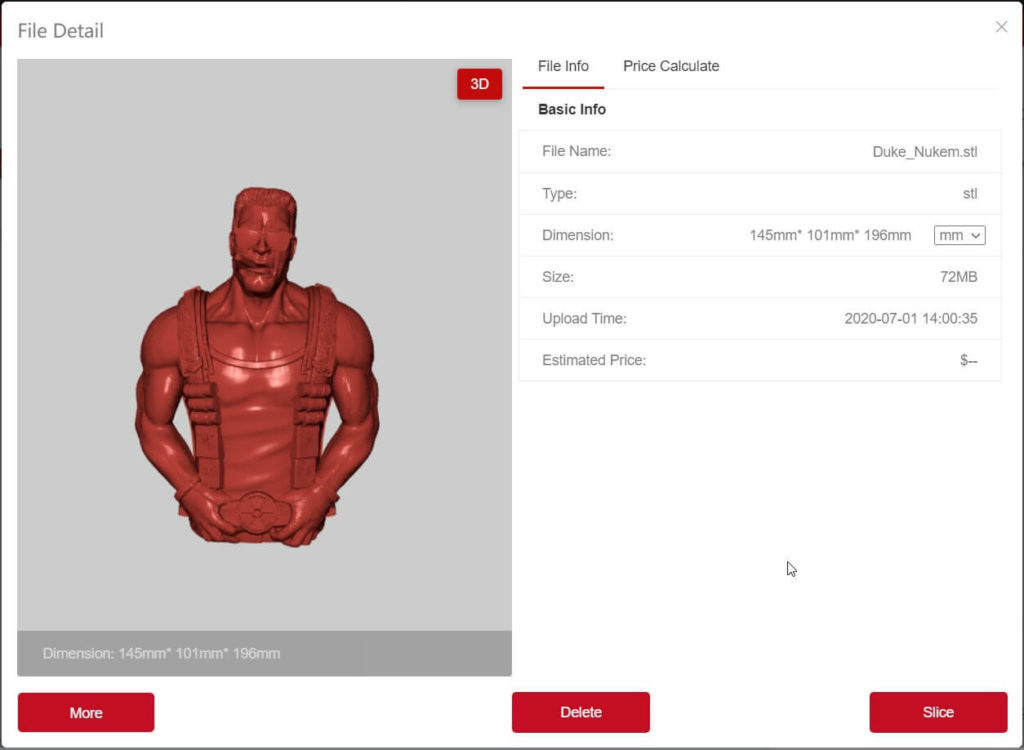
1. Navigate to My Files and upload your STL to RaiseCloud. You can drag and drop the file in your browser.
2. Click on the model, then click on Slice.
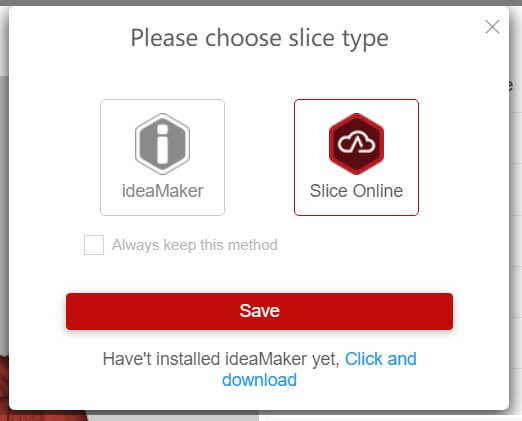
3. Choose Slice Online, then click Save.
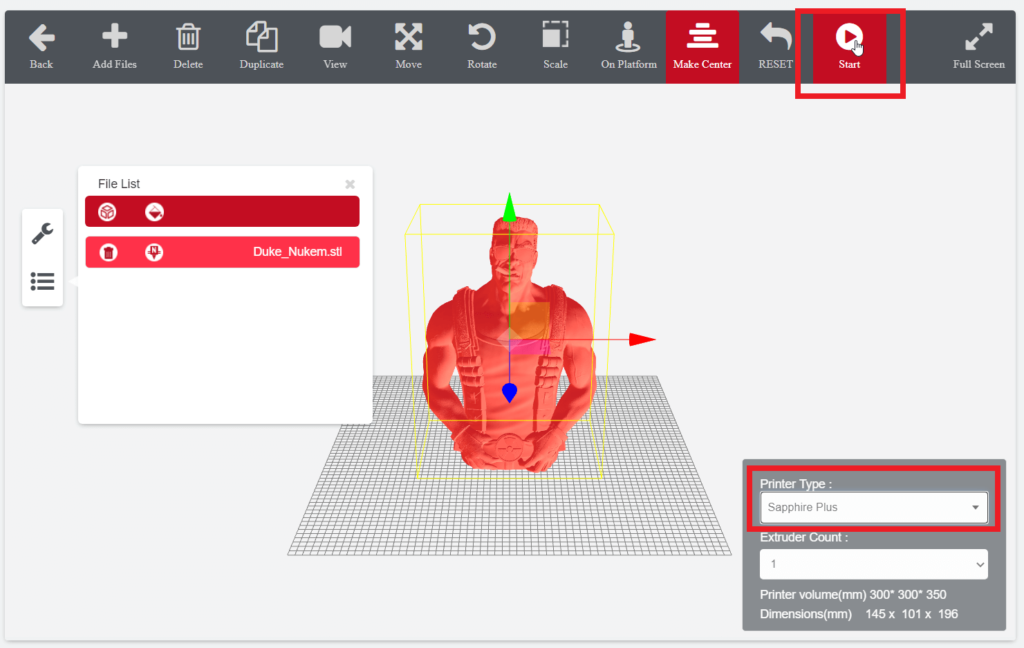
4. After the model loads, you can move set do basic model manipulation. When finished, select your printer type and click Start.
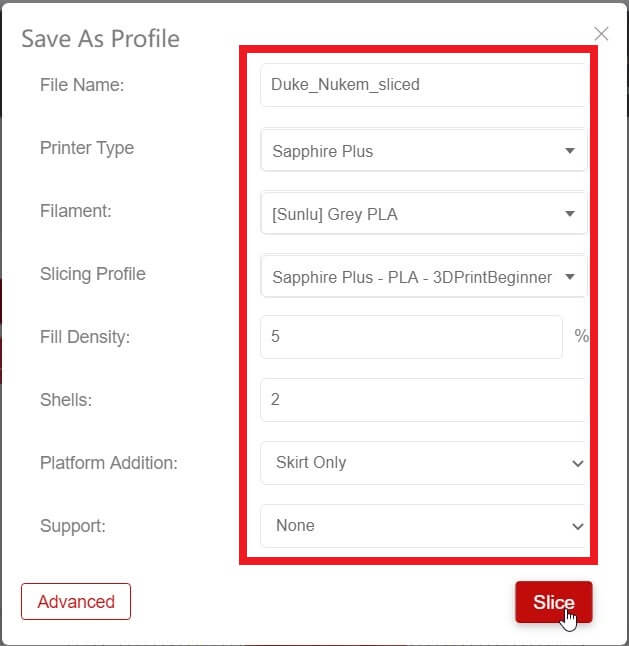
5. In the next screen, you need to select the correct settings then click on Slice. If you like to change more, you can go in the Advanced section where you can edit most of the settings you also get in IdeaMaker.
6. When finished, you will get an Email notification. There’s also an on-screen notification.
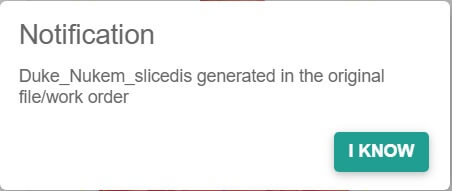
7. That’s it. Now you can start printing.
I noticed that the when using the Cloud Slicing the model is processed faster than on IdeaMaker. But there’s also a downside. Browser performance is not great with larger models.
Wrapping up
Hopefully, this quick introduction in RaiseCloud helped you and you are now able to print from anywhere.
If you have any questions, feel free to leave a commend or join the Discord server where there’s a dedicated IdeaMaker channel.
Liked it?
|
|

