Install Repetier Server on Raspberry Pi
What is Repetier Server?
Repetier Server is a piece of software made for controlling and remotely managing your 3D printers. It’s similar to OctoPrint which is an open source alternative.
Multiple concurrent printers
The main reason you would install Repetier Server on Raspberry Pi instead of OctoPrint is the possibility of using multiple printers at the same time. Unfortunately, OctoPrint does not support this out of the box and if you want to achieve the same, you need to install multiple instances on the same Pi.
Better touchscreen interface
If you are using a touchscreen, Repetier Server offers an excellent touchscreen interface which can help with managing your printers. OctoPrint does not have a touchscreen interface out of the box, but you can install OctoDash – Install OctoDash on Raspberry Pi.
Compatibility with multiple operating systems
Repetier Server can be run on Windows, Linux and Mac OS. You can easily repurpose any old computer to a Repetier Server with minimal effort, but for maximum efficiency, I recommend running it on a RaspberryPi.
You can run OctoPrint on multiple operating systems, but it runs best on Linux.
Missing Plugins
Repetier Server also has some drawbacks compared to OctoPrint. It does not have access to the huge repository of plugins like OctoPrint. A lot of features available in OctoPrint with plugins are already available out of the box with Repetier, but you should doublecheck in advance if it’s missing a specific functionality.
Paid license
Compared to OctoPrint, which is free and open-source, Repetier Server is paid software. But considering all the features it has, and the ability to use multiple printers at the same time makes Repetier a viable alternative to OctoPrint. It’s usually 59.99 Euro, but right now there’s a 20% discount available.
You can test Repetier Server by visiting the official website.
Prerequisites
To install Repetier Server you will need the following:
- Raspberrpy Pi (Raspberry Pi 3B, 3B+ or 4 is strongly recommended for best performance).
- 16 GB MicroSD card.
- BTT PI TFT50 – for touchscreen interaction
- Good power supply for the Pi – Any adapter works if it’s capable of delivering at least 2.5 A of power
- Webcam for monitoring your prints (optional).
If you have a Raspberry Pi with the BTT PI TFT50, I covered the assembly and installation in this guide.
Install Repetier Server on Raspberry Pi
Flash Repetier Server on SD Card
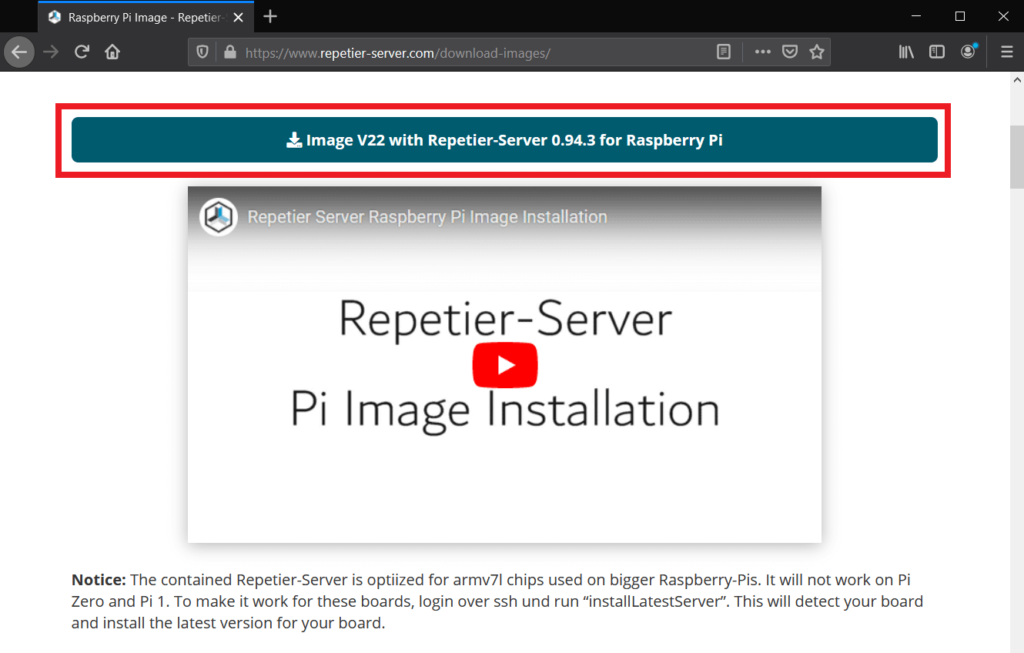
Download the Repetier Server image and unzip the archive.
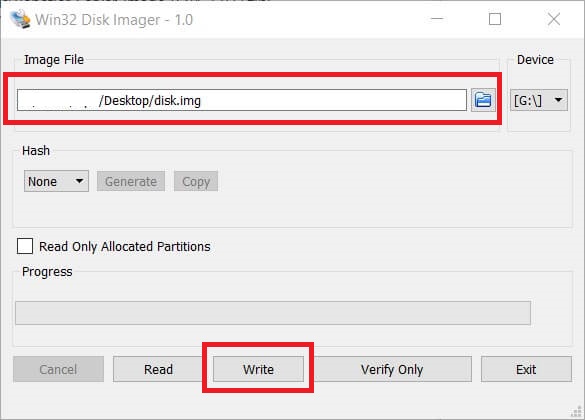
Download and install Win32 Disk Imager.
Open Win32 Disk Imager, load the disk.img file unzipped in first step and select your SD card drive letter.
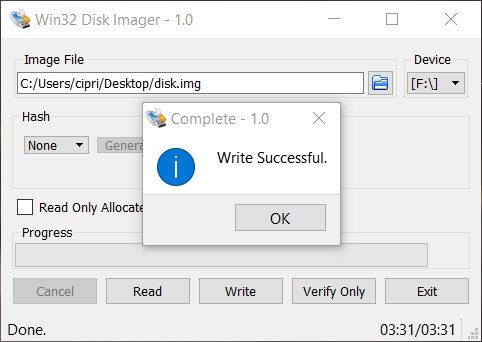
Click on Write to begin installing Repetier Server on the SD card. This process will take a few minutes, depending on the speed of your SD card. After the Repetier Server image has been written to the SD card, you can remove the SD card and insert it in your Raspberry Pi.
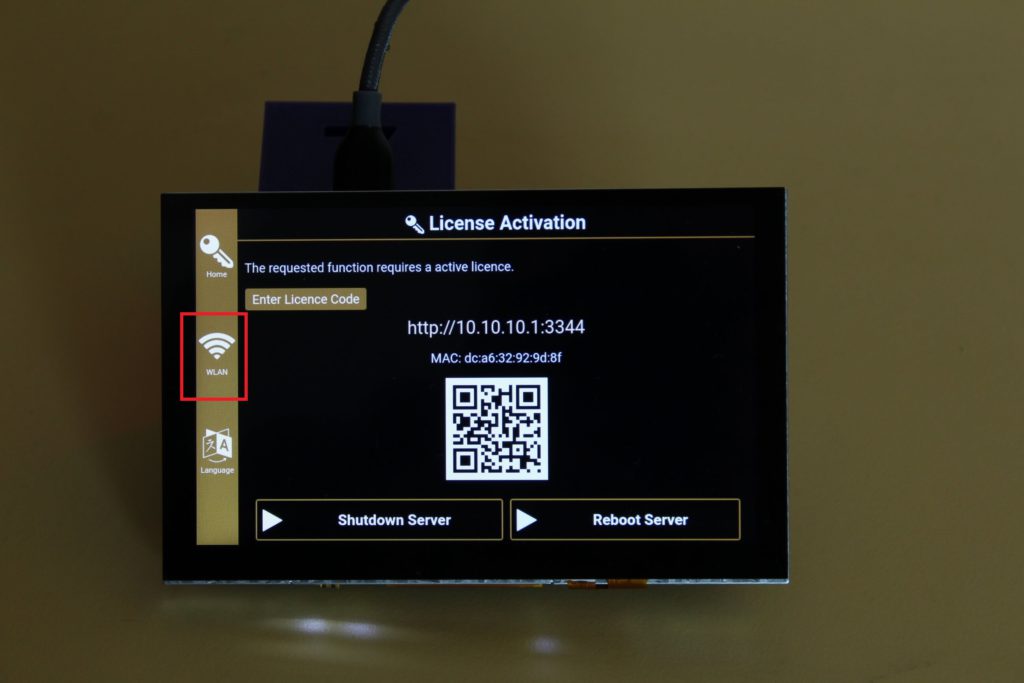
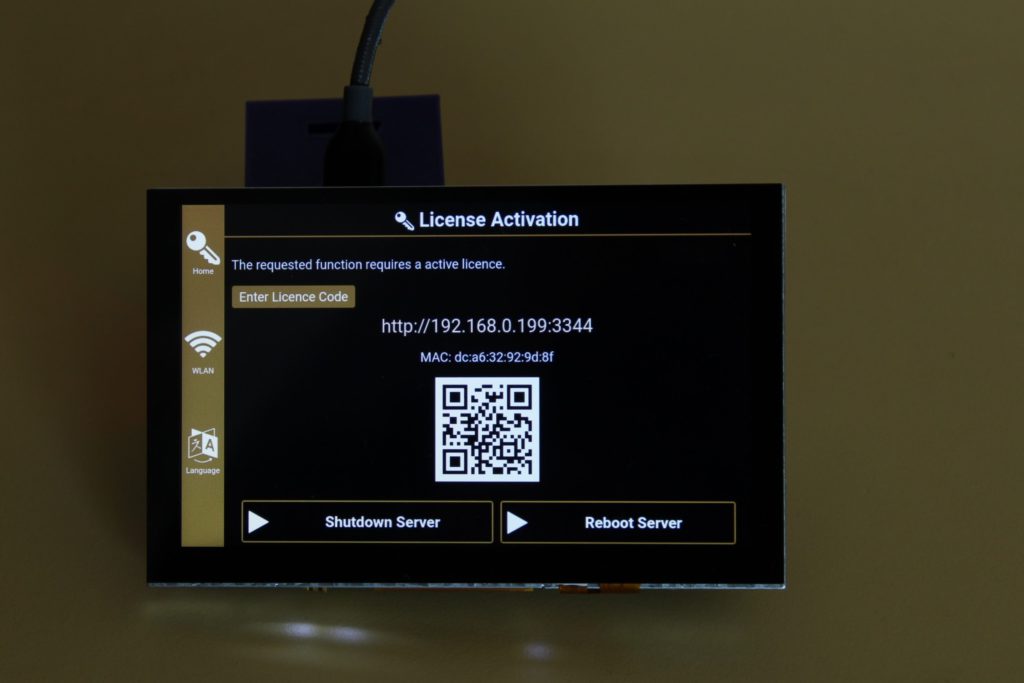
Power On the Raspberry Pi and wait a few minutes for the operating system to boot. When it’s done, you will be greeted by the license activation screen.
Initial setup
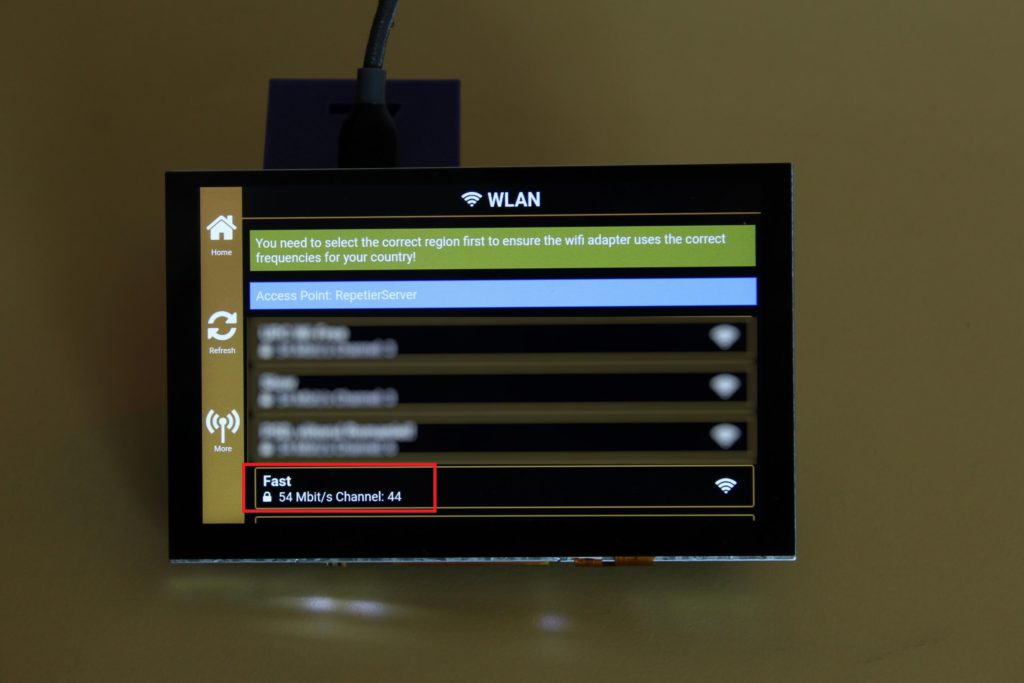
To connect on the Pi and activate the license, we first need to connect to Wi-Fi. Select the WLAN icon
Next, select your Wi-Fi network. In this case, my network is called “Fast“
In the next screen, select the Password button, enter your network password then press Enter.
Finally, touch the Connect button. Please note that you will be required to set your region/country in so that Repetier Server uses the correct channel settings.
If the connection is successful, on the License Activation screen you will find your new IP address.
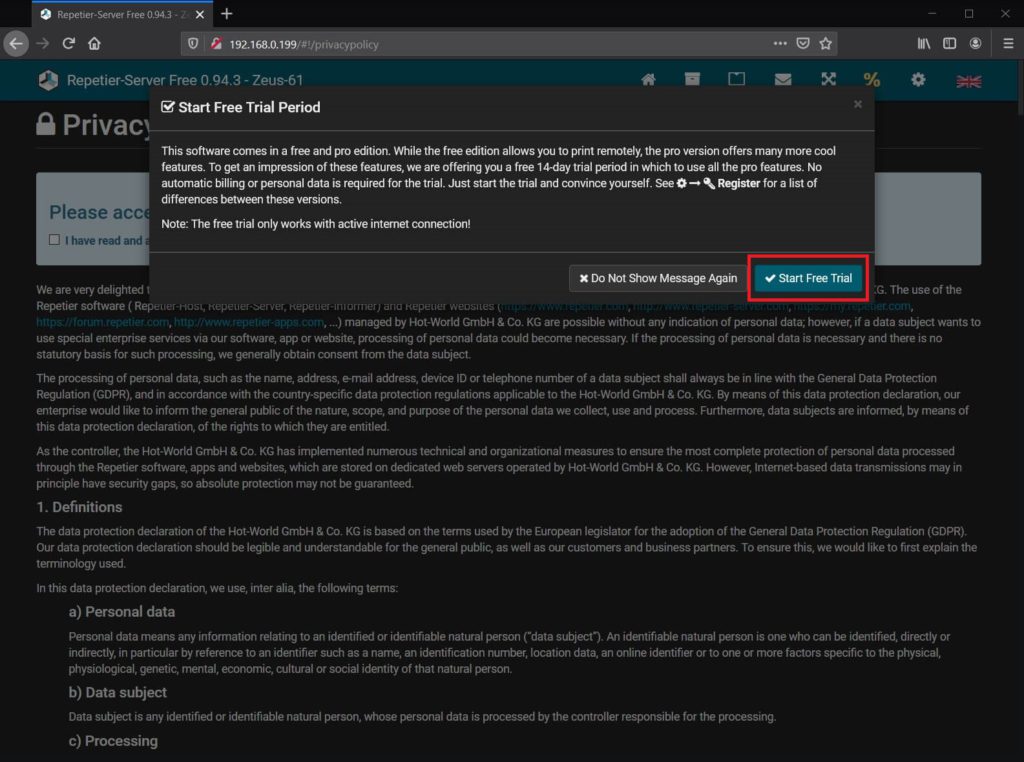
On your computer, navigate to the IP displayed on the screen. You can now start your Repetier Server trial by clicking the Start Free Trial button.
Printer setup on Repetier Server
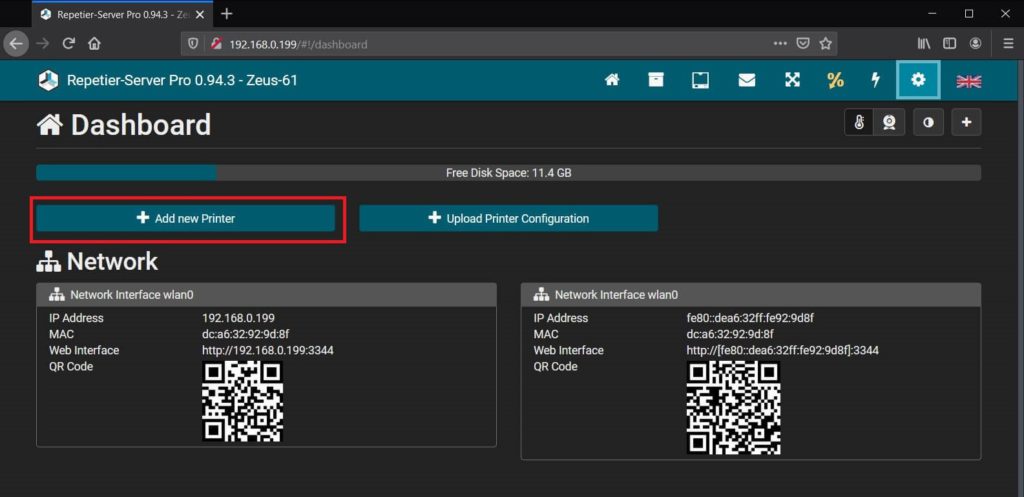
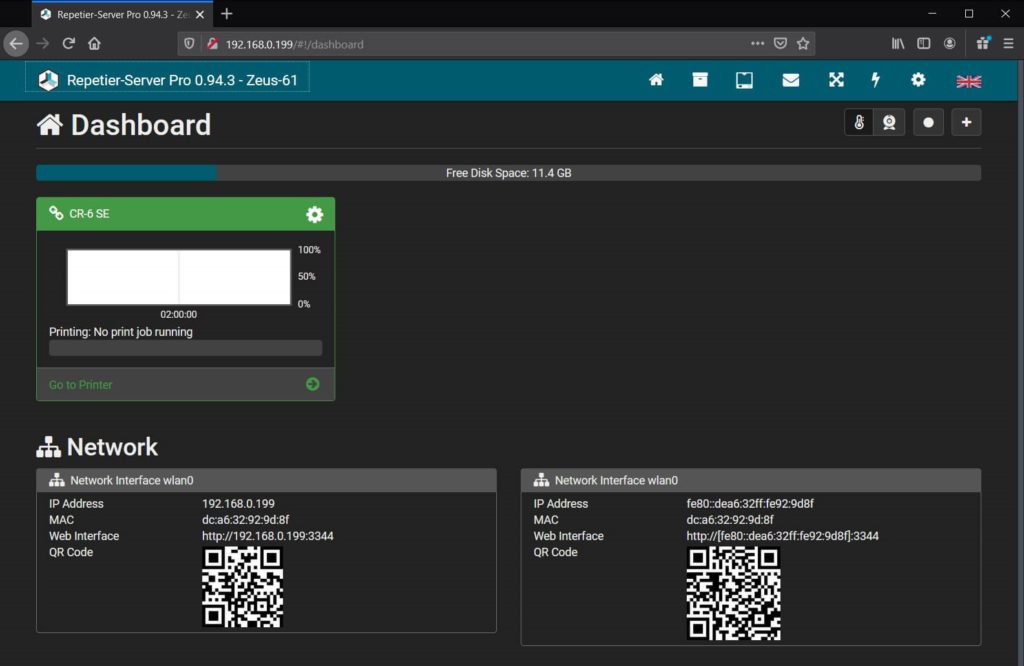
After the trial has been activated, and you accepted the Privacy Policy agreement, you will reach the Repetier Server Dashboard. Click on the Add new Printer button.
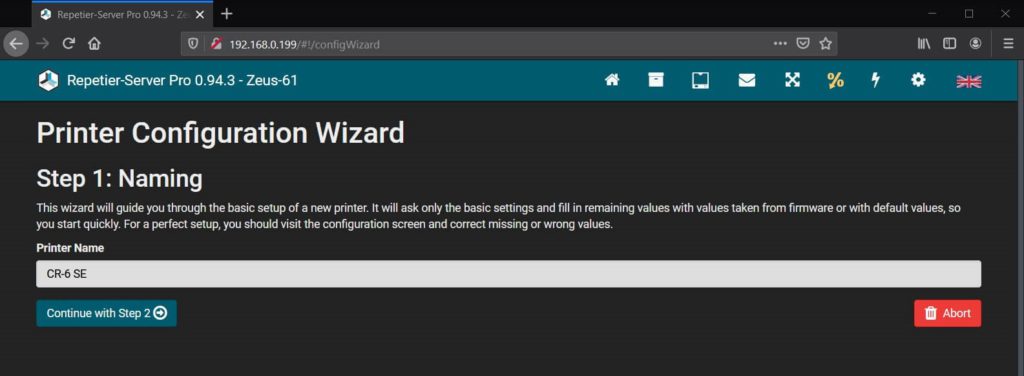
Enter the name of your printer and continue with step 2.
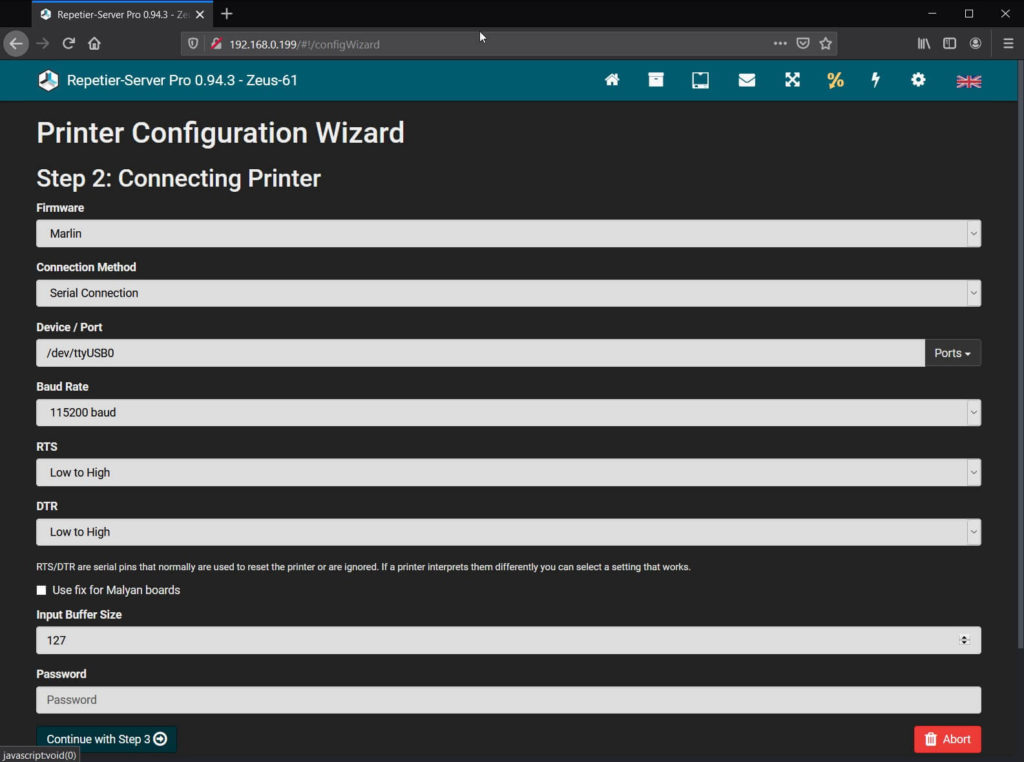
In the second step, you need to configure the printer info, and how the printer connects to the Repetier Server. When finished, proceed to the 3rd step.
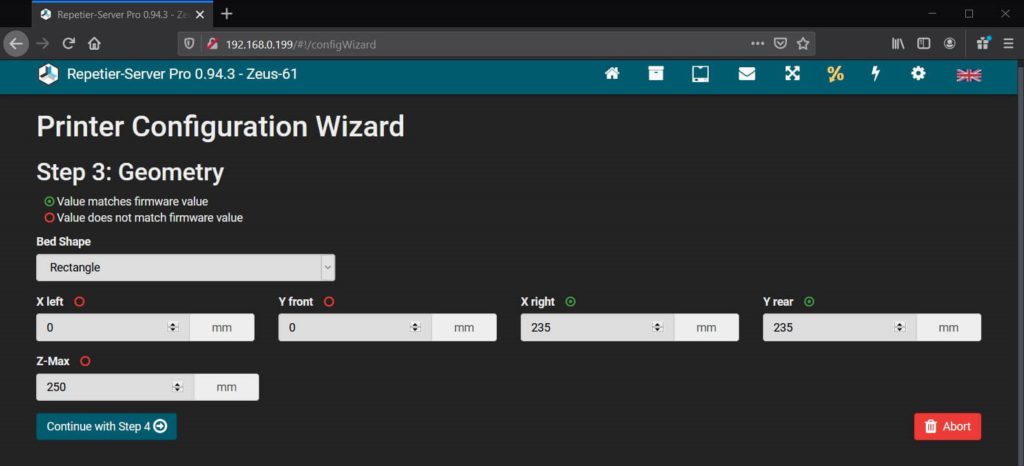
In the 3rd step of the Repetier Server setup, we need to enter the geometry of the printer.
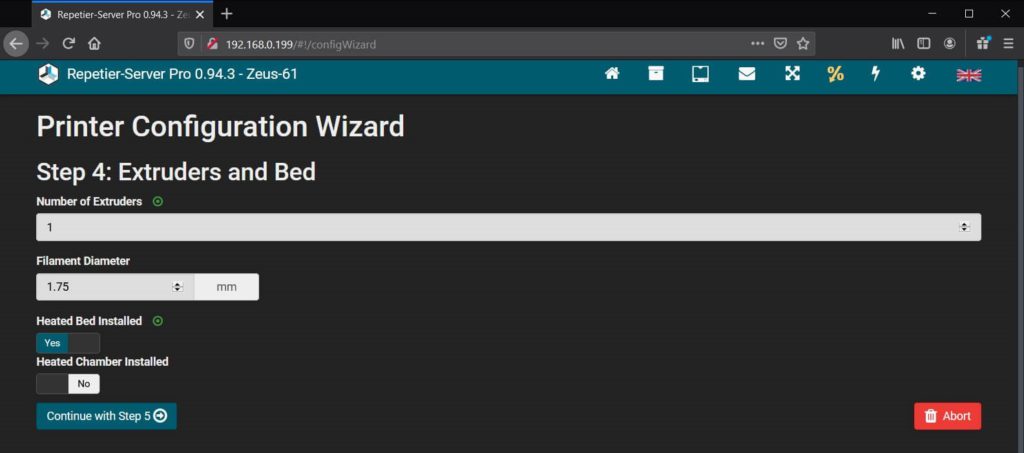
In the 4th step, we set the number of extruders, filament diameter and a heated bed.
Finally, we set the number of fans controlled by the printer then we click on Finish.
Now, the printer shows up on the Repetier Server Dashboard. You can repeat the process if you want to add another printer.
Wrapping Up
Hopefully, this guide helped you install Repetier Server on Raspberry Pi with BTT PITFT50. If you encounter any issues, leave a comment, or join the 3DPrintBeginner Discord server where you can get assistance.
Liked it?
|
|


