Hotend and HeatBed PID Tuning in Klipper
Doing a PID tuning in Klipper is important to ensure a consistent temperature during printing. The way our printers heat up the nozzle and heatbed is important for print quality, as every slight change in temperature can impact the layer quality.
I previously shared a guide on how to do PID tuning in Marlin, and because I do this quite often on my Klipper machines, I thought it would be helpful to share a quick guide on how to PID tune the heatbed and hotend with Klipper. The process of doing PID tuning in Klipper is somewhat similar to Marlin, but you need to use different commands to do it.
While the process is already documented on the Klipper documentation, I wanted to have it easy to reach on my website, when I need it. I also do this process slightly differently, as it seems to be working a bit better for me.
Why perform PID tuning in Klipper?
As previously mentioned, PID is an algorithm that makes sure the heaters for both hotend and heatbed supply just enough heat in order to have the difference between the highest and lowest temperature as small as possible.
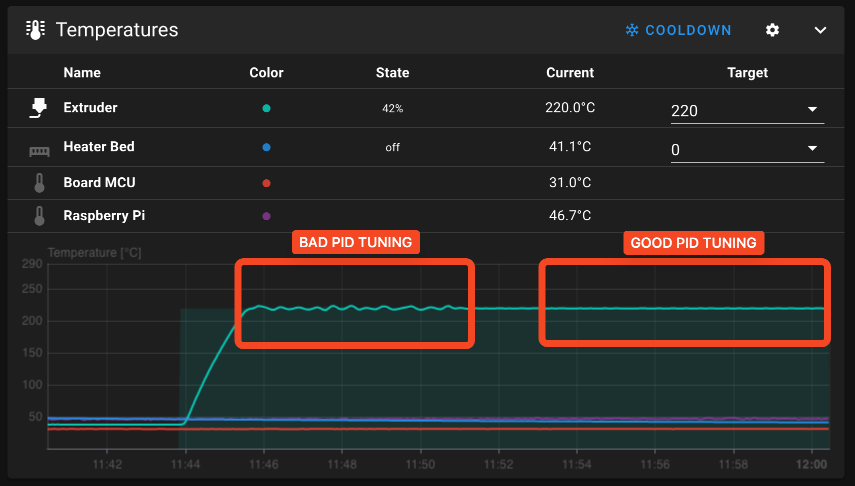
For example, if the PID settings are not correctly configured, when you heat up the printer the temperature might go past the configured value with 5C to 10C in most cases. It takes a bit longer to get a stable temperature and if not calibrated correctly, the temperature will not be stable.
The biggest impact on print quality comes with improper heatbed PID tuning in Klipper. Sometimes, the heating algorithm is not PID, which means that the heater will always use 100% of the power and then cycle back to 0% until the set temperature is reached.
While this works, the heatbed is under repeated thermal stress which can cause it to slightly bend according to the heating cycles and this creates uneven layers.
Most of the time, you need to perform a new PID tuning if you did any changes to the hotend. For example, the temperature consistency will be different if you use a silicone sock or if you changed the heater cartridge.
The same applies to the heatbed. You need to perform a PID calibration again if you added heatbed insulation material, or if you changed the printing surface. For example, when changing the printing surface from a glass sheet to a magnetic PEI sheet the temperature consistency can be slightly different so performing a PID tuning process is recommended.
Prerequisites for PID tuning in Klipper
Before you start doing the PID tuning in Klipper for your heatbed and hotend, I recommend doing the following steps for best results:
- Ensure that the hotend and heatbed are at room temperature
- If the hotend has a silicone sock protection for the heatblock, ensure that it’s set correctly
- If your printer has a magnetic flex plate, ensure that it’s attached to the printer just like it would be during printing
Hotend PID tuning in Klipper
For calibrating the hotend, I recommend following the steps below:
- Home the printer and adjust the nozzle position to sit in the middle of the bed, with about 5cm of clearance to the bed.
- Set the heatbed temperature to 60C
- Turn on the part cooling fans to 100% (can be done with M106 S255 command)
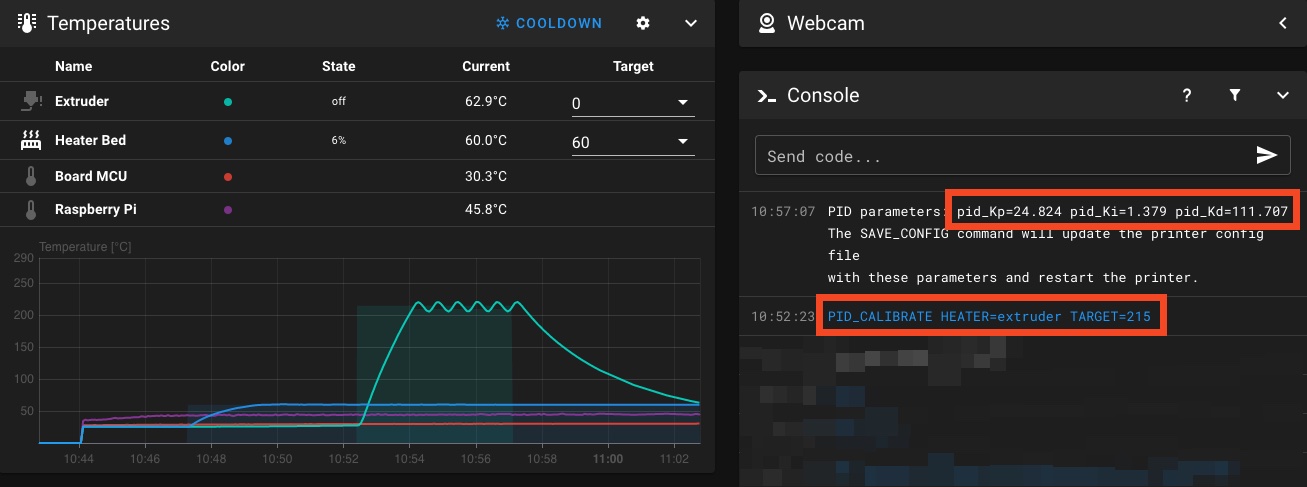
- Run the PID_CALIBRATE HEATER=extruder TARGET=215 command to start the PID tuning process and wait for it to be completed.
- When done run the SAVE_CONFIG command and the new PID settings will be saved to the printer config file.
Please note that I used 215C as the target, as it works well most of the time if you print PLA/PETG/ABS/ASA/TPU. The idea is to use a temperate as close as possible to the material you are printing most of the time. For example, if you print mostly ABS, I would PID tune the hotend for 240C.
Heatbed PID tuning in Klipper
For calibrating the heatbed, I recommend following the steps below:
- Home the printer and adjust the nozzle position to sit in the middle of the bed, with about 5cm of clearance to the bed.
- Turn on the part cooling fans to 100% (can be done with M106 S255 command)
- Run the PID_CALIBRATE HEATER=heater_bed TARGET=60 command to start the PID tuning process and wait for it to be completed.
- When done run the SAVE_CONFIG command and the new PID settings will be saved to the printer config file.
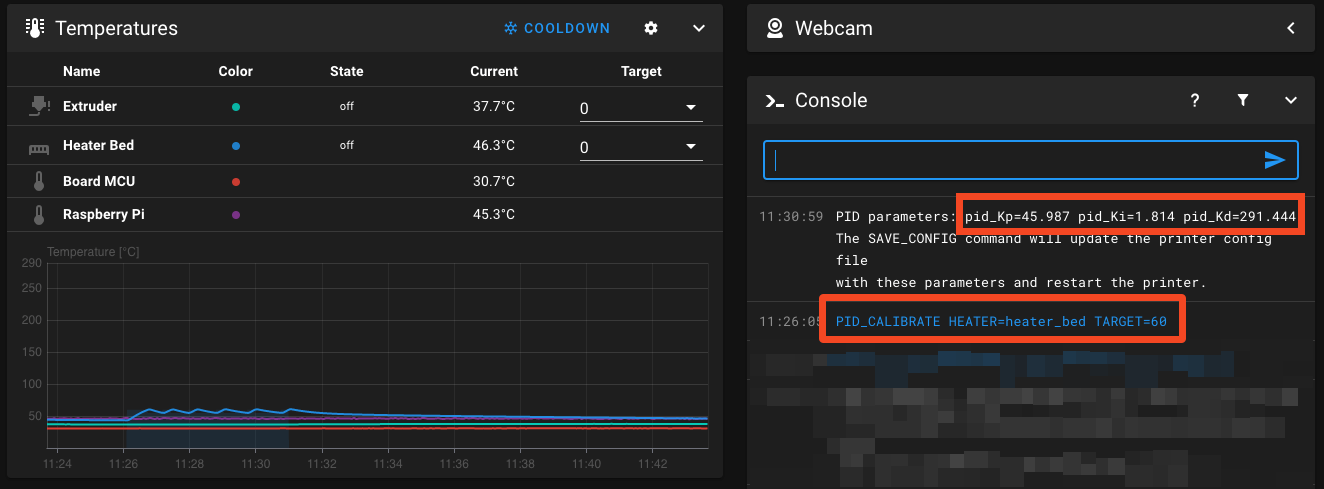
Don’t start the heatbed PID tuning before the heatbed has reached the environmental temperature, as it can generate bad results.
Please note that I used 60 as the target, as it works well most of the time if you print PLA/PETG/ABS/ASA/TPU. The idea is to use a temperate as close as possible to the material you are printing most of the time. For example, if you print mostly ABS, I would PID tune the heatbed for 100C.
Save Klipper PID tuning values
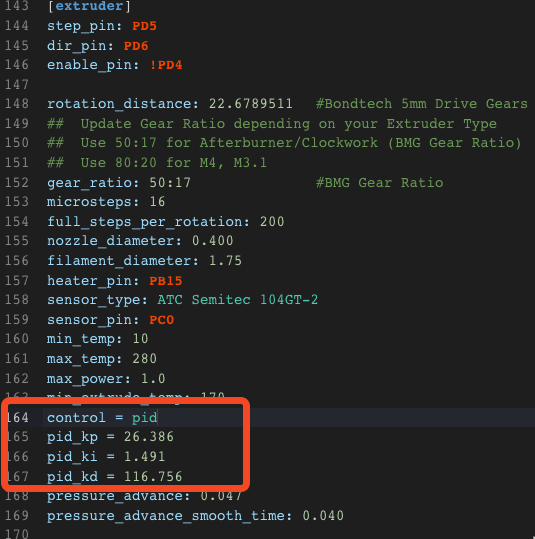
As previously mentioned, the values are saved to the printer.cfg file automatically, if you run the SAVE_CONFIG command. They are added at the bottom of the file.
But if you want, you can also open up the printer.cfg file, and add the values manually, under the Extruder and Heatbed config. In the image below, you can see an example of how my PID values are configured on the Voron Trident.
Wrapping up
That’s it! You have completed the PID tuning in Klipper and now your temperatures should be more stable. If everything went well, the temperature graphs for the hotend and heatbed should be straight and the temperature variation shouldn’t be higher than 0.5C to 1C.
If you notice larger temperature variations, then you can repeat the process. A secondary PID tunning in Klipper usually fixes any remaining issue.
Liked it?
|
|





You can leave a comment for this article on the 3DPrintBeginner Forum